Sign In
Upload
Manuals
Brands
Danfoss Manuals
Air Compressor
Turbocor VTT Series
Danfoss Turbocor VTT Series Manuals
Manuals and User Guides for Danfoss Turbocor VTT Series. We have
1
Danfoss Turbocor VTT Series manual available for free PDF download: Service Manual
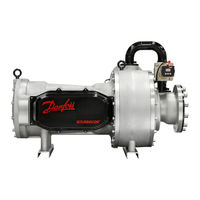
Danfoss Turbocor VTT Series Service Manual (165 pages)
Variable Twin Turbo Compressors
Brand:
Danfoss
| Category:
Air Compressor
| Size: 66 MB
Table of Contents
Table of Contents
3
List of Tables
6
List of Figures
7
Proprietary Notice
11
Introduction
13
Organization
13
Purpose
13
Commitment to Quality
14
List of Figures
14
Safety Summary
14
Danger Notification
14
Caution Notification
14
Note
14
Figure 1 - Danger Notification Example
14
Figure 2 - Caution Notification Example
14
Figure 3 - Note Example
14
Electrical Isolation of the VFD
15
Handling Electronic Static Sensitive Devices
15
Figure 4 - Danger Notification Example
15
ESD Protection/Grounding
16
Precautions
15
Refrigerant Type
15
Figure 5 - ESD Label
16
Testing Voltages of the Power Electronics
16
VTT/VFD Fasteners
16
VTT O-Rings
17
Compressor Fundamentals
19
Main Fluid Path
19
Economizer
19
Compressor Cooling
19
Figure 6 - IFV Flow
19
Figure 7 - Motor Cooling Path
19
Compressor and VFD Cooling
20
VFD Cooling
20
Figure 8 - VFD Cooling Path
20
Compressor Energy and Signal Flow
21
Figure 9 - System Architecture and Control Interface (Revisions a and B)
22
Figure 10 - System Architecture and Control Interface (Revisions C and Later)
23
Compressor Components
25
Component Identification
25
Table 1 - Compressor Component Identification (Service Side)
25
Figure 11 - Compressor External Component Identification - Service Side
25
Table 2 - Compressor Component Identification (Power Side)
26
Figure 12 - Compressor External Component Identification - Power Side
26
Table 3 - Compressor Component Identification (Service Side - Cover off )
27
Figure 13 - Compressor Component Identification - Service Side (Cover Off)
27
Table 4 - Compressor Component Identification (Power Side - Cover off )
28
Figure 14 - Compressor Component Identification - Power Side (Cover Off)
28
Table 5 - Compressor Component Identification (Power Side - Cables)
29
Figure 15 - Compressor Sensors and Cables Topside
29
Figure 16 - Compressor Sensors and Cables Topside
29
External Components
30
IFV Pipe Assembly
30
Figure 17 - IFV Pipe Assembly
30
Removal and Installation
30
IFV Pipe Assembly Verification
31
Torque Specifications
31
IFV Actuator
31
Table 6 - IFV Pipe Assembly Torque Specifications
31
Figure 18 - IFV Actuator
32
Figure 19 - IFV Actuator Mounting Set Screws
32
Removal and Installation
32
Figure 20 - IFV Actuator Install
33
Programming (Required)
33
Calibration
34
Torque Specifications
34
ICM Body
34
Figure 21 - ICM Body
34
Table 7 - IFV Actuator Torque Specifications
34
Figure 22 - Bonnet/Function Module Removal
35
Removal and Installation
35
Torque Specifications
36
IFV Cable
36
Figure 23 - Bonnet/Function Module O-Ring Placement
36
Figure 24 - IFV Cable
36
Table 8 - Bonnet/Function Module O-Ring Descriptions
36
Table 9 - ICM Body Torque Specifications
36
Figure 25 - IFV Cable Connection
37
Figure 26 - J14 CCM Board Connector
37
Removal and Installation
37
Figure 27 - IFV Cable Retaining Clips
38
Verification
38
Pressure/Temperature Sensor Cable Harness
39
Figure 28 - Pressure/Temperature Harness
39
Figure 29 - J8 CCM Board Connector
39
Removal and Installation
39
Figure 30 - Pressure/Temperature Sensor Harness Retaining Clips
40
Figure 31 - Pressure/Temperature Sensor R/T Curve
41
Verification
41
Economizer Blank
42
Figure 32 - Economizer Blank
42
Removal and Installation
42
Table 10 - Economizer Torque Specifications
42
Torque Specifications
42
Motor Cooling EXV Assembly
43
Figure 33 - EXV (Revision a Only)
43
Figure 34 - EXV (Revisions B and Later)
43
Removal and Installation
43
Figure 35 - Actuator Coil Removal
44
Figure 36 - Actuator Coil Installation
44
Verification
44
EXV Protection
45
Figure 37 - Opening Valve Manually
45
Torque Specifications
46
EXV Cable
46
Table 11 - EXV Torque Specifications
46
Figure 38 - Brazing the EXV
46
Figure 39 - EXV Cable
46
Removal and Installation
47
Figure 40 - CCM J15 Connector
47
Figure 36 - EXV Cable Retaining Clip
47
Verification
48
Running Check
48
Motor Cooling Exit Flange
48
Figure 42 - Cable Pinout for Continuity/Resistance Verification
48
Figure 43 - Motor Cooling Exit Flange (Revision a Only)
49
Figure 44 - Motor Cooling Exit Flange (Revisions B and Later)
49
Removal and Installation
50
Table 12 - Motor Cooling Exit Flange Torque Specifications
50
Torque Specifications
50
Bottom Plug
51
Removal and Installation
51
Torque Specifications
51
Table 13 - Bottom Plug Torque Specifications
51
Figure 45 - Bottom Plug
51
Power Side
52
Motor Power Cover
52
Figure 46 - Motor Power Cover (Revision A)
52
Figure 47 - Motor Power Cover (Revisions B and Later)
52
Removal and Installation
53
Torque Specifications
53
Mains Input Bracket
53
Figure 48 - Mains Input Bracket (Revision A)
53
Table 14 - Motor Power Cover Torque Specifications
53
Figure 49 - Mains Imput Bracket (Revisions C and Later)
54
Removal and Installation
54
Table 15 - Mains Input Bracket Torque Specifications
54
Torque Specifications
54
Motor Terminal Block
55
Figure 50 - Motor Terminal Block
55
Removal and Installation
56
Verification
56
Figure 51 - Measuring AC Input Voltage
57
Table 16 - Expected AC Voltage Range
57
Table 17 - Motor Terminal Block Torque Specifications
57
Torque Specifications
57
Tower Plate
58
Figure 52 - Tower Plate
58
Removal and Installation
58
Torque Specifications
59
Motor Power Feed through
59
Figure 53 - Tower Plate Torque Pattern
59
Figure 54 - Motor Power Feed through
59
Table 18 - Tower Plate Torque Specifications
59
Figure 55 - Motor Power Feed through (Mounted)
60
Removal and Installation
60
Figure 56 - Motor Power Feed through Exploded View
61
Torque Specifications
62
Verification
62
Motor
62
Table 19 - Motor Power Feed through Torque Specifications
62
Connections
63
Figure 57 - Connection to Stator
63
Motor Verification
63
Figure 58 - Service Side Cover
64
Figure 59 - Stator Temperature Sensor Cable Connector
65
Figure 60 - Stator Temperature Sensor Cable External Connector
65
Table 20 - Stator Thermistor R/T Curve
66
Figure 61 - Rear Bearing Sensor Feed through
67
Figure 62 - Stator Cooling Temperature Sensor Pinout
68
Service Side
69
Service Side Cover
69
Figure 63 - Service Side Cover
69
Removal and Installation
69
Table 21 - Motor Power Cover Torque Specifications
69
Torque Specifications
69
Front Bearing Power and Sensor Feed Throughs
70
Removal and Installation
70
Rear Bearing Power and Sensor Feed Throughs
70
Figure 64 - Front Bearing Sensor Feed through
70
Figure 65 - Front Bearing Power Feed through
70
Figure 66 - Rear Bearing Sensor Feed through
71
Figure 67 - Rear Bearing Power Feed through
71
Removal and Installation
71
VTT Service Electronics Assembly
72
Figure 68 - VTT Service Electronics (Revisions a and B)
72
Figure 69 - VTT Service Electronics (Revisions C and Later)
72
Figure 70 - Thermal Paste Application
73
Removal and Installation
73
CCM
74
CCM Function
74
Figure 71 - CCM (Revisions a and B)
75
Figure 72 - CCM (Revisions C and Later)
75
CCM Connections
76
Figure 73 - CCM Electrical Connections and Test Points (Revisions a and B)
76
CCM-CIM 24V Cable
77
Figure 74 - CCM-CIM 24V Cable (Revisions a and B)
77
Figure 75 - CCM-CIM 24V Cable (Revisions C and Later)
77
Figure 76 - CCM J7 Connector (Revisions a and B)
77
Figure 77 - CCM J7 Connector (Revisions C and Later)
77
Removal and Installation
77
DC-DC-CCM 24V Cable
78
Figure 78 - 24 VDC Connector at CIM
78
Figure 79 - DC-DC-CCM Cable (Revisions a and B)
78
VDC CCM-CIM Cable Verification
78
Figure 80 - DC-DC-CCM Cable (Revisions C and Later)
79
Figure 81 - J16 and J24 (Revisions a and B)
79
Figure 82 - J4 and J 7 (Revisions a and B)
79
Removal and Installation
79
Figure 83 - J16 (Revisions C and Later)
80
Figure 84 - J4 (Revisions C and Later)
80
CCM-CIM Cable
81
DC-DC-CIM 24V Cable Verification
81
Figure 85 - CCM-CIM Cable (Revisions a and B)
81
Figure 86 - CCM-CIM Cable (Revisions C and Later)
81
Removal and Installation
81
Figure 87 - J2 Connection at CIM
82
Figure 88 - J17 (Revisions a and B)
82
Figure 89 - J17 (Revisions C and Later)
82
CCM-CIM Cable Verification
83
CCM-VFD Cable
83
Figure 90 - CCM-VFD Cable (Revisions a and B)
83
Figure 91 - CCM-VFD Cable (Revisions C and Later)
83
Figure 92 - J4 Connector (Revisions a and B)
83
Removal and Installation
83
Figure 93 - J4 Connector (Revisions C and Later)
84
Figure 94 - Terminal Identification
84
Table 22 - Terminal to Wire Color
84
CCM-VFD Cable Verification
85
Figure 95 - Front Bearing Sensor Cable
85
Front Bearing Sensor Cable
85
Removal and Installation
85
Figure 96 - Front Bearing Sensor Connections
86
Front Bearing Sensor Cable Verification
86
Table 23 - Front Bearing Sensor Pin Verification
86
Figure 97 - 9-Pin Connector
87
Figure 98 - Feed through Connector
87
Figure 99 - Rear Bearing Sensor Cable
87
Rear Bearing Sensor Cable
87
Figure 100 - Rear Bearing Sensor Connections
88
Removal and Installation
88
Figure 101 - 9-Pin Connector
89
Rear Bearing Sensor Cable Verification
89
Table 24 - Rear Bearing Sensor Pin Verification
89
Figure 102 - Feed through Connector
90
Figure 103 - Motor Temperature Sensor Cable
90
Motor Temperature Sensor Cable
90
Removal and Installation
90
Figure 104 - CCM J12 Connection
91
Motor Temperature Sensor Cable Verification
91
Pwm
91
Table 25 - CCM Test Point Values
91
Figure 105 - Pulse Width Modulation Amplifier (Revisions a and B)
92
Figure 106- Pulse Width Modulation Amplifier (Revisions C and Later)
92
DC-DC PWM Cable
93
Figure 107 - 250V DC-DC-PWM Cable (Revisions a and B)
93
Figure 108 - 250V DC-DC-PWM Cable (Revisions C and Later)
93
PWM Connections
93
Removal and Installation
93
Figure 109 - PWM J11 Connector (Revisions a and B)
94
Figure 110 - DC-DC J2 and J6 Connector (Revisions a and B)
94
Figure 111 - PWM J11 Connector (Revisions C and Later)
95
Figure 112 - DC-DC J2 Connector (Revisions C and Later)
95
Figure 113 - DC-DC 250 VDC Test Points (Revisions a and B)
96
Figure 114 - DC-DC 250 VDC Test Points (Revisions C and Later)
96
Verification
96
Figure 115 - PWM Connector - 6 Pin
97
Figure 116 - PWM Test Points
97
Figure 117 - PWM Connector - 4 Pin
98
Table 26 - Electronics Side Torque Specifications
98
Torque Specifications
98
Figure 118 - Stator Temperature Sensor Feed through
99
Figure 119 - Stator Temperature Sensor Internal Connector
99
Removal and Installation
99
Stator Temperature Sensor Feed through
99
Figure 120 - Stator Temperature Feed through Orientation
100
Stator Temperature Sensor Verification
100
Figure 121 - Stator Temperature Sensor Feed through Connector
101
Figure 122 - High and Low Pressure/Temperature Sensors
101
High and Low Pressure Temperature Sensors
101
Table 27 - Stator Temperature Sensor Feed through Torque Specifications
101
Torque Specifications
101
Figure 123 - Suction Temperature Sensor Location
102
Figure 124 - Discharge Temperature Sensor Location
102
Removal and Installation
102
Figure 125 - Temperature/Pressure Sensor Pin Location
103
Table 28 - Temperature/Pressure Sensor Torque Specifications
103
Temperature/Pressure Sensor Verification
103
Figure 126 - Suction Housing Cable Clamps
104
Front Bearings
104
Internal Components
104
Figure 127 - IFV Assembly Removal
105
Figure 128 - Support Locations
105
Figure 129 - Suction Cover Removal
106
Figure 130 - Suction Cover Removed
106
Figure 131 - Guide Pin Locations
107
Figure 132 - End Cap Removal
107
Figure 133 - Shaft Dowel Pin Placement
108
Figure 134 - Impeller Bolt
108
Figure 135 - First Stage Impeller Removal
109
Figure 136 - Nylon Shaft Protector and Cap
109
Figure 137 - Volute Removal - Step One
110
Figure 138 - Volute Removal - Step Two
110
Figure 139 - Second Stage Impeller Removal
111
Figure 140 - Touchdown Bearing/Labyrinth Seal Plate Removal
111
Figure 141 - Front Touchdown Bearing
112
Figure 142 - Shim Example
112
Figure 143 - Front Bearing Feed through Internal Connectors
113
Figure 144 - Front Bearing Sensor and Power Bearing Feed Throughs
113
Figure 145 - Front Bearing Sensor Feed through
114
Figure 146 - Front Bearing Power Feed through
114
Figure 147 - Touchdown Bearing/Labrynth Seal Plate Torque Pattern
115
Figure 148 - Volute Torque Pattern
116
Figure 149 - Suction Housing Torque Pattern
117
Figure 150 - Front Bearing Power Feed through Pinout
118
Table 29 - Front Bearing Coil Resistance
118
Verification
118
Figure 151 - Front Twin Bearing Assembly
119
Front Twin Bearing Assembly
119
Removal and Installation
119
Figure 152 - Twin Bearing Mylar Insertion
121
Figure 153 - Guide Pin Locations
121
Rear Bearings
121
Figure 154 - End Cap Removal
122
Figure 155 - Rear Bearing Sensor and Rear Bearing Power Harness
122
Figure 156 - Rear Feed through Removal
123
Figure 157 - Axial Bearing Assembly Jacking Screw Locations
123
Figure 158 - Axial Bearing Removal
124
Figure 159 - Thrust Disk Removal
124
Figure 160 - Stator Cooling Temperature Sensor
125
Figure 161 - Radial Bearing Mylar Insertion
125
Figure 162 - Radial Bearing Screws
126
Figure 163 - Radial Bearing Assembly Jacking Screw Locations
126
Figure 164 - Radial Bearing Assembly Removal
127
Figure 165 - Stator View
127
Figure 166 - Thrust Disk Alignment Pins
128
Figure 167 - Rear Bearing Sensor Feed through
129
Figure 168 - Rear Bearing Power Feed through
129
Bearing Verification
130
Figure 169 - Rear Bearing Power Feed through Pin Identification
130
Stator Temperature Verification
130
Table 30 - Rear Bearing Coil Resistance
130
Table 31 - Internal Components Torque Specifications
131
Torque Specifications
131
Variable Frequency Drive Components
133
VFD Modules
133
VFD Control Card
133
Figure 170 - VFD
133
Figure 171 - VFD Control Card
134
Figure 172 - RS 485 and Interlock Connection Details
134
VFD Card Connections
134
Removal and Installation
135
Table 32 - RS485 Details
135
Table 33 - VFD Card Torque Specifications
135
Torque Specifications
135
VFD Control Card Verification
135
VFD Orifice
136
VFD Orifice Specifications
136
Figure 173 - VFD Orifice
136
Figure 174 - Cold Plate Tubes
136
VFD Valve
137
VFD Valve Specifications
137
Figure 175 - VFD Valve
137
VFD Pressure Control Valve Cable
138
VFD Pressure Control Valve Pin Connections
138
Figure 176 - VFD Pressure Control Valve Cable
138
Figure 177 - VFD Pressure Control Valve Pin Identification
138
VFD Pressure Control Valve Removal and Installation
139
Figure 178 - VFD Pressure Control Valve M12 Connection
139
Figure 179 - CIM (Revisions a and B) J6 Connection
139
VFD DC-DC Cable
140
Removal and Installation
140
Figure 180 - CIM (Revisions a and B) Wire Diagram
140
Figure 181 - VFD DC-DC Cable
140
Figure 182 - DC-DC J1 Connector
141
Figure 183 - VFD + Regen 82 and - Regen 83
141
VFD DC-DC Cable Verification
142
Torque Specifications
142
Table 34 - Regen Cable Torque Specifications
142
OEM Module Components
143
DC-DC Module
143
Figure 184 - DC-DC (Revisions a and B)
143
Figure 185 - DC-DC (Revisions C and Later)
143
DC-DC Connections
144
Figure 186 - DC-DC J1 Connection and J12 -J13 Test Points
144
Removal and Installation
144
Figure 187 - DC-DC J2 and J4 Connections
145
Figure 188 - DC-DC J1 Connection and J12 -J13 Test Points
145
Figure 189 - DC-DC J2 and 4 Connections
146
Fan Removal and Installation
147
DC-DC Verification
147
Figure 190 - Fan Connector
147
Figure 191 - DC-DC Fan Orientation
147
Figure 192 - DC-DC 24 and 250 VDC Output (Revisions a and B)
148
Figure 193 - DC-DC 24 and 250 VDC Output (Revisions C and Later)
148
Table 35 - DC-DC Torque Specifications
148
Torque Specifications
148
Compressor Interface Module (CIM)
149
Figure 194 - CIM (Revision C Shown)
149
Figure 195 - CIM Faceplate (Revisions a and B)
149
Figure 196 - CIM Faceplate (Revisions C and Later)
149
Figure 197 - CIM Connectivity (Revisions a and B)
150
Figure 198 - CIM Connectivity (Revisions C and Later)
150
CIM Verification
151
Figure 199 - Active Alarm/Fault Viewer
151
Removal and Installation
151
Table 36 - CIM Torque Specifications
151
Torque Specifications
151
Compressor Removal and Installation
153
Refrigerant Containment
153
Compressor Removal
153
Figure 200 - Compressor Assembly
153
Figure 201 - Compressor Power Cable Removal
154
Figure 202 - Strain Relief
154
Compressor Installation
155
Torque Specifications
157
Table 37 - Motor Terminal Block Torque Specifications
157
Appendix A: Acronyms
159
Table A1 - Acronym/Terms
159
Appendix B: Special Tooling Specifications
161
Figure B1 - Volute Assembly Sleeve
161
Figure B2 - Long Guide Pin
162
Figure B3 - Short Guide Pin
162
Figure B4 - Thrust Disk Alignment Pin
163
Figure B5 - Shaft Bolt Torquing Pin
164
Advertisement
Advertisement
Related Products
Danfoss Turbocor Twin-Turbine TTS Series
Danfoss Turbocor TT350
Danfoss Turbocor TT700
Danfoss Turbocor TG230
Danfoss Turbocor TG310
Danfoss Turbocor TG390
Danfoss Turbocor TG520
Danfoss TGH Series
Danfoss TTH375
Danfoss Turbocor TT500
Danfoss Categories
Controller
DC Drives
Thermostat
Control Unit
Air Compressor
More Danfoss Manuals
Login
Sign In
OR
Sign in with Facebook
Sign in with Google
Upload manual
Upload from disk
Upload from URL