Sign In
Upload
Manuals
Brands
APRILIA Manuals
Motorcycle
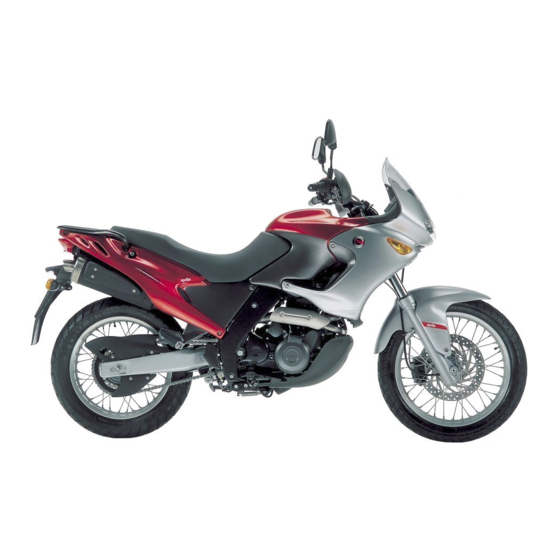
Pegaso 650 I.E.
APRILIA Pegaso 650 I.E. Manuals
Manuals and User Guides for APRILIA Pegaso 650 I.E.. We have
2
APRILIA Pegaso 650 I.E. manuals available for free PDF download: Service Manual, Use And Maintenance Book
APRILIA Pegaso 650 I.E. Service Manual (320 pages)
Brand:
APRILIA
| Category:
Motorcycle
| Size: 14 MB
Table of Contents
0 Introduction 4!",% /& #/.4%.43
2
Table of Contents
2
Introduction
2
Information on the Updating of the Manual
3
Updated Manual General List
3
Engine Service and Repair Manuals
6
Spare Parts Catalogues
6
Special Tool Manuals
6
Use and Maintenance Manuals
6
Precautions and General Informations
7
Before the Disassembly of the Components
7
Disassembling the Components
7
Reassembling the Components
7
Advice for Consultation
8
General Information 4!",% /& #/.4%.43 1
12
Engine Number
13
Frame Number
13
Engine Oil
14
Fork Oil
14
Fuel
14
Brake Fluid
15
Coolant
15
Carbon Monoxide
16
Clutch Fluid
16
Hot Components
16
30%#)!, 4//,3 M
22
Specific Tools
22
Generic Tools
24
Tools Used for Other Vehicles
26
POSITIONING the VEHICLE on the FRONT SUPPORT STAND M
27
POSITIONING the VEHICLE on the REAR SUPPORT STAND M
27
Product Properties
28
Joints with Hose Clamps and Screw Clamps
29
Driving Torques
30
Service and Setting up
39
General Specifications of the Driving Torques
30
Service and Setting up
40
Regular Service Intervals Chart
42
Checking and Cleaning the Terminals
46
Checking the Electrolyte Level
46
Long Inactivity of the Battery
47
Fuel Supply System
52
Recharging the Battery
47
Checking the Operation of the Accelerator Control
53
Idling Adjustment
54
Adjusting the Accelerator Control
56
Bleeding the Oil Delivery Pump
60
Bleeding Operations
66
Checks to be Carried out after Bleeding the Braking Systems
72
Adjusting the Bearing Slack Steering
77
Checking the Bearing Slack Steering
77
Pegaso 650 I.E
77
Adjusting the Rear Fork
78
Aprilia Part
78
Front Suspension
79
Adjusting the Rear Shock Absorber
80
Rear Suspension
80
REAR SUSPENSION with HYDRAULIC PRELOAD ADJUSTMENT M
82
Checking the Rear Suspension Linkage
83
Checking the Drive Chain Slack
85
Adjusting the Driving Chain
86
Checking the Driving Chain, Pinion and Sprocket Wear
86
Drive Chain Tension and Lubrication
87
Inspecting the Driving Chain Shoe
87
Condition of Tread
88
Inflation Pressure
88
Engine
95
Fuel Supply System 4!",% /& #/.4%.43
114
Checking the Fuel Supply
116
Maintenance
116
Foreword
121
Sensors
122
Injection System Diagram
123
Electronic Unit Connector
124
Automatic Testing
125
Driving Shaft Position Sensor
125
Electronic System Troubleshooting According to the Information Provided by the Diagnostic Warning Light
125
Removing the Injectors
126
Removing the Throttle Body
128
Removing the Throttle Body Components
129
Removing the Idling Speed Adjustment Cable
130
Inspecting the Throttle Body
131
Assembling the Throttle Body
132
Checking Throttle Valve Control Shaft End Play
133
Adjusting the Throttle Body
134
Changing and Adjusting the Throttle Valve Potentiometer
135
Co Adjustment
136
Electric System
149
#//,!.4 4%-0%2!452%
150
Cable Colours
154
Checking the Alternator Loadless Operation
154
Checking the Recharging Voltage
154
Checking the Alternator Continuity
155
Checking the Voltage
155
Regulator
155
Injection Power Supply Diagram
156
Troubleshooting
156
Checking the Fall Sensor
157
Checking the Injection Relay
157
Connections to the Engine Control Unit
158
Failure Code Verification
160
Troubleshooting
160
Eliminating Electronic System Faults
162
Checking the Injectors
163
Checking the Throttle Valve Potentiometer
163
Checking the Air
164
Thermistor Operation
164
Checking the Instrument
175
Wiring Diagram
175
Fuel Level Indicator
177
Wiring Diagram
177
Checking the High Beam Relay
178
Wiring Diagram
178
Checking the Blinking Operation
180
Checking the Operation of the Horn
180
Activating the Battery
181
Battery Maintenance
182
Checking the Battery
182
Changing the Headlight
183
Changing the Front
185
Changing the Number Plate Bulb
186
Changing the Rear Light Bulb
186
Changing the Dashboard Bulbs
187
Chassis
194
Removal of the Fuel Tank
197
Removing the Fuel Tank Filler Cap
198
Removing the Oil Sump Guard
199
Removing the Right and Left Sides
199
Removing the Front Mudguard Group
200
Removing the Rear Luggage Rack
200
Removing the Saddle
200
Removing the Battery
201
Removing the Air Cleaner Case
202
Removing the Electronic Unit
203
Removing the Antivibration Weight
204
Removing the Hand Guards
204
Removing the Handgrip
205
Removing the Clutch Lever
206
Removing the Electric Controls on
207
The Left Side of the Handlebar
207
Removing the Front Brake Lever
208
Removing the Throttle Grip
208
Removing the Electric Controls on
210
The Right Side of the Handlebar
210
Removing the Horn
211
Removing the Ignition Switch
211
Steering Lock
211
Removing the Handlebar
212
Removing the Rear-View Mirrors
212
Removing the Front Fairing
213
Removing the Dashboard
214
Removing the Headlight
214
Removing the Dashboard Fairing
215
Removing the Dashboard Mount
215
Removing the Drive Chain Guards
216
Removing the Saddle Lock
216
Removing the Number Plate Holder
217
Removing the Glove Compartment
218
Removing the Air Conveyor
219
Removing the Exhaust Silencers
219
Removing the Passenger Footrest Group
219
Removing the Saddle Support
220
Removing the Drive Pinion
222
Removing the Driving Chain
222
Removing the Rear Light
222
Removing the Chain Rollers and Shoe
223
Removing the Centre Stand
224
Removing the Side Stand
224
Removing the Front Direction
225
Indicators
225
Removing the Rear Direction
225
Removing the Frame
226
Removing the Front Wheel
229
Checking the Front Wheel
230
Components
230
Front Wheel Bearings
230
Front Brake Disc
231
Front Tyre
231
Front Wheel Gaskets
231
Front Wheel Pin
231
Front Wheel Rim
231
Speedometer Control
231
Disassembling the Front Wheel
232
Bearings
232
Assembling the Front Wheel
233
Bearings
233
Rear Brake Disc
239
Rear Tyre
239
Rear Wheel Pin
239
Rear Wheel Rim
239
Final Drive Unit Bearings
240
Flexible Couplings
241
Sprocket
241
Disassembling the Rear Wheel
242
Bearings
242
Assembling the Rear Wheel Bearings
243
Disassembling the Final Drive Unit
244
Bearings
244
Assembling the Final Drive Unit
245
Bearings
245
Removing the Crown Gear
246
Installing the Rear Wheel
247
Checking the Components
248
Tyre Disassembly
248
Assembling the Tyre
249
Changing the Front Brake Pads
251
Checking the Front Brake Disc
252
Removing the Front Brake Disc
252
Removing the Front Brake Pump
252
Removing the Front Brake Calipers
253
Draining the Braking Systems
255
Changing the Rear Brake Pads
257
Checking the Rear Brake Disc
257
Removing the Rear Brake Disc
258
Removing the Rear Brake Pump
258
Removing the Rear Brake Caliper
260
Draining the Rear Braking System
261
Removing the Fork Together with the Front Wheel
263
Checking the Components
265
Steering Bearings
265
Steering Gaskets
265
Removing the Steering Bearings
266
Changing the Fork Oil
268
Checking the Oil Level
268
Removing the Slider-Tube Assemblies
268
Disassembling the Slider-Tube
269
Assemblies
269
Checking the Components
271
Reassembling the Wheel-Holder Tube - Slider Unit
272
Installing the Slider-Tube Assemblies
274
Removing the Rear Fork
275
Checking the Components
277
Rear Fork Bearings
277
Rear Fork Gaskets
277
Rear Fork Pin
277
Disassembling the Rear Suspension Linkage
282
Disassembling the Suspension
282
Linkage
282
Chain Breaker/Rivet Tool
283
Breaking the Chain
284
Positioning the Joining Link
285
Rivetting the Pins
285
#(%#+).' 4(% %,%#42)#!, 6
288
Battery
294
Brakes
294
Chassis
295
Front Brake Pipe
296
Rear Brake Pipes
296
Fuel System Pipes
297
Engine Oil Pipes
298
Breather and Impurity Drainage Pipes
299
Cooling System Pipes
299
Accelerator Control Cable and Cold Start Cable
300
Clutch Control Cable
300
Revolution Counter Cable
301
Speedometer-Odometer Cable
301
Electric Cables
302
Auxiliary System Problems
308
Battery Recharging Problems
308
Ignition And/Or Starting Problems
308
SPARK PLUGS (no Spark)
308
Cooling System
309
Electric System
309
Engine
309
Front Braking System
309
Front Suspension
309
Rear Braking System
309
Rear Suspension
309
Supply System
309
Throttle Body Components
309
Wheels
309
Advertisement
APRILIA Pegaso 650 I.E. Use And Maintenance Book (112 pages)
Brand:
APRILIA
| Category:
Motorcycle
| Size: 7 MB
Table of Contents
Safe Drive
2
Table of Contents
4
Clothing
9
Accessories
10
Load
10
Instruments and Indicators
14
Ignition Switch
14
Steering Lock
14
Anti-Theft Hook
22
Special Tools
23
Fuel
27
BRAKE FLUID - Recommendations
31
Disc Brakes
43
Front Brake
43
Rear Brake
43
Coolant
43
Tyres
43
Getting on and off the Vehicle
52
Preliminary Checking Operations
98
Starting
101
Parking
103
Maintenance
103
Spark Plug
103
Battery
103
Bulbs
103
Advertisement
Related Products
APRILIA PEGASO 650 FACTORY
APRILIA PEGASO 650 STRADA
APRILIA PEGASO 650 IE - 2003
APRILIA PEGASO 650 IE STRADA - 2005
APRILIA PEGASO 650 TRAIL - BROCHURE 2009
APRILIA PEGASO 650 STRADA-TRAIL
APRILIA PEGASO 650 I.E. STRADA
APRILIA Pegaso 650
APRILIA SCARABEO 100 4T - 06-2001 PART10
APRILIA SCARABEO 50 IE - 06-2001 PART8
APRILIA Categories
Motorcycle
Scooter
Electric Shaver
Engine
Bicycle
More APRILIA Manuals
Login
Sign In
OR
Sign in with Facebook
Sign in with Google
Upload manual
Upload from disk
Upload from URL