Table of Contents
Advertisement
Quick Links
Advertisement
Table of Contents

Subscribe to Our Youtube Channel
Related Manuals for WatchNet RTS series


Summary of Contents for WatchNet RTS series
-
Page 2: Table Of Contents
3.6.1 Connecting Video Input ....................... 22 3.6.2 Connecting Video Output......................23 3.7 Connecting Bi-directional Audio & Looping Video Matrix............23 3.7.1 Audio Input/One Audio Output....................23 3.7.2 Looping video (RTS series only) ....................24 3.7.3 Matrix Video Output (RTS series only) ..................24... - Page 3 3.7.4 Alarm Input and Relay Output ..................... 24 3.7.5 Alarm Input........................... 25 3.7.6 Alarm Output..........................25 3.7.7 Alarm Input and Output Details ....................25 3.7.8 Relay Output Description ......................26 3.8 RS-232..............................27 3.9 RS-485..............................27 3.10 Other Interfaces......................... 28 4 MAIN SCREEN ....................29 4.1 Login, Main Menu &...
- Page 4 4.5 Motion Detect............................37 4.5.1 Go to Motion Detect Menu ......................37 4.5.2 Motion Detect..........................37 4.5.3 Video Loss............................39 4.5.4 Camera Mask Detect ........................39 4.6 Alarm Setup and Alarm Activation ....................40 4.6.1 Go to alarm setup interface......................40 4.6.2 Alarm setup...........................
- Page 5 5.5.7 Video Matrix (For RTSL Series and RTSH Series)..............55 5.5.7.1 Loop outputs ........................55 5.5.7.2 Matrix outputs ........................55 5.5.7.3 Rear Panel Connection....................56 5.5.7.4 37-pin cable introduction....................56 5.5.7.5 Matrix setup........................56 5.5.7.6 Video Matrix Interface and Application................. 56 5.5.7.7 Examples...........................
- Page 6 7.5 Search..............................71 7.5.1 Download............................71 7.6 Config ..............................72 7.6.1 System Info........................... 72 7.6.2 Setting ............................73 7.6.2.1 General ..........................73 7.6.2.2 Encode..........................73 7.6.2.3 Schedule........................... 74 7.6.2.4 RS232 ..........................74 7.6.2.5 Network..........................75 7.6.2.6 Multi-DDNS ........................75 7.6.2.7 FTP.............................
- Page 7 APPENDIX A HDD CAPACITY CALCULATION............88 APPENDIX B COMPATIBLE USB DRIVE LIST ............89 APPENDIX C COMPATIBLE CD/DVD BURNER LIST .........90 APPENDIX D COMPATIBLE SATA HDD LIST ............91...
- Page 8 Welcome Thank you for purchasing our DVR! This operations manual has been designed to be a reference tool for the installation and operation of your system. Here you can find detailed information about the features and functions specific to this DVR series, as well as a detailed menu tree. Before installation and operation please read the following safeguards and warnings carefully!
-
Page 9: Important Safeguards And Warnings
Important Safeguards and Warnings 1. Electrical safety DVR installation and operation should conform to all applicable local electrical safety codes. We assume no liability or responsibility for any damages such as fire, or electrical shock caused by improper handling or installation. 2. -
Page 10: Features And Specifications
• RTS systems can support up to 8 HDDs/6 HDDs & CD-RW/DVD-RW supported • EL systems can support 1 HDDs • Multiple control methods: Front panel, IR remote control, Watchnet keyboard, USB mouse and network keyboard. • Smart video detection: Motion detection, camera masking, video loss. - Page 11 Video Video Input 4/8/16 Channel, BNC, 1.0Vp-p, 75 , looping (optional), matrix output Video Output 2 channel TV output BNC, 1.0Vp- p, 75 ,1 VGA output Video Standards NTSC (525 line, 60f/s), PAL (625 line, 50f/s) Video Compression H.264 Video Resolution Format NTSC D1 (4CIF)
- Page 12 Monitor, PTZ control, playback, system setting, file download, log information Auxiliary Interface USB Interface 2 ports, 1 for mouse, 1 for backup RS-232 Watchnet keyboard, PC communication RS-485 PTZ control Environmental Power Supply 110V 60Hz / 220V 50Hz Power consumption...
-
Page 13: Overview And Controls
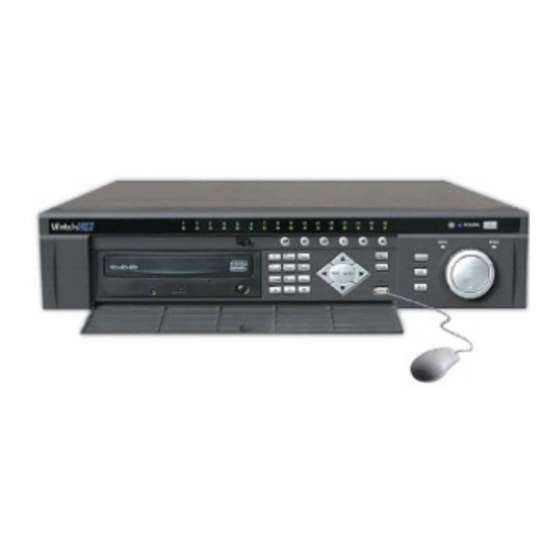
2 OVERVIEW AND CONTROLS This section provides information about front and rear panel. When installing the DVR for the first time, please refer to this part first. Front Panel This DVR series has two different front panels. Refer to Figure 2-1 and Figure 2-2 for both of these front panels. - Page 14 Figure 2-2 Name Icon Function ► | Play Next Selection Play the next recording file ► ► Fast Forward Fast Play Speed, 4 levels of speed adjustment Slow Play Slow playback, 4 levels of speed adjustment Play/Pause ► Play / Pause When in real time monitor, press to enter search menu.
-
Page 15: Front Panel For El System
Front Panel for EL system Icon Name Function Press and hold for three seconds to shut down the DVR. DVR is in stand- Power Button by When power button led is up During normal playback or while paused, push this button to reverse ◄... -
Page 16: Rear Panel
Rear Panel 2.3.1 RTS series Please refer to Figure 2-3 for real panel information. 365H Figure 2-3 2.3.2 RTSL/RTSH (with Loop Out and Matrix) Refer to Figure 2-4 for real panel information 366H Figure 2-4 Note: 25-pin or 37-pin interface... -
Page 17: El Systems
2.3.3 EL Systems Please refer to Figure 2.3.3 for real panel information. Figure 2.3.3 2.3.4 Connection Sample Refer to Figure 2.3.4 for a connection sample reference when connecting the Figure 2.3.4... -
Page 18: Remote Control
Remote Control The remote control interface is shown as in Figure 2-5 367H367H Name Icon DVR Remote switch Cancel Switch View Mode View ■ Stop ►| Play Next Selection ►► Fast Forward Slow Play ► Play / Pause ◄ Reverse Play Play Previous Selection |◄... -
Page 19: Mouse Control
Mouse Control When inside the main menu In the input box, select multiple input methods. Left-click the corresponding button on the panel, then input numerals, or English characters In English input mode: ← stands for deleting the previous character. In numeral input mode: ← stands for deleting the previous numeral. Left-Click When special sign is needed, click the corresponding numeral in the front panel to select. -
Page 20: Installation And Connections
SATA cables, fastening screws and smart HDD shelf design are already provided in the accessories. Please follow the instructions below to install the hard disk. 3.2.3.1 RTS series 1. Remove the upper cover of the DVR 2. Remove the upper HDD bracket 3. -
Page 21: El System
5. Screw the bracket back into the internal unit. 6. Loosen the power cords for the HDD 8. Connect the power cord for the HDD. 7. Connect the HDD with the SATA/IDE port, via the communications cable 9. Replace the back cover, and re-screw firmly 10. -
Page 22: Cd/Dvd Burner Installation
CD/DVD Burner Installation For built-in burner, remove the front plate cover to install CD burner. Use SATA series burners. This series DVR is compatible with various burner brands that are popular in today’s market. Consult technical support or visit our website for more information. -
Page 23: Connecting Video Output
3.6.2 Connecting Video Output This section provides information about physically connecting video display devices to the DVR. See Figure 3-2. In the setup menu toggle the default outputs 368H to Automatic, VGA, or CCTV. If connecting the DVR with a TV monitor or VGA monitor in automatic mode, the DVR will automatically detect the monitor type. -
Page 24: Looping Video (Rts Series Only)
2. Connect the other end of the coaxial cable to the analog device. 3.7.3 Matrix Video Output (RTS series only) Use video matrix output connector during installation to display video sequentially from each video input. The unit displays each channel for selected seconds. This feature can use to verify camera installation. -
Page 25: Alarm Input
activities, including triggering a relay device, sending an alert to a security office or storing pre-alarm video to the DVR. 3.7.5 Alarm Input Check the alarm input mode if it is grounding alarm input or not. For this series DVR, grounding signal is needed for alarm input. If connecting two units or one DVR and other device, please use a relay to separate them. -
Page 26: Relay Output Description
• Please parallel connect the Ground of the DVR and the ground of the alarm detector. • Please connect the NC port of the alarm sensor to the DVR alarm input (ALARM) • To reset the touched-off alarm remotely, use the DVR controllable 12 V power supply to the alarm detector such as the smoke detector. -
Page 27: Rs-232
Relay Specification JRC-27F Model: Silver Material of the touch Rating Rated switch capacity 30VDC 2A, 125VAC 1A resistance Maximum switch power 125VA 160W load Maximum switch voltage 250VAC, 220VDC Maximum switch current Insulation Between touches with 1000VAC 1minute 50/60Hz same polarity 1000VAC 1minute 50/60Hz Between touches with different polarity... -
Page 28: Other Interfaces
Other Interfaces 3.10 There are still other interfaces on the DVR, such as USB ports. Refer to the 376H Figure 3-11 for more information. Figure 3-11... -
Page 29: Main Screen
4 Main Screen Before operation, please make sure HDD and all the cable connections are properly installed. Single camera view, click on the desired button to select a different camera. : Enter Backup window : 1 View camera on the screen. : Enter DVR settings : 4 View cameras on the screen. -
Page 30: Login, Main Menu & Shutdown
Login, Main Menu & Shutdown 4.1.1 Logging In When the system boots up, it will display the GUI in multiple-camera mode. To login, navigate to the login button then press Enter or left-click the login button, then the System Login window will appear. See Figure 4-1. -
Page 31: Auto Resume After Power Failure
The other way is to press and hold the power button on the front panel for at least 3 seconds. The system will stop all operations and then click the power button in the rear panel to turn off the DVR. 4.1.4 Auto Resume after Power Failure The system can automatically backup video and resume previous working status after power failure. -
Page 32: Enable/Disable Record
4.2.2.3 Enable/disable record Please check current channel status: means it is not in recording status, means it is in recording status. Use the mouse or direction keys to highlight channel number. See Figure 4-6. Figure 4-6 4.2.2.4 Enable all channel recording Highlight All for Manual, to enable all channel recording. -
Page 33: Search & Playback
Figure 4-9 Search & Playback RTS series supports 4 channel searches and will have 4 display windows while EL systems will support 1 display window but can display 4 channels simultaneously if there are recording on all 4 channels 4.3.1 Search Menu There are three ways to go to search menu. -
Page 34: Basic Operation
Please refer to the following sheet for more information. Serial Number Function Slow Play Previous Frame Reverse Playback Pause Play Next Frame Fast Play Stop Previous File Next Channel Next File Previous Channel Search Backup 4.3.2 Basic Operation 4.3.2.1 Playback There are several search modes: Video type, channel number, or time. -
Page 35: Fast Forward/Fast Backward And Frame By Frame Playback
In slow playback mode, click this button to ► ▌▌ Play/Pause switch between play/pause modes. In playback mode, press ▐◄ and ►▌ to view the Previous/Next previous or next video in current channel. 4.3.2.7 Fast forward/fast backward and frame by frame playback Special Functions of Illustration Remarks... -
Page 36: Schedule Menu
4.4.1 Schedule Menu In the main menu, go to DVR Setting, then go to Schedule menu. See Figure 4-12. There are three record types: R-Regular, MD-Motion detection, A- Alarm. In some series, system also supports C-Card) Figure 4-12 4.4.2 Basic Operation There are totally six periods. -
Page 37: Motion Detect
Advanced to HDD management, set one or more disk(s) as redundant. Select from the dropdown list. See Figure 4-13. The system auto 393H overwrites old files once the hard disk is full. Please note only read/write disk or read-only disk can backup file and support file search function, so at least one read-write disk should be set otherwise video will not be recorded. - Page 38 • PTZ preset: Click set button, the interface is shown as in Figure 4-15. Set preset for one or more channels. • Region: click “select” button to set motion detection region. See Figure 398H 4-16. • Sensitivity: There are six levels. The sixth level being the most sensitive. •...
-
Page 39: Video Loss
4.5.3 Video Loss Figure 4-14, select video loss in the Type item. See the interface shown 400H as in Figure 4-17.This function allows the user to be informed when video 401H loss has occurred. The can enable alarm output channel and then enable the show message function. -
Page 40: Alarm Setup And Alarm Activation
• Alarm output: When camera masking has occurred, the system enables peripheral alarm devices. Select this icon to enable this function • Show message: System pops up message in the screen to alert the user once an alarm occurred. Please highlight icon to enable this function Note: In this interface, the copy/paste function is only valid for the same type, which means it can not copy a channel setup in video loss mode to camera mask detect mode. -
Page 41: Backup
Figure 4-19 Backup Click backup icon in the main menu, there are two function items: Detect device and backup files. 4.7.1 Detect Device View device information. Figure 4-20. Figure 4-20 4.7.1 Backup Select backup device, channel, start time, and end time. Click the add button, system will begin searching. -
Page 42: Ptz Control And Color Setup
Figure 4-21 Select the backup button, to backup the selected files. This will start the burning process. At this time, the “Backup” button will change to a “stop” button. View the remaining time and process bar at the bottom left. See figure 4-22. -
Page 43: Ptz Setup
• Connect power adapter to the dome. 4.8.2 PTZ Setup Note: The camera video should be in the current screen. Before setup, please check the following connections are correct: • PTZ and decoder connection is correct. Decoder address is correctly setup. •... -
Page 44: Menu Operations And Controls
5 Menu Operations and Controls Menu Tree This series DVR menu tree is shown as below. Main Menu When login, the system main menu shows as below. Figure 5-1. There are six icons in total: Search, Information, Setting, Advanced, Backup and Shutdown. Move the cursor to highlight the icon, then left-click to enter the sub-menu. -
Page 45: General
5.3.1 General General setting includes the following items. See Figure 5-3. 445H • System Time: This allows the setting of the system time and date. • Date Format: (Toggle between three date formats) YYYY-MM-DD, MM-DD- YYYY, or DD-MM-YYYY. • Date Separator: (There are three denotations to separate date) Dot, hyphen, and forward-slash. -
Page 46: Schedule
• Frame rate: (NTSC) 1 f/s, 2 f/s, 4 f/s, 7f/s, 15f/s, 20f/s, 30f/s (PAL) 1 f/s, 2f/s, 3f/s, 6f/s,12f/s,25f/s. (NTSC Default: 30f/s) (PAL Default: 25f/s) • Enable audio: Turn audio recording on or off. • Cover area (Privacy mask): Set a window blanking section. Drag the mouse to set proper section size. -
Page 47: Pppoe Connection
• Subnet mask • Gateway • Service port: Default port is 4000. (System server port 4001 is reserved for network UDP use.) • HTTP port: Default value is 80 • Protocol: Select proper protocol from the dropdown list. • Max connections: Amount of connections allowed, up to 10. •... -
Page 48: Web Connect Via Network
the save button, the dvr will need to restart to activate the configuration. After rebooting, IP camera will connect to Internet automatically. The IP in the PPPoE is the dynamic value. 5.3.5.2 Web connect via Network There are two ways. a. - Page 49 Figure 5-9 System also supports uploading multiple DVRs to one FTP server. Create multiple folders under this FTP. In Figure 5-6, select FTP and then select 453H the properties button. See Figure 5-10 for more information on the interface. 454H Figure 5-10 Please highlight the icon in front of Enable to activate FTP functionality.
-
Page 50: Ntp
• When interval value is 0, system uploads all corresponding files. • Period 1 and Period 2: Two periods for each channel can be set. System file name is shown as in Figure 5-12. Figure 5-12 5.3.5.4 NTP SNTP server (Such as Absolute Time Server) in the PC must be installed first. -
Page 51: Alarm
5.3.6 Alarm Please refer to chapter 4.6 Alarm Setup and Activation. 5.3.7 Detect Please refer to chapter 4.5 Detect. 5.3.8 Pan/Tilt/Zoom The pan/tilt/zoom setup includes the following items. Please select channel first. See Figure 5-14. • Protocol: Select corresponding PTZ protocol such as DH-SD1. •... -
Page 52: Default
After completing setup select the save button, this will go to the previous menu. Figure 5-15 5.3.10 Default Click default icon, system pops up a dialogue box. Highlight to restore factory default setup. See Figure 5-16. 460H • Select all •... -
Page 53: Search
Search Please refer to chapter 4.3 Search. Advanced Double-click the advanced icon in the main window, the interface below will be shown. See Figure 5-17. There are seven function keys: Hard Disk 461H Management, Alarm Output, Alarm Input, Manual Record, Account, Auto Maintain, and TV Adjust. -
Page 54: Alarm Output
Figure 5-19 5.5.2 Alarm Output Setting up proper alarm output can be found here. Please highlight icon select the corresponding alarm output. After completing setup select the OK button, this will go to the previous menu. See Figure 5-20. Figure 5-20 5.5.3 Manual Record Please refer to chapter 4.2.2 Manual Record. -
Page 55: Auto Restart
Figure 5-21 5.5.5 Auto Restart Scheduling an auto-reboot time and auto-delete for old files setup is found here. See Figure 5-222. Select proper setup from dropdown list. Figure 5-222 5.5.6 TV Adjust Adjustments for TV output setup can be found here. See Figure 5-233. Drag slide bar to adjust each item. -
Page 56: Rear Panel Connection
between the cameras. So the matrix outputs can be used, for front TV’s, to tour and display the cameras. 5.5.7.3 Rear Panel Connection The rear panel is shown as below. See Figure 5-244. 469H Figure 5-244 5.5.7.4 37-pin cable introduction There are three colors cable. -
Page 57: Examples
Figure 5-278 A. Single Tour Please enable tour function. Then set interval time and select corresponding cameras. Select “ALL” to tour between all channels. B. Alarm Select the “Alarm In” channel number from the dropdown list. If there is an alarm signal from the channel selected, the matrix output will go to tour as was set in the “Alarm”... -
Page 58: Information
Figure 5-290 B. Example two Figure 5-301, when alarm occurs in channel one, the activated matrix 476H output one begins touring between CAM1, CAM6 and CAM7 of the DVR until alarm activation tour stops. Figure 5-301 Information System information can be viewed and edited here. There are five items in total: HDD (Hard Disk Information), BPS (Data Stream Statistics), Log, Version, and Online Users. -
Page 59: Bps
means error occurred / “-“means there is no disk. The serial number after the disk information such as “O”, which means it is current working disk. If disk is damaged, system shows as “?” Figure 5-323 5.6.2 BPS View the current video data streams (KB/s) and occupied hard disk storage (MB/h). -
Page 60: Version
5.6.4 Version Version information can be seen here. See Figure 5-356. 481H • Channel • Alarm In • Alarm Out • Version: • Build Date • Web Version • Serial No. Figure 5-356 5.6.5 Online Users Here online users can be managed. See Figure 5-367. Users can be disconnected or blocked here, if the login user has proper system privileges. - Page 61 Figure 5-378...
-
Page 62: About Auxiliary Menu
6 About Auxiliary Menu Go to Pan/Tilt/Zoom Menu Click Pan/Tilt/Zoom Icon, the PTZ interface is shown as Figure 6-1. Setting the following items by using the icons can be done here. • Zoom • Focus • Iris Figure 6-1 In Figure 6-1, please click direction arrows (See Figure 6-1 ) to adjust PTZ 487H position. -
Page 63: Preset Setup
Figure 6-3 In Figure 6-1, click page switch button, see the interface in Figure 6-4. Activating the following functions can be found here: • Preset • Tour • Pattern • Aux On • Aux Off • Auto Scan • Auto Pan •... -
Page 64: Activate Tour
Figure 6-6 6.2.4 Activate Tour In Figure 6-4, input the patrol (Tour) number in the “No.” blank, and select the “Tour” button. 6.2.5 Pattern Setup Figure 6-3, select the “Pattern” button and then select the “Begin” button. 502H The interface is shown in Figure 6-7. -
Page 65: Activate Auto Scan
6.2.8 Activate Auto Scan Figure 6-4, click “Auto Scan” button, the system begins auto scan. 511H Correspondingly, the “Auto Scan” button will change to a “Stop” button. Select the “Stop” button to terminate the scan operation. Dome Menu Control Figure 6-4, select the “Page Switch” button, the interface is shown as below. 512H Figure 6-9 Select “menu”... -
Page 66: Web Client Operation
7 WEB CLIENT OPERATION Please note, all the operations here in chapter seven are using a 16-ch DVR as an example. There might be slightly differences in the interface due to different series. Network connection Before web client operation, please check the following items: •... -
Page 67: Video
Input your IP address here. Login Window Figure 7-2 Default factory login username is “admin” and password is “1234”. Note: For security reasons, please modify the password after the first login. Video After login, the interface is shown as below. See 7-3. Figure 7-3... - Page 68 • Tab Menu: Select from the Menu to change some settings on the DVR • Cameras: Click on the icons to connect to the camera • Refresh: refresh the camera list • Start Dialog: Enable Audio talk function • Local Play: play video that is save to the local computer •...
-
Page 69: Ptz Control
- Change Show Mode: resize or switch to full screen mode - Local Record: When clicking local record button, the system begins recording and this button becomes highlighted. - Capture Picture: take a picture and save to remote computer - Close Window: disconnect to the current connected camera 7.3.1 PTZ Control Please click the corresponding direction arrow to adjust zoom, focus and iris. -
Page 70: Auto Scan
Figure 7-5 7.3.1.1 Auto Scan In Figure 7-5 move the camera to the desired left limit location and then click left limit button. Then move the camera again to the desired right limit and then click right limit button to set the limits. 7.3.1.2 Pattern In Figure 7-5 input pattern value and then click start record button to begin PTZ movement. -
Page 71: Search
Search Clicking the search button will show the interface below. See Figure 7-6 533H Select the type, Begin/End Time and date, Channel Playback (up to 4 channels) and click the search button to display the recordings. Use the page up/down keys to view the search results. -
Page 72: Config
Figure 7-9 Downloaded file name is usually made up of: Filename + Date + Time+ Channel #. The file extension name is .dav. For example • [1]: channel 1 • 234: file name • 20080622: 22 June,2008 • 181643: 6 o’clock 16 minutes 43 seconds. Config Click the Config button to enter the DVR’s configurations. -
Page 73: Setting
Figure 7-10 7.6.2 Setting 7.6.2.1 General Click the general button, the interface below will be shown. Here file length can be change. And choose overwrite the previous file or stop recording when disk is full. 7.6.2.2 Encode Change the DVR settings for quality, camera name, FPS, resolution, disable/enable audio... -
Page 74: Schedule
7.6.2.3 Schedule Click Schedule, the interface is shown as Figure 7-11. Change the schedule thru the remote connection. Figure 7-11 Tip: After finishing the setup for one channel, click “Save as” button, system pops up the following interface. See Figure 7-12. Copy one channel setup to other 523H channels. -
Page 75: Network
7.6.2.5 Network Network parameter setup interface is shown below. This is used to modify DDNS, PPPoE, Email, DDNS settings. 7.6.2.6 Multi-DDNS Use This Parameters if using Multiple DDNS sites... -
Page 76: Ftp
7.6.2.7 FTP Enable/Disable FTP capabilities set the FTP parameters & FTP Schedules. 7.6.2.8 Alarm Change the Alarm-in parameters of the DVR. -
Page 77: Detect
7.6.2.9 Detect Change Event-Motion Detect settings. Set the re-action of the system if motion is detected. 7.6.2.10 PAN/TILT/ZOOM Change the COMPORT parameters of the system. 7.6.2.11 TOOL Create a backup of the configuration of the system. Figure 7.6.1... -
Page 78: Export Config
A. Export Config Clicking the Export Configuration button in Figure 7.6.2.1 will save current configuration to a directory. The file extension name is .cfg. B. Import Config Click Import Config button in Figure 7.6.2.1 select the file to load a previously backed up configuration. -
Page 79: Record Control
Figure 7-13 7.6.3.2 Record Control Click “record control” button the interface is shown as below. See Figure 562H 7-14. Select the recording mode for each channel. Select the Alarm output channel. Alarm output channel can not support large overload. (Use less than 1A). -
Page 80: Snap & Watermark
7.6.3.4 Snap & Watermark Please note this function is only supported on special series DVR. 7.6.3.5 Auto Reboot Enable the auto restarting of the DVR and the auto delete of old files function. -
Page 81: Extend Function
7.6.4 Extend Function Change the parameters of the Extended Function of the DVR 7.6.4.1 ATM/POS Set the input DATA of the POS system of the DVR 7.6.4.2 Audio Settings Change the audio settings of the DVR... -
Page 82: Dns Setting
7.6.4.3 DNS Setting Add a Network DNS to the DVR About About About About Click the About button to view current web client information. Un-install Web Control There are three ways to un-install web control. • From start, click run and then input order regsvr32 -u WebRec.ocx. •... -
Page 83: Pro Surveillance System
8 Pro Surveillance System Professional surveillance system allows the managing of Multiple DVRs remotely. Features Professional surveillance system has the following features: • Manage devices conveniently • Support multiple-device connection, real-time surveillance and playback • Device management, log review and user management •... -
Page 84: More Details
• Section 3: Here various display modes can be selected. This system supports the following display modes: full-screen /single window/four-window/six- window/eight-window/nine-window/sixteen-window. • Section 4: This section displays data flux and CPU status. • Section 5: There are four function buttons: PTZ/Color setting/Device/Plan Management. -
Page 85: Rs232 Operation
9 RS232 Operation Network Connection Before serial port operation, please connect matrix with the DVR through RS232. Then set DVR serial port protocol to the corresponding matrix protocol. Note: Please contact the local retailer to confirm if the DVR supports matrix protocol. -
Page 86: Faq
10 FAQ 1. This system can run in windows 98 or not? Please install DIRECTX 7.0 or higher manually if you want to run this system in a Windows 98 environment. 2. System cannot the detect hard disk. First check whether the hard disk is broken. Then check jumper, IDE data cable and power cord. - Page 87 11. What peripheral equipment the DVR can work with? DVR supports much peripheral equipment such as keyboard, matrix, control decode card, alarm input and output equipment, alarm server, and access control system. Slight differences may be found in user interface. All the designs and software here are subject to change without prior written notice.
-
Page 88: Appendix A Hdd Capacity Calculation
Appendix A HDD Capacity Calculation Calculate the total capacity needed by each DVR according to video recording (video recording type and video file storage time). Step 1: According to Formula (1) to calculate storage capacity q that is the capacity of each channel needed for each hour, unit MByte. 3600 1024 ÷... -
Page 89: Appendix B Compatible Usb Drive List
Appendix B Compatible USB Drive List NOTE: Please upgrade the DVR firmware to latest version to ensure the accuracy of the table below. For USB drive, please confirm the format FAT32. Manufacturer Model Capacity Sandisk Cruzer Micro 512M Sandisk Cruzer Micro Sandisk Cruzer Micro Sandisk... -
Page 90: Appendix C Compatible Cd/Dvd Burner List
Appendix C Compatible CD/DVD Burner List NOTE: Please upgrade the DVR firmware to latest version to ensure the accuracy of the table below. And you can use the USB cable with the model recommended to set USB burner. Manufacturer Model Interface Type Sony... -
Page 91: Appendix Dcompatible Sata Hdd List
Appendix D Compatible SATA HDD List NOTE: Please upgrade the DVR firmware to latest version to ensure the accuracy of the table below. Manufacturer Series Model Capacity Type Seagate Barracuda.10 ST3750640AS 750G SATA Seagate Barracuda.10 ST3500630AS 500G SATA Seagate Barracuda.10 ST3400620AS 400G SATA...
Need help?
Do you have a question about the RTS series and is the answer not in the manual?
Questions and answers