Sun Microsystems Sun Fire V210 Installation Manual
Hide thumbs
Also See for Sun Fire V210:
- Administration manual (114 pages) ,
- Manual (102 pages) ,
- Service manual (62 pages)
Table of Contents

Related Manuals for Sun Microsystems Sun Fire V210


Summary of Contents for Sun Microsystems Sun Fire V210
-
Page 1: Installation Guide
Sun Fire™ V210 and V240 Servers Installation Guide Sun Microsystems, Inc. 4150 Network Circle Santa Clara, CA 95054 U.S.A. 650-960-1300 Part No. 816-4825-11 April 2003, Revision A Send comments about this document to: docfeedback@sun.com... - Page 2 LOOK GUIs and otherwise comply with Sun’s written license agreements. Use, duplication, or disclosure by the U.S. Government is subject to restrictions set forth in the Sun Microsystems, Inc. license agreements and as provided in DFARS 227.7202-1(a) and 227.7202-3(a) (1995), DFARS 252.227-7013(c)(1)(ii) (Oct. 1998), FAR 12.212(a) (1995), FAR 52.227-19, or FAR 52.227-14 (ALT III), as applicable.
-
Page 3: Table Of Contents
Contents Contents iii Figures vii Tables ix Preface xi Introduction to the Sun Fire V210 and V240 Servers 1 Overview of the Sun Fire V210 and V240 Servers 2 Features 3 Differentiating Features 4 Sun Advanced Lights-Out Manager 4 Contents of the Ship Kit 5... - Page 4 Connecting to the Server Using a System Running Microsoft Windows 37 To Connect to the Server 37 Using the Sun Fire V210 and V240 Server With a Terminal Server 39 Sun Fire V210 and V240 Servers Installation Guide • April 2003...
- Page 5 To Connect to a Sun Fire V210 and V240 Server Through a Terminal Server 40 Powering On and Configuring the Server 41 Powering On The Server 42 Keyswitch (Sun Fire V240 only) 42 To Power On From The Keyboard 42...
- Page 6 Sun Fire V210 and V240 Servers Installation Guide • April 2003...
-
Page 7: Figures
Attaching the Cable Management Arm 20 FIGURE 2-13 Attaching Cables to the Cable Management Arm 21 FIGURE 2-14 Sun Fire V210 Server Back Panel 22 FIGURE 2-15 Sun Fire V240 Server Back Panel 22 FIGURE 2-16 Temperature and Altitude Operating Ranges 29... - Page 8 Patch Panel Connection Between a Terminal Server And A Sun Fire V240 39 FIGURE 3-1 viii Sun Fire V210 and V240 Servers Installation Guide • April 2003...
-
Page 9: Tables
Operating and Storage Specifications 28 TABLE 2-10 Acoustic Noise Generated 31 TABLE 2-11 Operating Power Limits and Ranges for the Sun Fire V210 and V240 Servers 32 TABLE 2-12 Power Consumption 32 TABLE 2-13 Pin Crossovers for Connecting to a Typical Terminal Server 40... - Page 10 Sun Fire V210 and V240 Servers Installation Guide • April 2003...
-
Page 11: Preface
Preface This document provides you with a detailed guide through the unpacking, rackmounting, and initial set up procedures for the Sun Fire V210 and V240 servers. Using UNIX Commands ® This document does not contain information on basic UNIX commands and procedures such as shutting down the system, booting the system, and configuring devices. -
Page 12: Typographic Conventions
Shell Prompts Shell Prompt C shell machine-name% C shell superuser machine-name# Bourne shell and Korn shell Bourne shell and Korn shell superuser ALOM shell sc> OpenBoot PROM shell xii Sun Fire V210 and V240 Servers Installation Guide • April 2003... -
Page 13: Related Documentation
Sun Fire V210 and V240 Servers Parts 817-0743-xx Replacement Manual Read the Sun Fire V210 and V240 Servers Compliance and Safety Guide before performing any of the procedures documented in this manual. Accessing Sun Documentation Online You can view, print, or purchase a broad selection of Sun documentation, including localized versions, at: http://www.sun.com/documentation... - Page 14 Please include the part number (816-4825-10) of your document in the subject line of your email. xiv Sun Fire V210 and V240 Servers Installation Guide • April 2003...
-
Page 15: Introduction To The Sun Fire V210 And V240 Servers
Introduction to the Sun Fire V210 and V240 Servers This chapter provides a description of the Sun Fire V210 and V240 servers and gives an overview of the installation process. The chapter contains the following sections: “Overview of the Sun Fire V210 and V240 Servers” on page 2 “Sun Advanced Lights-Out Manager”... -
Page 16: Overview Of The Sun Fire V210 And V240 Servers
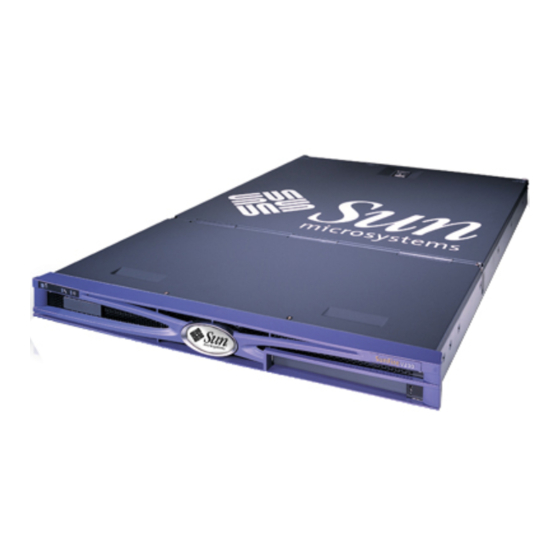
Overview of the Sun Fire V210 and V240 Servers The Sun Fire V210 and V240 servers are 1 rack unit (RU) or 2 RU servers with one or two processors. The Sun Fire V210 Server FIGURE 1-1 Sun Fire V210 and V240 Servers Installation Guide • April 2003... -
Page 17: Features
Two USB ports One 10Base-T management port PCI expansion Optional DVD-ROM drive Up to four SCSI hard disk drives System configuration card Front and back service indicators Advanced Lights-Out Manager Chapter 1 Introduction to the Sun Fire V210 and V240 Servers... -
Page 18: Differentiating Features
None Behind front bezel Keyswitch For detailed information about the features of the server, see the Sun Fire V210 and V240 Servers Administration Guide. Sun Advanced Lights-Out Manager The Sun Fire V210 and V240 servers are shipped with the Sun™ Advanced Lights Out Manager (ALOM) software installed. -
Page 19: Contents Of The Ship Kit
. Make sure that all the TABLE 1-3 parts are present in the ship kit. If any components are missing, contact your Sun sales representative. Contents of the Sun Fire V210 and V240 Servers Ship Kit TABLE 1-3 Description Quantity... -
Page 20: Installation Overview
See “Rackmounting the Server” on page 10. 3. Install any optional components shipped with your system. Note – See the installation procedures for these components in the Sun Fire V210 and V240 Servers Administration Guide, which is included on the Sun Fire V210 and V240 Servers Documentation CD. -
Page 21: Using The Sun Fire V210 And V240 Servers Documentation
Solaris media kit for a complete listing of included software and detailed installation instructions. 8. Load online documentation from the Sun Fire V210 and V240 Documentation CD. See the installation instructions that accompany the Sun Fire V210 and V240 Documentation CD for more information. - Page 22 Sun Fire V210 and V240 Servers Installation Guide • April 2003...
-
Page 23: Installing The Hardware
C H A P T E R Installing the Hardware This chapter describes how to mount the Sun Fire V210 and V240 servers into a rack and attach the cables, and provides environmental and operating information. It includes the following sections: “Rackmounting the Server”... -
Page 24: Rackmounting The Server
The server slides into the mounted slide assemblies. The cable management arm clips into the slide assemblies (without screws). Velcro straps hold cables in place along the length of the cable management arm. Sun Fire V210 and V240 Servers Installation Guide • April 2003... -
Page 25: Compatible Racks
Use the slide rail kit to mount the server into the rack types listed below: Sun Microsystems Sun Rack 900 Sun Microsystems Sun Fire Expansion Cabinet To Rackmount the Server 1. Remove the inner glides from the slide assemblies. See FIGURE 2-1 a. -
Page 26: Figure 2-2 Attaching The Inner Glides To The Server
The inner glides are marked F and R for Front and Rear. The catches should be at the front of the server (see FIGURE 2-2 Attaching the Inner Glides to the Server FIGURE 2-2 Sun Fire V210 and V240 Servers Installation Guide • April 2003... -
Page 27: Figure 2-3 Attaching The Slide Assemblies To The Rack
3. Screw the slide assemblies to the rack. Do not tighten the screws fully, leave them loose enough to allow movement. Screws on the inside of the slide assemblies allow for adjustment to fit different rack depths. See FIGURE 2-3 Location of depth ad- justment screws Attaching the Slide Assemblies to the Rack... -
Page 28: Figure 2-4 Spacer Tool Placement (Plan View)
Align spacer tool with this section of catch Using the Spacer Tool FIGURE 2-5 b. Move the spacer tool to the bottom of the catches. Sun Fire V210 and V240 Servers Installation Guide • April 2003... -
Page 29: Figure 2-6 Slide Assembly Vertical Alignment
6. Ensure the slide assemblies are aligned vertically as shown in FIGURE 2-6 Equal distance Rack Spacer tool 90˚ Slide assembly Equal distance Slide Assembly Vertical Alignment FIGURE 2-6 Chapter 2 Installing the Hardware... -
Page 30: Figure 2-7 Tightening The Front Screws
Tightening the Front Screws FIGURE 2-7 8. Remove the spacer tool. 9. Extend both slide assemblies to reveal the slot towards the back of each. Sun Fire V210 and V240 Servers Installation Guide • April 2003... -
Page 31: Figure 2-8 Using The Spacer Tool At The Back Of The Rack
10. At the back of the rack, insert the narrow cutouts in the spacer tool into the slots in the slide assemblies. for slot location. FIGURE 2-8 Use this cutout to align the backs of the slide assemblies Using the Spacer Tool at the Back of the Rack FIGURE 2-8 11. -
Page 32: Figure 2-10 Using Spacer Tool At The Back Of The Rack
15. At the front of the rack, ensure that the slide assemblies are not extended. Lift the release catch to close the slide assemblies. You can use the spacer tool to lift the catches. For latch location, see FIGURE 2-11 Sun Fire V210 and V240 Servers Installation Guide • April 2003... -
Page 33: Figure 2-11 Location Of Slider Release Catch
Release catch Location of Slider Release Catch FIGURE 2-11 Lift catch to release slider Release Catch Operation FIGURE 2-12 16. Run the server into the slide assembly. When the server comes to its stop point, pull the green trigger on the outside of the inner glides to allow the server to slide fully into the rack. -
Page 34: Figure 2-13 Attaching The Cable Management Arm
18. Thread the velcro straps through the holes in the cable management arm. 19. Secure the cables along the length of the cable management arm using the velcro straps. Sun Fire V210 and V240 Servers Installation Guide • April 2003... -
Page 35: Connecting The Cables
Caution – Leave enough slack in the cable to allow for articulation of the cable management arm and extension of the slide assemblies. Attach cable using straps provided Leave enough slack cable to allow for arm movement Attaching Cables to the Cable Management Arm FIGURE 2-14 20. -
Page 36: Power
Sun Fire V240 Server Back Panel FIGURE 2-16 Power The Sun Fire V210 server has a single AC inlet on the back of the server. The Sun Fire V240 server has two inlets, one for each power supply unit. The operating range is shown in . -
Page 37: Ethernet Ports
In addition, each server has one 10Base-T Ethernet management domain interface, labelled NET MGT. For information on configuring this port for managing the server with ALOM, see the ALOM Online Help which is included on the Sun Fire V210 and V240 Server Documentation CD. - Page 38 If you need to connect to the SERIAL MGT port using either a DB-9 or a DB-25 connector, use an adapter to perform the crossovers given for each in TABLE 2-3 TABLE 2-4 Sun Fire V210 and V240 Servers Installation Guide • April 2003...
-
Page 39: Rj-45 To Db-9 Adapter Crossovers
RJ-45 to DB-9 Adapter Crossovers RJ-45 to DB-9 Adapter Crossovers TABLE 2-3 Serial Port (RJ-45 Connector) Pin Adapter (DB-9) Pin 1 (RTS) 8 (CTS) 2 (DTR) 6 (DSR) 3 (TXD) 2 (RXD) 4 (Signal Ground) 5 (Signal Ground) 5 (Signal Ground) 5 (Signal Ground) 6 (RXD) 3 (TXD) -
Page 40: External Scsi Port
Hard Disk Drive Indicators TABLE 2-6 Indicator LED Colour LED State Component Status Activity Green Flashing Active SCSI transactions No activity Ready to Blue Ready to remove remove Not ready to remove Sun Fire V210 and V240 Servers Installation Guide • April 2003... -
Page 41: Table 2-7 Network Link Indicators
Network Link Indicators TABLE 2-7 LED Colour LED State Network Link Status Green Link is established. Blinking Link is transferring data. Link is not established. Network Speed Indicators TABLE 2-8 LED Colour LED State Network Speed Status Green The network link is established and running at its maximum supported speed. -
Page 42: Physical Specifications
10% to 90% RH non- up to 93% RH non- condensing, 27˚C max wet condensing, 38˚C max wet bulb bulb Altitude -400m up to 3000m -400m up to 12000m Sun Fire V210 and V240 Servers Installation Guide • April 2003... -
Page 43: Figure 2-17 Temperature And Altitude Operating Ranges
Temperature, ˚C -400 3000 Altitude, m Pressure, kPa Temperature and Altitude Operating Ranges FIGURE 2-17 27˚C wet bulb temperature 90% RH Moisture content 10% RH Dry bulb temperature, ˚C Temperature and Relative Humidity Ranges FIGURE 2-18 Chapter 2 Installing the Hardware... -
Page 44: Recommended Operating Environment
Electrostatic discharge (ESD) is easily generated and less easily dissipated in areas where the relative humidity is below 35%, and becomes critical when levels drop below 30%. Sun Fire V210 and V240 Servers Installation Guide • April 2003... -
Page 45: Airflow Considerations
The Sun Fire V210 and V240 servers self-cool when operated in still air. Ensure unobstructed airflow through the chassis. The Sun Fire V210 server uses internal fans that can achieve a total airflow of 30cfm in normal operating conditions. The Sun Fire V240 server uses internal fans that can achieve a total airflow of 60cfm in normal operating conditions. -
Page 46: Operating Power Limits And Ranges
Operating Power Limits and Ranges The table below gives operating power for the Sun Fire V210 and V240 servers. Operating Power Limits and Ranges for the Sun Fire V210 and V240 Servers TABLE 2-12 Description Sun Fire V210 Server Sun Fire V240 Server... -
Page 47: Calculating Heat Dissipation
Power Consumption TABLE 2-13 Server Model Configuration Average Power (Watts) Instantaneous Power (VA) Sun Fire V210 2x1064MHz CPU 4G DIMM 2xHDD Sun Fire V240 1x1064MHz CPU 512M DIMM 1xHDD Sun Fire V240 2x1064MHz CPU 2G DIMM 2xHDD Sun Fire V240... - Page 48 Sun Fire V210 and V240 Servers Installation Guide • April 2003...
-
Page 49: Communicating With The Server
The chapter contains the following section. “Setting Up a Console Connection to the Server” on page 36 “Connecting to the Server Using a System Running Microsoft Windows” on page 37 “Using the Sun Fire V210 and V240 Server With a Terminal Server” on page 39... -
Page 50: Setting Up A Console Connection To The Server
To Connect to the Server Using an ASCII Terminal 1. Set up a connection between the terminal and the Sun Fire V210 and V240 server. 2. For the General terminal settings, refer to the terminal’s operating manual. Sun Fire V210 and V240 Servers Installation Guide • April 2003... -
Page 51: Connecting To The Server Using A System Running Microsoft Windows
Connecting to the Server Using a System Running Microsoft Windows If you want to configure and operate a Sun Fire V210 or V240 server from a PC or laptop running Microsoft Windows, you can do so using the Windows Hyperterminal. - Page 52 Set Flow Control to Xon/Xoff. The correct values for all settings in this window are as shown below. Property Setting Bits Per Second 9600 Data Bits Parity None Stop Bits Flow Control Xon/Xoff Sun Fire V210 and V240 Servers Installation Guide • April 2003...
-
Page 53: Using The Sun Fire V210 And V240 Server With A Terminal Server
Using the Sun Fire V210 and V240 Server With a Terminal Server The serial ports on the Sun Fire V210 and V240 server are DTE ports. If you connect these to other DTE ports, then the cabling between them must perform a crossover (also known as a roll-over). -
Page 54: To Connect To A Sun Fire V210 And V240 Server Through A Terminal Server
If the pinouts for the server’s serial ports do not correspond with the pinouts for the RJ-45 ports on the terminal server, you need to make a crossover cable that takes each pin on the Sun Fire V210 and V240 server’s serial port to the corresponding pin in the terminal server’s serial port. -
Page 55: Powering On And Configuring The Server
C H A P T E R Powering On and Configuring the Server This chapter tells you how to power on and configure the server to suit your application. It contains the sections: “Powering On The Server” on page 42 “Configuring The Server”... -
Page 56: Powering On The Server
ALOM CLI commands. 4. Turn on power to any peripherals and external storage devices you have connected to the server. Read the documentation supplied with the device for specific instructions. Sun Fire V210 and V240 Servers Installation Guide • April 2003... -
Page 57: To Power On Using The On/Standby Switch
5. At the console sc> prompt, type the following command to power on the server: sc> poweron To Power On Using the On/Standby Switch Caution – Never move the system when the system power is on. Movement can cause catastrophic disk drive failure. Always power off the system before moving it. 1. -
Page 58: Configuring The Server
Configuring The Server The Sun Fire V210 and V240 server comes preinstalled with the Solaris 8 operating environment. When you power on the server for the first time, you will automatically be taken through a configuration procedure. This procedure consists of a number of questions. -
Page 59: To Configure With The Server's Details Registered At A Name Server
To Configure With the Server’s Details Registered at a Name Server Note – Follow the instructions in this section only if you have a name server installed on your network. For instructions on using a name server to automate the process of configuring the Solaris operating environment on multiple servers, refer to the Solaris Advanced Installation Guide that accompanies the Solaris operating environment CDs. -
Page 60: To Configure A Standalone Server For The First Time
3. Specify a Host Name for the server. 4. Confirm the information you have given. 5. Specify the date and time information. 6. When prompted, give a password (if any) for users logging in as root. Sun Fire V210 and V240 Servers Installation Guide • April 2003... -
Page 61: Clearing Your Configuration
ALOM instructions, and configuration information, refer to the ALOM Online Help which is included on the Sun Fire V210 and V240 Server Documentation The ALOM software is preinstalled on the server and is ready to run as soon as power is applied to the server. -
Page 62: To Display The Alom Prompt
If another user is logged on and has write capability, you will see the message below after issuing the console command: sc> Console session already in use. [view mode] Sun Fire V210 and V240 Servers Installation Guide • April 2003... -
Page 63: To Take Console Write Capability Away From Another User
To Take Console Write Capability Away From Another User 1. Type: sc> console -f Chapter 4 Powering On and Configuring the Server... - Page 64 Sun Fire V210 and V240 Servers Installation Guide • April 2003...
- Page 65 environmental specifications, 28 features differentiating, 4 shared features, 3 Index heat dissipation, 33 host name, 46 acoustic noise, 31 Advanced Lights-Out Manager (ALOM) I/O ports location, 21 accessing, 47 ALOM prompt, 48 installation overview, 6 components monitored, 5 console prompt, 48 overview, 4 ports, 4 keyswitch, 42...
- Page 66 password, admin user, 42 physical specifications, 28 ports Ethernet, 23 power, 22 SCSI, 26 serial, 23 USB, 25 power consumption, 32 requirements, 32 power on, 42 rackmounting compatible racks, 10 overview, 10 rackmount kit, 10 SERIAL MGT port, 42 server media kit, contents of, 7 ship kit contents, 5 standby power, 32 status indicators, 26...
- Page 67 Index...
- Page 68 Index...
- Page 69 Index...
- Page 70 Sun Fire V210, V240 and Netra 240 Installation Guide • April 2003...
Need help?
Do you have a question about the Sun Fire V210 and is the answer not in the manual?
Questions and answers