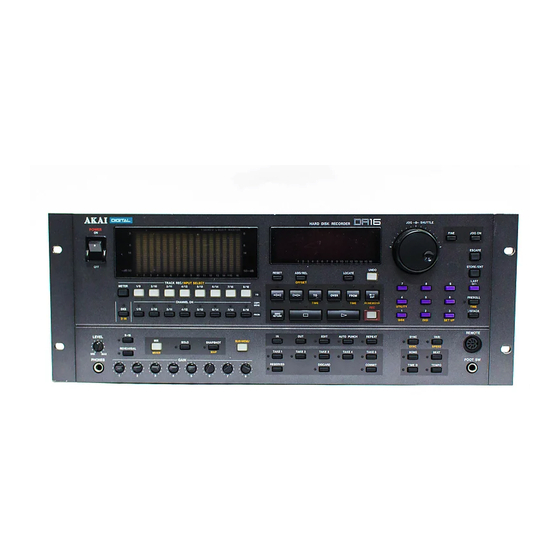
Akai DR16 pro Operator's Manual
Hard disk recorder
Hide thumbs
Also See for DR16 pro:
- Operator's manual (170 pages) ,
- Operator's manual (6 pages) ,
- Operator's manual (11 pages)

Related Manuals for Akai DR16 pro


Summary of Contents for Akai DR16 pro
- Page 1 HARD DISK RECORDER Operator’s Manual WARNING To prevent fire or shock hazard, do not expose this appliance to rain or moisture. 000218-4 Printed in Japan...
-
Page 2: Important Notice
Important Notice The material in this document is copyright to AKAI professional M.I. Corp., and may not be quoted or reproduced in any form without written permission from the company. LIMITED SOFTWARE WARRANTY POLICY All the software provided with, or purchased especially for, AKAI professional products has been tested for functionality. - Page 3 Always disconnect the DR16pro from the power supply by pulling on the plug, not the cord. • Allow only an AKAI professional dealer or qualified professional engineer to repair or reas- semble the DR16pro. Apart from voiding the warranty, unauthorized engineers might touch live internal parts and receive a serious electric shock.
- Page 4 Precautions When Using the Installed Hard Disk Drive The hard disk drive has extremely high precision and is vulnerable to shock and vibration. If transporting the DR16pro by either land or air, we recommend packing it in a shell-shaped case lined with urethane rubber which meets ATA specifications. Make sure the DR16pro is used in the horizontal position.
- Page 5 WARNING THIS APPARATUS MUST BE EARTHED IMPORTANT This equipment is fitted with an approved non-rewireable UK mains plug. To change the fuse in this type of plug proceed as follows: 1) Remove the fuse cover and old fuse. 2) Fit a new fuse which should be a BS1362 5 Amp A.S.T.A or BSI approved type. 3) Refit the fuse cover.
- Page 6 31C-En COPYRIGHT NOTICE The AKAI DR16pro is a computer-based device, and as such contains and uses software in ROMs. This software, and all related documentation, including this Owner’s Manual, contain proprietary information which is protected by copyright laws. All rights are reserved. No part of the software or its documentation may be copied, transferred or modified.
- Page 7 If the warranty is valid, AKAI professional will, without charge for parts or labour, either repair or replace the defective part(s). Without a valid warranty, the entire cost of the repair (parts and labour) is the responsibility of the product’s owner.
-
Page 8: Table Of Contents
Contents Contents Introduction ....................... What is the DR16pro? ......................1 Signal Flow ........................3 Level Diagram ........................5 Inside the DR16pro ......................6 1 Front and Rear Panels ....................7 Front Panel ........................7 Rear Panel ........................18 2 Getting Around the DR16pro..............Operating Modes ...................... - Page 9 Formatting Disks ......................102 Erasing Disks ......................... 104 Optimizing Your Hard Disks ................... 105 Copying Disks and Projects ................... 107 Data Compatibility with Akai 16 Bit DR8/DR16 Models ..........109 13 Backup and Restore ................Backup ........................... 110 Restore .......................... 114 14 Synchronization ..................
-
Page 10: Introduction
Introduction Introduction From all at Akai, thank you for purchasing an Akai DR16pro Hard Disk Recorder, and welcome to the exciting world of hard disk recording. Please take the time to read this manual. It will allow you to get the best out of your DR16pro. - Page 11 Introduction • Built in Ethernet (AKAINET) interface for connection to remote controllers. • Optional IB-802T SMPTE reader/generator board for time-code synchronization. • Optional IB-803M MIDI interface board for MIDI sequencer synchronization. • Optional IB-805R RS422 in terface board for master/slave operation via RS422. •...
-
Page 12: Signal Flow
Introduction Signal Flow Page 3... - Page 13 Introduction Description of Signal Flow Input A signal input to the ANALOG INPUT channels 1 to 16 passes through the gain switches (HIGH, MID, LOW) and the GAIN controls. The signal is then converted to digital. Alternatively, pressing the DIGI key will select DIGITAL INPUT for channels 1 to 8 from the optional Digital Audio Interface (eg.
-
Page 14: Level Diagram
Introduction Level Diagram Page 5... -
Page 15: Inside The Dr16Pro
Introduction Inside the DR16pro Multi-Channel Digital Input Multi-Channel Digital Output Optional ADAT or AES/EBU Optional ADAT or AES/EBU IB-802T SMTPE READER/GENERATOR IB-805R RS422 INTERFACE IB-803M MIDI INTERFACE IB-808G GPIO PARALLEL INTERFACE IB-1616A Alesis™ ADAT INTERFACE IB-D16MA24 AES/EBU INTERFACE MULTITRACK REMOTE CONTROLLER RE32 Page 6... -
Page 16: Front And Rear Panels
1: Front and Rear Panels Front and Rear Panels Front Panel Page 7... - Page 17 1: Front and Rear Panels HARD D POWER 1 SEND 2 L BUS R MASTER S-M SONG EDIT MIX BUSY –dB 50 50 –dB RESET ABS/REL OFFSET TRACK REC/INPUT SELECT 8/16 METER 2/10 3/11 4/12 5/13 6/14 7/15 CHANNEL ON COPY MOVE 8/16...
- Page 18 1: Front and Rear Panels SHUTTLE HARD DISK RECORDER FINE JOG ON S-M SONG ESCAPE EDIT MIX BUSY 10 11 12 13 14 15 16 STORE/ENT 50 –dB UNDO RESET ABS/REL LOCATE LAST OFFSET 8/16 IN -> OVER FROM PREROLL COPY TIME TIME...
- Page 19 1: Front and Rear Panels 14 15 16 SHUTTLE HARD DISK RECORDER FINE JOG ON S-M SONG ESCAPE EDIT MIX BUSY 10 11 12 13 14 15 16 STORE/ENT 50 –dB UNDO RESET ABS/REL LOCATE LAST OFFSET 8/16 IN -> OVER FROM PREROLL...
- Page 20 1: Front and Rear Panels SHUTTLE HARD DISK RECORDER FINE JOG ON S-M SONG ESCAPE EDIT MIX BUSY 10 11 12 13 14 15 16 STORE/ENT 50 –dB UNDO RESET ABS/REL LOCATE LAST OFFSET 8/16 IN -> OVER FROM PREROLL COPY TIME TIME...
- Page 21 1: Front and Rear Panels SHUTTLE HARD DISK RECORDER FINE JOG ON S-M SONG ESCAPE EDIT MIX BUSY 10 11 12 13 14 15 16 STORE/ENT 50 –dB UNDO RESET ABS/REL LOCATE LAST OFFSET 8/16 IN -> OVER FROM PREROLL COPY TIME TIME...
- Page 22 1: Front and Rear Panels SHUTTLE HARD DISK RECORDER FINE JOG ON S-M SONG ESCAPE EDIT MIX BUSY 10 11 12 13 14 15 16 STORE/ENT 50 –dB UNDO RESET ABS/REL LOCATE LAST OFFSET 8/16 IN -> OVER FROM PREROLL COPY TIME TIME...
- Page 23 1: Front and Rear Panels 31 33 CHANNEL ON COPY MOVE DIGI 8/16 2/10 3/11 4/12 5/13 6/14 7/15 ZERO FROM RETURN D IN 9-16 LEVEL SUB-MENU SOLO SNAPSHOT REHEARSAL TAKE1 TAKE2 MIXER GAIN PHONES RESERVED 31) Phones LEVEL This control adjusts the headphone volume level. 32) PHONES connection A stereo pair of headphones can be connected to this 1/4 inch stereo phone jack.
- Page 24 1: Front and Rear Panels COPY CHANNEL ON MOVE 8/16 DIGI 2/10 3/11 4/12 5/13 6/14 7/15 ZERO FROM RETURN D IN 9-16 LEVEL SUB-MENU SOLO SNAPSHOT REHEARSAL TAKE1 TAKE2 MIXER GAIN PHONES RESERVED 38) SUB-MENU key This key is used to select sub-menu functions. Many of the keys have sub-menu functions (indicated in amber, usually beneath the key).
- Page 25 1: Front and Rear Panels IN -> OVER FROM PREROLL COPY TIME TIME <<MEMO>> MOVE UTILITY TIME 8/16 7/15 :/STACK ZERO FROM RETURN DISK DIGI SET UP EDIT AUTO PUNCH REPEAT SYNC VARI SUB-MENU SYNC SPEED TAKE1 TAKE2 TAKE3 TAKE4 TAKE5 SONG BEAT...
- Page 26 1: Front and Rear Panels IN -> OVER FROM PREROLL COPY TIME TIME <<MEMO>> MOVE UTILITY TIME 7/15 8/16 :/STACK ZERO FROM RETURN DISK DIGI SET UP EDIT AUTO PUNCH REPEAT SYNC VARI SUB-MENU SYNC SPEED TAKE1 TAKE2 TAKE3 TAKE4 TAKE5 SONG BEAT...
-
Page 27: Rear Panel
1: Front and Rear Panels Rear Panel Page 18... - Page 28 1: Front and Rear Panels SCSI-A DIGITAL I/O L/R PUSH MASTER OUT Option slots These slots are for installing the following optional interface cards: • IB-802T SMPTE reader/generator board • IB-803M MIDI (IN/OUT/THRU) interface board • IB-805R RS422 interface board •...
- Page 29 • There should be at least 0.5m of cable between each node EXPANSION socket For connection to the Akai MT8 Mix Tab or RC15 remote control. TERM switch This switch selects 75Ω termination for the SYNC connection. When a video signal is con- nected, this switch must be set to ON.
- Page 30 1: Front and Rear Panels GAIN MID GAIN MID GAIN MID GAIN MID HIGH HIGH HIGH HIGH ANALOG INPUT HIGH HIGH HIGH HIGH SEND MASTER MASTER MASTER MASTER HIGH HIGH HIGH HIGH HIGH HIGH HIGH HIGH HIGH HIGH ANALOG OUTPUT 12 13 14 15 10) ANALOG INPUT (1 ~ 8) connectors...
- Page 31 ANALOG OUTPUT AKAI ELECTRIC CO., LTD. SERIAL NUMBER 79504-00005 MODEL NUMBER DR16pro SCSI-B ID AKAI ELECTRIC CO., LTD. AKAI ELECTRIC CO., LTD. MADE IN JAPAN MADE IN JAPAN MADE IN JAPAN T 4 2 1 O/OFF I/ON SIGNAL 16) SIGNAL GROUND Use this post to connect the DR16pro to earth ground in the event of ground loops.
-
Page 32: Getting Around The Dr16Pro
2: Getting Around the DR16pro Getting Around the DR16pro The DR16pro is relatively easy to operate. If you have used a conventional tape recorder, you will find it quite straightforward. Operating Modes The DR16pro has various operating modes: NORMAL MODE SONG MODE SUB-MENU MODE MIX MODE... -
Page 33: Operation
2: Getting Around the DR16pro Operation Display The custom FLD (Fluorescent Light Display) shows recording time information and messages indicating the system status. Absolute/Relative Indicators Time Display S-M SONG Status Messages EDIT MIX BUSY 9 10 11 12 13 14 15 16 Disk Activity Indicators Busy Indicator Mode Indicators... -
Page 34: Setting Parameters
2: Getting Around the DR16pro Cursor The DR16pro provides a cursor to step through the items in some of the sub-menu functions. Rotate the outer SHUTTLE of the JOG/SHUTTLE control clockwise to move to the right sub-menu parameter. Rotate the SHUTTLE counterclockwise to move to the left sub-menu parameter. Setting Parameters Most parameters can be set using the JOG/SHUTTLE control or the numeric keypad. -
Page 35: Entering Time Values
2: Getting Around the DR16pro Entering Time Values To locate to any point, set the “in” point, “out” point, direct locate point, stack locate point, etc., you must display the desired time on the display. The desired time can be entered as follows: Press the LOCATE key. - Page 36 2: Getting Around the DR16pro Press the IN key or OUT key as required. The point will be stored. The time display will stop flashing. “IN” or “OUT” respectively will momentarily flash on the display. Confirm the stored locations. Press the IN key to set the DR16pro to the “in” point; press the OUT key to select the “out” point.
-
Page 37: Setting Up The Dr16Pro
3: Setting Up the DR16pro Setting Up the DR16pro Locating the DR16pro The DR16pro should be located on a strong, level surface, with plenty of room for ventilation. If you rack mount the DR16pro, leave at least 1U of free space above and below it. Connecting The Power Warning: Before connecting to an AC receptacle, make sure that the mains voltage in your area matches that printed on the DR16pro rear panel. -
Page 38: Typical Dr16Pro Setup
3: Setting Up the DR16pro Typical DR16pro Setup The following diagram shows the DR16pro in a typical recording setup: Optional hard disk for extra recording time DAT Recorder for mixdown and backup SCSI HARD DISK SCSI-A Digital Out MIDI CLOCK or MTC MIDI OUT (optional IB-803M MIDI Digital In... -
Page 39: Recording
4: Recording Recording This chapter describes how to record using the DR16pro. Sampling Frequency It is important that you set the sampling frequency before recording. If it is changed after some material has been recorded, that material will playback at the wrong pitch. The DR16pro can record at any one of the three common digital audio sampling frequencies: 32 kHz, 44.1 kHz, and 48 kHz. - Page 40 4: Recording Selecting the Sampling Frequency Press the SUB-MENU key. The indicator in the key will flash and the text “SUB-MENU” will appear on the display. Press the 2(DIGI) key – numeric keypad. The message “DIGI OUT” will appear on the display. Use the JOG/SHUTTLE control to select the sampling rate option.
- Page 41 The new record bit-length will be selected. 20-Bit Packed Audio This is a special option that is only available when recording AKAI format audio files. Typically, 20- bit audio occupies the same space on disk as 24-bit audio (the extra 4-bits of storage space in each sample being wasted).
-
Page 42: Input Source
4: Recording Input Source The DR16pro can record from its eight analog inputs, the stereo (two-channel) built-in AES/EBU digital input, the optional multi-channel digital audio option card (AES/EBU or ADAT) or the inter- nal two-channel bus signal. Analog Inputs The DR16pro has eight analog input connectors on its rear panel. These connectors use 1/4 inch stereo phone jacks. - Page 43 4: Recording Sampling Frequency To record via the digital inputs, the DR16pro must be set to the same sampling frequency as that used by the incoming digital signal. This is because the DR16pro has to synchronize with the incoming signal (word sync). If you are recording from a CD, prerecorded MD, this will be 44.1kHz. If you are recording from a DAT that was recorded via analog inputs, this will be 48kHz.
-
Page 44: Selecting The Input Channels
4: Recording To switch input sources 1-8 to digital: Press the DIGI key. The LED over the DIGI key lights. Input sources A1 .. A8 from the analog boards will now be switched to D1..D8 from the optional digital audio interface. If no digital signal is input at the optional digital audio interface, the LED flashes and the message “PLL UNLOCK”... - Page 45 4: Recording When 96kHzsample rate is selected and the DR16pro is in ‘dual channel’ mode, the followig can be selected: Display Description RECIN 1 - 2 Mono ‘96kHz’ signal fed to inputs 1 and 2 RECIN 3 - 4 Mono ‘96kHz’ signal fed to inputs 3 and 4 RECIN 5 - 6 Mono ‘96kHz’...
- Page 46 4: Recording Set the destination tracks: Press the SUB-MENU key. The indicator in the key will flash and the text “SUB-MENU” will appear on the display. Press the TRACK REC(INPUT SELECT) key for track 15. The selected TRACK REC key will light up and the display will show the currently selected input source for that track.
-
Page 47: Starting & Stopping Recording
4: Recording Starting & Stopping Recording Arming Tracks To arm tracks ready for recording: Press the respective TRACK REC keys. The TRACK REC keys of armed tracks will flash. TRACK REC/INPUT SELECT METER 2/10 3/11 4/12 5/13 6/14 7/15 8/16 Recording To start recording: Press the Play... -
Page 48: Punch-In Functions
4: Recording Punch-In Functions Manual Punch-In/Out Manual punch-in/out allows you to punch-in and punch-out during playback. Set up the DR16pro so that it is ready to record. Record setup procedures are explained on the preceding pages. Arm the channel that you want to use for punch-in/out. The TRACK REC key of the armed track will flash. - Page 49 4: Recording Footswitch Punch-In/Out Manual punch-in/out can also be carried out using a footswitch, especially useful if you are playing an instrument and operating the DR16pro simultaneously. Connect a footswitch to the FOOT SW connection on the front panel. Set up the DR16pro so that it is ready to record. Record setup procedures are explained on the preceding pages.
- Page 50 4: Recording Auto Punch-In/Out Auto punch in/out allows you to automatically punch in and punch out at the specified in and out points. This is useful when you need greater accuracy than that possible using manual punch in/ out. It also allows you to repeat a punch in/out until you are satisfied with the result. Set up the DR16pro so that it is ready to record.
- Page 51 4: Recording Track Number Limitations The DR16pro carries certain technical limitations regarding the number of tracks you can use simultaneously for recording and playback. In practical terms, it is unlikely that you will encounter this limitation. Nevertheless, this limitation is described below. When you select a track for recording (including auto or manual punch-in), if the number of play back tracks (including those that contain no data) exceeds a certain number, some tracks may not play back.
- Page 52 4: Recording Mute Stop Mode The REC MON parameter is used to select a special Mute Stop mode that prevents the monitoring of inputs when recording is stopped. This is a special function intended for use in dialog replace- ment. The following table describes monitoring operations when the Recording Monitor status is set to Mute Stop: Key Selection...
-
Page 53: Recording Undo
4: Recording Recording Undo If you record new material over some existing material, and then decide that you preferred the original, you can use the undo function to restore the original. In fact, you can switch between the original and the new during playback for comparison. This is possible because the DR16pro al- ways records new material on a different area of the hard disk, except in Destructive Recording Mode. -
Page 54: Setting The Recording Mode
4: Recording Setting the Recording Mode The Akai DR16pro features two recording modes: Normal and Destructive. In Normal Recording mode, if you record twice on the same track at the same time location, both recordings remain on the hard disk, in different areas. - Page 55 4: Recording To set the recording mode: Press the SUB-MENU key. The indicator in the key will flash and the text “SUB-MENU” will appear on the display. Press the 3(SET UP) key – numeric keypad, then rotate the JOG/SHUTTLE control to select Recording Mode.
-
Page 56: Playback
5: Playback Playback This chapter describes some functions that apply to playback only. Outputs The DR16pro has 16 analog outputs that can be configured as 16 individual track outputs in MULT mode, or the combination of two send outputs and a master stereo output in MIX mode. It also has a digital output that duplicates the signal at the master stereo output. -
Page 57: Starting & Stopping Playback
5: Playback Digital Audio Formats The DR16pro can transmit either of the two industry-standard digital audio formats. Type 1 (pro- fessional) is usually referred to as AES/EBU format. Type 2 (consumer) is also known as S/PDIF format. Both of the connectors (XLR and RCA/phono) on the rear panel of the DR16pro can transmit either Type 1 or Type 2 signals as output. -
Page 58: Special Play Keys
5: Playback Special Play Keys The DR16pro has four special play keys for confirming edit points, punch-in locations, etc. These are the TO(TIME), OVER, FROM(TIME), and IN->OUT(<<MEMO>>) keys: IN -> OVER FROM TIME TIME <<MEMO>> The TO key Setting the TO time Press the SUB-MENU key. - Page 59 5: Playback The FROM key Setting the FROM time Press the SUB-MENU key. The indicator in the key will flash and the text “SUB-MENU” will appear on the display. Press the FROM(TIME) key. The “play from” time will appear on the display: Use the JOG/SHUTTLE control, or numeric keypad to specify a time.
- Page 60 5: Playback The OVER key This function uses the TO and FROM times that were set in the two functions described previously. See “Setting the TO time” on page 49 and “Setting the FROM time” on page 50. Operation Press the OVER key. Playback will start the specified TO(TIME) number of seconds before the current position, continue past current position for the specified FROM(TIME) number of seconds, and then stop and return to the current position.
-
Page 61: Repeat
5: Playback Repeat The repeat function allows you to repeatedly play the material that occurs between the “in” point and “out” point. Operation Set the “in” and “out” points See “Specifying the “in” Point and “out” Point” on page 26. Press the REPEAT key. -
Page 62: Varispeed
5: Playback Varispeed The varispeed function allows you to vary the pitch of recorded material during playback. Setting the Amount of Varispeed To set the amount of varispeed: Press the SUB-MENU key. The indicator in the key will flash and the text “SUB-MENU” will appear on the display. Press the VARI(SPEED) key. -
Page 63: Projects
You can also use DR16pro project files on the Akai DD1500, DD8 or other Akai DD-Series hard- disk recorders. The DR16pro is also able to handle disks and files created for use on other sys- tems such as Digidesign Protools. -
Page 64: Loading Project Files
6: Projects Loading Project Files You can load existing project files from any connected hard disk. To load a project file: Press the SUB-MENU key. The indicator in the key will flash and the text “ SU B-ME N U ” will appear on the display. Press the 4 (UTILITY) key –... -
Page 65: Deleting Project Files
6: Projects Deleting Project Files You can delete existing project files from any connected hard disk. To delete a project file: Press the SUB-MENU key. The indicator in the key will flash and the text “SU B-ME N U ” will appear on the display. Press the 4(UTILITY) key –... - Page 66 6: Projects Importing a Foreign Project Files The DR16pro is able to read and write certain files to Macintosh HFS format disks. To import a project file from a Macintosh disk: Press the SUB-MENU key. The indicator in the key will flash and the text “ SU B-ME N U ” will appear on the display. Press the 4(UTILITY) key –...
-
Page 67: Creating A New Protools Session On A Macintosh Disk
6: Projects Creating a New Protools Session on a Macintosh Disk. The DR16pro can directly record Digidesign Protools Files onto Macintosh format disks. To create a new Protools Session file: Press the SUB-MENU key. The indicator in the key will flash and the text “SU B-ME N U ” will appear on the display. Press the 4(UTILITY) key –... - Page 68 6: Projects 10) Press the STORE/ENT key. The message “D O N E ” appears momentarily on the display. The DR16pro is now operating under the new project name and new recordings will be made directly into the new Protools Session file. Note: If the name you try to assign already exists on the selected hard disk, the message “...
-
Page 69: Mixer
7: Mixer Mixer This chapter examines the mixer functions. Inside the DR16pro is a 16-channel digital mixer. There are sixteen channels available from the hard disk tracks. You can set the mixer parameters for each channel independently. Output Assignment Mode There are two modes for the assignment of output: MULT output and MIX output. -
Page 70: Individual Channel Settings
7: Mixer Use the jog wheel to select 8-AES (ADAT). Use the SHUTTLE control to move the cursor to the right field. Use the jog wheel to select either NORM for 1–8 or SWAP for 9–16. Press the STORE/ENT key. Individual Channel Settings In order to access individual channel settings for mixing, you need to enter Mix Mode. - Page 71 7: Mixer Setting the Pan You set the stereo position of each input channel with this Mix Mode function. Rotate the JOG wheel to select the “PAN” function. Rotate the SHUTTLE control to move the cursor to the data item. The pan data will be underlined: “PAN MID”.
- Page 72 7: Mixer Rotate the JOG wheel to change the level value. The send pan position range is from L63 (extreme left) through MID (center)to R63(extreme right). The default pan position is MID. The pan position will also be displayed graphically using the peak level meters. When the Auxiliary Send is set to mono (see “Selecting Mono or Stereo Send”...
- Page 73 7: Mixer Rotate the JOG wheel to set the fade time. The following options are available: OFF:No fade will be applied. 001 - 126: The value here determines when the Snapshot starts fading in before the allocated time on the Snapshot map. You can set the fade from 0.1 seconds to 12.6 seconds in units of 100ms.
-
Page 74: System Settings
7: Mixer Rotate the JOG wheel. The display changes to “A U X I N A - 1”. The playback and record functions of the selected channel will be disabled. The CHANNEL ON key can be used to mute the AUX INPUT. When the AUX INPUT is active, the CHANNEL ON key will flash. - Page 75 7: Mixer Selecting Pre- or Post- Metering The peak level meters can show the channel levels before (PRE) or after (POST) the Channel Level parameter (see “Setting the Level for Each Channel” on page 61). You should select POST to view the effects of the mix balance on the clipping conditions of each channel. Rotate the SHUTTLE control to move the cursor to the data item.
- Page 76 7: Mixer Selecting Pre- or Post- Send You can switch the signal path of the send channels to be before (PRE) or after (POST) the individual channel levels. Mono pre- or post- send: Rotate the JOG wheel to select the desired function. Select either the “SEND1”...
-
Page 77: Snapshot Settings
7: Mixer Snapshot Settings Up to 99 mixer snapshots can be stored and recalled. These points are identified using a two-digit number (01 to 99). Storing a Snapshot To store a mixer snapshot: In Mix Mode, adjust the mixer parameters. For details, see the previous sections. -
Page 78: Mapping Snapshots
7: Mixer Mapping Snapshots The allocation of stored snapshots to specific times is called Mapping. You create a map of snap- shots and then play them back for automated mixing during playback. Locating Snapshots Locate to the point to which you want to assign the snapshot. Press the SUB-MENU key. - Page 79 7: Mixer Inserting Snapshots Check your snapshot map. Use the steps shown in “Checking Snapshots” on page 69. Locate to another point. Use the JOG/SHUTTLE control to select the snapshot you want to assign and press the STORE/ENT key. The snapshot numbers are assigned by the location of the snapshot on the time axis. When you assign a new snapshot to a locate point earlier than an existing snapshot, the new snap- shot is given the existing number.
-
Page 80: Other Functions
7: Mixer Automation Mix The mixer automation may be used to control the signal from the digital and headphone outputs, even when the mixer is in MULT mode. Press the SNAPSHOT key. The green LED beside the key lights. Press the Play key to listen to the mix. -
Page 81: Adat Digital Output
7: Mixer ADAT Digital Output If you install an optional 8-in/16-out ADAT IB-1616A (or 8-in/8-out ADAT IB-804A) interface board, you will be able to digitally transfer audio between the DR16pro and an Alesis ADAT machine (or any other device that includes this interface). However with the 8-in/8-out ADAT IB-804A, since the Alesis ADAT uses only 8 tracks, you will be able to transfer only eight audio signals from the DR16pro at any time. -
Page 82: Take Functions
8 Take Functions Take Functions The DR16pro gives you the ability to record up to five takes of a recording, allowing you to com- pare different takes or replace the current recording with data that was stored as a take. The Take functions are similar to the Undo function, only much more versatile. - Page 83 8: Take Functions Checking a Take Press the TAKE key you want to listen to. Select from the TAKE keys which have a lit LED. When a TAKE key has been selected, its LED flashes. Press the Play key to listen to the take. The DR16pro will play from the current point, switching to the stored take data when it reaches that location.
- Page 84 8 Take Functions The following diagram illustrates the commit procedure: Take1 Original COMMIT Take2 Original Deleting a Take Press the DISCARD key. The red LED beside the DISCARD key flashes and the green LEDs beside the TAKE keys with data flash. The message “DISCARD”...
-
Page 85: Other Take Applications
8: Take Functions Other Take Applications Storing Specific Tracks or Sections You can store a track, a section of a track, or a set of tracks to a take. Make a recording of some material. After the recording is made, the corresponding TRACK REC key will light, to show which tracks contain data. -
Page 86: Locate Functions
9: Locate Functions Locate Functions This chapter explains how to use the locate functions. You can locate to the beginning of a record- ing. You can also locate to a specific point just by entering the time on the display, store and recall up to nine direct locate points using the number keypad, and store and recall up to 100 stack locate points. -
Page 87: Direct Locate Points (1 ~ 9 Keys)
9: Locate Functions A quick and convenient method of entering a location value is to use the :/STACK key. This key pushes two digits of the locate time with one key press. For example, to enter the time 1 hour 5 seconds 6 frames: Press the LOCATE key. -
Page 88: Stack Locate Points
9: Locate Functions Stack Locate Points Up to 100 stack locate points can be stored and recalled. These points are identified using a two- digit number (00 to 99). Storing Stack Locate Points To store a stack locate point: Locate to the desired point. The location will be shown on the display. -
Page 89: Last Memory
9: Locate Functions Last Memory The LAST 0/- key function allows you locate to the last two points at which the stop key was pressed. This can be used to return to the previous point after locating to a different point, or after playing, recording, rewinding, and fast forwarding. -
Page 90: Preroll
9: Locate Functions Preroll The preroll function allows you to locate to a point a few seconds before the specified locate point. For example, if the preroll value is set to 5, and the preroll function is on, the DR16pro will locate to a position 5 seconds before the specified locate point. -
Page 91: Time Display
10: Time Display Time Display The DR16pro can display time in any one of three ways: absolute, relative, and BBC: Absolute Time (ABS) Absolute time effectively starts at the beginning of the hard disk at zero, and is fixed. When the DR16pro is in this mode, the ABS indicator will be lit on the display. -
Page 92: Setting Relative Time To Zero
10 Time Display Setting Relative Time to Zero Locate the point at which you want to set relative time to zero. Press the RESET key. Relative time will be selected automatically, and set to 00 :00 :0 0:0 0. 0. To return to absolute time, press the ABS/REL key. -
Page 93: Editing
11: Editing Editing This chapter describes the editing functions. The DR16pro has nine edit functions: copy, copy+insert, move, move+insert, insert, erase, delete, slip, and slip track: Copy the specified section to any track. Material at the destination is overwritten. Copy+Insert the specified section to any track. Subsequent material is moved forward. -
Page 94: Undoing An Edit
11: Editing Undoing an Edit Before looking at each edit function, you need to know how to undo an edit. This will be useful when edits do not turn out as planned. It also gives you the freedom to experiment with edits — using the undo function to “compare”... -
Page 95: Copy
11: Editing Copy The copy function allows you to make multiple copies of a section of audio and re-position it elsewhere. You can copy material from one section of a track to another, or across tracks. Note: The copy operation will overwrite any material that may be present at the destination insert point. - Page 96 11: Editing Press the EDIT key to select the Copy function. The LED beside the key will light up, and you will see a display similar to the following: EDIT Press the STORE/ENT key. The destination insert point will be stored. Warning: Any material after the destination insert point up to the length of the source section will be overwritten by the copy operation.
-
Page 97: Copy+Insert
11: Editing Executing the Copy Press the STORE/ENT key to execute the copy. When the DR16pro has completed the copy operation, the message “D ON E ” will momen- tarily appear on the display. The LED beside the EDIT key will switch off and the previous mode restored. Copy+Insert The copy+insert function works basically the same as the copy function. -
Page 98: Move
11: Editing Use the CHANNEL ON keys (and the 9-16 key, if necessary) to select the copy source tracks. Use the TRACK REC (INPUT SELECT) keys (and the 9-16 key, if necessary) to select the copy destination tracks. Press the STORE/ENT key to execute the copy. When the DR16pro has completed the copy operation, the message “D ON E ”... -
Page 99: Move+Insert
11: Editing Use the CHANNEL ON keys (and the 9-16 key, if necessary) to select the move source tracks. Use the TRACK REC(INPUT SELECT) keys (and the 9-16 key, if necessary) to select the move destination tracks. Press the STORE/ENT key to execute the move. When the DR16pro has completed the move operation, the message will momentarily appear on the display. -
Page 100: Insert
11: Editing Press the STORE/ENT key. Use the JOG/SHUTTLE control to specify the number of repeats. Use the CHANNEL ON keys (and the 9-16 key, if necessary) to select the move source tracks. Use the TRACK REC(INPUT SELECT) keys (and the 9-16 key, if necessary) to select the move destination tracks. -
Page 101: Erase
11: Editing Press the STORE/ENT key. You will see a display similar to the following: EDIT Use the JOG/SHUTTLE control or the numeric keypad to specify the length of the in- sert. The insert time is shown on the time display. Use the TRACK REC(INPUT SELECT) keys (and the 9-16 key, if necessary) to select the insert tracks. -
Page 102: Delete
11: Editing Use the TRACK REC(INPUT SELECT) keys (and the 9-16 key, if necessary) to select the tracks you want to erase. Press the STORE/ENT key to erase the tracks. When the DR16pro has completed the erase operation, the message “D O N E” will momen- tarily appear on the display. -
Page 103: Slip
11: Editing Slip The slip function moves all the audio forward or backwards from the marked “in” point to the current position. If the current position is beyond the “in” point, a section of blank audio is inserted (“Insert” on page 91). However, if the current position is before the “in” point, the material between the two points is deleted (“Delete”... -
Page 104: Slip Track
11: Editing Slip Track The slip track function moves all audio on the current track forward or backward so that the audio at the marked “in” point is moved to the current position. The following diagram illustrates the slip track function: Original Track "in"... -
Page 105: Hard Disks
SCSI-A bus. Alternatively, you could replace the internal hard disk with a larger one. Only certain hard disks can be used with the DR16pro, so please consult your AKAI professional dealer. -
Page 106: Scsi
12: Hard Disks Hard Disk Size The total available recording time depends on the total size of all storage media — the internal hard disk and any external hard disks connected via the SCSI-A bus. As can be seen from the table below, the sampling frequency also affects the available time. - Page 107 12: Hard Disks SCSI-A The SCSI-A bus is used to connect external hard disks for recording. SCSI Cables Use only high-quality SCSI cables when connecting SCSI devices. Cables are available in a vari- ety of lengths; however, you should pay particular attention to the total length of the SCSI daisy chain.
- Page 108 12: Hard Disks SCSI Termination The ends of a SCSI daisy chain must be terminated correctly. Otherwise, data errors, system crashes, etc., may occur. Termination at the DR16pro end of the chain is taken care of by the DR16pro. At the other end of the chain you must fit a terminator. Some SCSI devices have a terminator built-in.
-
Page 109: Checking For Disks
12: Hard Disks Checking for Disks To check the status of a hard disk connected to SCSI-A bus: Press the SUB-MENU key. The indicator in the key will flash and the text “SU B-ME N U ” will appear on the display. Press the 1(DISK) key –... -
Page 110: External Hard Disk Operating Precautions
12: Hard Disks External Hard Disk Operating Precautions • Before connecting a hard disk, make sure that the DR16pro and hard disk are powered off. If a hard disk is connected with its power on it could be damaged. • Always power on the external hard disks before the DR16pro. -
Page 111: Formatting Disks
SCSI ID. Make sure that you know the SCSI ID of the disk you want to format before starting this procedure. The DR16pro uses Akai DD-PLUS as its default disk format. It is also possible to format disks for use on MACINTOSH computers. - Page 112 12: Hard Disks Note: While the DR16pro can properly format a Macintosh hard disk or MO, it does not install any type of Macintosh driver software on the disk. Therefore, disks formatted on the DR16pro will require third-party mounting software in order to appear on the Macintosh desktop.
-
Page 113: Erasing Disks
12: Hard Disks Erasing Disks This function allows you erase all material on a disk before starting a new session. You may want to back up the existing material for future use before proceeding. See “Backup and Restore” on page 110. To erase a disk: Press the SUB-MENU key. -
Page 114: Optimizing Your Hard Disks
12: Hard Disks Optimizing Your Hard Disks Editing and recording on the DR16pro is non-destructive, except in destructive recording mode. (See “Setting the Recording Mode” on page 45.) This means that when you record new material over a location with existing data, the DR16pro does not erase the existing material. Instead, it allocates space elsewhere on the hard disk to store the new material and marks the previous location as overwritten. - Page 115 12: Hard Disks Note: Executing the Minimize function requires a significant amount of free disk space. Its first priority is to destroy no data accidentally. The Minimize function makes a copy of the portion of the take that can be played back before it removes the original take. Therefore, if your disk is full of recordings, or even close to full, you may not be able to use the Minimize function.
-
Page 116: Copying Disks And Projects
12: Hard Disks Copying Disks and Projects You can copy the entire contents of a hard disk, or a single project on the disk, to another disk connected to the SCSI-A bus. Note: You should use a destination hard disk that is larger than your source disk. An error message appears if you try to copy data from a large capacity disk to a smaller disk, preventing the Copy function from being performed. - Page 117 12: Hard Disks 10) Press the STORE/ENT key again to start copying. As the DR16pro copies the disk, the message “C O P Y I N G ” will appear on the display. When the copy function is complete, the message “D ON E ” will appear on the display. The previous mode will be restored.
-
Page 118: Data Compatibility With Akai 16 Bit Dr8/Dr16 Models
“SESSION_1.” While editing or using the Take function for a disk data created on the Akai DD1500, you may find multiple projects use the same take. When you copy such projects one by one using the Project Copy function, the associated take will be copied each time you copy the project. -
Page 119: Backup And Restore
13: Backup and Restore Backup and Restore This chapter explains how to back up and restore material recorded on the DR16pro. You can back up to a SCSI tape drive via SCSI. Backup Backup to a SCSI Tape Drive The DR16pro is able to make backups to SCSI Tape Drives (SCSI-DAT, etc.). Connect the SCSI connector of the SCSI Tape Drive to the SCSI-A connector of the DR16pro using an appropriate SCSI cable (bearing in mind all the precautions and considerations regarding SCSI termination, SCSI ID numbers and the total SCSI cable length). - Page 120 13: Backup and Restore Select “S C S I ” with the JOG/SHUTTLE control then press the STORE/ENT key. The message “T R A N SM I T” will appear in the display. Select “T R A N S M I T ” with the JOG/SHUTTLE control (if not already selected) and then press the STORE/ENT key.
- Page 121 13: Backup and Restore Backup to multiple tapes If a single tape cannot accommodate the entire backup data, it is possible to back it up across several tapes. When the tape becomes full during backup, the backup operation is temporarily stopped and the message “TA PE F U L L”...
- Page 122 13: Backup and Restore Backup of multiple disks The DR16pro may use audio data spread over several disks for a single project. When such a project is backed up, the DR16pro will automatically access the appropriate disks that contain the necessary audio data.
-
Page 123: Restore
13: Backup and Restore Restore Before you restore your backup to the hard disk, it is recommended to delete all the data from the disk by using the erase function (see “Erasing Disks” on page 104), although the data is deleted automatically when restored. - Page 124 Interchangeability with DD Machines Such as DD8 / DD1500 The AKAI DD8/DD1500 system allows you to store several backups on a single tape, while the DR16pro can store only one backup. Further, the title of the backup made on the DR16pro is always fixed as “Backup”.
- Page 125 13: Backup and Restore Loading from DAT Insert your write-protected backup tape, which has been made on the DR8/DR16, into the DAT recorder and set it up for playback. Note: Before loading from a DAT recorder, make sure that the volume controls on any equip- ment connected to the DAT recorder’s outputs are turned fully down.
- Page 126 13: Backup and Restore Press the STORE/ENT key. The new connector will be selected. 10) If everything is set correctly, press the STORE/ENT key. The DR16pro will display the message “S TA RT TAPE”. 11) Start playback on the DAT recorder. When the DR16pro receives the data, it starts loading data and the display shows the mes- sage “BUSY”.
-
Page 127: Synchronization
IB-802T SMPTE Reader/Generator Board To use SMPTE/EBU synchronization, you must install the optional IB-802T SMPTE reader/gen- erator board. Please contact your Akai professional dealer for details. Connection and Setup Follow the steps below to setup the SMPTE/EBU system. Note: If you try to set parameters related to the SMPTE/EBU synchronization without an IB- 802T board installed, the message “N O OPT IO N ”... - Page 128 14: Synchronization Use the JOG/SHUTTLE control to select the type of sync mode. Sync Mode Display SMPTE/EBU S M P T E - L T C MIDI Clock M I D I - S P P MIDI Timecode M I D I - M T C MIDI Machine Control M I D I - M M C In this case, select “S M P T E - L T C ”...
- Page 129 14: Synchronization SMPTE-LTC Master Synchronization Press the SYNC key to turn on the synchronization function. The green LED beside the key will light. Note: If the SYNC key is OFF, the DR16pro will not output the timecode. Press the Play key, or the Play and REC keys simultaneously.
-
Page 130: Midi Synchronization
Clock (SPP) signals. You can also use MMC software to control the DR16pro externally. IB-803M MIDI Interface Board To use MIDI synchronization, you must install the optional IB-803M MIDI interface board. Please contact your Akai professional dealer for details. Connection and Setup Follow the steps below to setup the MIDI synchronization system. - Page 131 14: Synchronization Use the JOG/SHUTTLE control to select the status of the sync mode. Select from the following available options: • MIDI-MTC: OFF, MASTER • MIDI-SPP: OFF, MASTER • MIDI-MMC: OFF, SLAVE The default is OFF for MIDI-MTC and MIDI-SPP; the default is SLAVE for MIDI-MMC. If you select the default, the DR16pro returns to the previous mode.
-
Page 132: Master/Slave Operation Via Rs422
DR16pro. Master/Slave Operation Via RS422 IB-805R RS422 Interface Board To use RS422 master/slave operation, you must install an optional IB-805R RS422 interface board. Please contact your Akai professional dealer for details. RS422 MASTER Setup To setup the system: Connections:... - Page 133 14: Synchronization Press the SYNC(SYNC) key. You will see a display similar to the following: Use the JOG/SHUTTLE control to select the “R S42 2-MC ” (Machine Control) menu. Press the STORE/ENT key. Use the JOG/SHUTTLE control to select “MA STE R ” mode. ress the STORE/ENT key.
- Page 134 14: Synchronization RS422 FULL SLAVE Setup To setup the system: Connections: DR16pro Slave RX 3 8 RX 2 7 RS-422 TX 3 8 TX 2 7 RX 2 7 TX 3 8 VTR Slave VIDEO EDITOR Master RX 3 8 RS-422 TX 2 7 Press the SUB-MENU key.
-
Page 135: Digital Audio Sync
14: Synchronization Digital Audio Sync Setting digital clock sync As a default setting, the DR16pro automatically locks to the external digital clock (word clock) to record a digital input signal. (AutoSync: ON) DR16pro DR16 DAT/CD PLAYER DIGITAL DIGITAL However, there may be some cases where locking to an external digital clock will cause a prob- lem. -
Page 136: Song Mode
MIDI. See “MIDI Synchronization” on page 121. Note: To use MIDI synchronization, you must install an optional IB-803M MIDI interface board. Please contact your AKAI professional dealer for details. Tempo Map When you use the DR16pro as a MIDI master, the tempo of the connected MIDI slave sequencer is determined by the rate of the MIDI clock. - Page 137 15: Song Mode Tempo and Beat Map Before creating a tempo or beat map, it’s a good idea to jot them down on paper first. This way you’ll also have a hard copy for quick reference. The following tables show how you could layout a beat map and tempo map.
-
Page 138: Creating A Song
15: Song Mode Creating a Song Selecting a song To select a song, follow the steps below: To select a song: Press the SONG key. The green LED beside the key will light up. The word SONG will appear on the display, indicating that the DR16pro is in Song mode. - Page 139 15: Song Mode You can also set a value using the Absolute/Relative time display. See “Setting Relative Time to Zero” on page 83. Tip: To see the Absolute/Relative time display when the DR16pro is in Song Mode, press the TIME D key. In order to operate the DR16pro in offset sync with an external device, fine tune the start point to set the offset amount.
- Page 140 15: Song Mode Press the STORE/ENT key. A beat of 3/4 will be stored at the specified point. SONG Repeat Steps 5, 6, and 7 to create a Beat map. Note: You can set the beat for each bar, but the smallest resolution is one bar. If you set the beat in the middle of a bar, the change will be entered at the beginning of the bar.
-
Page 141: Creating A Tempo Map
15: Song Mode Creating a Tempo Map You must create a Beat map before creating a Tempo map. To create a Tempo map: Press the TEMPO key in Song mode. The green LED beside the key will light. The following screen appears on the display, indicating that the tempo of the first beat point (step) - default setting - is set to 120.0. - Page 142 15: Song Mode To check the Tempo map: Press the TEMPO key in Song mode. Rotate the JOG wheel. The step numbers change and you can check the step, time, and tempo. Press the TEMPO key again to cancel the tempo function. Deleting Entries from the Tempo Map To delete an entry from the Tempo map: Press the Tempo key in Song mode.
-
Page 143: Other Functions
MIDI controller numbers and set up for mixing tab unit MT8. Assigning AKAINET Machine ID The AKAINET (Ethernet) interface built in to the DR16pro allows multiple DR16pros to be oper- ated from a single remote controller such as the Akai RE32. AKAINET (BNC Ethernet cable) -
Page 144: Saving/Loading Settings To Flash Rom
16: Other Functions Press the STORE/ENT key. A message such as “MACHINE 0 1”will appear on the display showing the currently selected machine ID number. Use the JOG/SHUTTLE control to change the ID number. The range is 1 to 16. Press the STORE/ENT key. - Page 145 16: Other Functions Loading Settings from Flash ROM Settings that have been saved to Flash ROM will automatically be used as the default settings each time a new project is created. You can also manually load the settings from Flash ROM which can be useful if you want to override the settings that may have been loaded from a project created on another machine.
- Page 146 16: Other Functions Adjusting the Display Brightness This function adjusts the brightness of the Peak Level meters and the Time and Status display. Press the SUB-MENU key. The indicator in the key will flash and the text “ SU B-ME N U ” will appear on the display. Press the 3(SET UP) key –...
- Page 147 16: Other Functions Assigning the MIDI Controllers Press the SUB-MENU key. The indicator in the key will flash and the text “SU B -MEN U ” will appear on the display. Press the 3(SET UP) key – numeric keypad. Use the JOG/SHUTTLE control to select the MIDI Controller functions. You will see a display similar to the following: Press the STORE/ENT key to enter the MIDI Controller functions.
- Page 148 16: Other Functions Setting the Pan Controller Rotate the JOG wheel to select the Pan Controller function. Rotate the SHUTTLE control to move the cursor to the data item. The pan controller data will be underlined: “PAN n 0 1 0”. Rotate the JOG wheel to select a controller number.
-
Page 149: Setting Up For Using The Mt8 Mixing Tab Unit
16: Other Functions Setting the Fade Controller Rotate the JOG wheel to select the “FADE” Controller function. The message “F A D E O F F” will appear on the display. Rotate the SHUTTLE control to move the cursor to the data item. The data item will be underlined on the display. -
Page 150: Scms
If you are recording material that is protected by copyright from any source, you must have the permission of the copyright owner before you use it. There are no restrictions on the use of copyright-free material. AKAI professional cannot accept any responsibility for breach of copyright law. Page 141... -
Page 151: Appendix
17: Appendix Appendix Specifications Digital Audio Format 16/20/24-bit linear PCM Simultaneous Recording 10 tracks 20 ~ 22 kHz ±1.0 dB (FS @ 48 kHz) Audio Frequency Response A/D Conversion 24-bit 128-times oversampling 5th DS modulation D/A Conversion 20-bit 8-times oversampling sign magnitude Dynamic Range Greater than 96 dB Distortion... -
Page 152: Specifications
17: Appendix Specifications (Continued) Extension Slots x5 SMPTE, MIDI, RS422, ADAT, AES/EBU optional boards Mixer Parameters LEVEL Channel level (0 ~ 127) Stereo pan position (L63 ~ MID ~ R63) SEND1, SEND2 Mono send level (0 ~ 127) SENDS Stereo send level (0 ~ 127) SDPAN Stereo send pan (L63 ~ MID ~ R63) Bus mode (ON, OFF) -
Page 153: Options
17: Appendix Options Multi-AES/EBU Installing an optional board IB-D16MA24 allows the DR16pro to input 8-channel and output 16- channel digital signal in the AES/EBU digital audio signal format. Note: You cannot use this board in conjunction with another optional digital board IB- 1616A (IB-804A) (ADAT interface board). - Page 154 17: Appendix GPO outputs the DR16pro’s operation status. For example, it can cause an external indicator to light up during recording. Pin number Operation GPO-1 Outputs LOW when TRACK REC1 is ON. GPO-2 Outputs LOW when TRACK REC2 is ON. GPO-3 Outputs LOW when TRACK REC3 is ON.
-
Page 155: Ib-808G Block Diagram
17: Appendix IB -808G Block Diagram Page 146... -
Page 156: System Error Codes
17: Appendix System Error Codes DISK SCSI ERRORS Bus-reset during command SY S ER R 1 Early disconnection SY S ER R 2 Illegal bus phase SY S ER R 3 Incomplete data SY S ER R 4 Unexpected data SY S ER R 5 Software timeout SY S ER R 6... - Page 157 17: Appendix DISK FILE ERRORS S YS ERR 26 Illegal filename etc. S YS E RR 27 Too many files/buffers open S YS E RR 28 File not found S YS E RR 29 File already open S YS E RR 30 Access denied (file write protected) S YS E RR 31 G-partition full (disk full)
- Page 158 17: Appendix ETHERNET / PROTOCOL ERRORS S YS ER R 64 Command queue full SY S ER R 65 Bad command SY S ER R 66 File queue full SY S ER R 67 File not found SY S ER R 68 Host not responding SY S ER R 69 Too many hosts connected...
- Page 159 17: Appendix BACKUP / RESTORE ERRORS S YS ERR 128 Operation failed S YS E RR 129 Operation aborted S YS E RR 130 Tape size too small S YS E RR 131 Restore cannot recreate a disk. The backup uses multiple disks. (Probably created by other software) S YS E RR 132 Media has changed...
- Page 160 17: Appendix GENERAL ERRORS (Continued) S YS ER R 209 Mixer fade automation too busy SY S ER R 211 Project cannot be saved since disk has been changed SY S ER R 212 Timecode generator ROM is incompatible SY S ER R 213 No free entries in MIDI Beat map SY S ER R 214 No free entries in MIDI Tempo map...
-
Page 161: Midi Implementation Chart
17: Appendix MIDI Implementation Chart Date: 6/99 Version: 1.0 Function **** Transmitted Recognized Remarks Basic Default Channel Changed Default Mode Messages Altered **************** Note Number True Voice **************** Velocity Note ON Note OFF Pitch Bend CH ON O ON/OFF LEVEL (Default 7) O 0 - 127 PAN L63 - R63 (Default 10) Setting Range... -
Page 162: Index
18: Index Index Data compatibility ..........109 9-16 key ............14 DD1500 ............. 54, 109 Delete .............. 93 Destructive recording mode ......45 DIGI(D IN) key ............. 8 ABS/REL(OFFSET) key ........9 Digital audio formats ......... 48 Absolute time ..........24, 82 AES/EBU .......... - Page 163 18: Index copy+insert ..........88 PHONES connection ........14 delete ............93 Phones LEVEL control ........ 14 erase ............92 Play key ............13 insert ............91 POWER switch ..........8 move ............89 PREROLL(TIME) key ......11, 81 move+insert ..........90 REC key ............
- Page 164 18: Index mono send level, setting ......63, 66 stereo send level, setting ......62 stereo send pan position, setting ..... 62 LAST 0/- key ..........11, 80 snapshots Last memory ............. 80 automation mix ........71 Levels, setting the ..........61 checking locations ........
- Page 165 18: Index Power, connecting ..........28 Pre- metering ............ 66 Preroll ..............81 Sampling frequency .......... 30 PREROLL key ........... 11 sample rates Projects ............. 54 32 kHz ............ 30 creating ............54 44.056 kHZ ..........30 deleting ............56 44.1 kHz ..........
-
Page 166: Index
18: Index sync mode ..........118 timecode type ..........119 System error code ........147-151 System set up ..........134 System settings ..........65 TAKE keys ............16 Takes ............73-76 checking take ............74 committing specific tracks ........76 take ............ - Page 167 1-3, Hiranuma 1-chome, Nishi-ku, Yokohama, Japan 000218-4 Printed in Japan...
Need help?
Do you have a question about the DR16 pro and is the answer not in the manual?
Questions and answers
how to fix error 8
Error 8 on the Akai DR16 Pro is a "Selection timeout" SCSI error. To fix it, check the following:
1. Ensure the SCSI cable is properly connected and not damaged.
2. Verify that the SCSI device (e.g., hard drive) is powered on and functioning correctly.
3. Make sure the SCSI ID settings do not conflict with other devices.
4. Confirm proper SCSI termination is in place.
5. Try replacing the SCSI cable or using a different SCSI device if the issue persists.
This answer is automatically generated