Table of Contents
Advertisement
RINNAI
Reflection
Flame Fire Operation and Installation Manual
This appliance shall be installed in accordance with:
• Manufacturer's Installation Instructions
• Local Gas Fitting Regulations
• NZS 5261 and Australian Installation Code AS5601
• Municipal Building Codes
• Any other local relevant statutory regulation
This product is only to be installed with an approved Rinnai flue system.
Installation and service must be performed by an authorised person.
INSTALLER: Please leave this manual with the customer after installation
OWNER: Please retain this manual for future reference
Rinnai New Zealand
Reflection: 03-08
Advertisement
Table of Contents

Related Manuals for Rinnai Advance


Summary of Contents for Rinnai Advance
- Page 1 • Municipal Building Codes • Any other local relevant statutory regulation This product is only to be installed with an approved Rinnai flue system. Installation and service must be performed by an authorised person. INSTALLER: Please leave this manual with the customer after installation...
-
Page 2: Limited Warranty
Rinnai authorised service centre. installed or is otherwise installed contrary to All Rinnai appliances meet or exceed the safety manufacturer’s recommendations, has been standards required by New Zealand gas and damaged during or after installation, has not electrical regulations. - Page 3 For assistance or additional information consult an authorised person or Rinnai on 0800 RINNAI (0800 746 624). Installation and service must be performed by an authorised person. Rinnai New Zealand...
- Page 4 Introduction Congratulations on the purchase of your Rinnai Reflection Flame Fire. Rinnai has been supporting New Zealand for over 30 years with quality appliances, and we’re proud to have our products used everyday by many New Zealanders. Rinnai Reflection...a reflection of inspired design, from an initial pencil sketch to ingeniously designed, precision-engineered working models.
-
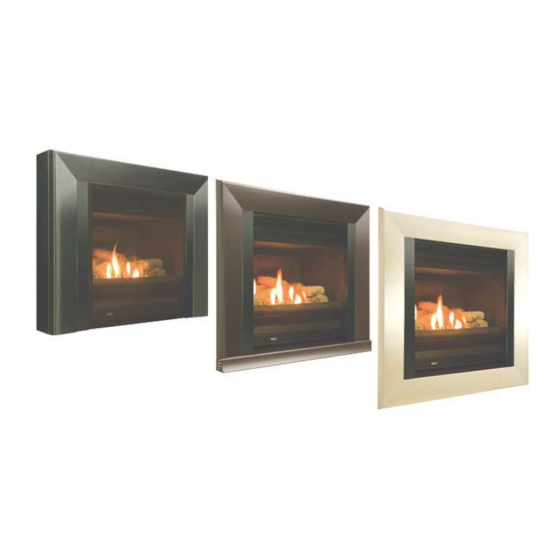
Page 5: General Design Layout
General design Layout The Reflection models differ only in the colour of frame surround and installation application. Reflection Advance Extruded aluminium frame available in two Black Trim Kit, stainless steel option can colour options; Galaxy Black and dark Bronze be purchased as an additional accessory to... - Page 6 Rinnai Service Centre. do not place articles on or against this appliance. do not use or store flammable materials near this appliance. do not spray aerosols in the vicinity of this appliance whilst in operation.
-
Page 7: Installation
For existing masonry installations, to ensure adequate draw of the appliance, Rinnai strongly recommends the use of a Rinnai Flexiliner Flue system. Failure to meet this criteria may result in an unsafe situation. Installation without a flexiliner flue is permissible as long as the chimney is checked for soundness and ability to achieve a good draw. - Page 8 A hearth is not necessary but can be used for decorative purposes or protection of sensitive flooring materials if required. If used the bottom of the appliance must be level with the top of the hearth so there is a continuous level. Rinnai New Zealand Reflection: 03-08...
-
Page 9: Control Panel Layout
Room Temperature Adjustment The room temperature and pre-set temperatures can only be displayed and adjusted when the heater is running. Press the button to increase the temperature setting or button to decrease the temperature setting. Rinnai New Zealand Reflection: 03-08... -
Page 10: Remote Control
The remote control will not turn heaters on if ‘Timer(s)’ have been set. To manually operate when ‘Timer(s)’ are not selected, press the ‘ON’ or ‘OFF’ button. To alter the temperature when the heater is operating, press the buttons. Rinnai New Zealand Reflection: 03-08... - Page 11 ‘Timer 2’ is programmed in the same way. Remember to ensure that the ‘Timer 2’ indicator is flashing when you program in the desired setting. The timers can be programmed to operate for any two periods within twenty four hours. Rinnai New Zealand Reflection: 03-08...
- Page 12 The temperature differential at the time of sensing the room governs how long before the programmed ‘ON’ time the mircocomputer will operate the heater and ignite the burner. Rinnai New Zealand Reflection: 03-08...
-
Page 13: Maintenance, Servicing And Repair
Regular servicing is not covered by the Rinnai warranty. do not attempt to carry out any service work other than that mentioned in the troubleshooting pages. If you have any other faults or problems, please refer to your installer or call Rinnai on 0800 RINNAI (0800 746 624). -
Page 14: Troubleshooting And Error Codes
In all cases, you can clear the error message by turning the heater OFF, then ON again. If the error message still remains, please contact your nearest service contact and arrange for a service call. Rinnai New Zealand Reflection: 03-08... -
Page 15: Installer Information
Installer Information Rinnai New Zealand Reflection: 03-08... - Page 16 All measurements are in mm. Advance Advance Spacer 100mm Amplify Elevate Rinnai New Zealand Reflection: 03-08...
-
Page 17: Appliance Location
A functional height is 400mm from the floor to the bottom of the Zero Clearance Box is recommended. When integrating a floating hearth, this clearance can be stretched to 600mm. The Reflection range has a top air discharge so this needs to be factored when installing. Rinnai New Zealand Reflection: 03-08... -
Page 18: Gas Supply And Connection
Masonry Brick work can be alkaline which can be corrosive to copper. Gas fitters Fireplaces and often wrap tape around the copper pipe coming into contact with the brick Copper work. Rinnai New Zealand Reflection: 03-08... - Page 19 Rinnai recommend a maximum flue height of 8m. Length Flue Systems For new fireplace installations a Rinnai Zero Clearance Box and Flue kit is a mandatory requirement to meet warranty conditions. For masonry installations, to ensure adequate draw, Rinnai strongly recommends the use of a Rinnai Flexiliner Flue System.
- Page 20 Any under-floor air supply to the fireplace must be completely sealed off to prevent secondary air draw • An approved chimney cap and cowl must be installed. If there is an existing cap it must be free of defects/deterioration and repaired/ replaced Rinnai New Zealand Reflection: 03-08...
- Page 21 Clearance Box For installations into decorative fireplaces a Rinnai Zero Clearance Box and Zero Clearance Flue Kit is required. Failure to meet this installation criteria will void any product warranty. We have developed a simple overview as to the steps and trades involved. Installing the fire last minimises building debris/dust entering the fire which is common when building/ renovating.
- Page 22 Zero Clearance Box • Any residual heat in the box is ducted away via the outer flue • When the fire is installed the clamp sleeve can be lowered to connect the fire spigot to the flue Rinnai New Zealand Reflection: 03-08...
-
Page 23: Installation Procedure
Trim Kit (black provided as standard) Supplied with engine Frame Supplied separately Flexi-pipe gas connection Supplied with engine Seal Strip, Advance only (for sealing appliance to enclosure) Supplied with spacer Operation and Installation Instructions Supplied with engine Remote Control (battery included) Supplied with engine... -
Page 24: Electrical Connection
If using a zero clearance box, there is a knock out for the electrical connection with an edge protector supplied. This needs to be cut and fitted. Advance Masonry Electrical cord is not fire rated. do not thread out of the back of the fire as Installations there is a risk the cord could come into contact with the back of the heater. - Page 25 For a masonry fixing, measure and drill 4 holes in the fireplace and insert wall plugs to secure backing plate and Backing Plate sits spacer to the fireplace. inside the back rim of the spacer Rinnai New Zealand Reflection: 03-08...
- Page 26 The heater should be run on the high setting in a well ventilated room until these dissipate. Rinnai New Zealand Reflection: 03-08...
-
Page 27: Testing Procedure
All burner aeration is factory preset and cannot be adjusted. If you are unable to get the unit to operate correctly refer to Troubleshooting guide on page 14 before contacting Rinnai. Rinnai New Zealand Reflection: 03-08... - Page 28 For cleaning and servicing, the dress guard can be removed by pulling it outward from the bottom. 4 x self tapping Narrow side of frame screws (included) Bottom Panel trim inner dress guard fixing holes BOTTOM Rinnai New Zealand Reflection: 03-08...
- Page 29 Everything wall cavity. The control panel can now be inserted into the metal box. A Together click should be felt once properly located. Rinnai New Zealand Reflection: 03-08...
-
Page 30: Commissioning Checklist
Appliance positioned in suitable location? (i.e. clearances, combustibles etc.) Was a Rinnai approved flue system installed and is the flue drawing effectively 3. Has specified gas pressures been checked and set? Is the logset located correctly? 5. - Page 31 Wiring diagram (ETR) Rinnai New Zealand Reflection: 03-08...
-
Page 32: Customer Contacts
Email: info@rinnai.co.nz Website: www.rinnai.co.nz All Rinnai appliances meet or exceed the safety standards required by New Zealand gas and electrical regulations. Rinnai is constantly improving its products and as such specifications are subject to change or variation without notice. RINNAI...
Need help?
Do you have a question about the Advance and is the answer not in the manual?
Questions and answers