Table of Contents
Advertisement
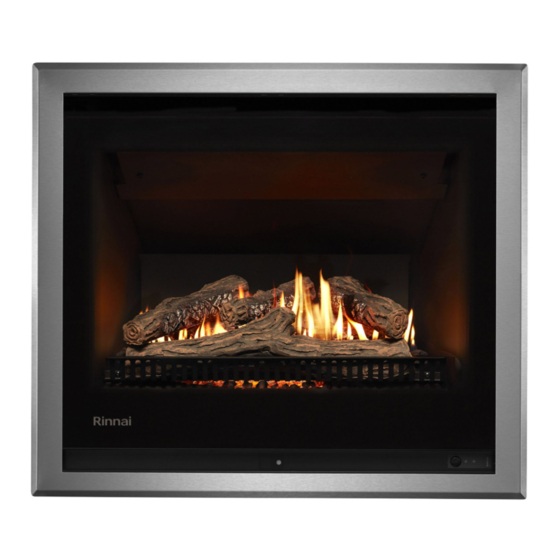
Rinnai 650 / 750 GAS FIRE
Operation / Installation Manual
MODELS: RDV600ER / RDV700ER
This appliance shall be installed in accordance with:
• Manufacturer's Installation Instructions
• Current AS/NZS 5601 AS/NZS 3000
• Local Regulations and Municipal Building Codes including local OH&S requirements
This appliance must be installed, maintained and removed by an Authorised Person.
All Rinnai gas products
For continued safety of this appliance it must be installed and maintained in
are A.G.A. certified.
accordance with the manufacturers instructions.
Advertisement
Chapters
Table of Contents
Troubleshooting

Related Manuals for Rinnai 650


Summary of Contents for Rinnai 650
- Page 1 Rinnai 650 / 750 GAS FIRE Operation / Installation Manual MODELS: RDV600ER / RDV700ER This appliance shall be installed in accordance with: • Manufacturer’s Installation Instructions • Current AS/NZS 5601 AS/NZS 3000 • Local Regulations and Municipal Building Codes including local OH&S requirements This appliance must be installed, maintained and removed by an Authorised Person.
- Page 2 Congratulations on the purchase of your Rinnai 650 or 750 Gas Fire. We trust you will have many years of comfort and enjoyment from your appliance. BEFORE PROCEEDING WITH THE OPERATION OR INSTALLATION OF YOUR NEW HEATER PLEASE READ THIS MANUAL THOROUGHLY AND GAIN A FULL UNDERSTANDING OF THE REQUIREMENTS, FEATURES AND OPERATION OF YOUR NEW APPLIANCE.
-
Page 3: Table Of Contents
CARE AND MAINTENANCE..........................15 SERVICE................................15 TROUBLE SHOOTING ............................. 15 ERROR CODES..............................16 TROUBLE SHOOTING CHECKLIST ........................ 17 ABNORMAL FLAME PATTERN........................18 CR2450 BUTTON BATTERIES......................... 18 TABLE OF CONTENTS - INSTALLATION......................19 CONTACT INFORMATION ..........................48 RDV 600_700 OIM Rinnai... -
Page 4: Before You Start
CARTON CONTENTS / ITEM CHECKLIST The components for Rinnai 650 and 750 Gas Fires are supplied in separate cartons, the following tables list which components are in each carton. Ensure that the components listed for the installation method being installed are present before proceeding with the installation. -
Page 5: Installation Record
The glass dress guard supplied with this appliance MUST NOT be permanently removed as it fulfils an operational safety function. WARNING Additional dress guards including free standing types may be WARNING used in conjunction with, but not replace, the dress guard supplied with this appliance. RDV 600_700 OIM Rinnai... -
Page 6: Safety
• DO NOT modify this appliance. Modifying from original specifications may create a dangerous situation and will void your warranty. • Only the flue components specified by Rinnai must be used. • Unpack the heater and check for damage. DO NOT INSTALL A DAMAGED HEATER. If the heater is damaged, contact your supplier for advice. - Page 7 DO NOT spray aerosols in the vicinity of this appliance while it is in operation. Most aerosols contain flammable substances which can be a heater hazard if used near this heater when it is in use. RDV 600_700 OIM Rinnai...
- Page 8 When the heater is operated for the first time or after long periods of non use a slight odour may be emitted, this is normal. However if odours persist switch ‘OFF’ the appliance and contact Rinnai. RDV 600_700 OIM Rinnai...
-
Page 9: Safety Devices
Refer to the trouble shooting guides on pages; 15 through 17 for further information. Pressure Relief: The burner box glass panel is secured to the burner box via spring loaded pressure relief fasteners. RDV 600_700 OIM Rinnai... -
Page 10: About Your Heater
ABOUT YOUR HEATER GENERAL DESCRIPTION The Rinnai 650 and 750 Gas Fire have a natural draft combustion system, intended for use with Natural Gas and Propane Gas. The Burning effect is achieved using one single main burner with strategically placed, 'life like', imitation logs / stones and granules. -
Page 11: Design Features
Viewing window for error code display (This is located behind the fascia, see page “ERROR CODES” on page 16 for details). Remote (IR) control STANDBY / ON button Flame Up / Down buttons Room temperature display (displays the current temperature of the room in which the control is located) RDV 600_700 OIM Rinnai... -
Page 12: Control Panel Operation
The heater will automatically modulate between flame settings to maintain the default set temperature of 22°C. No additional control of the flame or heat output is possible via the appliance ON/OFF button. RDV 600_700 OIM Rinnai... -
Page 13: Remote Control Operation
During normal operation the display will remain illuminated for approximately 5 seconds after a button has been pushed, constant activation will greatly reduce battery life. Avoid unnecessary activation. RDV 600_700 OIM Rinnai... -
Page 14: Replacing The Cr2450 Button Batteries
The heater will automatically modulate between flame settings to maintain the default set temperature of 22°C. No control of the flame or heat output is possible via the appliance ON/OFF button. RDV 600_700 OIM Rinnai... -
Page 15: Care And Maintenance
Rinnai recommend that this appliance and installation be inspected and serviced every 2 years or more frequently. If the power supply cord or any other component of the heater are damaged, they must be replaced by Rinnai or a suitably qualified person. -
Page 16: Error Codes
‘OFF’, then ‘ON’ again. If the Error Message still remains or returns on the next operation, contact WARNING Rinnai or your nearest service agent and arrange for a service call. Your Rinnai Gas Fire is also Error Code Viewing Window... -
Page 17: Trouble Shooting Checklist
CARE AND MAINTENANCE TROUBLE SHOOTING CHECKLIST Use the following chart to help determine whether a service call is required, however if you are unsure about the way your heater is operating, contact Rinnai or your local agent. Fault Fault Condition... -
Page 18: Abnormal Flame Pattern
CARE AND MAINTENANCE ABNORMAL FLAME PATTERN Each Rinnai Gas Fire has a distinct flame pattern. The flame should look the same every time you start your heater, after an initial warm up period of approximately 15 minutes. Abnormal flame performance and/or pattern can indicate a problem with your heater, such as blocked gas injectors, incorrectly installed / inadequate flue system or the Ceramic logs / stones and or burn media may have shifted from when the heater was first installed. -
Page 19: Table Of Contents - Installation
COMMISSIONING THE APPLIANCE FOR DIFFERENT GAS TYPE.............. 42 ATTACHING FASCIA ASSEMBLY ........................43 ABNORMAL FLAME PATTERN........................44 WIRING DIAGRAM.............................. 45 INSTALLATION AND COMMISSIONING CHECKLIST ..................46 CONTACT INFORMATION ......................... 48 THIS APPLIANCE MUST BE INSTALLED, SERVICED AND REPAIRED BY AN AUTHORISED PERSON. RDV 600_700 OIM Rinnai... -
Page 20: Specifications
Bunsen type burner Flue - Masonry Co-linear flexi flue, air intake Ø75mm, exhaust Ø100mm. Appliance MUST BE installed with a Rinnai flue System. Flueing - False Chimney Co-linear (air intake Ø75mm, exhaust Ø100mm) to Coaxial direct vent flueing (inner Ø100mm, outer Ø170mm). -
Page 21: Dimensions
Note: RDV700ER with three sided fascia shown for illustrative purposes External Dimensions - Flue Centre Gas Connection MODEL RDV600ER Three Sided Fascia RDV600ER Four Sided Fascia RDV700ER Three Sided Fascia RDV700ER Four Sided Fascia All dimensions are in mm RDV 600_700 OIM Rinnai... -
Page 22: Heater Location
IDEA Check the manufacturers installation instructions for these items and ensure the recess is suitable. Rinnai does not take any responsibility for any damage occurring to any items installed above and in the vicinity of the heater. NOTE ENCLOSURE REQUIREMENTS Masonry Fireplace The appliance must be positioned within the fireplace on a flat level surface. -
Page 23: Enclosure Dimensions
‡ Corner installations use False Fireplace enclosure dimensions and framing specifications. In a masonry fireplace, use a slurry of sand and cement to level the base as required. NOTE RDV 600_700 OIM Rinnai... -
Page 24: Heater Engine - General Installation
For masonry fireplace installations: Gas supply dimension MUST include the thickness of an infill IMPORTANT panel (when fitted). A standard Rinnai infill panel adds 2mm to the front of the enclosure. For false fireplace installations: Gas supply dimension MUST include the thickness of the cladding to be used. -
Page 25: Electrical Supply
FLUEING The following diagrams illustrate the flue installation options that are available for the RDV600ER and RDV700ER space heaters. Only the genuine Rinnai flue is certified as part of the space WARNING heaters installation requirements. Only an authorised person must install, service and remove the Rinnai RDV600ER and RDV700ER space heaters space heater &... - Page 26 (supplied with RDVFA) and the horizontal terminal (supplied as an additional flue component) to the exterior wall. Minimum and maximum flue length requirements MUST be observed. IMPORTANT RDV 600_700 OIM Rinnai...
- Page 27 High Wind Terminal Cap (Vertical Cowl) - 46DVA-VCH - Abey® Order Code: DV991 Square Horizontal Terminal Cap (Horizontal Terminal) - 46DVA-E48 (600mm) - Abey® Order Code: DV984 Horizontal Flue Spigot (Horizontal Masonry Terminal Mount) - Rinnai Order Code: R2449 RDV 600_700 OIM...
- Page 28 Flue Installation Dimensions and Restrictions (all dimensions in mm) This method NOT suitable for combustible material constructions. WARNING Vertical Horizontal Masonry Fireplace (Non-combustible ONLY) False Fireplace Max 2000 Max 2000 Min 245 Max 410 Vertical Off-Set Direct Horizontal Extended Horizontal RDV 600_700 OIM Rinnai...
- Page 29 A flue terminal is considered to be a source of ignition. For appliances not addressed above acceptance should be obtained from the Technical Regulator. FIGURE 6.2 (in-part) MINIMUM CLEARANCES REQUIRED FOR FAN-ASSISTED FLUE TERMINALS, ROOM-SEALED APPLIANCE TERMINALS AND OPENINGS OF OUTDOOR APPLIANCES RDV 600_700 OIM Rinnai...
-
Page 30: Heater Engine Installation
Secure both pipes to the spigot plate firmly with pipe clamps A horizontal masonry installation MUST use a horizontal masonry terminal mount to affix the co- linear adaptor and the horizontal wall terminal to the exterior wall. IMPORTANT DV 600_700 OIM Rinnai... - Page 31 (not supplied) using the three holes across the top of the fascia assembly mounting panel and the 3 holes on each side of the side panels as shown Step 9. Connecting Gas Continue to “CONNECTING GAS” on page 35. V 600_700 OIM Rinnai...
-
Page 32: False Fireplace Installation
If pre-fitting flue prior to engine delivery, leave sufficient lengths of both the Ø 100mm exhaust pipe and the Ø 75mm inlet pipe within the enclosure opening. This will enable connection IMPORTANT of the flues to the engine spigot plate which is on the heater to be installed. DV 600_700 OIM Rinnai... - Page 33 Remove To assist with flue and electrical connections, if possible leave any side cladding of the false HINT fire place open until the heater engine installation is finalised. V 600_700 OIM Rinnai...
- Page 34 (not supplied) using the three holes across the top of the fascia assembly mounting panel and the 3 holes on each side of the side panels as shown Step 11. Connecting Gas Continue to “CONNECTING GAS” on page 35. DV 600_700 OIM Rinnai...
-
Page 35: Connecting Gas
Use a soapy solution to test all gas connections. If a leak is present bubbles will form at the leak point. When finished remove any residue with a rag. Prevent any soapy solution from coming in CAUTION contact with electrical components. Continue to “BURNER MEDIA INSTALLATION” on page 36. V 600_700 OIM Rinnai... -
Page 36: Burner Media Installation
Locate the two slots in the base of the log and carefully place these over the positioning pins which are located at the rear of the burner box, ensuring that the detailed surface of the log is facing out to the front. DV 600_700 OIM Rinnai... - Page 37 “FRONT” and “REAR” logs. Step 8. Replacing the Burner Box Glass Replace burner box glass panel assembly in the reverse sequence to that explained in Step 1. on page 36. V 600_700 OIM Rinnai...
-
Page 38: Ceramic Stone Set Installation
Step 7 . Replacing the Burner Box Glass Replace burner box glass panel assembly in the reverse sequence to that explained on page 36 in Step 1. Removing the Burner Box Glass. DV 600_700 OIM Rinnai... -
Page 39: Commissioning Instructions
Gas supply pressure is to be checked with all other gas appliances in the household running on high. Failure to check this may result in lower than recommended required gas pressures, NOTE resulting is poor performance and reduced flame effect. V 600_700 OIM Rinnai... - Page 40 3. Press the 'TEST' button , twice on the PCB control panel, the igniter will spark and the appliance will light to its lowest setting, (Main burner - stage 1), and the display , will show DV 600_700 OIM Rinnai...
- Page 41 Always check gas pressure values to those recorded on this appliances data plate, values on the data plate override values printed in this instruction. WARNING V 600_700 OIM Rinnai...
-
Page 42: Commissioning The Appliance For Different Gas Type
, the gas type code will be shown on the display 4. Press the 'Set Button' , to lock in the code. 5. Gas pressure settings should now be checked as per Checking and setting Pilot burner pressure. - p.41, Steps 1 through 3. DV 600_700 OIM Rinnai... -
Page 43: Attaching Fascia Assembly
For protection of young children or the infirm a secondary guard is required. If the heater is not operating correctly refer to the “TROUBLE SHOOTING CHECKLIST” on page 17 before contacting Rinnai. WARNING It is the responsibility of the installer to check that under normal operating conditions of the appliance, all flue gases are exhausted to the outside atmosphere and that there is no spillage of combustion gases into the room. -
Page 44: Abnormal Flame Pattern
COMPLETING HEATER INSTALLATION ABNORMAL FLAME PATTERN Each Rinnai Gas Fire has a distinct flame pattern. The flame should look the same every time you start your heater, after an initial warm up period of approximately 15 minutes. Abnormal flame performance and/or pattern can indicate a problem with your heater, such as blocked gas injectors, incorrectly installed / inadequate flue system or the Ceramic logs / stones and or burn media may have shifted from when the heater was first installed. -
Page 45: Wiring Diagram
3 2 1 w w bk bk bl r OH.TH R.TH bl w FR2 FR1 SV 3 SV 2 SV 1 ON/OFF DISPLAY UNIT CONTROL DISPLAY UNIT WIRING DIAGRAM UNI CONTROL MODEL 3 1 Burner Issue A RDV 600_700 OIM Rinnai... -
Page 46: Installation And Commissioning Checklist
1. Is the appliance positioned in a suitable location (clearances, combustible clearances, mantels and surrounds etc)? 2. Was a Rinnai approved flue system installed and tested in accordance with the instructions? 3. Has the gas pressure been checked and set? 4. - Page 47 NOTES RDV 600_700 OIM Rinnai...
-
Page 48: Contact Information
Braeside, VIC 3195 For further information visit: www.rinnai.com.au Rinnai has a Service and Spare Parts network with personnel who are fully trained and equipped to give the best service on your Rinnai appliance. If your appliance requires service, please call our National Help Line. Rinnai recommends that this appliance be serviced every 2 years.
Need help?
Do you have a question about the 650 and is the answer not in the manual?
Questions and answers
Is there an apple app for gas fire 650