Axis A1001 User Manual
Network door controller & entry manager
Hide thumbs
Also See for A1001:
- Installation manual (210 pages) ,
- User manual (73 pages) ,
- Quick reference (28 pages)
Table of Contents
Advertisement
Advertisement
Table of Contents

Related Manuals for Axis A1001


Summary of Contents for Axis A1001
- Page 1 USER MANUAL AXIS A1001 Network Door Controller & AXIS Entry Manager...
- Page 2 Later versions cause harmful interference to radio or television reception, which of this document will be posted to the Axis website, as required. See can be determined by turning the equipment off and on, the user is also the product’s online help, available via the web-based interface.
- Page 3 • report problems to Axis support staff by logging in to your private your local authority responsible for waste disposal. Businesses should support area contact the product supplier for information about how to dispose •...
-
Page 4: Table Of Contents
Technical Specifications ........AXIS A1001 Network Door Controller ....... -
Page 5: Hardware Overview
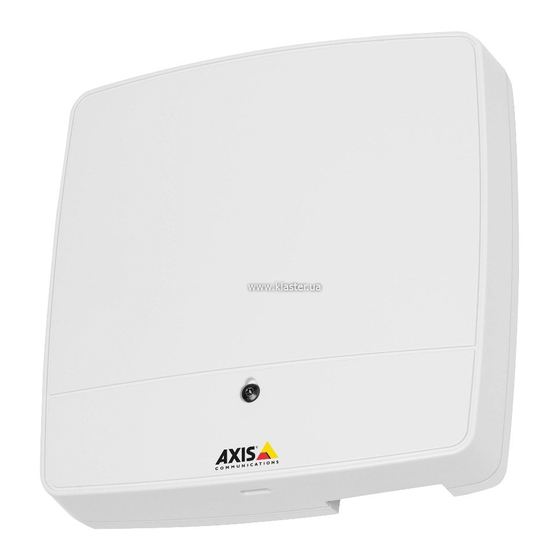
AXIS A1001 Network Door Controller & AXIS Entry Manager Hardware Overview Hardware Overview Front and back: Cover Cover screw Cover removal slot Base DIN clip – upper Tampering alarm switch – back DIN clip – lower Part number (P/N) & Serial number (S/N) - Page 6 AXIS A1001 Network Door Controller & AXIS Entry Manager Hardware Overview I/O interface: Reader data connector (READER DATA 1) 10 Reader data connector (READER DATA 2) Reader I/O connector (READER I/O 1) Reader I/O connector (READER I/O 2) Door connector (DOOR IN 1)
-
Page 7: Led Indicators
AXIS A1001 Network Door Controller & AXIS Entry Manager Hardware Overview LED indicators, buttons and other hardware: Power LED indicator Status LED indicator Network LED indicator Reader 2 LED indicator (not used) Reader 1 LED indicator (not used) Tampering alarm pin header – front (TF) Tampering alarm pin header –... -
Page 8: Connectors And Buttons
AXIS A1001 Network Door Controller & AXIS Entry Manager Hardware Overview Lock Green Steady when not energized. Steady when energized. Unlit Floating. Note • The Status LED can be configured to flash while an event is active. • The Status LED can be configured to flash for identifying the unit. Go to Setup > Additional Controller Configuration >... - Page 9 Resetting the product to factory default settings. See page 41. • Connecting to an AXIS Video Hosting System service. See page 35. To connect, press and hold the button for about 1 second until the Status LED flashes green. •...
-
Page 10: Accessing The Product
Macintosh computer (Mac OS X), click on the Bonjour tab and select the product from the drop-down list. If you do not know the IP address, use AXIS IP Utility to locate the product on the network. For information about how to discover and assign an IP address, see the Installation Guide, available on axis.com. -
Page 11: System Configuration
The first time you access the Axis product, the Overview page will prompt you to configure the hardware, to set date and time, to configure the network settings, and to configure the door controller as part of a system or as a standalone unit. -
Page 12: System Configuration
AXIS A1001 Network Door Controller & AXIS Entry Manager System Configuration To delete and reconfigure the hardware configuration, click Reset and start new hardware configuration. Locks 1. If a door monitor will be used, select Door monitor and then select the option that matches how the door monitor circuits will be connected. - Page 13 AXIS A1001 Network Door Controller & AXIS Entry Manager System Configuration Locked = Relay closed – Select for locks that unlock during power outages (fail open/safe). • None – Select if only one lock will be used. Note • Most lock, door monitor, and reader options can be changed without resetting and starting a new hardware configuration.
-
Page 14: Manage Network Door Controllers
AXIS A1001 Network Door Controller & AXIS Entry Manager System Configuration • Lock – Manually trigger the lock. Both primary locks and secondary locks if there are any will be affected. Click Lock or Unlock. • Lock (access) – Manually trigger the lock to grant access. Only primary locks will be affected. Click Access. - Page 15 AXIS A1001 Network Door Controller & AXIS Entry Manager System Configuration Add Door Controllers to the System Important When pairing door controllers, all access management settings on the added door controller will be deleted and overwritten by the system’s access management settings.
-
Page 16: Maintenance Instructions
System Configuration Maintenance Instructions To keep the access control system running smoothly, Axis recommends regular maintenance of the access control system, including door controllers and connected devices. Do maintenance at least once a year. The suggested maintenance procedure includes, but is not limited to, the following steps: •... -
Page 17: Access Management
AXIS A1001 Network Door Controller & AXIS Entry Manager Access Management Access Management The Access Management page allows you to configure and manage the system’s users, groups, doors, and schedules. To open the Access Management page, click Access Management. The access management structure is flexible, allowing you to develop a workflow that suits your needs. The following is a workflow example: 1. - Page 18 AXIS A1001 Network Door Controller & AXIS Entry Manager Access Management 3. To create a regular access schedule, select Addition Schedule, or to create a subtraction schedule, select Subtraction Schedule. 4. Click Save. To expand an item in the Access Schedules list, click .
-
Page 19: Groups
AXIS A1001 Network Door Controller & AXIS Entry Manager Access Management 5. Set the duration in the time fields. See Time. 6. For recurring schedule events, select the Recurrence pattern and Range of recurrence parameters. See Recurrence Pattern and Range of Recurrence. -
Page 20: Doors
AXIS A1001 Network Door Controller & AXIS Entry Manager Access Management To verify when and how a group can access certain doors, click To delete a group or group members, doors or schedules from a group, click The following credentials are available: •... - Page 21 AXIS A1001 Network Door Controller & AXIS Entry Manager Access Management Identification Types Identification types are portable credential storage devices, pieces of memorized information, or various combinations of the two that determine how users will be granted access to the door. Common identification types include tokens such as cards or key fobs, personal identification numbers (PINs), and request to exit (REX) devices.
-
Page 22: Users
AXIS A1001 Network Door Controller & AXIS Entry Manager Access Management 2. In the Doors list, click next to the door that you want to control. 3. Click the required door action. The available manual door actions are: • Get door status – Verify the current state of the door monitor, door alarms, and locks. - Page 23 AXIS A1001 Network Door Controller & AXIS Entry Manager Access Management • Card number (required if no PIN or card raw) – Enter the card number. See the card manufacturer’s information about where to locate the card number. The card number can also be retrieved by the system. Swipe the card on a connected reader, select the reader in the list, and click Retrieve.
-
Page 24: Access Management 17
AXIS A1001 Network Door Controller & AXIS Entry Manager Access Management 1. Open a plain text editor and create a new document. 2. Go to Setup > Export Users 3. Select all the values on the page and copy them. - Page 25 AXIS A1001 Network Door Controller & AXIS Entry Manager Access Management 3. Create a Subtraction schedule called Nights & weekends. 4. Create a nights and weekends Schedule item that recurs Sunday–Saturday 16:00–06:00. 5. Drag the predefined Always schedule and the Nights & weekends access schedule to the Day shift personnel group.
-
Page 26: Alarm And Event Configuration
AXIS A1001 Network Door Controller & AXIS Entry Manager Alarm and Event Configuration Alarm and Event Configuration Events that occur in the system, for example when a user swipes a card or a REX device is activated, are logged in the event log. -
Page 27: Events
Events The Axis product can be configured to perform actions when different events occur. For example, the product can send an email notification when an alarm is triggered. The set of conditions that defines how and when the action is triggered is called an Action Rule. - Page 28 System • System Ready – Triggers the action rule when the system is in state ready. For example, the Axis product can detect the system state and send a notification when the system has started. Select Yes to trigger the action rule when the product is in state ready. Note that the rule will only trigger when all necessary services, such as the event system, has started.
- Page 29 AXIS A1001 Network Door Controller & AXIS Entry Manager Alarm and Event Configuration • Output Port – Activate an I/O port to control an external device. • Send Notifications – Send a notification message to a recipient. • Status LED – The status LED can be set to flash for the duration of the action rule or for a set number of seconds. The status LED can be used during installation and configuration to visually validate if the trigger settings, for example the door open too long trigger, work correctly.
-
Page 30: Reader Feedback
AXIS A1001 Network Door Controller & AXIS Entry Manager Alarm and Event Configuration Recipients Recipients receive notification messages. The following recipients are available: • HTTP • HTTPS • Email • To add a recipient: 1. Go to Setup > Additional Controller Configuration > Events > Recipients and click Add. - Page 31 AXIS A1001 Network Door Controller & AXIS Entry Manager Alarm and Event Configuration Readers have different LED behaviors, but typically they use different sequences of steady lights and flashing lights in red, green, and amber. Readers can also use one-pitch beepers to send messages, using different sequences of short and long beeper signals.
-
Page 32: System Options
IP address filtering is enabled on the Setup > Additional Controller Configuration > System Options > Security > IP Address Filter page. Once enabled, the listed IP address are allowed or denied access to the Axis product. Select Allow or Deny from the list and click Apply to enable IP address filtering. - Page 33 Axis product: Server/Client certificates - To authenticate the Axis product. CA certificates - To authenticate peer certificates, for example the certificate of an authentication server in case the Axis product is connected to an IEEE 802.1X protected network.
-
Page 34: Date & Time
IPv4 Address Configuration By default, the Axis product is set to use IPv4 (IP version 4) and to obtain the IP address automatically via DHCP. The IPv4 settings are configured under Setup > Additional Controller Configuration > System Options > Network > TCP/IP > Basic. - Page 35 AXIS Video Hosting System (AVHS) AVHS used in conjunction with an AVHS service, provides easy and secure Internet access to controller management and logs accessible from any location. For more information and help to find a local AVHS Service Provider go to www.axis.com/hosting...
- Page 36 Host Name Configuration The Axis product can be accessed using a host name instead of an IP address. The host name is usually the same as the assigned DNS name. The host name is configured under Setup > Additional Controller Configuration> System Options > Network >...
- Page 37 (LAN) from the public network (Internet). Use NAT traversal when the Axis product is located on an intranet (LAN) and you wish to make it available from the other (WAN) side of a NAT router.
- Page 38 SOCKS is a networking proxy protocol. The Axis product can be configured to use a SOCKS server to reach networks on the other side of a firewall or proxy server. This functionality is useful if the Axis product is located on a local network behind a firewall, and notifications, uploads, alarms, etc need to be sent to a destination outside the local network (for example the Internet).
-
Page 39: Ports & Devices
The Axis product provides several maintenance functions. These are available under Setup > Additional Controller Configuration > System Options > Maintenance. Click Restart to perform a correct restart if the Axis product is not behaving as expected. This will not affect any of the current settings. -
Page 40: Support
Click Default to reset all settings, including the IP address, to the factory default values. This button should be used with caution. The Axis product can also be reset to factory default using the control button, see Reset to Factory Default Settings, on page 41. -
Page 41: Advanced
File Upload Files, for example web pages and images, can be uploaded to the Axis product and used as custom settings. To upload a file, go to Setup > Additional Controller Configuration > System Options > Advanced > File Upload. -
Page 42: Troubleshooting
To upgrade the product’s firmware: 1. Save the firmware file to your computer. The latest version of the firmware is available free of charge from Axis website at www.axis.com/techsup 2. Go to Setup > Additional Controller Configuration > System Options > Maintenance in the product’s web pages. -
Page 43: Symptoms, Possible Causes And Remedial Actions
Status indicator. 5. Reinstall the product, referring to the Installation Guide. If the emergency recovery procedure does not get the product up and running again, contact Axis support at www.axis.com/techsup/ Symptoms, Possible Causes and Remedial Actions Problems setting the IP address Try the installation again. - Page 44 AXIS A1001 Network Door Controller & AXIS Entry Manager Troubleshooting Status and Network indicator LEDs are flashing red rapidly Hardware failure Contact your Axis reseller.
-
Page 45: Technical Specifications
AXIS A1001 Network Door Controller & AXIS Entry Manager Technical Specifications Technical Specifications AXIS A1001 Network Door Controller Item Specifications Function/group Models AXIS A1001 Network Door Controller Door controller Readers Up to 2 readers per controller (Wiegand, RS485 (OSDP)) with supported card formats Doors 1–2 doors per controller... - Page 46 This product includes software developed by the OpenSSL Project for use in the OpenSSL Toolkit (http://www.openssl.org/), and cryptographic software written by Eric Young (eay@cryptsoft.com) In outdoor installations combining AXIS A1001 and AXIS T98A15-VE, the allowed maximum voltage is 30 V DC.
-
Page 47: Axis Entry Manager
AXIS A1001 Network Door Controller & AXIS Entry Manager Technical Specifications AXIS Entry Manager Item Specifications Function/group Models AXIS A1001 with built-in web-based software Door controller Readers Up to 2 readers per controller (Wiegand, RS485 (OSDP)) with supported card formats 1–33... -
Page 48: Connectors
This product includes software developed by the OpenSSL Project for use in the OpenSSL Toolkit (http://www.openssl.org/), and cryptographic software written by Eric Young (eay@cryptsoft.com) In outdoor installations combining AXIS A1001 and AXIS T98A15-VE, the allowed maximum voltage is 30 V DC. Connectors For information about the connectors’... - Page 49 AXIS A1001 Network Door Controller & AXIS Entry Manager Technical Specifications Reader Data Connector 6-pin terminal block supporting RS485 and Wiegand protocols for communication with the reader. The RS485 ports support: • Two-wire RS485 half duplex • Four-wire RS485 full duplex The Wiegand ports support: •...
- Page 50 AXIS A1001 Network Door Controller & AXIS Entry Manager Technical Specifications Function Notes Specifications 1, 3 0 V DC 0 V DC (-) 2, 4 Input For communicating with door monitor. 0 to max 40 V DC Digital input — Connect to pin 1 or 3 respectively to activate, or leave floating (unconnected) to deactivate.
- Page 51 AXIS A1001 Network Door Controller & AXIS Entry Manager Technical Specifications Function Specifications Power and Ethernet Power over Ethernet IEEE 802.3af/802.3at Type 1 Class 3 Max load on outputs = 7.5 W Power Lock Connector 4-pin terminal block for powering one or two locks (DC output). The lock connector can also be used to power external devices.
-
Page 52: Connection Diagrams
AXIS A1001 Network Door Controller & AXIS Entry Manager Technical Specifications Connection Diagrams Connect devices according to the hardware pin chart generated through the hardware configuration. For more information about hardware configuration and the hardware pin chart, see Configure the Hardware, on page 11. - Page 53 User Manual Ver. M2.2 AXIS A1001 Network Door Controller & AXIS Entry Manager Date: February 2014 © Axis Communications AB, 2013 - 2014 Part No. 56043...
Need help?
Do you have a question about the A1001 and is the answer not in the manual?
Questions and answers