Axis A1001 Installation Manual
Network door controller
Hide thumbs
Also See for A1001:
- Installation manual (210 pages) ,
- User manual (73 pages) ,
- Quick reference (28 pages)
Table of Contents
Advertisement
Quick Links
Advertisement
Table of Contents

Related Manuals for Axis A1001


Summary of Contents for Axis A1001
- Page 1 INSTALLATION GUIDE AXIS A1001 Network Door Controller...
- Page 2 This product fulfills the requirements for immunity Search by product, category, or phrase according to EN 61000-6-2 industrial environments. • report problems to Axis support staff by logging in to This product fulfills the requirements for immunity your private support area •...
- Page 3 Fax: +46 46 13 61 30 www.axis.com Supported Readers This list of supported readers is subject to change without notice. Contact your Axis reseller for information about supported readers. This product is compatible with UL-listed Wiegand access control readers This product is approved for use in systems that require UL...
-
Page 5: Safety Information
AXIS A1001 Network Door Controller Safety Information Read through this Installation Guide carefully before installing the product. Keep the Installation Guide for future reference. Hazard Levels DANGER Indicates a hazardous situation which, if not avoided, will result in death or serious injury. -
Page 6: Safety Instructions
Battery The Axis product uses a 3.0 V CR2032 lithium battery as the power supply for its internal real-time clock (RTC). Under normal conditions this battery will last for a minimum of five years. Low battery power affects the operation of the RTC, causing it to reset at every power-up. A log message will appear when the battery needs replacing. - Page 7 WARNING • Risk of explosion if the battery is incorrectly replaced. • Replace only with an identical battery or a battery which is recommended by Axis. • Dispose of used batteries according to local regulations or the battery manufacturer's instructions.
-
Page 9: Installation Steps
AXIS A1001 Network Door Controller Installation Guide This Installation Guide provides instructions for installing AXIS A1001 Network Door Controller on your network. For other aspects of using the product, see the User Manual available at www.axis.com Installation Steps 1. Make sure the package contents, tools and other materials necessary for the installation are in order. -
Page 10: Recommended Tools
AXIS T8129 PoE Extender Mains adaptor 24 V DC • AXIS T98A15-VE Surveillance Cabinet NOTICE NOTICE NOTICE In outdoor installations combining AXIS A1001 and AXIS T98A15-VE, the allowed maximum voltage is 30 V DC. For information about available accessories, see www.axis.com... -
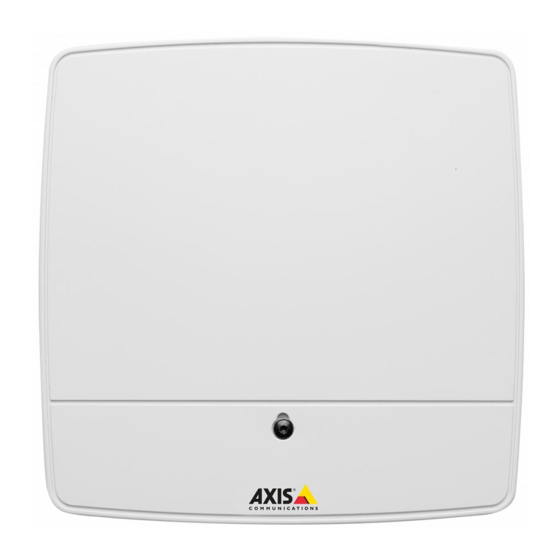
Page 11: Hardware Overview
AXIS A1001 Network Door Controller Hardware Overview Front and back: Cover Cover screw Cover removal slot Base DIN clip – upper Tampering alarm switch – back DIN clip – lower... - Page 12 AXIS A1001 Network Door Controller Part number (P/N) & Serial number (S/N) I/O interface: Reader data connector (READER DATA 1) 10 Reader data connector (READER DATA 2) Reader I/O connector (READER I/O 1) Reader I/O connector (READER I/O 2) Door connector (DOOR IN 1)
- Page 13 AXIS A1001 Network Door Controller LED indicators, buttons and other hardware: Power LED indicator Status LED indicator Network LED indicator Reader 2 LED indicator (not used) Reader 1 LED indicator (not used) Tampering alarm pin header – front (TF) Tampering alarm pin header – back (TB)
-
Page 14: Led Indicators
AXIS A1001 Network Door Controller LED Indicators Color Indication Network Green Steady for connection to a 100 MBit/s network. Flashes for network activity. Amber Steady for connection to a 10 MBit/s network. Flashes for network activity. Unlit No network connection. - Page 15 AXIS A1001 Network Door Controller • Digital output – For connecting, for example, reader beepers and reader LEDs. Door Connector Two 4-pin terminal blocks for connecting door monitoring devices and request to exit (REX) devices Auxiliary Connector 4-pin configurable I/O terminal block. Use with external devices, in combination with, for example tampering alarms, event triggering and alarm notifications.
-
Page 16: Specifications
The control button is used for: • Resetting the product to factory default settings. See page 35. • Connecting to an AXIS Video Hosting System service or AXIS Internet Dynamic DNS Service. For more information about these services, see the User Manual. Specifications Operating Conditions The Axis product is intended for indoor use. - Page 17 AXIS A1001 Network Door Controller Connectors For information about the connectors’ positions, see Hardware Overview, on page 11. For connection diagrams and information about the hardware pin chart generated through the hardware configuration, see Connection Diagrams, on page 21 and Configure the Hardware, on page 23.
- Page 18 AXIS A1001 Network Door Controller Reader I/O Connector 6-pin terminal block for: • Auxiliary power (DC output) • Digital Input • Digital Output • 0 V DC (-) Function Notes Specifications 0 V DC 0 V DC (-) DC output For powering auxiliary equipment.
- Page 19 AXIS A1001 Network Door Controller Auxiliary Connector 4-pin configurable I/O terminal block for: • Auxiliary power (DC output) • Digital Input • Digital Output • 0 V DC (-) For an example connection diagram, see Connection Diagrams, on page 21.
- Page 20 AXIS A1001 Network Door Controller Function Notes Specifications 0 V DC 0 V DC (-) For powering controller when not using DC input 10–30 V DC, max 26 W, Power over Ethernet. Max load on outputs = Note: This pin can only be used as 14 W power in.
-
Page 21: Connection Diagrams
AXIS A1001 Network Door Controller Power & Relay Connector 6-pin terminal block with built-in relay for: • External devices • Auxiliary power (DC output) • 0 V DC (-) Connect locks and loads to the pins according to the hardware pin chart generated through the hardware configuration. -
Page 22: Install The Hardware
Auxiliary Connector I/O configured as input I/O configured as output Install the Hardware CAUTION Never mount the Axis product while power is applied to the product. Always apply power at the end of the installation. NOTICE NOTICE NOTICE To protect the circuits against electrostatic discharge (ESD), use ESD protection when handling the product while the components and contacts are exposed. -
Page 23: System Considerations
The Axis product should be installed on a wall (preferred) or a ceiling, with or without a junction box. It can also be installed on a DIN rail. -
Page 24: Wall And Ceiling Mount
AXIS A1001 Network Door Controller 9. Disconnect the product from the network. If not powering the product through Power over Ethernet, also disconnect the product from its power source. To cancel the hardware configuration, click Cancel. This can be done in any of the hardware configuration pages. -
Page 25: Din Rail Mount
AXIS A1001 Network Door Controller Base Screw hole (4x) 6. Connect the cables. See page 26. DIN Rail Mount 1. If required, install a DIN rail (not included). 2. If required, remove the cover screw, insert a slotted screwdriver into the cover removal slot and remove the cover. -
Page 26: Connect The Cables
2.5 mm (0.1 in). If the base is bent, the cover will not close. 8. Connect the cables. See page 26. Connect the Cables CAUTION Disconnect power before connecting any wires to the Axis product. Never make connections while power is applied to the product. - Page 27 AXIS A1001 Network Door Controller NOTICE NOTICE NOTICE • The product shall be connected using a shielded network cable (STP). All cables connecting the product to the network shall be intended for their specific use. Make sure that the network devices are installed in accordance with the manufacturer’s instructions. For information about regulatory requirements, see Regulatory Information, on page 2 .
- Page 28 AXIS A1001 Network Door Controller 3. Strip the cables and wires as required using a crimp tool. 4. Connect the wires between the door controller and the locks, doors and other devices. For more information about the connectors and their specifications, see page 14 and page 17.
- Page 29 AXIS A1001 Network Door Controller Note • For devices that have been configured in the product’s hardware configuration pages, use the hardware pin chart as a guide on how to connect the pins. For more information about hardware configuration and the hardware pin chart, see Configure the Hardware, on page 23.
-
Page 30: Access The Product
AXIS A1001 Network Door Controller 9. Make sure that the LEDs indicate the correct conditions. See LED Indicators, on page 14. 10. Attach the cover to the base and tighten the cover screw. Cover Cover screw (T10) Access the Product The product can be used with most operating systems and browsers. -
Page 31: Access From The Internet
If you do not know the IP address, use AXIS IP Utility to locate the product on the network. For information about how to discover and assign an IP address, see Assign an IP Address. - Page 32 AXIS IP Utility automatically discovers and displays Axis products on your network. The application can also be used to manually assign a static IP address. Note that the computer running AXIS IP Utility must be on the same network segment (physical subnet) as the Axis product.
- Page 33 7. For information about how to set the password, see page 34. Assign IP Addresses in Multiple Devices AXIS Camera Management speeds up the process of assigning IP addresses to multiple devices by suggesting IP addresses from a specified range.
-
Page 34: Set The Root Password
Utilities. Set the Root Password To access the Axis product, you must set the password for the default administrator user root. This is done in the Configure Root Password dialog, which opens when the product is accessed for the first time. -
Page 35: Reset To Factory Default Settings
AXIS A1001 Network Door Controller To prevent network eavesdropping, the root password can be set via an encrypted HTTPS connection, which requires an HTTPS certificate. HTTPS (Hypertext Transfer Protocol over SSL) is a protocol used to encrypt traffic between web browsers and servers. The HTTPS certificate ensures encrypted exchange of information. -
Page 36: Further Information
Further Information The User Manual is available at www.axis.com Visit www.axis.com/techsup to check if there is updated firmware available for your network product. To see the currently installed firmware version, go to Setup > About. Visit Axis learning center www.axis.com/academy for useful trainings, webinars, tutorials and guides. - Page 38 Installation Guide Ver. M2.3 AXIS A1001 Network Door Controller Date: November 2013 © Axis Communications AB, 2013 Part No. 54596...
Need help?
Do you have a question about the A1001 and is the answer not in the manual?
Questions and answers