Table of Contents
Advertisement
Quick Links
Advertisement
Table of Contents

Subscribe to Our Youtube Channel
Related Manuals for Konica Minolta Di551


Summary of Contents for Konica Minolta Di551
- Page 1 Advanced Information Di551/Di650 www.minoltaeurope.com The essentials of imaging...
-
Page 3: Table Of Contents
Large Capacity Cassette (LCC) C-404 .........2-14 Hole-Punch Unit PK-2/PK-5 ............2-15 Memory Expansions..............2-15 Printer Control Device Pi6500e.............2-15 HDD-2 Hard Disk ................2-15 Total Counter ................2-15 Safe Working with Your System ..........2-16 Laser Safety..................2-20 Internal Laser Radiation..............2-20 Safety Label ..................2-22 System serial number ..............2-24 Di551/Di650 IVZ-1... - Page 4 . . . When Working with your System..........2-60 . . . When Servicing and Repairing the System ......2-60 2.16 Proper Use of Your System ............2-61 Initial Steps . . . Basic Operator Steps ..............3-1 Entering the Number of Copies ............3-1 IVZ-2 Di551/Di650...
- Page 5 Viewing the Meter Counts .............3-38 Printing the Counter List..............3-39 3.11 Enabling Energy Saving Modes..........3-40 Enabling Energy Saving Mode............3-41 Enabling Auto Shut Off Mode............3-42 3.12 Using the Bypass Tray ...............3-43 Load the Paper on to the Bypass Tray..........3-43 Processing Tab Papers..............3-44 Di551/Di650 IVZ-3...
- Page 6 Specify Copy Start on Wide Size Paper for the Bypass Tray ..4-62 Applying Functions ..............4-64 Storing Originals (from the Original Glass)........4-65 Storing Originals (from the EDH)..........4-67 Applying 90° Rotation ..............4-69 Set Original Position (Special Originals)........4-73 IVZ-4 Di551/Di650...
- Page 7 Using Non-Image Area Erase.............5-30 Information on: Non-Image Area Erase ........5-31 Procedure: Using Non-Image Area Erase........5-32 5.10 Creating Reverse Images ............5-33 Information on: Reverse Image.............5-33 Procedure: Creating Reverse Image..........5-34 5.11 Using Image Repeat Mode ............5-35 Information on: Repeat..............5-36 Procedure: Using Repeat Mode............5-38 Di551/Di650 IVZ-5...
- Page 8 Calling up Key Operator Mode ............7-2 Leaving Key Operator Mode............7-2 Overview of the Key Operator Mode Menu ........7-3 (1) System Initial Setting .............. 7-5 (1) Date & Time Setting ..............7-5 (2) Language Select Setting ............7-7 IVZ-6 Di551/Di650...
- Page 9 (12) Energy Saver Setting............7-48 7.14 (13) Memory Switch Setting ............7-49 Changing Settings.................7-49 Overview of Settings ..............7-50 7.15 (14) Machine Management List Print.........7-55 7.16 (15) Call Remote Center..............7-57 7.17 (16) Side 2 Lens Adjustment ............7-59 7.18 (17) Finisher Adjustment............7-60 Di551/Di650 IVZ-7...
- Page 10 System Maintenance ..............9-1 Cleaning System Parts ..............9-1 Cleaning the Original Cover and Original Glass......9-2 Specifications ................9-3 System Di551/Di650............... 9-3 Electronic Document Handler (EDH-4)........... 9-5 Finisher FN-6 (optional)..............9-5 Finisher FN-113 (optional).............. 9-6 Cover Inserter B (optional for Finisher FN-6) ......... 9-7 Hole-Punch Unit PK-2/PK-5 (optional for Finisher FN-6) ....
- Page 11 . . . with the Automatic Duplex Unit ..........9-14 . . . with the Cover Inserter B (optional).........9-14 . . . with Punch/Z-fold Unit ZK-2 (optional) ........9-15 . . . with the FN-113 and FN-6 Finishers (optional) .......9-16 CE Marking (Declaration of Conformity)........9-18 Index.....................9-19 Di551/Di650 IVZ-9...
- Page 12 IVZ-10 Di551/Di650...
-
Page 13: Introduction
Please keep the serial number (located on the system’s rating plate) and the system’s date of purchase handy to ensure fast, accurate assistance in the event of difficulties..because we want you to be a satisfied customer. Di551/Di650... -
Page 14: Protecting The Environment
This system complies with the Energy Star energy efficiency criteria. Use of Recycled Paper This system is designed to use recycled paper that conforms to CEN/CLC 12281 or DIN 19309. Your local MINOLTA representative will be pleased to provide more information. Di551/Di650... -
Page 15: Guide To This Manual
Troubleshooting This chapter contains tables and instructions to help you recognize faults and eliminate malfunctions. Appendix The appendix contains a collection of useful supplementary information such as: • System maintenance • Specifications • Index Di551/Di650... -
Page 16: A Brief Explanation Of The Conventions Used In This Manual
The arrow marks the precautionary measure required to avoid the danger. CAUTION This is a caution! The caution points out a potential and dangerous situation. Not observing the caution can lead to personal and/or system damage. ➜ The arrow marks the precautionary measure required to avoid the danger. Di551/Di650... - Page 17 Step 3 of a sequence of actions ❍ This bullet indicates a list within a sequence of actions. ❍ This is a helpful hint Texts highlighted in this manner contain useful little tips and tricks for the copying process. Di551/Di650...
-
Page 18: A Brief Explanation Of Important Concepts And Symbols
Whenever paper dimensions are specified in the Owner’s Manual, the first value always refers to the width of the paper (side A) and the second to the length (side B). 21 x 29.7 cm Width of the paper Length of the paper (side A) (side B) Di551/Di650... - Page 19 29.7 x 21 cm Lengthwise Crosswise Size data with or without "R"? Lengthwise sizes are specified with an "R". If it is clear which direction the size has to bed inserted (e.g. A3 can only be fed lengthwise), the "R" is omitted. Di551/Di650...
-
Page 20: Overview Of System Features
(optional), as a printer server on a network operating system. The device is designed for an average volume of 50,000 to 70,000 (Di551) or 100,000 (Di650) printouts per month. The digital technology and the memory capacities of this system give it a range of features that goes far beyond common copier functions. - Page 21 AMS = automatic zoom factor selection to copy mixed size originals onto a specific paper size. APS = automatic paper selection to select paper based on the originals and a magnification ratio. Non-Image Area Erase Copy with the original cover open without getting the familiar black edges. Di551/Di650...
- Page 22 Sheet/Cover Insertion Insert up to 30 separator sheets and/or cover and back sheets from one of the paper drawers or from the bypass tray. The inserts, cover and back sheets can be printed or left blank as desired. 1-10 Di551/Di650...
- Page 23 Process paper sizes that are larger than the standard sizes. Z-fold for Finisher FN-6 (optional) with Punch/Z-fold Unit ZK-2 (optional) Provides A3 copies with a Z-fold or folds B4 copies twice. Z-Folded Original Automatically feed in originals with Z folds using the EDH. Di551/Di650 1-11...
-
Page 24: Automatic Features
Automatically switches the paper trays when paper runs out. This enables copying to be continued without interruption when a paper tray is emptied. Rotation Automatic rotation of the image area when the alignment of the originals does not correspond to the paper alignment. 1-12 Di551/Di650... -
Page 25: Finishing Features
Copies are output in the order in which the originals were scanned. The copy sets are output alternating lengthwise and crosswise. Group The copies are output in groups. Rotation Group The copies are output in groups. The copy sets are output alternating lengthwise and crosswise. Di551/Di650 1-13... -
Page 26: Features That Can Only Be Set Up By A Service Technician
View the Weekly Timer Times on the Help Screen The service technician can set up a button on the help screen to call up the weekly timer times. This button then allows the user to view the weekly timer times. 1-14 Di551/Di650... -
Page 27: Getting To Know Your System
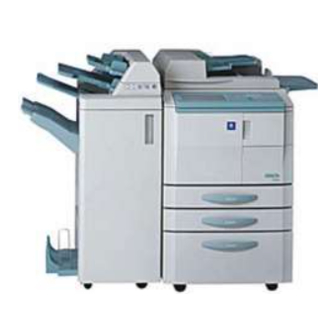
Bypass Tray Holds up to 100 sheets of standard paper (80 g/m²) or 1 sheet of special paper Large Capacity Holds up to 4,000 sheets of standard paper Cassette LCC (80 g/m²) (optional) . . . continued on next page Di551/Di650... - Page 28 Open these doors to clear paper misfeeds Punch/Z-fold Unit Punches and Z-folds copies (option) Finisher (option) Used for regulated, stacked or sorted output of copies Power switch Switches the system on and off (weekly timer remains active) . . . continued on next page Di551/Di650...
- Page 29 Getting to Know Your System Item Name Description Main switch Switches the system off (weekly timer is disabled) LCD touch screen Touch-sensitive screen for viewing and modifying system jobs and settings Control panel Provides the keys for operating the system Di551/Di650...
-
Page 30: Internal System Overview
Drum unit The image is generated on the drum unit Fixer unit Fuses the toner onto the paper Total Counter Displays the total number of copies and printouts made Di551/Di650... -
Page 31: Options (Accessories)
Do not exceed the capacity of the offset trays! Do not exceed the capacity of the finisher offset trays, otherwise a paper misfeed may occur. You should empty the offset trays during a large copy job to avoid exceeding the capacity. Di551/Di650... -
Page 32: Finisher Fn-6
Finisher door Open this door to • clear a paper misfeed • fill the staple cartridges Booklet output Copies processed using the “Folding” and “Stapling & Folding” features are output here Copy basket Catches copies discharged by the booklet output Di551/Di650... - Page 33 Transport rollers Rotate the transport rollers to transport jammed paper out of the staple unit Lever for opening the Open the paper-jam door to remove jammed paper-jam door paper . . . continued on next page Di551/Di650...
- Page 34 Open the paper-jam door to remove jammed paper-jam door paper Handle on the stapler Pull the stapler unit out by this handle, to unit remove jammed paper or fill the staple cartridges Staple cartridges Replace the staple cartridges when the staples run out Di551/Di650...
- Page 35 Do not exceed the capacity of the offset trays! Do not exceed the capacity of the finisher offset trays, otherwise a paper misfeed may occur. You should empty the offset trays during a large copy job to avoid exceeding the capacity. Di551/Di650...
-
Page 36: Finisher Fn-113
Open the paper-jam door to remove jammed door (FN1) paper Recessed Grip Place a hand in the recessed grip and pull the finisher away from the main unit • to clear a paper misfeed • to replenish staples 2-10 Di551/Di650... -
Page 37: Punch/Z-Fold Unit Zk-2
Handle Pull the unit out by the handle to clear a paper Lever for opening the Open the paper-jam door to remove jammed paper-jam door paper Waste container This is where the punch waste is collected Di551/Di650 2-11... -
Page 38: Cover Inserter B For Finisher
Place cover pages for automatic feed Lower tray You can place paper here • for automatic feed of cover pages • if you want to staple, punch and/or fold copies manually Lower paper feeders Ensure correct alignment of the paper stack 2-12 Di551/Di650... -
Page 39: Large Capacity Cassette (Lcc) C-403
Ensure correct alignment of the paper stack Button for lowering the Press this button to lower the paper plate and paper plate refill with new paper Paper plate Automatically lifts the paper stack Rear tray Ensures correct alignment of the paper stack Di551/Di650 2-13... -
Page 40: Large Capacity Cassette (Lcc) C-404
Ensure correct alignment of the paper stack Button for lowering the Press this button to lower the paper plate and paper plate refill with new paper Paper plate Automatically lifts the paper stack Rear tray Ensures correct alignment of the paper stack 2-14 Di551/Di650... -
Page 41: Hole-Punch Unit Pk-2/Pk-5
128 MB Extended Memory 256 MB Extended Memory Printer Control Device Pi6500e Allows the system to be used as a printer. HDD-2 Hard Disk Enables permanent storage of job and image data. Total Counter Records the copies made for accounting purposes. Di551/Di650 2-15... -
Page 42: Safe Working With Your System
Never insert paper clips, staples or other small pieces of metal into the openings of the system. If metal items should ever accidentally fall into the system, switch the system off immediately. Unplug the power cable. Consult your technical representative. 2-16 Di551/Di650... - Page 43 Note that the system is still switched on even when it is in low power mode. ➜ Always switch off the system using the main power switch if the system is not going to be used for a long time. Di551/Di650 2-17...
- Page 44 ➜ When carrying out a procedure, touch only those parts of the system that must be touched for this procedure as described in this manual. ➜ Never put your hands into the booklet output of the finisher. 2-18 Di551/Di650...
- Page 45 A negligible amount of ozone is released during printing! While this is not a health hazard, it may result in an unpleasant odor. It is recommended that the room be well ventilated. ➜ Locate the system in a well-ventilated room. Di551/Di650 2-19...
-
Page 46: Laser Safety
Print head The above illustration indicates the location of the print head of the system. This is a semiconductor laser system. The maximum radiation capacity of the laser diode is 15 mW. The wavelength is 775-800 nm. 2-20 Di551/Di650... - Page 47 Operating the system in a manner that does not conform to the descriptions provided in this manual can lead to the release of hazardous radiation. ➜ Operate the system only in accordance with the instructions provided in this manual. Di551/Di650 2-21...
-
Page 48: Safety Label
Use this operating manual to familiarize yourself with the hazards before carrying out any activity in a hazard area. ➜ Clean soiled safety labels to keep them visible and legible. Replace safety labels if they become illegible. For further information, consult your technical representative. 2-22 Di551/Di650... - Page 49 DO NOT place your hand on the paper stack because the finisher tray moves (Finisher FN-6 only) upward if pressure is exerted on it and could crush your fingers in the finisher paper exit. (Finisher FN-112/FN-6) Di551/Di650 2-23...
-
Page 50: System Serial Number
The serial number is located on a label at the following position: Make a note of the serial number of your system in the table below. Please keep this information at hand in the event of any questions for fast help in the event of problems. Model: Serial No.: 2-24 Di551/Di650... -
Page 51: Transporting The System
External influences can cause damage to the system! The main tray of the finisher lowers during the output cycle. Objects located under the main tray can damage the main tray. ➜ Do not put any objects under the main tray of the finisher. Di551/Di650 2-25... -
Page 52: Space Required For System
Objects located under the main tray can cause serious damage to the main tray. Units in mm 1620 1140 1525 1836 Di551/Di650 1620 1620 1140 2021 1836 Di650 + Finisher FN-6 + large capacity cassette (LCC) C-403... -
Page 53: Storing Supplies
Units in mm 1620 1140 1620 1836 2435 Di551/Di650 + Finisher FN-6 + Z-fold Unit ZK-2 + Cover inserter B + Large Capacity Cassette (LCC) C-404 Storing Supplies WARNING Toner can be hazardous to your health! Toner is harmful to your health. -
Page 54: Switching The System On And Off
Switch on the system power supply with the main switch. ➜ Switch the main switch to position I. To be able to use the copy feature, you must switch on the system again with the power switch. For more information, see page 2-30. 2-28 Di551/Di650... -
Page 55: Switching Off Power Supply
Wait 10 seconds! If you want to switch the system off and then on with the main switch, wait 10 seconds before switching the system on again. Otherwise malfunctions may occur. Di551/Di650 2-29... -
Page 56: Switching On The System (Daily)
Press the power switch to switch on the system. The warm-up phase (about 5 and a half minutes for the Di551, about 6 minutes for the Di650) begins. A copy job can be set up now. Touch the touch screen briefly. -
Page 57: Switching Off The System (Daily)
Use the power switch to switch off the system daily. The weekly timer remains enabled after switching off. Press the power switch to switch off the system. The system is switched off. The weekly timer draws a minimum amount of power to remain functional. Di551/Di650 2-31... -
Page 58: Control Panel Keys And Indicators
Energy saver On/Off Key • to enable and disable the energy- saving function • to interrupt the weekly timer function Panel reset Press this key to reset the system to the default setting . . . continued on next page 2-32 Di551/Di650... - Page 59 Stop Press this key to stop a copy cycle Start To start a copy or scan cycle Utility Press to display the meter count display Proof Copy To output a test copy with the current system settings Di551/Di650 2-33...
-
Page 60: Indicators And Keys On The Touch Screen
• Dual Page • Chapter Mode Rotation OFF This key switches page rotation on or Store Turns document memory on or off System memory Indicator Shows the remaining available memory capacity . . . continued on next page 2-34 Di551/Di650... - Page 61 Output display Indicator Displays the selected finishing mode. Job folder Key/ • Used to select a reserve job Indicator • Displays status messages regarding a job Messages and Indicator Displays the current messages and status displays status values Di551/Di650 2-35...
-
Page 62: Using The Touch Screen
Never place heavy objects on the touch screen. ➜ Use care when touching the surface of the touch screen. ➜ Do not apply strong pressure to the surface. ➜ Avoid touching the surface of the touch screen with sharp objects. 2-36 Di551/Di650... -
Page 63: Adding Paper
Paper Tray 4 - LCC (optional) Capacity: up to 4,000 sheets (80 g/m²) Inserting special papers! When you are processing special papers, make sure that the paper tray is set for that type of paper. For more information, see page 7-30. Di551/Di650 2-37... -
Page 64: Refilling Trays 1 And 2
500 sheets (80 g/m²) ❍ Tray 2 up to 500 sheets (80 g/m²) Make sure not to exceed the maximum paper filling level. The paper stack must not be higher than the red mark of the indicator. 2-38 Di551/Di650... - Page 65 For more information, see page 7-30. 1, 2, 3 Section 3 Management Section 1 Introduction 1, 2, 3, 1, 2, 3, 1, 2, 3 Section 3 Section 3 Management Section 3 Management Section 1 Section 1 Section 1 Management Introduction Introduction Introduction Di551/Di650 2-39...
-
Page 66: Refilling Tray 3
❍ Tray 3 up to 1,500 sheets (80 g/m²) Make sure not to exceed the maximum paper filling level. The paper stack must not be higher than the red mark of the indicator. 2-40 Di551/Di650... - Page 67 For more information, see page 7-30. 1, 2, 3 Section 3 Management Section 1 Introduction 1, 2, 3, 1, 2, 3, 1, 2, 3 Section 3 Section 3 Management Section 3 Management Section 1 Section 1 Section 1 Management Introduction Introduction Introduction Di551/Di650 2-41...
-
Page 68: Add Paper To Paper Tray 4 - C-404 (Option)
Repeat steps 2 to 4 until the tray is full. Make sure not to exceed the maximum paper filling level. The paper stack must not be higher than the red mark of the indicator. Close the top cover of the paper tray. 2-42 Di551/Di650... - Page 69 For more information, see page 7-30. 1, 2, 3 Section 1 Introduction Section 1 Introduction 1, 2, 3, 1, 2, 3, 1, 2, 3 Section 1 Section 1 Section 1 Introduction Introduction Introduction Section 1 Section 1 Introduction Section 1 Introduction Introduction Di551/Di650 2-43...
-
Page 70: Add Paper To Paper Tray 4 - C-403 (Option)
Repeat steps 2 to 4 until the tray is full. Make sure not to exceed the maximum paper filling level. The paper stack must not be higher than the red mark of the indicator. Close the top cover of the paper tray. 2-44 Di551/Di650... - Page 71 For more information, see page 7-30. 1, 2, 3 Section 1 Introduction Section 1 Introduction 1, 2, 3, 1, 2, 3, 1, 2, 3 Section 1 Section 1 Section 1 Introduction Introduction Introduction Section 1 Section 1 Introduction Section 1 Introduction Introduction Di551/Di650 2-45...
-
Page 72: Filling The Bypass Tray
Slide the edge guides to fit the size of the inserted paper. Processing special paper using the bypass tray! You can use the bypass tray to process special paper, such as tab papers, OHP transparencies and others. For more information, see page 3-43. 2-46 Di551/Di650... - Page 73 For more information, see page 7-30. 1, 2, 3 Section 1 Introduction Section 1 Introduction 1, 2, 3, 1, 2, 3, 1, 2, 3 Section 1 Section 1 Section 1 Section 1 Introduction Introduction Introduction Section 1 Introduction Section 1 Introduction Introduction Di551/Di650 2-47...
-
Page 74: Adding Toner
Use only toner that is suitable for this system. The number of copies that can be made with the toner cartridge is 44,000 (A4 with 6% coverage). If you have questions, please contact your technical representative. Add toner. Open the toner door. 2-48 Di551/Di650... - Page 75 Getting to Know Your System Pull the locking lever forward. Pull the toner bottle holder carefully out. Remove the used toner cartridge. Shake the new cartridge several times. This loosens any clumps of toner. Remove the plastic closure from the toner cartridge. Di551/Di650 2-49...
- Page 76 Getting to Know Your System Place the new toner cartridge in its holder. Make sure that the back of the cartridge is securely in the guide. Slide the toner bottle holder carefully back in position. Close the toner door. 2-50 Di551/Di650...
-
Page 77: Replenishing The Staple Supply
If the staple magazine runs out, a message is displayed on the touch screen. Use only staples that are suitable for this system. If you have questions, please contact your technical representative. Finisher FN-6 This finisher has one staple unit. Open the finisher door. Carefully remove the stacker unit. Di551/Di650 2-51... - Page 78 Leave the remaining staples in the stapler head, otherwise the first copy set after refilling it will not be stapled. Insert a new staple cartridge into the stapler head. The arrows must be aligned over each other. 2-52 Di551/Di650...
- Page 79 Hook the stapler head back into the stapler unit. Push the stapler head back along its guides. Finally push the stapler head down a little until it latches in place. Carefully slide the stacker unit back. Close the finisher door. Di551/Di650 2-53...
- Page 80 Open the cover (H3) at the right of the finisher. Open the cover (FN7) at the right of the finisher. Rotate the green dial to the left to move the staple units to the centre position. 2-54 Di551/Di650...
- Page 81 You can now remove the empty staple magazine. Position a new staple cartridge. Carefully remove the seal from the staples. Position the staple unit back in the holder. The staple unit clicks into the holder with an audible click. Di551/Di650 2-55...
- Page 82 Getting to Know Your System Open the cover (FN7) at the right of the finisher. Open the cover (H3) at the right of the finisher. Slide the finisher carefully back to the copier. 2-56 Di551/Di650...
-
Page 83: Monitoring The Pm Count Time
View the time of the next maintenance interval. Press the [UTILITY] key on the control panel. Utility The counter list is displayed. Press the [MODE CHECK] key on the control panel. Mode check The PM count is displayed on the counter list. Di551/Di650 2-57... -
Page 84: Printing The Pm Count
Press the [START] key on the control panel to start the printout of the counter list. The counter list is printed. Closing the PM Count Screen Close the PM count screen. ➜ Press [EXIT] to return to the default settings. The default settings are displayed again. 2-58 Di551/Di650... -
Page 85: Shutting Down The System
Remove the power plug from the outlet. Store the system in a dry, dust-free room. Ensure that the system is not subject to vibrations. Protect the system against: Splashing liquids Direct sunlight Strong temperature fluctuations Direct air flow from heating or air conditioning units Di551/Di650 2-59... -
Page 86: Note The Following Important Information
Allow only specially trained and authorized service personnel to carry out maintenance and repairs. ➜ If the service call message is displayed on the touch screen and the system does not respond, write down the error code. Unplug the power cable. Consult your technical representative. 2-60 Di551/Di650... -
Page 87: Proper Use Of Your System
These include: Money Stamps (cancelled or uncancelled) Personal identification cards Vehicle registration documents Copyrighted materials (without the permission of the copyright holder) If you are unsure whether a certain document may be copied, please consult the relevant public authorities. Di551/Di650 2-61... - Page 88 Getting to Know Your System 2-62 Di551/Di650...
-
Page 89: Initial Steps
10-Key Pad. The entered number of copies is displayed in the upper right-hand corner of the touch screen. Did you enter an incorrect number? ➜ Press the [C] key on the control panel and enter the correct number of copies. Di551/Di650... -
Page 90: Start Cycle
The system is reset to the system default setting. Automatic Reset of the System In key operator mode, you can specify a time after which the system is automatically reset to its initial settings. For more information, see page 7-49. Di551/Di650... -
Page 91: Activating The System
The touch screen switches on again. The system is ready for operation. Setting Period for Automatic Shut off In key operator mode you can specify a period after which the system is automatically switched off. For more information, see page 7-48. Di551/Di650... -
Page 92: Interrupting Weekly Timer Mode
Confirm your input by pressing [START]. The system is ready for operation. Position original in the EDH face up Protecting the weekly timer with a code You can specify a 4-digit code for protecting the weekly timer. For more information, see page 7-45. Di551/Di650... - Page 93 Do not switch off the system power supply in weekly timer mode! Do not switch off the system with the main switch if the weekly timer is active. If this is done, the weekly timer function will be deleted. Di551/Di650...
-
Page 94: Entering The E.k.c. Password
You should lock the system again when you have finished copying to prevent anyone else using your cost center. Proceed as follows: Press and hold [C] and press [UTILITY]. Your copy data will be saved. The touch screen will show the message "Enter E.K.C. code". The system is locked. Di551/Di650... -
Page 95: Placing The Originals On The Original Glass
Push the original into the upper left corner of the original glass. Align the document along the positioning plate. Is the original transparent? ➜ Place a sheet of white paper of the same size on top of the original. Di551/Di650... - Page 96 To avoid black edges on your copies . . . If you are making single-sided copies from books, you can apply the “Frame/Fold Erasure” or “Non-Image Area Erase” feature to prevent unsightly black edges. Di551/Di650...
-
Page 97: Feeding Originals Using The Edh
OHP transparencies (overhead projector films), folded, curled paper, punched, stapled or bound paper. ➜ Manually place originals that are not suitable for the EDH onto the original glass. For more information, see page 3-7. Di551/Di650... -
Page 98: Loading Equal-Sized Originals Into The Edh
More than 100 originals? If you want to process more than 100 originals, you must place them by blocks and save them or work with the “Program Job” feature. For more information, see page 5-27. 3-10 Di551/Di650... -
Page 99: Loading Mixed-Sized Originals Into The Edh
A5R, B6R (A5 crosswise) Make sure not to exceed the maximum paper filling level. The paper stack must not be higher than the red mark of the indicator. Align the originals to the back side of the EDH. Di551/Di650 3-11... - Page 100 Initial Steps . . . Push the originals flush up against the feed chamber of the EDH. Slide the guide plates to fit the size of the largest original. 3-12 Di551/Di650...
-
Page 101: Place Z-Folded Originals In The Edh
Align the originals to the back side of the EDH. Push the originals flush up against the feed chamber of the EDH. Slide the document guide plates to fit the size of the originals. Di551/Di650 3-13... -
Page 102: Checking The System Settings
1st page – Basic & Special Originals 2nd page – Application Mode You can switch pages using the arrow keys found on the lower edge of the touch screen. These arrow keys, however, are displayed only if there are features enabled in “Application Mode”. 3-14 Di551/Di650... -
Page 103: Changing Settings
The selected function cannot be modified, only released. ➜ For more information, see page 3-16. Change the system setting as desired. Press the [MODE CHECK] key on the control panel to return to the check mode screen. Change any other settings, if necessary. Di551/Di650 3-15... -
Page 104: Releasing Settings
A dialog field is displayed to confirm the release. Confirm the release by pressing [YES]. The feature is released (switched off). Release or change any other settings, if necessary. Press the [EXIT] key to end this step. The basic options are displayed again. 3-16 Di551/Di650... -
Page 105: Processing A Proof Copy
Press the [EXIT] key to confirm the new copier settings. The basic options are displayed. Press the [START] key on the control panel to start the printout. Di551/Di650 3-17... -
Page 106: Reserving Copy Jobs
Press the key for the next free job folder. The basic option settings now apply for the reserve job. Make any necessary changes to the settings for the reserve job. Be sure the scanning cycle for the originals of the previously started job is finished. 3-18 Di551/Di650... - Page 107 Initial Steps . . . Load the originals of the reserve job into the EDH. Press the [START] key to start the scanning cycle. only when setting up additional reserve jobs Repeat steps 3 to 5. Di551/Di650 3-19...
-
Page 108: Calling Up The Status Display
➜ Press the [STATUS] key. The display on the touch screen changes. The Status screen is displayed. ➜ Press the [OK] key to close the status display. 3-20 Di551/Di650... -
Page 109: Status Display Message Definitions
Shows the remaining time required to complete the job. If a vertical arrow is displayed behind the number 999, the remaining time is greater than 999 minutes. If less than 1 minute is left, it is indicated by: <1. Di551/Di650 3-21... -
Page 110: Changing The Order Of Reserve Jobs
The background of the selected job turns black. Press the [JOB PRIORITY] key as often as necessary to move the copy job up to the position desired. Press the [OK] key to close the status display. The basic options are displayed again. 3-22 Di551/Di650... -
Page 111: Deleting A Reserve Job
The background of the selected job turns black. Press the [JOB DELETE] key. A dialog box with a prompt is displayed. Press the [YES] key. The job is deleted. Press the [OK] key to close the status display. The basic options are displayed again. Di551/Di650 3-23... -
Page 112: Checking The User Name Of A Reserve Job
The user name is displayed on the right side. Press the [OK] key to hide the user name again. The status displays are shown again. Press the [OK] key to close the status display. The basic options are displayed again. 3-24 Di551/Di650... -
Page 113: Calling Up The List Of Already Executed Jobs
4 pages. Scroll through the pages using the arrow keys found on the lower edge of the touch screen. Press the [OK] key to return to the status display. Press the [OK] key to close the status display. The basic options are displayed again. Di551/Di650 3-25... -
Page 114: Opening The Noncomplete Job List
Press the [NONCOMPLETE JOB LIST] key. The Noncomplete Job List is displayed. Press the [OK] key to return to the status display. The status display appears again. Press the [OK] key to close the status display. The basic options are displayed again. 3-26 Di551/Di650... -
Page 115: Interrupting The Setup Of A Reserve Job
Clear the paper jam. Press the [START] key on the control panel. The job is continued. Press the key for the job folder that you were setting up before you had to interrupt it. Continue setting up the reserve job. Di551/Di650 3-27... - Page 116 The message in the job folder tab changes to PRINT. Press the [START] key on the control panel. Printing is continued. Continue setting up the reserve job. Interrupt not always necessary! If paper runs out, you do not necessarily have to interrupt configuring your reserve job. 3-28 Di551/Di650...
-
Page 117: Interrupting A Copy Job
The LED is on, not blinking: when interrupt mode is enabled Interrupt with delay! In key operator mode you can define when the interrupt is to be enabled. For more information, see page 7-49. Di551/Di650 3-29... - Page 118 1,000 (100%) ❍ Finisher: main tray, sorted What is displayed when check mode is opened? ➜ Check mode shows the settings of the interrupted copy job. Press the [START] key on the control panel to start the copy job. 3-30 Di551/Di650...
- Page 119 Initial Steps . . . Continue the interrupted copy job. On the control panel press the [INTERRUPT] key. The control panel LED on the [INTERRUPT] key goes out. Press the [START] key on the control panel. The interrupted copy job continues. Di551/Di650 3-31...
-
Page 120: Recalling System Settings Of The Last Job
Program memory The Program Memory screen is displayed. Press the [PRE-JOB RECALL] key. Press the [OK] key. The basic options are displayed again. The system settings of the last completed job are set. 3-32 Di551/Di650... -
Page 121: Saving And Recalling System Settings
Program memory slots with 16 asterisks indicate that system settings were saved without a name. Saving System Settings Configure the system settings for your job. Press the [PROGRAM MEMORY]. key on the control panel. Program memory The Program Memory screen is displayed. Di551/Di650 3-33... - Page 122 Press the [CANCEL] key. The basic options are displayed again. Change the system settings for your job. Start by saving the system settings again. Select a free program memory slot to store the system settings. The program memory slot has a black background. 3-34 Di551/Di650...
- Page 123 Press the [CANCEL] key to cancel the process of saving the job. Press the [OK] key to complete the save procedure. The basic options are displayed again. The system configuration for the job is now stored and can be called up anytime. Di551/Di650 3-35...
-
Page 124: Recalling System Settings
Load the originals. Press the [PROGRAM MEMORY]. key on the control panel. Program memory The Program Memory screen is displayed. Select the program memory slot where the desired system settings were stored. Press the [CANCEL] key to exit the process. 3-36 Di551/Di650... - Page 125 Press the [OK] key to close the overview screen. The basic options are displayed again. Do you want to cancel this procedure? ➜ Press the [CANCEL] key. Press the [START] key on the control panel to start the copy job. Di551/Di650 3-37...
-
Page 126: Check System Meter Count
Shows the total number of copies. Printer counter Shows the total number of printouts. ➜ Hide counter list Press the [EXIT] key to return to the basic options. The counter list closes. The basic options are displayed again. 3-38 Di551/Di650... -
Page 127: Printing The Counter List
The basic options are displayed. Select the paper tray containing the paper that you want the counter list printed onto. Press the [START] key on the control panel to start the printout of the counter list. The counter list is printed. Di551/Di650 3-39... -
Page 128: Enabling Energy Saving Modes
[ENERGY SAVER]. This button can be set up to activate either energy saving mode or auto shut off mode. Use the key operator mode to configure which energy saving mode is triggered when this button is pressed. For more information, see page 7-49. 3-40 Di551/Di650... -
Page 129: Enabling Energy Saving Mode
The Press key/screen to cancel touch screen display dims. A message is displayed on the touch screen. ➜ Exiting Energy Saving Mode Press any key on the control panel to end this mode. Di551/Di650 3-41... -
Page 130: Enabling Auto Shut Off Mode
When the system is in auto shut-off mode the [ENERGY SAVER] LED on the control panel is on. The touch screen switches off. ➜ Exit automatic shut off Press the [ENERGY SAVER] key on the control panel to exit this mode. 3-42 Di551/Di650... -
Page 131: Using The Bypass Tray
Place the paper flush up against the feed chamber of the bypass tray. ❍ Special papers, OHP transparencies: max. 1 sheet ❍ Other: max. 100 sheets (80 g/m²) Slide the edge guides to fit the size of the inserted paper. Di551/Di650 3-43... -
Page 132: Processing Tab Papers
Examples: 1, 2, 3 Section 1 Introduction Section 1 Introduction 1, 2, 3, 1, 2, 3, 1, 2, 3 Section 1 Section 1 Section 1 Section 1 Introduction Introduction Introduction Section 1 Introduction Section 1 Introduction Introduction 3-44 Di551/Di650... -
Page 133: Using The Help Mode
Display of phone and fax numbers for the technical representative A help menu with information on seven different help topics Keys for calling step-by-step instruction on nine different help topics A key for calling up the key operator mode Di551/Di650 3-45... -
Page 134: Open Help Topic Overview
Place originals on EDH ❍ Paper supply Add paper to a tray ❍ Toner supply Add toner ❍ Help menu Help for seven different topics Press the [EXIT] key to exit help mode. The basic options are displayed again. 3-46 Di551/Di650... -
Page 135: Call Help For A Specific Cycle
Press the [HELP] key on the control panel. Help Help text with information on the current screen is displayed. Read the help text. Press the [EXIT] key to exit help mode. The display in which you called the help topic is displayed again. Di551/Di650 3-47... -
Page 136: Using Bookmark Function
CHECK] to switch to check mode, the second page, “application mode”, is automatically displayed. You can access the bookmarked page directly from there, for example, to make specific settings. For additional information on check mode see page 3-14. 3-48 Di551/Di650... -
Page 137: Basic Functions
External influences can cause damage to the system! The main tray of the finisher lowers during the output cycle. Objects located under the main tray can damage the main tray. ➜ Do not put any objects under the main tray of the finisher. Di551/Di650... - Page 138 Do not exceed the capacity of the offset trays! Do not exceed the capacity of the finisher offset trays, otherwise a paper misfeed may occur. You should empty the offset trays during a large job to avoid exceeding the capacity. Di551/Di650...
-
Page 139: Non Sort - Output To The Main Tray
Configure the system settings for your job. Use the 10-Key Pad to set the number of copies. Load the originals ❍ into the EDH or ❍ on the original glass. Press the [START] key on the control panel to start the copy job. Di551/Di650... -
Page 140: Sort - Output To The Main Tray
Note the following important information! These features cannot be combined: • Basic functions: Loading document onto the original glass (available only with Image Insert, Dual Page, or if the document memory is used), Folding, Stapling & Folding, Three-folding • Applications: OHP Interleave Di551/Di650... - Page 141 Configure the system settings for your job. Use the 10-Key Pad to set the number of copies. Load the originals ❍ into the EDH or ❍ on the original glass. Press the [START] key on the control panel to start the copy job. Di551/Di650...
-
Page 142: Staple - Output To The Main Tray
1 staple (at an angle), 1 staple (parallel), 2 staples (parallel) These features cannot be combined: • Basic functions: Loading document onto the original glass (available only with Image Insert, Dual Page, or if the document memory is used), Folding, Stapling & Folding, Three-folding • Applications: OHP Interleave Di551/Di650... - Page 143 In the basic options press the [STAPLE SORT] key. The background of the key turns black. Press the [OUTPUT MENU] key. The output menu is displayed. Select a staple setting and the type of binding. Right Left binding Binding face up Di551/Di650...
- Page 144 Configure the system settings for your job. Use the 10-Key Pad to set the number of copies. Load the originals ❍ into the EDH or ❍ on the original glass. Press the [START] key on the control panel to start the copy job. Di551/Di650...
-
Page 145: Group - Output To The Main Tray
These features cannot be combined: • Basic functions: 1-2 and 2-2 when loading document onto the original glass (except with document memory), Proof Copy, Folding, Stapling & Folding, Three-folding • Applications: Sheet / Cover Insertion, Chapter, Combination, Booklet, OHP Interleave, Image Insert, Repeat Di551/Di650... - Page 146 Configure the system settings for your job. Use the 10-Key Pad to set the number of copies. Load the originals ❍ into the EDH or ❍ on the original glass. Press the [START] key on the control panel to start the copy job. 4-10 Di551/Di650...
-
Page 147: Output To The Sub Tray
Sheet / Cover Insertion, Chapter, Combination, Booklet, OHP Interleave, Image Insert, Repeat when outputting with the printed side down • Basic functions: 1-2 or 2-2 when loading document onto the original glass, Folding, Stapling & Folding, Three-folding, Punch, Cover Sheet Di551/Di650 4-11... - Page 148 Non Sort (output with printed side down) [FACE DOWN] ❍ Non Sort (output with printed side up) [FACE UP] ❍ Group (output with printed side down) [FACE DOWN] and [GROUP] ❍ Group (output with printed side up) [FACE UP] and [GROUP] 4-12 Di551/Di650...
- Page 149 Configure the system settings for your job. Use the 10-Key Pad to set the number of copies. Load the originals ❍ into the EDH or ❍ on the original glass. Press the [START] key on the control panel to start the copy job. Di551/Di650 4-13...
-
Page 150: Folding, Stapling & Folding
2-sided originals or very dark originals? If you are copying 2-sided originals, disable the automatically enabled “Booklet” feature in the application settings. If you are copying very dark originals or are applying the “Reverse Image” feature, the fold might shift somewhat. 4-14 Di551/Di650... - Page 151 OHP Interleave, Reverse Image Do not exceed the capacity of the offset trays! Do not exceed the capacity of the finisher offset trays, otherwise a paper misfeed may occur. You should empty the offset trays during a large copy job. Di551/Di650 4-15...
- Page 152 Use the 10-Key Pad to set the number of copies. Load the originals ❍ into the EDH or ❍ on the original glass. (only if using the document memory) Press the [START] key on the control panel to start the copy job. 4-16 Di551/Di650...
-
Page 153: Adding Front And Back Cover Sheets
30 mm These features cannot be combined: • Basic functions: Output to Top Offset Tray, Punching with Hole punch unit PK-2 • Applications: OHP transparencies, Cover Page feature with Separator or Cover Sheet and Booklet Di551/Di650 4-17... - Page 154 Cover sheet position [FRONT], [FRONT + BACK], [BACK] ❍ Cover sheet tray [UPPER TRAY], [LOWER TRAY] Confirm your selection by pressing [OK]. The output options are displayed again. Confirm your selection by pressing [OK]. The basic options are displayed again. 4-18 Di551/Di650...
- Page 155 Press the [START] key on the control panel to start the copy job. Print the paper for the cover inserter first! Paper fed by the cover inserter runs only through the finisher. Thus it cannot be printed in the same procedure as the copy job itself. Di551/Di650 4-19...
-
Page 156: Hole-Punch
If this occurs, disable paper tray switching. 80mm Hole-Punch Punch/Z-fold Unit takes priority! If your system is equipped with both the Hole Punch Unit PK-2/PK-3 and the Punch/Z-fold Unit ZK-2, the punch function of the ZK-2 is applied. 4-20 Di551/Di650... - Page 157 You cannot combine with these functions if you use the Hole Punch Unit PK-2: • Basic functions: Cover sheet insertion • Special originals: Mixed originals (A4R, B5R, A5, A5R mixed and/or APS) • Applications: Sheet/Cover Insertion, Sheet with Copy with Chapter, Cover with Booklet, Program Job Di551/Di650 4-21...
- Page 158 Select a punch mode. Confirm your selection by pressing [OK]. The output options are displayed again. Confirm your settings by pressing [OK]. The basic options are displayed again. Configure the system settings for your job. Use the 10-Key Pad to set the number of copies. 4-22 Di551/Di650...
- Page 159 Basic Functions Load the originals ❍ into the EDH or ❍ on the original glass. (only if using the document memory) Press the [START] key on the control panel to start the copy job. Di551/Di650 4-23...
-
Page 160: Z-Fold
(measured from paper edge to first fold crease) These features cannot be combined: • Basic functions: Loading document onto the original glass (only with Document Memory), Stapling for B4, Output to sub tray, Folding, Stapling & Folding, Trimming, Tandem Mode • Applications: OHP Interleave 4-24 Di551/Di650... - Page 161 20 stapled sets 2 sheets 0~30 sheets 10 stapled sets 3 sheets 0~20 sheets 4 stapled sets 4 sheets 0~10 sheets 3 stapled sets 5 sheets 2 stapled sets 6 sheets and more Z-fold cannot be combined with stapling Di551/Di650 4-25...
- Page 162 Use the 10-Key Pad to set the number of copies. Load the originals ❍ into the EDH or ❍ on the original glass. (only if using the document memory) Press the [START] key on the control panel to start the copy job. 4-26 Di551/Di650...
-
Page 163: Three-Folding
• Max. capacity max. 50 sheets (three folded) Booklet output: These features cannot be combined: • Basic functions: Sorting, Grouping, Stapling, Folding, Stapling & Folding, Punching, Output Top Offset Tray • Applications: OHP Interleave, Dual Page, Program Job, Reverse Image Di551/Di650 4-27... - Page 164 Use the 10-Key Pad to set the number of copies. Load the originals ❍ into the EDH or ❍ on the original glass. (only if using the document memory) Press the [START] key on the control panel to start the copy job. 4-28 Di551/Di650...
-
Page 165: Manual Stapling, Punching Or Folding
1 Staple (diagonal) 2 Staples (parallel) Three-folding Hole-Punch Punch/Z-fold Unit takes priority! If your system is equipped with both the Hole Punch Unit PK-2 or PK-5 and the Punch/Z-fold Unit ZK-2, the punch function of the ZK-2 is applied. Di551/Di650 4-29... - Page 166 19 sheets (80 g/m² with thicker cover sheets) • Output tray: Booklet output Three-folding • Paper size: A4R, 8.5"×11"R • Types of paper: 60 to 80 g/m² • Folding capacity: up to 3 sheets (80 g/m²) • Output tray: Booklet output 4-30 Di551/Di650...
- Page 167 START/STOP-key How can I interrupt this process? ➜ Press the START/STOP key again to stop the procedure. If you are using booklet mode, the incomplete booklet is left in the stapler unit of the finisher. Di551/Di650 4-31...
-
Page 168: Output Without Finisher
Please note the following: If you are making 1-sided copies (1-1) and have to place the originals onto the original glass, copy from the last to the first page. This will cause the copies to be output sorted correctly. 4-32 Di551/Di650... - Page 169 Configure the system settings for your job. Use the 10-Key Pad to set the number of copies. Load the originals ❍ into the EDH or ❍ on the original glass. Press the [START] key on the control panel to start the copy job. Di551/Di650 4-33...
- Page 170 Group (output with printed side down) Rotation Group (output with printed side down) Non Sort (output with printed side up) Rotation Sort (output with printed side up) Group (output with printed side up) Rotation Group (output with printed side up) 4-34 Di551/Di650...
- Page 171 Rotation Group (output with printed side up) • [OUTPUT MENU]: enabled Enabled options [ROTATION GROUP], [FACE UP] • [SORT]: disabled enabled: key on the touch screen has a black background disabled: key on the touch screen has a white background Di551/Di650 4-35...
-
Page 172: Using Two Systems In Tandem
Tandem mode has to be set up by a service technician! If you want to use tandem mode, you have to have your systems configured by a service technician. If you have questions, please contact your technical representative. 4-36 Di551/Di650... - Page 173 The tandem mode is automatically deactivated if the [PANEL RESET] key on the master unit is pressed. If the tandem mode is enabled by default, it is deactivated automatically, if the [PANEL RESET] keys on the control panels of both systems are pressed. Di551/Di650 4-37...
- Page 174 If you scan the originals of a reserve copy job while the system is operating in tandem mode, the reserve copy job is also run in tandem mode. This lets you prepare up to four reserve copy jobs for output in tandem mode. 4-38 Di551/Di650...
- Page 175 ➜ Ten reserve copy jobs have been set up on the slave unit (not in tandem mode). Wait until the reserve copy jobs have been processed. Make any necessary changes to the copy settings on the master unit. Di551/Di650 4-39...
- Page 176 As soon as enough free memory is created on the slave unit, the output continues on both systems. If a specified time period elapses before sufficient free memory is created, the copy job is completed on the master unit. 4-40 Di551/Di650...
-
Page 177: Setting The Copy Mode
Setting the Copy Mode Select a copy mode. Choose between: Make 2-sided copies from 2-sided originals. Make 1-sided copies from 2-sided originals (Simplex). Make 2-sided copies from 1-sided originals (Duplex). 1-1 (initial setting) Make 1-sided copies from 1-sided originals. Di551/Di650 4-41... -
Page 178: Creating 1 And 2-Sided Copies (Using The Edh)
Press the [SPECIAL ORIGINAL] key if the direction of the original is different from the specified default direction. Change the setting of the Original Direction. 4-42 Di551/Di650... - Page 179 On the control panel press the [START] key to start the scan cycle and to output the copies. Do you want to cancel this procedure? ➜ Press the [STOP] key on the control panel. Di551/Di650 4-43...
-
Page 180: Creating 2-Sided Copies (Using The Original Glass)
The [STORE] key has a black background. The function for scanning documents has been enabled automatically. only as required Press the [SPECIAL ORIGINAL] key if the direction of the original is different from the specified default direction. Change the setting of the Original Direction. 4-44 Di551/Di650... - Page 181 Did you enter an incorrect number? ➜ Press the [C] key on the control panel and enter the correct number of copies. Press the [START] key on the control panel. The document placed on the original glass is scanned. Di551/Di650 4-45...
- Page 182 Press the [EXIT] key to confirm the cancellation. Press the [STORE] key to complete the scanning procedure. Press the [START] key on the control panel to start the printout. Do you want to cancel this procedure? ➜ Press the [STOP] key on the control panel. 4-46 Di551/Di650...
-
Page 183: Adjusting The Contrast
Basic Functions Adjusting the contrast Select the exposure level for your copies. Choose between: Auto exposure (AE) Manual exposure Di551/Di650 4-47... -
Page 184: Enabling Auto Exposure Mode
Press the [AE] key. The background of the key turns black. “Auto Exposure Mode” is now enabled. Configure the system settings for your job. Press the [START] key on the control panel to start the copy job. 4-48 Di551/Di650... -
Page 185: Manually Adjusting Copy Density
“User 1” and “User 2” are positions for storing user-defined exposure levels. For more information, see page 7-15. ➜ Press the white arrow key until the black bar is at the desired user-defined setting User 1 or User 2. Di551/Di650 4-49... -
Page 186: Adjusting The Image Density
The Special Originals screen is displayed. Press the key of the function for which you want to define the exposure range. ❍ Auto ❍ Increase Contrast ❍ Photo ❍ Text The background of the selected function turns black. 4-50 Di551/Di650... - Page 187 If you pressed the [TEXT] key in step 2, the message Density Shift (Text) is displayed. Use the 10-Key Pad to enter the exposure range you want (0 to 5). Example: Enter 3 to select exposure range 3. Press the [OK] key to confirm your input. Di551/Di650 4-51...
-
Page 188: Setting The Lens Mode
Basic Functions Setting the Lens Mode Enlarge or reduce the sized of your originals. Choose between: Automatic Magnification Selection (AMS) Preset Zoom Ratio (RE) User-set Zoom Ratio (Zoom) 4-52 Di551/Di650... -
Page 189: Enabling Automatic Magnification Selection (Ams)
Configure the system settings for your job. Press the [START] key on the control panel to start the copy job. Copy result not as desired? If necessary, disable the “Rotation Mode” feature to achieve the desired copy result. Di551/Di650 4-53... -
Page 190: Selecting A Preset Zoom Ratio
Define the user-defined zoom ratio in key operator mode. For more information, see page 7-15. Creating 1:1 copies! If you want to create a copy of the same size as your original, just press [1:1] on the touch screen. 4-54 Di551/Di650... -
Page 191: Selecting User-Set Zoom Ratios
Press the [OK] key to end this step. The dialog closes. The selected zoom ratio is displayed on the touch screen. Configure the system settings for your job. Press the [START] key on the control panel to start the copy job. Di551/Di650 4-55... -
Page 192: Horizontal/Vertical Stretch
X: 2.000, Y: 4.000 X: 4.000, Y: 4.000 You can produce more effects by placing the original onto the original glass at an angle. X: 2.000, Y: 0.500 X: 0.500, Y: 2.000 X: 2.000, Y: 0.500 X: 0.500, Y: 2.000 4-56 Di551/Di650... -
Page 193: Setting The Copy Paper Size
Specify the size and the type of the paper that is loaded in a paper tray. If necessary, manually select the paper tray containing the paper to be used. Select from these choices: Paper Tray 1 Paper Tray 2 Paper Tray 3 Paper Tray 4 LCC (optional) Bypass Tray Auto Paper Select Mode (APS) Di551/Di650 4-57... -
Page 194: Enabling Auto Paper Select Mode (Aps)
Configure the system settings for your job. Press the [START] key on the control panel to start the copy job. Copy result not as desired? If necessary, disable the “Rotation Mode” feature to achieve the desired copy result. 4-58 Di551/Di650... -
Page 195: Manually Selecting A Paper Tray
Use automatic tray switching! If a tray runs out of paper, the system automatically switches to another tray that has been filled with the same paper if paper tray switching is enabled. For more information, see page 7-49. Di551/Di650 4-59... -
Page 196: Specifying The Paper Type/Size For The Bypass Tray
Press the key with the black background. The selection is cleared. All keys now have white backgrounds. Are you processing tab papers? The AMS feature is enabled automatically if you select the “TAB” feature. ➜ Note this when processing tab papers using the bypass tray. 4-60 Di551/Di650... - Page 197 Press the [OK] key to confirm your input. The basic options are displayed again. Configure the system settings for your job. Press the [START] key on the control panel to start the copy job. Di551/Di650 4-61...
-
Page 198: Specify Copy Start On Wide Size Paper For The Bypass Tray
Set a customized paper size. Set the copy start in “image pos.”. ❍ Lead edge at the paper feed edge ❍ Rear edge at the opposite side to the paper feed edge Press the [OK] key to confirm your input. 4-62 Di551/Di650... - Page 199 Basic Functions Configure the system settings for your job. Press the [START] key on the control panel to start the copy job. Di551/Di650 4-63...
-
Page 200: Applying Functions
Reverse Image. The scope of possibilities is very extensive. For this reason, we have described these applications in a separate chapter; see page 5-1. [ROTATION OFF] This function is used to rotate documents. [STORE] Feature for scanning documents in the document memory 4-64 Di551/Di650... -
Page 201: Storing Originals (From The Original Glass)
Place the original face down on the original glass. Are you using one of these features: Dual Page, Non-Image Area Erase, Repeat or Auto Layout? ➜ Leave the EDH open. This ensures that these functions are executed optimally. Di551/Di650 4-65... - Page 202 Press the [START] key on the control panel to start the copy job. The copies are output. When the output cycle finishes, the scanned data in the memory is deleted automatically. Do you want to cancel the copy cycle? ➜ Press the [STOP] key on the control panel. 4-66 Di551/Di650...
-
Page 203: Storing Originals (From The Edh)
In the basic options press the [STORE] key. The background of the key turns black. Scan mode is now enabled. Use the 10-Key Pad to set the number of copies. Load up to 100 originals (80 g/m²) face-up into the EDH. Di551/Di650 4-67... - Page 204 Do not scan any more originals. Press the [STORE] key to complete the scanning procedure. Press the [START] key on the control panel to start the copy job. When the copy cycle finishes, the data in the memory is deleted automatically. 4-68 Di551/Di650...
-
Page 205: Applying 90° Rotation
The background of the key turns black. The “90° Rotation” feature is disabled. The feature display for “90° Rotation” is hidden. Changing initial settings Use key operator mode to modify the system’s initial settings. For more information, see page 7-1. Di551/Di650 4-69... - Page 206 The copy image is rotated by 90° automatically. As such, it fits 1:1 onto the paper. Original Paper 90° Rotation and APS APS only in combination with 90° Rotation The “APS” feature can only be used in combination with the “90° Rotation” feature. 4-70 Di551/Di650...
- Page 207 The copy image is rotated by 90° and shrunk automatically. If you use the “AMS” feature alone, the copy image is reduced in size so much that it will fit onto the A4 paper lengthwise without image loss. Original Paper 90° Rotation and AMS Only AMS Di551/Di650 4-71...
- Page 208 The copy image is rotated by 90° and shrunk automatically. If you use the “AMS” feature alone, the copy image is reduced in size so much that it will fit onto the A4 paper crosswise without image loss. 90° Rotation and Original Paper Only AMS 4-72 Di551/Di650...
-
Page 209: Set Original Position (Special Originals)
Before working with folding, stapling or punching features, check the setting for the original direction. If the position is wrong, a fold, staple or punched hole may be placed in the wrong position. Position on EDH Loading onto the original glass Di551/Di650 4-73... - Page 210 The basic options are displayed again. The background of the [SPECIAL ORIGINAL] key turns black. Change any other necessary system settings. Use the 10-Key Pad to set the number of copies. Press the [START] key on the control panel to start the copy job. 4-74 Di551/Di650...
-
Page 211: Setting Text/Photo Enhance (Special Originals)
Text Original only: Text Photo Originals only: Photo Very light original: Increase contrast All lighter or darker? If the copies seem generally too light or too dark, the copy density setting can be changed. For more information, see page 4-50. Di551/Di650 4-75... - Page 212 Change any other necessary system settings. Use the 10-Key Pad to set the number of copies. Load the originals ❍ into the EDH ❍ on the original glass. Press the [START] key on the control panel to start the copy job. 4-76 Di551/Di650...
-
Page 213: Copying Mixed Sizes (Special Originals)
Punch Unit PK-2 (B6 and/or with APS) • Special originals: Special Size, Original with Z-Fold, Tab Paper • Applications: Sheet / Cover Insertion, Chapter, Combination, Booklet, OHP Interleave, Image Insert, Dual Page, Program Job, Non-Image Area Erase, Repeat, Auto Layout, Overlay, Overlay Memory Di551/Di650 4-77... - Page 214 Press the [START] key on the control panel to start the copy job. Position Mixed Original? The originals must be positioned properly so they can be fed in without difficulty. For more information, see page 3-11. 4-78 Di551/Di650...
-
Page 215: Copying Z-Folded Originals (Special Originals)
Mixed Original, Special Size, Tab Paper • Applications: Non-Image Area Erase, Auto Layout, Image Repeat, Overlay Memory Position originals for Z-folding? The originals must be positioned properly so they can be fed in without difficulty. For more information, see page 3-13. Di551/Di650 4-79... - Page 216 Use the 10-Key Pad to set the number of copies. Load the originals ❍ into the EDH. Align the originals against the back edge of the EDH. Then adjust the original guides. Press the [START] key on the control panel to start the copy job. 4-80 Di551/Di650...
-
Page 217: Defining Special Original Types (Special Originals)
Combination, Booklet, Dual Page, Non-Image Area Erase, Image Shift • Special originals: Mixed Original, Original with Z-Fold, Special Size • Applications: Sheet / Cover Insertion, Chapter, Combination, Booklet, Dual Copy, Non-Image Area Erase, OHP Interleave, Image Insert, Overlay Memory Di551/Di650 4-81... - Page 218 When you press [FULL AREA] the entire area of the original glass will be scanned. ➜ Press the [FULL AREA] key to scan the entire area of the original glass. Confirm your selection by pressing [OK]. The selection window closes. 4-82 Di551/Di650...
- Page 219 Change any other necessary system settings. Use the 10-Key Pad to set the number of copies. Load the originals ❍ into the EDH ❍ on the original glass. Press the [START] key on the control panel to start the copy job. Di551/Di650 4-83...
- Page 220 Basic Functions 4-84 Di551/Di650...
-
Page 221: Applications
If you want to disable all applications, press the [ALL CLEAR] key. To disable a single application, press the application which has a black background to indicate that it is enabled. The background of the key turns white. The application is now disabled. Di551/Di650... -
Page 222: Adding Inserts And Cover Sheets
One paper tray for both front and back cover sheets! Front and back cover sheets have to be loaded into one tray. If you want to use different paper for the front and back cover sheets, load the paper alternately into the tray. Use a uniform paper thickness. Di551/Di650... -
Page 223: Information On Sheet And Cover Insertion
APS, Grouping, Rotation Sort, Rotation Group, Punching with Hole Punch Unit PK-2 • Special originals: Mixed Original, Tab • Applications: Combination, Booklet, OHP Interleave, Image Insert, Dual Page, Program Job, Non-Image Area Erase, Repeat, Auto Layout, Overlay, Overlay Memory Di551/Di650... -
Page 224: Procedure: Sheet And Cover Insertion
The screen for sheet and cover insertion is displayed. Place the paper for the covers, back covers and sheets in the indicated paper trays. Press the [CHANGE COVERS TRAY] or the [CHANGE INSERTION TRAY] key, several times if necessary, to select a different paper tray. Di551/Di650... - Page 225 Confirm your input by pressing [OK]. Change any other necessary system settings. Use the 10-Key Pad to set the number of copies. Load the originals into the EDH. Press the [START] key on the control panel to start the copy job. Di551/Di650...
-
Page 226: Executing Chapter Mode
Combination, OHP Interleave, Image Insert, Program Job, Non-Image Area Erase, Overlay Memory It makes sense to combine features! Combine this feature with one of the stamp features, such as page numbering, paragraph numbering or watermark numbering. For more information, see page 5-51. Di551/Di650... -
Page 227: Procedure: Setting Chapters
What effect do the title page positions have? ➜ Use the keypad to set the desired position. Example: Title page at position 4 The back of page 3 is left blank. Page 4 is copied to the front side of the next sheet. Di551/Di650... - Page 228 Use the 10-Key Pad to set the number of copies. Load the originals into the EDH. Press the [START] key on the control panel to start the scanning cycle. The copies begin to be printed after all originals have been scanned. Di551/Di650...
-
Page 229: Creating Combinations
4 original pages onto 1 copy page 8 in 1 8 original pages onto 1 copy page Vertical order 4 in 1 4 original pages onto 1 copy page 8 in 1 8 original pages onto 1 copy page Di551/Di650... -
Page 230: Information On: Combination
These features cannot be combined: • Basic functions: APS, Group, Rotation Sort, Rotation Group • Special originals: Mixed Original • Applications: Sheet/Cover Insertion, Chapter, Booklet, OHP Interleave, Image Insert, Dual Page, Program Job, Non-Image Area Erase, Repeat, Overlay Memory 5-10 Di551/Di650... -
Page 231: Procedure: Creating Combination
Press the [COMBINATION] key. The screen for combination options is displayed. Select the desired mode. ❍ Horizontal order 2 in 1, 4 in 1 or 8 in 1 ❍ Vertical order 4 in 1 or 8 in 1 Di551/Di650 5-11... - Page 232 Use the 10-Key Pad to set the number of copies. Load the originals into the EDH. Press the [START] key on the control panel to start the scanning cycle. The copies begin to be printed after all originals have been scanned. 5-12 Di551/Di650...
-
Page 233: Creating Booklets
....Original ....2-sided Choose between: Booklet without cover sheet Booklet with cover sheet without copy Booklet with cover sheet with copy Di551/Di650 5-13... -
Page 234: Information On: Booklets
Program Job, Non-Image Area Erase, Repeat, Overlay Memory Automatically assemble booklets If your system is equipped with the FN-6 Finisher, you can have your copies folded and saddle-stitched automatically before they are output. For more information, see page 4-14 and the following pages. 5-14 Di551/Di650... -
Page 235: Procedure: Creating Booklets
In the basic options press the [APPLICATION] key. The screen with the Applications is displayed. Press the [BOOKLET] key. The screen for booklet settings appears. Select the desired mode. ❍ No cover sheet ❍ Cover with Copy sheet ❍ Cover with Blank sheet Di551/Di650 5-15... - Page 236 1-2 or 2-2. Make any other required system settings. Use the 10-Key Pad to set the number of booklets. Load the originals into the EDH. Press the [START] key on the control panel to start the scanning cycle. 5-16 Di551/Di650...
-
Page 237: Creating Ohp Interleave
APS, 1-2, 2-2, Staple, Sort, Group, Folding, Stapling & Folding, Trimming, Rotation Sort, Rotation Group, Cover Sheet Insertion, Three Folding, Punching • Special originals: Mixed Originals, Tabs • Applications: Sheet/Cover Insertion, Chapter, Combination, Booklet, Dual Page, Program Job, Repeat, Image Insert, Overlay Memory Di551/Di650 5-17... -
Page 238: Procedure: Creating Ohp Interleave
The screen with the Applications is displayed. Press the [OHP INTERLEAVE] key. The screen for generating OHP interleaves is displayed. Select the desired mode. ❍ Blank sheet Interleaving ❍ Copy sheet Interleaving Confirm your selection by pressing [OK]. Change any other necessary system settings. 5-18 Di551/Di650... - Page 239 Applications Load an OHP transparency into the bypass tray. Load the originals ❍ into the EDH ❍ on the original glass. Press the [START] key on the control panel. Di551/Di650 5-19...
-
Page 240: Inserting Images
These features cannot be combined: • Basic functions: Group, Rotation Sort, Rotation Group • Special originals: Mixed Original, Tab • Applications: Sheet / Cover Insertion, Chapter, Combination, OHP Interleave, Dual Page, Program Job, Non-Image Area Erase, Repeat, Auto Layout, Overlay, Overlay Memory 5-20 Di551/Di650... -
Page 241: Procedure: Inserting Image
4 and 5, which were scanned from the EDH. ➜ Confirm each position setting by pressing the [SET] key. ➜ If you want to specify more than 15 positions, press the right arrow key. More input fields appear. Di551/Di650 5-21... - Page 242 [START]. Combined with "Booklet"? You can combine the “Insert Image” application with the booklet feature. To do so, press the [BOOKLET] key in the screen for inserting images and configure any necessary settings there. 5-22 Di551/Di650...
-
Page 243: Processing Dual
Choose between: Double pages copy the inner pages only Cover sheet in front + double pages copy book title and inner pages Cover sheet front and back + double pages copy book title, back page and inner pages Di551/Di650 5-23... -
Page 244: Information On: Dual Page
These features cannot be combined: • Basic functions: APS, AMS, Rotation Sort, Rotation Group, Folding, Stapling & Folding, Three-Folding • Special originals: Mixed Original, Tab • Applications: Sheet/Cover Insertion, Combination, Image Insert, Program Job, Image Shift, Overlay, Overlay Memory 5-24 Di551/Di650... -
Page 245: Procedure: Making Dual Copy
Front/Back cover + Facing pages only as required Change the binding position of the book if required. Normally, the order “1 to n” is used for the Booklet function. Confirm your selection by pressing [OK]. The basic options are displayed again. Di551/Di650 5-25... - Page 246 Front cover + Facing pages SURVEYOR’S REPORT Front/Back cover + Facing pages SURVEYOR’S SURVEYOR’S REPORT REPORT Press the [STORE] key to complete the scanning procedure. Press the [START] key on the control panel to start the copy job. 5-26 Di551/Di650...
-
Page 247: Program Job
Stapling & Folding, Punching with Hole Punch Unit PK-2, Three-Folding, Server functions-2 • Special originals: Mixed Original • Applications: Sheet / Cover Insertion, Chapter, Combination, Booklet, OHP Interleave, Image Insert, Dual Page, Program Job, Repeat, Overlay, Overlay Memory Di551/Di650 5-27... -
Page 248: Procedure: Program Job
Change any other necessary system settings. Load the originals ❍ into the EDH ❍ on the original glass. Press the [START] key on the control panel to start the scanning cycle. A dialog appears after every scanning cycle. 5-28 Di551/Di650... - Page 249 Press the [STORE] key to complete the store procedure. Press the [START] key on the control panel to start the copy job. Correct order maintained? Scan the originals in the order in which the copies are to be output. Di551/Di650 5-29...
-
Page 250: Using Non-Image Area Erase
Erase black edges along contours At Right Angles Along Contours Set type of non-image area erase in key operator mode! In key operator mode you can specify the non-image area erase mode to be used. For more information, see page 7-66. 5-30 Di551/Di650... -
Page 251: Information On: Non-Image Area Erase
Rotation Sort, Rotation Group • Special originals: Mixed Original, Z-Folded Original • Applications: Sheet / Cover Insertion, Chapter, Combination, Booklet, Image Insert, Dual Page, Dual Page with EDH and Document Memory, Reverse Image, Full-Image Area, Image Shift, Image Memory Di551/Di650 5-31... -
Page 252: Procedure: Using Non-Image Area Erase
Change any other necessary system settings. Use the 10-Key Pad to set the number of copies. Place the original on the original glass. Leave the original cover open. Press the [START] key on the control panel to start the copy job. 5-32 Di551/Di650... -
Page 253: Creating Reverse Images
To make an inverted copy, the originals have to be scanned into the document memory. Information on: Reverse Image Note the following important information! These features cannot be combined: • Basic functions: Folding, Stapling & Folding, Three-Folding • Applications: Non-Image Area Erase, Repeat, Full-Image Area, Stamp, Overlay Di551/Di650 5-33... -
Page 254: Procedure: Creating Reverse Image
Change any other necessary system settings. Use the 10-Key Pad to set the number of copies. Load the originals ❍ into the EDH ❍ on the original glass. Press the [START] key on the control panel to start the copy job. 5-34 Di551/Di650... -
Page 255: Using Image Repeat Mode
Auto Detection Automatically detect the area of original that is to be repeated several times. Repeat Specified number of repeats. 2, 4 or 8 repeats are possible. Di551/Di650 5-35... -
Page 256: Information On: Repeat
Rotation Sort, Rotation Group • Special originals: Mixed Original, Z-Folded Original • Applications: Sheet / Cover Insertion, Chapter, Combination, Booklet, OHP Interleave, Image Insert, Dual Page, Non-Image Area Erase, Reverse Image, Frame/Fold Erasure, Auto Layout, Image Shift, Stamp/Overlay 5-36 Di551/Di650... - Page 257 Rotation Sort, Rotation Group • Special originals: Mixed Original, Z-Folded Original • Applications: Sheet / Cover Insertion, Chapter, Combination, Booklet, OHP Interleave, Image Insert, Dual Page, Non-Image Area Erase, Reverse Image, Frame/Fold Erasure, Auto Layout, Image Shift, Overlay, Overlay Memory Di551/Di650 5-37...
-
Page 258: Procedure: Using Repeat Mode
Press the [2 REPEAT], [4 REPEAT] or [8 REPEAT] key to repeat the entire original area. The repeat rate is derived from the selected paper size divided by the original size. Confirm your selection by pressing [OK]. 5-38 Di551/Di650... - Page 259 EDH or Auto Detection on the original glass Press the [START] key on the control panel to start the scanning cycle. The copies begin to be printed after all originals have been scanned. Repeat Di551/Di650 5-39...
-
Page 260: Using Frame/Fold Erasure
Note the following important information! • Erase areas: Frame erasure 1 to 300 mm (in 1 mm increments) Fold erasure 1 to 300 mm (in 1 mm increments) These features cannot be combined: • Applications: Image Repeat, Full-Image Area 5-40 Di551/Di650... -
Page 261: Procedure: Using Frame/Fold Erasure
Press the [FOLD ERASURE] key to set the value for the fold erasure. Press the [FOLD] key and enter the value with the arrow keys or with the touch screen keypad. Confirm your input by pressing [OK]. Di551/Di650 5-41... - Page 262 Change any other necessary system settings. Use the 10-Key Pad to set the number of copies. Load the originals ❍ into the EDH ❍ on the original glass. Press the [START] key on the control panel to start the copy job. 5-42 Di551/Di650...
-
Page 263: Using Auto Layout
Rotation Sort, Rotation Group • Special originals: Mixed Original, Z-Folded Original • Applications: Sheet / Cover Insertion, Chapter (available if non-image Area erase is disabled), Combination, Booklet, Image Insert, Reverse Image, Repeat, Full-Image Area, Image Shift, Overlay, Overlay Memory Di551/Di650 5-43... -
Page 264: Procedure: Using Auto Layout
Placing the originals on the original glass? ➜ Do not close the EDH during the scanning cycle. Press the [START] key on the control panel to start the scanning cycle. The copies are printed automatically after the scanning cycle. 5-44 Di551/Di650... -
Page 265: Using Full-Image Area
Please note the following: Use wide size paper when making all-image area copies Note the following important information! These features cannot be combined: • Basic functions: Rotation, Rotation Sort • Applications: Non-Image Area Erase, Reverse Image, Frame/Fold Erasure Di551/Di650 5-45... -
Page 266: Procedure: Using Full-Image Area
Use the 10-Key Pad to set the number of copies. Load the originals into the EDH. Press the [START] key on the control panel to start the scanning cycle. The copies are printed automatically after the scanning cycle. 5-46 Di551/Di650... -
Page 267: Creating A File Margin
Original Only Reduce & Shift Shift Choose between: Image Shift Shift the print area to create a file margin. Reduce & Shift The print area is reduced in size automatically and shifted to create a file margin. Di551/Di650 5-47... -
Page 268: Information On: Image Shift
• Applications: Auto Layout, Overlay Memory Reduce & Shift These features cannot be combined: • Basic functions: APS, zoom ratio changes • Special originals: Mixed Original • Applications: Dual Page, Non-Image Area Erase, Image Repeat, Auto Layout, Overlay 5-48 Di551/Di650... -
Page 269: Procedure: Using Image Shift
The screen for generating a file margin is displayed. Press the [IMAGE SHIFT] key to create the image shift by moving the printed area. Press the [REDUCE & SHIFT] key to create the image shift by automatically reducing and shifting the printed area. Di551/Di650 5-49... - Page 270 Load the originals ❍ into the EDH ❍ on the original glass. Press the [START] key on the control panel to start the scanning cycle. The copies are printed automatically after the scanning cycle. 5-50 Di551/Di650...
-
Page 271: Using Stamp/Overlay
A stamp appears in the foreground of an image and covers any other copy image. Watermark A watermark appears in the background of an image and is covered by any other copy image. Overlay With overlay image elements from a sample original are copied together with other original pages. Di551/Di650 5-51... -
Page 272: Information On: Stamp/Overlay
Page number is not printed or counted ❍ in combination with blank insertion: [PRINT OFF] Page number is not printed but is counted [SKIP PAGE] Page number is not printed or counted When using the “Overlay” feature, the originals have to be scanned first. 5-52 Di551/Di650... - Page 273 Enter negative starting number for page counting! For example, if you wish to start the page count from page 4, you can set a negative starting number for the page counting. Example below: Start number for page count -2. Di551/Di650 5-53...
-
Page 274: Procedure: Using Stamp
Press the [STAMP/OVERLAY] key. The screen for selecting the Stamp, Watermark and Overlay features is displayed. Press the key for the desired feature. Confirm your selection by pressing [OK]. The screen for fine adjusting the selected function appears. 5-54 Di551/Di650... - Page 275 Confirm your settings by pressing [OK]. Change any other necessary system settings. Use the 10-Key Pad to set the number of copies. Load the originals. Press the [START] key on the control panel to start the copy job. Di551/Di650 5-55...
-
Page 276: Procedure: Using Watermark
Press the [STAMP/OVERLAY] key. The screen for selecting the Stamp, Watermark and Overlay features is displayed. Press the key of the desired feature. Confirm your selection by pressing [OK]. The screen for fine adjusting the selected function appears. 5-56 Di551/Di650... - Page 277 Confirm your settings by pressing [OK]. Change any other necessary system settings. Use the 10-Key Pad to set the number of copies. Load the originals. Press the [START] key on the control panel to start the copy job. Di551/Di650 5-57...
-
Page 278: Procedure: Using Overlay
Press the [OVERLAY]. Confirm your selection by pressing [OK]. The document memory is enabled automatically. Load the template original into the EDH or onto the original glass. Press the [START] key on the control panel. The original is scanned. 5-58 Di551/Di650... - Page 279 The original pages are scanned. Press the [STORE] key to complete the scanning procedure. Change any other necessary system settings. Use the 10-Key Pad to set the number of copies. Press the [START] key on the control panel to start the printout. Di551/Di650 5-59...
-
Page 280: Procedure: Overlay Memory (Store Image)
In the basic options press the [APPLICATION] key. The screen with the Applications is displayed. Press the [STAMP/OVERLAY] key. The screen for selecting the Stamp, Watermark and Overlay features is displayed. 5-60 Di551/Di650... - Page 281 The overlay memory feature appears. Recall an image to use the image overlay feature. For more information, see page 5-62. Press [OK] until the basic options appear again. Press the [STORE] key. Scan is disabled. The sample original is stored. Di551/Di650 5-61...
-
Page 282: Procedure: Overlay Memory (Recall Image)
In the basic options press the [APPLICATION] key. The screen with the Applications is displayed. Press the [STAMP/OVERLAY] key. The screen for selecting the Stamp, Watermark and Overlay features is displayed. 5-62 Di551/Di650... - Page 283 EDH ❍ on the original glass. Press the [START] key to start the scanning cycle. Press [STORE] to leave scanning mode. Press the [START] key on the control panel to start the printout of the copies. Di551/Di650 5-63...
- Page 284 Applications 5-64 Di551/Di650...
-
Page 285: Network Functions
Printing and storing a job Save the data of a job to the hard drive after completing a copy job. Print the job immediately afterwards. Calling up a job from the hard drive Call up the data of a job to print it Di551/Di650... - Page 286 Organize image memory codes! You can save several jobs under one image memory code. You can delete an image memory code in key operator mode and all of the jobs belonging to it. For more information, see page 7-62. Di551/Di650...
-
Page 287: Storing A Job
Booklet, OHP Interleave, Image Insert, Dual Page, Program Job, Non-Image Area Erase, Auto Layout, Image Shift (reduce & shift), Overlay On the control panel press the Printer Copier Scan [MODE] key several times if necessary to select the “Scan” feature. The scan display appears. Di551/Di650... - Page 288 Press the [1-CHARACTER DELETE] key as necessary to delete your input character for character. Then enter the correct image store password. Press the [OK] key to confirm the image store password. The screen for entering a job name appears. Di551/Di650...
- Page 289 The basic options are then displayed again. Proper use of user’s choice setting! In the user’s choice setting you can specify whether the window for entering the job name appears again after the store cycle. For more information, see page 7-49. Di551/Di650...
-
Page 290: Deleting A Job
On the control panel press the Printer Copier Scan [MODE] key several times if necessary to select the “Scan” feature. The scan display appears. Press the [IMAGE STORE/DELETE] key. The dialog for entering the 8-digit image store password is displayed. Di551/Di650... - Page 291 A dialog appears, prompting whether you are sure you want to delete the job. Confirm the deletion with [YES]. The job is deleted. Press [PREVIOUS SCREEN] to close the cycle. Enter an image store code to delete another job. Di551/Di650...
-
Page 292: Storing And Printing A Job
The dialog for entering the 8-digit image store password is displayed. Enter the image store password using the touch screen keypad. Did you enter an incorrect number? ➜ Press the [1-CHARACTER DELETE] key as necessary to delete your input character for character. Then enter the correct image store password. Di551/Di650... - Page 293 Press the [START] key on the control panel to scan the originals and then save the data. When the scanning cycle completes, the data storage screen is displayed automatically. When all data has been saved to the hard drive, the basic options appear again. Di551/Di650...
- Page 294 Proper use of user’s choice setting! In the user’s choice setting you can specify whether the window for entering the job name appears again after the store cycle. For more information, see page 7-49. 6-10 Di551/Di650...
-
Page 295: Recalling Job From Hard Drive
On the control panel press the Printer Copier Scan [MODE] key several times if necessary to select the “Scan” feature. The scan display appears. Press the [IMAGE RECALL] key. The dialog for entering the 8-digit image store password is displayed. Di551/Di650 6-11... - Page 296 Mark the wrong job in the print window. Press the left arrow key. The job is hidden in the print window and displayed on the left side. only as required Press the [JOB CHECK] key to recall check mode and to check the system settings of the lob. 6-12 Di551/Di650...
- Page 297 If you want to interrupt the cycle, press the [CANCEL] key when the recall window appears. A dialog box is shown for confirmation. Confirm the cancellation with [YES]. If you interrupt the recall cycle, this will not delete the data from the hard disk. Di551/Di650 6-13...
-
Page 298: Web Functions
Environment Setup Settings for e-mail transmission (also available in key operator mode). Machine Status Information on the paper drawer configurations, the system configuration and the installed options ➜ Click [REFRESH] to update the screen. 6-14 Di551/Di650... -
Page 299: Starting The Web Utilities
In the web browser, select the “Open” command under the “File” menu. Enter the URL: http:// (IP address or system host name). If you do not know it, ask your network administrator for the IP address or system host name. Di551/Di650 6-15... - Page 300 Replace the staple cartridge Dispose of Trimmer trash basket: Empty the waste container for the trimming unit Dispose of Punch trash basket: Empty the punch waste container PM call: A maintenance interval is pending ➜ Click [REFRESH] to update the screen. 6-16 Di551/Di650...
-
Page 301: Calling Up System Status
Start the Web Utilities. For more information, see page 6-15. Click [MACHINE STATUS]. The screen now displays information on the paper drawer configurations, the system configuration and the installed options. Di551/Di650 6-17... -
Page 302: Calling Up Job Status
The current job status, the number of jobs in the queue and the remaining print time for the current job are displayed. Under “Job List”, click a [JOB PRIORITY NO.] to view the data of the current job or a job in the queue. 6-18 Di551/Di650... - Page 303 Network Functions Under “Job Status”, click a [JOB ID NO.] to view the data of a job already printed. Up to 16 jobs are displayed in the list. ➜ Click [REFRESH] to update the screen. Di551/Di650 6-19...
-
Page 304: Calling Up And Editing Hard Drive Data
Yes you can search for a print job. ➜ To do so, enter the name or ID of the print job you are looking for in the “Job Search” dialog field. Then click [SEARCH]. The print job you indicated is then displayed. 6-20 Di551/Di650... - Page 305 ❍ Click [IMAGE] to view a preview image of the first page as well as detailed information on the selected data. Then click [OUTPUT] to have the data printed. Click [BACK] to return to the Job List. Di551/Di650 6-21...
- Page 306 Change the number of sets if necessary. Start output on the system using the [START] button on the control panel. When the print job is finished, a message indicating so is displayed on the PC. 6-22 Di551/Di650...
- Page 307 Click [RENAME] to rename the data record and save it under a new name on the hard drive. Enter the new name or ID in the dialog field. Then click [APPLY] to save your changes. Click [RESET] to cancel your changes. Click [BACK] to return to the Job List. Di551/Di650 6-23...
-
Page 308: E-Mail Transmission Setting
Web Utilities. For more information on setting up e-mail transmission, see page 7-10. Start the Web Utilities. For more information, see page 6-15. Click [ENVIRONMENT SETUP]. Enter the 4-digit code and confirm your input with [APPLY]. Click [E-MAIL TRANSMISSION SETTING]. 6-24 Di551/Di650... - Page 309 Network Functions Check the settings and modify them as needed. Click [APPLY] to save the settings. Click [RESET] to cancel your changes. Di551/Di650 6-25...
- Page 310 Network Functions 6-26 Di551/Di650...
-
Page 311: Settings In Key Operator Mode
Help cannot be called up from key operator mode... You can no longer call up help in key operator mode by pressing the [HELP] key on the control panel. To access the help mode, you have to leave key operator mode. Di551/Di650... -
Page 312: Overview
Code not accepted? ➜ Reenter the code and confirm your selection with [OK]. If the code still is not accepted, talk to the system administrator. Leaving Key Operator Mode ➜ To exit key operator mode, press [RETURN] in key operator mode. Di551/Di650... -
Page 313: Overview Of The Key Operator Mode Menu
Control panel adjustment [11] Set auto tray selection [12] Energy saver setting [13] Memory switch setting For more information, see page 7-49 [14] Machine management list Program memory list print User management list E.K.C. management list Font pattern list Di551/Di650... - Page 314 Side 2 lens adjustment [17] Finisher adjustment Staple and fold stopper adj. Folding stopper adjustment [18] HDD management setting Password list/delete JOB auto delete period setting State of HDD capacity [19] Set scanner transmission [20] Non-Image area erase setting Di551/Di650...
-
Page 315: 1) System Initial Setting
Use the [SET] key to select the value that you want to change. ❍ Enter the new value using the touch screen keypad. ❍ Only if necessary Press the [SUMMER TIME] key to enable the summer time feature. This causes the “Current time” to be shown one hour off. Di551/Di650... - Page 316 The dialog box for entering the date and time appears again. Press the [OK] key to confirm your input. The submenu appears again. Press the [RETURN] key. The key operator mode menu is displayed again. 24-hour days Specify the hour in 24-hour mode. Di551/Di650...
-
Page 317: Language Select Setting
Press the [2] Language select setting key in the submenu. The screen for setting the language appears. Press the key of the desired language. Press the [OK] key to confirm your input. The submenu appears again. Press the [RETURN] key. The key operator mode menu is displayed again. Di551/Di650... -
Page 318: Ip Address Setting
Press the [3] IP address setting key in the submenu. The screen for setting the IP address appears. Select a setting. Press the [RESET] key to delete the old value. Enter the new value using the touch screen keypad. Press the [SET] key to save the new value. Di551/Di650... - Page 319 Press the [OK] key to confirm your input. The screen for setting the IP address appears again. Press the [OK] key to confirm your input. The submenu appears again. Press the [RETURN] key. The key operator mode menu is displayed again. Di551/Di650...
-
Page 320: E-Mail Transmission Setting
Call up key operator mode. The key operator mode menu is displayed. In the key operator mode menu press the [1] System initial setting key. A submenu appears. Press the [4] E-Mail transmission setting key in the submenu. Another submenu appears. 7-10 Di551/Di650... - Page 321 Press the [3 ] E-Mail settings <Receiving person of condition info> key. Use the touch screen keypad to enter the e-mail address of the person who should be informed by e-mail of, for example, a malfunction. Confirm your selection by pressing [OK]. Di551/Di650 7-11...
- Page 322 Confirm your selection by pressing [OK]. Press the [OK] key to confirm your input. The submenu appears again. Press the [RETURN] key. The key operator mode menu is displayed again. 7-12 Di551/Di650...
-
Page 323: 2) Copier Initial Setting
Mode, Special Original, Original Type Rotation Call up key operator mode. The key operator mode menu is displayed. In the key operator mode menu press the [2] Copier initial setting key. An overview of the basic options appears. Di551/Di650 7-13... - Page 324 Select the settings that are to be enabled automatically when the system is switched on or a control panel reset is carried out. Press the [OK] key to confirm your input. The key operator mode menu is displayed again. 7-14 Di551/Di650...
-
Page 325: 3) User Setting Mode
The key operator mode menu is displayed. In the key operator mode menu press the [3] User settings menu key. A submenu appears. Press the [1] Setting user density level 1 key in the submenu. The screen for setting the copy density appears. Di551/Di650 7-15... - Page 326 ❍ Specify the desired value for the density setting using the touch screen keypad. Press the [OK] key to confirm your input. The submenu appears again. Press the [RETURN] key. The key operator mode menu is displayed again. 7-16 Di551/Di650...
-
Page 327: Setting User Density Level 2
❍ Specify the desired value for the density setting using the touch screen keypad. Press the [OK] key to confirm your input. The submenu appears again. Press the [RETURN] key. The key operator mode menu is displayed again. Di551/Di650 7-17... -
Page 328: Setting The Zoom Ratio (Lens Mode)
❍ USERSET 2:2.000 ❍ USERSET 3:0.500 Change any other zoom ratios as you like. Press the [OK] key to confirm your input. The submenu appears again. Press the [RETURN] key. The key operator mode menu is displayed again. 7-18 Di551/Di650... -
Page 329: 4) E.k.c. Function Setting
You are now in E.K.C. mode. Master code not accepted? ➜ Reenter the master code and confirm your selection with [OK]. ➜ If the master code still is not accepted, find out whether the code has been changed. Di551/Di650 7-19... -
Page 330: (1) E.k.c. Data Edit
The screen for managing E.K.C. accounts appears. From the list of E.K.C. accounts, select the E.K.C. account you want to modify using the arrow keys (to the right of the list). Press the [CHANGE] key. The screen for modifying E.K.C. data appears. 7-20 Di551/Di650... - Page 331 Message that the name has already been used? ➜ Press the [OK] key and enter a different name. Press the [RETURN] key. The submenu appears again. Press the [RETURN] key. The key operator mode menu is displayed again. Di551/Di650 7-21...
- Page 332 The screen for setting up a new E.K.C. account appears. Press [PASSWORD], [NAME] or [LIMIT] and enter the new values with the touch screen key pad. ❍ Password: max. 8 digits ❍ Name: max. 8 characters ❍ Limit: 0 to 999,999 copies 7-22 Di551/Di650...
- Page 333 Message that the name has already been used? ➜ Press the [OK] key and enter a different name. Press the [RETURN] key. The submenu appears again. Press the [RETURN] key. The key operator mode menu is displayed again. Di551/Di650 7-23...
- Page 334 Press the [DELETE] key. A confirmation dialog appears. Confirm the deletion with [YES]. The E.K.C. is deleted. Press the [RETURN] key. The submenu appears again. Press the [RETURN] key again. The key operator mode menu is displayed again. 7-24 Di551/Di650...
- Page 335 A confirmation dialog appears. Confirm the deletion with the [YES] key. The E-K-C. count is reset to 0. Press the [RETURN] key. The submenu appears again. Press the [RETURN] key again. The key operator mode menu is displayed again. Di551/Di650 7-25...
-
Page 336: (2) E.k.c. All Count Reset
Press the [2] Reset All E.K.C. accounts key in the submenu. The screen for resetting the counter appears. Press the [YES] key. The counters are reset. Press the [RETURN] key. The submenu appears again. Press the [RETURN] key again. The key operator mode menu is displayed again. 7-26 Di551/Di650... -
Page 337: (3) E.k.c. Function Setting
[WARNING] A warning is displayed. Copies, however, may continue to be made without restriction. Press the [OK] key to confirm your input. The submenu appears again. Press the [RETURN] key. The key operator mode menu is displayed again. Di551/Di650 7-27... -
Page 338: 5) Program Memory Lock/Delete
A white field indicates that the program memory position is unlocked. Press the field to the left of the program memory position to change its status. Press the [OK] key to confirm your input. The key operator mode menu is displayed again. 7-28 Di551/Di650... -
Page 339: Deleting System Settings
Select the program memory position of the system settings that you want to delete. Press the [DELETE] key. The stored system settings are deleted. Press the [OK] key to confirm your input. The key operator mode menu is displayed again. Di551/Di650 7-29... -
Page 340: 6) Paper Type/Special Size Setting
Use the arrow keys on the touch screen to select the paper type that you want to assign to the paper tray. Press the [OK] key to confirm your input. The key operator mode menu is displayed again. 7-30 Di551/Di650... -
Page 341: Specifying The Paper Size
In the key operator mode menu press the [6] Paper type/Special size setting key. The screen for selecting a paper type appears. Press the [SPECIAL SIZE SETTING] key. The screen for selecting a paper size appears. Select the paper tray that you want to configure the paper size for. Di551/Di650 7-31... - Page 342 Use the arrow keys on the touch screen to select a wide paper size. Press the [PAPER TYPE SETTING] key and set an overall size with the number keys on the touch pad. Confirm your selection by pressing [OK]. The key operator mode menu is displayed again. 7-32 Di551/Di650...
-
Page 343: Set Copy Start To Wide Size Paper
The key operator mode menu is displayed. In the key operator mode menu press the [6] Paper type/Special size setting key. The screen for selecting a paper type appears. Press the [SPECIAL SIZE SETTING] key. The screen for selecting a paper size appears. Di551/Di650 7-33... - Page 344 Set the copy start in “image pos.” ❍ Lead edge at the paper feed edge ❍ Rear edge at the opposite side to the paper feed edge Press the [OK] key to confirm your input. The key operator mode menu is displayed again. 7-34 Di551/Di650...
-
Page 345: 7) Panel Contrast/Key Sound Adjustment
❍ Backlight contrast adjustment Press the arrow keys for Dimmer and Brighter to adjust the brightness of the touch screen background. Confirm your selection by pressing [OK]. The key operator mode menu is displayed again. Di551/Di650 7-35... -
Page 346: 8) Key Operator Data Setting
Use the keypad on the touch screen to enter the name of the contact person. Press the [FOR ASSISTANCE] key. Use the keypad on the touch screen to enter the phone number of the contact person. Confirm your selection by pressing [OK]. The key operator mode menu is displayed again. 7-36 Di551/Di650... -
Page 347: 9) Weekly Timer
The key operator mode menu is displayed. In the key operator mode menu press the [9] Weekly timer key. A submenu appears. The prompt for entering the code appears. Enter the 4-digit code with the touch screen keypad and confirm the input with [OK]. Di551/Di650 7-37... -
Page 348: Weekly Timer On/Off Setting
Press the [WEEKLY TIMER ON] key to enable the weekly timer. Press the [WEEKLY TIMER OFF] key to disable the weekly timer. Confirm your selection by pressing [OK]. The submenu appears again. Press the [RETURN] key. The key operator mode menu is displayed again. 7-38 Di551/Di650... -
Page 349: Timer Setting
Always enter 2-digit values, e.g. 07 for 7 minutes. Set any other on and off times for the weekdays. Confirm your input by pressing [OK]. The submenu appears again. Press the [RETURN] key. The key operator mode menu is displayed again. Di551/Di650 7-39... - Page 350 The screen for scheduling block times appears. Select the weekdays to which the block time will apply. Enter the switch-on time for the weekly timer using the touch screen keypad. Then press the [SET] key to set the switch-off time. 7-40 Di551/Di650...
- Page 351 Confirm your input by pressing [OK]. The data are copied into the menu for specifying weekly timer times. Confirm your input by pressing [OK]. The submenu appears again. Press the [RETURN] key. The key operator mode menu is displayed again. Di551/Di650 7-41...
-
Page 352: Timer Action On/Off Setting
Select the desired weekday on which the system is to be switched on/ off. ❍ black background: system switched on ❍ white background: system switched off Confirm your selection by pressing [OK]. The submenu appears again. Press the [RETURN] key. The key operator mode menu is displayed again. 7-42 Di551/Di650... - Page 353 Thursday of the selected month. Confirm the prompt with [YES] and make any other required settings. Confirm your input by pressing [OK]. The submenu appears again. Press the [RETURN] key. The key operator mode menu is displayed again. Di551/Di650 7-43...
-
Page 354: Lunch Hour Off Setting
Press the [FUNCTION INVALID] key to disable the pause function. Confirm your input by pressing [OK]. The submenu appears again. Press the [RETURN] key. The key operator mode menu is displayed again. 7-44 Di551/Di650... -
Page 355: Timer Interrupt Password Setting
If you input 0000 as the password, the weekly timer can be interrupted by switching the system off and on again. In this case, you will be prompted to input the duration of the interruption after switching on. Di551/Di650 7-45... -
Page 356: 10) Control Panel Adjustment
3 to 5. On the control panel press the [1] key to return to the selection. The key operator mode menu is displayed again. 7-46 Di551/Di650... -
Page 357: 11) Set Auto Tray Selection
Use the [UP] and [DOWN] arrow keys on the touch screen to sort the trays according to the desired access priority. Confirm your input by pressing [OK]. The key operator mode menu is displayed again. Di551/Di650 7-47... -
Page 358: 12) Energy Saver Setting
The period for the energy saving function must not exceed the period for automatic shut off. If the same period is set for the two functions, the automatic shut off will be enabled instead of the energy saving function. 7-48 Di551/Di650... -
Page 359: 13) Memory Switch Setting
Use the arrow keys on the right side of the touch screen to select the setting you want to modify. Press the [CHANGE SETTING CONTENTS] key as many times as necessary until you find the desired value. Confirm your input by pressing [RETURN]. The key operator mode menu is displayed again. Di551/Di650 7-49... -
Page 360: Overview Of Settings
APS/AMS / Erased for Original Glass (1:1) EDH frame erasure Automatically deletes a frame around an selection original when original is loaded into the EDH. OFF / 1mm / 2mm / 3mm* / 4mm / 5mm frame * Initial setting 7-50 Di551/Di650... - Page 361 A5R* / B6R / 5.5 × 8.5R Rotation When rotation is on, this function is enabled: ON - Always* / ON - APS / AMS only / ON - APS / AMS / Reduce only * Initial setting Di551/Di650 7-51...
- Page 362 Arrow key change Image Interval for image shift Shift Decimal point OFF 1 step-1mm* / Decimal point ON 1 step-0.1 mm Exit direction of 1 sheet Single copies are output with: Face down* / Face up * Initial setting 7-52 Di551/Di650...
- Page 363 ON (every job disabled)* / ON (not every job enabled) / OFF Overlay delete Sets whether data in overlay memory can be deleted or overwritten. Every job disabled* / Not every job disabled * Initial setting Di551/Di650 7-53...
- Page 364 (SRV) function should remain enabled after a recall cycle. Face down* / Face up Document direction Sets whether non-sorted or sorted 1-sided copies should be output to the main tray. Face down* / Face up * Initial setting 7-54 Di551/Di650...
-
Page 365: 14) Machine Management List Print
Prints a list of system character sets. The basic options are displayed again. Press the [START] key on the control panel to start the list printout. Press the [UTILITY] and [C] key on the control panel in succession to return to the submenu. Di551/Di650 7-55... - Page 366 Settings in Key Operator Mode Press the [RETURN] key. The key operator mode menu is displayed again. 7-56 Di551/Di650...
-
Page 367: 15) Call Remote Center
In the key operator mode menu press the [15] Call remote service centre key. A submenu appears. From the submenu, select the message that you want to send to the service center. The screen for sending the message is displayed. Di551/Di650 7-57... - Page 368 Press the [START] key. The message is sent to the remote center. The service technician will contact you. Press the [RETURN] key. The submenu appears again. Press the [RETURN] key. The key operator mode menu is displayed again. 7-58 Di551/Di650...
-
Page 369: 16) Side 2 Lens Adjustment
Select the paper tray that you want to adjust the lens for. Select the desired value using the arrow keys. Repeat steps 4 and 5 for any other trays. Confirm your settings by pressing [OK]. Press the [RETURN] key. The key operator mode menu is displayed again. Di551/Di650 7-59... -
Page 370: 17) Finisher Adjustment
The second page of the key operator mode menu is displayed. In the key operator mode menu press the [17] Finisher adjustment mode key. A submenu appears. Select the item you want to modify from the submenu. The screen for entering the new values appears. 7-60 Di551/Di650... - Page 371 Settings in Key Operator Mode only as required Use [NEXT] and [BACK] to select the paper size for which you want to make settings. Confirm your settings by pressing [SET]. Press the [RETURN] key. The key operator mode menu is displayed again. Di551/Di650 7-61...
-
Page 372: 18) Hdd Management Setting
In the submenu press the [1] Password list/delete key. The image store password list is displayed. Select the image store password that you want to delete and then press the [DELETE] key. A confirmation dialog appears. Confirm the deletion with [YES]. 7-62 Di551/Di650... - Page 373 Settings in Key Operator Mode Press the [RETURN] key. The submenu appears again. Press the [RETURN] key. The key operator mode menu is displayed again. Di551/Di650 7-63...
-
Page 374: Job Auto Delete Period Setting
Use the touch screen keypad to specify how many weeks (up to 52) should pass before a password and all of its associated copy jobs are deleted. Confirm your settings by pressing [OK]. The submenu appears again. Press the [RETURN] key. The key operator mode menu is displayed again. 7-64 Di551/Di650... -
Page 375: State Of Hdd Capacity
In the submenu press the [3] State of HDD capacity key. The current hard disk capacity is displayed. Press the [RETURN] key. The submenu appears again. Press the [RETURN] key. The key operator mode menu is displayed again. Di551/Di650 7-65... -
Page 376: 19) Scan Transmission Object Change/Delete
Press the [AUTO] key. The type of non-image area erase and the original density will be selected in accordance with the detected original. Confirm your selection by pressing [OK]. Press the [RETURN] key. The key operator mode menu is displayed again. 7-66 Di551/Di650... -
Page 377: Troubleshooting
The original glass is dirty. Clean the original glass. See page 9-2. The original is not flat Place the original correctly against the original glass. on the original glass. See page 3-7. The paper is damp. Replace the paper. The copy is blurred. Di551/Di650... - Page 378 See page 3-7. Position the original correctly in the original feed. See page 3-9. The copy is not straight. The original is not suitable Place the original on the for the EDH. original glass. See page 3-7. Di551/Di650...
-
Page 379: Your System Is Not Working Correctly
I (ON). The building circuit Switch on the circuit breaker is activated. breaker. Copying cannot be There is another paper Clear all paper jams that continued after a paper jam. you can find. jam. Di551/Di650... - Page 380 The finisher is stapling at Automatic rotation is Change the position of the wrong position. enabled. the original to prevent rotation. The hole punch unit is The waste container is Empty the hole punch not working. full. unit waste container. Di551/Di650...
- Page 381 Troubleshooting If there are any other technical problems: switch the system off, remove the power plug from the outlet and contact the technical representative. Di551/Di650...
-
Page 382: If The Pm Call Message Is Displayed
Make a note of the malfunction code shown in the message line in the upper left area of the touch screen. Switch the system off. Switch off the system power supply with the main switch. Remove the power plug from the outlet. Call your technical representative and report the malfunction code. Di551/Di650... -
Page 383: If The System Still Operates Partially
Press the [RESET] key on the control panel. Make a note of the message shown Please switch OFF/ON in the message line. E-18-2 Switch off the system with the power switch and then on again. Call your technical representative and report the malfunction message. Di551/Di650... -
Page 384: If The Memory "Overflows
Press [CONTINUE] to continue the scan cycle for the reserve job when memory space is released. No [STOP SCAN] for booklets! The [STOP SCAN] key cannot be enabled if jobs using the “Booklet” feature are interrupted due to a memory overflow. Di551/Di650... -
Page 385: If The "Please Switch Off/On" Screen Appears
If the system data flow is interrupted, the “Please switch OFF/ON” screen is displayed. Switch off the system with the on/off switch. Wait approximately 10 seconds. Switch on the system with the on/off switch. If the display appears again, please contact your technical representative. Di551/Di650... -
Page 386: Clearing A Paper Jam
If there is a paper jam in the system, the cycle is interrupted. The touch screen shows the position of the jam. ➜ Follow the instructions on the touch screen to clear the paper jam. Press [GRAPHIC ILLUSTRATION] to remove the paper with the help of a step-by-step diagram. 8-10 Di551/Di650... -
Page 387: Emptying The Waste Container
The waste container collects the waste paper generated when copies are punched. When the waste container is full, a message to that effect appears on the touch screen. PK-2 Hole-Punch Unit Empty the hole punch unit waste container. Open the finisher door. Pull the waste container out carefully. Di551/Di650 8-11... - Page 388 Troubleshooting Empty the waste container. Replace the waste container carefully. Close the finisher door. 8-12 Di551/Di650...
-
Page 389: Pk-5 Hole-Punch Unit
Troubleshooting PK-5 Hole-Punch Unit Empty the hole punch unit waste container. Open the finisher door. Pull the waste container out carefully. Empty the waste container. Replace the waste container carefully. Di551/Di650 8-13... - Page 390 Troubleshooting Close the finisher door. 8-14 Di551/Di650...
-
Page 391: Punch/Z-Fold Unit Zk-2
Troubleshooting Punch/Z-fold Unit ZK-2 Empty the waste container for the Punch/Z-fold Unit ZK-2. Open the finisher door. Pull the waste container out carefully. Empty the waste container. Replace the waste container carefully. Di551/Di650 8-15... - Page 392 Troubleshooting Close the finisher door. 8-16 Di551/Di650...
-
Page 393: Appendix
Wipe clean with a soft cloth moistened with a mild home detergent: system housing original cover Wipe with a soft, dry cloth: touch screen original glass CAUTION System may be damaged by improper cleaning ➜ Wipe the surface of the control panel clean using a soft, dry cloth only. Di551/Di650... -
Page 394: Cleaning The Original Cover And Original Glass
Open the EDH. Wipe the original cover clean with a soft cloth moistened with a mild home detergent. Wipe the original glass clean with a soft cloth moistened with a mild home detergent. Di551/Di650... -
Page 395: Specifications
Appendix Specifications System Di551/Di650 Specifications Type Stationary floor unit Copying system Indirect electrostatic process Platen Stationary Photoconductor Light source Xenon lamp Development process Dry, 2-component process with magnetic wave Fixing method Lamp-Heated Roller Density settings Automatic and manual (9 increments) Zoom ratios •... - Page 396 • Stack bypass tray: max. 100 sheets (80 g/m²) Warm-up time about 5.5 minutes (Di551), about 6 minutes (Di650) 1st copy about 3.4 seconds A4 (Di551), about 3.1 seconds A4 (Di650) Power requirements 230 V/50 Hz Power consumption max. 2.3 kW (with options) Noise emission max.
-
Page 397: Electronic Document Handler (Edh-4)
50 sheets (80 g/m² ) or paper stack up to 5 mm Staple capacity 5,000 Staples Dimensions • Width: 656 mm • Depth: 656 mm • Height: 990 mm Weight approx. 65 kg Power requirements Supplied from System Di551/Di650... -
Page 398: Finisher Fn-113 (Optional)
• Number of holes: 4-point punching Power requirements of copier Current consumption 71 W or less Dimensions • Width: 656 mm • Depth: 637 mm • Height: 1020 mm Weight 48.5 kg Accessories 2 staple holders with 5,000 staples/holder Di551/Di650... -
Page 399: Cover Inserter B (Optional For Finisher Fn-6)
A3, B4, F4, A4, A5, 11"×17", 8.5"×11" Dimensions PK-2 PK-5 • Width: 68 mm 130 mm • Depth: 442 mm 470 mm • Height: 120 mm 115 mm Weight approx. 2 kg (PK-2), approx. 3 kg (PK-5) Power requirements Supplied from Finisher Di551/Di650... -
Page 400: Punch/Z-Fold Unit Zk-2 (Optional)
• Thick paper (91 to 200 g/m²) Paper sizes A4, B5, 8.5"×11", wide size (max. 314 mm × 223 mm) Dimensions • Width: 430 mm • Depth: 639 mm • Height: 695 mm Weight approx. 30 kg Power requirements supplied from system Di551/Di650... -
Page 401: Large Capacity Cassette C-404 (Optional)
A3, B4, F4, A4, A4R, 11"×17", 8.5"×14", 8.5"×11", 8.5"×11"R, wide size (max. 314 mm × 459 mm) Dimensions • Width: 670 mm • Depth: 639 mm • Height: 695 mm Weight approx. 42 kg Power requirements supplied from system Di551/Di650... -
Page 402: Supplies
Supplies The following table provides an itemization of the supplies. If necessary, please contact you local Minolta partner. Supplies Maximum number of copies Toner cartridge 44,000 (A4 at 6% image ratio) Developer 250,000 Photoconductor 500,000 Staples 5,000 staples 9-10 Di551/Di650... -
Page 403: You Can Process This Paper
100 sheets (80 g/m²) from bypass tray Specifying special paper sizes and weights! You can configure standard sizes (special), special sizes, wide sizes and paper weights in key operator mode. For more information, see page 7-30. Di551/Di650 9-11... -
Page 404: With The Large Capacity Cassettes Lcc (Optional)
100 sheets (80g/m²) from the bypass tray Tray 4 (LCC) up to 4,000 sheets (80 g/m²) Specifying special paper sizes and weights! You can configure special sizes, wide sizes and paper weights in key operator mode. For more information, see page 7-30. 9-12 Di551/Di650... -
Page 405: With The Bypass Tray
• Thin: 50~59 g/m² • TAB: 91~170 g/m² Paper capacity max. 100 sheets 80 g/m²; max. 1 sheet (OHP transparency) Specifying paper sizes and weights... Define paper sizes and weights in key operator mode. For more information, see page 7-1. Di551/Di650 9-13... -
Page 406: With The Automatic Duplex Unit
. . . with the Cover Inserter B (optional) Cover Inserter B Standard sizes Punch mode: A4, B4, F4, A4, B5 Fold mode: A3, B4 Original weights 50~170 g/m² paper 60~90 g/m² paper (in fold mode) 9-14 Di551/Di650... -
Page 407: With Punch/Z-Fold Unit Zk-2 (Optional)
20 stapled sets 2 sheets 0~30 sheets 10 stapled sets 3 sheets 0~20 sheets 4 stapled sets 4 sheets 0~10 sheets 3 stapled sets 5 sheets 2 stapled sets 6 sheets and more Z-fold cannot be combined with stapling. Di551/Di650 9-15... -
Page 408: With The Fn-113 And Fn-6 Finishers (Optional)
2 to 9 copies 50 sets 100 sets 10 to 20 copies 50 sets 50 sets 21 to 30 copies 30 sets 30 sets 32 to 40 copies 25 sets 25 sets 41 to 50 copies 20 sets 20 sets 9-16 Di551/Di650... - Page 409 2 to 9 copies 50 sets 100 sets 10 to 20 copies 50 sets 50 sets 21 to 30 copies 30 sets 30 sets 32 to 40 copies 25 sets 25 sets 41 to 50 copies 20 sets 20 sets Di551/Di650 9-17...
-
Page 410: Ce Marking (Declaration Of Conformity)
According to EC guidelines, this is not permitted. ➜ Use only shielded interface cables. If you require the complete declaration of conformity A complete declaration of conformity can be obtained by calling the following numbers: by fax recall at +49-511-7404-346 telephone number +49-511-7404-272 9-18 Di551/Di650... -
Page 411: Index
Bypass tray ............3-43 4-60 4-62 9-13 Loading tab papers ..............3-44 Refilling ..................2-46 Call up, job ..................6-11 Capacity, memory ................8-8 Cautions ..................1-4 2-16 Chapter mode ..................5-6 Check mode ..................3-14 Check user name ................3-24 Cleaning ....................9-1 Cleaning, original glass ...............9-1 Di551/Di650 9-19... - Page 412 Date ....................7-5 Delete Copy job ..................7-64 Job ....................6-6 System settings ................7-29 Density shift ..................4-50 Dimensions, system ................2-26 Document memory ................4-65 Dual page ..................5-23 Duplex ..................4-42 4-44 Duplex unit ..................9-14 9-20 Di551/Di650...
- Page 413 Fold erasure ..................5-40 Folding ..............4-14 4-24 4-27 4-29 Folding and stapling ................4-14 Frequency tolerances ................2-27 FTP ....................7-66 Full-image area ..................5-45 Functions ...................4-64 Automatic ..................1-12 Finishing features .................1-13 General ..................1-8 Set up by a service technician .............1-14 Group ....................4-9 Di551/Di650 9-21...
- Page 414 Inserting the staple cartridge ............. 2-51 Inserts ....................5-2 Installation site, system ..............2-25 Intended use ..................2-61 Interruption ..................3-29 IP address ................... 7-8 Jam ..................3-27 8-10 Call up ..................6-11 Delete ...................3-23 Print ....................6-8 Program ..................5-27 Store ....................6-3 9-22 Di551/Di650...
- Page 415 Loading tab papers ................2-47 Lock, program memory position ............7-28 Lunch hour off setting ................7-44 Machine management lists ..............7-55 Machine status ..................6-17 Main switch ..................2-28 Main tray ................4-4 Maintenance ..................9-1 PM count ..................2-57 Malfunctions ................8-1 Manual processing ................4-29 Di551/Di650 9-23...
- Page 416 Mixed original ................3-11 Original glass ................. 3-7 Z-fold ................... 3-13 Original feeder ..................3-9 Output menu ..................4-1 Overlay ....................5-51 Overlay memory ................5-51 Oversized paper ................5-45 Overview of features ................1-8 Overview, key operator mode ............. 7-3 9-24 Di551/Di650...
- Page 417 Punch/Z-fold unit ZK-2 (optional) ......2-11 4-20 4-24 9-15 Recycled paper ..................1-2 Reduction ..................4-52 Refilling trays ..................2-37 Remote center ...................7-57 Remote diagnostics ................7-57 Repeat ....................5-35 Replenishing the staple supply ..........2-51 2-54 Reserve copy jobs ................3-18 Reserve job ..................3-18 Reset counter ..................7-26 Di551/Di650 9-25...
- Page 418 Standard size, tab, wide size ............4-81 Staple ................4-6 4-14 4-29 Start, cycle ..................3-2 State of HDD capacity ............... 7-65 Status display ..................3-20 Stop, cycle ..................3-2 Storage Supplies ..................2-27 System ..................2-59 Storage of supplies ................2-27 9-26 Di551/Di650...
- Page 419 System overview .................2-1 System settings Delete ...................7-29 Store ....................3-33 Tab papers ........2-39 2-41 2-43 2-45 2-47 3-44 Takeback and reutilization ..............1-2 Tandem mode ...................4-36 Text mode ..................4-75 Three-folding ..................4-27 Time .....................7-5 Timer ....................3-4 Timer interrupt password ..............7-45 Timer setting ..................7-39 Di551/Di650 9-27...
- Page 420 Watermark ..................5-51 Web functions ................... 6-14 Web utilities ..................6-14 Weekly timer ................7-37 7-45 Interrupt ..................3-4 Wide size ............. 4-62 5-45 7-30 7-33 Z-fold ................3-13 4-24 4-79 Z-fold unit ZK-2 (optional) ........2-11 4-20 4-24 9-15 9-28 Di551/Di650...
- Page 421 Appendix Zoom ................4-52 4-55 4-56 Zoom ratio ................4-52 7-18 Fixed magnification ratios ............4-54 Manual selection ................4-54 Preset zoom ratios ...............7-18 User-set zoom ratio ..............4-55 Vertical, horizontally different ............4-56 Di551/Di650 9-29...
- Page 422 Appendix 9-30 Di551/Di650...
Need help?
Do you have a question about the Di551 and is the answer not in the manual?
Questions and answers