Polycom RMX 2000 Getting Started Manual
Version 1.1
Hide thumbs
Also See for RMX 2000:
- Administrator's manual (312 pages) ,
- Getting started manual (134 pages) ,
- Hardware manual (69 pages)
Table of Contents
Advertisement
Quick Links
Download this manual
See also:
Administrator's Manual
Advertisement
Table of Contents

Related Manuals for Polycom RMX 2000


Summary of Contents for Polycom RMX 2000
- Page 1 RMX 2000 Getting Started Guide Version...
- Page 2 Polycom, Inc. Information contained herein is subject to change without notice and does not represent commitment of any type on the part of Polycom, Inc. Polycom and Accord are registered trademarks of Polycom, Inc.
- Page 3 CE Mark R&TTE Directive electrician, as appropriate. Polycom Inc., declares that the Polycom RMX 2000 is in conformity with the following relevant harmonized standards: EN 60950-1:2001 EN 55022: 1998+A1:2000+A2:2003 class A EN 300 386 V1.3.3: 2005...
- Page 4 Regulatory Notices Chinese Communication Certificate...
-
Page 5: Table Of Contents
Polycom RMX 2000 Getting Started Guide Table of Contents System Overview ......1-1 RMX 2000 .................... - Page 6 Table of Contents Fast Configuration Wizard ..........2-10 RMX’s Default Conferencing Settings ..........2-17 Customizing the RMX’s Default Conferencing Settings ..2-18 Basic Operation ......3-1 Starting the RMX ..................
- Page 7 Polycom RMX 2000 Getting Started Guide Changing the Video Layout of a Conference ....3-34 Video Forcing ................ 3-35 Participant Level Operations ............3-37 Video Forcing ................ 3-39 Personal Layout Control ............3-40 Conference Control Using DTMF Codes ......3-43...
- Page 8 Table of Contents...
-
Page 9: System Overview
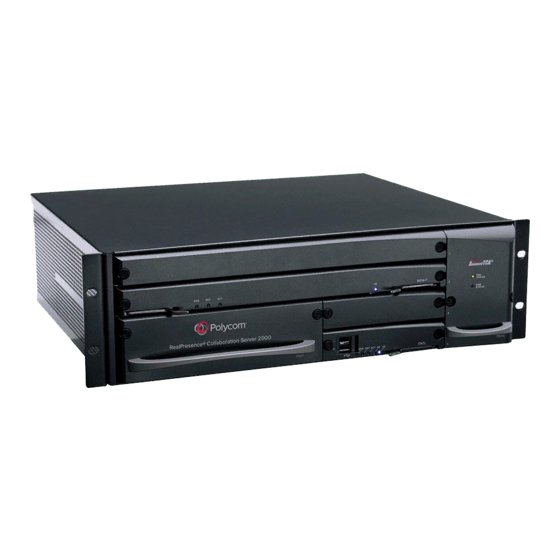
RMX Administrator’s Guide included with the system. RMX 2000 The Polycom RMX 2000 Multipoint Control Unit (MCU) is a high performance, scalable, IP-network (H.323 and SIP) solution that provides the user with feature-rich, and easy-to-use multipoint voice and video conferencing. - Page 10 Web Client IP Phone Figure 1-1 Multipoint Video Conferencing using an Polycom RMX 2000 The Polycom RMX 2000 unit is controlled, via the LAN, by the Polycom RMX 2000 Web Client application, using Internet Explorer installed on the user’s workstation.
-
Page 11: Rmx Main Features
Polycom RMX 2000 Getting Started Guide RMX Main Features Video Display Dynamic Continuous Presence The dynamic Continuous Presence capability of the RMX system enables viewing flexibility by offering multiple viewing options and window layouts for video conferencing. The Continuous Presence mode offers 24 layouts to accommodate different numbers of participants and conference settings. -
Page 12: Standard Definition (Sd)
The H.239 protocol allows compliant endpoints to share content. By default, all Conferences, Entry Queues, and Meeting Rooms launched on the RMX have H.239 capability. People+Content is Polycom’s proprietary equivalent of H.239. Media Encryption Encryption is available at the conference and participant levels, based on... -
Page 13: Ivr-Enabled Conferencing
Polycom RMX 2000 Getting Started Guide IVR-Enabled Conferencing Interactive Voice Response (IVR) is a software module that automates the connection process and lets participants perform various operations during ongoing conferences. The participants use their endpoints’ keypads and remote control to interact with the conference’s menu-driven scripts using DTMF codes. -
Page 14: Connection Methods
— for undefined participants directly to a conference — for undefined participants via a single dial Entry Queue Conference Management and Monitoring Features The Polycom RMX 2000 Web Client provides capabilities for management and monitoring of participants and conferences, including the following: •... -
Page 15: First Time Installation And Configuration
First Time Installation and Configuration First Time Installation and Configuration of the Polycom RMX 2000 consists of the following procedures: Hardware Installation and Setup — Mount the RMX in a rack. — Connect the necessary cables. Gather Network Equipment and Address Information —... - Page 16 Chapter 2-First Time Installation and Configuration brackets. Fasten the RMX to the rack with screws through the four holes in the RMX’s front mounting brackets. • Using a shelf – Install the shelf, supplied by the rack manufacturer, in the rack. Mount the RMX on the shelf. Fasten the RMX to the rack with screws through the four holes in the RMX’s front mounting brackets.
-
Page 17: Connecting Cables
Polycom RMX 2000 Getting Started Guide Connecting Cables Prior to connecting cables, remove all protective caps from their port jacks. Connect the following cables to the back panel: • Power cable • LAN cable to LAN 2 Port. Power... -
Page 18: Gather Network Equipment And Address Information
Chapter 2-First Time Installation and Configuration Gather Network Equipment and Address Information IP Services The IP addresses and network parameters which enable communication Hardware between the RMX, its management application and the conferencing Installation devices are organized in two IP services: Setup •... - Page 19 Polycom RMX 2000 Getting Started Guide Table 2-1 Network Equipment and Address Information (Continued) Parameter Factory Default Local Network Settings Control Unit 192.168.1.1 Default Gateway Shelf Management 192.168.1.252 IP Address Signaling Host IP – address Media Board IP – address (MPM 1) Media Board IP –...
-
Page 20: First Entry Configuration
During first-time power-up, a dialog box appears requesting you to enter a Product Activation Key. Obtain the Product Activation Key Access the Support Page of the Polycom website: www.polycom.com/support In the Resource Center section, click the Register Your Product link. -
Page 21: Procedure 2: Modifying The Factory Default Management Network Settings
RMX 2000 and the computer and modifying the management network parameters using the Polycom RMX 2000 Web Client. For more information about the direct connection method, see RMX 2000 Administrators’s Guide, Appendix F: "Configuring Direct Connections to RMX” on page F-1. -
Page 22: Procedure 3: First-Time Power-Up And Connection To Mcu
Chapter 2-First Time Installation and Configuration In the lan.cfg file, modify the following parameters using the information supplied by your network administrator. Make sure that there are no extra spaces at the end of each line. — Management (Control Unit) IP Address —... -
Page 23: Procedure 4: Modifying The Default Ip Service Settings
Polycom RMX 2000 Getting Started Guide Start the RMX Web Client application on the workstation, by entering as defined in the USB key in http://<Control Unit IP Address> the browser’s address line and pressing Enter. In the RMX Welcome Screen, enter the default Username(POLYCOM)and Password(POLYCOM)and click Login. -
Page 24: Fast Configuration Wizard
Chapter 2-First Time Installation and Configuration Fast Configuration Wizard Enter the required IP information in the dialog box. Table 2-2 Fast Configuration Wizard – IP Field Description Network Service The name of the Default IP Service, assigned by the Name Fast Configuration Wizard. - Page 25 Polycom RMX 2000 Getting Started Guide Enter the required Routes information in the dialog box. Table 2-3 Fast Configuration Wizard – Routes Field Description Default IP Router Enter the IP address of the default router. Address Click the Next button.
- Page 26 Chapter 2-First Time Installation and Configuration If you selected SIP, skip the following steps and go to Step 11. Enter the required Gatekeeper information in the dialog box. Table 2-4 Fast Configuration Wizard – Gatekeeper Field Description Gatekeeper Select Specify to enable configuration of the gatekeeper IP address.
- Page 27 Polycom RMX 2000 Getting Started Guide Table 2-4 Fast Configuration Wizard – Gatekeeper (Continued) Field Description Aliases Alias The alias that identifies the RMX’s Control Unit within the network. Up to five aliases can be defined for each RMX. Note: When a gatekeeper is specified, at least one prefix or alias must be entered in the table.
- Page 28 Chapter 2-First Time Installation and Configuration Table 2-5 Fast Configuration Wizard – SIP Server Field Description SIP Server Select Specify to enable SIP Server configuration. When Off is selected, all SIP options are disabled. SIP Server IP Enter either the IP address of the preferred SIP Address server or its host name (if a DNS server is used).
- Page 29 The maximum extension time allowed by the MCU is 30 minutes. These flags can be modified later, if required, via the Setup menu’s System Configuration option. For more details, see the RMX 2000 Administrator’s Guide, "System Configuration” on page 11-5. 14 Click the Finish button.
- Page 30 Chapter 2-First Time Installation and Configuration The RMX confirms successful configuration. 15 In the Success Message box, click OK. The RMX requests confirmation of reset. 16 Click Yes. 17 Wait for the system to reset. 18 Click OK. 19 Log out of the RMX Web Client and log in again with the new IP address.
-
Page 31: Rmx's Default Conferencing Settings
A Conference Profile is assigned to a Meeting Room to define its conferencing properties. The DefaultVideo384 Profile contains the video conference parameters with a bit rate of 384Kbps, Auto Layout and Polycom Skin. The Profile uses an IVR Service called Conference IVR Service. IVR Service Name:... -
Page 32: Customizing The Rmx's Default Conferencing Settings
IVR Service or Entry Queue IVR Service. These services must be assigned to the appropriate conference profile or Entry Queue. For more details about IVR Services, see the RMX 2000 Administrator’s Guide, "IVR Services” on page 9-1. 2-18... - Page 33 384 Kbps (as in the default Entry Queue) or play voice messages in different languages – create a new Entry Queue. For more details about defining Entry Queues, see the RMX 2000 Administrator’s Guide, "Defining a New Entry Queue Service” on page 9-24.
- Page 34 Chapter 2-First Time Installation and Configuration 2-20...
-
Page 35: Basic Operation
Basic Operation The most common operations performed via the RMX Web Client are: • Starting, monitoring and managing conferences • Monitoring and managing participants and endpoints as individuals or groups. — Participant – A person using an endpoint to connect to a conference. -
Page 36: Rmx Screen Components
The Login dialog box appears. Enter your Username and Password and click the Login button. On first entry, the default Username and Password are both POLYCOM. The RMX main screen opens. RMX Screen Components The RMX Web Client’s main screen consists of five panes: •... - Page 37 Polycom RMX 2000 Getting Started Guide The Administrator’s view is show below: Conference List List Pane Management Address Book Status/ The main screen can be customized. For more information, see "Customizing the Main Screen” on page 3-9.
-
Page 38: Viewing And System Permissions
Chapter 3-Basic Operation Viewing and System Permissions The RMX Web Client user’s viewing and system permissions depend on the Login level as summarized in the table below: Table 3-1 Viewing and System Permissions Viewing Permissions Chairperson Operator Administrator Conference List List Pane Address Book Status Bar... -
Page 39: Conference List
Polycom RMX 2000 Getting Started Guide Conference List The Conference List pane lists all the conferences currently running on the MCU along with their Status, Conference ID, Start Time and End Time data. The number of ongoing conferences is displayed in the pane’s title. -
Page 40: Rmx Management
Chapter 3-Basic Operation RMX Management The RMX Management pane lists the parameters that need to be Viewing Permissions configured to set up and run conferences. The Configuration Pane is divided into two sections: • Frequently Used – parameters often configured monitored or modified. -
Page 41: Participant Alerts
Polycom RMX 2000 Getting Started Guide Participant Alerts Viewing Permissions It is a list of participants that are experiencing connection problems. It is sorted by conference. Open the Participant Alerts pane by clicking the Participant Alerts button on the left side of the Status Bar. -
Page 42: Address Book
Chapter 3-Basic Operation Address Book The Address Book is a list of Participants and Groups that have been defined on the RMX. The information in the address book enables RMX users to easily assign participants to conferences. The Address Book toolbar contains six buttons: •... -
Page 43: Displaying And Hiding The Address Book
Polycom RMX 2000 Getting Started Guide Displaying and Hiding the Address Book The first time you access the RMX Web Client, the Address Book pane is displayed. You can hide it by clicking the anchor pin ( ) button. The Address Book pane closes and a tab appears in the top right corner of the screen. -
Page 44: Customizing The Rmx Management Pane
Chapter 3-Basic Operation symbol appears in the column heading indicating the sort order and that the list is sorted by this field. Click on the column heading to toggle its sort order. To change the order of columns in a pane: Click the heading to be moved and drag it to the new position. - Page 45 Polycom RMX 2000 Getting Started Guide You can move items between the Frequently Used and Rarely Used sections depending on the operations you most commonly perform and the way you prefer to work with the RXM Web Client. This only works in List View because in Toolbar view, all items are represented by icons.
-
Page 46: Starting A Conference
Dialing in to an Ad Hoc Entry Queue which is used as the access point to the MCU. For a detailed description of Ad Hoc Entry Queues, see the RMX 2000 Administrator’s Guide, "Entry Queues” on page 3-1. Starting a Conference from the Conference Pane To start a conference from the Conference pane: In the Conference pane, click the New Conference ( ) button. -
Page 47: General Tab
Polycom RMX 2000 Getting Started Guide The system displays the conference’s default Name, Duration and the default Profile, which contains the conference parameters and media settings. The RMX automatically allocates the conference ID, upon conference start. In most cases, you can accept the default conference ID and click OK, or you can change the conference ID and click OK and the conference is launched. - Page 48 Chapter 3-Basic Operation Table 3-2 New Conference – General Options (Continued) Field Description Duration Define the duration of the conference in hours using the format HH:MM (default 01:00). Enter the unique-per-MCU conference ID. If left blank, the MCU automatically assigns a number once the conference is launched.
-
Page 49: Participants Tab
Indicates the IP address of the participant’s endpoint. • For dial-out connection, displays the IP address of the endpoint called by the Polycom RMX 2000. • For dial-in connection, displays the participant’s IP address used to identify and route the participant to the appropriate conference. - Page 50 Auto (default setting) indicates that the endpoint must connect according to the conference encryption setting. Define a new participant.For more information on Participant definition, see the RMX 2000 Administrator’s Guide, "Adding a new participant to the Address Book” on page 4-4.
- Page 51 Polycom RMX 2000 Getting Started Guide To add participants from the Address Book: In the Participants List, click the Add from Address Book button to open the Participants Address Book. In the Address Book, select the participants that you want to add to the conference and click the Add button.
- Page 52 Chapter 3-Basic Operation Using Drag & Drop to add Participants from the Address Book: You can add participants to a conference directly from the Participants Address Book without having to use the New Conference – Participants tab. To drag & drop participants into the Participants List: 11 Open the Address Book.
- Page 53 Polycom RMX 2000 Getting Started Guide The Information tab opens. 14 Enter the following information: Table 3-4 New Conference – Info Options Field Description Info1, 2, 3 There are three information fields that allow you to enter general information for the conference such as company name, contact person etc...
-
Page 54: Connecting To A Conference
Maple_Room Conference ID: 1001 Password: 34567 Prefix in SIP Endpoint Gatekeeper - 925 Network Maple_room@polycom.com IP Endpoint Oak_Room Conference ID: 1002 Password: 71356 Dial-in Connection via IVR System The chairperson can use the chairperson password as the conference password and does not need to enter the conference password. -
Page 55: Dial-In H.323 Participants
Polycom RMX 2000 Getting Started Guide Dial-in H.323 Participants For H.323 participants, the dialing string is composed of the MCU prefix in the Gatekeeper and the conference ID. For example: Gatekeeper Prefix Conference ID 1001 Conference Name Maple_Room The participant dials... -
Page 56: Conference Access Via An Entry Queue
Chapter 3-Basic Operation Conference Access Via an Entry Queue Access via an Entry Queue allows all participants to dial the same entry point that acts as a routing lobby. Once in the Entry Queue, participants are guided to the conference according to the conference ID they enter. IP Endpoint Maple_Room Conference ID: 1001... -
Page 57: Sip Participants
Polycom RMX 2000 Getting Started Guide H.323 participants can bypass the Entry Queue voice messages by adding the correct Conference ID of destination conference to the initial dial string: Gatekeeper Prefix][EQ ID][##Destination Conference ID] For example: Conference ID 1001 H.323 participants dial 9251000##1001 H.323 participants can also add the Conference Password to the initial... -
Page 58: Endpoint Names In The Video Layout
During conferences you can view the endpoint name in the endpoint’s video layout windows. The MCU can display up to 33 characters of the endpoint’s name, depending on the window’s layout (size). The following is an example of endpoint name display in the Polycom ViaVideo endpoint window: Endpoint Name The displayed name is determined as follows: •... - Page 59 Polycom RMX 2000 Getting Started Guide • If the endpoint’s display name is changed in the RMX Web Client, it overrides all the above. To change the Display Name: In the Participants list, double click the participant or right-click the participant and select Participant Properties from the drop-down menu.
-
Page 60: Monitoring On Going Conferences
Chapter 3-Basic Operation Monitoring On Going Conferences Conference monitoring enables you to keep track of conferences and their participants: if all its participants are correctly connected and whether errors or faults have occurred. Monitoring and Operations Methods Operation Selection All Monitoring and Operations procedures performed during on going conferences can be performed by either of two methods: •... -
Page 61: Conference Level Monitoring
Polycom RMX 2000 Getting Started Guide Using multi-select, you can monitor and perform simultaneous operations on multiple participants in multiple conferences. Multi-selected conferences are displayed as sublists in the Participants List pane. The sublists can be expanded and collapsed by clicking the sublist control buttons that appear next to the conference name in the sublist headings. - Page 62 Chapter 3-Basic Operation No status indicator means that the conference is running without problems. Table 3-5 Conferences – Monitoring Information Field Description Name Displays conference name and type of conference: • – Video Conference • – High Definition Video Conference Status Displays the status of the ongoing conference.If there is no problem with the participant’s connection no indication...
- Page 63 You can view all the conference’s properties but those that appear with a gray background cannot be modified. For a detailed description of Conference Level Monitoring, see the Polycom RMX 2000 2000 Administrator’s Guide, "Conference Level Monitoring” on page 5-3.
-
Page 64: Participant Level Monitoring
Chapter 3-Basic Operation Participant Level Monitoring Participant Connection Monitoring When a conference is selected in the Conference List, details of its participants appear in the List pane. The following participant indicators and properties are displayed: Table 3-6 Participant Monitoring – Indicators and Properties Field Description Name... - Page 65 Polycom RMX 2000 Getting Started Guide Table 3-6 Participant Monitoring – Indicators and Properties Field Description Status (cont.) Secondary Connection – The endpoint’s video channel cannot be connected to the conference and the participant is connected only via audio. Role Displays the participants role or function in the conference: Chairperson –...
- Page 66 For more information about Content Sharing, see the RMX 2000 Administrator’s Guide, "H.239” on page 6-7. For more information, see the RMX 2000 Administrator’s Guide, "Participant Level Monitoring” on page 5-7. 3-32...
-
Page 67: Operations Performed During On Going Conferences
The duration of a conference is set when the new conference is created. The default duration of a conference is 1 hour. All conferences running on the Polycom RMX 2000 are automatically extended as long as there are participants connected to the conference. -
Page 68: Changing The Video Layout Of A Conference
Chapter 3-Basic Operation To terminate a conference manually: In the conference list, select the conference you wish to delete and click the Delete Conference ( ) button. You are prompted for confirmation. Click OK to terminate the conference. Changing the Video Layout of a Conference While the conference is running you can change the video layout and select one of 24 video layouts supported by the RMX. -
Page 69: Video Forcing
Polycom RMX 2000 Getting Started Guide From the Video Layout options, select the Number of Windows to display and the Video Layout thumbnail required and click OK. Number of Video Windows Video Layout Thumbnail Selected Layout Video Forcing The chairperson or operator can select which participant appears in each of the video layout windows for any participant by using Video Forcing. - Page 70 Chapter 3-Basic Operation • Participant level video forcing overrides conference level video forcing. • A participant can view him/herself in a layout window, by selecting the Same Layout option. • When different size video windows are used in video layouts such as 1+2, 1+3, 1+4, etc., a participant can only be forced, in Personal Layout, to a video window of the same size as that selected for him/her in Conference Layout.
-
Page 71: Participant Level Operations
3-15. Open the Address Book to select the participant for Participant the conference.For more information about the From Address Book, see RMX 2000 Administrator’s Guide, Address "Address Book” on page 4-1. Book Connect Connect a disconnected defined dial-out participant Participant to the conference. - Page 72 Chapter 3-Basic Operation Table 3-7 Participant Level Operations (Continued) Menu Button Description Option Suspend Suspend the video transmission from the participant Video to the conference. The suppressed participant’s video is not transmitted to the conference but the participant still receives conference video.The Suspend Video indicator appears in the Participants List and the Resume Video button ( ) becomes active.
-
Page 73: Video Forcing
Participant Select for a detailed view of all Participant Properties. Properties For more information about Participant Properties, see the RMX 2000 Administrator’s Guide, "Participant Level Monitoring” on page 5-7. Video Forcing Video Forcing Guidelines: See "Video Forcing Guidelines:” on page 3-35. -
Page 74: Personal Layout Control
Chapter 3-Basic Operation Repeat step 3 to force participants to other windows. Click OK. To cancel Video Forcing for a window: In the Layout Type menu, select Conference. In such a case, switching between participants is audio activated. Personal Layout Control Personal Layout Control With the RMX Web Client Video RMX users can use the RMX Web Client to the change the... - Page 75 Polycom RMX 2000 Getting Started Guide Click OK. To cancel Video Forcing for a window: In the Layout Type menu, select Conference. The participants Video Layout reverts to that of the conference. Personal Layout Control With Click&View Personal With the Click&View application, participants can change their Layouts via DTMF codes entered from their endpoints.
- Page 76 Chapter 3-Basic Operation The Personal Layout options menu is displayed on the video screen. On the endpoint’s keypad, press the number corresponding to the number of video squares you wish to select. For example, if you want a four-square video layout, press The video window layout of your screen changes to the first four- window layout as follows: Repeated presses of the...
-
Page 77: Conference Control Using Dtmf Codes
Polycom RMX 2000 Getting Started Guide The following table summarizes the Video Layout options available via Click&View. Table 3-8 Video Layout Options DTMF Code Layout Options Conference Control Using DTMF Codes Participants and chairpersons can manage their connection to ongoing conferences from their endpoints, using touch-tone signals (DTMF codes) from their endpoints. - Page 78 Chapter 3-Basic Operation Table 3-9 Conference IVR Service Properties - DTMF Codes Operation DTMF String Permission Mute My Line Unmute My Line Increase Broadcast Volume Decrease Broadcast Volume Mute All Except Me Chairperson Cancel Mute All Except Me Chairperson Change Password Chairperson Mute Incoming Participants Chairperson...
-
Page 79: Appendix A: Glossary
Appendix A Glossary This appendix lists the terms and abbreviations that are related to the Polycom RMX 2000, and are commonly used in the RMX 2000 documentation Abbreviation/ Explanation Term Bandwidth Defines the information carrying capacity of a channel. In... - Page 80 Appendix A-Glossary Abbreviation/ Explanation Term Codec Coder-decoder. A device that converts voice and video into digital code, and vice versa. Refers to the endpoint video camera and video board that are used for videoconferencing. Conference Connection between two or more endpoints exchanging video and audio information.
- Page 81 Polycom RMX 2000 Administrator’s Guide Abbreviation/ Explanation Term G.722 ITU-T audio algorithm, 64Kbps, 7 kHz. G.728 ITU-T audio algorithm, 16Kbps, 3.4 kHz. Gatekeeper A type of server that performs two main functions: translates LAN alias addresses of terminals and gateways to IP addresses and provides bandwidth management.
- Page 82 Appendix A-Glossary Abbreviation/ Explanation Term Internet Protocol. The working protocol that forms the basis of the internet. ISDN Integrated Services Digital Network. A set of protocol and interface standards (voice, video and data) that comprise a telephone network. There are two types of ISDN lines: BRI and PRI.
- Page 83 Polycom RMX 2000 Administrator’s Guide Abbreviation/ Explanation Term Session Initiation Protocol. An application-layer protocol designed to work over IP networks. A SIP service defines the properties and the IP addresses of the SIP network components. T1 Line An 1.5 Mb digital switched line used in the United States.
- Page 84 Appendix A-Glossary...
Need help?
Do you have a question about the RMX 2000 and is the answer not in the manual?
Questions and answers