AT&T Merlin II Installation And Maintenance Manual
Hide thumbs
Also See for Merlin II:
- System manual (245 pages) ,
- System administrator manual (98 pages) ,
- User manual (29 pages)

Related Manuals for AT&T Merlin II


Summary of Contents for AT&T Merlin II
- Page 1 AT&T 518-600-016 MERLIN II ® COMMUNICATIONS SYSTEM Installation, Administration, and Maintenance Manual...
- Page 2 ©1990 AT&T Issue 2 All Rights Reserved January, 1990 Printed in USA NOTICE The information in this document is subject to change without notice. AT&T assumes no responsibility for any-errors that may appear in this document. MERLIN is a registered trademark of AT&T. HOLADAY is a trademark of Holaday Industries.
-
Page 3: Table Of Contents
Section 1: System Description What’s in This Manual Section 1: System Description Section 2: Installation Section 3: Administration Section 4: Troubleshooting Section 5: Ordering Information System Overview System Configuration System Features System Hardware 1-18 MERLIN II System Components 1-18 Control Unit Components 1-18 Module Controls and Indicators 1-23... -
Page 4: What's In This Manual
What's in This Manual This manual provides information about how to install and maintain a MERLIN II Communications System. It covers the MERLIN II System Feature Module 1, Feature Module 2, and Release 3. For further information on specific features and options, see the MERLIN Communications for that release. -
Page 5: System Overview
System Overview The MERLIN® II Communications System is a programmable digital telephone system with many features to make voice and data easy to manage. It supports up to 56 outside lines and 120 stations, depending on the configuration. Voice terminals allow access to the system for conversations, feature programming, or system administering. - Page 6 MERLIN II System control unit Analog Basic Digital Power Processor station telephone line station supply module module module module module Modern pool types Local host access Digital voice and data Digital Digital Digital Digital Digital PT510D port port port port port 7406D/with Digital...
-
Page 7: System Configuration
The size, type, and features of a MERLIN II system are SYSTEM determined using system planning forms. CONFIGURATION A MERLIN II system can be as small as four outside lines System Size and eight analog voice terminals, or as large as 56 outside lines and 72 stations. - Page 8 In a pooled system, outside lines can be grouped into line pools (groups of interchangeable lines). To get an outside line in a pooled system, the user must dial an access number or use a dedicated pool button on the voice terminal.
- Page 9 Network Central interface office lines Digital PBX 25 Pair cable DIW cable 66 Type (System 25, hardware System 75, or System 85) DIW cable 4 0 8 4 0 8 4 0 8 4 0 8 4 0 8 Power Supply Jack Field for outside...
-
Page 10: System Features
Table 1-1 lists the features that are available for SYSTEM FEATURES MERLIN II System Feature Modules 1 and 2, and Release 3. The features in Table 1-1 are described fully in NOTE: the MERLIN II Communications System System Manual. The following paragraphs describe feature that are either new in Release 3 or have been significantly modified for Release 3. - Page 11 MERLIN II Attendant. The MERLIN II Attendant automatically answers and routes incoming calls. The feature is available only when the optional MERLIN II Attendant accessory is installed. Also, to gain access to this feature, you must use the517C13 Basic Telephone (012) Module. The MERLIN II Attendant performs two major functions (Figure 1-3): Immediate call handling, in which all incoming...
- Page 12 Posted Message. The Posted Message feature provides a method of sending one of 20 user-defined messages to another terminal. Each message can be up to 16 characters long and will appear on the caller’s display. System Speed Dial. System Speed Dial allows the caller to store frequently used numbers as three-digit codes.
- Page 13 MERLIN II Attendant Call transferred to answers call. receptionist; MERLIN II Attendant disconnects Caller enters route or extension number. Route or extension valid? Route or extension answers? Second route or extension answers? call transferred; connection announcement played; MERLIN II Attendant disconnects.
- Page 14 TABLE 1-1 MERLIN II System Features Release 3 Feature Account Code Entry Allowed List Attendant (Automatic) [MERLIN II Attendant] Attendant Barge-in Attendant Position Setting Auto Answer All Auto Answer-Intercom Auto Intercom Automatic Line Selection (ALS) Automatic Route Selection (ARS) Basic Telephones Behind-Switch Operation Bridging on Shared Lines Call Coverage...
- Page 15 TABLE 1-1 MERLIN System Features (continued) Feature Release 3 Call Forwarding and Follow Me Call Park Call Pickup Call Pickup Groups Call Report (SMDR) Call Restriction Camp On Centralized Programming Conference Coverage Inhibit Dialing Timeout Internal for Rotary Lines Direct Inward System Access (DISA) Disallowed List Display Do Not Disturb...
- Page 16 TABLE 1-1 MERLIN II System Features (continued) Feature Release 3 Executive Barge-In Extended Station Status (ES Status) Flexible Numbering Follow Me Forced Account Code Entry (FACE) Group Call Distribution (GCD) Group Listening Group Page Hold Hold Disconnect Interval Intercom Intercom Dial Tone Labels for Lines and Stations Last Number Redial 5 For Feature Module 2, the feature name is “Attendant Barge-In”...
- Page 17 TABLE 1-1 MERLIN II System Features (continued) Feature Release 3 Leave Word Calling Line Assignments in Behind-Switch Systems Line Assignments in Pooled Systems Line Assignments in Square Systems Line Pickup Line Representation Setting Line Request Loudspeaker Page Manual Signaling Menu Driven Administration Message Monitor-on-Hold 9 The feature name is "Line Pools"...
- Page 18 TABLE 1-1 MERLIN II System Features (continued) Feature Release 3 Music-on-Hold Night Service Notify On-Hook Dialing On-Line Module Swap One-Touch Hold with Call Announcement Outside Auto Dial Page All PBX, Centrex, or Custom Calling Features Personal Speed Dial Personalized Ringing Posted Message Privacy Reed...
- Page 19 TABLE 1-1 MERLIN II System Features (continued) Release 3 Feature Ringing/Idle Line Preference Ringing-on-Transfer Ringing Options Saved Number Redial Send Message Simultaneous Voice and Data Calls Special Characters in Programmed Dialing Sequences Stopwatch System Renumbering System Size System Speed Dial System Type Test 16 The feature name is “Ringing Line Preference”...
- Page 20 TABLE 1-1 MERLIN II System Features (continued) Feature Release 3 Tie Lines Tones Touch-Tone Enable Touch-Tone or Rotary Signaling Transfer Transfer Return Interval Type of Telephone Voice Announcement Enable/Disable Voice Announcement to Busy Telephone 20 The information for this feature is found in Section 2, “System Components,” of the System Manual for Release 3.
-
Page 21: System Hardware
System Hardware The MERLIN II system includes the following hardware: MERLIN II SYSTEM COMPONENTS Control unit Voice terminals > Analog > Digital Basic Touch-Tone Digital data equipment Modems System accessories/auxiliary devices The assembly of modules containing a power source, a CONTROL UNIT processor, and jack connections for outside lines, tie lines, COMPONENTS... - Page 22 E x p a n s i o n Basic carrier carrier FIGURE 1-4 Control unit components. Power Supply Module. The Power Supply Module receives an input of 117 VAC and supplies the system with the following dc voltages: +5, -5, and -48 VDC. The Power Supply Module can support up to 45 unit loads per carrier.
- Page 23 Power supply Line/station Station Processor Processor module module module module module (R3) (408) (FM1 and 2) (000) (with feature (with feature m o d u l e ) module) Digital Basic Line module Line Tie line station-module telephone with DTMF module module (008D)
- Page 24 The Processor Module contains Processor Module. the circuitry that controls the system’s programs and features. It houses the Feature Module. Release 3 of the MERLIN II System must use Processor Module 517B7 with Feature Module 517F6. The Feature Module contains the Feature Module.
- Page 25 – 8-Analog (008) Module. The 008 module has jacks for eight analog stations. It has no jacks for outside lines. Simultaneous voice and data is available but requires you to connect both an odd and even numbered jack to the same voice terminal.
-
Page 26: Module Controls And Indicators
Label Power indicator Diagnostic 96-pin connector Auxiliary power input jack SMDR port On/Off switch Application port P o w e r c o n n e c t o r Warning light Ground lug Power supply module Pr ocessor module (517B7) for Release 3 FIGURE 1-5 Module controls and indicators. -
Page 27: Power Cord
SMDR port Label Application port Status indicators (LEDs) Warning iight DIP switch (S2) l a b e l Port 4 Port 3 Diagnostic 96-pin connector Port 2 Port 1 DIP switch (S1) Tie line module (517A14) Processor module (517A7) for Feature Moduies 1 and 2 FIGURE 1-5 Module controls and indicators (continued). -
Page 28: Voice Terminals
This module has the following port Processor Module. and light: SMDR port. This port is an interface to Station Message Detail Recording (SMDR) for call reports on call activity or a printout of system administration. Warning light. When this red light is lit it indicates that there is a problem with either the Feature Module, line or station module, or the Processor Module. - Page 29 Voice terminals work like special input/output (I/O) devices. The control unit performs all the decision making for the system while voice terminals act as the system’s sensors. Voice terminals inform the control unit of button depressions and feature status. They also inform the user of specific conditions by flashing lights or generating tones.
- Page 30 Analog voice terminals 7102A > 5-Button > 10-Button > 10-Button HFAI > 10-Button with Built-In Speakerphone (BIS-10) > BIS-22 . > BIS-22 with Display > 34-Button > 34-Button Deluxe > 34-Button (SP-34) > 34-Button (SP-34D) > BIS-34 > BIS-34 with Display >...
- Page 31 10-Button 10-Button BIS-10 HFAI BIS-22D 34-button with display BIS-34D BIS-34 with display Display console FIGURE 1-6 A selection of analog voice terminals. 1-28 System Hardware...
-
Page 32: Basic Operation Of Voice Terminals
7406D with display and Data Stand 7406D with Data Stand FIGURE 1-7 A selection of digital voice terminals. Voice terminals perform a variety of functions. With a BASIC OPERATION voice terminal, a user can make and receive intercom and OF VOICE outside calls, page someone, and, with the proper voice TERMINALS terminal (the attendant console), administer the MERLIN... - Page 33 When a voice terminal goes off- Dialing out or in. hook, it signals the control unit to make a connection through a network switch to an available or requested outside line. When the path is established, the voice terminal receives a dial tone. The control unit will select a path in its multiplexing scheme to make the connection.
-
Page 34: System Accessories
Figure 1-8 shows several of the MERLIN II system SYSTEM accessories described here. ACCESSORIES Devices such as a horn, bell, Alerter Accessories. strobe, or chime can be connected to a Supplemental Alert Adapter so that people working in noisy or remote areas of a building can be alerted to incoming calls. - Page 35 Basic Telephone and Modem General Purpose Adapter (GPA) interface 2 (BTMI-2) In-Range Out- of- Building Protectors (IROB) Off-Premises Telephone Interface (OPTI) Hands-Free Unit (HFU) Headset with Headset Adapter I n d o o r Indoor bell horn Indoor/outdoor Extra alert alerter strobe Alerter accessories...
- Page 36 Basic Telephone and Modem Interface 2 (BTMI-2). The BTMI-2 is a replacement for the BTMI. It connects telephones and data communications devices such as autodialers, answering machines, cordless telephones, facsimile machines, and modems to the MERLIN II system. A timer may be connected to a BTMI-2 for automatic answering based on time of day.
- Page 37 Provides the voice terminal Hands-Free Unit (HFU). user with full speakerphone capability. This includes hands-free telephone conversation, on-hook dialing, monitor-on-hold, and teleconferencing at a short distance from the voice terminal. To use this accessory, you must program A Answer- Intercom. The HFU is for use with all analog voice terminals except 5-button and 10-button HFAI.
- Page 38 The OPRE Off-Premises Range Extender (OPRE). will be available in place of the Off-Premises Telephone Interface (OPTI) for users of Feature Module 1, Feature Module 2, and Release 3. The OPRE will allow users to connect off-premises Touch-Tone Basic telephones to the MERLIN II system.
-
Page 39: Theory Of Operation
Theory of Operation The MERLIN II system architecture provides a digital SYSTEM network that supports voice and data communications. ARCHITECTURE The modular nature of the system makes the base configuration efficient and easy to expand. The control unit contains the memory for the system’s features, Input/Output (I/O) functions, and interface requirements. - Page 40 FIGURE 1-9 System architecture. Theory of Operation 1-37...
- Page 41 The Power Supply Module Power Supply Module. converts 117 VAC line voltage to the following outputs: +5 VDC, -5 VDC, and -48 VDC (tip/ring). The central processor complex Processor Module. consists of a main board and the Feature Module. The main board contains the 68000 microprocessor, RAM, a real-time clock, interrupt circuitry, and port interface to the modules through the I/O bus.
- Page 42 If you use a 008 module in this slot, you must provide for outside lines using another module. The 408 module has a port processor to handle real- time intensive tasks such as ATL line protocol and central office rotary outpulsing. The port processor receives instructions from the main processor over the I/O bus.
-
Page 43: Analog To Digital Signal Processing
processor. The port processor directs Touch-Tone circuitry to output tones. The tones are placed on the TDM bus by the DSE through buffer circuitry. After a tip condition occurs at the remote end, a conversation may occur. The MERLIN II system receives analog signals from the ANALOG TO DIGITAL central office lines and analog modules. - Page 44 PCM uses PAM as its starting point but goes further. PCM digitizes the information and sends the 8-bit code via PAM. PCM digitizes the PAM information by comparing each PAM sample to a point on a chart. Each point has a distinct 8-digit binary code.
-
Page 45: Digital Switching
Mu-Law 255 is a commanding scheme which uses a Mu-Law 255 compression ratio that is compatible with modern channel bank equipment. The scale is divided into 16 intervals, with each interval having 16 levels. Therefore, it has 256 discrete values. Mu-Law 255 has a negative and positive zero;... - Page 46 Each module has a DSE to interface codecs or digital transceivers to the TDM bus. The actual digital switching occurs when the DSE is programmed by the system I/O bus to place (transmit) data or retrieve (receive) data on the TDM bus in specific time slots. This process also involves time slot interchanging so that an available slot in the TDM cycle can be filled with a talk (transmit) or listen (receive) slot.
-
Page 47: System Capacity
The MERLIN II system hardware limits the system SYSTEM CAPACITY capacity for the items found in Table 1-2. TABLE 1-2 MERLIN II System Capacity Item Capacity Module slots Board signatures Time slots Simultaneous duplex connections Tones Table 1-3 lists items that the system architecture either allows or requires. -
Page 48: E&M Signaling
Most signaling systems, other than loop signaling, are E&M SIGNALING separate from the trunk equipment. They are normally located between the trunk equipment and the line facility. E&M signaling systems derive their name from the historical designations of the signaling leads on schematics covering these systems. - Page 49 Central Dimension Central MERLIN II RJ2GX RJ2GX office office System SITE #2 SITE #l Off-hook Dial tone Site #1 dials E lead M lead M lead of site #1 connected to number for site #2 E lead of site #2 Ring Off-hook E lead...
- Page 50 A tie line may be administered in one of the Direction three following ways: Two-way (default): Calls may be made in either direction. Outgoing only: Calls may be made but not received. Incoming only: Calls may be received but not made. There are four types of tie line options.
- Page 51 Unprotected mode: Must be used for the E&M Type 1 Standard interface in order to meet voltage drop criteria for the interface. This mode is used when there is a network interface. Protected mode: Resistance is added in tie M lead to provide additional protection from foreign voltages and transients.
- Page 52 This option sets the dialing mode for the Dialing Mode tie line. Touch-Tone Rotary (default) This option determines whether the dial tone Dial Tone originates from the remote or local end of the tie line, or both (you receive a second dial tone). Remote (default) Local This option sets a time limit...
- Page 53 TABLE 1-4 Tie Line Preferred Signaling Formats Preferred Signaling Format Installation Situation From MERLIN II System MERLIN II System Far End Signaling Protected Signaling Protected Mode and Mode and Type Unprotected Type Unprotected Location MERLIN II Same Site Simplex Simplex System or Inter- Type 5...
- Page 54 TABLE 1-4 Tie Line Preferred Signaling Formats (continued) Insulation Situation Preferred Signaling Format From Far End MERLIN II System MERLIN II System Signaling Protected Signaling Protected Mode and Mode and Type Unprotected Type Unprotected Location Other Inter- E&M Protected E&M Requires a building Type 1...
-
Page 55: System Connectivity
System Connectivity This section describes typical hardware configurations for a MERLIN II system with accessories and auxiliary equipment Connectivity diagrams with descriptions are provided for the following: Simultaneous voice and data (analog station) using the analog station module (408) to gain access to a remote host computer. - Page 56 Bridging Remote adapter host BR 241-B1 c o m p u t e r Even Station Odd Modem Analog voice D 8 W C e n t r a l terminal Office cord Line Other P o w e r 4 0 8 4 0 8 4 0 8 4 0 8 4 0 8 S u p p l y D 8 A C...
-
Page 57: Local Host Computer Access
Local host computer access allows shared use of the host LOCAL HOST computer through Modular Processor Data Modules COMPUTER ACCESS (MPDMs). The MPDMs may have different data rates or the same rate, each set to a data rate of 19,200 bps or less. Refer to the connectivity diagram in Figure 1-13. - Page 58 See Note 2 MPDM D 8 W See Note 3 cord jack interface RS 232-C (M25B) M P D M 4 0 8 4 0 8 4 0 8 4 0 8 0 0 8 D Power Supply interface jack Local host computer...
- Page 59 008D Power Supply D8W cord 1000' max. Modem p o o l - - - - - - - - - - - - - - - - - - - - - - - - - - - - - - - M T D M M T D M RS-232-C...
- Page 60 P o w e r 4 0 8 4 0 8 4 0 8 4 0 8 0 0 8 D Supply D8W cord Modem pool - - - - - - - - - - - - - - - - - - - - - - - - - - - - M T D M M T D M RS-232-C (M25B)
-
Page 61: General Requirements For Modems
4 0 8 4 0 8 4 0 8 4 0 8 0 0 8 D Power Supply RS-232-C (M25B) 17’ max. - - - - - - - - - - - - - - - - - - - - - - - - - - 2 2 1 2 C D8W cord M T D M... - Page 62 The following paragraphs describe the basic requirements for any modem, and specific requirements when used in outgoing and incoming modem pools. Modems can meet these requirements through NOTE: fixed features or through hardware and software options that can be set. An option setting may make a modem appropriate for one pool in the MERLIN II system but not another.
-
Page 63: Music-On-Hold
Touch-Tone dialer that can pause and dial characters 0 through 9, #, and * Detection of dial tone to take terminal dialing instructions Ability (compatible parity and character length with the MTDM) EIA (RS 232-C) lead DSR and RLS on before a call is placed (follows DTR) In addition to meeting the basic requirements, a modem Requirements for... - Page 64 8-Ohm wire Speaker 4BU cord 4 0 8 4 0 8 4 0 8 4 0 8 4 0 8 Power (Page input) Supply Page Pac 20 Powermate 1 0 3 A (Paging) connecting Music In b l o c k (Music) 1 2 3 4 5 6 7 8 D4BU cords...
- Page 65 Music in Page Pac 20 Page Powermate input Common control unit D 4 B U Switch 4 0 8 4 0 8 4 0 8 4 0 8 4 0 8 Power cord Page C K L S Supply input D L G S Page p o r t...
- Page 66 Section 2: installation Preinstallation Requirements Reviewing the Planning Forms Environmental Requirements Spare and Location Requirements Power Requirements and Secifications Grounding Requirements Wire Length Limitations Wall Attachment Requirements System Grounding Requirements System Ground Connection AC Outlet Tests CO Line Protector Surge Protectors IROB Protectors Static Discharge Problems Radio-Frequency Interference...
- Page 67 Jack Field Wiring 2-33 Constructing a Jack Field for Voice Terminal Wiring 2-35 Connecting Voice TerminaI Wiring to a Jack Field 2-37 Extending the Network Interface to a Jack Fieid for Outside Lines 2-41 Wiring Reference Tables 2-45 Installing the Control Unit 2-50 Control Unit Components 2-50...
- Page 68 Testing the System 2-100 Testing the Voice Terminal Jacks for a Dial Tone 2-100 Testing Intercom Calls 2-101 Testing Outside Lines 2-103 Testing Tie Lines 2-104 Completing the Installation 2-106 Attaching the Control Unit Covers 2-106 Modifying the System 2-112 Adding an Outside Line 2-112 Adding a Voice Terminal...
-
Page 69: Preinstallation Requirements
Preinstallation Requirements Review the completed system planning forms, which REVIEWING THE should be on site, before starting installation. The forms PLANNING FORMS for Release 3 are titled: Form la, System Form—Incoming Lines Form 1b, System Form—Tie Lines Form 1c, System Form—Module Identification Diagram Form 1d, System Form—Station Planning Form 1e, System Form—Requirements and Options... - Page 70 The control unit cannot be installed WARNING: outdoors. must be installed in an environment suitable for electronic equipment. Do not expose the control unit to devices that generate electrical interference such as arc welders or motors. The control unit should be located with the following SPACE AND LOCATION points in mind:...
-
Page 71: Grounding Requirements
60 Hz +/- 1 percent Frequency range. 3 amperes per power supply Max. current. 225 watts per power supply Max. power use. The system must be connected to a properly grounded ac GROUNDING outlet. See page 2-5, “System Grounding Requirements,” REQUIREMENTS for more information. -
Page 72: Wall Attachment Requirements
The customer should have a backboard mounted at the WALL ATTACHMENT control unit site. If one is not in place, you may need to REQUIREMENTS attach a backboard to the wall. The backboard should meet these specifications: It should be made of 3/4-inch thick plywood. It should be 4 feet wide by 2 feet high in order to accommodate a basic control unit with an expansion carrier and jack field. -
Page 73: System Grounding Requirements
System Grounding Requirements Proper grounding of the installation site is fundamental to protect the MERLIN communications system against these types of electrical discharges: Lightning strikes near the Power surges Power crosses on Central Static discharge The following procedures serve as electrical safety requirements and guidelines in grounding. - Page 74 Adequate bonding of the Central Office line protector ground and the power company ground Refer to Figure 2-1 for an example of a typicaI MERLIN system grounding plan. MERLIN II System control unit 4 0 8 4 0 8 4 0 8 4 0 8 Power Supply lines...
-
Page 75: Ac Outlet Tests
The following tests verify proper grounding of the ac AC OUTLET TESTS outlet. Hazardous voltages are present during the WARNING: following tests. Use great care when working with ac power line voltages. Check the ac outlet for proper ground with a circuit tester. You may use any generic unit (such as the Ideal NOTE: 61-035 Circuit Tester) to verify that the outlet is... -
Page 76: Co Line Protector
The following test can be used to check CO line protector CO LINE PROTECTOR grounding. This test does not check the bond between the power company and telephone company protector grounds. 1 Connect a craft test set between the protector ground lug and the ring side of the CO line. -
Page 77: Irob Protectors
Equipment that is connected to the analog station jacks IROB PROTECTORS (408/008) and is located in a building outside of the main (control unit location) building, but within 1000 feet of the control unit is called In-Range, Out-of-Building (IROB) equipment. To protect both the control unit and the IROB equipment from exposure to lightning, inadvertent contact with power lines, and power currents induced by nearby power lines, IROB Protectors are required. - Page 78 placed in areas where a high electromagnetic field strength exists. Leading causes of interference include AM and FM radio station transmitters, television station transmitters, induction heaters, and motors (with commutators) of 0.25 horsepower (200 watts) or greater. Small tools with universal motors are generally not a problem when they operate on separate power lines.
- Page 79 over ac circuit wire. When crossing station wire over ac circuits is unavoidable, try to maintain a 3-foot clearance. Use conduit for wiring runs whenever possible. Be sure that the conduit is grounded. If the conduit is not grounded, run a No. 12 wire from the conduit and terminate it on the ac earth ground, or bond it to the earth ground.
-
Page 80: Wiring The System
Wiring the System Figure 2-2 illustrates typical MERLIN II system wiring. TYPICAL MERLIN II Central office lines enter the site through a 25-pair cable. SYSTEM WIRING The network interface in this example is a 66-type block configured as an RJ21-X-type connector. From the network interface, a DIW cable takes the 25 lines to a jack field for outside lines. - Page 81 (Jack field for outside lines) Central office D2R cords lines Z122C Box RJ21-X DIW cable 25 Pair cable With interface Z610A Adapters 408 408 408 408 408 Power Outside Supply lines (Jack field for voice terminais) 4-Pair Z122C Box DIW cords with Z610A adapters D 8 W...
-
Page 82: Module Jacks
MODULE JACKS There are various types of jacks on the line and station modules (Figure 2-3). Each type of jack has a specific function as follows: These jacks are for analog Analog station jacks. voice terminals, analog data devices, and accessories. These jacks are for basic Basic telephone jacks. - Page 83 PFT jack Switch Outside Iine jacks Tie line jacks Analog station Analog station Tie line jacks jacks jacks Switch 0 0 8 400EM 4 0 8 FIGURE 2-3 Line and station module jacks. Wiring the System 2-15...
- Page 84 PFT jack Outside iine jacks Outside line Outside line jacks jacks PFT jack PFT jack 8 0 0 400 w/DTMF Outside line jacks Basic t e l e p h o n e jacks Digital station jacks 008D FIGURE 2-3 line and station module jacks (continued). 2-16 Wiring the System...
-
Page 85: Outside Line Wiring
Outside Line Wiring The local telephone company provides the telephone PREPARING THE numbers for outside lines, as well as an installed network NETWORK interface that may consist of 1-Line adapters (RJ11-type), INTERFACE 2-line adapters (RJ14-type), or 25-line (50-pin, RJ21-type) connectors. You can connect the outside lines from the network interface connector to the control unit using D2R cords. - Page 86 Single-line adapter (RJ11) 2-Line adapter (RJ14) (267C) 66-Type block (RJ21-type) 25 line interface Line Ring Phone Number Line 1 555-3827 555-3828 Line 555-3829 Line 555-3851 Line 4 Line 5 Line 6 Line 25 FIGURE 2-4 Network interface adapters. 2-18 Wiring the System...
-
Page 87: Testing The Outside Lines
You often need to test an outside line at the network TESTING THE interface or jack field. This test will verify that the outside OUTSIDE LINES telephone lines are working properly. To perform this test, you-need a basic rotary dial telephone and a Touch-Tone telephone, each with a modular cord, or two craft sets. - Page 88 You need one D2R Single-pair modular line cords. cord for each outside line. The cord must be long enough to reach the network interface. These labels are marked 01, Green line-cord labels. 02, 03, etc. You need a matching pair for each line cord.
-
Page 89: Tie Line Module Wiring
4 Write the telephone number assigned to each of the line jacks next to the number for that line jack on the outside line numbers label found on the inside of the control unit’s front cover or on the inside of the left door of the jack field box containing the outside lines. - Page 90 408 408 408 408 400 P o w e r S u p p l y 25 pair RJ2GX cable T (5) R (4) Network T1 (1) cord Z601A R1 (2) Facility Adapter E (3) Signaling M (6) Equipment Z601A - Adapter Jack Position Connector Position MERLIN II System...
-
Page 91: Voice Terminal Wiring
Voice Terminal Wiring You can connect up to 120 station jacks, which support up CONNECTlNG VOICE to 120 voice terminals in the MERLIN II system. TERMINAL WIRING TO THE CONTROL The terms “voice terminal” and “station” are NOTE: UNIT synonymous when describing the wiring and labeling of the voice terminal side of the MERLIN II system. - Page 92 Refer to “Jack Field Wiring” on page 2-33 for instructions on how to construct a jack field. You need the following items to complete the connections: Use this label to record the System directory label. end locations of each intercom number in the system. These labels come in pairs Blue station-cord labels.
- Page 93 2 Wire the station jacks on the modules to the jack field using D8W cords. Thread the wires through the wire manager located at the base of each module as you connect them to the station jacks. Label each end of each wire with the intercom number to which it connects.
- Page 94 3 Beginning with a pair of labels marked 01, label each cord at both ends with matching labels. If the distance between a voice terminal location and the control unit requires the use of extension cords, label each end of the wiring run. Attach one label near the plug to the voice terminal and the matching label near the plug to the control unit.
-
Page 95: Wiring A Voice Terminal For Two Voice-Pairs
If an analog voice terminal requires either the Voice WIRING A VOICE Announcement to Busy Voice Terminal feature or the TERMINAL FOR TWO Simultaneous Voice and Data feature, you need to assign VOICE-PAIRS two adjacent odd/even station jacks (01 and 02, 13 and 14, etc.) on an analog station module to that voice terminal. - Page 96 4 0 8 4 0 8 4 0 8 4 0 8 4 0 8 Power Supply l i n e s A d j a c e n t odd/even j a c k s Bridging A d a p t e r (BR-241-B1) (See Note) D8W cords...
- Page 97 Odd numbered jack Voice Bridging adapter (Even numbered terminal station) Even MERLIN II System Even numbered jack Station (Voice control unit (Odd numbered Line Terminal) station) O O O O O O O O O O O O O O O O O O O O O O O O 4 4 3 1 1 3 2 2 Even station jack from...
-
Page 98: Standard 4-Pair Wiring
STANDARD 4-PAIR If you are wiring for 4-pair using a 66-type block, review WIRING the diagram in Figure 2-8. Notice that the wiring for the additional voice pair (the even-numbered jack) terminates in the same place on the building wiring block as the wiring for the odd-numbered jack. - Page 99 Brand Rex part # BR866-JC Standard 8-pin jack wiring 1 — T – – – – — 1 – – – – – – – – – – – – – – – – – – – – – – – – —...
- Page 100 Follow the diagram in Figure 2-9 if you are performing a postwire surface-mounted application or if you are using apparatus boxes in a jack field. The postwire surface-mounting requires a 104A connecting Block. Two 4-pair modular cords coming from the control unit (adjacent odd/even jacks) plug into it and the voice pairs from each connect to the wires of a single 4-pair modular cord.
-
Page 101: Jack Field Wiring
Even port Odd port 1 — — T — — 1 2 — — R — — 2 3 — — T — — 3 4 — — R — — 4 5 — — T — — 5 6 — — R —... - Page 102 the point of connection to the outside lines from the network interface, which is provided by the local telephone company, to jacks in a jack field for the outside. lines. Refer to the topics referenced below depending on your wiring needs. If you decide not to have direct connections from the voice terminals to the control unit and the building wiring and jack fields are not installed, you need to...
-
Page 103: Constructing Ajack Field For Voice Terminal Wiring
You may also decide to connect the outside wiring directly from the network interface to the control unit and the voice terminal wires directly from the voice terminal locations to the control unit. If the installation is simple or other factors determine that direct wiring is best for all connections, you may skip these wiring instructions. - Page 104 See the equipment supplier to obtain the correct adapters for the system. Each box holds six single- Z122C apparatus boxes. port voice terminaI connectors. These adapters (or Modular wall jack adapters. connecting blocks) terminate the wiring runs at the voice terminal locations. Various adapters (e.g., the 102A, 103A, 104A, 104B, 105AF, and 106AFD) are used to connect eight-conductor jacks to 110-type hardware.
- Page 105 A backboard should be in place at the location where you plan to install the control unit. If no board is ready, see “Wall Attachment Requirements” on page 2-4. If the backboard is in place, do the following: Mark positions on the backboard mounting surface for the control unit and the jack field in relation to each other.
- Page 106 Running the Cables Do not run cables inside or on top of air CAUTION: plenums or ducts, along hot pipes, or across walkways. If you use staples to attach cords to walls or baseboards, be careful not to pierce the cable. If there are one or more In-Range Out-of-Building voice terminals to be installed, be sure to use two IROB protectors for each IROB voice terminal.
- Page 107 Insert and punch down (connect the wires of the spooled cable into the cutdown section of the adapter next the label for wiring run 1 in the jack field (the top jack in the box labeled 1-6). If necessary, trim the ends of the wires with a pair of scissors or diagonal pliers.
- Page 108 Wrap the jacketed cable around the center post until the colored wires extend over the two plastic caps. Align the cable in one of the notches on the jack, and attach the jack to the wall. One type of jack requires screws, while another uses adhesive backing.
- Page 109 If the local telephone company has provided an RJ2l-type EXTENDING THE network interface, you can connect the control unit to the NETWORK network interface using adapters that allow you to plug INTERFACE TO A D2R cords directly into the interface. You can also extend JACK FIELD FOR the network interface to a group of single-pair modular OUTSIDE LINES...
- Page 110 You need this tool to strip Cable termination tool. some of the jacket from the raw end of the 25-pair cable. If the connecting block on the 4-line adapter does not have two caps that automatically punch down wires when the cap is snapped onto the block, you also need a tool for punching down the wires.
- Page 111 Depending on the kind of line wiring, follow the order and color codes listed in Table 2-4, “CO Line Wiring, 6-Position Jack, Single-Pair,” Table 2-5, “CO Line Wiring, 6-Position Jack, Two-Pair,” and Table 2-6, “CO Line Wiring, 6-Position Jack, Multipair” on pages 2-46 through 2-48.
- Page 112 Attach the label, 1-8, to the outside of the right door of the apparatus box. Attach the long, narrow label showing jacks 1 through 8 to the inside of the right door of the apparatus box. Attach the telephone number directory inside the left door of the apparatus box, and close the left door.
-
Page 113: Wiring Reference Tables
Wiring Reference Tables The following tables provide reference information on wiring equipment and wiring designations for the MERLIN II system and CO line wiring. TABLE 2-2 Wiring Parts Cross Reference PPEC Description Apparatus Code COMCODE Z122B Apparatus Box 103962239 Z122C Apparatus B 103980843 103970562 2A Adapter Mounting... - Page 114 TABLE 2-3 4-Pair Wiring 102A Modular 103A 25-Pair Cord Z601A Pair Corn. Modjk Wire Term Cable CabIe Signal Pins Pair Colors Stmp Colors Colors GREEN BLUE BLUE ORANGE ORANGE BLACK -48V YELLOW BROWN W-BR W-BR SLATE BROWN BR-W TABLE 2-4 CO Line Wiring, 6-Position Jack, Single-Pair D2R Cord CU Line Jack RJ11 NI Specification...
- Page 115 TABLE 2-5 CO line Wiring, 6-Position Jack, Two-Pair RJ14 NI Specification 267A2 Adapter 267C Adapter Signal Color Plug Jack 1 Jack 2 Plug Jack GREEN BLACK YELLOW Wiring the System 2-47...
- Page 116 TABLE 2-6 CO Line Wiring, 6-Position Jack, Multipair RJ21 NI Specification CO Line Wiring Z610A Adapter Pair Conn Jack Signal Terminal Number Terminal Jack Color BR-W W-BR 2-48 Wiring the System...
- Page 117 TABLE 2-7 Wiring Tie Line Ports to Network interface From MERLIN II Network Interface RJ2GX, 25 pair connecting block Tie Line Number Signal Pin No. 44 47 20 23 Wiring the System 2-49...
-
Page 118: Installing The Control Unit
Installing the Control Unit The required components of a MERLIN II CONTROL UNIT Communications System control unit are shown in Figure COMPONENTS 2-10 and are listed below: Basic Carrier Assembly Power Supply Module Processor Module Feature Module 4-Line/8-Analog. Voice TerminaI (408) Module 8-Analog (008) Module If an 8-Analog Module is used, a module NOTE:... - Page 119 Basic carrier Power supply Processor Station module module (with module feature module) (408) FIGURE 2-10 The required components of a MERLIN II system control unit. The following modules maybe added to the system: 4-Line/8-Analog (408) Module 8-Analog (008) Module 4-Line (400 with DTMF) Module 8-Line (800) Module 12-Line Basic Telephone (012) Module 8-Digital Station (008D) Module...
-
Page 120: Mounting The Basic Carrier
The basic earner is designed to be mounted on a plywood MOUNTING THE backboard that is attached to a wall. The four mounting BASIC CARRIER bosses secure the basic carrier to the backboard (refer to Figure 2-1 1). number 10 panhead screw fits into each mounting boss. - Page 121 Mounting bosses Front view Mounting surface 18” Backboard 9 7/16" FIGURE 2-11 Preparing the backboard for the basic carrier. Installing the Control Unit 2-53...
- Page 122 To mount the basic carrier to the backboard, refer to Figure 2-12 and follow these steps: Use the basic carrier as a template to mark the hole locations on the mounting surface. Position the carrier on the backboard and check that all measurements are correct.
- Page 123 M o u n t i n g surface 1. Use the basic carrier as a template to mark hole Iocations on the backboard. Backboard B a s i c c a r r i e r 2. Drill pilot holes and mount the basic carrier on the backboard.
-
Page 124: Mounting The Expansion Carrier
attach the expansion carrier to the backboard and to the MOUNTING THE basic carrier, refer to Figure 2-13 and follow these steps: EXPANSION CARRIER Locate the breakaway plastic tab on the right side of the basic carrier. Use a flat-bladed screw driver to gently pry the tab open until it snaps free. - Page 125 Mounting surface Expansion carrier Basic carrier Connector C a r d e x t e n d e r Backboard FIGURE 2-13 Mounting an expansion carrier. Review the following paragraphs that discuss unit load DETERMINING UNIT requirements and module slot assignments before LOAD installing modules.
- Page 126 Supply Module and allows the carrier to support an additional 20 unit loads. With an Auxiliary Power Unit, a single carrier MERLIN II system can add accessories without the expense of an expansion carrier. Refer to Table 2-8 for the approximate unit load requirements for the equipment listed.
- Page 127 TABLE 2-8 Unit Load Rating of MERLIN II System Voice Terminals and Accessories Unit Unit Voice Terminals Load Load Accessories BIS-10 voice terminal General Purpose Adapter BIS-34 voice terminal Hands Free Unit BIS-34D voice terminal with Headset Adapter display BIS-22 voice terminal Basic Telephone &...
- Page 128 TABLE 2-9 Unit Load Calculation Example Total VOICE TERMINALS Unit Load Unit Load x Qty 5-Button 10-Button HFAI 7406 Digital BIS-34D BIS-22D Voice terminal total 40 Total Unit Load x Qty ACCESSORIES Unit Load Basic Telephone & Modem Interface General Purpose Adapter Hands Free Unit Accessories total...
-
Page 129: Determining Module Slot Assignments
The slot assignments for modules in the basic and DETERMINING expansion carriers are shown in Figure 2-14. MODULE SLOT ASSIGNMENTS In order to function, a basic carrier must contain the following: A Power Supply Module in the leftmost slot A Processor Module (equipped with a Feature Module) in slot 0 The Feature Module must be installed in CAUTION:... -
Page 130: Module Installation
Basic Carrier Expansion carrier P o w e r P o w e r supply supply module module P r o c e s s o r module S l o t identification: Power Power Supply Supply slot slot FIGURE 2-14 Module slot assignments on basic and expansion carriers. Module Installation All modules can be installed and removed as shown in Figures 2-15 and 2-16. - Page 131 “On-Line Module Swap” on page 4-7 and be sure to follow the procedures exactly. In a system without the On-Line Module Swap feature, turn the power off in the following sequence before installing or removing a module: Turn the power off at the Power Supply Module on the basic carrier.
-
Page 132: Removing Amodule
“Installing a Tie Line Module” on page 2-80, “Installing a Basic Telephone Module” on page 2-81. 1. Lower module onto rod on carrier 2 Swing in FIGURE 2-15 Installing a module on the carrier. To remove a module, refer to Figure 2-16 and follow these REMOVING A steps: MODULE... - Page 133 3. Disengage module from rod on carrier 2. Pull out and swing up 1. Pushup on tab FIGURE 2-16 Removing a module from the carrier. Installing the Control Unit 2-65...
- Page 134 INSTALLING THE Do not attach any cables or power cords to WARNING: POWER SUPPLY the Power Supply Module until it is installed in the MODULE carrier. If a Power Supply Module requires a Frequency Generator, it must be installed before the Power Supply Module is installed in the carrier.
- Page 135 Connect one end of the ac power cord to the connector marked “AC INPUT” on the Power Supply Module. 5 Do not plug the power cord into the outlet at this time. Refer to “Connecting the Control Unit to an AC Outlet,”...
- Page 136 Be sure to follow proper electrostatic CAUTION: discharge precautions. Refer to “Static Discharge Problems” on page 2-9. With the Power Supply Module out of the carrier and on its left side, remove the five screws. Carefully turn the module over on its right side and remove the left half of its housing.
- Page 137 1. Position the Power Supply Module so that the recessed holes ate facing up. Remove five screws. 2. Separate the module halves. Transformer Long cable 3. Locate the Frequency (4-pin connectors) Generator and the two cables. Short cable Frequency (3-pin connectors) Generator Frequency Transformer...
- Page 138 When you add an expansion carrier, you must install a Adding a Shield to a second Power Supply Module in it to power the additional Power Supply Module line and/or station modules. The second Power Supply Module may induce excessive noise on the new line or station module immediately to its right.
- Page 139 Upper copper label Tuck label tightly in corner Lower copper label Power unit information label UL label FIGURE 2-18 Proper placement of foil shields and labels on the Power Supply Module. 7 With the copper-foil shielding in place, place the power unit information label on the lower piece of foil as shown in Figure 2-18.
-
Page 140: Installing The Auxiliary Power Unit
Install an Auxiliary Power Unit if the system must support INSTALLING THE more than 45 unit loads. AUXILIARY POWER UNIT Remove power from the system. Make sure that the 0N/OFF switch on the Power Supply Module is set to the OFF position. Unplug the power cord from the ac outlet. -
Page 141: Installing The Feature Module On The Processor Module
Auxiliary power unit o u t l e t power input output AC line cord Power 4 0 8 4 0 8 4 0 8 4 0 8 4 0 8 Control Suppty unit AC power cord D6AP-87 modular line cord Auxiliary p o w e r input... - Page 142 The Release 3 Feature Module can only be used with the Processor Modules (517B7 and 517C7) developed for Release 3. When replacing a Feature Module, make CAUTION: sure that you have all the necessary records to readminister the system. When the Feature Module is replaced, all system memory is lost, and the system will have to be readministered.
- Page 143 Feature module Processor module FIGURE 2-20 Installing the Feature Module. The MERLIN II system can be configured to operate Modifying the 517A7 solely as a square (key) system. As such, every outside Processor Module for line appears on the same button at each voice terminal. If Square (Key) you have Processor Module 517A7, use the following O p e r a t i o n...
- Page 144 3 On the header at the center right of the module, locate the shunt (blue plug) attached to one of the pins. 4 Remove the shunt from the single header pin, then reinsert it so that it covers both pins on the header. 5 Snap the module halves back together.
- Page 145 S n a p s 1. Release 7 snaps 2. Open the processor case Shunt P i n 4. Adjust the shunt on 3. Locate top top header (AA) header (AA) to cover both pins on processor b o a r d Processor b o a r d Bottom header (AA) (Do not touch)
- Page 146 If you have Processor Module 517B7, use the following Modifying the 517B7 inductions to modify it for square (key) operation: Processor Module for Square (Key) Before you insert the Feature Module, orient the Operation Processor Module case as shown in Figure 2-22. Do not open the Processor Module case.
-
Page 147: Installing Line And Station Modules
Top header (HD1) S h u n t P i n Bottom header (HD2) (Do not touch) Wire manager Closed processor module FIGURE 2-22 Modifying the 517B7 Processor Module for square (key) operation. The following installation procedure applies to these INSTALLING LINE modules: AND STATION... - Page 148 Install line and station modules as follows: 1 Review the appropriate form to verify which modules will be installed on the carrier. Form lc, Station Form—Module Identification Diagram (for Release 3) Master Planning Form, Module Location Diagram (for Feature Modules 1 and 2) 2 Install line and station modules in slots 1 through 5 on the basic carrier and slots 6 through 11 on the expansion carrier.
- Page 149 If you are installing a Basic Telephone Module, you also Installing a Basic need to install a Frequency Generator in the Power Supply Telephone Module Module. A Frequency Generator is required for each carrier that has one or more Basic Telephone Modules. If possible, place all Basic Telephone Modules on the same carrier.
- Page 150 Before connecting a printer to the control unit, make sure that all modules are installed on the control unit Refer to Figure 2-23 and the following instructions to connect a printer to the control unit: Locate the Z200A EMI filter. Notice that the filter is closer to one end of the cord than the other.
- Page 151 Modular Z200A c o r d fitter M o d u l a r cord 355AF 3 5 5 A a d a p t e r (See Note) S M D R Printer port interface cable (25 pin, RS 232-C) AT&T 572 (or equivalent) Printer...
- Page 152 TABLE 2-10 AT&T 572 Printer Programming Options Menu Status Function FORM LENGTH LQ or NLQ BUZZER BUILT-IN FONT RESOLUTION N-LINE BUFFER PW ON MODE ON-LINE B1-DIR.1 DIRECTION LF+CR BUF. FULL ACTIVE P.E. CR+LF AUTO CR ZERO CR ONLY AUTO LF 1"...
- Page 153 TABLE 2-11 AT&T 475/476 Printer DIP Switch Settings Switch 2 Switch 1 Switch 21 DIP1-Open DIP1-Open DIP1-Open DIP2-Open DIP2-Closed DIP2-Open DIP3-Open DIP3-Open DIP3-Open DIP4-Open DIP4-Open DIP4-Closed DIP5-Closed DIP5-Open DIP5-Open DIP6-Closed DIP6-Open DIP6-Open DIP7-Closed DIP7-Closed DIP7-Open DIP8-Open DIP8-Open DIP8-Closed Switch 24 Switch 22 Switch 23 DIP1-Open...
- Page 154 When the printer is located greater than 50 feet away from Connecting a Printer the control unit, or the printer and the MERLIN II system to the Control Unit 50 are not connected to the same ground, connect the printer or More Feet Away according to these instructions.
- Page 155 Locate the Z200A EMI filter. Notice that the filter is closer to one end of the cord than the other. Plug the end of the cord closest to the filter into the SMDR port of the Processor Module. The SMDR port is the top port on the Processor Module.
- Page 156 6 At the remote printer location, connect another 400B2 power adapter, as described in step 4. the output from the 400B2 adapter is connected to the building wiring and the input modular jack should be connected to the ADU. 7 If the printer interface cable has a female connector, connect the output modular jack of the power adapter to a Z3A1 ADU.
- Page 157 M o d u l a r c o r d Z 2 0 0 A EMI filter Modular cord 3 5 5 A F a d a p t e r EIA Crossover cable (M7U-87) Z3A4 A D U Modular cord SMDR p o r t...
-
Page 158: Connecting The Control Unit To An Ac Outlet
A properly grounded outlet protects the system against CONNECTING THE damage from power surges and other disturbances. Refer CONTROL UNIT TO to “System Grounding Requirements” on page 2-5. The AN AC OUTLET outlet should be 117-volt, 60-Hz, third wire grounded. To ensure proper operation of the system, the ac outlet should be connected to earth ground. - Page 159 1 If there is an Auxiliary Power Unit(s), plug it (them) Turn the Power On into the ac outlet. 2 If there is an expansion carrier(s), set that power supply switch to the ON position. The green power light on the Power Supply Module goes on. 3 Set the power switch on the basic carrier’s Power Supply Module to On.
-
Page 160: Connecting The Voice Terminals
Connecting the Voice Terminals You can connect any of the following analog voice terminal models to the MERLIN II system: 7102A 5-Button 10-Button 10-Button HFAI BIS-10 BIS-22 BIS-22D 34-Button 34-Button Deluxe 34-Button (SP-34) 34-Button (SP-34D) BIS-34 BIS-34D with Display MERLIN II System Display Console The 7102A is the same as a basic telephone and NOTE: must be connected to a 012 module. -
Page 161: Assembling The Voice Terminals
The following voice terminal items come boxed together: ASSEMBLING THE VOICE TERMINALS Voice terminal body Handset Coiled handset cord Modular voice terminal cord Desk stand and/or wall mount Instructions for assembling the voice terminal Refer to Figure 2-25 and follow the steps below to assemble each voice terminal: Attach the desk stand or wall mount to the voice terminal. - Page 162 C o n n e c t h a n d s e t Set Test/Program switch to center position Adjust ringer volume switch Connect modular cord to jack labeled “LINE” FIGURE 2-25 Assembling a voice terminal. 2-94 Connecting the Voice Terminals...
-
Page 163: Connecting Voice Terminals To The System
To connect each voice terminal to the system, do the CONNECTING VOICE following: TERMINALS TO THE SYSTEM 1 Place the voice terminal in its designated location. 2 Plug the voice terminal into the system either by direct connection or through a jack field. Connecting a voice terminal to the control unit directly requires one or more modular cords. -
Page 164: Labeling Each Voice Terminal
Lift the handset. Red and green lights are on and a dial tone is present. Touch one or more dial pad buttons. The dial tone stops. Hang up the handset. The green light goes out. If the voice terminal does not respond as described, make a note of the problem and refer to Section 4, "Troubleshooting."... -
Page 165: Connecting The Power Failure Telephone
A module that has outside line jacks also has at least one CONNECTING THE Power Failure Telephone (PFT) jack (Figure 2-26). If a POWER FAILURE power temporarily disables the MERLIN II system failure TELEPHONE control unit and voice terminals, you can still gain access to an outside line through a basic Touch-Tone or rotary dial telephone that is plugged into the PFT jack on a module with outside line jacks. - Page 166 Power failure Power failure teiephone jack teiephone jack Bridges Bridges to lowest to lowest position position 4 0 8 8 0 0 B r i d g e s Power failure to lowest telephone jack position 400 w/DTMF FIGURE 2-26 PFT jacks with bridging assignments. 2-98 Connecting the Voice Terminals...
-
Page 167: Testing The Pft Jacks
To test a PFT jack proper operation, the outside line TESTING THE PFT numbers to the module’s line jacks must be assigned and JACKS the lines must be operational, When you are certain of this, follow the procedure below to test the PFT jacks: Plug a Touch-Tone or rotary dial telephone into a PFT jack. -
Page 168: Testing The System
Testing the System Perform the following tests to determine that the system is working properly. If these tests reveal any problems, refer to Section 4, ‘Troubleshooting,” and take corrective action To test each voice terminal jack for intercom and outside TESTING THE VOICE line dial tones at the control unit location, follow the steps TERMINAL JACKS... -
Page 169: Testing Intercom Calls
4 Pick Up the handset. The green light next to the red light goes on and you hear another intercom dial tone. 5 Replace the handset. Without lifting the handset, touch a line button. Testing for an Outside Line Dial The red light goes on next to this button. - Page 170 Lift the handset. The green light next to the red light goes on and you hear an intercom dial tone. Dial the intercom number of the voice terminal where someone is waiting for the call. You hear a single tone. At the other voice terminal, on tone sounds, the red light glows steadily next to (Intercom-Voice), and the green light next to the red light flashes.
- Page 171 5 After verifying two-way communication, hang up at both voice terminals. On both voice terminals, the lights go out, and the red light goes on next to the third button down in the left most column of buttons. Make sure the outside lines for the numbers assigned to TESTING OUTSIDE the system are connected to the control unit modules.
-
Page 172: Testing Tie Lines
Use any voice terminal in the system to test the ability to Placing Outside Calls place outside calls on each outside line as follows: Lift the handset. The green light goes on next to the red light. Dial the outside number of someone you know will answer the call. - Page 173 Test dial repeating he lines, wink start, immediate start, Testing Outgoing and and delay start tie lines when you are sure that someone is Two-way Dial available to receive your call at the far end. Follow these Repeating Tie Lines steps: At any voice terminal that has a tie line appearance, press the first tie line button.
-
Page 174: Completing The Installation
Test dial repeating tie lines when someone is available at Testing Incoming and the far end to place calls to your system. Follow these Two-way Dial steps: Repeating Tie Lines At a preset time, the person at the far end places a dial repeating call to your system by dialing the tie line number of the voice terminal at which you are waiting. - Page 175 Top cover Front cover FIGURE 2-27 Control unit covers. Testing the System 2-107...
- Page 176 To install the top cover, see Figure 2-28 and follow these Installing the Top steps: Cover Be sure the cords have been pressed through the wire managers at the base of the modules. Install the empty module that came with the system in the rightmost slot of the carrier if it is lacking a functional module in this slot.
- Page 177 Top cover E m p t y m o d u l e FIGURE 2-28 Installing the control unit top cover. Testing the System 2-109...
- Page 178 To install the front cover, see Figure 2-29 and follow these Installing the Front steps: Cover 1 Hook the top of the front cover onto the top cover just installed. 2 Push down on the bottom of the front cover until it locks securely on the base of the wire managers on the modules.
- Page 179 Front cover E m p t y module FIGURE 2-29 Installing the control unit front cover. Testing the System 2-111...
-
Page 180: Modifying The System
Modifying the System The MERLIN II communications system is designed so that you can make changes quickly and easily. If the system is not at full capacity, you can add an expansion carrier, additional outside lines or voice terminals, or more data equipment. -
Page 181: Adding A Voice Terminal
4 If all line jacks in the control unit are full, you can add any combination of line modules m the system so long as the sum total of outside lines does not exceed 56. Contact an equipment supplier to order additional line modules. - Page 182 terminals that a system can accommodate. For example, you can have up to 60 stations with either the Simultaneous Voice and Data feature or Voice Announcement to Busy Voice Terminal feature. These two features require an additional voice pair so that they can transmit either voice or data or indicate to a caller that a voice terminal is busy.
-
Page 183: Moving A Voice Terminal
If the voice terminal locations connect to the control through a jack field, install a wiring run for each unit new voice terminal location according to the instructions in “Jack Field Wiring,” on page 2-33. If the voice terminals connect directly to the control unit, see "Connecting Voice Terminal Wiring Directly"... - Page 184 3 Determine whether the new location has a jack field or a direct connection to the control unit. If you have a jack field, follow these steps: a Locate the jumper cord with the voice terminal’s intercom number. b Unplug it from the jack in the jack field for the voice terminal’s old location.
-
Page 185: Adding Accessories
Adding Accessories There are many accessories that can be added to the system, some of which are shown in the following illustrations. There are two types of accessory equipment available, general accessories and power accessories. To add accessory equipment, follow the instructions that come with the components. - Page 186 Alerter accessories (Figure 2-30) such as horns and bells Alerter Accessories provide audible alerts to make you aware of voice terminal ringing in noisy or large working environment. The strobe emits a high intensity flashing light to alert you of voice terminal ringing in high ambient noise environment (e.g., heavy machinery areas) and quiet zones (e.g., hospitals, libraries, and broadcast studios).
-
Page 187: Installation Instructions
A Frequency Generator is necessary in order to use basic Frequency Generator telephones. A Frequency Generator must be connected to the Power Supply Module of each carrier that contains one or more Basic Telephone Modules. See page 2-67 for installation instructions. A General Purpose Adapter (GPA) connects Touch-Tone General Purpose (not rotary) equipment such as modems, autodialers, and... - Page 188 The Hands-Free Unit (HFU) is a speakerphone that allows Hands-Free Unit people to place and answer outside and intercom calls without using the handset (Figure 2-32). Connect a HFU to the “OTHER” jack on the voice terminal. D 8 A C c o r d M i c r o p h o n e l i g h t...
- Page 189 A headset connected to a voice terminal through the Headset Adapter Headset Adapter allows the user to handle calls more easily (Figure 2-33). 10-Button voice terminal To station (bottom view) jack LINE jack O n / Q u i e t b u t t o n button O T H E R...
-
Page 190: Power Accessories
An optional Loudspeaker Paging System allows people Loudspeaker Paging System with MERLIN II system voice terminals to page co- workers and/or make announcements through loudspeakers. A Music Coupler connects a music source to the MERLIN Music Coupler II system. This enables you to have background music over the Loudspeaker Paging System, and Music-on-Hold. - Page 191 However, if there is a power demand of over 45 unit loads on one Power Supply Module, an Auxiliay Power Unit is generally required. This will support an additional 20 unit loads. If one or more of the following conditions exist, the system may need an Auxiliary Power Unit: The maximum number of voice terminals are connected to the system.
- Page 192 The Basic Telephone and Modem Interface 2 (BTMI-2) Basic Telephone and connects most types of telephones to analog module jacks Modem Interface 2 on the control unit (Figure 2-34). The BTMI-2 replaces the BTMI, which is no NOTE: longer available. 2-124 Adding Accessories...
- Page 193 Basic Telephone and Modem Interface 2 (BTMI-2) D 8 W c o r d L i n e Timer T e l j a c k j a c k device D4BU cord B a s i c telephone Line MERLIN II System control unit FIGURE 2-34 A Basic telephone and Modem Interface 2.
- Page 194 Equipment that is connected to the analog station jacks IROB Protectors (408/008) and is located in a building outside of the main (control unit location) building, but within 1000 feet of the control unit, is called In-Range, Out-of-Building (IROB) equipment. To protect both the control unit and the IROB equipment from exposure to lightning, in advertent contact with power lines, and power currents induced by nearby power lines, IROB protectors are required.
- Page 195 IROB lROB Protector Protector Inter buiding- wiring Analog Control voice unit terminal Approved ground Ilr’— ‘,, IROB protector FIGURE 2-35 Grounding protection for IROB telephones. Adding Accessories 2-127...
- Page 196 The Off-Premises Range Extender (OPRE) will be Off-Premises Range available for Module 1, Feature Module 2, and Feature Extender Release 3 users to connect a basic Touch-Tone telephone location at a remote system to the via an outside telephone line. As of this printing the Off-Premises Range NOTE: Extender is not available.
- Page 197 'Power Off-premises Telephone Moduiar Iine cord Outside MERLIN II System Jack control unit field Adding Accessories 2-129...
- Page 198 Voice terminal operation is guaranteed for a wiring run of Voice Terminal Power feet up 1000 from the control unit. For a wiring run that Supply Unit is more than l000 feet from the control unit, you may have to supply extra power to the voice terminal. to one voice terminal is low, it is If the power probably...
-
Page 199: Upgrading An Existing System
Upgrading an Existing System If you are upgrading a MERLIN 11 System with Feature Module 1 or 2 to a MERLIN II System with Release 3 or a MERLIN II System with Feature Module 1 m a MERLIN 11 System with Feature Module 2, you may need to do some site preparation work before installing the new modules that make up the upgraded control unit. -
Page 200: Get A Printout Of The Existing System
adding more stations, and if there is a jack field for • If them, you may need to enlarge that jack field. If no jack field exits, one may have to be built, especially if there are to be more than 30 stations, since a jack field would be the preferred method of connecting that many stations to the control unit. - Page 201 3 Press [More], [More], [Print], [All] Wait until printing is complete before leaving administration mode. Don’t remove the printout until page after you’ve left administration mode or printing alignments will be affected. 4 Press Conference to return to the administration menu or leave administration mode by sliding the T/P switch to the center position.
- Page 202 Remove Processor Module 517A7 from t of the Basic Carrier. See “Removing a Module” on page 2-64 for instructions. Insert Feature Module 3 in the Release 3 Processor Module (517B7). See “Installing the Feature Module on the Processor Module” on page 2-73 for instructions.
- Page 203 If no jack field is used to connect the CO lines to > the network interface, connect new CO lines directly to the appropriate jacks on the line modules. See “Testing Outside Lines" on page 2-103 and/or “Testing Tie Lines” on page 2-104 for instructions on testing the line jacks for dial tone.
- Page 204 Follow these steps to upgrade the system from Feature UPGRADE Module 1 to Feature Module 2. INSTRUCTIONS FMI TO FM2 Shut down the system, Basic Carrier first, any Auxiliary Power Units next, and the Expansion Carrier last if there is one. Remove the Processor Module.
- Page 205 If no jack field is used to connect the CO lines to > the network interface, connect new CO lines directly to the appropriate jacks on the line modules. See “Testing Outside Lines” on page 2-103 for instructions on testing the line jacks for dial tone. 9 Connect any new station wiring as follows as appropriate: >...
- Page 206 Section 3: Administration The Administrator/Attendant Console Types of Administrator/ Attendant Consoles Assigning Intercom Numbers Display Console Shift Buttons Using the Display During Administration Before Administering a System 3-12 Review Planning Forms 3-12 Kabkes fir tge Adninistrator/Attendant Console 3-13 Lables for Attendant Console and Voice Terminals 3-14 Default Settings 3-15...
- Page 207 Administering Stations 3-36 Assigning Lines to Stations 3-36 Identifying Analog Voice Terminal Type 3-41 Identifying Jacks for the Voice Announcement to Busy Voice Terminal Feature 3-43 Setting Options 3-45 Identifying, Music-on-Hold Line Jack 3-45 Identifying Loudspeaker Page Line Jack 3-46 Administering Data 3-48 Identifying Analog Jacks Needing Simultaneous...
- Page 208 Optional Features 3-71 Features Compatibility Table 3-71 3-73 Quick Reference to Administration Features Administering Features from a Display Console 3-74 Administering Features from a BIS-34D Console 3-93 Administering Basic Telephones 3-110 Basic Telephones Connected To Basic Telephone Modules 3-110 Basic Telephones Connected to Telephone Interface Devices...
-
Page 209: The Administrator/Attendant Console
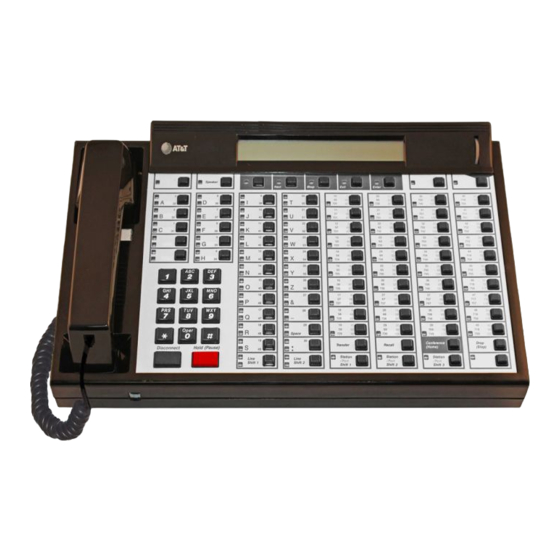
The Administrator/Attendant Console After the MERLIN II system hardware has been installed. you set its operating conditions and features through a series of administration procedures, which are described in this section. You use similar procedures, also described in this section, to change an existing MERLIN II system’s operating conditions and features to adapt it to new communication requirements. - Page 210 which administration information and system promps appear on the console’s display screen. An overlay is provided with the Displav Console to show the functions of each button when the console is in administration mode. When administration is completed, remove the overlay and place it in the tabbed pocket folder of the MERLIN II Communications System Release 3 (or Feature Module 2) System Manual.
- Page 211 FIGURE 3-I A MERLIN II System Display Console. The Administrator/Attendant Console 3-3...
- Page 212 The BIS-34D Console is suitable for administering a small BIS-34D Console system, that is, a system configured for 8 or fewer lines and 20 or fewer stations. This console, shown in Figure 3-2, cannot be used to administer the MERLIN II System Release 3.
- Page 213 — FIGURE 3-2 A BIS-34D Console. The Administrator/Attendant Console 3-5...
-
Page 214: Assigning Intercom Numbers
Each voice terminal in the system has a unique intercom ASSIGNING number. These intercom numbers are automatically INTERCOM assigned to Auto Intercom buttons on the Display Console NUMBERS and on a BIS-34 Console used with a system configured as a small system. When a B1S-34 Console is used on a system configured as a large system, lines are automatically assigned to buttons above and to the right of the dial pad. -
Page 215: Using The Display During Administration
TABLE 3-1 Display Console Station Shift Buttons Label Selects Intercom Numbers Shift 1 10 through 49 (or the equivalent Flexible Numbering codes) Shift 2 50 through 69,700 through 719 (or the equivalent Flexible Numbering codes) Shift 3 720 through 759 (or the equivalent Flexible Numbering codes) If you want to select a particular voice terminal, the light must be on next to the shift button for the group that contains that voice terminal’s intercom number. - Page 216 With the Display Console, the entire administration The Display on the process is menu-driven. You use the buttons beneath the Display Console display to select the action you want to perform. The buttons beneath the display change their functions to match the labels on the display as the display changes during administration.
- Page 217 FIGURE 3-3 Administration Menu for MERLIN II System, Release 3. The Administrator/Attendant Console...
- Page 218 FIGURE 3-4 Administration Menu for MERIJN II System with Feature Module 2. 3-10 The Administrator/Attendant Console...
- Page 219 The BIS-34D display provides the following kinds of The Display on the information: BIS-34D Console The current administration mode A “wait” message if the entire system or an individual voice terminal can’t be administered The current feature being administered An echo of your input System prompts for additional input information For Feature Module 2, proceed with NOTE:...
-
Page 220: Before Administering A System
Before Administering a System Once a system has been installed, it can be administered. How you do this depends on whether you are administering a new system, upgrading from an older to a newer system or making changes to an existing system. Read the remaining paragraphs under this heading and then go to the appropriate topic that suits your situation: Ž... - Page 221 Master Planning Form Flexible Numbering Form System Configuration Form Station Configuration Forms Enhanced Night Service Forms Call Restrictions and Allowed Lists Forms Group Page Form Group Call Distribution Forms Call Pickup Group Forms System Speed Dial Form Forms for Automatic Route Selection Tables You should also label buttons on the administrator/ attendant console, other attendant consoles, and the voice terminals.
- Page 222 you have a MERLIN II System Display Console with more than 40 stations in the system, some labels will have two entries. Write the lower intercom number on the top half of the button label and the higher intercom number on the bottom half.
-
Page 223: Default Settings
The default operating conditions for a MERLIN II system DEFAULT SETTINGS are the following: Administration port. Station port 01 (intercom number 10) is the only port for system administration and initially the only attendant port. CalI Report (SMDR). Both incoming and outgoing calls are recorded;... - Page 224 On-Line Module Swap Port. Station port 19 is designated as having the capability to reset modules for on-line module swap (for Release 3 only). Posted Message. Users can choose from among 20 messages and leave one posted for information to callers with display sets (for Release 3 only).
-
Page 225: Administering In Several Sessions
Answer Supervision Time. 300 ms > Dial Tone. Remote > Incoming Disconect Time. 300 ms > Incoming Line Dial Mode. Rotary > Incoming Line Type. Wink start > Inward Dial Plan Numbers. Four digits. 4010 >. through 4097 Line Direction. Two way >... -
Page 226: To Enter Administration Mode
Follow these steps to enter the administration mode: TO ENTER ADMINISTRATION Slide the T/P switch on the left side of the console to MODE Press Conference twice. On the DisplayConsole, the administration menu appears. On the BIS-34D Console, lights start flashing next to Adm Pool, Adm Tel, Message, and Speaker. -
Page 227: System Busy Messages
Set options • > Identify music-on-hold line jack loudspeaker page line jack >Identify Administer data > Identify analog jacks needing simultaneous voice and data feature • Administer tie lines (R3 only) • Administer optional features The administration procedures for optional features are provided in quick reference tables at the end of this section. - Page 228 Module renumbering Flexible numbering Line pool administration Tie line direction assignment Tie line incoming type outgoing line type Tie line signaling Tie line inward dial plan administration Voice announcement to busy voice terminal Music-on-Hold port assignment Page port assignment Simultaneous Voice and Data port assignment The following features require that the station be idle during administration: Centralized Programming...
-
Page 229: Administering A New System
Administering a New System A MERLIN system can be set for two different sizes: SETTING SYSTEM small and large. The small setting is for systems SIZE administered for eight or fewer lines. The large setting for systems administered for more than eight lines. This large size setting allows the system accommodate Up 56 lines. -
Page 230: Setting System Type
5 Dial number designate system size: 0 = small 1 = large The message “System is Re-starting... ” appears. When renumbering is complete, after a short delay, the lights flash next to Adm Tel, Adm Pool, Message, and Speaker. 6 Continue administration or leave administration mode by sliding the T/P switch to the center position. -
Page 231: Designating Attendant Positions
With a BIS-34D Console Enter administration mode by sliding the T/P switch Press Conference twice. Lights flash nexto to Adm Tel, Adm Pool, Message, and Speaker. Press Message. The green light goes on steady next to Message. All flashing lights go off. - Page 232 you want to designate a new attendant position and the system already has the maximum number, you must change an existing attendant position to a nonattendant voice terminal before you designate the new attendant position. With a Display Console Enter administration mode by sliding the T/P switch to Press Conference twice.
-
Page 233: Performing Flexible Numbering
5 Press the Auto Intercom button until the green light next to the button shows the setting you want: Studygreen light = attendant position Flashing green light = potential attendant position Green Iight off cannot be assigned as an attendant position 6 Press #. - Page 234 OPTI, you cannot dial flexible numbers longer than two digits. • If a flexible number is invalid or conflicts with a number already assigned, the console beeps. • There are some unused numbers already available that you can assign to stations without initializing. The number are 784 through 799, 857 through 869, 876 through 880, 888 through 889.
-
Page 235: Dial Plan Printout
first station or line and instruct the system to renumber the other stations or lines in the group sequentially. You can get a printout of the numbers currently assigned DIAL PLAN stations, lines, line pools, Call Distribution and Group PRINTOUT Page groups. -
Page 236: Numbers To Make Space In The Dial Plan)
Press Message. Dial #999 and wait for the beep. Press Message. Wait until printing is complete before leaving administration mode. Don’t remove the printout until after you’ve Ieft administration mode or printing page alignments will be affected. Leave administration mode by sliding the T/P switch to the center position. - Page 237 1 Enter administration mode by sliding the T/P switch to 2 Press Conference twice. The administration menu appears. 3 Press [FlexNum], [Block], [InitSp]. All the intercom numbers are assigned numbers in the 7000 range. (Add 7000 to the default intercom number. Intercom 10 becomes 7010, intercom 11 becomes 7011, etc.) 4 To assign Flexible Numbering codes, press [Exit]...
-
Page 238: Single Renumbering
Press the line button or Auto Intercom button of the last (highest-numbered) line or station in the string of lines or stations to be changed. Press [Enter]. system prompts you to enter first new Fiexible number dial code. Dial the first (lowest-numbered) new Flexible Number dial code. - Page 239 Press [Single] Press the appropriate button for the type of dial code you want to change. The choices are the following: [Station] [Pools] [Page Zns] [GrpCall] Take one of the actions below to indicate the “old” dial code. The third action can only be used for lines or NOTE: stations.
-
Page 240: Administering Lines
Administering Lines If your system is pooled, follow this procedure. If your ASSIGNING LINES TO LINE POOLS system is square or behind-switch, follow the “Assigning Lines to Stations” procedure in this Section under {POOLED SYSTEMS “Administering Stations” on page 3-36. ONLY) To administer lines in pooled systems, you group DESCRIPTION... - Page 241 assigned to a pool, it cannot assigned a second pool nor to an individual as a personal line. • The system can have as many as 11 different line pools. If the business has special-purpose lines, such as WATS or FX lines, they should be assigned to separate pools.
- Page 242 Refer to Form 1a, System Form- Incoming Lines and/or Form 1b, System Form-Tie Lines for Release 3, and the Master Planning Form, Line Jacks for Feature Module 2 which shows how each line jack should be administered. Follow the steps below to add or remove lines from the main pool.
-
Page 243: Specifying Touch-Tone Or Rotary Signaling
3 Press Adm Pool. Green light comes on steady and two beeps sound. 4 Dial the pool code. Press line buttons until your selection is shown: Red light on = line in pool Red light off = line not in pool 6 Press Adm Pool. -
Page 244: Administering Stations
With a BIS-34D Console Enter administration mode by sliding the T/P switch Press Conference twice. Lights flash next to Adm Tel, Adm Pool, Message, and Speaker. Press Message. Green light goes on steady and two beeps sound. Dial #302 Press line buttons for the selection you want: Green light on = Touch Tone selected Green light off = rotary seiected Press Message. - Page 245 With a Display Console Enter administration mode by sliding the T/P switch to Press Conference twice. The administration menu appears. Press [Stations], [Line/Pool]. Press the Auto Intercom button or dial the code for the station Press [Enter] . Press the the buttons until your selection is shown.
- Page 246 e Press [ E n t e r ] You hear a 2-beep signal to let you know that a copy procedure is complete. f Repeat steps b through e for each station for which you want to copy line assignments. g Press to return to the Stations screen.
- Page 247 Use this procedure to assign stations dial access to line Assigning Stations pools. Refer to Form 1a, System Incoming Lines Dial Access to line for Release 3, or the System Configuration Form for Pools Feature Module 2 for proper assignments. With a Display Console Enter administration mode by sliding the T/P switch to Press Conference twice.
- Page 248 Press [Enter]. Press the Auto Intercom button or dial the intercom number of the station you are copying to. Press [Enter]. You hear a 2-beep signal to let you know that the copy procedure is complete. Repeat steps a through e for each station for which you want to copy line assignments.
-
Page 249: Identifying Analog Voice Terminal Type
Press Adm Tel 8 Press Conference to return to the administration menu or leave administration mode by sliding the T/P switch to the center position. Initially, the system recognizes all analog voice terminals IDENTIFYING or HFAI models, the kind that have raised plastic as BIS ANALOG VOICE buttons. - Page 250 Follow the appropriate procedure below to identify any voice terminals in the system that are membrane-button rather than BIS/HFAI (raised button) models. With a Display Console 1 Enter administration mode by sliding the T/P switch to Press Conference twice. The administration menu appears. Press [Stations], [More], [BIS/HFAI] 4 Press the Auto intercom button until your selection is...
-
Page 251: Identifying Jacks For The Voice Announcement
6 Press Message. 7 Press Conference to return to the administration menu or leave administration mode by sliding the T/P switch the center position. Refer to Form 1d, System Form-Station Planning for IDENTIFYING JACKS Release 3, or the Station Jacks section of the Master FOR THE VOICE Planning.Form for Feature Module 2. - Page 252 The system prompts you to assign voice/voice pairs of jacks by pressing the appropriate Auto Intercom buttons. Each successive press of a button gives you one of the following codes: Green light on = station jack is in a voice/voice pair Green light off = station jack is not paired 5 Press Conference to return to the administration menu or leave administmtion mode by sliding the T/P switch...
-
Page 253: Setting Options
Setting Options If the MERLIN system has Music-on-Hold, you need to IDENTIFYING MUSIC- identify the control unit line jack to which the music ON-HOLD LINE JACK source is connected. Remember that the Music-on-Hold line can't be placed in a line pool, assigned to a voice terminal, used for Loudspeaker Page, or used as a Direct Inward System Access (DISA) line. - Page 254 With a BIS-34D Console Enter administration mode by sliding the T/P switch to Press Conference twice. and Speaker. Lights flash next to Adm Tel, Adm Pool, Message, Press Message. Dial #204. Green light nex t o Message goes on steady and two beeps sound. Press the line button until your selection is shown: Green light on = jack is assigned for Music-on-Hold Green light off = jack is for a standard line or loudspeaker page...
- Page 255 3 Press [More], [Options], [XtrnPg]. 4 The system prompts you to press the appropriate line button to identify the line jack used for Loudspeaker Page. Each successive press of a button gives you one of the following codes: Green light on = Loudspeaker Page line Green light off = standard line or Music-on-Hoid line 5 Press Conference to return m the administration menu or leave administration mode by sliding the T/P switch...
-
Page 256: Administering Data
Administering Data IDENTIFYING Refer to Form 1d, System Form-Station Planning for ANALOG JACKS Release 3, or the Station Jacks section of the Master NEEDING planning Form for Feature Module 2. The form shows whether a second station jack has been assigned to any SIMULTANEOUS VOICE AND DATA analog voice terminal to allow simultaneous voice and... - Page 257 With a Display Console Enter administration mode by sliding the T/P switch to Press Conference twice. The administration menu appears. Press [More], [More], [Data], [Voe/Data] Assign voice/data pairs by pressing the appropriate Auto Intercom-buttons. Each successive press of a button gives you one of the following codes: Green light on= voice terminal is in a voice/data pair Green light off = voice terminal is not paired Press Conference to return to the administration menu...
-
Page 258: Administering Tie Lines
Administering Tie Lines Available only with MERLIN System Release 3, a tie line module provides up to four tie line ports. For many installations, placing tie lines in one or more pools will be most convenient for their use. By default, lines in pools are set to not ring at stations. - Page 259 Switches 1 through 5 control Port 4 S2(controls (E&M unprotected) Ports 3 and 4) Switches Port 4 6 through control Port 3 P o r t 3 (E&M protected) Switches 1 through 5 control Port 2 Port 2 (simplex) P o r t 1 Switches S1 (controls 6 through...
- Page 260 The unprotected mode must be used for the NOTES: E&M Type 1 Standard interface in order to meet the voltage drop criteria for that interface. Switch positions designated n/a can be either on or off. Refer to Form lb, System Form-Tie Lines and set the options for each tie line port as described here.
- Page 261 TABLE 3-2 Tie Line DIP Switch Settings Switch Switch Port Options Position Setting Unprotected E&M o f f o f f protected o f f o f f o f f n / a Simplex Unprotected E&M Protected o f f o f f o f f Simplex...
-
Page 262: Selecting The Direction
The default settings for tie line options are summarized DEFAULT TIE LINE below in Table 3-3. SETTINGS TABLE 3-3 Default Tie Line Settings Tie Line Option Default Setting Answer supervision time 300 ms Dial mode (incoming line) Rotary Dial mode (outgoing line) Rotary Dial Tone Remote... -
Page 263: Selecting The Line Type
5 Press the button beneath the display to select the direction of the tie line: > Two way (default) > Outgoing > Incoming The direction screen appears. 6 Repeat step 4 for each line port. 7 Press Conference to return to the main administration menu or leave administration mode by sliding the T/P switch to the center position. -
Page 264: Selecting The Signal Type
If the tie line is Touch-Torte signaling, the NOTE: immediate start (Imm) option is disallowed. 6 Repeat steps 4 and 5 for each incoming tie line port. 7 Press and select [Exit] [OutType] [InType] select the outgoing line type repeat steps 4 and 5 for each outgoing tie line port. -
Page 265: Selecting The Dialing Mode
To select the dialing mode for tie lines, follow these steps: SELECTING THE DIALING MODE Enter administration mode by sliding the T/P switch to Press Conference twice. The administration menu appears. Press [More], [More], [More], [TieLines], [More], [InMode]. The in mode screen appears. Press the tie line button to select the dialing mode. -
Page 266: Selecting The Answer Supervision Time
To select the answer supervision time for tie lines, follow SELECTING THE these steps: ANSWER SUPERVISION TIME Enter administration mode by sliding the T/P switch to Press Conference twice. The administration menu appears. Press [More], [More], [More], [TieLines], [More], [More], [AnsSupv] The answer supervision screen appears. -
Page 267: Selecting The Disconnect Time
To select the disconnect time for tie lines, follow these SELECTING THE steps: DISCONNECT TIME Enter administration mode by slding the T/P switich to Press Conference twice. The administration menu appears. Press [More], [More], [More], [TieLines], [More], [More]. [InDisc] . The in disconnect screen appears. -
Page 268: Flexible Renumbering Of The Dial Plan
The Inward Dial Plan, that is, the numbers that other SELECTING THE people use to call in to the business on tie lines, can have INWARD DIAL PLAN either three or four digits. This option is set for all the tie lines installed and does not need to be administered to individual lines. - Page 269 These default dial plan numbers can be changed to a 3- digit number or some other 4-digit number. However, 3- digit and 4-digit numbers cannot be mixed. Flexible numbering for the tie lines is not related to the flexible numbering of stations, lines, line pools, and groups.
-
Page 270: Printing The Inward Dial Plan
1 Enter Administration mode by sliding the T/P switch to 2 Press Conference twice. The administration menu appears. 3 Press [More], [More], [More], [TieLines], [More], [More]. [More], [InDPin] The inward dial plan screen appears. 4 Press [Block] . 5 Press [Stations] . -
Page 271: Administering An Upgraded System
Administering an Upgraded System Use the printout of the prior system obtained at the beginning of the procedure for upgrading an existing system plus the new FM2 planning forms or the new R3 planning forms to readminister the system. See “Get a Printout of the Existing System”... -
Page 272: Administering A Changed System
Administering a Changed System Performing system administration on an existing system that has been changed involves some special considerations. Read the following information carefully before you install or remove modules or change the basic settings for a MERLIN system that is already in use. You may delete important system administration settings if you: Install or remove modules in the control unit... - Page 273 Follow the appropriate procedure below to renumber the system. Be sure to update all of the planning forms that are affected by the replacement or addition of a module. With a Display Console Enter administration mode by sliding the T/P switch to Press Conference twice.
-
Page 274: Changing System Size
If you change the system size designation from small to CHANGING SYSTEM large, or vice versa, the system reverts to the default SIZE setting. See "Default Setings" on pg 3-15. In addition, the line assignments will change on all attendant consoles. Be sure to record the changes on the appropriate NOTE: planning forms. -
Page 275: Changing System Type
6 Continue administration or leave administration mode by sliding the T/P switch to the center position. If you change the system type (square, pooled, or behind- CHANGING SYSTEM TYPE switch), you delete all system line administration and voice terminal programming formerly in place. You'll have to reassign the lines and reprogram all the voice terminals, since this change resets them to the default configuration. - Page 276 3 Press [System], [Type] 4 Press the appropriate button: > For a square system, press [Square] > For a pooled system, press one of the following: [ButnAcc], [ARS], [DialAcc] > For a behind switch system, press [More], [BehindSw] The message "System is Re-starting..." appears, followed by the administration menu.
-
Page 277: Changing Attendant Positions
to an If you change a standard voice terminal station port CHANGING attendant position or vice versa, you have reassign lines ATTENDANT and features to it, since all settings return to the default POSITIONS condition. Depending upon the equipment plugged into the port and the port’s new use, you may have to change the voice terminal or console and any attached accessory equipment. - Page 278 Press the appropriate Auto Intercom buttons until the green lights show the code you wan Steady green light = attendant position Flashing green light = potential attendant position used as nonattendant voice terminal Green light off = cannot be assigned as attendant position Press [Store] The message “System is Re-starting...”...
-
Page 279: Replacing Modules While On-Line (Release 3 Only)
A module that needs to be replaced can be exchanged with REPLACING another module of the same type while the system is in MODULES WHILE operation. This procedure requires the designation of a ON-LINE (RELEASE 3 station port to place modules in reset. The default port is ONLY) station 19, the first port on the second module. -
Page 280: Optional Features
Optional Features After you have completed system administration, you can assign the optimal features listed on the following table to the system. If the system has a printer, you can get a printout showing the current status of these features. See “Printouts”... - Page 281 TABLE 3-4 Features Compatibility Table F e a t u r e Allowed Lists Attendant (MERLIN II) Automatic Route Selection Behind Switch Operation Call Pickup Groups Call Report Call Restriction Camp On Centralized Programming Dialing Timeout Interval Direct Inward System Access Disallowed Lists Extended Station Status Forced Account Code Entry...
- Page 282 Table 3-5, “Display Console Administration,” provides an QUICK REFERENCE alphabetized list of features that can be administered from TO ADMINISTRATION Display Console for MERLIN System Release 3 and FEATURES Feature Module 2. Consult Table 3-4, “Features Compatibility Table,” to see which features are available for Feature Module 2.
- Page 283 Administering Features from a Display Console Table 3-5 Display Console Administration Procedure: Slide T/P switch to P, press Conference button F e a t u r e twice, then follow steps for feature Allowed Lists P r e s s [ M o r e ] , [ T a b l e s ] , [ M o r e ] , [ A l w L i s t ] To set up Dial list number (0 through 7).
- Page 284 TABLE 3-5 Display Console Administration (continued) Procedure: Slide T/P switch to P, press Conference button F e a t u r e twice then follow steps for feature 1 Press Allowed Lists [More], [More], [Print], [More], [AllowTo] (continued) 2 Press Conference to return to the adminisnation menu. To get a printout of station access to...
- Page 285 TABLE 3-5 Display Console Administration (continued) Procedure: Slide T/P switch to Conference button P, press F e a t u r e twice, then follow steps for feature Automatic Route Selection (continued) To delete an Press [More], [Tables], [ARS-Inp] area code or Dial table number (0 through 7).
- Page 286 TABLE 3-5 Display Console Administration (continued) Procedure: Slide T/P switch to P, press Conference button F e a t u r e twice, then follow steps for feature Automatic Route Selection (continued) To delete a pool 1 Press [More], [Tables] [ARS-Pool] . number (action Dial table number (0 through 9).
- Page 287 TABLE 3-5 Display Console Administration (continued) Procedure: Slide T/P switch to P, press Conference button Feature twice, then follow steps for feature Autormatic Route selection (continued) To get a 1 Press [More], [More], [Print], [More]. printout of ARS 2 Press to begin printing.
- Page 288 TABLE 3-5 DispIay Console Administration (continued) Procedure: Slide T/P switch to P, press Conference button Feature twice, then follow steps for feature Call Report To administer Press [More], [Options], [More], [SMDR] Call Report Press [MinTime] options Use Backspace or Drop to remove the value.
- Page 289 TABLE 3-5 Display Console Administration (continued) Procedure: Slide T/P switch P, press Conference button F e a t u r e twice, then follow steps for feature Call Restrictions (continued) 2 To assign Press [Stations], [Restrct] . call Press Auto Intercom button for station. restrictions to stations Press...
- Page 290 TABLE 3-5 Display Console Administration (continued) Procedure: Slide T/P switch to P, press Conference button Feature twice, then follow steps for feature Camp On To set the Camp 1 Press [More], [Opitions], [CampOn] . On return Use Backspace or Drop to remove the current entry. interval Enter the number of minutes (1 through 5) that calls should remain camped.
- Page 291 TABLE 3-5 Display Console Administration (continued) Procedure: Slide T/P switch to P, press Conference button Feature twice, then follow steps for feature Direct Inward 5 Press line button: system Access Green light on = line or the pool can be used for DISA (continued) Green light off = be or line pooi cannot be used for DISA 6 Press Conference to return to the administration menu.
- Page 292 3-5 Display Console Administration (continued) TABLE Procedure: Slide T/P switch to P, press Conference button F e a t u r e twice, then follow steps for feature print the Press [More], [More], [Print], [More], [More], [More], [More], disallowed lists [ D i s L i s t ] Dial the list number (0 through 7).
- Page 293 TABLE 3-5 Display Console Administration (conntinued) Procedure: Slide T/P switch to P’, press Conference button Feature twice, then follow steps for feature Group Call Distribution To assign lines Press [Stations], [More], [GrpCall] . and stations to 2 Dial code (870 through 875), or logical ID number of Call Distirbution groups for G r o u p .
- Page 294 TABLE 3-5 Display Console Administration (continued) Procedure: Slide T/P switch to P, press Conference button Feature twice, then follow steps for feature Hold Disconnect 1 Press [Lines], [More], [HidAband] lnterval 2 Press line buttons: Steady green on = line drops held call on long (450 millisecond) signal (default) Green off = line drops held call on short (50 millisecond) signal 3 Press Conference to return to the administration menu.
- Page 295 TABLE 3-5 Display Console Administration (continued) Procedure: Slide T/P switch to P, press Conference button Feature twice, then follow steps for feature Night Service. Enhanced To assign Press [More], [Night], [Group] . stations to Dial attendant's station number or depress the Auto Intercom button. attendant’s Night Service Press [Enter] .
- Page 296 TABLE 3-5 Display Console Administration (continued) Procedure: Slide T/P switch to P, press Conference button Feature twice, then follow steps for feature Night Service, Enhanced (continued) To set up an Press [More], [Night], [Emerg]. allowed list of Dial entry number (0 through 9). emergency numbers Press [Enter].
- Page 297 TABLE 3-5 Display Console Administration (continued) Procedure: Slide T/P switch to P, press Conference button F e a t u r e twice, then follow steps for feature Night Service, Enhanceed (continued) To set times for Dial number of day of week: Night Service to 0 = Sunday 4 = Thursday...
- Page 298 TABLE 3-5 Display Console Administration (continued) Procedure: Slide T/P switch to P, press Conference button F e a t u r e twice, then follow steps for feature One-Touch Call Handling 1 Press To set system [More], [Options], [More], [More], [OneTouch] for One-Touch 2 Press [Transfer]...
- Page 299 TABLE 3-5 Display Console Administration (continued) Procedure: Slide T/P switch to P, press Conference button F e a t u r e twice, then follow steps for feature Recall Timer 1 Press [More], [Options], [More], [More], [Recall] Interval 2 Use Backspace or Drop to remove the current entry. 3 Dial number to specify timer interval: 0 = 350 milliseconds 1 = 450 milliseconds...
- Page 300 TABLE 3-5 Display Console Administration (continued) Procedure: Slide T/P switch to P, press Conference button F e a t u r e twice, then follow steps for feature System 1 Press [More], [More], [Print] Information Report 2 Press to begin printing. [SysConf] Printout 3 Press Conference to return to the administration menu.
- Page 301 TABLE 3-5 Display Console Administration (continued) Procedure: Slide T/P switch to P, press Conference button Feature twice, then follow steps for feature System Time 1 Press [System], [More], [Time] 2 Press Backspace or Drop to remove current entry. 3 Dial the new Line using 24-hour format (0000 through 2359). 4 Press [Enter] 5 Press Conference to return to the administration menu.
- Page 302 Administering Features from a BIS-34D Console Table 3-6, BIS-34D Administration, below describes the administration procedures for optional features using the BIS-34D Console. You cannot administer Release 3 features using NOTE: the BIS-34D console. Not all features have a procedure for getting a printout; however, if you want to verify your administration for those features that do offer a printout, keep the following points in mind:...
- Page 303 TABLE 3-6 BIS-34D Console Administration Procedure: Slide T/P switch to P, press Conference F e a t u r e button twice, then follow steps far feature Allowed Lists Press Message. To set up allowed lists Dial #5. Dial list number (0 through 7). Dial entry number (0 through 9).
- Page 304 TABLE 3-6 BIS-34D Console Administration (continued) Procedure: Slide T/P switch to P, press Conference button twice, then follow steps for feature Feature Automatic Route Selection (ARS) Press Message. To specify how many tables are 6-digit tables Dial #305. Dial number of 6-digit tables (0 through 8). Press Message.
- Page 305 TABLE 3-6 BIS-34D Console Administration (continued) Procedure: Slide T/P switch to P, press Conference F e a t u r e button twice, then follow steps for feature Automatic Route Selection (ARS) (Continued) To associate an Press Message. absorption type with a Dial #7.
- Page 306 TABLE 3-6 BIS-34D Console Administration (continued) Procedure: Slide T/P switch to P, press Conference Feature button twice, then follow steps for feature Automatic Route Selection (ARS) (continued) Press Message. To get a printout of ARS tables Dial #902 and wait for beep. Press Message.
- Page 307 TABLE 3-6 BIS-34D Console Administration (continued) Procedure: Slide T/P switch to P, press Conference Feature button twice, then follow steps for feature Call Report (continued) To record outgoing and Dial #3910 to record outgoing calls only incoming calls Dial #3911 to record outgoing and incoming calls. Press Message.
- Page 308 TABLE 3-6 BIS-34D Console Administration (continued) Procedure: Slide T/P switch to P, press Conference F e a t u r e button twice, then follow steps for feature Call Restrictions (continued) Press Speaker until the green light shows the restrictions 2 To assign call wanted: restrictions to phones...
- Page 309 TABLE 3-6 BIS-34D Console Administration (continued) Procedure: Slide T/P switch to P, press Conference F e a t u r e button twice, then follow steps for feature Centralized Programming 1 Press Conference. 2 Press Auto Intercom button for phone to be programmed. 3 If red light next to Adm Tel goes off and console rings way 5 seconds, go on to step 4.
- Page 310 TABLE 3-6 BIS-34D Console Administration (continued) Procedure: Slide T/P switch to P, press Conference Feature button twice, then follow steps for feature Direct Inward System Access set up DISA outward 1 Press Message. restriction 2 Dial #325. 3 Dial 0 for outward restriction or 1 for no restriction 4 Press Message.
- Page 311 TABLE 3-6 BIS-34D Console Administration (continued) Procedure: Slide T/P switch to P, press Conference Feature button twice, then follow steps for feature Forced Account Code Entry 1 Press Message. 2 Dial #319. 3 Press Auto Intercom button(s): Steady green light on = phone has Forced Account Code E n t r y Green light off = phone doesn't have Forced Account Code Entry...
- Page 312 TABLE 3-6 BIS-34D Console Administration (continued) Procedure: Slide T/P switch to P, press Conference Feature button twice, then follow steps for feature Group Paging 1 Press Message. To assign phones to groups for Group Page 2 Dial #. 3 Dial default Group page group number (881 through 886). 4 Press Auto lntercom buttom(s): Steady green light on = phone in paging group Green light off = phone not in paging group...
- Page 313 TABLE 3-6 BIS-34D Console Administration (continued) Procedure: Slide T/P switch to P, press Conference Feature button twice, then follow steps for feature Night Service, Enhanced To assign phones to Press Message. attendant's Night Service Dial #307. group Dial attendants intercom number. Press Auto Intercom button(s): Steady green light on = phone in group Green light off = phone not in group...
- Page 314 TABLE 3-6 BIS-34D Console Administration (continued) Procedure: Slide T/P switch to P, press Conference button twice, then follow steps for feature Feature Night Service, Enhanced (continued) Press Message. To set times for Night Service to go on and off Dial #311. automatically Dial the number of the day of the week 4 = Thursday...
- Page 315 TABLE 3-6 BIS-34D Console Administration (continued) Procedure: Slide T/P switch to P, press Conference Feature button twice, then follow steps for feature Night Service, Enhanced (continued) To suspend Night Service Press Message. with Time Set Dial #313. Dial 9. Press Message. To get a printout of Press Message.
- Page 316 TABLE 3-6 BIS-34D Console Administration (continued) Procedure: Slide T/P switch to P, press Conference Feature button twice, then follow steps for feature Reminder Service Cancel 1 Press Message. 2 Dial #333. 3 Dial a time using 24-hour format (0000 through 2359) or touch Drop to remove entry.
- Page 317 TABLE 3-6 BIS-34D Console Administration (continued) Procedure: Slide T/P switch to P, press Conference Feature button twice, then follow steps for feature System Speed Dial To assign System Speed 1 Press Conference. Dial codes 2 Dial 0. 3 Dial System Speed Dial Code (#60 through #99 for FMl and FM2 or #600 through #729 for R3), then dial* if it is a marked code.
- Page 318 TABLE 3-6 BIS-34D Console Administration (continued) Procedure: Slide T/P switch to P, press Conference button Feature twice, then follow steps for feature Transfer Return 1 Press Message. Interval 2 Dial #306. 3 Dial number of rings (1 through 9) before call return to original phone.
- Page 319 Administering Basic Telephones The MERLIN II system may include basic telephones installed in the office or at remote locations. A basic telephone is any single line telephone set (a zero button set such as the 7102A), any rotary telephone (a 500 set), or any Touch-Tone telephone (a 2500 set).
- Page 320 lf the system is square, users with basic telephones can • get an outside line by dialing 88. If the telephone has more than one line assigned to it, the system automatically searches through the lines in the order assigned, and provides the first idle line it finds. Assign identical types of lines, such as all local lines, to basic telephones in square systems, or give the user a list of the diaI codes shown on the Station...
- Page 321 If a user needs to access specific lines or line pools, refer to the list of dial codes on the Station Configuration Form, Basic Telephones (Pooled Systems) for Feature Module 2 or Form 3e, Station Configuration Form, Basic Telephones (Pooled Systems) for Release 3.
- Page 322 Use either Centralized Programming to program the basic telephone or connect a voice terminal directly to the control unit station jack where you plan to connect the OPTI, BTMI, or BTMI-2. To use centralized Programming, follow the procedures on page 3-81 a Display Console or page 3-100 for a BIS-34D Console.
- Page 323 Programming Voice Terminals CENTRALIZED When you performed system administration, you assigned PROGRAMMING lines and line pools to the individual voice terminals in the system. In administering optional features, you may also have assigned Call Restriction or Forced Account Code Entry to voice terminals and assigned them to groups for Group Page, Group Call Distribution, Call Pickup, and Night Service.
- Page 324 1 Enter programming mode by sliding the T/P switch to Digital phones: Dial #33. NOTE: 2 Take the appropriate action: > To assign immediate, delayed, or no ringing to an individual line or line pool button, press the button and dial the appropriate code: - Dial *35 for No Ring.
- Page 325 4 Leave programming mode by sliding the T/P switch to the center position. Digital phones: Dial #00. NOTE: Call Coverage The Call Coverage feature allows you to cover calls, including intercom calls, for other voice terminals in your system. To program this feature, follow these steps: Label a button with lights.
- Page 326 You can use the Call Pickup feature to answer a call that is Call Pickup ringing, parked, or on hold anywhere in the system. To program this feature, follow these steps: Label a button. Enter programming mode by sliding the T/P switch to Digital phones: Dial #33.
- Page 327 4 To program other features, you must dial to exit Automatic Line Selection. Dialing applies only to exiting the Automatic Line Selection programming routine. Otherwise, leave programming mode by sliding the T/P switch to the center position. Digital phones: Dial #00. NOTE: There are three features that can be programed onto voice Rapid Dialing...
- Page 328 > To program a switchhook flash at the beginning of a programmed dialing sequence, press Recall and then press Hold. > To program Touch-Tone Enable, press Transfer. 6 Leave programming mode by sliding the T/P switch to the center position. Digital phones: Dial #00.
- Page 329 1 Label a button. 2 Enter programming mode by sliding the T/P switch to Digital phones: Dial #33. NOTE: 3 Press the button you want to program. 4 Dial 74 (you do not need to dial an outside number). 5 Leave programming mode by sliding the T/P switch to the center position.
- Page 330 Section 4: Troubleshooting Basic Troubleshooting Procedures Troubleshootig Checklist Merlin II System Planning Forms General Operating Conditions 0n-Line Module Swap Tie Line Troubleshooting 4-11 Testing Tie Lines 4-11 4-30 Procedures for Specific Symptoms 4-30 Locating the Symptom 4-31 Difficult to Place CaIls 4-34 Caller Can’t Hear Person Answering 4-35...
- Page 331 General Tests 4-55 Reaming the Control Unit 4-55 Testing Outside Lines 4-56...
- Page 332 Basic Troubleshooting Procedures This section shows you how to diagnose and solve basic problems in the MERLIN II system. It also provides you with the procedures for making an on-line module swap in a Release 3 system. Most of the troubleshooting procedures are based on identifying the symptom, determining whether it is hardware or software related, isolating the problem to one of the areas indicated in Figure 4-1, and replacing...
- Page 333 FIGURE 4-1 Specific areas of the MERLIN II system for troubleshooting reference. TROUBLESHOOTNG When a problem occurs with the MERLIN II system, CHECKLIST follow this general procedure: 1 Identify the symptom. 2 Isolate the problem area and/or the faulty component(s). 4-2 Basic Troubleshooting Procedures...
- Page 334 3 If the symptom is hardware related: Check the connections. Replace individual components in the area of tie problem with components known to be working until the malfunction is connected. Test the system. Notify the local telephone company if the problem is on the outside Iines.
- Page 335 Each MERLIN II system site should have the following MERLIN II SYSTEM PLANNING FORMS planning forms completed and available for reference during service and maintenance. For Release 3: • Form la, System Form-Incoming Lines • Form 1b, System Form-Tie Lines •...
- Page 336 • Form 5k, Allowed Lists • Form 5l, Disallowed Lists • Form 6, System Speed Dial Assignments • Forms 7a through 7c, Enhanced Night Service • Forms 8a through 8c, Label Forms For Feature Module 1 and Feature Module 2: •...
- Page 337 > The red warning light on the Processor Module is o f f > All lights on the Tie Line Module are off Module jacks. Check that all module connection are • securely seated in the line and station jacks. •...
- Page 338 On-Line Module Swap Troubleshooting the MERLIN II system somtimes involves replacing control unit modules. It is possible with Release 3 of the MERLIN II system, to remove and insert modules while the system is in operation. The Processor Module and Power Supply NOTE: Modules cannot be removed using On-Line Module Swap.
- Page 339 remove the controller station port designation. The green light goes out.. Now select the station port you want to designate as the controller station port by touching its Auto Intercom button. The green light goes on. Replace a Module When replacing a module, you need a MERLIN system voice terminal then follow these steps: Plug a voice terminal into the controller station port.
- Page 340 Touch a programmable button. Dial 09 plus the slot number of the module to be removed (01 through 11) to select that slot The green light next to Intercom Ring will flash. The red light next to Intercom Voice indicates activity on the module. Flashing red light =activity Steady red light =no activity Digital station modules with only data calls...
- Page 341 12 Exit the procedure by: > Touching Intercom Ring. > On an analog voice terminal, sliding the T/P switch to the center position. > On a digital voice terminal, dialing #00. 4-10 On-Line Module Swap...
- Page 342 Tie Line Troubleshooting TESTING TIE LINES Before performing the following tests, make sure that the tie lines for the system are connected and properly configured. These tests procedures verify proper installation for Type 1 Standard, Type 1 Compatible, and Type 5 Simplex, or E&M signaling types. Refer to page 1-48 for a description of these signaling types.
- Page 343 6 Print out the tie line translation and make sure that the ports are configured as described in step 4. > If the tie lines are translated correctly, go on to step 7. If the tie lines are not translated correctly according to Form 1b, repeat steps 4 through 6.
- Page 344 FIGURE 4-2 Cross-connect field for Type 1 Standard and Type 1 Compatible. 9 Go off-hook on station A. > If you hear dial tone, go on to step 10. > If you do not hear dial tone, hangup and repeat steps 8 and 9 for any other ports being tested.
- Page 345 11 Listen for ringback tone. > If there is ringback tone, go on to step 12. > If there is no ringback tone, hangup and repeat steps 8 and 9 for any other ports being tested. When all ports have been tested, go on to step 17. 12 Pickup the handset at station B.
- Page 346 17. Hang up. Repeat steps 8 and 9 for any other ports > If all the line are good, go on to step 25. > If one or more of the tie lines are not good, go to step 18. NOTE: For the following steps, refer to Table 4-1 to identify the pin numbers of the tie line jack associated with the leads identified in the...
- Page 347 b Try another tie line port, then retest the condition. > If the condition has been corrected, the original tie line port is faulty. Go back to step 8. > If the condition has not been connected, go on to step 19c. c Replace the Tie Line Module, then retest the condition.
- Page 348 Connect a craft set between leads T1 and RI. Select the tie line being tested using station A. The receiving end should provide dial tone. NOTE: The tie line dial tone option should be administered for remote in order to send dial tone out to the port being tested.
- Page 349 To test tie lines configured for Type 1 Compatible, follow Testing Type 1 these steps: Compatible Tie Lines Connect an attendant console to station port 10. Connect a printer to the SMDR port on the Processor Module. Set the printer port to 1200 baud. Set the Tie Line Module switches to E&M signaling/protected mode.
- Page 350 From the 66-type block, cross-connect tie line port 1 to one of the ports you want to test (ports 2, 3, or 4). See Figure 4-2. NOTE: Test only one port at a time. Go off-hook on station A. > If you hear dial tone, go on to step 10. >...
- Page 351 13 Go off-hook on station B. > If you hear dial tone, go to step 14. > If you do not hear dial tone, go on to step 14 14 Dial station A. > If the tie line does not drop (within five seconds) go on to step 15.
- Page 352 18 Ensure that all phones are on-hook. Connect a volt meter between the M lead and ground at the 66-type connecting block for one of the bad tie lines. > If the voltage is 48 volts, go to step 20. >...
- Page 353 Connect the volt meter between the E lead and ground at the 66-type block for the tie line being tested. > If the voltage is 0 volts, go to step 21. > If the voltage is not 0 volts, go to step 19. Select the tie line being tested and go off-hook station A.
- Page 354 25 Readminister port 1 for Type 1 Compatible. 26 Print out the tie line translation and make sure that all the ports are configured for Type 1 Compatible. > If the tie lines are translated correctly according to Form 1b, testing is complete. >...
- Page 355 Print out the tie line translation and make sure that the ports are configured as described in step 4. > If the tie lines are translated correctly, go on to step 7. > If the tie lines are not translated correctly according to Form lb, repeat steps 4 through 6.
- Page 356 FIGURE 4-3 Cross-connect field for Type 5 Simplex 9 Go off-hook on station A. > If you hear dial tone, go on to step 10. > If you do not hear dial tone, hangup and repeat steps 8 and 9 for any other ports being tested. When all ports have been tested, goon to step 17.
- Page 357 11 Listen for ringback tone. > If there is ringback tone, go on to step 12. > If there is no ringback tone, hang up and repeat steps 8 and 9 for any other ports being tested. When all ports have been tested, go on to step 17. 12 Pick up the handset at station B.
- Page 358 Hang up. Repeat steps 8 and 9 for any other ports being tested. > If all tie lines are good, go on to step 25. > If one or more of the tie lines are not good, go m step 18. NOTE: For the following steps, refer to Table 4-1 on page 4-15 to identify the pin numbers of the tie line jack associated with the leads...
- Page 359 c Replace the Tie Line Module, then retest the condition. > If the condition has been corrected, the original Tie Line Module is faulty. Go back to step 8. > If the condition has not been corrected, stop testing and call the equipment supplier. If the problem was either the tie line port or the Tie Line Module, call the equipment supplier when you have finished testing.
- Page 360 > If you hear a dial tone and connot break it, go to step > If you do not hear dial tone, go to step 19. Connect a craft set between leads T and R. Select the tie line being tested using station B. The transmitting end should provide dial tone.
- Page 361 Procedures for Specific Symptoms Use the contents page of this Section to locate a specific LOCATING THE symptom and the page number on which its SYMPTOM troubleshooting procedure can be found. Then perform the recommended action to isolate and correct the problem.
- Page 362 Symptom: People have difficulty placing outside talk DIFFICULT TO PLACE CALLS and/or intercom calls from one or more voice terminals. To Investigate Further Possible Cause Possible Solution 1. A faulty accessory is Disconnect the accessory If the trouble still occurs. c o n n e c t e d from the malfunctioning reconnect the accessory and...
- Page 363 Possible Cause Possible Solution To Investigate Further 4. Faulty MERLIN II system Try to place an outside call If the trouble appears only on components. and an intercom call from intercom calls or the trouble several voice terminals. appears only on one voice terminal, the trouble is caused by a component in your system.
- Page 364 Possible Cause Possible Solution To Investigate Further 5. Faulty telephone company Step 2. Replace the wiring If the calls still do not go wiring (Continued). with a cord this is known to through, contact the work and try to place calls. equipment supplier.
- Page 365 Symptom: The person placing a call from the MERLIN CALLER CAN'T HEAR PERSON II system, doesn't hear the person answering. ANSWERING Possible Cause Possible Solution To Investigate Further The Dialing Timeout interval Step 1. Check Form 1a If the lines are rotary, the is too long.
- Page 366 Symptom: A person called with the voice PERSON CALLED announcement to idle voice terminal procedure cannot CAN'T HEAR CALLER hear the caller. Possible Cause Possible Solution To Investigate Further Misadministration of the C h e c k t o s e e i f t h e membrane button set.
- Page 367 Symptom: Calls waiting on hold are frequently CALLS ON HOLD disconnected. DISCONNECTED Possible Cause Possible Solution To Investigate Further The hold disconnect interval Follow the instructions for If calls on hold are still for the MERLIN II system is the "Hold Disconnect disconnects, contact the shorter than the interval at Interval"...
- Page 368 Symptom: Calls to voice terminals connected to 408 CALLS ARE CUT OFF or 008 modules are cutoff or dropped. OR DROPPED Possible Cause PossibIe Solution To Investigate Further Step 1 Check the number of Too many Off-Premises If the trouble still occurs. the voice terminal connections to Telephone Interfaces module is still overloaded.
- Page 369 Symptom: A voice terminal doesn‘t ring. PHONE DOESN’T RING Possible Cause Possible Solution To Investigate Further 1. The volume control Check the volume control If the trouble persists, go to Possible Cause 2. switch setting is too low. setting on the voice terminal. Slide the switch to a higher”...
- Page 370 Possible Solution To Investigate Further Possible Cause If the green light is off, Step 1. Look at the light next 3. The Do Not Disturb there is no button labeled Do a Do Disturb button. feature is activated. Not Disturb, or the Do Not If the green light is on, touch Disturb button has no light the button to deactivate the...
- Page 371 Symptom: There is trouble with voice terminal lights, PHONE CONSTANTLY RINGS speaker, and/or ringing. Possible Cause Possible Solution To Investigate Further 1. The T/P switch on an Check the position of the T/P If the T/P switch is in switch. If it is set to either T analog voice terminal is not center position and the set in the center position.
- Page 372 LIGHTS, SPEAKER, Symptom: There is trouble with voice terminal lights, RINGING PROBLEMS speaker, and/or ringing. Possible Cause Possible Solution To Investigate Further 1. A faulty control unit or Analog set: Slide the T/P to Possible Cause 3. Power Supply Module. switch on the left side of the voice terminal the T...
- Page 373 Possible Cause Possible Solution To Investigate Further 1. A faulty control unit or If the lights are dim when Contact the equipment Power Supply Module testing an analog set look for supplier for assistance. (Continued). a faulty control unit or Power Supply Module.
- Page 374 Possible Cause Possible Solution To lnvestigate Further 2. A faulty voice terminal If some (but not all) of the Plug the original (Continued). lights flash Continually malfunctioning voice and/or a tone sounds at terminal into its original jack irregular intervals and go Possible Cause 3.
- Page 375 Possible Cause Possible Solution To Investigate Further 3. Faulty cable connection. Step 1. Go to the control If the trouble still occurs, the unit and locate the intercom trouble is in the control unit. jacks for the malfunctioning Call the equipment supplier voice terminal and for a for assistance.
- Page 376 Symptom: All voice terminals are without lights or dial NO LIGHTS OR DIAL tone. TONE Possible Cause Possible Solution To lnvestigate Further 1. The control unit is not Follow the instructions under If the green power light on receiving power. “Restarting the Control Unit”...
- Page 377 Symptom: A caller waiting on hold hangs up, but the LINE BUTTON LIGHT light next to that line button on voice terminals in the SHOWS FALSE system continues to flash as if the call were still on STATUS hold. Possible Cause Possible Solution To Investigate Further The hold disconnect internaI...
- Page 378 Symptom: When a call is terminated at a BIS-34 Voice BIS-34 LIGHTS DON'T G O O F F terminal, the line button lights do not go off. Possible Cause Possible Solution To Investigate Further Misadministration of the Check to see if the BIS-34 BIS/HFAI voice terminal.
- Page 379 Symptom: A feature programmed on a voice terminal P R O G R A M M E D doesn't work. FEATURE DOESN'T W O R K Possible Cause Possible Solution To Investigate Further 1. The feature was Turn to the programming If the feature is programmed programmed incorrectly or instructions for the feature in...
- Page 380 MODULE DOESN'T Symptom: A module doesn't work properly in a slot. WORK Possible Cause Possible Solution To Investigate Further 1. The module needs to be To correct this problem, it is If the module is correctly cleared of previous preferable have a printer administered for the system administration.
- Page 381 Possible Cause Possible Solution To Investigate Further If a Release 3 system: If the module doesn’t work. 2. The module contacts are Refer to the instructions go to "General Tests" on dirty. under "On-Line Module page 4-55 before calling the Swap"...
- Page 382 CHANGED Symptom: Intercom numbers have changed or INTERCOM features assigned to a person's station have changed. NUMBERS OR FEATURES Either of these conditions can occur when a system has been readministered and the wires to the stations affected have not been connected to the jacks that reflect the latest administration.
- Page 383 Symptom: When you touch the Recall button or RECALL BUTTON access the Recall feature, nothing happens. DOESN'T WORK Possible Cause Possible Solution To Investigate Further If the system does not have 1. Your system has Ask the system administrator ARS, go to Possible Cause 2. Automatic Route Selection if the system has ARS.
- Page 384 Symptom: When using a MERLIN II system behind R E C A L L another switching system, such as a PBX, the outside D I S C O N N E C T S line disconnects when you touch Recall or access the LINE WHEN Recall feature (in place of a switchhook flash) BEHIND SWITCH...
-
Page 385: Power Failure
Symptom: All programmed features don't work after a SYSTEM LOOSES ITS power failure. MEMORY DUE TO A POWER FAILURE Possible Cause To Investigate Further Possible Solution 1. The blue shorting plug in Use these steps to try and If system features do not the Processor Module that is correct the problem: work go to "General Tests"... - Page 386 General Tests If you are experiencing a problem not described previous tests, or if none of the tests reveaI a specific problem, try the following procedures before calling the equipment supplier. If the portion of the memory that maintains administration RESTARTING THE and station programming has been corrupted, the system CONTROL UNIT...
- Page 387 To restart the control unit, remove and restore its power by Hardware Restart following these steps: Turn the power off at the Power Supply Module on the basic carrier. If there is an Auxiliary Power Unit, turn the power off. If there is an expansion carrier, turn the power off.
- Page 388 Plug the telephone’s modular cord into the network Testing a Single-Line interface and listen for a dial tone. Network Interface • If a dial tone is present, the trouble is in the control unit or the wiring. • If no dial tone is present, have the local telephone company check the line and the network interface.
- Page 389 Section 5: Ordering Information O r d e r i n g I n f o r m a t i o n Product Listing Ordering Information...
-
Page 390: Ordering Information
Ordering Information This section contains a comprehensive listing of all PRODUCT LISTING MERLIN system components and accessories. All products listed are compatible with all releases of the MERLIN II system unless otherwise noted. AT&T Service technicians can order most products as ORDERING lNFORMATION price element items through DOSS. - Page 391 TABLE 5-I Products: Control Unit (continued) Apparatus Description Comcode Code Code Circuit Pack Module 4-Line, 8-Voice Terminal (408) 105-351-076 61382 517B1 Circuit Pack Module, 4-Line with Touch-Tone Receivers (400 w/TTR) 105-408-892 517B12 61383 Circuit Pack Module 12-Basic Telephone (012) 105-512-412 517C13 61387 Feature Module 1 (FM1)
- Page 392 TABLE 5-2 Products: Voice Terminals and Accessories Apparatus Description Code Comcode code Voice Terminals Z7302H01C-003 3160-111 5-Button 105-217-426 105-217-509 10-Button Z303H01D003 3161-172 10-Button HFAI 105-371-942 Z7309H01C-003 3161-161 105-161-061 BIS-10 7313H01A-003 3165-10B BIS-22 105-188-809 7314H01A-003 3166-228 BIS-22D (with Display) 105-630-420 7315H01B-003 3166-DSB BIS-34 105-309-074...
- Page 393 TABLE 5-2 Products: Voice Terminals and Accessories (continued) Apparatus Code Description Comcode Code Desk Stands and Wall Mounts Adjustable Desk Stand, 10-Button VT 103-746-855 32002 l l C Adjustable Desk Stand, 34-Button VT 103-746-863 32003 Fixed Desk Stand, 5-& 10-Button VT 103-746-848 32004 Desk Stand/Wall Mount 14A, BIS-10...
- Page 394 TABLE 5-2 Products: Voice Terminals and Accessories (continued) Apparatus Comcode Code Code Description Button Label Sheets D-181785 10-Button BIS VT 105-336-978 22-Button BIS VT 105-336-960 D-181784 105-690-770 D-182211 22-Button BIS VT with Display 105-336-956 D-181783 34-Button BIS VT Display Console (FM1) (includes one Faceplate) 105-299-754 D-181727...
- Page 395 TABLE 5-3 Products: System Accessories Apparatus Description Comcode Code Code 2-Line Adapter 103-715-652 267C 61400 AC Surge Protector 105-327-647 145A None Acoustic Coupler Adapter 104-010-061 349A 31710 Auxiliary Power Unit 103-806-998 335A 61216 Basic Telephone Modem Interface 2 (FM2 & R3 only) 105470-355 113A 2301-BTIA...
- Page 396 Table 5-3 Products: System Accessories (continued) P E C Apparatus Description Comcode C o d e C o d e 6 1 2 2 2 Extra Alert Deluxe Chime 403-762-826 CHM-CH-BT2-B-1 6 1 2 2 3 Extra Alert Deluxe Horn 403-764-053 HORN E SET 4S 6 1 2 1 3...
- Page 397 Index Automatic Line Seletion, 3-114 programming on voice terminals, 3-117 Accessories Automatic Route Selection, 4-52 alerter, 2-118 BIS-34D console administration, 3-95 — 3-97 general, 2-118 — 2-122 power, 2-122 — 2-130 Display console administration, 3-75 — 3-78 Auxiliary Power Unit, 1-31, 2-122 — 2-123 that extend telephone range, 2-130 installing, 2-72 —...
- Page 398 Control unit (continued) Cable connecting a printer to, 50 or More Feet connectorized, 2-41 Away, 2-86 — 2-89 spooled DIW, 2-36 connecting to an ac outlet, 2-90 Cable termination tool, 2-42 covers, attaching, 2-106 — 2-112 Cables enviromental requirements for, 2-1 running, 2-38 —...
- Page 399 Display Console General operating conditions, 4-5 — 4-7 in administration mode, 3-3 General Purpose Adapter, 1-33, 2-119, 3-48 use of shift buttons with, 3-6 — 3-7 General tests for troubleshooting, 4-55 — 4-57 uses of, 3-1 Ground connection, description of, 2-5 — 2-6 Display Console administration overlay, (illus.) 2-6 description of, 3-14...
- Page 400 Intercom dial tone Line assignments to stations, directions for, BIS-34D console administration, 3-103 3-36 — 3-41 changing, 3-103 Line cords, single-pair modular, 2-20 Display console administration, 3-85 Line jacks. See Jacks. outside line Intercom number, verify, 2-96 Line module, installing, 2-79 — 2-80 Intercom numbers changed, 4-51 Line pools IROB protectors, 1-34, 2-9, 2-126 —...
- Page 401 Module (continued) line, installing, 2-79 – 2-80 Off-Premises Range Extender, 1-35, 3-110 power supply, adding labels to, 2-71 Off-Premises Telephone Interface, 1-33, 1-35, power supply, adding a shield to, 2-70 3-110, 2-128 — 2-130 power supply, installation procedure, administering telephones connected to, 2-66 —...
- Page 402 Power supply module, 1-38 Recall Timer Interval controls and indicators, 1-23 BIS-34D console administration, 3-106 description of, 1-19 Display console administration, 3-90 Power supply units, auxiliary, 2-122 — 2-123 too long, 4-53 Printer too Short, 4-52 connecting to the control unit, 2-81 — 2-85 Reminder Service Cancel connecting to the control unit 50 or more feet BIS-34D console administration, 3-107...
- Page 403 Stations Tables (continued) assigning dial access to line pools, 3-39 — 3-41 Port requirements for system accessories, 1-44 assigning lines and line pools to, 3-36 — 3-38 Products: adjunct equipment, 5-6 — 5-7 Supplemental Alert Adapter, 1-35, 2-122 Products: control unit, 5-1 — 5-2 Surge protection See Grounding Products: voice terminals, and accessories, System...
- Page 404 Time, setting Night Service with Time Set, Voice terminal wiring 3-87, 3-105 for adjacent odd/even jacks, 2-27 (illus.) connecting directly, 2-25 — 2-26 Time, system connecting through a jack field, 2-24 BIS-34D console administration, 3-108 connecting to the control unit, 2-23 — 2-44 Display console administration, 3-92 for two voice-pairs, 2-26 —...
Need help?
Do you have a question about the Merlin II and is the answer not in the manual?
Questions and answers
the clip from my old merlin phone is to big to fit into the new AT&T phone, What can I do if anything