AT&T MERLIN LEGEND MLX-10 Non-Display Telephone User Manual
Non-display telephone
Hide thumbs
Also See for MERLIN LEGEND MLX-10 Non-Display Telephone:
- User manual (148 pages) ,
- Quick reference manual (9 pages)
Table of Contents
Advertisement
Quick Links
Download this manual
See also:
User Manual
Advertisement
Chapters
Table of Contents

Related Manuals for AT&T MERLIN LEGEND MLX-10 Non-Display Telephone


Summary of Contents for AT&T MERLIN LEGEND MLX-10 Non-Display Telephone
- Page 1 AT&T MERLIN LEGEND™ Communications System MLX-10™ Non-Display Telephone User's Guide...
- Page 2 AT&T 555-610-123 Copyright © 1991 AT&T Issue 1 All Rights Reserved August 1991 Printed in U.S.A. Notice Every effort was made to ensure that the information in this book was complete and accurate at the time of printing. However, information is subject to change.
- Page 3 Rings One long _______________________ Inside call One long and one short ___________ Outside call One long and two short ____________ Transfer or returning call One long and three short ___________ Returning Callback call Line Button Lights Automatic connection Green Line or feature in use Line Request in use Red and green You’re on line...
- Page 4 Account Codes Feature Use Programmed Button Name Code 1. Program a line button for each feature (Appendix C) 2. Press programmed button Feature Code 1. Press Feature 2. Dial code (see below) 82+ code Account Code Entry Callback—Selective Call Waiting—Pickup Camp-On Follow Me 34 + ext.
-
Page 5: Table Of Contents
Contents About This Book viii Conventions Used How to Comment on This Book Your MLX-10 Telephone MLX-10 Model Dedicated Feature Buttons Line Buttons 1-11 Line Button Lights 1-12 Caring for Your Phone 1-13 Adjusting the Desk Stand Contents... - Page 6 Contents Making and Answering Calls Making Outside Calls on Phones with SA Buttons Making Outside Calls on Phones with ICOM Buttons Making Inside Calls Answering Calls T o n e s Using and Programming Features Using Features Programming Features Feature Finder C o n t e n t s...
- Page 7 Contents Features Account Code Entry Auto Dial Callback Call Waiting 5-11 Conference 5-13 Coverage 5-19 Do Not Disturb 5-20 Forward and Follow Me 5-24 Headset/Handset Mute 5-25 Last Number Dial 5-26 Line Request 5-27 Messaging 5-32 Paging 5-34 Park 5-37 Personalized Ring 5-38 Personal Speed Dial...
- Page 8 Contents Features—Continued Ringing Options 5-45 Saved Number Dial 5-48 Signaling and Notify 5-49 5-52 System Speed Dial Transfer 5-53 Voice Announce 5-61 Programming Special Characters Feature Codes Programming Codes Index/Glossary IG-1 C o n t e n t s...
-
Page 9: Important Safety Instructions
The exclamation point in an equilateral triangle is intended to alert the user to the presence of important operating and maintenance (servicing) instructions in the literature accompanying the product. IMPORTANT SAFETY INSTRUCTIONS Always follow these basic safety precautions when using your telephone equipment. -
Page 10: Save These Instructions
Never push objects of any kind into the telephone through openings or slots. Never spill liquid of any kind on the telephone. Do not use the telephone near a gas leak. If you suspect a gas leak, report it immediately, but use a telephone away from the area in question. -
Page 11: About This Book
About This Book This book gives you the information you need to use your non-display telephone. If you have questions about this book or need additional information, see your system manager. He or she is a co-worker who is responsible for managing the system. -
Page 12: Conventions Used
About This Book Conventions Used The following typographic conventions are used in this book: Buttons that you program (“hand-labeled” buttons) are shown in bold italic type with initial capitals: Press Privacy. Buttons that are programmed at the factory (imprinted buttons) are shown in bold Roman type with initial capitals: Press Transfer. -
Page 13: How To Comment On This Book
About This Book How to Comment on This Book We welcome your feedback on this book. Please use the feedback form on the next page. If the form is missing, send your comments to A. Sherwood, AT&T, 99 Jefferson Road, Rm. -
Page 14: Your Mlx-10 Telephone
Your MLX-10 Telephone Your MLX-10™ telephone is part phone, part intercom, and part computer. It has touch-tone dialing, a speakerphone, and programming capabilities. Your phone has many features. Some of these, such as Transfer and Conference, are built in. Others, such as Forward and Call Waiting, can be programmed and used when you need them. -
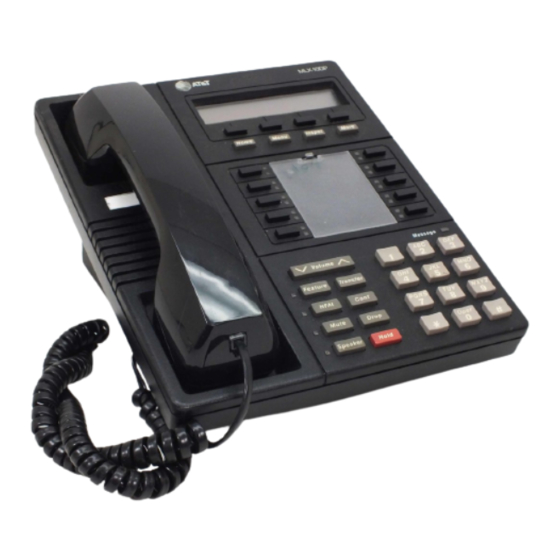
Page 15: Mlx-10 Model
Your MLX-10 Telephone MLX-10 Model Handset Button Labeling Card Line Buttons (10) Message Light Dialpad Volume Control Dedicated Feature Buttons (8) User Cards and Tray MLX-10 Model... - Page 16 Your MLX-10 Telephone User cards and tray Button labeling card Instructions for feature use and A card you can label with the line directory information in a sliding or feature assigned to each line tray under the phone button Volume control Dedicated feature buttons A button for controlling the The 8 imprinted buttons for the...
-
Page 17: Dedicated Feature Buttons
Your MLX-10 Telephone Dedicated Feature Buttons Eight imprinted (dedicated) feature buttons, are located in the lower left corner of the phone. These buttons are programmed for the features you use most often. Four of the buttons have lights next to them to show their on/off status. - Page 18 Your MLX-10 Telephone Speaker Press to turn on the speakerphone so you can make or answer a call without using the handset. Press Speaker before dialing to get a dial tone. Press Speaker when the phone rings to answer the call. Press Speaker while the handset is in use to turn off the handset and turn on the speakerphone.
-
Page 19: Line Buttons
Your MLX-10 Telephone Line Buttons There are ten line buttons—two columns of five each—in the center of the phone. Use these buttons to make and receive inside calls (calls to and from other extensions) and outside calls. Two or more line buttons are labeled either ICOM (Intercom) or SA (System Access). - Page 20 Your MLX-10 Telephone Phones with SA Buttons SA Ring. Use this button to make and receive both inside and outside calls. To call an inside number, dial only the extension. For outside calls, dial a dial-out code (usually a 9) before the phone number.
- Page 21 Your MLX-10 Telephone SA Originate Only. Use this button only to make calls; calls do not come in on this button. To make an outside call, enter a dial-out code (usually a 9) before dialing the phone number. This button is set up by your company to make either inside ringing or voice-announced calls (not both).
- Page 22 Your MLX-10 Telephone Phones with ICOM Buttons ICOM Ring. Use this button to make inside ringing calls and to receive both inside ringing and voice-announced calls. You cannot use this button for outside calls, but they can be transferred to you. lCOM Voice.
- Page 23 Your MLX-10 Telephone ICOM Originate Only. Use this button to make inside calls; calls do not come in on this button. This button is set up by your company to make either inside ringing or voice- announced calls. 555-1234. Use any button labeled with a phone number to make or receive outside calls only.
-
Page 24: Line Button Lights
Your MLX-10 Telephone Line Button Lights Each line button has two lights next to it, a red one and a green one, showing whether the line is available, in use, or on hold. Meaning Light You are automatically connected to this Steady red line when you lift the handset. -
Page 25: Caring For Your Phone
Your MLX-10 Telephone Caring for Your Phone First unplug the phone from the wall jack, then use a soft cloth lightly dampened with water or a mild soap solution to clean the phone. CAUTION: To prevent permanent damage, do not immerse the phone in water or any other liquid, or use liquid or aerosol cleaners directly on the phone. -
Page 26: Adjusting The Desk Stand
Your MLX-10 Telephone Adjusting the Desk Stand The angle of a desktop phone can be adjusted. Put the phone face down on a flat surface, remove the cord from the clips in the stand, and follow the steps below. 1. Press on the top rear center of the stand to release the tab. 2. - Page 27 Your MLX-10 Telephone The diagram on the bottom of the user card tray also tells you how to adjust the stand. 1-14 Adjusting the Desk Stand...
-
Page 28: Making And Answering Calls
Making and Answering Calls How you make outside calls depends on the line buttons on your phone. Instructions for making outside calls on phones with SA buttons are on page 2-2. Instructions for making outside calls on phones with ICOM buttons are on page 2-3. How you make inside calls and how you answer calls is basically the same for phones with ICOM buttons and phones with SA buttons. -
Page 29: Making Outside Calls On Phones With Sa Buttons
Making and Answering Calls Making Outside Calls on Phones with SA Buttons Use any SA button, or any line button labeled with a phone number, Pool, or the name of a special service (for example, WATS) to make an outside call. Only SA buttons need a dial-out code (usually a 9) before dialing the phone number. -
Page 30: Making Outside Calls On Phones With Icom Buttons
Making and Answering Calls Making Outside Calls on Phones with ICOM Buttons You can use any line button labeled with a phone number or the name of a special service (for example, WATS) to make an outside call. (ICOM buttons are reserved for inside calls.) To Make an Outside Call 1. -
Page 31: Making Inside Calls
Making and Answering Calls Making Inside Calls Inside calls are either voice-announced or ringing. When you make a voice-announced call, your co-worker’s phone does not ring; your voice is heard over the speakerphone instead. When your co-worker is on another call using the handset, your voice still comes over the speakerphone if your co-worker’s phone is programmed to allow voice announcements. - Page 32 Making and Answering Calls To Make Inside Ringing Calls 1. If the red light next to the ICOM Ring or SA Ring button is not on, press the button, The red light next to the line button goes on. 2. Lift the handset or press Speaker. The green light goes on.
-
Page 33: Answering Calls
Making and Answering Calls Answering Calls Your phone alerts you to an incoming call in several ways. The phone can ring or you can receive a voice-announced call via the speakerphone. Or, while on the phone, you may hear a Call Waiting signal—a beep—... -
Page 34: Distinctive Rings
Making and Answering Calls To Identify Ringing Calls (Distinctive Rings) Your phone uses four distinctive ringing patterns to help you identify different types of incoming calls. Ring Meaning An inside call One long ring One long ring and An outside call one short ring One long ring and An outside call transferred to you or a... - Page 35 Making and Answering Calls To Answer Ringing Calls If You Are Not On the Phone: 1. A flashing green light next to a line button indicates a call is ringing on that line button. If the red light next to the button with the call is not on, press that line button.
-
Page 36: Tones
Making and Answering Calls Tones When making a call or using a feature, you may hear a tone. Each tone has its own meaning. Meaning Tone You can make a call. Dial tone (steady tone) The phone you are calling is Busy (slow repeating tone) busy. -
Page 37: Using And Programming Features
Using and Programming Features You can use most of your phone’s features either by pressing programmed line buttons or by dialing feature codes, depending on the following: the number of unlabeled line buttons. If all the line buttons have lines assigned to them, you can use features only by dialing feature codes. - Page 38 Using and Programming Features whether the feature needs a programmed line button. Some features, such as Do Not Disturb, cannot be used with feature codes. You need to program a button to turn the feature on and off. The light next to the button provides a visual reminder when the feature is in use.
- Page 39 Using and Programming Features whether the feature can be used only by dialing a feature code. Some features are meant to be used by dialing a 1-, 2-, or 3-digit code. For example, Personal Speed Dial allows you to dial phone numbers quickly by using codes instead of programming separate Auto Dial buttons to dial each number.
-
Page 40: Using Features
Using and Programming Features Using Features There are two ways to use your phone’s features: Press a programmed button. When you have programmed a feature onto a line button, press that button to use the feature. Dial a feature code. Many features have a 1-, 2-, or 3-digit feature code. -
Page 41: Programming Features
Using and Programming Features Programming Features Your company may have already labeled and programmed features onto line buttons. You can program any unlabeled line buttons with the features of your choice. While it isn’t necessary to program most features onto line buttons, it’s much faster to use the features if you do. - Page 42 Using and Programming Features While you are programming, the phone rings to alert you that you cannot make or receive calls until the ringing stops. To turn off the ringing, press Speaker. In addition, depending on the ringing option programmed on your phone, the lights next to the line buttons remain steady (immediate ring), flash (delayed ring), or don’t come on at all (no ring) when you program your phone.
-
Page 43: Feature Finder
Feature Finder The Feature Finder on the next few pages helps you easily identify and find features by function instead of by name: Calling Basics Covering Calls Messaging and Paging Privacy Ringing Chapter 5 lists features alphabetically with descriptions and step-by-step instructions for programming and use. -
Page 44: Calling Basics
Feature Finder Calling Basics If you want to . . . See . . . Page Dial numbers with the touch of Auto Dial a button Program codes to quickly dial Personal Speed Dial 5-38 numbers you call often Quickly dial numbers System Speed Dial 5-52 programmed by your company... -
Page 45: Covering Calls
Feature Finder Covering Calls Page If you want to . . . See . . . 5-39 Pickup Answer a co-worker’s ringing phone from your phone 5-13 Coverage Have a co-worker answer your calls 5-20 Forward and Forward your calls to another Follow Me phone Messaging and Paging... - Page 46 Feature Finder Privacy If you want to . . . See . . . Page Prevent interruptions by Do Not Disturb 5-19 blocking calls to your phone Prevent co-workers from joining Privacy 5-42 your calls Prevent the person on a call Headset/Handset 5-24 from hearing you speak to...
-
Page 47: Features
Features This chapter describes features alphabetically with instructions for programming and using them. Some features have to be programmed on your phone before you can use them. Others are built in to the system and do not need programming. You use most features by pressing a programmed line button or dialing a feature code. -
Page 48: Account Code Entry
Features Account Code Entry Account codes help your company track phone use to bill clients and to forecast and budget costs. You can use account codes for incoming as well as outgoing calls if your system is programmed for both. If your system has this feature, it is either required or optional: Required. - Page 49 Features To Enter an Account Code Before Calling 1. Press programmed Account Code button, or press Feature and dial 82. 2. Dial account code followed by #. See Notes. 3. Press outside line or SA button. 4. Lift handset or press Speaker. 5.
-
Page 50: Auto Dial
Features Auto Dial Use Auto Dial to automatically dial either inside or outside numbers you call often. You can program inside Auto Dial buttons for extensions of co-workers or paging areas. The green light next to the Auto Dial button goes on if your co-worker is on the phone or using Do Not Disturb. - Page 51 Features Notes: Program account codes, access codes, and outside numbers as outside Auto Dial buttons. Special characters may be needed when you program an outside Auto Dial button. For more on special characters and their meanings, see Appendix A. To Use an Outside Auto Dial Button Press programmed Auto Dial button.
-
Page 52: Callback
Features Callback When you reach a busy extension or the outside line you want to use is busy, use Callback to automatically place the call when the extension or line is free. You’ll hear a priority ring —one long ring and three short rings —as soon as the extension or line is free. - Page 53 Features To Program a Selective Callback Button 1. Label button to be programmed as Callback. 2. Press Feature and dial 00. 3. Press button you labeled Callback. 4. Dial 5. Press Feature and dial To Use Selective Callback for Busy Extensions When you reach a busy extension, press programmed Callback button, or press Feature and dial 55.
- Page 54 Features To Turn Automatic Callback On and Off 1. Press Feature and dial 00. 2. Press any ICOM or SA button. 3. Dial 12 to turn on or 12 to turn off. 4. Press Feature and dial To Use Automatic Callback 1.
-
Page 55: Call Waiting
Features Call Waiting When all the ICOM or SA buttons on your phone are busy and another call comes in, Call Waiting informs you of inside calls with a single beep and outside calls with two beeps. To answer a waiting call, you can either hang up or put your current call on hold. - Page 56 Features To Complete a Call and Answer a Waiting Call 1. When you hear Call Waiting tone, hang up. Your phone rings. 2. Lift handset or press Speaker. You are connected to the call. To Put a Call on Hold and Pick Up a Waiting Call 1.
-
Page 57: Conference
Features Conference Use Conference to include up to five people in the same conversation. You can conference one or two outside numbers and up to three extensions, including your own. Conference allows you to consult privately with each participant before adding him or her to the conference and to put the entire conference on hold. - Page 58 Features To Set Up a Conference Call Make call to first outside number or extension. Press Conf after person answers. The green light next to the line button flashes to signal that the person is on hold for the conference. To make next call, press an ICOM or SA button for an inside call or an SA or line button for an outside call.
-
Page 59: Coverage
Features Coverage Coverage allows co-workers to answer your calls from their phones or you to answer co-workers’ calls from your phone. Coverage can be set up on an individual or group basis and turned on or off as necessary. You can program your phone to have inside and outside calls covered. -
Page 60: Group Coverage
Features Secondary Individual Coverage. When your phone rings, the call is sent immediately to all co-workers with secondary Individual Coverage buttons for your extension. The green light next to each button flashes immediately, Your co- workers can program their phones for immediate ring (the co-workers’... - Page 61 Features Group Coverage can work with Individual Coverage or alone. If you have both, your calls only go to Group Coverage if the person who provides Individual Coverage does not answer after a system-programmed number of rings, or if his or her phone is busy.
- Page 62 Features To Program Which Calls Are Covered 1. Press Feature and dial 00. 2. Press any ICOM or SA button. 3. Dial 48 for both inside and outside calls, or dial 48 for outside calls only. 4. Press Feature and dial Notes: This procedure applies to both Individual and Group Coverage.
- Page 63 Features To Turn Coverage Off and On Press programmed Coverage Off button. The green light next to the button goes on, and your calls do not go to coverage. Press programmed Coverage Off button again. The green light next to the button goes off, and your calls are sent to coverage.
- Page 64 Features To Program an Individual Coverage Button Label button to be programmed as Coverage–(name). Press Feature and dial 00. Press button you labeled Coverage–(name). Dial 40 for primary Coverage or 41 for secondary Coverage. Dial extension of phone you want to cover. Press Feature and dial To Program a Group Coverage Button Label button to be programmed as Group Coverage–(name).
-
Page 65: Do Not Disturb
Features Do Not Disturb Do Not Disturb prevents your phone from ringing and prevents paging and voice-announced inside calls from being heard on your speakerphone. You are not alerted to inside calls, but if you receive an outside call, the green light next to the line button flashes. -
Page 66: Forward And Follow Me
Features Forward and Follow Me Forward and Follow Me send your calls to another extension or to an outside phone. This allows callers to reach you when you are working at someone else’s desk or even at another location, such as your home. Your phone must be set up by your company to allow you to forward calls to an outside number (ask your system manager). - Page 67 Features To Program a Forward Button Label button to be programmed as Forward. Press Feature and dial 00. Press button you labeled Forward. Dial Press Feature and dial To Forward Calls to an Extension Press any ICOM or SA button. Lift handset or press Speaker.
- Page 68 Features To Set Up Follow Me from Another Extension 1. Press any ICOM or SA button. 2. Lift handset or press Speaker. 3. Press Feature and dial 34. 4. Dial your extension. Listen for double break in dial tone. Your calls are forwarded to the extension where Follow Me was initiated.
- Page 69 Features To Cancel Forward and Follow Me Sent from One Extension 1. Press any ICOM or SA button. 2. Lift handset or press Speaker. 3. Press Feature and dial 4. Dial extension calls are sent from. Listen for double break in dial tone. Calls from that extension are no longer sent to your phone.
-
Page 70: Headset/Handset Mute
Features Headset/Handset Mute When you are on the phone using the handset or headset, use Headset/Handset Mute to talk privately with someone in your office without the caller hearing you (you can still hear the caller). Headset/Handset Mute must be programmed onto an unlabeled line button. -
Page 71: Last Number Dial
Features Last Number Dial Use Last Number Dial to automatically redial the last inside or outside number you called. To Program a Last Number Dial Button 1. Label button to be programmed as Last Number. 2. Press Feature and dial 00. 3. -
Page 72: Line Request
Features Line Request Line Request puts you in queue (“in line”) for access to a busy outside line. When the line becomes available, your phone alerts you with a beep. For example, when you want to use a WATS line and it is busy, use Line Request to notify you when the line is free. -
Page 73: Messaging
Features Messaging Use Messaging to send messages directly to co-workers with display phones and to co-workers with voice-mail. The Message light on your phone is on when the system operator has a message for you. A fax or voice-mail message can also turn on the light. - Page 74 Features To Program a Leave Message Button 1. Label button to be programmed as Leave Message. 2. Press Feature and dial 00. 3. Press button you labeled Leave Message. 4. Dial 5. Press Feature and dial To Leave a Message on a Busy or Unanswered P h o n e When you reach a busy or unanswered extension, press the programmed Leave Message button or press Feature and dial 25...
-
Page 75: Receiving Messages
Features To Cancel a Message You Left on a Display Phone 1. Press Feature and dial 2. Dial co-worker’s extension. Note: You cannot cancel voice-mail messages. Receiving Messages When the red Message light on your phone is on, you have a message from the system operator, or a voice-mail message, if your phone is set up for voice-mail. - Page 76 Features Posting Messages To let co-workers know where you are when you don’t answer your phone, you can post a message that appears on their display phones when they call you. Program a line button on your phone to post messages. You can post 1 of 20 programmed messages to appear on co-workers’...
- Page 77 Features To Program a Posted Message Button Label button to be programmed as Posted Message. Press Feature and dial 00. Press button you labeled Posted Message. Dial 751. Press Feature and dial To Post a Message Press programmed Posted Message button. The green light next to the button flashes.
-
Page 78: Paging
Features Paging Paging is using your phone to broadcast an announcement. You can page over your co-workers’ speakerphones or over the building’s loudspeaker system, if your company has one. Speakerphone Paging is heard on all speakerphones or, if set up by your company, by a selected group such as a department or work area. - Page 79 Features To Use Speakerphone Paging 1. Press any lCOM or SA button. 2. Lift handset. See Note. 3. Press Group Page–(name) or Page All button or dial extension. 4. Make announcement after beep. Note: Using the speakerphone for Speakerphone Paging may create a feedback tone.
-
Page 80: Park
Features Park If your co-worker doesn’t answer when you transfer a call, use Park to hold the call while you page him or her. When you park a call on your phone, you are putting it on hold so it can be answered from any phone in the system. You then page your co-worker and announce the call. - Page 81 Features To Program a Park Button 1. Label button to be programmed as Park. 2. Press Feature and dial 00. 3. Press button you labeled Park. 4. Dial 5. Press Feature and dial To Use Park and Speakerphone Page 1. While on a call, press programmed button, or press Park Transfer, dial your extension, and press Transfer again or...
- Page 82 Features To Use Park and Loudspeaker Page While on a call, press programmed Park button, or press Transfer, dial your extension, and press Transfer again, or hang up. Press programmed Loudspeaker Page button, or press Feature and dial 9 and Loudspeaker Page line number. Dial code for zone you want to page.
-
Page 83: Personalized Ring
Features Personalized Ring You can choose one of eight ringing patterns to make it easier to distinguish your phone’s ring from someone else’s. You hear the personalized part of the ring before you hear the distinctive ring for an inside, outside, transferred, or Callback call. -
Page 84: Personal Speed Dial
Features Personal Speed Dial Use Personal Speed Dial to dial 2-digit codes instead of the entire dialing sequence for numbers you call often. Personal Speed Dial is also convenient for account codes or when long-distance access codes and area codes make a dialing sequence long. -
Page 85: Pickup
Features Pickup Pickup lets you answer a ringing phone from another extension. You can pick up calls by dialing the feature code for Pickup along with the ringing phone’s extension or the number of the line with the call. Or you can press a programmed Pickup button. - Page 86 Features To Use Pickup for Any Line or Extension Press programmed Pickup button, or press Feature and dial 9. Your speakerphone turns on automatically. Dial extension or line number. You are connected to call. To Program a Pickup Button for a Specific Line or Extension Label button as Pickup-(line, extension, or name).
- Page 87 Features To Program a Group Pickup Button 1. Label button to be programmed as Pickup–(name of group). 2. Press Feature and dial 00. 3. Press button you labeled Pickup–(name of group). 4. Dial 5. Press Feature and dial To Use Group Pickup Press programmed Pickup–(name of group) button, or press Feature and dial 88.
-
Page 88: Privacy
Features Privacy Use Privacy to prevent co-workers from connecting to your calls. Privacy can be turned on before or during a call and remains on until turned off. If another person has already joined your call, turning Privacy on does not drop the person from the call. -
Page 89: Recall
Features Recall If your phone has ICOM buttons, use Recall to disconnect from one call and get a dial tone to make another call without hanging up. Just press the Recall button you programmed to get a new inside or outside dial tone. Or, if you make a mistake, press the Recall button and begin dialing again. -
Page 90: Reminder Service
Features Reminder Service Use Reminder Service to set your phone to ring at a set time like an alarm clock. Your phone will ring at the set time daily until you cancel the reminder. You can set only one reminder. To Program a Reminder Set Button 1. -
Page 91: Ringing Options
Features Ringing Options There are several ways your phone can ring with an outside call or with inside calls that come in on SA buttons— immediately, after a delay, or not at all. Outside line and SA buttons can be programmed with the same ringing option, or each button can have a different one. - Page 92 Features To Program Ringing Options on All Outside Line Buttons 1. Press Feature and dial 00. 2. Press an outside line button. 3. Select ringing option: Dial 345 for no ring. The red lights next to all line buttons go off. Dial 346 for delayed ring.
- Page 93 Features To Turn Abbreviated Ring On and Off 1. Press Feature and dial 00. 2. Press an outside line or SA button. 3. Dial 341 to turn on, or 342 to turn off. 4. Press Feature and dial 5 - 4 7 Ringing Options...
-
Page 94: Saved Number Dial
Features Saved Number Dial When you reach a busy or unanswered number that you intend to call again later, use Saved Number Dial to save it and redial it automatically with the press of a programmed button. Saved Number Dial lets you make other calls in the meantime. The number remains stored, no matter how many times you redial it, until you replace it with another number. -
Page 95: Signaling And Notify
Features Signaling and Notify In addition to calling directly, there are two other ways to use the phone to contact your co-worker, Use Signaling to beep or use Notify to turn on a light on a co-worker’s phone. Signaling. To use Signaling, program a Signal button. You can signal your co-worker without lifting your handset. - Page 96 Features To Program a Signal Button 1. Label button to be programmed as Signal–(name). 2. Press Feature and dial 00. 3. Press button you labeled Signal–(name). 4. Dial 5. Dial co-worker’s extension. 6. Press Feature and dial To Use Signaling Press programmed Signal–(name) button without lifting handset.
- Page 97 Features To Program Notify Buttons 1. Label button to be programmed as Notify Send (name) or Notify Receive (name). 2. Press Feature and dial 00. 3. Press button you labeled Notify Send (name) or Notify Receive (name). 4. Dial 757 for Notify Send or 758 for Notify Receive 5.
-
Page 98: System Speed Dial
Features System Speed Dial Use System Speed Dial to dial 3-digit codes instead of an entire sequence for phone numbers programmed by your company. Ask your system manager for a list of the codes, and record them on the System Speed Dial card in the card tray under your phone. -
Page 99: Transfer
Features Transfer Transfer sends calls to both inside and outside phones. When a call you transferred to an inside phone goes unanswered, it rings back at your phone after the length of time programmed by your company. Unanswered calls transferred to outside phones do not ring back at your phone. - Page 100 Features To Make Announced Transfers Press Transfer. Call is put on hold automatically. Press an SA or outside line button to make an outside transfer. See Notes. Dial extension or outside phone number (including dial-out code, if necessary) followed by a #. Announce the call: If person can take the call, press Transfer or hang up.
- Page 101 Features Notes: Your phone automatically selects an SA Voice or SA Ring or an ICOM Voice or ICOM Ring button. You do not need to press an ICOM or SA button when the button you want to use is selected automatically. If the extension is busy, use Camp-On (see page 5-57).
- Page 102 Features To Use One-Touch Transfer with Automatic Completion Press programmed Auto Dial button. Call is transferred automatically. Note: One-Touch Transfer with automatic completion works only when transferring calls to extensions. To Use One-Touch Transfer with Manual Completion for Announced Calls 1.
- Page 103 Features To Use One-Touch Transfer with Manual Completion for Unannounced Calls 1. Press programmed Auto Dial button. Call is put on hold, and co-worker’s extension is dialed automatically. 2. Press Transfer or hang up. See Notes. Notes: If the extension is busy, use Camp-On (see below). One-Touch Transfer with manual completion works only when transferring calls to extensions.
- Page 104 Features To Program a Camp-On Button 1. Label button to be programmed as Camp-On. 2. Press Feature and dial 00. 3. Press button you labeled Camp-On. 4. Dial 5. Press Feature and dial To Use Camp-On If you reach a busy extension when attempting to transfer a call, press programmed Camp-On button, or press Feature and dial 57.
- Page 105 Features If you are busy on another call and receive a transferred call via Camp-On, you hear a tone indicating that you have a call waiting. You use the same feature code to answer a Camp-On call as you do to pick up a waiting call. (See Call Waiting). If more than one call is camped-on at your phone, you receive the calls in the order they arrived.
- Page 106 Features To Answer Unannounced Transferred Calls If red light is not on next to ICOM or SA button with call, press that button. Lift handset or press Speaker. You are connected with transferred call. Note: If you don’t answer the transferred call in the time allowed by your system, the call returns to the person who transferred it.
-
Page 107: Voice Announce
Features Voice Announce To prevent interruptions from voice-announced calls and speakerphone paging, you can turn off your phone’s ability to receive all voice announcements. If you later decide that you want to hear voice announcements, you can turn it back on. You do not have to program a button to turn this feature on and off. -
Page 108: Programming Special Characters
Programming Special Characters When you program Auto Dial buttons or PersonaI Speed Dial codes, you are storing a sequence of numbers to be dialed automatically. Some sequences need special characters—for example, press # # to signal the end of a dialing sequence, or press Hold to insert pauses after a dial-out code or to separate a phone number from an extension number. - Page 109 Programming Special Characters Ask your system manager which special characters are needed and when to use them. Also, see Auto Dial and Personal Speed Dial in Chapter 5. Press... Means... Description Drop Stop Inserts a stop within a sequence of automatically dialed numbers.
- Page 110 Programming Special Characters Press... Means... Description Hold Pause Inserts a brief pause (1.5 seconds) in the dialing sequence to wait for a response, such as a new dial tone. If you insert two pauses, for example, automatic dialing continues after a three-second delay.
- Page 111 Programming Special Characters Example of Using Special Characters When you program a Personal Speed Dial number that includes a long-distance access code and a phone number, you may need to include pauses (Hold) and indicate end of dialing sequence ( # # ): 1.
-
Page 112: Feature Codes
Feature Codes When you haven’t programmed a line button for a feature, use the feature code to activate the feature. To use a feature code, press the Feature button and dial the code. Not all features can be activated by a code. Some features, like Do Not Disturb, must be programmed onto a line button to turn the feature on and off. - Page 113 Feature Codes Code Feature code 82 + Account Code Entry Callback—Selective Call Waiting pick up† Camp-On 34 + extension Follow Me† Forward 33 + extension inside 33 + dial-out code + outside number + # Forward/Follow Me cancel from all extensions† 34 + extension cancel from one extension†...
- Page 114 Feature Codes Code Feature Pickup group pickup 9 + extension inside 9 + line number outside Privacy Recall Reminder Service cancel reminder 81 + time + A or P set reminder code System Speed Dial B - 3 Feature Codes...
-
Page 115: Programming Codes
Programming Codes Programming codes are used to program a feature onto a button for one-touch feature use or to set up how your phone works. You can use any unlabeled line button to program features of your choice. See Chapter 3 for more on programming. - Page 116 Programming Codes Code Feature Callback automatic callback off‡ automatic callback on‡ selective callback Call Waiting off‡ on‡ Camp-On Coverage 42 + group group† inside and outside‡ off† outside only‡ 40 + extension primary individual coverage† 41 + extension secondary individual coverage† Do Not Disturb†...
- Page 117 Programming Codes Feature Code Messaging leave message turn Message light off posted message† Paging group 22 + group ext. Park Personalized Ring‡ 32 + ring(s) (1–8) Personal Speed Dial # (01–24) + Pickup general pickup group pickup inside extension outside line number Privacy Recall...
-
Page 118: Off
Programming Codes Code Feature Ringing Options Abbreviated off‡ Abbreviated on‡ delayed all Iines‡ delayed one Iine‡ immediate all lines‡ immediate one line no ring all lines‡ no ring one line‡ Saved Number Dial† Signaling and Notify 23 + extension signaling† notify receive†... - Page 119 Index/Glossary Abbreviated Ring The standard setting that rings your phone once when you are on a call. 5-45, 5-47 account code A code used by your company to associate incoming and outgoing calls with corresponding accounts, employees, projects, and clients. 5-2, 5-3 Account Code Entry A feature you use to enter account codes.
-
Page 120: Camp-On
Index/Glossary Callback A feature that automatically redials your call as soon as a busy extension or busy line is free. Selective Callback—Callback that is activated only for selected calls. 5-6, 5-7 Automatic Callback —Callback that is activated every time you reach a busy extension or, if your phone has SA buttons, a busy outside line. -
Page 121: Do Not Disturb
Index/Glossary dedicated feature buttons The imprinted feature buttons on your phone, for example, Transfer and Hold. 1-2, 1-3, 1-4, 1-5 desk stand An adjustable support you can remove from the phone for wall mounting. 1-3, 1-13, 1-14 dial-out code A code (usually a 9) you must dial when using an SA (System Access) button to make an outside call. -
Page 122: Forward
Index/Glossary fax machine Equipment that can be connected to a phone to produce an exact likeness of a document and send it instantaneously to similar equipment at another location. 5-29 Feature button An imprinted button you press to use features via their feature code. feature code A 1-, 2-, or 3-digit code you dial to use features. -
Page 123: Headset/Handset Mute
Index/Glossary Group Coverage See Coverage. Group Paging See Paging. Group Pickup See Pickup handset The hand-held part of the phone that you pick up, talk into, and listen from. A handset is also called a “receiver.” 1-2, 1-3 Headset/Handset Mute A feature you use to mute the microphone in your headset or handset so you can speak privately with someone in your office without your caller hearing you. -
Page 124: Leave Message
Index/Glossary ICOM (Intercom) buttons Three buttons you use to make inside calls. 1-9, 1-10 ICOM Ring —to make or receive inside ringing calls. 1-9 ICOM Voice —to make or receive voice-announced inside calls. 1-9 ICOM Originate Only —to make only inside ringing calls. (Some phones may be setup so that you use this button to make voice-announced calls.) 1-10 Individual Coverage See Coverage. - Page 125 Index/Glossary line buttons The rows of buttons above and/or to the right of your dialpad, which you or your company can program with lines or features. 1-2, 1-3, 1-6 Line Request A feature that alerts you when a busy outside line is free. 5-26 Loudspeaker Paging See Paging.
- Page 126 Index/Glossary Notify A Signaling feature you use to notify a co-worker by turning on a light on his or her phone. 5-49, 5-51 Notify Receive button A programmed button on your phone that goes on when a co-worker notifies you. 5-49, 5-51 Notify Send button A programmed button you use to notify a co-worker by turning on a...
-
Page 127: Park
Index/Glossary Page All button See Paging. Paging A feature you use to broadcast announcements through your co-workers’ speakerphones or over a loudspeaker system. 5-32 Loudspeaker Paging—A feature you use to broadcast announcements over a loudspeaker system. 5-32, 5-33 Speakerphone Paging —A feature you use to broadcast announcements through your co-workers’... -
Page 128: Privacy
Index/Glossary Pool button A line button you use to make and receive outside calls on phones with SA (System Access) buttons. Only SA button phones have Pool buttons. Posted Message A Messaging feature you use to post a message on co-workers’ display phones explaining why you are unable to answer your phone. - Page 129 Index/Glossary Reminder Set button A button you press to set reminder times. 5-44 Ringing Options A feature you use to control whether or not your phone will ring and how it will ring. 5-45 SA (System Access) buttons Three buttons you press to make inside and outside calls. 1-7, 1-8 SA Ring —to make and receive inside and outside calls.
- Page 130 Index/Glossary Signaling A feature you use to send a private signal (a beep) to a co-worker’s phone. 5-49 Speaker button A button you press to activate the built-in speakerphone on your phone. speakerphone The part of your phone that allows you to make and receive calls without using the handset.
- Page 131 Index/Glossary System Speed Dial A feature you use to dial 3-digit codes programmed by your company instead of complete phone numbers or long-distance company access codes. 5-52 Tone The signal you hear when making a call or using a feature. Transfer A feature you use to send calls to inside and outside phones.
- Page 132 Index/Glossary Voice Announce A feature you use to allow your phone to receive voice announcements or to prevent your phone from receiving voice announcements. 5-61 voice-announced calls Calls you receive via the speakerphone. Volume control A button for controlling the volume of your phone’s ring, handset, and speakerphone.
Need help?
Do you have a question about the MERLIN LEGEND MLX-10 Non-Display Telephone and is the answer not in the manual?
Questions and answers