Christie CP2309-RGB Installation And Setup Manual
Hide thumbs
Also See for CP2309-RGB:
- User manual (94 pages) ,
- Installation and setup manual (44 pages) ,
- Installation and setup manual (19 pages)
Table of Contents
Advertisement
Quick Links
Advertisement
Table of Contents

Subscribe to Our Youtube Channel
Related Manuals for Christie CP2309-RGB


Summary of Contents for Christie CP2309-RGB
- Page 1 Installation and Setup Guide 020-103078-04 CP2309-RGB...
- Page 2 Christie's control such as maintenance of the product in proper working conditions. Performance specifications are based on information available at the time of printing. Christie makes no warranty of any kind with regard to this material, including, but not limited to, implied warranties of fitness for a particular purpose.
-
Page 3: Table Of Contents
Completing the installation checklist........26 CP2309-RGB Installation and Setup Guide 020-103078-04 Rev. 1 (11-2023) Copyright © 2023 Christie Digital Systems USA, Inc. All rights reserved. If printed, please recycle this document after use. - Page 4 Environmental........... . 43 CP2309-RGB Installation and Setup Guide 020-103078-04 Rev. 1 (11-2023) Copyright © 2023 Christie Digital Systems USA, Inc. All rights reserved. If printed, please recycle this document after use.
-
Page 5: Introduction
For complete product documentation and technical support, go to www.christiedigital.com. Product documentation For installation, setup, and user information, see the product documentation available on the Christie website. Read all instructions before using or servicing this product. 1. Access the documentation from the Christie website: •... -
Page 6: Safety Precautions
Introduction Safety precautions Learn about the safety precautions related to the Christie CP2309-RGB projector. This projector is intended for use in a cinema environment. General safety precautions Read all safety and warning guidelines before installing or operating the projector. Warning! If not avoided, the following could result in death or serious injury. -
Page 7: Ac Power Precautions
Learn about the labels that may be used on the product. Labels on your product may be yellow or black and white. General hazards Hazard warnings also apply to accessories once they are installed in a Christie product connected to power. Fire and Shock Hazard To prevent fire or shock hazards, do not expose this product to rain or moisture. - Page 8 Consult the service manual. Disconnect all power sources before performing maintenance or service procedures. CP2309-RGB Installation and Setup Guide 020-103078-04 Rev. 1 (11-2023) Copyright © 2023 Christie Digital Systems USA, Inc. All rights reserved. If printed, please recycle this document after use.
- Page 9 Indicates Class 4 laser radiation when open. Avoid eye or skin exposure to direct or scattered radiation. CP2309-RGB Installation and Setup Guide 020-103078-04 Rev. 1 (11-2023) Copyright © 2023 Christie Digital Systems USA, Inc. All rights reserved. If printed, please recycle this document after use.
-
Page 10: Light Intensity Hazard Distance
If the vertical distance to hazard zone requirement (Zone D) is satisfied, the horizontal clearance distance (Zone C) is not needed. CP2309-RGB Installation and Setup Guide 020-103078-04 Rev. 1 (11-2023) Copyright © 2023 Christie Digital Systems USA, Inc. All rights reserved. If printed, please recycle this document after use. - Page 11 • F—Represents the side view of the projector. The following table lists the hazard distance for the Christie projector lens with the zoom adjusted to its most hazardous position. For US and international hazard distances based upon IEC 62471-5:2015, Photobiological Safety of Lamps and Lamp Systems –...
-
Page 12: List Of Components
Introduction • The Christie Laser Projection System Installation Checklist must be fully completed after the installation and sent to lasercompliance@christiedigital.com. A copy can remain on-site. This checklist can be found as a separate document in the accessory box with the manual. -
Page 13: Technical Support
Dealer or Christie Sales/Service contact phone number: Serial number: The serial number can be found on the license label. Purchase date: Installation date: Technical support Technical support for Christie Cinema products is available at: • Support.cinema@christiedigital.com • +1-877-334-4267 • Christie Professional Services: +1-800-550-3061 or NOC@christiedigital.com CP2309-RGB Installation and Setup Guide 020-103078-04 Rev. -
Page 14: Installing And Setting Up
Installing and setting up Learn how to position and install the projector. Site requirements To safely install and operate the CP2309-RGB projector, the installation location must meet these minimum requirements. Physical operating environment • Ambient temperature (operating) 10 to 35°C (50 to 95°F) •... -
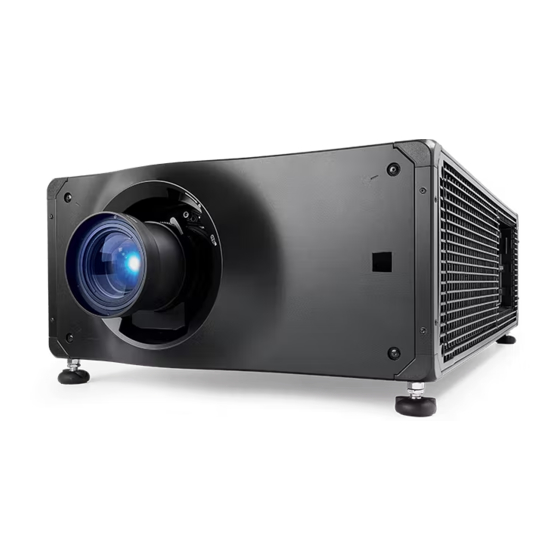
Page 15: Projector Components (Front)
Learn about the components on the front of the projector Projector lens A list of available lenses is available in the projector specifications. For more information, see the CP2309-RGB Specifications Guide (P/N: 020-103082-XX), CP2315-RGB Specifications Guide (P/N: 020-102776-XX), or CP2320-RGB Specifications Guide (P/N: 020-102777-XX). Adjustable feet Turn the adjustable feet to increase or decrease the projector height. -
Page 16: Projector Components (Rear)
Do not install or operate the projector in any position that does not meet the stated product specifications for alignment and orientation. CP2309-RGB Installation and Setup Guide 020-103078-04 Rev. 1 (11-2023) Copyright © 2023 Christie Digital Systems USA, Inc. All rights reserved. If printed, please recycle this document after use. -
Page 17: Connecting To Power
• SHOCK HAZARD! A dedicated, protected ground or earth wire must be installed on the product by Christie qualified technicians or electricians before it can be connected to power. • A certified electrician must be present during installation to make sure the installation meets the local electrical code. - Page 18 2. To open the AC input area of the projector, remove the four screws holding the cover and swing the cover downwards to open it. CP2309-RGB Installation and Setup Guide 020-103078-04 Rev. 1 (11-2023) Copyright © 2023 Christie Digital Systems USA, Inc. All rights reserved. If printed, please recycle this document after use.
- Page 19 8. Lift the AC input cover into place and re-attach it using the four screws. CP2309-RGB Installation and Setup Guide 020-103078-04 Rev. 1 (11-2023) Copyright © 2023 Christie Digital Systems USA, Inc. All rights reserved. If printed, please recycle this document after use.
-
Page 20: Connecting To An Uninterruptable Power Supply
IN-LINE receptacle. 4. Remove the protective cap from the UPS input plug. CP2309-RGB Installation and Setup Guide 020-103078-04 Rev. 1 (11-2023) Copyright © 2023 Christie Digital Systems USA, Inc. All rights reserved. If printed, please recycle this document after use. -
Page 21: Installing The Lens
2. On the front of the projector, unlock the lens assembly with a hex key. CP2309-RGB Installation and Setup Guide 020-103078-04 Rev. 1 (11-2023) Copyright © 2023 Christie Digital Systems USA, Inc. All rights reserved. If printed, please recycle this document after use. -
Page 22: Projection Lens
2. On the front of the projector, unlock the lens assembly with a hex key. CP2309-RGB Installation and Setup Guide 020-103078-04 Rev. 1 (11-2023) Copyright © 2023 Christie Digital Systems USA, Inc. All rights reserved. If printed, please recycle this document after use. -
Page 23: Installing The Touch Panel
4. Tighten the mounting arm until it fits tightly on the ball joint. CP2309-RGB Installation and Setup Guide 020-103078-04 Rev. 1 (11-2023) Copyright © 2023 Christie Digital Systems USA, Inc. All rights reserved. If printed, please recycle this document after use. -
Page 24: Projector Power Modes
If the projector is not connected to AC power with breakers in the ON position, you cannot turn on the touch panel. Projector power modes The CP2309-RGB projectors track laser operation hours for the laser optical subsystem (LOS). The projector operates with the following power modes: Mode... -
Page 25: Turning On Or Off The Projector
Digital Cinema Initiatives (DCI) specification. You cannot complete marriage remotely. For more information on marriage, refer to CP2309-RGB User Guide (P/N: 020-103081-XX). You cannot complete marriage remotely because you must select the Marriage button on the input panel during the marriage process. -
Page 26: Disposing Of The Product Packaging
At the Arming stage, enter the Marriage password. 4. Select Finish. Disposing of the product packaging Once the product has been installed and set up, Christie recommends reusing or recycling the product packaging according to your local regulations. Completing the installation checklist Complete the provided installation checklist (P/N: 020-103137-XX) and return it to Christie. -
Page 27: Connecting Devices And Establishing Communication
Linear Time Code (LTC) output. Output for multi-projector playback. Input for multi-projector playback (Christie Integrated Media Block (IMB) to Christie IMB only). SM and FIPS LED status indicators Indicates marriage status. In full power mode, a green LED indicates the projector is properly married and encrypted content can be displayed. -
Page 28: Projector Led Status Indicators
Solid FIPS (Federal Information Processing Standards Publication) security status is operating correctly. CP2309-RGB Installation and Setup Guide 020-103078-04 Rev. 1 (11-2023) Copyright © 2023 Christie Digital Systems USA, Inc. All rights reserved. If printed, please recycle this document after use. -
Page 29: Led Status Indicators
Connecting the projector to a network The CP2309-RGB projectors can be connected to various media devices and wired networks. For detailed information on connecting the projector to a device or network, see the CP2309-RGB User Guide (P/N: 020-103081-XX). Connecting the devices to the 3D port For information on connecting devices to the 3D port on the projector, refer to the product documentation for the device you are using. -
Page 30: Managing The Light Source
For Red, Green, and Blue power levels, system stability may be affected if levels are set below the minimum (MIN) power limit shown. To make sure color and brightness are held at the required levels for your installation, Christie ™... -
Page 31: Modifying An Existing Laser File
System stability may be affected if you set a power level below the minimum power level recommended. When setting the Red or Green power level, Christie recommends setting a level below the maximum (MAX) limit shown. A value below the maximum limit ensures an optimal brightness that can be maintained over time. -
Page 32: Copying Existing Laser Settings To A New File
2. Select the Display White Test Pattern slider. 3. In the Laser File list, select the file to delete. CP2309-RGB Installation and Setup Guide 020-103078-04 Rev. 1 (11-2023) Copyright © 2023 Christie Digital Systems USA, Inc. All rights reserved. If printed, please recycle this document after use. - Page 33 Managing the light source 4. Select Delete. 5. To confirm the deletion, select Delete. CP2309-RGB Installation and Setup Guide 020-103078-04 Rev. 1 (11-2023) Copyright © 2023 Christie Digital Systems USA, Inc. All rights reserved. If printed, please recycle this document after use.
-
Page 34: Adjusting The Image
Learn how to adjust image geometry so it displays correctly. Calibrating the Intelligent Lens System On CP2309-RGB projectors, the Intelligent Lens System (ILS) is activated by default. Use the Auto Calibrate feature of the ILS to find and compensate for motor backlash, and to determine the movement range for the currently installed lens. -
Page 35: Correcting Keystone Effect
2. If the keystone effect is severe, unevenly adjust the feet to compensate for projector tilt. CP2309-RGB Installation and Setup Guide 020-103078-04 Rev. 1 (11-2023) Copyright © 2023 Christie Digital Systems USA, Inc. All rights reserved. If printed, please recycle this document after use. -
Page 36: Displaying A Test Pattern
Adjusting the image Christie recommends using the lens offset to align the center of the image to the center of the screen before correcting the keystone effect. 3. If one side of the image is longer than another, adjust the tilt and level of the projector. - Page 37 6. Loosen the lock screw located next to the Focus adjustment slider. 7. Unlock the fold mirror screws to unlock the adjustment knobs. CP2309-RGB Installation and Setup Guide 020-103078-04 Rev. 1 (11-2023) Copyright © 2023 Christie Digital Systems USA, Inc. All rights reserved. If printed, please recycle this document after use.
- Page 38 14. When the correct image quality is achieved, tighten all screws to hold the adjustments: CP2309-RGB Installation and Setup Guide 020-103078-04 Rev. 1 (11-2023) Copyright © 2023 Christie Digital Systems USA, Inc. All rights reserved. If printed, please recycle this document after use.
-
Page 39: Adjusting Vertical Boresight
When adjusting boresight, you must maintain the boresight distance from the lens to the prism plane set by Christie. For example, when you move the top screw outward, turn the bottom two boresight screws to maintain the overall distance. -
Page 40: Adjusting Horizontal Boresight
When adjusting boresight, you must maintain the boresight distance from the lens to the prism plane set by Christie. For example, when you move the top screw outward, turn the bottom two boresight screws to maintain the overall distance. -
Page 41: Adjusting Digital Micromirror Device (Dmd) Convergence
Normally, the three colors should overlap precisely to form pure white lines throughout the image and one or more poorly converged individual colors may appear adjacent to some or all of the lines. Contact your Christie qualified service technician to correct digital micromirror device (DMD) convergence issues. -
Page 42: Correcting On-Screen Color
The next steps may include creating a Measured Color Gamut Data (MCDG) file and configuring a Pureformity Color ™ Technology (PCT) file to achieve optimal color and brightness uniformity. For more information on managing color settings, see the CP2309-RGB User Guide (P/N: 020-103081- XX). CP2309-RGB Installation and Setup Guide 020-103078-04 Rev. 1 (11-2023) Copyright ©... -
Page 43: Regulatory
(01/2016) on the control of pollution caused by electronic information products, hazardous CP2309-RGB Installation and Setup Guide 020-103078-04 Rev. 1 (11-2023) Copyright © 2023 Christie Digital Systems USA, Inc. All rights reserved. If printed, please recycle this document after use. - Page 44 EU Directive (2012/19/EU) on waste and electrical and electronic equipment (WEEE) and the applicable official amendment(s). CP2309-RGB Installation and Setup Guide 020-103078-04 Rev. 1 (11-2023) Copyright © 2023 Christie Digital Systems USA, Inc. All rights reserved. If printed, please recycle this document after use.
Need help?
Do you have a question about the CP2309-RGB and is the answer not in the manual?
Questions and answers