Christie CP2309-RGB Installation And Setup Manual
Hide thumbs
Also See for CP2309-RGB:
- User manual (94 pages) ,
- Installation and setup manual (19 pages) ,
- Installation and setup manual (45 pages)
Table of Contents
Advertisement
Quick Links
Advertisement
Table of Contents

Related Manuals for Christie CP2309-RGB


Summary of Contents for Christie CP2309-RGB
- Page 1 Installation and Setup Guide 020-103078-01 CP2309-RGB...
- Page 2 The warranty does not apply to any product where the serial number has been removed or obliterated. The warranty also does not apply to any product sold by a reseller to an end user outside of the country where the reseller is located unless (i) Christie has an office in the country where the end user is located or (ii) the required international warranty fee has been paid.
-
Page 3: Table Of Contents
Projector LED status indicators........26 CP2309-RGB Installation and Setup Guide 020-103078-01 Rev. 1 (06-2019) Copyright 2019 Christie Digital Systems USA, Inc. All rights reserved. ©... - Page 4 Environmental........... . 41 CP2309-RGB Installation and Setup Guide 020-103078-01 Rev. 1 (06-2019) Copyright 2019 Christie Digital Systems USA, Inc. All rights reserved. ©...
-
Page 5: Introduction
For complete production documentation and technical support, go to www.christiedigital.com. Product documentation For installation, setup, and user information, see the product documentation available on the Christie website. Read all instructions before using or servicing this product. 1. Access the documentation from the Christie website: •... -
Page 6: Safety Precautions
Introduction Safety precautions Learn about the safety precautions related to the Christie CP2309-RGB projectors. General safety precautions Read all safety and warning guidelines before installing or operating the projector. Warning! If not avoided, the following could result in death or serious injury. -
Page 7: Ac/Power Precautions
• SHOCK HAZARD! A dedicated, protected ground or earth wire must be installed on the product by Christie qualified technicians or electricians before it can be connected to power. • SHOCK HAZARD! Disconnect the product from AC before installing, moving, servicing, cleaning, removing components, or opening any enclosure. - Page 8 • F—Represents the side view of the projector. The following table lists the hazard distance for the Christie projector lens with the zoom adjusted to its most hazardous position. For US and international hazard distances based upon IEC 62471-5:2015, Photobiological Safety of Lamps and Lamp Systems –...
-
Page 9: Product Labels
Learn about the labels that may be used on the product. Labels on your product may be yellow or black and white. General hazards Hazard warnings also apply to accessories once they are installed in a Christie product that is connected to power. Fire and Shock Hazard To prevent fire or shock hazards, do not expose this product to rain or moisture. - Page 10 CLASS 1 LASER PRODUCT IEC 60825-1:2014 Wavelengths: 450 nm - 661 nm FDA laser variance (US projectors only) CP2309-RGB Installation and Setup Guide 020-103078-01 Rev. 1 (06-2019) Copyright 2019 Christie Digital Systems USA, Inc. All rights reserved. ©...
-
Page 11: List Of Components
Direct-coupled laser module integrated in the projector chassis • Compact form to fit in existing projection booths • Exhaust air extraction (using optional accessory) CP2309-RGB Installation and Setup Guide 020-103078-01 Rev. 1 (06-2019) Copyright 2019 Christie Digital Systems USA, Inc. All rights reserved. ©... -
Page 12: Contact Your Dealer
Serial number: The serial number can be found on the license label located on the display panel. Purchase date: Installation date: CP2309-RGB Installation and Setup Guide 020-103078-01 Rev. 1 (06-2019) Copyright 2019 Christie Digital Systems USA, Inc. All rights reserved. ©... -
Page 13: Installing And Setting Up
Installing and setting up Learn how to position and install the projector. Site requirements To safely install and operate the CP2309-RGB projector, the installation location must meet these minimum requirements. Physical operating environment • Ambient temperature (operating) 10°C to 35°C (50°F to 95°F) •... -
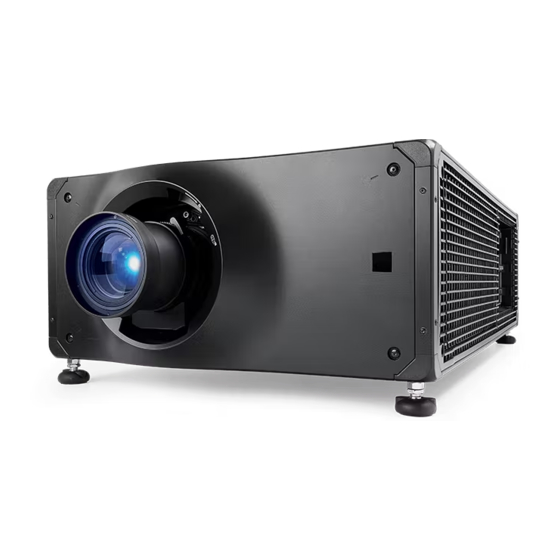
Page 14: Projector Components (Front)
Turn the adjustable feet to increase or decrease the projector height. Air intake Communications panel External devices are connected here. Top cover CP2309-RGB Installation and Setup Guide 020-103078-01 Rev. 1 (06-2019) Copyright 2019 Christie Digital Systems USA, Inc. All rights reserved. ©... -
Page 15: Projector Components (Rear)
Do not install or operate the projector in any position that does not meet the stated product specifications for alignment and orientation. CP2309-RGB Installation and Setup Guide 020-103078-01 Rev. 1 (06-2019) Copyright 2019 Christie Digital Systems USA, Inc. All rights reserved. ©... -
Page 16: Connecting To Power
• SHOCK HAZARD! A dedicated, protected ground or earth wire must be installed on the product by Christie qualified technicians or electricians before it can be connected to power. • A certified electrician must be present during installation to ensure the installation meets the local electrical code. - Page 17 2. To open the AC input area of the projector, remove the four screws holding the cover and swing the cover downwards to open it. CP2309-RGB Installation and Setup Guide 020-103078-01 Rev. 1 (06-2019) Copyright 2019 Christie Digital Systems USA, Inc. All rights reserved. ©...
- Page 18 Neutral (white or blue) connections. 8. Lift the AC input cover into place and re-attach it using the four screws. CP2309-RGB Installation and Setup Guide 020-103078-01 Rev. 1 (06-2019) Copyright 2019 Christie Digital Systems USA, Inc. All rights reserved. ©...
-
Page 19: Connecting To An Uninterruptable Power Supply
4. Remove the protective cap from the UPS input plug. 5. Connect the UPS input plug to the IN-LINE receptacle connector. CP2309-RGB Installation and Setup Guide 020-103078-01 Rev. 1 (06-2019) Copyright 2019 Christie Digital Systems USA, Inc. All rights reserved. ©... -
Page 20: Installing The Lens
1. Remove the lens surround. 2. On the front of the projector, unlock the lens assembly with a hex key. CP2309-RGB Installation and Setup Guide 020-103078-01 Rev. 1 (06-2019) Copyright 2019 Christie Digital Systems USA, Inc. All rights reserved. ©... -
Page 21: Removing The Projection Lens
If the lens does not slide out easily, reset the lens offset. 4. Attach the lens cap to avoid damage to the lens. CP2309-RGB Installation and Setup Guide 020-103078-01 Rev. 1 (06-2019) Copyright 2019 Christie Digital Systems USA, Inc. All rights reserved. ©... -
Page 22: Installing The Touch Panel
7. To turn the touch panel on, press the power button on the top of the panel. Projector power modes The CP2309-RGB projectors track laser operation hours for the laser optical sub-system (LOS). The projector operates with the following power modes: CP2309-RGB Installation and Setup Guide 020-103078-01 Rev. -
Page 23: Turning The Projector On Or Off
If you turn on the light source when the projector power is off, power is turned on automatically. Allow the projector to cool down for 10 minutes after turning it off. CP2309-RGB Installation and Setup Guide 020-103078-01 Rev. 1 (06-2019) Copyright 2019 Christie Digital Systems USA, Inc. All rights reserved. ©... -
Page 24: Activating Marriage
You must complete marriage to display content and to comply with the Digital Cinema Initiatives (DCI) specification. For more information on marriage, refer to CP2309-RGB User Guide (P/N: 020-103081-XX) You cannot complete marriage remotely. 1. In the left navigation menu, tap Service Setup > Marriage Setup. -
Page 25: Connecting Devices To The Projector And Establishing Communication
AES3 port for digital audio output. Linear Time Code (LTC) output. Output for multi-projector playback. Input for multi-projector playback (Christie IMB to Christie IMB only). SM and FIPS LED status indicators CP2309-RGB Installation and Setup Guide 020-103078-01 Rev. 1 (06-2019) Copyright 2019 Christie Digital Systems USA, Inc. -
Page 26: Projector Led Status Indicators
Red: Off Green: Off Unacknowledged critical error Yellow: Off Red: Flashes three times per second Green: Off Acknowledged critical error CP2309-RGB Installation and Setup Guide 020-103078-01 Rev. 1 (06-2019) Copyright 2019 Christie Digital Systems USA, Inc. All rights reserved. ©... -
Page 27: Sm And Fips Led Status Indicators
Connecting the projector to a network The CP2309-RGB projectors can be connected to various media devices and wired networks. For detailed information on connecting the projector to a device or network, see the CP2309-RGB User Guide (P/N: 020-103081-XX). CP2309-RGB Installation and Setup Guide 020-103078-01 Rev. -
Page 28: Connecting The Devices To The 3D Port
For information on connecting devices to the 3D port on the projector, refer to the product documentation for the device you are using. CP2309-RGB Installation and Setup Guide 020-103078-01 Rev. 1 (06-2019) Copyright 2019 Christie Digital Systems USA, Inc. All rights reserved. ©... -
Page 29: Managing The Light Source
For Red, Green, and Blue power levels, system stability may be affected if levels are set below the minimum (MIN) power limit shown. To ensure color and brightness are held at the required levels for your installation, Christie ™... -
Page 30: Modifying An Existing Laser File
System stability may be affected if you set a power level below the minimum power level recommended. When setting the Red or Green power level, Christie recommends setting a level below the maximum (MAX) limit shown. A value below the maximum limit ensures an optimal brightness that can be maintained over time. -
Page 31: Copying Existing Laser Settings To A New File
3. In the Laser File list, select the file to delete. 4. Tap Delete. 5. To confirm the deletion, tap Delete. CP2309-RGB Installation and Setup Guide 020-103078-01 Rev. 1 (06-2019) Copyright 2019 Christie Digital Systems USA, Inc. All rights reserved. ©... -
Page 32: Adjusting The Image
Learn how to adjust image geometry so it displays correctly. Calibrating the Intelligent Lens System On the CP2309-RGB projectors, the Intelligent Lens System (ILS) is activated by default. Use the Auto Calibrate feature of the ILS to find and compensate for motor backlash, and to determine the movement range for the currently installed lens. -
Page 33: Correcting Keystone Effect
Projector tilted vertically to the screen 1. If the image suffers from slight keystone effect, it can be corrected with electronic cropping. CP2309-RGB Installation and Setup Guide 020-103078-01 Rev. 1 (06-2019) Copyright 2019 Christie Digital Systems USA, Inc. All rights reserved. ©... -
Page 34: Displaying A Test Pattern
Adjusting the integrator and fold mirror Extreme misalignment of projection optics can cause permanent damage to critical optical components. Only Christie qualified technicians can perform internal optical adjustments. Notice. If not avoided, the following could result in property damage. •... - Page 35 6. Loosen the lock screw located next to the Focus adjustment slider. 7. Unlock the fold mirror screws to unlock the adjustment knobs. CP2309-RGB Installation and Setup Guide 020-103078-01 Rev. 1 (06-2019) Copyright 2019 Christie Digital Systems USA, Inc. All rights reserved. ©...
- Page 36 13. As required to fill the image, make fine adjustments to the fold mirror, integrator rotation, and integrator focus. 14. When the correct image quality is achieved, tighten all screws to hold the adjustments: CP2309-RGB Installation and Setup Guide 020-103078-01 Rev. 1 (06-2019) Copyright 2019 Christie Digital Systems USA, Inc. All rights reserved. ©...
-
Page 37: Adjusting Vertical Boresight
When adjusting boresight, you must maintain the boresight distance from the lens to the prism plane set by Christie. For example, when you move the top screw outward, turn the bottom two boresight screws to maintain the overall distance. -
Page 38: Adjusting Horizontal Boresight
When adjusting boresight, you must maintain the boresight distance from the lens to the prism plane set by Christie. For example, when you move the top screw outward, turn the bottom two boresight screws to maintain the overall distance. -
Page 39: Adjusting Dmd Convergence
Normally, the three colors should overlap precisely to form pure white lines throughout the image and one or more poorly converged individual colors may appear adjacent to some or all of the lines. Contact your Christie qualified service technician to correct DMD convergence issues. Correcting on-screen color After installation, further image adjustments may be required to correct color on the screen. - Page 40 Adjusting the image For more information on managing color settings, see the CP2309-RGB User Guide (P/N: 020-103081- XX). CP2309-RGB Installation and Setup Guide 020-103078-01 Rev. 1 (06-2019) Copyright 2019 Christie Digital Systems USA, Inc. All rights reserved. ©...
-
Page 41: Regulatory
China Ministry of Information Industry (along with 7 other Government Agencies) Order No.32 (01/2016) on the control of pollution caused by electronic information products, hazardous CP2309-RGB Installation and Setup Guide 020-103078-01 Rev. 1 (06-2019) Copyright 2019 Christie Digital Systems USA, Inc. All rights reserved. ©... - Page 42 China packaging recycling mark standard (GB18455-2001) • EU Directive (2012/19/EU) on waste and electrical and electronic equipment (WEEE) and the applicable official amendment(s). CP2309-RGB Installation and Setup Guide 020-103078-01 Rev. 1 (06-2019) Copyright 2019 Christie Digital Systems USA, Inc. All rights reserved. ©...
- Page 43 Corporate offi ces Worldwide offi ces Christie Digital Systems USA, Inc. Africa United Kingdom Columbia Korea (Seoul) ph: 714 236 8610 ph: +27 (0)11 510 0094 ph: +44 (0) 118 977 8000 ph: +57 (318) 447 3179 ph: +82 2 702 1601 Christie Digital Systems Canada Inc.
Need help?
Do you have a question about the CP2309-RGB and is the answer not in the manual?
Questions and answers