Christie CP2315-RGB Installation And Setup Manual
Hide thumbs
Also See for CP2315-RGB:
- User manual (94 pages) ,
- Installation and setup manual (19 pages) ,
- Installation and setup manual (45 pages)
Table of Contents
Advertisement
Quick Links
Advertisement
Table of Contents

Related Manuals for Christie CP2315-RGB


Summary of Contents for Christie CP2315-RGB
- Page 1 Installation and Setup Guide 020-102772-02 CP2315-RGB...
- Page 2 The warranty does not apply to any product where the serial number has been removed or obliterated. The warranty also does not apply to any product sold by a reseller to an end user outside of the country where the reseller is located unless (i) Christie has an office in the country where the end user is located or (ii) the required international warranty fee has been paid.
-
Page 3: Table Of Contents
Completing the installation checklist........26 CP2315-RGB Installation and Setup Guide 020-102772-02 Rev. 1 (05-2019) Copyright 2019 Christie Digital Systems USA, Inc. All rights reserved. ©... - Page 4 Environmental........... . 45 CP2315-RGB Installation and Setup Guide 020-102772-02 Rev. 1 (05-2019) Copyright 2019 Christie Digital Systems USA, Inc. All rights reserved. ©...
-
Page 5: Safety Precautions
Safety precautions Learn about the safety precautions related to the Christie CP2315-RGB projectors. General safety precautions Read all safety and warning guidelines before installing or operating the projector. Warning! If not avoided, the following could result in death or serious injury. -
Page 6: Laser Safety Precautions
• SHOCK HAZARD! A dedicated, protected ground or earth wire must be installed on the product by Christie qualified technicians or electricians before it can be connected to power. • SHOCK HAZARD! Disconnect the product from AC before installing, moving, servicing, cleaning, removing components, or opening any enclosure. -
Page 7: Light Intensity Hazard Distance
2.0 meters (global installations) above any surface upon which any persons are permitted to stand. • E—Represents the top view of the projector. CP2315-RGB Installation and Setup Guide 020-102772-02 Rev. 1 (05-2019) Copyright 2019 Christie Digital Systems USA, Inc. All rights reserved. ©... - Page 8 • F—Represents the side view of the projector. The following table lists the hazard distance for the Christie projector lens with the zoom adjusted to its most hazardous position. For US market only, hazard distances based upon FDA guidance document 1400056, Classification and Requirements for Laser Illuminated Projectors (LIPs), dated February 18, 2015.
-
Page 9: Product Labels
Learn about the labels that may be used on the product. Labels on your product may be yellow or black and white. General hazards Hazard warnings also apply to accessories once they are installed in a Christie product that is connected to power. Fire and Shock Hazard To prevent fire or shock hazards, do not expose this product to rain or moisture. -
Page 10: Mandatory Action
CLASS 1 LASER PRODUCT IEC 60825-1 Wavelengths: 450 nm - 656 nm FDA laser variance (US projectors only) CP2315-RGB Installation and Setup Guide 020-102772-02 Rev. 1 (05-2019) Copyright 2019 Christie Digital Systems USA, Inc. All rights reserved. ©... - Page 11 Indicates a light hazard. Do not look directly into the lens. The extreme high brightness can cause permanent eye damage. CP2315-RGB Installation and Setup Guide 020-102772-02 Rev. 1 (05-2019) Copyright 2019 Christie Digital Systems USA, Inc. All rights reserved. ©...
-
Page 12: Introduction
For complete production documentation and technical support, go to www.christiedigital.com. Product documentation For installation, setup, and user information, see the product documentation available on the Christie Digital Systems USA Inc. website. Read all instructions before using or servicing this product. -
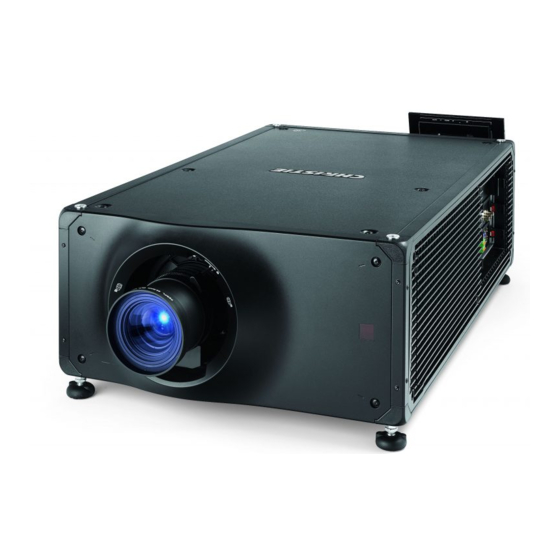
Page 13: Projector Components (Front)
Turn the adjustable feet to increase or decrease the projector height. Air intake Communications panel External devices are connected here. Top cover CP2315-RGB Installation and Setup Guide 020-102772-02 Rev. 1 (05-2019) Copyright 2019 Christie Digital Systems USA, Inc. All rights reserved. ©... -
Page 14: Projector Components (Rear)
Three-chip 0.98 inch CFB DC2K light engine • Christie CineLife ™ Series 3 electronics ™ • LiteLOC color lock feature for constant image brightness and color CP2315-RGB Installation and Setup Guide 020-102772-02 Rev. 1 (05-2019) Copyright 2019 Christie Digital Systems USA, Inc. All rights reserved. ©... -
Page 15: Contact Your Dealer
Serial number: The serial number can be found on the license label located on the display panel. Purchase date: Installation date: CP2315-RGB Installation and Setup Guide 020-102772-02 Rev. 1 (05-2019) Copyright 2019 Christie Digital Systems USA, Inc. All rights reserved. ©... -
Page 16: Installing And Setting Up
Installing and setting up Learn how to position and install the projector. Site requirements To safely install and operate the CP2315-RGB projector, the installation location must meet these minimum requirements. Physical operating environment • Ambient temperature (operating) 10°C to 35°C (50°F to 95°F) •... -
Page 17: Lifting And Positioning The Projector
• SHOCK HAZARD! A dedicated, protected ground or earth wire must be installed on the product by Christie qualified technicians or electricians before it can be connected to power. • A certified electrician must be present during installation to ensure the installation meets the local electrical code. - Page 18 1. Remove the four screws holding the AC receptacle knockout plate. The AC supply is routed to the terminal block through an appropriate strain relief mounted on this knockout plate. CP2315-RGB Installation and Setup Guide 020-102772-02 Rev. 1 (05-2019) Copyright 2019 Christie Digital Systems USA, Inc. All rights reserved. ©...
- Page 19 Ground (green) connection, followed by the Line (black or brown) and Neutral (white or blue) connections. CP2315-RGB Installation and Setup Guide 020-102772-02 Rev. 1 (05-2019) Copyright 2019 Christie Digital Systems USA, Inc. All rights reserved. ©...
-
Page 20: Connecting To An Uninterruptable Power Supply
Part Number North America 125V/15A 108-382104-XX Japan 125V/12A 108-371102-XX China 250V/10A 108-373104-XX UK 250V/10A 108-388100-XX EU/Korea 250V/10A 108-390103-XX Australia 250V/10A 108-392105-XX CP2315-RGB Installation and Setup Guide 020-102772-02 Rev. 1 (05-2019) Copyright 2019 Christie Digital Systems USA, Inc. All rights reserved. ©... - Page 21 6. Place the protective cap from the UPS plug on the MAIN input plug. 7. Reinstall the rear panel of the projector. 8. Reinstall the projector touch panel. CP2315-RGB Installation and Setup Guide 020-102772-02 Rev. 1 (05-2019) Copyright 2019 Christie Digital Systems USA, Inc. All rights reserved. ©...
-
Page 22: Installing The Lens
5. Insert and tighten the two lens mount hex screws shipped separately with the projector. 6. Lock the lens assembly in place by rotating the lens clamp downward. CP2315-RGB Installation and Setup Guide 020-102772-02 Rev. 1 (05-2019) Copyright 2019 Christie Digital Systems USA, Inc. All rights reserved. ©... -
Page 23: Installing The Touch Panel
3. While supporting the touch panel, fit the other end of the touch panel mounting arm over the ball joint on the rear panel or electronics side of the projector. CP2315-RGB Installation and Setup Guide 020-102772-02 Rev. 1 (05-2019) Copyright 2019 Christie Digital Systems USA, Inc. All rights reserved. ©... -
Page 24: Projector Power Modes
If the projector is not connected to AC power with breakers in the ON position, you cannot turn the touch panel on. Projector power modes The CP2315-RGB projectors track laser operation hours for the laser optical sub-system (LOS). The projector operates with the following power modes: CP2315-RGB Installation and Setup Guide 020-102772-02 Rev. -
Page 25: Turning The Projector On Or Off
If you turn on the light source when the projector power is off, power is turned on automatically. Allow the projector to cool down for 10 minutes after turning it off. CP2315-RGB Installation and Setup Guide 020-102772-02 Rev. 1 (05-2019) Copyright 2019 Christie Digital Systems USA, Inc. All rights reserved. ©... -
Page 26: Activating Marriage
You must complete marriage to display content and to comply with the Digital Cinema Initiatives (DCI) specification. For more information on marriage, refer to CP2315-RGB User Guide (P/N: 020-102768-XX) You cannot complete marriage remotely. 1. In the left navigation menu, tap Service Setup > Marriage Setup. -
Page 27: Connecting Devices To The Projector And Establishing Communication
AES3 port for digital audio output. Linear Time Code (LTC) output. Output for multi-projector playback. Input for multi-projector playback (Christie IMB to Christie IMB only). SM and FIPS LED status indicators CP2315-RGB Installation and Setup Guide 020-102772-02 Rev. 1 (05-2019) Copyright 2019 Christie Digital Systems USA, Inc. -
Page 28: Projector Led Status Indicators
Red: Off Green: Off Unacknowledged critical error Yellow: Off Red: Flashes three times per second Green: Off Acknowledged critical error CP2315-RGB Installation and Setup Guide 020-102772-02 Rev. 1 (05-2019) Copyright 2019 Christie Digital Systems USA, Inc. All rights reserved. ©... -
Page 29: Sm And Fips Led Status Indicators
Connecting the projector to a network The CP2315-RGB projectors can be connected to various media devices and wired networks. For detailed information on connecting the projector to a device or network, see the CP2315-RGB User Guide (P/N: 020-102768-XX). CP2315-RGB Installation and Setup Guide 020-102772-02 Rev. -
Page 30: Connecting The Devices To The 3D Port
For information on connecting devices to the 3D port on the projector, refer to the product documentation for the device you are using. CP2315-RGB Installation and Setup Guide 020-102772-02 Rev. 1 (05-2019) Copyright 2019 Christie Digital Systems USA, Inc. All rights reserved. ©... -
Page 31: Managing The Light Source
For Red, Green, and Blue power levels, system stability may be affected if levels are set below the minimum (MIN) power limit shown. To ensure color and brightness are held at the required levels for your installation, Christie ™... -
Page 32: Modifying An Existing Laser File
System stability may be affected if you set a power level below the minimum power level recommended. When setting the Red or Green power level, Christie recommends setting a level below the maximum (MAX) limit shown. A value below the maximum limit ensures an optimal brightness that can be maintained over time. -
Page 33: Copying Existing Laser Settings To A New File
3. In the Laser File list, select the file to delete. 4. Tap Delete. 5. To confirm the deletion, tap Delete. CP2315-RGB Installation and Setup Guide 020-102772-02 Rev. 1 (05-2019) Copyright 2019 Christie Digital Systems USA, Inc. All rights reserved. ©... -
Page 34: Adjusting The Image
Learn how to adjust image geometry so it displays correctly. Calibrating the Intelligent Lens System On the CP2315-RGB projectors, the Intelligent Lens System (ILS) is activated by default. Use the Auto Calibrate feature of the ILS to find and compensate for motor backlash, and to determine the movement range for the currently installed lens. -
Page 35: Correcting Keystone Effect
Projector tilted vertically to the screen 1. If the image suffers from slight keystone effect, it can be corrected with electronic cropping. CP2315-RGB Installation and Setup Guide 020-102772-02 Rev. 1 (05-2019) Copyright 2019 Christie Digital Systems USA, Inc. All rights reserved. ©... -
Page 36: Displaying A Test Pattern
Adjusting the integrator and fold mirror Extreme misalignment of projection optics can cause permanent damage to critical optical components. Only Christie qualified technicians can perform internal optical adjustments. Notice. If not avoided, the following could result in property damage. •... - Page 37 6. Loosen the lock screw located next to the Focus adjustment slider. 7. Unlock the fold mirror screws to unlock the adjustment knobs. CP2315-RGB Installation and Setup Guide 020-102772-02 Rev. 1 (05-2019) Copyright 2019 Christie Digital Systems USA, Inc. All rights reserved. ©...
- Page 38 13. As required to fill the image, make fine adjustments to the fold mirror, integrator rotation, and integrator focus. 14. When the correct image quality is achieved, tighten all screws to hold the adjustments: CP2315-RGB Installation and Setup Guide 020-102772-02 Rev. 1 (05-2019) Copyright 2019 Christie Digital Systems USA, Inc. All rights reserved. ©...
-
Page 39: Aligning The Boresight
If boresight is required, continue to step 4. The adjustment screws (A) on the lens mount affects the corresponding cross-hairs on the test pattern. CP2315-RGB Installation and Setup Guide 020-102772-02 Rev. 1 (05-2019) Copyright 2019 Christie Digital Systems USA, Inc. All rights reserved. ©... - Page 40 5. To fine tune the focus of cross-hair pattern I, adjust the appropriate adjustment screw (A) until the cross-hair image is in focus with minimal flare. CP2315-RGB Installation and Setup Guide 020-102772-02 Rev. 1 (05-2019) Copyright 2019 Christie Digital Systems USA, Inc. All rights reserved. ©...
- Page 41 This may require adjusting both setscrews and adjustment screws. CP2315-RGB Installation and Setup Guide 020-102772-02 Rev. 1 (05-2019) Copyright 2019 Christie Digital Systems USA, Inc. All rights reserved. ©...
-
Page 42: Adjusting Dmd Convergence
5. To adjust the convergence knobs, use the 3 mm driver included with the projector. If adjusting by hand without using the tool, pull out the convergence adjustment knobs to engage them. CP2315-RGB Installation and Setup Guide 020-102772-02 Rev. 1 (05-2019) Copyright 2019 Christie Digital Systems USA, Inc. All rights reserved. ©... -
Page 43: Correcting On-Screen Color
The next steps may include creating a Measured Color Gamut Data (MCDG) file and configuring a ™ Pureformity Color Technology (PCT) file to achieve optimal color and brightness uniformity. For more information on managing color settings, see the CP2315-RGB User Guide (P/N: 020-102768- XX). CP2315-RGB Installation and Setup Guide 020-102772-02 Rev. 1 (05-2019) Copyright 2019 Christie Digital Systems USA, Inc. -
Page 44: Regulatory
IEC 61000-3-3/EN61000-3-3: Limitations of Voltage Changes, Voltage Fluctuations, and Flicker Immunity • CISPR 24/EN55024 EMC Requirements – Information Technology Equipment CP2315-RGB Installation and Setup Guide 020-102772-02 Rev. 1 (05-2019) Copyright 2019 Christie Digital Systems USA, Inc. All rights reserved. ©... -
Page 45: Environmental
• Regulation (EC) No. 1907/2006 on the registration, evaluation, authorization and restriction of chemicals (REACH) and the applicable official amendment(s). CP2315-RGB Installation and Setup Guide 020-102772-02 Rev. 1 (05-2019) Copyright 2019 Christie Digital Systems USA, Inc. All rights reserved. ©... - Page 46 Corporate offi ces Worldwide offi ces Christie Digital Systems USA, Inc. Australia Germany Republic of South Africa United Kingdom Cypress ph: +61 (0) 7 3624 4888 ph: +49 2161 664540 ph: +27 (0)11 510 0094 ph: +44 (0) 118 977 8000...
Need help?
Do you have a question about the CP2315-RGB and is the answer not in the manual?
Questions and answers