
Related Manuals for Wirepath Surveillance WPS-300-BUL-IP


Summary of Contents for Wirepath Surveillance WPS-300-BUL-IP
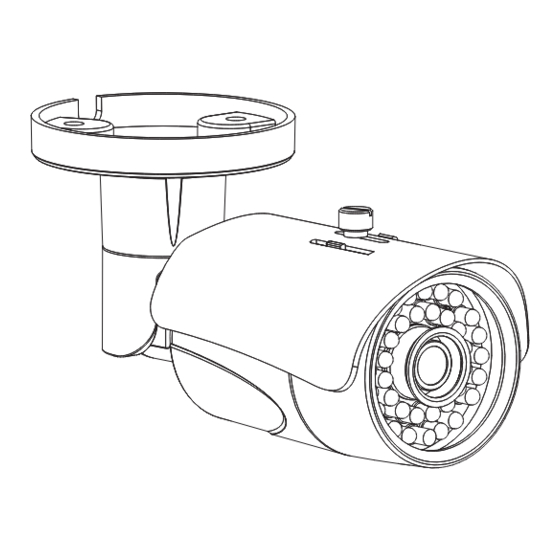
- Page 1 WPS-300-BUL-IP IP BULLET CAMERA INSTALLATION MANUAL Review manual thoroughly before installation. Retain for future reference.
-
Page 2: Safety Instructions
WPS-300-BUL-IP Installation Manual 1. Safety Instructions Read and follow all instructions and warnings in this manual. Keep for future reference. Install according to manufacturer’s instructions. Do not install near any heat sources such as radiators, heat registers, stoves or other apparatus (including amplifiers) that produce heat. -
Page 3: Table Of Contents
WPS-300-BUL-IP Installation Manual Table of Contents 1. Safety Instructions 2. Introduction 2.1. Features 3. Package Contents 4. Required Items for Installation 5. How It Works 6. Camera Connections 6.1. Network Cable Recommendation (PoE and non-PoE) 6.2. Choosing the Right Network Equipment 6.3. -
Page 4: Streaming
WPS-300-BUL-IP Installation Manual 9.1.3. Configuration Menu Guidelines 9.2. System Information and Settings 9.2.1. System Information Menu Settings 9.2.1.1. Server Information 9.2.1.2. OSD Setting 9.2.1.3. Time Setting 9.2.1.4. Network LED 9.2.2. Camera Time Setup 9.2.2.1. NTP Time 9.2.2.2. Synchronize With PC’s Time 9.2.2.3. - Page 5 WPS-300-BUL-IP Installation Manual 9.3.4.3. Controlling Administrator Access 9.3.5. Advanced IP Settings - QoS/DSCP 9.3.5.1. QoS / DSCP Setting 9.3.6. PPPoE Setup 9.3.6.1. PPPoE Overview 9.3.6.2. PPPoE Settings 9.3.6.3. Send Mail after PPPoE Dialed 9.3.7. DDNS Setup 9.3.7.1. DDNS Overview 9.3.7.2. DDNS Settings 9.3.7.3.
- Page 6 WPS-300-BUL-IP Installation Manual 9.5.3.2. How to Set Up Scheduling for Events 9.5.3.3. Setting up Snapshot 9.6. Log List 9.6.1. System Log 9.6.2. Motion Detection Log 9.6.3. All Logs 10. Manual Camera Reset 10.1. Reset Procedure 11. Mobile App Access 12. Specifications 13.
-
Page 7: Introduction
WPS-300-BUL-IP Installation Manual 2. Introduction Thank you for purchasing a Wirepath™ IP Surveillance camera. The WPS-300-BUL-IP is an indoor/outdoor camera designed for mounting to any wall, ceiling or surface, for easy monitoring over a web or smartphone interface. We recommend that this document be read in its entirety before proceeding with system design, installation, or operation of the camera. -
Page 8: Package Contents
WPS-300-BUL-IP Installation Manual 3. Package Contents • (1) WPS-300-BUL-IP Camera • (4) Screws • (1) WPS-ACC-PWR Power Adapter • (4) Wall Fasteners • (1) Female to Female RJ45 Adapter • (1) Quick Start Guide • (1) 3mm Allen Key NOTE: A POWER SUPPLY IS NOT INCLUDED WITH THIS CAMERA. The PS-12DC-1A, WPS-PS multiple output power supply or a Power over Ethernet (PoE) switch is recommended. -
Page 9: How It Works
(NVRs) on the same network, or even off the network (with the correct setup and web access). Users can see the camera feed through the interface of their choice, or see recorded footage from a storage device like an NVR. Wirepath Surveillance offers apps for iOS ®... -
Page 10: Camera Connections
WPS-300-BUL-IP Installation Manual 6. Camera Connections Wirepath™ Surveillance IP Cameras can be powered by Power over Ethernet (PoE) through the Cat5e/Cat6 Ethernet connection. This method is recommended because it limits the amount of wiring required, reducing installation cost and time. The camera must be connected to a compatible PoE-equipped router/switch or a PoE injector for this method to work. -
Page 11: Camera Installation Instructions
WPS-300-BUL-IP Installation Manual 7. Camera Installation Instructions 7.1. Wiring Installation Run a Cat5e/6 cable from the network port to the camera location and terminate both ends to 568B. (Non-PoE applications) Run wiring to the camera from the power supply location. Use the voltage drop calculator at www.SnapAV.com... -
Page 12: Network Software Setup - Ip Installer
WPS-300-BUL-IP Installation Manual 7.5. Network Software Setup - IP Installer The IP Installer software included with the camera provides a quick view of Wirepath™ IP Surveillance devices connected to the local network. Use the Installer to search for and set basic IP settings for each camera. -
Page 13: Ip Installer-Configuring Camera Ip Settings
WPS-300-BUL-IP Installation Manual 7.6. IP Installer-Configuring Camera IP Settings If the router DHCP server is enabled, then by default, the camera will receive a DHCP IP address when it is connected to the network. This should be changed to a reserved or static IP address so that the camera remains accessible after setup. -
Page 14: Ip Camera Web Interface - Setup And Use
WPS-300-BUL-IP Installation Manual 8. IP Camera Web Interface - Setup and Use 8.1. First Time Access Instructions Connect the PC to the same local network (LAN) as the camera. Open the web browser and enter the IP address assigned to the camera. Include the port number in the address if one was set. -
Page 15: Camera Web Browser Interface
WPS-300-BUL-IP Installation Manual 8.2. Camera Web Browser Interface The web browser Home screen displays video and current information from the camera feed. The camera name, time signature, video frame size and frames per second (FPS) being streamed are all displayed by default. Use the drop-down menus and buttons to interact with the cameras inputs and outputs, change the stream, or enter the setup menus. -
Page 16: Web Interface Layout - Bottom Bar
WPS-300-BUL-IP Installation Manual 8.2.2. Web Interface Layout - Bottom Bar Information Bar Displays basic information about the camera feed. Video Size Adjusts the size of the Live View area within the browser window. Video Source (If Streaming 2 is enabled) Allows for selection of one of two video streams from the camera. -
Page 17: Camera Configuration Menu Setup
WPS-300-BUL-IP Installation Manual 9. Camera Configuration Menu Setup After browser access to the camera has been established, the remaining steps for setup may be completed so that cameras are remotely viewable from inside and outside of the LAN, but secure from unwanted access. -
Page 18: System Information And Settings
WPS-300-BUL-IP Installation Manual 9.2. System Information and Settings 9.2.1. System Information Menu Settings • Navigation: Log in as an administrator. From Home Screen, click “Config” button in top right corner. 9.2.1.1. Server Information MAC Address Cannot be changed. Use the MAC address to identify a camera if IP settings have been lost. -
Page 19: Time Setting
WPS-300-BUL-IP Installation Manual 9.2.1.3. Time Setting Server Time Current time based on the settings saved in the camera. Date Format Select the order in which days (d), months (m), and years (y) are displayed. (Only available for NTP and Manual mode) Set the camera time zone in hours ahead of or behind Time Zone Greenwich Mean Time (GMT). -
Page 20: Camera Time Setup
WPS-300-BUL-IP Installation Manual 9.2.2. Camera Time Setup Important! Wirepath™ Surveillance strongly recommends using the “NTP” time setting option unless Internet access is not available from the camera network. Other settings may not keep the correct time after power outages or other failures. -
Page 21: Ntp Setup Instructions (For Cameras With Internet Access)
WPS-300-BUL-IP Installation Manual 9.2.2.5. NTP Setup Instructions (For Cameras with Internet Access) Set the Time Setting option to “NTP”. Set the desired Date Format and Time Zone. C. If applicable to your region, check the box to enable Daylight Savings Settings: •... -
Page 22: User Management
WPS-300-BUL-IP Installation Manual 9.2.3. User Management • Navigation: Log in as an administrator. From Home Screen, click “Config” button in top right corner, then click “User Management” in left column “System” sub-menu. 9.2.3.1. Anonymous User Login Enabling this feature allows anyone that visits the address of the camera to: •... -
Page 23: Administrator Account Setup
WPS-300-BUL-IP Installation Manual 9.2.3.5. Administrator Account Setup The administrator password should be changed during setup to prevent unwanted access. Select a new password up to ten characters in length made up of letters and numbers (no punctuation or symbols). Click the “Edit” button next to the username “admin” in the User List to open the User Setup window. -
Page 24: System Update
WPS-300-BUL-IP Installation Manual 9.2.4. System Update • Navigation: Log in as an administrator. From Home Screen, click “Config” button in top right corner, then click “System Update” in left column “System” sub-menu. Important! Firmware updates MUST be performed over a wired IP connection to ensure the connection is sustained throughout the process. -
Page 25: How To Back Up Camera Settings
WPS-300-BUL-IP Installation Manual 9.2.4.4. How to Back Up Camera Settings Settings for a camera can be downloaded to a configuration backup file in case the camera is reset or must be replaced. This file saves ALL settings from the configuration menus that can be modified. -
Page 26: Upgrade The Firmware
WPS-300-BUL-IP Installation Manual 9.2.4.6. Upgrade the Firmware Important! Updating Firmware MUST be performed over a wired IP connection to the device to ensure that a connection is sustained throughout the process. If connection is lost during update, use the IP Installer to find the device again and re-start the update. -
Page 27: Network Ip Settings
WPS-300-BUL-IP Installation Manual 9.3. Network IP Settings • Navigation: Log in as an administrator. From Home Screen, click “Config” button in top right corner, then click “IP Settings” in left column. 9.3.1. Basic IP Settings 9.3.1.1. IP Assignment Important! These settings are required for the camera to communicate correctly at all times. Use only static IP addresses. -
Page 28: Port Assignment
WPS-300-BUL-IP Installation Manual Basic IP Settings, Continued 9.3.1.2. Port Assignment Port for accessing the camera web interface. Set to 80 by default. Each Camera must have a unique Web Page port number in order to access from outside the local network. To make port numbering easy to Port remember, use 4 digits: “8”... -
Page 29: Multicast Setting (Based On Rtsp Server)
WPS-300-BUL-IP Installation Manual Basic IP Settings, Continued 9.3.1.5. Multicast Setting (Based on RTSP Server) Multicasting delivers a single stream to multiple network recipients simultaneously. All packets are copied identically to each recipient to save bandwidth. When using Multicast, be sure to enable the function “Force Multicast RTP via RTSP” in your media player, then key in the RTSP path of your camera: “rtsp://(IP address)/”... -
Page 30: Advanced Ip Settings - Https Access Setup
WPS-300-BUL-IP Installation Manual 9.3.2. Advanced IP Settings - HTTPS Access Setup Accessing the Camera through HTTPS provides an additional security level for the video stream by requiring certificate authentication. To use this feature, a certificate must be created and then verified by a third party. To set up HTTPS access correctly, contact the HTTPS verifier. -
Page 31: Advanced Ip Settings - Snmp
WPS-300-BUL-IP Installation Manual 9.3.3. Advanced IP Settings - SNMP SNMP (Simple Network Management Protocol) is used for network management of larger networks. It allows for monitoring network devices such as IP cameras via a management host. This is an advanced setting that should be used only on larger systems. -
Page 32: Advanced Ip Settings - Access List (Ip Filter)
WPS-300-BUL-IP Installation Manual 9.3.4. Advanced IP Settings - Access List (IP Filter) IP address filtering is used to allow or deny access to the camera from individual IP addresses or ranges of IP addresses. This adds an additional layer of security to the camera. -
Page 33: Add Or Remove Ip Addresses Or Ranges
WPS-300-BUL-IP Installation Manual 9.3.4.2. Add or Remove IP Addresses or Ranges Enable IP Address Filtering to gain access to the settings: Enter an IP address or range of addresses into the field and select whether to allow or deny access:... -
Page 34: Advanced Ip Settings - Qos/Dscp
WPS-300-BUL-IP Installation Manual 9.3.5. Advanced IP Settings - QoS/DSCP Quality of Service (QoS) is used within a network to define priority levels for selected traffic. This allows for a higher level of bandwidth to be used whenever a particular type of traffic is being sent to avoid latency and packet loss. The network administrator should be consulted before enabling this feature. -
Page 35: Pppoe Setup
WPS-300-BUL-IP Installation Manual 9.3.6. PPPoE Setup 9.3.6.1. PPPoE Overview Point-to-Point Protocol Over Ethernet (PPPoE) is a network protocol primarily used with DSL (Digital Subscriber Line) providers and modems. This protocol requires a login to connect to the modem even when a router is used. Configuration of these settings is not required to operate the camera on a standard network. -
Page 36: Ddns Setup
WPS-300-BUL-IP Installation Manual 9.3.7. DDNS Setup 9.3.7.1. DDNS Overview Dynamic Domain Name Servers (DDNS) map an alphanumeric Internet domain name to a network’s WAN IP address. When configured, DDNS enables login to cameras from anywhere on the Internet without having to remember a numeric address – that could change on a regular basis. -
Page 37: Setting Up A Ddns Address - Wirepathdns
WPS-300-BUL-IP Installation Manual 9.3.7.4. Setting Up a DDNS Address – WirepathDNS To use Wirepath DDNS service, enable the DDNS feature by selecting the button. Enter a prefix for the address in the host name field as shown in the example above (system1). -
Page 38: Server Settings
WPS-300-BUL-IP Installation Manual 9.3.8. Server Settings Server Settings menus allow configuration of the message and file transfer systems used by the camera to send emails, video files, or snapshots to email recipients, to an FTP server, or to be hosted over the local network. -
Page 39: Ftp Settings
WPS-300-BUL-IP Installation Manual 9.3.8.3. FTP Settings An FTP server is a remote computer server the camera connects to over the network or Internet. When an FTP server is configured, recorded video and snapshot files can be stored on the server for later access. Contact the network administrator for FTP server setup information. -
Page 40: Network Share Settings
WPS-300-BUL-IP Installation Manual 9.3.8.4. Network Share Settings • Navigation: Log in as an administrator. From Home Screen, click “Config” button in top right corner, then click “Server Settings” in left column menu. In the Server Settings sub-menu on the main window of the page, click “Network Share Settings”. -
Page 41: Camera A/V Settings
WPS-300-BUL-IP Installation Manual 9.4. Camera A/V Settings 9.4.1. Image Settings Menu The image setting menu is used to set up the camera view for the best image possible. Brief descriptions of the menu are given below. Complete instructions for setup are in the following sections. -
Page 42: Tips For Getting The Best Camera Image
WPS-300-BUL-IP Installation Manual 9.4.1.1. Tips for Getting the Best Camera Image • Too much brightness causes the image to fade. Too little brightness will cause dark colors to run together. • Too much contrast will cause obscured details. Too little contrast will cause the image to lose clarity and brightness. -
Page 43: Ext Light Sensor Mode (Default Mode)
WPS-300-BUL-IP Installation Manual 9.4.2.2. EXT Light Sensor Mode (Default Mode) The default day-night settings are usually ideal. The camera has been calibrated to run in color mode as long as enough ambient light is available for the sensor to use. Once the scene begins to darken, the camera will adjust to black and white night mode, and the IR LEDs will turn on as needed. -
Page 44: How To Configure Privacy Masks
WPS-300-BUL-IP Installation Manual 9.4.2.4. How to Configure Privacy Masks Privacy mask allows for areas of an image to be blocked out to avoid unwanted capturing of sensitive areas. Example: A camera used to monitor the front lawn of a house would have the windows on the neighboring homes masked to avoid peeping on the neighbors. -
Page 45: Video Settings Menu Overview
WPS-300-BUL-IP Installation Manual 9.4.3. Video Settings Menu Overview The Camera supports up to four streams that can be used for streaming to a mobile device, network recorder, control system GUI, or the browser GUI simultaneously. While the highest quality is desired, it may not be supported by the network or device. -
Page 46: Video Streaming 1 And 2 Setup
WPS-300-BUL-IP Installation Manual 9.4.4. Video Streaming 1 and 2 Setup Note: Streaming 1 and 2 settings are identical. Settings options have only been covered once. Basic/ Set the streaming mode to “Advanced” to allow fine control of streaming parameters. Extra options for Advanced Advanced mode are indicated below. -
Page 47: Streaming 3 And 4 Setup
WPS-300-BUL-IP Installation Manual Video Streaming 1 and 2 Setup, Continued GOP (Group of Pictures) is used to generate the visible frames of a video stream. The GOP size setting determines the multiplier to use for producing intermediate frames based on a standard of 15fps. -
Page 48: Event Record Setup And Scheduling
WPS-300-BUL-IP Installation Manual 9.5. Event Record Setup and Scheduling Cameras can be set up to record on a set schedule,in response to contact closure, or in response to motion. Set up how and when events are handled, including if and when to send an email notification or to send a file backup of an event to an off-site location. -
Page 49: Record File
WPS-300-BUL-IP Installation Manual Event Settings Menu, Continued 9.5.1.1. Record File Select the type of file to create when the event occurs: • AVI File – Creates a short .AVI format video file. • JPEG Files (Streaming 1 must be set MJPEG) – Creates a series of JPEG files at about 1 FPS. -
Page 50: Configuring Motion Detection Areas
WPS-300-BUL-IP Installation Manual 9.5.2. Configuring Motion Detection Areas Motion detection allows for specific areas of the image to be used for triggering the recording of video, an alarm, or sending a notification. When an area is defined, motion in that area will trigger the predefined action; this is useful to avoid unwanted events from being triggered due to motion in areas of no concern. -
Page 51: Adding A New Motion Detection Area
WPS-300-BUL-IP Installation Manual 9.5.2.2. Adding a New Motion Detection Area Select Event Setting under Event on the left side Menu. Select the Area for Motion Detection. C. Select Area 1 next to the blue box. D. Place the mouse at the upper left hand corner of the area to mask, hold down the left mouse button and drag the box over the area to mask and release the mouse button. -
Page 52: Schedule Menu
WPS-300-BUL-IP Installation Manual 9.5.3. Schedule Menu Use this menu to configure a schedule for capturing images from the camera to be stored. Enable Check box to Enable Scheduling feature. Grid with Days of the Week and Time of day for snapshots to be recorded. Enabled dates and time appear as a Green box. -
Page 53: How To Set Up Scheduling For Events
WPS-300-BUL-IP Installation Manual 9.5.3.2. How to Set Up Scheduling for Events Select Schedule under Event on the left side Menu. Select the Enabled check box. C. Click on the box(es) to enable one-hour blocks of time for the desired Day of week and Time of day. -
Page 54: Log List
WPS-300-BUL-IP Installation Manual 9.6. Log List The camera software stores a log file for several parameters in the camera. Use the Log List menu to select a log to view. 9.6.1. System Log Displays System events such as logins and configuration changes. This log is maintained even through loss of power. -
Page 55: Manual Camera Reset
WPS-300-BUL-IP Installation Manual 10. Manual Camera Reset If the camera ever becomes unresponsive after an update, or Administrator access is lost, it may be necessary to manually reset the camera back to default configuration. The procedure was designed to require significant effort so that resets could not easily be done with malicious intent. -
Page 56: Specifications
WPS-300-BUL-IP Installation Manual 12. Specifications Imaging Image sensor 1/4" 1MP CMOS sensor Lens Type 2.8mm Mega Pixel Fixed Lens F1.8 View Angle 77.79°H, 49.55°V Video Resolution 1280x800@30fps, 1280x720@30fps, 640x480@30fps, 320x240@30fps 176x144@30fps Minimum Illumination 0.1 lux @F1.8 (IR off) 0 lux @F1.8 (IR on) - Page 57 WPS-300-BUL-IP Installation Manual Housing & Power Operating Temperature 14°F ~ 113°F Weight 1.32 lbs Weather Rating IP66 POE / Consumption Yes - PoE IEEE 802.3af 1.926W (IR Off) / 4.32W (IR On) 12VDC Power Consumption 1.6W (IR Off) / 3.6W (IR On)
-
Page 58: Dimensions
WPS-300-BUL-IP Installation Manual 13. Dimensions 8.0" 7.4" 3.07" 3.5" Ø 2.25"... -
Page 59: Warranty
WPS-300-BUL-IP Installation Manual 14. Warranty 3-Year Limited Warranty This Camera has a 3-Year Limited Warranty. The warranty includes parts and labor repairs on all components found to be defective in material or workmanship under normal conditions of use. This warranty shall not apply to products that have been abused, modified, disassembled, or improperly installed. - Page 60 © 2014 Wirepath™ Surveillance 140912-1428...
Need help?
Do you have a question about the WPS-300-BUL-IP and is the answer not in the manual?
Questions and answers