Renesas E1 User Manual
Emulator
Hide thumbs
Also See for E1:
- User manual (55 pages) ,
- Quick start manual (5 pages) ,
- User manual (55 pages)
Table of Contents
Advertisement
Quick Links
4
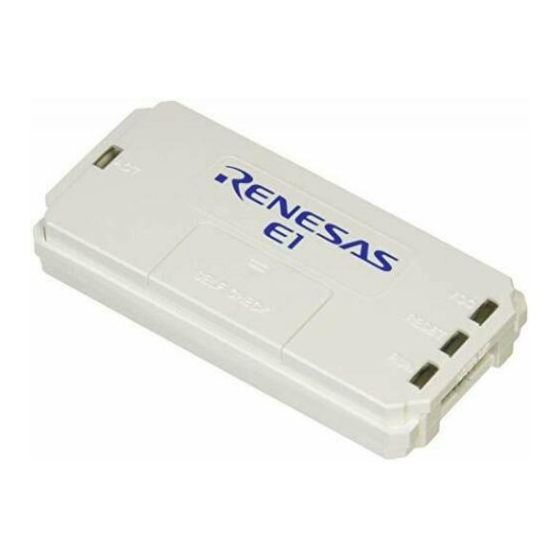
E1 Emulator
E20 Emulator R0E000200KCT00
All information contained in these materials, including products and product specifications, represents
information on the product at the time of publication and is subject to change by Renesas Electronics
Corporation without notice. Please review the latest information published by Renesas Electronics
Corporation through various means, including the Renesas Electronics Corporation website
(http://www.renesas.com).
www.renesas.com
R0E000010KCE00
User's Manual
Rev.4.01 Mar 2016
Advertisement
Table of Contents

Related Manuals for Renesas E1


Summary of Contents for Renesas E1
- Page 1 All information contained in these materials, including products and product specifications, represents information on the product at the time of publication and is subject to change by Renesas Electronics Corporation without notice. Please review the latest information published by Renesas Electronics Corporation through various means, including the Renesas Electronics Corporation website (http://www.renesas.com).
- Page 2 Renesas Electronics products are not subject to radiation resistance design. Please be sure to implement safety measures to guard them against the possibility of physical injury, and injury or damage caused by fire in the event of the failure of a Renesas Electronics product, such as safety design for hardware and software including but not limited to redundancy, fire control and malfunction prevention, appropriate treatment for aging degradation or any other appropriate measures.
-
Page 3: Preface
The E1 emulator (R0E000010KCE00) and the E20 emulator (R0E000200KCT00) are designed for use with the MCU’s made by Renesas Electronics. All components of the E1 and E20 emulators are listed under “1.1 Package Components”. If you have any questions about the E1 or E20 emulator, contact your local distributor. -
Page 4: Important
(2) In no event shall Renesas Electronics Corporation be liable for any consequence arising from the use of the emulator. - Page 5 Renesas or to a third party. (3) This user’s manual and the emulator are copyrighted, with all rights reserved by Renesas. This user’s manual may not be copied, duplicated or reproduced, in whole or part, without prior written consent from Renesas.
-
Page 6: Precautions For Safety
E1/E20 Emulator Precautions for safety Precautions for Safety This chapter, by showing the relevant diagrammatic symbols and their meanings, describes the precautions which should be taken in order to use this product safely and properly. Be sure to read and understand this chapter before using this product. - Page 7 E1/E20 Emulator Precautions for safety WARNING Warnings for AC Power Supply: Do not repair or remodel the emulator product by yourself in order to prevent danger such as an electric shock or fire and for the sake of quality assurance. For after-sale services in case of a mechanical or electrical fault, please contact your local distributor.
- Page 8 After use the equipment cannot be disposed of as household waste, and the WEEE must be treated, recycled and disposed of in an environmentally sound manner. Renesas Electronics Europe GmbH can take back end of life equipment, register for this service at “http://www.renesas.eu/weee” R20UT0398EJ0401 Rev.4.01...
-
Page 9: Table Of Contents
2.4. Turning the Power On/Off ........................23 2.4.1. When a Separate Power Supply is Used for the User System ..........23 2.4.2. When Power is supplied to the User System from the Emulator (E1 Only) ......24 2.5. Connecting System Ground ......................25 3. -
Page 10: Terminology
Some specific words used in this user's manual are defined below. Integrated development environment: High-performance Embedded Workshop This tool provides powerful support for the development of embedded applications for Renesas microcomputers. It has an emulator debugger function allowing the emulator to be controlled from the host machine via an interface. -
Page 11: Outline
The E1/E20 emulator package consists of the following items. After you have unpacked the box, check if your E1 or E20 emulator contains all of these items. Table 1.1 and Table 1.2 show the packing components for the E1 and E20, respectively. -
Page 12: System Configuration
E1/E20 Emulator Outline 1.2. System Configuration The E1 or E20 emulator is used by connecting it to the target MCU mounted on the user system. Figure 1.1 shows the configuration of the emulator system. User-system interface cable (with the 14-or 38-pin connector) -
Page 13: Specifications
E1/E20 Emulator Outline 1.4. Specifications Table 1.3 lists the specifications of the E1 or E20 emulator. Table 1.3 Specifications of the E1 or E20 emulator Item Description Emulator Type E1 Emulator E20 Emulator Type name: R0E000010KCE00 Type name: R0E000200KCT00 PC Interface USB 2.0 (high speed/ full speed) -
Page 14: Regulatory Compliance Notices
Address: Arcadiastrasse 10, 40472 Dusseldorf, Germany Trademark and Type name Trademark: Renesas Product name: E1 Emulator / E20 Emulator Type name: R0E000010KCE00 / R0E000200KCT00 Environmental Compliance and Certifications: Waste Electrical and Electronic Equipment (WEEE) Directive 2012/19/EU 1.5.2. United States Regulatory notices This product complies with the following EMC regulation. -
Page 15: Emulator Hardware Configuration
The emulator is connectable to the host computer via a USB port compliant with USB 2.0 (Full-Speed/High-Speed) or USB 1.1. USB interface cable RESET User-system interface cable SELF CHECK E1 main emulator unit Figure 1.2 E1 Hardware Configuration Optional 38-pin to 14-pin conversion adapter USB interface cable included in the package RESET User-system interface cable... -
Page 16: The Names Of The Emulator Parts
A connector for use in self-checking. The lid is usually closed because this connector is not self-checking: used during debugging. For details on the self-checking procedure, refer to appendix A. Marked ‘ACT’. This LED indicates the operating state of the E1 or E20 control software. (c) ACTIVE LED: Illuminated: The emulator is usable. -
Page 17: Operating Environment
When the switch is shifted to “|”, the power is on. Shifting the switch to “”, on the other hand, turns off the power. The USB supplies power to the emulator. Figure 1.5 E1 and E20 Host-Side View E1 Emulator E20 Emulator... -
Page 18: Setup
(1) Connect the A plug of the USB interface cable to the USB I/F connector of the host machine. (2) Connect the mini-B plug of the USB interface cable to the USB I/F connector of the E1 or E20 emulator. -
Page 19: Connecting The Emulator To The User System
(1) Connect the user-system interface cable to the user-side connector of the emulator. When connecting the user-system interface cable to the E1 emulator, check the position of the erroneous insertion prevention key to ensure that the cable is plugged in correctly. - Page 20 Pin 1 Figure 2.3 Connecting the User-System Interface Cable to the User System when the 14-Pin Connector is in Use with the E1 CAUTION Notes on connector insertion and removal: When connecting or disconnecting the user-system interface cable and the emulator or user system, grasp the connector cover at the end of the cable.
- Page 21 E1/E20 Emulator Setup 38-pin user-system interface cable 9.4 mm 26.2 mm 38-pin to 14-pin conversion adapter 14-pin connector 7614-6002 or 38-pin to 14-pin conversion adapter (top view) 2514-6002 R0E000200CKA00 10 mm (include in the E20 package) User system Figure 2.4...
- Page 22 E1/E20 Emulator Setup 38-pin user-system interface cable 30 mm 38-pin connector 2-5767004-2 5 mm : Area with limit on mounted components User system Connector (top view) Figure 2.5 Connecting the User-System Interface Cable to the User System when the 38-Pin...
-
Page 23: Turning The Power On/Off
(3) Connect the host machine and turn on the emulator. Connect the emulator and the host machine with a USB interface cable. The E1 emulator is turned on by connecting the USB interface cable. When using the E20 emulator, turn on its power switch. -
Page 24: When Power Is Supplied To The User System From The Emulator (E1 Only)
E1/E20 Emulator Setup 2.4.2. When Power is supplied to the User System from the Emulator (E1 Only) <When using the emulator> (1) Connect the user system. Connect the emulator and the user system with a user-system interface cable. (2) Connect the host machine and turn on the emulator. -
Page 25: Connecting System Ground
For a debugging environment where there is a GND gap between the user system and host PC, use the isolator for the E1 emulator (R0E000010ACB10 / R0E000010ACB20) or the isolator for the E20 emulator (R0E000200ACB10) that are separately available from Renesas. -
Page 26: Troubleshooting (Action In Case Of An Error)
Install the USB driver correctly. (2) Remains off This means that the E1 or E20 is in an unusable state for some reason. Check the following: • Whether the E1 or E20 and the host machine are connected with the USB interface cable. -
Page 27: Maintenance And Warranty
Failure or damage attributable to modifications, repairs, adjustments, or other acts made to the product by other than Renesas Electronics Corporation. (3) Consumables (e.g., sockets and adapters) are not covered by the aforementioned repair. In the above cases, contact your local distributor. If your product is being leased, consult the leasing company or the owner. -
Page 28: Repair Provisions
E1/E20 Emulator Maintenance and Warranty 4.3. Repair Provisions (1) Repairs not covered by warranty Problems arising in products for which more than one year has elapsed since purchase are not covered by warranty. (2) Replacement not covered by warranty If your product's fault falls into any of the following categories, the fault will be corrected by replacing the entire product instead of repairing it, or you will be advised to purchase a new product, depending on the severity of the fault. -
Page 29: Appendix A Self-Checking Program (Scp)
E1/E20 Emulator Appendix A Appendix A Self-Checking Program (SCP) This section gives the procedure for using the self-checking program for the E1 and E20 in fault analysis. A.1 Flow of Self-Checking Install the emulator software. Install the SCP and USB driver for the E1 and E20 on the host computer (this step is only required once). -
Page 30: Preparations For Self-Checking
The timing with which the supply of power starts differs with the emulator. E1: The supply of power starts when the USB interface connector is connected. E20: The supply of power starts when the power switch is turned on after the USB interface cable has been connected. -
Page 31: Executing The Self-Checking Program
CubeSuite+] -> [Emulator Utilities] -> [RX] -> [E1, E20 Emulator Self Check Program]. If you are using any other debugger product, refer to its manual, or install the self-checking program from included installation media, then open the start menu and select [Programs -> Renesas -> E1E20SCP -> E1E20 Self Check Program]. - Page 32 If the user interface cable has not been connected to the self-checking connector, the following message is displayed: “Please connect the user interface cable to the self-check connector on E1 or E20 in a correct direction.” Check that the user interface cable is connected to the self-checking connector in the right direction as shown in Figure A.1, and click on the [OK] button.
- Page 33 E1/E20 Emulator Appendix A If the user interface cable has been connected to the user system, “FAIL” is displayed on the screen (see figure below). Correctly connect the cable to the self-checking connector and click on the [START] button again to start the self-checking program.
- Page 34 E1/E20 Emulator Appendix A (3) As soon as the self-checking program is started. “TEST1 is running.” and “TEST2 is running.” are shown on the screen. If the emulator correctly completes TEST1 and TEST2, “TEST1: PASS” and “TEST2: PASS” are displayed.
- Page 35 E1/E20 Emulator Appendix A If you click on the [Cancel] button, “FAIL” is displayed on the screen (see figure below). Correctly connect the cable to the self-checking connector and click on the [START] button again to start the self-checking program.
- Page 36 The results of self-checking are saved as a text file. Table A.1 Error Messages Message Description The E1/E20 self-check has failed. The user interface cable was connected to the user system at the time the self-checking program was started or there is a fault in the emulator.
-
Page 37: Revision History
Revision History Rev. Date Description Page Summary 4.01 Mar 15, 2016 Regulatory Compliance Notices changed... - Page 38 E1 Emulator R0E000010KCE00 E20 Emulator R0E000200KCT00 User’s Manual Publication Date: Mar 15, 2016 Rev.4.01 Published by: Renesas Electronics Corporation...
- Page 39 SALES OFFICES SALES OFFICES Refer to "http://www.renesas.com/" for the latest and detailed information. Refer to "http://www.renesas.com/" for the latest and detailed information. Renesas Electronics America Inc. Renesas Electronics America Inc. 2801 Scott Boulevard Santa Clara, CA 95050-2549, U.S.A.
- Page 40 E1 Emulator R0E000010KCE00 E20 Emulator R0E000200KCT00 User’s Manual R20UT0398EJ0401...
Need help?
Do you have a question about the E1 and is the answer not in the manual?
Questions and answers