
Related Manuals for SolarEdge Energy Bank


Summary of Contents for SolarEdge Energy Bank
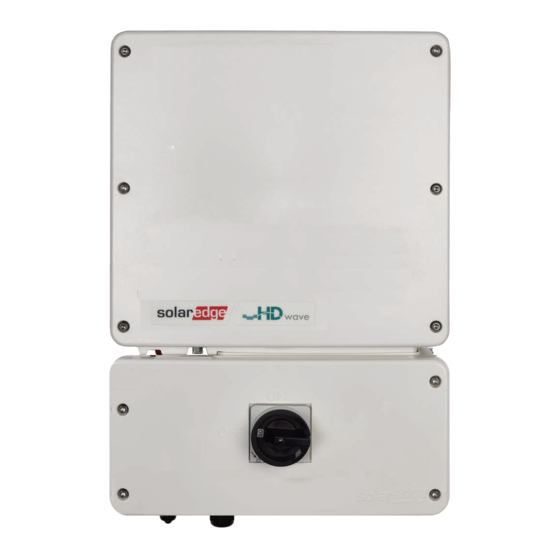
- Page 1 Installation Guide SolarEdge Home Hub Inverter Single Phase For Australia Version 1.5...
-
Page 2: Disclaimers Important Notice
You may refer to the SolarEdge web site (www.solaredge.com) for the most updated version. All company and brand products and service names are trademarks or registered trademarks of their respective holders. -
Page 3: Revision History
Revision History Version 1.5 (April 2023) LG Chem Prime Battery removed. Version 1.4 (October 2022) Updated name to SolarEdge Home Hub Inverter Single Phase Version 1.3 (January 2021) Added S-series Power Optimisers installation guidelines in Installation Guidelines on page 14. -
Page 4: Table Of Contents
Connecting an External CT to the Energy Meter (Optional) Connecting an External RSD Switch (Optional) Installing the 9V Battery Connecting Multiple Inverters through RS485 Chapter 6: Activating, Commissioning and Configuring the System Step 3: Verifying Proper Activation and Commissioning SolarEdge Home Hub Inverter Single Phase MAN-01-00812-1.5... - Page 5 Creating an Ethernet (LAN) Connection Verifying the Connection Appendix A: Errors and Troubleshooting Identifying Errors Energy Hub Inverter Troubleshooting Troubleshooting Communication Power Optimiser Troubleshooting Appendix B: Mechanical Specifications Appendix C: SafeDC™ Support Contact Information SolarEdge Home Hub Inverter Single Phase MAN-01-00812-1.5...
-
Page 6: Handling And Safety Instructions
Denotes additional information about the current subject. IMPORTANT SAFETY FEATURE Denotes information about safety issues. Disposal requirements under the Waste Electrical and Electronic Equipment (WEEE) regulations: NOTE Discard this product according to local regulations or send it back to SolarEdge. SolarEdge Home Hub Inverter Single Phase MAN-01-00812-1.5... -
Page 7: Important Safety Instructions
(for a string with multiple modules, use the max value) String Length = number of power optimisers in the string CAUTION! This unit must be operated according to the technical specification datasheet provided with the unit. SolarEdge Home Hub Inverter Single Phase MAN-01-00812-1.5... - Page 8 Use PV modules rated according to IEC 61730 class A. NOTE The symbol appears at grounding points on the SolarEdge equipment. This symbol is also used in this manual. NOTE The following warning symbols appear on the inverter warning label: Risk of electric shock Risk of electric shock from energy stored in the capacitor.
- Page 9 For inverters with a nameplate up to and including 10kW: Maximum short circuit peak current: 78.1A Maximum short circuit current duration (until current stops): 113msec Maximum 3-cycle short circuit current RMS value: 60A SolarEdge Home Hub Inverter Single Phase MAN-01-00812-1.5...
-
Page 10: Chapter 1: Overview
One or multiple batteries (optional) - DC-coupled batteries designed to work with the SolarEdge system. The batteries can be connected to the system optionally. When installing a battery, connect the DC cables from the battery and from Power Optimisers to an external combiner box, compliant with local regulation. -
Page 11: List Of Installation Equipment
List of Installation Equipment Standard tools can be used during the installation of the SolarEdge system. The following is a recommendation of the equipment needed for installation: 4 mm Allen torque screwdriver for the inverter enclosure screws... -
Page 12: Inverter Transport And Storage
(refer to the inverter weight in the specification datasheet provided with the unit), has a handle system and can be closed fully. Store the inverter in a dry place where ambient temperatures are - -25°C to +60°C. SolarEdge Home Hub Inverter Single Phase MAN-01-00812-1.5... -
Page 13: Chapter 2: Installing The Power Optimisers Safety
Drilling holes in the module frame should be done according to the module manufacturer instructions. SolarEdge Home Hub Inverter Single Phase MAN-01-00812-1.5... - Page 14 IMPORTANT SAFETY FEATURE Modules with SolarEdge Power Optimisers are safe. They carry only a low safety voltage before the inverter is turned ON. As long as the power optimisers are not connected to the inverter or the inverter is turned OFF, each Power Optimiser will output a safe Voltage of 1V.
-
Page 15: Installation Guidelines
For the minimum and maximum number of Power Optimisers in a PV string (PV string length), see the Power Optimiser datasheets. Refer to the Designer for PV string length verification. The Designer is available on the SolarEdge website at: https://www.solaredge.com/products/installer-tools/designer#/. - Page 16 *The same rules apply for Synergy units of equivalent power ratings, that are part of the modular Synergy technology inverter. For connecting homerun DC cables from Power Optimisers to the inverter, use cables with the following cross-sections: For MC4 connectors: 2.5-10 mm² SolarEdge Home Hub Inverter Single Phase MAN-01-00812-1.5...
- Page 17 When installing PV modules in a confined space such as Building-integrated photovoltaic (BIPV) modules, ventilation measures may be required to ensure that the Power Optimisers are not exceeding the maximum temperatures stated in their specifications. SolarEdge Home Hub Inverter Single Phase MAN-01-00812-1.5...
-
Page 18: Step 1: Mounting The Power Optimisers
4. Verify that each Power Optimiser is securely attached to the module support structure. 5. Record Power Optimiser serial numbers and locations, as described in Reporting and Monitoring Installation Data on page 50. Not applicable to smart modules. SolarEdge Home Hub Inverter Single Phase MAN-01-00812-1.5... -
Page 19: Step 2: Connecting A Pv Module To A Power Optimiser
Power Optimiser. Connect the Minus (-) output connector of the module to the Minus (-) input connector of the Power Optimiser. Figure 2: S-Series (left) and P-Series (right) Power Optimiser connectors SolarEdge Home Hub Inverter Single Phase MAN-01-00812-1.5... -
Page 20: Step 3: Connecting Power Optimizers In Strings
4. If you intend to monitor the installation, using the monitoring platform, record the physical location of each power optimizer, as described in Creating Logical and Physical Layout using Installation Information on page 51 SolarEdge Home Hub Inverter Single Phase MAN-01-00812-1.5... -
Page 21: Step 4: Verifying Proper Power Optimiser Connection
Make sure the PV modules are exposed to sunlight during this process. The Power Optimiser will only turn ON if the PV module provides at least 2W. In SolarEdge systems, due to the introduction of Power Optimisers between the PV modules and the inverter, the short circuit current I and the open circuit voltage V hold different meanings from those in traditional systems. -
Page 22: Chapter 3: Installing The Inverter
Refer to the sticker on the inverter that specifies its Serial Number and its Electrical Ratings. Provide the serial number when contacting SolarEdge support. The serial number is also required when opening a new site in the SolarEdge monitoring platform. Unpacking the inverter Extract the inverter out of the carton box following the on-package instruction. -
Page 23: Inverter Interfaces
Figure 3: Inverter Interfaces AC conduit entry - for AC connection to the grid or Backup Interface DC conduit entry - for DC connection to SolarEdge Power Optimisers and one or more batteries. When installing a battery, connect the DC cables from the battery and from Power Optimisers to an external combiner box, compliant with local regulation. - Page 24 Reset is indicated by all 3 LEDs than 30 board fast blinking simultaneously seconds, then released. Switch moved to P for more Pairing is indicated by all 3 Starts pairing LEDs blinking simultaneously. than 5 seconds, then released. LEDs SolarEdge Home Hub Inverter Single Phase MAN-01-00812-1.5...
- Page 25 The following table describes system performance information by LED color and ON/OFF/P switch position. Blinking = Turns ON and OFF for the same duration Flickering = Turns ON for 100 mS and turns OFF for 5 seconds Alternating = alternate LED flashes SolarEdge Home Hub Inverter Single Phase MAN-01-00812-1.5...
- Page 26 ON / P Alternating Alternating Alternating process can take upgrade up to 5 minutes Refer to the Trubleshooting ON/ OFF/ section Errors ON/ OFF / Error Blinking/ Blinking Flickering Troubleshooting on page 60 SolarEdge Home Hub Inverter Single Phase MAN-01-00812-1.5...
-
Page 27: Mounting The Inverter
66 - 100 % Mounting the Inverter The inverter is supplied with a mounting bracket kit: Figure 5: Mounting bracket NOTE Make sure the mounting surface or structure can support the weight of the inverter. SolarEdge Home Hub Inverter Single Phase MAN-01-00812-1.5... - Page 28 Power Optimiser. For SolarEdge inverters installed at a distance of 200 m or closer to the shoreline, special brackets must be purchased separately from SolarEdge and SS304 stainless screws are required. For details, please contact your local sales representative.
- Page 29 6. Optionally, secure the Connection Unit bracket to the wall/pole, using 3 screws: NOTE In case of inverter replacement with the Connection Unit still mounted, it is recommended to use all 3 holes. SolarEdge Home Hub Inverter Single Phase MAN-01-00812-1.5...
-
Page 30: Selecting A Residual Current Device (Rcd)
Install the residual-current device (RCD) in accordance with the applicable local standards and directives. SolarEdge recommends using a type- A RCD. The recommended RCD value is 100 mA or 300 mA unless a lower value is required by the specific local electric codes. - Page 31 RCD automatically resets when the residual currents are low it saves the manual reset. For detailed information, refer to the RCD Selection for SolarEdge Inverters Application Note , available on the SolarEdge website at http://www.solaredge.com/sites/default/files/application_note_ground_...
-
Page 32: Chapter 4: Installing The Battery (Optional)
Chapter 4: Installing the Battery (Optional) 31 Chapter 4: Installing the Battery (Optional) Install the battery in accordance with the manufacturer instructions. For the SolarEdge Energy Bank installation guide, see: https://www.solaredge.com/sites/default/files/se-energy-bank- installation-guide.pdf In addition, follow these guidelines: Make sure the battery's circuit breaker switch is OFF. -
Page 33: Chapter 5: Connecting The Inverter
2. Release the four Allen screws of the Connection Unit cover and remove the cover. CAUTION! When removing the cover, make sure not to damage internal components. SolarEdge will not be held responsible for any components damaged as a result of incautious cover removal. 3. Install a conduit of the required diameter: To install a 32 mm conduit, remove the conduit plug together with the reducing washer. -
Page 34: Connecting The Inverter To Ac Grid
Inverter 33 Connecting the Inverter to AC Grid For connecting the inverter to AC grid, use a 1–10 mm cable. For more wiring information, refer to the SolarEdge Recommended AC Wiring Application Note , available on the SolarEdge website at http://www.solaredge.com/files/pdfs/application-note-recommended- wiring.pdf. To connect to AC grid: 1. - Page 35 Connecting the DC Strings to the Inverter Unit.We recommend using the SolarEdge combiner box. For installation and connection instructions see: https://www.solaredge.com/sites/default/files/se-combiner-box- installation-guide-aus.pdf NOTE Functional electrical earthing of DC-side negative or positive poles is prohibited because the inverter has no transformer. Grounding (earth ground) of module frames and mounting equipment of the PV arraystring modules is acceptable.
-
Page 36: Connecting The Battery (Optional)
Unit.We recommend using the SolarEdge combiner box. For installation and connection instructions see: https://www.solaredge.com/sites/default/files/se-combiner-box- installation-guide-aus.pdf For setting up communication between the SolarEdge Home Battery and the inverter, SolarEdge strongly recommends using SolarEdge Home Network. Use the following cable types: DC - two pairs of DC cables - 6 mm (6–10 mm... -
Page 37: Connecting The Backup Interface
Connecting the Backup Interface To enable operation of the inverter in the stand-alone mode, the SolarEdge Backup Interface must be installed. When the inverter switches to the stand-alone mode, the Backup Interface ensures the neutral conductor continuity to the loads. -
Page 38: Connecting An External Ct To The Energy Meter (Optional)
Connecting an External CT to the Energy Meter (Optional) To enable import/export or consumption metering, connect an external current transformer (purchased separately from SolarEdge) to the Energy Meter. To connect an external CT: Open the CT gland at the bottom of the Connection Unit. -
Page 39: Connecting An External Rsd Switch (Optional)
The switch is not supplied by SolarEdge and should be purchased separately. If the SolarEdge Backup Interface is installed as part of the system, connect the external RSD switch to the Backup Interface (see the Backup Interface installation guide). Then, connect the RSD wires from the Backup Interface to the inverter, in the same manner, as... - Page 40 3. Connect the positive wire to the Safety Switch and the negative wire to the RSD- port on the Backup Interface connector. To connect an external RSD switch to multiple inverters: 1. Connect the external RSD switch to the Leader inverter, as explained above. SolarEdge Home Hub Inverter Single Phase MAN-01-00812-1.5...
-
Page 41: Installing The 9V Battery
A 9V battery is supplied with the inverter to enable the inverter to start production in case of a power outage. To install the 9V battery: 1. Connect the snap-on clip to the battery contacts. SolarEdge Home Hub Inverter Single Phase MAN-01-00812-1.5... -
Page 42: Connecting Multiple Inverters Through Rs485
For further information, contact SolarEdge support. You can add inverters to your system to increase on-grid and backup power production. Up to two additional SolarEdge Home Wave Inverter - Single Phase or SolarEdge Home Hub Inverter Single Phases may be connected to a single SolarEdge Home Hub Inverter Single Phase. - Page 43 3. Connect the cable to the 2nd Inv RS485 connector on the communication board. 4. Pull the cables lightly to make sure they are properly connected. 5. Close the communication glands of 5.5 N*m. SolarEdge Home Hub Inverter Single Phase MAN-01-00812-1.5...
-
Page 44: Chapter 6: Activating, Commissioning And Configuring The System
For communication options, refer to: Setting Up Communication with the Monitoring Platform on page 53. Before arriving at the site, download SolarEdge SetApp application to your mobile device from Apple App Store or Google Play . - Page 45 Open SetApp and follow the on-screen instructions (scan the inverter QR code, move the ON/OFF/P switch to P position for 2 seconds and release). The mobile device creates a Wi-Fi connection with the inverter and displays the main Commissioning screen. SolarEdge Home Hub Inverter Single Phase MAN-01-00812-1.5...
- Page 46 LED. When working voltage is reached, the inverter enters Production mode and produces power. The steadily lit green inverter LED indicates this mode. 4. Tap OK to return to the Commissioning menu. SolarEdge Home Hub Inverter Single Phase MAN-01-00812-1.5...
-
Page 47: Step 3: Verifying Proper Activation And Commissioning
The Grid Control option may be disabled. Enabling it opens additional options in the menu. The Energy Manager option is used for setting power export limitation, as described in the Export Limitation Application Note , available on the SolarEdge website at: https://www.solaredge.com/sites/default/files/feed-in_limitation_application_note.pdf. ... -
Page 48: Configuring Communication With Other Devices
If the above devices have not been auto-detected during system activation, configure them as explained below. To set up communication with the SolarEdge Energy Bank: 1. Run SetApp. 2. From the Commissioning screen, select Device Manager > Add New Devices. -
Page 49: Enabling Home Hub Applications
The produced power is stored in the battery to be used during power outages. When the grid voltage is down, the Backup Interface automatically switches to the Backup mode, disconnecting from the grid, while the SolarEdge Home Hub Inverter Single Phase supplies power to the backed-up loads. This application requires connection to the Backup Interface and backed-up loads (pre-selected or the entire home). -
Page 50: Enabling Demand Response Mode For Zero Export
1. Access SetApp. 2. From the Commissioning screen, select Power Control > Power Reduction Interface (RRCR) Mode > DRM. For more information on zero export and demand response enabling devices (DRED), see: https://www.solaredge.com/sites/default/files/dred-connection-application-note.pdf SolarEdge Home Hub Inverter Single Phase MAN-01-00812-1.5... -
Page 51: Reporting And Monitoring Installation Data
Reporting and Monitoring Installation Data Monitoring the site requires connecting the inverter to the monitoring platform, using any of the wired or wireless options available from SolarEdge. Refer to Setting Up Communication with the Monitoring Platform on page 53. The Monitoring Platform... - Page 52 Mapping existing sites using the Mapper mobile application Physical Layout Editor 1. If you are a registered installer, access the monitoring platform site creation page at https://monitoring.solaredge.com/solaredge-web/p/home#createSites. If you have not yet signed up, go to https://monitoring.solaredge.com/solaredge- web/p/createSelfNewInstaller. SolarEdge Home Hub Inverter Single Phase MAN-01-00812-1.5...
- Page 53 Reporting and Monitoring Installation Data 2. Fill out all required information in the screen, which includes information about your installation, as well as details about its logical and physical mapping. SolarEdge Home Hub Inverter Single Phase MAN-01-00812-1.5...
-
Page 54: Chapter 7: Setting Up Communication With The Monitoring Platform
Ethernet is used for a LAN connection. RS485 RS485 is used for the connection of multiple SolarEdge inverters on the same bus in a leader-follower configuration. RS485 can also be used as an interface to external devices, such as meters and third party data loggers. - Page 55 This wireless communication option enables connecting one or more SolarEdge Home Network enabled devices to inverter with an installed SolarEdge Home Network plug-in. The SolarEdge Home Network plug-in is provided with a user manual which should be reviewed prior to connection. Refer to: https://www.solaredge.com/sites/default/files/se-energy-net-plug-in-installation- guide.pdf...
-
Page 56: Communication Connectors
The communication board has the following connectors: Standard RJ45 terminal block for Ethernet connection RS485 connector The SolarEdge Wi-Fi antenna, ZigBee or Cellular Plug-ins can be connected to the communication board for optional wireless connection. SolarEdge Home Hub Inverter Single Phase MAN-01-00812-1.5... -
Page 57: Removing The Inverter Cover
CAUTION! When removing the inverter cover, make sure not to damage the internal components. SolarEdge will not be held responsible for any components damaged as a result of incautious cover removal. SolarEdge Home Hub Inverter Single Phase MAN-01-00812-1.5... -
Page 58: Creating An Ethernet (Lan) Connection
CAT6 standard cables have eight wires (four twisted pairs), as shown in the diagram below. Wire colors may differ from one cable to another. You can use either wiring standard, as long as both sides of the cable have the same pin-out and color-coding. SolarEdge Home Hub Inverter Single Phase MAN-01-00812-1.5... - Page 59 Each inverter sends its monitored data independently to the SolarEdge monitoring platform. The inverter connection does not support RX/TX polarity change. Supporting crossover Ethernet cables depends on the switch capabilities. SolarEdge Home Hub Inverter Single Phase MAN-01-00812-1.5...
-
Page 60: Verifying The Connection
3. In the Summary section, under Server Comm., make sure S_OK is displayed together with the selected communication option. 4. Scroll down to the Communication section and check that the communication options are as required. SolarEdge Home Hub Inverter Single Phase MAN-01-00812-1.5... -
Page 61: Appendix A: Errors And Troubleshooting
1. Open the site dashboard and click the Layout icon. 2. Right-click the inverter and select Info from the menu. The inverter details window is displayed. 3. Click the Errors tab. The list is displayed. SolarEdge Home Hub Inverter Single Phase MAN-01-00812-1.5... -
Page 62: Energy Hub Inverter Troubleshooting
Make sure the battery is correctly configured, as explained in Configuring Communication with Other Devices on page 47. Error 3x6C Battery internal Contact SolarEdge support. error SolarEdge Home Hub Inverter Single Phase MAN-01-00812-1.5... -
Page 63: Troubleshooting Communication
If after follower detection the number of followers displayed for the leader under RS485- > Follower Detect is lower than the actual number of followers, refer to the following application note to identify missing followers and troubleshoot connectivity problems: https://www.solaredge.com/sites/default/files/troubleshooting_undetected_RS485_ devices.pdf SolarEdge Home Hub Inverter Single Phase MAN-01-00812-1.5... -
Page 64: Power Optimiser Troubleshooting
3. Check that the selected communication option is properly configured. 4. Use a method independent of the SolarEdge device to check whether the network and modem are operating properly. For example, connect a laptop to the Ethernet router and connect to the Internet. - Page 65 1V safety Voltage. If a malfunctioning Power Optimisers located, check its connections, polarity, module, and Voltage. 3. Contact SolarEdge Support. Do not continue before finding the problem and replacing the malfunctioning Power Optimiser. If a malfunction cannot be bypassed or resolved, skip the malfunctioning Power Optimiser, thus connecting a shorter PV string.
-
Page 66: Appendix B: Mechanical Specifications
Appendix B: Mechanical Specifications 65 Appendix B: Mechanical Specifications The following figure provides inverter dimensions in mm [in]. SolarEdge Home Hub Inverter Single Phase MAN-01-00812-1.5... -
Page 67: Appendix C: Safedc
Appendix C: SafeDC™ Appendix C: SafeDC™ The SolarEdge inverters are certified for compliance with the following standards as disconnection devices for PV generators, meaning that they can replace a DC disconnect: IEC 60947-3:1999 + Corrigendum: 1999 + A1:2001 + Corrigendum 1:2001 + A2:2005;... -
Page 68: Support Contact Information
System configuration information, including the type and number of modules connected and the number and length of strings. The communication method to the SolarEdge server, if the site is connected. The product's software version as it appears in the status screen. - Page 69 ...
Need help?
Do you have a question about the Energy Bank and is the answer not in the manual?
Questions and answers