Table of Contents
Advertisement
Quick Links
Advertisement
Table of Contents

Related Manuals for Fire-Lite Alarms MS-9200E


Summary of Contents for Fire-Lite Alarms MS-9200E
- Page 1 One Fire-Lite Place Northford, CT 06472 Phone (203) 484-7161 FAX: (203) 484-7118 MS-9200E Addressable Fire Alarm Control Panel (Export Version) Programming, Installation, Maintenance and Operating Instruction Manual Document #50428 2/15/99 Rev. P/N 50428:C1 ECN 99-103 © 1999 Fire•Lite...
- Page 2 Installation Precautions - Adherence to the following will aid in problem-free installation with long-term relia WARNING - Several different sources of power can be connected Like all solid state electronic devices, this system may oper- to the fire alarm control panel. Disconnect all sources of power ate erratically or can be damaged when subjected to lightning before servicing.
-
Page 3: Table Of Contents
Table of Contents CHAPTER 1: Product Description ......................8 1.1: Features ...............................8 1.2: Specifications ..............................9 1.3: Controls and Indicators ..........................10 FIGURE 1-1: MS-9200 Membrane/Display Panel................11 1.4: Circuits ................................11 1.5: Components..............................12 1.5.1: Addressable Devices: 300 Series Detectors ..................13 1.5.2: Addressable Devices: 300 Series Modules ..................13 1.5.3: Addressable Device Accessories.......................14 1.6: Optional Modules ............................15 1.7: Accessories..............................16... - Page 4 Table of Contents FIGURE 2-19: Style B Circuit using M300..................37 FIGURE 2-20: Style D Circuit using M300 ..................38 FIGURE 2-21: Style B Circuit using M302..................39 FIGURE 2-22: Style D Circuit using M302 ..................40 2.12: The Control Module ..........................41 FIGURE 2-23: C304 Control Module - Alarm Polarity ..............41 FIGURE 2-24: C304 Control Module - Utilized as Form-C Relay .............42 FIGURE 2-25: Style Y NAC using C304 ....................43 2.13: The Addressable Manual Pull Station .......................44...
- Page 5 FIGURE E-1: Central Station Service Using MS-5012 ..............94 TABLE E-1: MS-5012 Connections to MS-9200 ................94 FIGURE E-2: Fire•Lite MS-9200E Connection to 411-UD ...............95 TABLE E-2: MS-5012 Connections to MS-9200E ................95 FIGURE E-3: Municipal Box Connected to RTM-8F Relay Transmitter Module ....96 FIGURE E-4: Remote Station Connection Using RTM-8F Module ..........97...
- Page 6 This control panel has been designed to comply with standards set forth by the following regulatory agencies: • Underwriters Laboratories Standard UL 864 • NFPA 72 National Fire Alarm Code • CAN/ULC - S527-M87 Standard for Control Units for Fire Alarm Systems Before proceeding, the installer should be familiar with the following documents.
- Page 7 MS-9200E Main Circuit Board Document #50428 Rev. C1 2/15/99 P/N 50428:C1...
-
Page 8: Chapter 1: Product Description
Product Description CHAPTER 1 The Fire•Lite MS-9200E is a compact, cost effective, addressable FACP (Fire Alarm Control Panel) with an extensive list of powerful features. The combination of Fire•Lite's 300 Series Addressable Devices and the MS-9200 FACP offers the latest in fire protection technology. The power supply and all electronics are contained on a single circuit board housed in an attractive metal cabinet, providing a complete fire control system for most applications. -
Page 9: Specifications
Specifications • Password and key-protected nonvolatile memory • User programmable password • Fully programmable from panel keyboard • Programmable from an off-line PC • Rapid poll algorithm for manual stations (U.S. Patent Pending) • SLC operates up to 10,000 ft. (3,000 m) or 1,000 ft. (300 m) with untwisted, unshielded wire (U.S. Patent #5,210,523) •... -
Page 10: Controls And Indicators
Controls and Indicators Current for all external devices: 3.0 amps expandable to 6.0 amps Current-limit: Fuseless, electronic, power-limited circuitry Maximum signaling current per circuit: 2.50 amps End-of-line resistor: 4.7K ohms, ½ watt (P/N 71252 UL listed) for NACs Alarm, Trouble and Supervisory Relays - TB3 Contact rating: 2.0 amps @ 30 VDC (resistive), 0.5 amps @ 30 VAC (resistive) Alarm and Trouble relays: Form-C Supervisory relay: Form-A... -
Page 11: Circuits
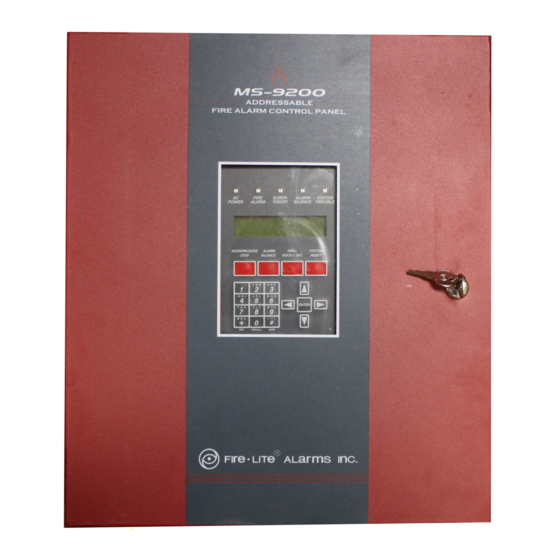
Circuits Membrane Panel Mounted on the main circuit board, the membrane switch panel includes a window for the LCD display and five sys- tem status LEDs. The membrane panel, which is visible with the cabinet door closed, has 21 keys, including a 12 key alpha-numeric pad similar to a telephone keypad. -
Page 12: Components
Components Components Main Circuit Board The main circuit board contains the system's CPU, power supply, other primary components and wiring interface connectors. Optional modules plug-in and are mounted to the main circuit board. The circuit board is delivered premounted in the MS-9200 cabinet. Note that newer versions of the circuit board have jumper JP1 which can be cut to disable the FACP battery charger when using an external battery... -
Page 13: 1: Addressable Devices: 300 Series Detectors
Components 1.5.1 Addressable Devices: 300 Series Detectors Fire•Lite's 300 Series Addressable Detectors consist of the SD300 Photoelectric smoke detector, SD300T Photoelec- tric smoke detector with thermal sensor and the CP300 Ionization smoke detector. The detectors communicate with the main circuit board CPU via an SLC loop. The MS-9200 CPU determines the alarm, maintenance or normal status of each device. -
Page 14: 3: Addressable Device Accessories
Components M302 The M302 is an addressable monitor module that can be used to interface and monitor conventional 2-wire smoke detectors. All 2-wire detectors being monitored must be UL compatible with the module (refer to the Fire•Lite Device Compatibility Docu- ment). -
Page 15: Optional Modules
Optional Modules Optional Modules The MS-9200 main circuit board includes option module connectors which are located on the right side of the board. Available option modules include the following: ACM-8RF Relay Control Module The ACM-8RF Relay Control Module contains eight high current (5 amps) Form-C relays. The module interfaces to host fire alarm control panels which employ an EIA-485 communications bus. -
Page 16: Accessories
Accessories Accessories 1.7.1 Dress Panel A red dress panel (DP-9200 for older backbox or DP-1-R for newer backbox) is available as an option (required for Canadian installation). The dress panel restricts access to the system wiring while allowing access to the membrane switch panel. -
Page 17: 3: Chg-120F Battery Charger
Accessories 1.7.3 CHG-120F Battery Charger The CHG-120F is capable of charging 25 AH to 120 AH lead-acid batteries with the newer version of the MS-9200 main circuit board which allows disabling of the FACP battery charger. The batteries and charger can be housed in the Fire•Lite BB-55F Battery Box which can be mounted up to 20 feet away from the control panel. -
Page 18: 4: Annunciators
Accessories 1.7.4 Annunciators AFM Series LED Zone Type Annunciators The AFM Series Annunciators remotely display system status. The AFM/AEM-16AT annunciators display zone alarm and trouble status. In addition, they provide remote Acknowledge, Silence, Reset and Drill functions. The AFM/AEM-32 annunciators display zone alarm status only and provide no remote system switch functions. For more detailed information, refer to the appropriate AFM Annunciator manual. - Page 19 Accessories LCD-40 Series Remote Fire Annunciators The LCD-40 Series, consisting of the LCD-40 and LCD-40L, are compact, attractive, 40-character backlit LCD fire annunciators that are capable of displaying English-language text. They mimic the display on the MS-9200 main control circuit board and will annunciate device type, point alarm, trouble or supervisory condition, zone assignment plus any custom alpha labels programmed into the control panel.
-
Page 20: 5: Fcps-24Fe Remote Field Charger Power Supply For System Power Expansion
Accessories 1.7.5 FCPS-24FE Remote Field Charger Power Supply for System Power Expansion The FCPS-24FE is a compact, remote power supply with battery charger. This remote power supply consists of a fil- tered 24 VDC output that may be configured to drive up to four Notification Appliance Circuits [four Style Y (Class B) or two Style Z (Class A) and two Style Y (Class B)]. -
Page 21: Chapter 2: Installation
Installation Installation CHAPTER 2 Carefully unpack the system and check for shipping damage. Mount the cabinet in a clean, dry, vibration-free area where extreme temperatures are not encountered. The area should be readily accessible with sufficient room to easily install and maintain the panel. Locate the top of the cabinet approximately 5 feet (1.5 m) above the floor with the hinge mounting on the left. -
Page 22: Backbox Mounting
Backbox Mounting Backbox Mounting Remove the main PC board assembly by unscrewing the four screws in the corners of the board. Two stand- offs support the board in the center. Set the board aside in a safe, clean place. Avoid static discharge which may damage the board. - Page 23 Backbox Mounting The new cabinet illustrated in this Figure, will begin shipping on November 1, 1998. MS-9200 Cabinet Dimensions - new version FIGURE 2-3: To remove To remove entire inner knockout, knockout, strike here. strike here. BB-17F Document #50428 Rev. C1 2/15/99 P/N 50428:C1...
- Page 24 Backbox Mounting The new cabinet illustrated in this figure will begin shipping on November 1, 1998. MS-9200 Cabinet Mounting - new version FIGURE 2-4: TR-4-R Trim Ring Document #50428 Rev.C1 2/15/99 P/N 50428:C1...
-
Page 25: Power
Power Power WARNING: Several different sources of power can be connected to this panel. Disconnect all sources of power before servicing. The panel and associated equipment may be damaged by removing and/or inserting cards, modules or interconnecting cables while this unit is energized. 2.2.1 AC Power and Earth Ground Connections Primary power required for this panel is 240 VAC, 50 Hz, 1.2 amperes. -
Page 26: Standard Relays
Standard Relays Standard Relays The MS-9200 provides a set of Form-C alarm and Form-C trouble contacts rated for 2.0 amps @ 30 VDC (resistive). The panel also provides a Form-A supervisory contact rated for 2.0 amps @ 30 VDC (resistive). Refer to Figure 2-4 for UL power-limited wiring requirements. -
Page 27: Ul Power-Limited Wiring Requirements
UL Power-limited Wiring Requirements UL Power-limited Wiring Requirements Power-limited and nonpower-limited circuit wiring must remain separated in the cabinet. All power-limited circuit wiring must remain at least 0.25" (6.35 mm) away from any nonpower-limited circuit wiring. Furthermore, all power-limited circuit wiring and nonpower-limited circuit wiring must enter and exit the cabinet through different knockouts and/or conduits. -
Page 28: Wiring The Signaling Line Circuit
Wiring the Signaling Line Circuit Wiring the Signaling Line Circuit The MS-9200 communicates with addressable initiating, monitor and control devices through a Signaling Line Cir- cuit (SLC) loop. This SLC loop can be wired to meet the requirements of NFPA Style 4 (see Figure 2-11), Style 6 (Figure 2-12) or Style 7 (Figure 2-13). - Page 29 Wiring the Signaling Line Circuit Style 4 Wiring and T-tapping T-tapping of the SLC loop wiring is allowed for 2-wire (Style 4) configurations. The total resistance of any branch cannot exceed 40 ohms. Measure the resistance as illustrated below. The total wire length of all combined branches cannot exceed 10,000 feet (3,000 m).
- Page 30 Wiring the Signaling Line Circuit Style 4 Two-Wire Communications Loop (supervised and Power-limited) The 2-wire communication loop meets NFPA 72 Style 4 requirements and may be T-tapped. Two-Wire Communications Loop FIGURE 2-11: BG-10LX SD300 M300 C304 Separate T-tap to other loop devices. I300 I300 CAUTION! Do not...
- Page 31 Wiring the Signaling Line Circuit Style 6 Four-Wire Communications Loop (Supervised and Power-limited) The 4-wire communications loop meets NFPA 72 Style 6 requirements. Style 6 cannot be T-tapped. Four-Wire Communications Loop FIGURE 2-12: BG-10LX SD300 M300 C304 I300 I300 CAUTION! Do not loop wiring under any terminals.
- Page 32 Wiring the Signaling Line Circuit Style 7 Four-Wire Communications Loop (Supervised and Power-limited) The 4-wire communications loop meets NFPA 72 Style 7 requirements. By flanking each communications loop device with a pair of I300 Fault Isolator Modules, each device is protected from short circuit faults that may occur on other devices.
- Page 33 Wiring the Signaling Line Circuit Shielded Wire Termination Requirements Shielded wire is recommended for use on the SLC loop, EIA-485 and EIA-232 circuits (refer to “Wire Requirements” on page 99, for additional wiring information). Proper termination of the shield is shown below for various applica- tions such as no conduit, partial conduit and full conduit.
-
Page 34: The Isolator Module
The Isolator Module The Isolator Module The Loop Isolator Module (I300) is used to protect critical elements of the com- munications loop from faults on other branches or sections of the loop. The I300 Loop In (-) I300 continuously monitors the circuit connected to Terminals 1(-), 3(-), 2(+) and 4(+). Loop In (+) Loop Out (-) Upon power-up, an integral relay is latched on. -
Page 35: The M300 Monitor Module
The M300 Monitor Module The M300 Monitor Module The M300 Monitor Module is an addressable module that monitors normally-open contacts and shorting-type alarm initiating devices. The supervised module circuits can be wired as NFPA Style B or Style D Initiating Device Cir- cuits. -
Page 36: The M302 Monitor Module
The M302 Monitor Module 2.11 The M302 Monitor Module The M302 Monitor Module is an addressable module that interfaces and monitors UL compatible conventional 2- wire smoke detectors. Refer to the Fire•Lite Device Compatibility Document. The supervised circuit may be wired as NFPA Style B or Style D. - Page 37 The M302 Monitor Module Style B Initiating Device Circuit (Utilizing M300) The NFPA Style B IDC (Initiating Device Circuit), utilizing an M300 Monitor Module, is supervised and power-limited. Style B Circuit using M300 FIGURE 2-19: UL listed Power Supervision Relay (must be wired as last device on loop as shown).
- Page 38 The M302 Monitor Module Style D Initiating Device Circuit (Utilizing M300) The Style D IDC (Initiating Device Circuit), utilizing an M300 Monitor Module, is supervised and power-limited. Style D Circuit using M300 FIGURE 2-20: UL listed Power Supervision Relay (must be wired as last device on loop as shown).
- Page 39 The M302 Monitor Module Style B Initiating Device Circuit (Utilizing M302 Monitor Module) The NFPA Style B IDC (Initiating Device Circuit) is supervised and power-limited. Style B Circuit using M302 FIGURE 2-21: End-of-Line Resistor 3.9K ohm (included) UL listed Compatible Smoke Detector UL listed Compatible Smoke Detector...
- Page 40 The M302 Monitor Module Style D Initiating Device Circuit (Utilizing M302 Monitor Module) The NFPA Style D IDC (Initiating Device Circuit) is supervised and power-limited. Style D Circuit using M302 FIGURE 2-22: UL listed Compatible Smoke Detector UL listed To Next Device End-of-Line Compatible Resistor...
-
Page 41: The Control Module
The Control Module 2.12 The Control Module The C304 Control Module is an addressable module that supervises and switches power to a Notification Appliance Circuit. The C304 can be wired as NFPA Styles W, X, Y or Z Notification Appliance or Speaker Circuits. Alterna- tively, the C304 module can be employed as a Form-C control relay. - Page 42 The Control Module C304 as a Relay Module To configure a C304 as a Form-C relay, the two break-off tabs, illustrated in Figure 2-24, must be broken off of the module. Use a pair of needle-nose pliers to break off each tab. Caution: Failure to break the tabs when configuring the module for Form-C operation can cause damage to the C304 module.
- Page 43 The Control Module NFPA Style Y Notification Appliance Circuit (Utilizing C304 Module) All circuits are supervised and power-limited. Style Y NAC using C304 FIGURE 2-25: UL listed Power Supervision Relay (must be wired as last device on loop as shown). End-of-Line Resistor 47K ohm, ½...
-
Page 44: The Addressable Manual Pull Station
The Addressable Manual Pull Station 2.13 The Addressable Manual Pull Station The BG-10LX is an addressable manual pull station with a Fire•Lite key-lock reset feature. Installation To install a BG-10LX pull station: Connect the MS-9200 Communications SLC loop to Terminal screws (+) and (-) on the BG-10LX. The BG-10LX is factory preset to address '00'. -
Page 45: Wiring Detectors
Wiring Detectors 2.14 Wiring Detectors To install addressable detectors: Connect the MS-9200 Communications SLC loop to Terminal (-) and (+) on the removable terminal block. If an RA400Z Remote LED Annunciator is being employed, connect the RA400Z positive terminal to the RA(+) terminal on the removable terminal block and the negative terminal to the RA(-) terminal on the remov- able block. -
Page 46: Optional Modules
Optional Modules 2.15 Optional Modules The MS-9200 supports option modules using connectors J6, J11 and J16 on the main circuit board. There are four optional modules available for the MS-9200: • RTM-8F Relay/Transmitter Module • PIM-24 Printer/PC Interface Module • UDACT-F Universal Digital Alarm Communicator/Transmitter •... - Page 47 Optional Modules WARNING: Disconnect all sources of pow er (AC and DC) before installing or removing any modules or wiring UDACT-F Mounting Options ABS-8RF FIGURE 2-30: The UDACT-F may be mounted directly to the MS-9200 main circuit board or remotely in an ABS-8RF or UBS-1F enclosure up to 6,000 feet (1,800 m) away from the control panel.
- Page 48 Optional Modules External UDACT-F Mounting in ABS-8RF FIGURE 2-32: Supervised and Power-limited EIA-485 and power connections. +24 VDC Nonresettable Solid Earth Power (TB4) Ground Connection To Phone Lines (supervised) Future Ferrite Shield Cores P/N FBD-1 RTM-8F Install 120 ohm EOL resistor (P/N 71244) on TB1 Terminals 3 &...
-
Page 49: 2: Acm-8Rf Relay Control Module
Optional Modules 2.15.2 ACM-8RF Relay Control Module ABS-8RF Enclosure FIGURE 2-33: WARNING: Disconnect all sources of power (AC and DC) before install- ing or removing any modules or wiring The ACM-8RF module provides eight Form-C relays with contacts rated for 5 amps. -
Page 50: 3: Rtm-8F Option Module Installation
Optional Modules 2.15.3 RTM-8F Option Module Installation WARNING: Disconnect all sources of pow er (AC and DC) before installing or removing any modules or wiring Insert the three supplied nylon standoffs into the holes located on the right-side edge of the MS-9200 main circuit board. - Page 51 Optional Modules RTM-8F Relay Transmitter Module Components RTM-8F Relay Transmitter Module FIGURE 2-36: Local Energy Municipal Box Trouble LED (yellow) JP1 - Cut for Polarity Reversal Remote Station operation Zone 1 JP2 - Jumper Settings: Zone 2 Alarm/Trouble Polarity Reversal Remote Station (Power-limited) Zone 3 Note: If relays are used as...
-
Page 52: Printer/Pc Interface Module
Printer/PC Interface Module 2.16 Printer/PC Interface Module A remote serial printer may be permanently connected to provide a hard-copy printout of program entries, history file and walktest data. The Printer/PC Interface Module P/N PIM-24 provides an EIA-232 conversion to adapt to most 40 and 80 column printers and most IBM PC/XT/AT or compatible computers including laptops and personal comput- ers. -
Page 53: Chapter 3: Programming/Read Status
Programming/Read Status Programming/Read Status CHAPTER 3 NOTE: This chapter provides a detailed description of the FACP programming. For your convenience, a Program- ming Flowchart has been included in “Screen Options Flowchart” on page 100. It may be helpful to follow along with the flowchart as this chapter is reviewed. -
Page 54: Initial Power-Up
Initial Power-up 1 = Programming: There are two programming levels. • Program Level 1 is for system configuration in which data relating to device types, zoning, messages, etc. is entered into the system memory • Program Level 2 is where a qualified operator can access features such as Disable, Clear History, Walktest, Time Change and Program Check. -
Page 55: Programming
Programming Programming Press the ENTER key. The screen below will appear: To enter the programming mode, press '1'. The display will read as follows: Entering the Level 1 password (default 00000) will cause the following screen to appear (refer to “Program Change - Level One”... -
Page 56: Program Change - Level One
Program Change - Level One Program Change - Level One When the correct password is entered, the MS-9200 will enter Level 1 program mode. In this mode, the trouble relay is activated and the System Trouble LED flashes and cannot be changed to steady and the piezo sounder is off. The following display will appear: 3.3.1 Clear Pressing '0' will clear all general system programming options described in “System Edit”... - Page 57 Program Change - Level One New Detector For each new detector, the Autoprogram feature selects default program values and presents the information to the user. A typical example follows: In the preceding example: • 'P' in 'P01' represents the actual type code (photoelectric) of the detector found at address 01. ('I' would repre- sent an Ionization detector) •...
- Page 58 Program Change - Level One arrow key is pressed with the blinking cursor on the last letter of the ADJ label, the cursor will move to the first letter of the NOUN field. Altering the NOUN field is done in a similar way. Use the up or down arrow keys to step through the NOUN library which is listed below: HVAC_ROOM _________ (default of blanks)
- Page 59 Program Change - Level One If ENTER is pressed, the device is deleted from memory and autoprogram displays the next new device. If the left arrow is pressed, the program is unchanged and the next new device is displayed. After all new detectors are presented for editing, the autoprogram feature displays the modules on the SLC loop start- ing with the device found at the lowest address.
-
Page 60: 3: Point Edit
Program Change - Level One Control modules default to Zone 00 (general alarm). All type code options are silenceable except Relay and Strobes. The selection of control module type codes may change their function. Select the type code from the library list below. -
Page 61: 4: System Edit
Program Change - Level One 3.3.4 System Edit The System Edit function is selected by pressing '3'. The system edit screen appears as shown below for software releases prior to P/N 73750. This software does not support the LCD-40 Annunciator. Use the up and down arrow keys to scroll through the choices for each option and the left and right arrow keys to move from option to option. -
Page 62: 5: Password Change
Program Change - Level One There are nine system function options for software P/N 73750 or greater. The factory default selections and user option selections are shown below: FUNCTION DEFAULT SELECTION V = Alarm Verification (N)one (Y) 120 seconds I = Silence Inhibit (N)one (Y) 60 seconds A = Autosilence... -
Page 63: 6: Load
Program Change - Level 2 the program change screen. If BACKSPACE is entered, the password remains unchanged and the program returns to the program change screen. 3.3.6 Load While displaying the Program Menu, program selection '5' sets up the MS-9200 for transfer of its application data- base from/to a DOS-based or Window-based computer. -
Page 64: 1: Disable
Program Change - Level 2 Pressing '1' will cause the following screen to appear: Enter the Level 2 password (default = 11111) then press the ENTER key to access Programming Change Level 2. The screen shown below will appear: From this screen, the available function choices include point Disable, Clear History, Walktest, Set Time and Check programming. -
Page 65: 2: Clear History
Program Change - Level 2 3.4.2 Clear History Pressing '2' displays the following screen: Press the ENTER key to clear the 500-event History file. Press the left arrow key (backspace) to exit without clearing the History file. Caution: Pressing Enter will clear all History events associated with this panel. Care should be taken to ensure this is the appropriate action. -
Page 66: 4: Set Time And Date
Program Change - Level 2 Note that if the system under test includes one or more enabled M302 monitor modules, the following may apply: If the M302 monitor module is used for a supervised, 2-wire smoke zone, alarming any monitor module in the system will result in the activation of programmed control outputs for an additional eight seconds or less. -
Page 67: Chapter 4: Operating Instructions
Operating Instructions Operating Instructions CHAPTER 4 Control Switches (Keys) 4.1.1 Acknowledge/Step The Acknowledge/Step key silences the piezo sounder and changes all flashing LEDs to steady. Only one press is necessary regardless of the number of new alarms, troubles or supervisory signals. When the piezo is silenced, an 'Acknowledge' message is sent to the printer and the history file. -
Page 68: Led Indicators
LED Indicators printer and history file. It also turns on all LEDs, piezo sounder and LCD display segments as long as the System Reset Key is held (lamp test). Any alarm or trouble that exists after System Reset will resound the system. LED Indicators The six LED indicators on the front panel operate as follows: AC Power... -
Page 69: Trouble Operation
Trouble Operation Trouble Operation With no alarms, the detection of a trouble in the system will cause the piezo to sound, the System Trouble LED to flash and the trouble relay to activate. A message will appear on the LCD display indicating the trouble condition. The same message is sent to the printer and history file along with time and date. - Page 70 Trouble Operation Monitor and Control Modules The following is a typical message that could appear on the LCD display for monitor modules and control modules in trouble. The information displayed in the first line in the previous example provides the following information: •...
-
Page 71: Alarm Operation
Alarm Operation item for one minute or until the Acknowledge/Step key is pressed again. As the Acknowledge/Step key is pressed, the MS-9200 displays events in the following priority order: Alarms in address order Supervisories in address order Troubles in address order Alarm Operation Alarm operation is similar to trouble operation, but with the following differences: •... -
Page 72: Nac (Notification Appliance Circuit) Operation
NAC (Notification Appliance Circuit) Operation Note that, like alarms, supervisory signals latch (except when programmed for supervisory autoresettable) and can be assigned to a software zone. Supervisory alarms do not cause resound as do other alarm conditions. Open circuits in supervisory wiring are processed by the MS-9200 the same way as other trouble conditions. -
Page 73: Time Functions: Real-Time Clock
Time Functions: Real-Time Clock 4.10 Time Functions: Real-Time Clock The MS-9200 includes a crystal-based clock that provides time of day, date and day of week. Time is displayed as 12 hour time with month/day/year and is stored in RAM. If both AC and battery power are lost, the time must be reset. 4.11 Coded Operation - NAC 1 and NAC 2 Shown below are the pulse rate outputs via NAC 1 or NAC 2 when coded operation is selected. -
Page 74: 4: Alarm Verification (None Or Two Minutes)
Style 6 Wiring 4.13.4 Alarm Verification (None or Two Minutes) If alarm verification is selected, an addressable smoke detector's alarm is ignored for a retard time of 13 seconds and the detector's alarm condition is automatically reset. There will be no alarm indication at the FACP during the Retard period. - Page 75 Read Status Read Status Entry The operator presses the Enter key and the LCD display shows: The operator presses '2' and the display shows: From the display shown above, an operator may select one of the choices as listed below: •...
- Page 76 Read Status In the preceding display: NORMAL is the present status (could be ALARM, TRBL_#, DISABL, etc.) SMOKE (DET) is the device type P indicates that this is a photoelectric detector (could be I if ionization or PULL BOX, HORN CKT, etc.) and 01 is the device address WEST HALLWAY is the custom label programmed for this device Z56 is the assigned software zone If the point is not installed, a Read Status command to that point will result in a NOT INSTALLED message on the...
-
Page 77: Appendix A: Power Supply Calculations
AC Branch Circuit Requirements @ 240VAC TABLE A-1: Number of Current Draw Total Current Unit Type Units (amps) per Device MS-9200E R45-24E Charger* CHG-120F Charger Total AC Branch Current Required amps *Discontinued and replaced with CHG-120F effective November 1, 1998. Document #50428 Rev. C1 2/15/99... -
Page 78: A.2: The Main Power Supply
Power Supply Calculations A.2 The Main Power Supply The MS-9200 provides filtered power for operating the fire alarm control panel, operating external devices and oper- ating the standby battery. The power for operating external devices is limited. Use Table A-2 (standby or nonalarm) and Table A-3 (alarm) to determine if external loading is within the capabilities of the MS-9200 power supply. - Page 79 Power Supply Calculations Filtered Load in Alarm - External Devices Connected to TB2 & TB4 Only TABLE A-3: Alarm Current Total Current Device Type # of Devices (amps) (amps) Main Circuit Board 0.168 0.168 RTM-8F ] one max. 0.146 ACM-8RF 0.158 AFM-16ATX ] one max.
- Page 80 Power Supply Calculations Battery Calculations TABLE A-4: Standby Load Required Standby Time in Hours Current (amps) (24 or 60 Hours) __________ Alarm Load Required Alarm Time in Hours Current (amps) (i.e. 5 minutes = 0.084) __________ Add Standby and Alarm Load for Required Ampere Hour Battery __________ Multiply by the Derating Factor or 1.2 X 1.2...
-
Page 81: Appendix B: Software Zones
Software Zones Software Zones Appendix B Setup and configuration of an addressable system is quite different than a conventional system. In a conventional sys- tem, assignment of input devices (smoke detectors, pull stations, heat detectors, etc.) to zones is straight forward. Wiring is direct from clearly marked panel terminals to any device assigned to a particular zone. - Page 82 Software Zones Correlation of Inputs and Outputs to Zones Zoning Example FIGURE B-1: Input Devices Zones Output Devices SD300 SD300 ZONE C304 M300 C304 M301 C304 CP300 ZONE C304 CP300 C304 SD300 SD300 ZONE C304 CP300 C304 Document #50428 Rev.C1 2/15/99 P/N 50428:C1...
- Page 83 Software Zones Detector Programming Sheet Example TABLE B-1: DETECTOR ZONE ASSIGNMENT Device Zone Device Zone ADJ (5 charact. max) ADJ (5 charact. max) Address Type Number Address Type Number NOUN (9 charact. max) NOUN (9 charact. max) SD300 FIRST HALL SD300 ELEV.
- Page 84 Software Zones Module Programming Sheet Example TABLE B-2: MONITOR/CONTROL MODULE ZONE ASSIGNMENT Device Zone Device Zone ADJ (5 charact. max) ADJ (5 charact. max) Address Type Number Address Type Number NOUN (9 charact. max) NOUN (9 charact. max) M300 WEST HALL M301 EAST STAIRWELL C304...
- Page 85 Software Zones Blank Zoning Sheet FIGURE B-2: Input Devices Zones Output Devices Document #50428 Rev. C1 2/15/99 P/N 50428:C1...
- Page 86 Software Zones Blank Detector Programming Sheet TABLE B-3: DETECTOR ZONE ASSIGNMENT Device Zone Device Zone ADJ (5 charact. max) ADJ (5 charact. max) Address Type Number Address Type Number NOUN (9 charact. max) NOUN (9 charact. max) Document #50428 Rev.C1 2/15/99 P/N 50428:C1...
- Page 87 Software Zones Blank Module Programming Sheet TABLE B-4: MONITOR/CONTROL MODULE ZONE ASSIGNMENT Device Zone Device Zone ADJ (5 charact. max) ADJ (5 charact. max) Address Type Number Address Type Number NOUN (9 charact. max) NOUN (9 charact. max) Document #50428 Rev.
-
Page 88: Appendix C: Lcd-40 Series Annunciator Wiring
LCD-40 Series Annunciator Wiring LCD-40 Series Annunciator Wiring Appendix C The following drawing illustrates the wiring of two LCD-40 Series Remote Annunciators to an MS-9200 FACP. A maximum of 32 LCD-40 Series annunciators may be connected to a single control panel. The EIA-485 wiring must pass through a ferrite core (P/N FBD-1) in each LCD-40 Series. -
Page 89: Appendix D: Afm And Ldm Series Wiring
AFM and LDM Series Wiring AFM and LDM Series Wiring Appendix D The following illustrations show the various configurations which may be wired utilizing AFM Series Annunciators. LDM Series Annunciators may be used in a similar manner. All illustrations show power supplied to annunciators by the MS-9200. - Page 90 AFM and LDM Series Wiring The following configuration provides 56 zones of alarm indication, a System Trouble LED, an On Line/Power LED, local piezo sounder and a local Silence/Acknowledge switch. AFM-32AX AFM-32AX Ribbon Cable MS-9200 The following configuration provides 16 alarm and trouble LEDs, System Trouble LED, On Line/Power LED, local Silence/Acknowledge, Drill and Reset remote switches and piezo sounder.
- Page 91 AFM and LDM Series Wiring The following configuration provides 16 red alarm LEDs, System Trouble LED, On Line/Power LED, local Silence/ Acknowledge switch and piezo sounder. All AFM-16AF annunciators will show the same information. EIA-485 Power MS-9200 Document #50428 Rev. C1 2/15/99 P/N 50428:C1...
- Page 92 AFM and LDM Series Wiring The following configuration allows the annunciation of 56 zones on the first two annunciators. 56 zones are annunci- ated on the second four annunciators. The same 56 zones are annunciated on the last four annunciators (which dupli- cate the previous set).
-
Page 93: Appendix E: Nfpa Standard-Specific Requirements
UDACT-F may be installed as illustrated in Figure 2-31, “UDACT-F Mounting to MS-9200,” on page 47 and Figure 2-32, “External UDACT-F Mounting in ABS-8RF,” on page 48. 411-UD may be installed as illustrated in Figure E-2, “Fire•Lite MS-9200E Connection to 411-UD,” on page 95. - Page 94 NFPA Standard-Specific Requirements NFPA Signaling Systems for Central Station Service (Protected Premises Unit) The following figure illustrates an example of Central Station/Remote Station Reporting using an MS-5012. The relay contacts from the MS-9200 may be used to trip any dialer UL listed for Central Station/Remote Station Ser- vices.
- Page 95 The following figure illustrates an example of Central Station/Remote Station Reporting using a 411UD. The relay con- tacts from the MS-9200 may be used to trip any dialer UL listed for Central Station/Remote Station Reporting Services. Fire•Lite MS-9200E Connection to 411-UD FIGURE E-2:...
- Page 96 NFPA Standard-Specific Requirements NFPA 72 Auxiliary Fire Alarm System All connections are power-limited and supervised. This applications is not suitable for separate transmission of sprin- kler supervisory or trouble conditions. Notes: 3 ohms maximum loop resistance allowed for wiring from control panel to Municipal Box. Cut JP4 on the MS-9200 main circuit board to supervise placement of RTM-8F module and circuit.
- Page 97 NFPA Standard-Specific Requirements NFPA 72 Remote Station Protective Signaling System Notes: Cut Jumper JP4 on the MS-9200 main circuit board to supervise placement of the RTM-8F module. Refer to Figure 2-8, “Typical UL Power-limited Wiring Requirements,” on page 27, and “UL Power-limited Wiring Requirements”...
- Page 98 NFPA Standard-Specific Requirements NFPA 72 Proprietary Protective Signaling Systems Proprietary Protective Signaling System FIGURE E-5: MS-9200 Addressable Fire Control Panel MS-9200 Main Board Form-C Alarm contact programmed to activate on General Alarm. Form-C Trouble contact which will automatically activate on any Trouble condition.
-
Page 99: Appendix F: Wire Requirements
Wire Requirements Wire Requirements Appendix F T-tapping of the SLC loop wiring is allowed for 2-wire (Style 4) configurations. The total resistance of any branch cannot exceed 40 ohms. The total wire length of all branches cannot exceed 10,000 feet (3,000 m). Connecting external system accessories to the MS-9200 main circuits must be carefully considered to ensure proper operation. -
Page 100: Appendix G: Screen Options Flowchart
Screen Options Flowchart Screen Options Flowchart Appendix G (Software P/N 73750 or greater) Trouble in System No Device Installed SYSTEM TRBL_#<type><addr> NORMAL <adj><noun> Z## (SYSTEM (UNPROGRAMMED SYSTEM) TROUBLE) Trouble in System Press Program Corrupted 'ENTER' 1=Programming 2=Read Status 3=AC/BAT Write Protect Press '1' Press '2'... - Page 101 Screen Options Flowchart Press '2' Display Point = */#, AA History = 1 Print = 2 Press ** Press *#AA Press **AA Press *AA Press #AA Press '1' Press '2' Press 'ENTER' Press 'ENTER' Press 'ENTER' Press 'ENTER' Press 'ENTER' EXAMPLE: EXAMPLE: EVENT HISTORY START...
- Page 102 Numerics Performance 28 Specification 9 300 Series Control-By-Event 72 see Addressable Devices Controls 10, 67 411-UD 93 Acknowledge/Step 67 Alarm Silence 67 Drill 67 ABS-8RF 49 Membrane Panel 11 Backbox 48 System Reset 67 AC Power 9 CP300 Detector 13 ACM-8RF 15 see also Addressable Devices see also Relay Control Module...
- Page 103 Membrane Panel Print Program 76 see Controls Recall/Increment 58 Relay Control Module 15, 49 Relay Transmitter Module Components 51 NAC 11, 26 Specifications 51 Coded Operation 73 Relay/Transmitter Module 15, 46 Presignal 73 Relays 10, 11, 26, 49 see also Notification Appliance Circuits C304 Module 42 NFPA Standards 93 RTM-8F 15, 27, 48, 93, 96, 97...
- Page 104 Limited Warranty ® Fire•Lite warrants its products to be free from defects in materials and workmanship for eighteen (18) months from the date of manufacture, under normal use and service. Products are date stamped at time of manufacture. The sole and exclusive obligation ®...
Need help?
Do you have a question about the MS-9200E and is the answer not in the manual?
Questions and answers