Table of Contents
Advertisement
Quick Links
12 Clintonville Road Northford, CT 06472
Phone (203) 484-7161
Technical Manuals Online! - http://www.tech-man.com
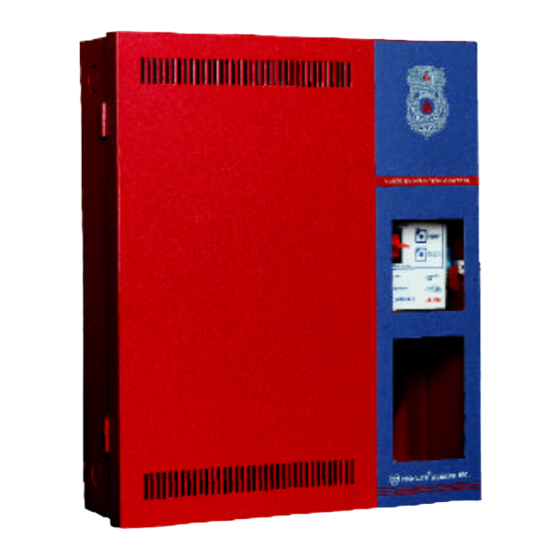
FIRE•COMMAND•25/50
Voice Evacuation Control Panel
Installation and Operating
Instruction Manual
FAX: (203) 484-7118
firealarmresources.com
Document
#50580
C
8/12/97
Rev.
P/N 50580:C
ECN 97-303
© 1997 Fire•Lite
Advertisement
Table of Contents

Related Manuals for Fire-Lite Alarms FIRE COMMAND 25


Summary of Contents for Fire-Lite Alarms FIRE COMMAND 25
- Page 1 FIRE•COMMAND•25/50 Voice Evacuation Control Panel Installation and Operating Instruction Manual Document #50580 8/12/97 Rev. P/N 50580:C ECN 97-303 12 Clintonville Road Northford, CT 06472 © 1997 Fire•Lite Phone (203) 484-7161 FAX: (203) 484-7118 Technical Manuals Online! - http://www.tech-man.com firealarmresources.com...
- Page 2 Technical Manuals Online! - http://www.tech-man.com firealarmresources.com...
-
Page 3: Table Of Contents
Table of Contents CHAPTER 1: Product Description ......................6 1.1: Product Features............................6 FIGURE 1-1: Command Board with Supplied Power Supply Module ..........8 FIGURE 1-2: Command Board With Amplifiers ................9 1.2: Specifications .............................. 10 1.3: Controls and Indicators ..........................11 FIGURE 1-3: Controls and Indicators .................... - Page 4 Table of Contents FIGURE 3-17: Installation of Power Supply Transformer ..............30 3.8.5: Local Playback Speaker Module (FC-LPS) ..................31 FIGURE 3-18: Installation of Speaker Module ...................31 CHAPTER 4: Operating Instructions ......................32 4.1: Switches...............................32 4.1.1: Manual Evacuate/Message Override....................32 FIGURE 4-1: Front Panel ........................32 4.1.2: REC - Record Push Button........................32 4.1.3: Playback Button ..........................33 4.2: LED Indicators ............................33...
- Page 5 This control panel has been designed to comply with standards set forth by the following regulatory agencies: • Underwriters Laboratories Standard UL 864 • NFPA 72 National Fire Alarm Code • CAN/ULC - S527-M87 Standard for Control Units for Fire Alarm Systems Before proceeding, the installer should be familiar with the following documents.
-
Page 6: Chapter 1: Product Description
Product Description Product Description CHAPTER 1 The FIRE•COMMAND•25/50 Voice Evacuation Control Panel (VECP) is a single-channel, 25 watt, 25 V , emer- gency voice evacuation panel. The panel includes dual field programmable message capability (up to 60 seconds) and an integral microphone. The base configuration requires that 24 VDC regulated power be provided to the FIRE•COMMAND•25/50 for operational power. - Page 7 Product Features • Integral digital message repeater with 'primary' and 'secondary' dual-message capability • Standard, prerecorded message: “May I have your attention please. May I have your attention please. The signal you have just heard indicates a report of a fire in this building. Please proceed to the nearest exit and leave the building. Do not reenter the building unless directed to do so by the proper authorities.”...
- Page 8 Product Features Command Board with Supplied Power Supply Module FIGURE 1-1: Amp #1 Input Amp #2 Input Output Trigger Trigger by con- Trigger by con- (activation by tact closure or tact closure or Manual Evacuate NAC reverse NAC reverse or CMD Inputs - Specific Form-C polarity - alarm...
- Page 9 Product Features Command Board With Amplifiers FIGURE 1-2: CAUTION: Match proper polarity connections to field wiring and speakers. Polarity shown is in the standby and alarm conditions. Technical Manuals Online! - http://www.tech-man.com Document #50580 Rev. C 8/12/97 P/N 50580:C firealarmresources.com...
-
Page 10: Specifications
Specifications Specifications Main Input Power - TB3 Terminals 3(-) and 4(+) Filtered 19.1 - 26.4 VDC, 4.2 amps maximum, supplied by an FACP or remote power supply UL listed for Fire Protective Signaling Service, such as the FCPS-24F(E). See Appendices for compatibility chart and wiring dia- grams. -
Page 11: Controls And Indicators
Controls and Indicators Speaker Circuit - TB1 Terminals 3(+) & 4(-) Style Y, 5(+) & 6(-) Style Z, 1 & 2 Shield (Standby and Alarm Polarity Shown) Power-limited circuitry Operation: Circuit can be wired Style Y or Style Z Normal Operating Voltage: 25 V (70.7 V operation possible by plugging optional FC-XRM70 conversion module into P1 of audio amplifier). -
Page 12: Circuits
Circuits LEDs (visible with panel door closed): • Power On - green LED • System Trouble - yellow LED • Alarm - red LED • Microphone Trouble - yellow LED • Tone Generator Trouble - yellow LED • Message Generator Trouble - yellow LED •... -
Page 13: Components
Components Components Main Circuit Board FIGURE 1-4: Main Circuit Board Audio Amplifier The Master Unit main circuit board contains the system's CPU, tone generators, auxiliary 35 mA output, DIP switches for field programmable fea- tures, digital message recorder/generator, inte- gral microphone input and preamplifier, other primary components and wiring interface com- ponents. - Page 14 Optional Modules FC-XRM70 Transformer Module 70.7 V This optional module plugs into connector P1 of the Audio Amplifier Module and provides conversion from 25 V to 70.7 V at full rated 25 watts output power. FC-PSM(E) Power Supply/Battery Charger Module This optional module plugs into connector P7 located in the lower left corner of the main circuit board thus allow- ing the VECP to be powered from its own internal power supply.
-
Page 15: Chapter 2: Field Programming
Field Programming Field Programming CHAPTER 2 The FIRE•COMMAND•25/50 VECP can be field programmed using option DIP switches S1 and S5 located in the upper right side of the main circuit board. It is recommended that tone selection, message repeat cycles and back- ground music options be reviewed and approved by the local AHJ. -
Page 16: S5 Dip Switch Settings
S5 DIP Switch Settings • Switch 5 - used to determine if the tone selected by S1 switches 2 and 3 will be generated after the message is transmitted: OFF = No tone after message ON = Tone after message (factory default setting) •... - Page 17 S5 DIP Switch Settings Switch 2 OFF (factory default setting) as shown in following Table: One 60 Second Message - Amp Selected TABLE 2-3: CMD1 CMD2 AMP1 AMP2 FIRE MESSAGE FIRE MESSAGE FIRE MESSAGE FIRE MESSAGE Command Input #1 (CMD1) activates only speaker circuit #1 and transmits up to a 60 second 'fire' message Command Input #2 (CMD2) activates only speaker circuit #2 and transmits up to a 60 second 'fire' message...
-
Page 18: S2 - Record Bypass Switch
S2 - Record Bypass Switch • Switch 8 - used to enable recording of digital voice message. OFF = Recording not permitted, Trouble Silence/Rec key used for trouble silence (factory default) setting) ON = Recording permitted, Trouble Silence/Rec key used to record voice message. Switch must be restored to default setting upon completion of recording. -
Page 19: Chapter 3: Installation
Installation Installation CHAPTER 3 Mounting Options The cabinet may be surface or semi-flush mounted. Semi-flush mounting VECP Cabinet FIGURE 3-1: requires use of the FC-TR trim ring illustrated in Figure 3-2. The door is removable during the installation period by opening and lifting it off the hinges. - Page 20 Backbox Installation Draw wires through the respective knockout locations. Cabinet Dimensions & Knockout Locations FIGURE 3-3: Left Side Right Side Bottom Technical Manuals Online! - http://www.tech-man.com Document #50580 Rev.C 8/12/97 P/N 50580:C firealarmresources.com...
- Page 21 Backbox Installation VECP Backbox and Battery Box FIGURE 3-4: P/N:FC-TR BB-17F is required when using the internal FC-PSM(E) Power Supply/Battery Charger and greater than 7 AH batteries. Mount the FIRE•COMMAND•25/50 (VECP) cabinet to the wall Remove knockouts on bottom of VECP cabinet and top of BB-17F. Using conduit, hang the BB-17F from the VECP cabinet making sure there is at least ½"...
-
Page 22: Operating Power
Operating Power Operating Power CAUTION: Several different sources of power can be connected to this panel. Disconnect all sources of power before servicing. The panel and associated equipment may be damaged by removing and/or inserting cards, modules or interconnecting cables while this unit is energized. Main Input Power - Connections Made Only if Optional FC-PSM(E) Power Supply is Not Installed The VECP requires filtered 24 VDC nominal power which can be supplied by the host FACP or by a remote power supply UL listed for Fire Protective Signaling Service, such as the FCPS-24F(E). -
Page 23: Auxiliary Dc Power Output Connections
Auxiliary DC Power Output Connections Auxiliary DC Power Output Connections The Auxiliary DC power output is power-limited. Auxiliary Power Connection FIGURE 3-6: Special Application Power (35 mA @ 24 VDC) is nonresettable power suitable for powering control modules and End-of Line Power supervision relays. -
Page 24: Output Circuits
Output Circuits Output Circuits Master Command Output Bus The Master Command Output is a 24 VDC reverse polarity output (TB6) which can be used to trigger additional FIRE•COMMAND•25/50 units. The Master Command Output will activate on any alarm condition as triggered by the Command Inputs CMD1 or CMD2, or when the manual evacuate switch is ON. - Page 25 Output Circuits energized. Should system power via FC-PSM(E) or main input power shut off, this relay will deenergize, trans- ferring its contacts. Trouble Relay FIGURE 3-10: AC Power Loss Relay - TB2 The optional FC-PSM(E) internal Power Supply/Battery Charger Module provides a Form-C AC Power Loss relay rated for 2.0 amps @ 30 VDC (resistive) and 0.6 amps @ 125 VAC (resistive).
-
Page 26: Ul Power-Limited Wiring Requirements
UL Power-limited Wiring Requirements UL Power-limited Wiring Requirements Power-limited and nonpower-limited circuit wiring must remain separated in the cabinet. All power-limited circuit wiring must remain at least 0.25" away from any nonpower-limited circuit wiring. Furthermore, all power-limited and nonpower-limited circuit wiring must enter and exit the cabinet through different knockouts and/or conduits. A typical wiring diagram for the FIRE•COMMAND•25/50 is shown below. -
Page 27: Installation Of Option Modules
Installation of Option Modules Installation of Option Modules 3.8.1 Audio Amplifier Module (FC-AAM25) The optional audio amplifier module is identical to the module provided with the factory standard panel configura- tion. It can be used to provide a second 25 watt speaker circuit, increasing the total VECP power to 50 watts, or it can be used as a backup amplifier. -
Page 28: Rms Transformer Module (Fc-Xrm70)
Installation of Option Modules 3.8.2 70.7 V Transformer Module (FC-XRM70) The 70.7 V Transformer Module can be used to convert the 25 V amplifiers for installations where 70.7 V speakers already exist or are to be installed. Transformer connector J1 connects to amplifier connector P1. Caution: Before installing any modules, make certain all power (AC and DC) has been removed. -
Page 29: 3: Power Supply/Battery Charger Module Fc-Psm(E)
Installation of Option Modules 3.8.3 Power Supply/Battery Charger Module FC-PSM(E) The optional Power Supply/Battery Charger Module can be used to provide stand-alone power to the VECP. The FC-PSM module is powered by 120 VAC and the FC-PSME module is powered by 220/240 VAC. In addition to sup- plying operating power, the module is capable of charging 7 AH to 17 AH batteries. -
Page 30: 4: Transformer Installation
Installation of Option Modules 3.8.4 Transformer Installation Caution: Before installing any modules or cables, make certain all power (AC and DC) has been removed. Locate two threaded mounting studs in the bottom left corner of the backbox (refer to backbox illustration below). -
Page 31: 5: Local Playback Speaker Module (Fc-Lps)
Installation of Option Modules 3.8.5 Local Playback Speaker Module (FC-LPS) The Local Playback Speaker Module can be used to monitor the recorded digital message without transmitting the message over the system speakers. The speaker module plugs into P2 of the main circuit board. This optional mod- ule is necessary to take advantage of the Playback feature. -
Page 32: Chapter 4: Operating Instructions
Operating Instructions Operating Instructions CHAPTER 4 Switches 4.1.1 Manual Evacuate/Message Override Front Panel FIGURE 4-1: Manual Evacuate/Message Override is a two position switch used for manually generating programmed evacuation tones/messages or for paging. It is visible through the window of the closed backbox door. The door must be unlocked and opened for access to the switch. -
Page 33: 3: Playback Button
LED Indicators end of the voice recording, the unit automatically ends the message at the time out period selected. For dual language recordings, it is recommended that the 60 second option be selected. The two 30 second recordings should only be used for fire/nonfire or fire evacuation/fire clear messages. For Dual Message Only - Follow all steps listed above except note that as soon as the ‘Trouble Silence’... -
Page 34: 2: Leds Visible With Door Open And Optional Dress Panel Removed (Figure 1-1 & Figure 1-2)
Operation Tone Generator Trouble This yellow LED turns on steady when one of the supervised tone generators fail or fall below acceptable levels. Message Generator Trouble This yellow LED turns on steady when the supervised digital message generator fails or falls below acceptable levels. -
Page 35: 2: Fire Alarm Restoral
Operation 4.3.2 Fire Alarm Restoral Turn off the Alarm LED located on the front panel Deactivate the Master Command Bus Turn off the Notification Appliance Circuits Turn off the Audio Amplifiers Turn off the digital voice message or tone at its present point in transmission 4.3.3 Manual Evacuation Switch Activation The Voice Evacuation Control Panel will, upon activation of the Manual Evacuation switch: Turn on the panel Alarm LED steady... -
Page 36: 7: Trouble Condition Restoral
Operation • The Power On LED on the front panel remains on if battery power is supplied • Deactivate the AC Loss Relay on the FC-PSM(E) (immediate or 6 hour delay depending on S1 position) Battery Trouble (low or no battery) •... - Page 37 Operation Reactivate the trouble relay Turn off local piezo Turn off the system Trouble LED Close CMD1 input In addition to the above trouble condition restorals, the following specific restorals will occur: AC restoral • Turn on the AC ON LED on the FC-PSM(E) module •...
-
Page 38: Chapter 5: Application Examples
Application Examples Application Examples CHAPTER 5 The FIRE•COMMAND•25/50 is a Voice Evacuation Control Panel which can be used, with a variety of Fire Alarm Control Panels, to provide emergency audio messages. This chapter contains a few application examples and is not meant to provide a comprehensive list of all possible VECP applications. -
Page 39: One Speaker Circuit With Backup
One Speaker Circuit With Backup One Speaker Circuit With Backup Another application consists of one FIRE•COMMAND•25/50 with one amplifier and a single speaker circuit. A sec- ond amplifier can be installed as a backup if desired. This configuration is suitable for small facilities requiring no more than 25 watts of output power. -
Page 40: Two Speaker Circuits - One 60 Second Message On Both Amps
Two Speaker Circuits - One 60 Second Message On Both Amps Two Speaker Circuits - One 60 Second Message On Both Amps This application consists of one FIRE•COMMAND•25/50 with two speaker circuits which requires installation of the optional second amplifier. This configuration is suitable for small facilities requiring no more than 50 watts of output power. -
Page 41: Two Speaker Circuits - Two 30 Sec. Messages (Fire And Nonfire)
Two Speaker Circuits - Two 30 Sec. Messages (Fire and Nonfire) Two Speaker Circuits - Two 30 Sec. Messages (Fire and Nonfire) This application consists of one FIRE•COMMAND•25/50 with two speaker circuits which requires installation of the optional second amplifier. This configuration is suitable for small facilities requiring no more than 50 watts of total output power (provided on dual 25 watt speaker circuits). -
Page 42: Two Speaker Circuits - One Or Two Messages (Cmd1 And Cmd2 Amp Selection)
Two Speaker Circuits - One or Two Messages (CMD1 and CMD2 Amp Selection) Two Speaker Circuits - One or Two Messages (CMD1 and CMD2 Amp Selection) This application consists of one FIRE•COMMAND•25/50 with two speaker circuits which requires installation of the optional second amplifier. -
Page 43: Appendix A: Battery Calculations
Battery Calculations Battery Calculations Appendix A When the optional FC-PSM(E) Power Supply/Battery Charger is installed, use the Total Standby and Alarm Load Currents calculated in Table A-2 and Table A-3 for the following battery calculation. When powered by an external power source via TB3, use Table A-2 and Table A-3 to assist in the battery calculations. - Page 44 Battery Calculations Enter the total alarm current requirements into Table A-3 for the FIRE•COMMAND•25/50. When the optional FC-PSM(E) Power Supply/Battery Charger is installed, enter the total alarm current requirements calculated in Table A-3 into Table A-1 and perform calculations. If power is being provided by a regulated 24 VDC from a separate power supply such as the FCPS-24F(E) or an FACP, use the alarm current calculated in Table A-3 to calculate battery requirements for the separate power supply or FACP.
-
Page 45: Appendix B: Digital Voice Messages
Digital Voice Messages Digital Voice Messages Appendix B The FIRE•COMMAND•25/50 digital message generator provides a 60 second record time which allows for a single fire message of 60 seconds length or two 30 second messages. One or two messages may be field programmed. Refer to “REC - Record Push Button”... -
Page 46: Appendix C: Fcps-24F(E) Connections
FCPS-24F(E) Connections FCPS-24F(E) Connections Appendix C FCPS-24F(E) Connections to FIRE•COMMAND•25/50 FIGURE C-1: Command Input (alarm polarities) 4.7K ELR Trouble Relay transfer on loss of power No jumper on P10 Factory installed jumper must be in FIRE•COMMAND•25/50 place on P7 Regulated, filtered, power-limited output, 3 amps maxi- mum- wiring is supervised by the FIRE•COMMAND•25/50 (loss of power results in transfer of Trouble Relay) FACP NAC activation causes... -
Page 47: Appendix D: Addressable Module Connections
Addressable Module Connections Addressable Module Connections Appendix D When configured with an addressable FACP such as the MS-9200(E), the FIRE•COMMAND•25/50 may be trig- gered either by the FACP main NAC output or from addressable control modules. Figure D-1 illustrates CMD1 trig- gered by an addressable control module. -
Page 48: Appendix E: Wiring Requirements
Wiring Requirements Wiring Requirements Appendix E Connecting external system accessories to the FIRE•COMMAND•25/50 main circuits must be carefully considered to ensure proper operation. It is important to use the correct type of wire, wire gauge and wire run length per each cir- cuit. - Page 49 Notes Technical Manuals Online! - http://www.tech-man.com Document #50580 Rev. C 8/12/97 P/N 50580:C firealarmresources.com...
- Page 50 Notes Technical Manuals Online! - http://www.tech-man.com Document #50580 Rev.C 8/12/97 P/N 50580:C firealarmresources.com...
- Page 51 Notes Technical Manuals Online! - http://www.tech-man.com Document #50580 Rev. C 8/12/97 P/N 50580:C firealarmresources.com...
- Page 52 Limited Warranty Fire-Lite ® warrants its products to be free from defects in materials and workmanship for eighteen (18) months from the date of manufacture, under normal use and service. Products are date stamped at time of manufacture. The sole and exclusive obligation of Fire-Lite ®...
Need help?
Do you have a question about the FIRE COMMAND 25 and is the answer not in the manual?
Questions and answers