
Related Manuals for Baicells EG3015M-M30-HP


Summary of Contents for Baicells EG3015M-M30-HP
- Page 1 EG3015M-M30-HP Configuration Guide Document Version: 01 All rights reserved © Baicells Technologies Co., Ltd.
- Page 2 About This Document This document describes the configuration of the LteTurbo CPE for EG3015M-M30-HP. It is a guide that how to configure the device after its installation completes. Copyright Notice Baicells Technologies Co., Ltd., copyrights the information in this document. No part of this document may be reproduced in any form or means without the prior written consent of Baicells Technologies Co., Ltd.
-
Page 3: Table Of Contents
Menu 1. Configuration Overview ....................1 2. Installation ........................1 Part & Materials ......................1 Led ............................ 2 3. Configuration ........................4 Status Menu ........................4 3.1.1 Overview ........................4 3.1.2 Routes ........................11 Network Menu ....................... 12 3.2.1 LAN Settings ......................12 3.2.2 WAN Settings ...................... - Page 4 3.4.8 UPnP ........................37 3.4.9 Attack Protection ..................... 38 VPN Menu ........................39 3.5.1 IPSec ........................39 3.5.2 OpenVPN ......................... 41 System Menu ........................43 3.6.1 NTP .......................... 43 3.6.2 Account ........................44 3.6.3 Dynamic DNS ......................45 3.6.4 WEB Setting ......................48 3.6.5 FTP Auto Upgrade ....................
-
Page 5: Configuration Overview
1. Configuration Overview The Baicells LteTurbo CPE is loaded with its own GUI for configuring its operating parameters. You can log in to the GUI either locally through the Local Maintenance Terminal (LMT), which is an Ethernet port, or remotely via IP address. You can also use the Baicells Operations Management Console (OMC) to configure the CPE;... -
Page 6: Led
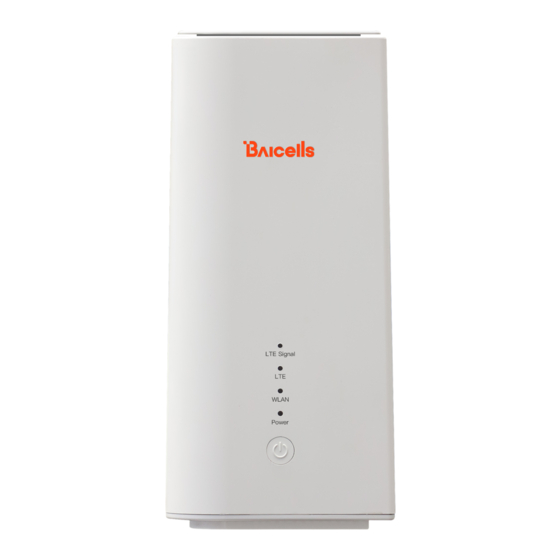
You will need standard tools, Ethernet cable, ground wire, and RJ-45 connectors for installing and connecting the outdoor unit. The CPE has 4 lights, divided into 5 groups according to the function: lte signal light, power light, LTE light, WLAN light,LAN light (see figure below). - Page 7 1. SIM card is abnormally red 2. Red flash without network access 3. Successful network access, green light and red light out Lan light 1. The speed is 10/100Mbsps, and the orange and green lights are on at the same time 2.
-
Page 8: Configuration
3. Configuration Status Menu 3.1.1 Overview After logging in, the GUI opens to the Status > Overview page (Figure 3-1). This page is a dashboard of key information regarding the CPE. - Page 9 Figure 3-1 Overview The equipment connection status pane displays the connection status of CPE equipment with LTE network and WAN network. The icons are described as follows: LTE signal For SIM card, it is gray when checking SIM / disconnect, orange when SIM card is recognized, and red after network access.
- Page 10 The Wifi Config pane displays the SSIDs of the CPE device. Click the icon jump to the WLAN settings page for WiFi configuration. The LTE Signals pane shows the signal quality of primary cell. Click icon to view LTE details, such as the CPE's SIM card status and its IMSI and IMEI numbers, wireless frequency being used, eNB connection status, and current signal strength and quality.
- Page 11 days. The Device Health pane shows device health data, such as CPU Usage, Memory Usage, USIM Status, LTE/NR Connection Time, System Up Time, etc. The Diagnosis pane shows Ping diagnosis results, Traceroute diagnosis results, Ping Wathchdog configuration data. Click the displayed data to quickly enter the configuration page.
- Page 12 The LAN Connections pane will show details about all smart devices currently connected through the CPE. The WiFi Associated Stations pane shows the device information currently accessing WiFi. Refer to Table 3-1for a description of the Status fields. Table 3-1 Status Field Name Description...
- Page 13 Field Name Description IMSI The unique International Mobile Subscriber Identity (IMSI) number associated with the SIM card in the subscriber's CPE. The IMSI must be identifiable by the operator's LTE network in order to access LTE Mode The LTE network operates with either Time Division Duplexing (TDD) or Frequency Division Duplexing (FDD) IMEI International Mobile Equipment Identity is like a serial number for the...
- Page 14 Field Name Description RSRP1 ~ RSRP4 The Signal-to-Interference-plus-Noise Ratio reflects the signal strength of the signal received from the two antennas in the eNB, expressed in decibels (dB) NOTE: Additional SINR values are reported when a transmitting device is using more than two antennas. WAN Throughputs The current downlink data throughput rate, in Kbps The current uplink data throughput rate, in Kbps...
-
Page 15: Routes
Field Name Description IPv4 DNS/ IPv6 IPv4 or IPv6 DNS LAN Connections Device Name The name of each smart device connected through the CPE MAC Address The MAC address of each smart device connected through the CPE IP Address The IP address of each device connected through the CPE Lease Time Amount of time a smart device’s IP address has been leased Type... -
Page 16: Network Menu
Figure 3-2 Routes Network Menu 3.2.1 LAN Settings Enter the Network > LAN host IP address, subnet mask, and the Maximum Transmission Unit (MTU) size, in bytes (Figure 3-3). The range is 1000-2000 bytes. The default is 1500 bytes. Figure 3-3 LAN settings You can enable or disable the DHCP server (Figure 3-4). - Page 17 Access Points (CAPWAP) server. When using option 138, the device will connect with the server's LAN port and get an Access Controller (AC) IP address.
-
Page 18: Wan Settings
Figure 3-4 DHCP settings The DHCP Reservations may be used to bind an IP address to a specific MAC address (Figure 3-5). In the bottom half of the pane, enter the IP address and the MAC address, and click on ADD. The IP address must be within the range of DHCP addresses. Any configured bindings will appear at the top of the window. - Page 19 Figure 3-6 WAN Settings DNS Mode set how to get DNS server IP: Automatic: automatically obtain the DNS server IP assigned by EPC. If Manually DNS is not selected, it is automatic mode. Manually: manually configure the primary and standby DNS server IP. 3.2.2.2 Tunnel Mode This CPE can support L2TP, GRE, PPTP, and VxLAN VPN type.
- Page 20 Figure 3-7 Tunnel Mode 3.2.2.3 Bridge Mode When the CPE worked at Bridge mode, the WAN ports address will bridge to LAN port, and the LAN port will work at trunk mode.
-
Page 21: Wlan Settings
Figure 3-8 Bridge Mode 3.2.3 WLAN Settings Select Network > WLAN Settings, and set the WLAN Network, WLAN Expire time. This function is only applicable to indoor CPE products. For outdoor CPE, WiFi will be turned off 10 minutes after startup by default. - Page 22 Figure 3-9 WLAN Overview The overview page displays the relevant information of the devices connected to the Wi-Fi hotspot. For each device displayed, you can operate enable / disable and settings. Click the "SETTINGS" button to enter the network settings page. As shown in Figure 3-10.
- Page 23 Figure 3-10 WLAN Settings Table 3-2 WLAN Settings Parameters Field Name Description Device Configuration Network Mode Support 80211 Wireless Protocol Country Code Country code Channel Configurable channel Band Width Wireless Supported Bandwidth Transmit Power Maximum power sent by WIFI Interface Configuration ESSID Service set ID.
-
Page 24: Static Routes
Field Name Description Mode WIFI working mode: WIFI hotspot, WIFI STA. Default WIFI hotspot Encryption Encryption mode. Support No Encryption, WPA-PSK, and WPA2-PSK. Cipher Algorithm mode. Support CCMP (AES), TKIP, TKIP and CCMP (AES) Key Renewal Set the lifetime of the key used in secure sessions when Interval(seconds) WPA PSK is encrypted WIFI password... - Page 25 Figure 3-12 DMZ Examples When the LAN has a DMZ/firewall server, you can enable DMZ on the CPE so that packets from the WAN are forwarded to the firewall (Figure 3-13). Alternatively, you can enable Internet Control Message Protocol (ICMP) redirect error messages to support Layer 2 multicast features.
-
Page 26: Lte Menu
Figure 3-13 DMZ LTE Menu 3.3.1 Connection Settings LTE connection settings includes Default connection settings, Power Scan Option, Power Max Option, and 256QAM settings. 3.3.1.1 Default connection If the Connection Mode is set to Always on, CPE will automatically access the LTE network after boot. - Page 27 Figure 3-15 Scan Mode Settings 3.3.1.3 Power Max Option Set whether to ignore the maximum power limit issued by the base station, 1: ignore, 0: do not ignore, Default value is 1. Figure 3-16 Power Max Option 3.3.1.4 256QAM Settings Set whether to turn on 256QAM modulation for LTE module.
-
Page 28: Scan Mode
3.3.2 Scan Mode The Scan Mode determines which frequencies the CPE’s routine scan of available frequencies will cover. Scanning is a process of tuning to a specific frequency and measuring the simplest signal quality [e.g., Received Signal Strength Indication (RSSI)]. As part of the cell selection and reselection process, the CPE performs the scan first and then selects a small number of candidate cells to go through the next step of measuring and evaluating signals to select the best eNB that can serve it. - Page 29 Select one of the following options: Full Band (default) – All channels in the band. (Figure 3-19) − The CPE will routinely scan all channels in the band and all EARFCNs, increasing the time it takes to connect compared to the other modes. The band is dependent on the CPE model.
- Page 30 Figure 3-20 Dedicated EARFCN Cell Lock – A combination of PCI + EARFCN or frequency. (Figure 3-21) − The CPE is limited to scanning a specific list of eNBs based on both their Physical Cell Identifier (PCI) and EARFCN or frequency. The CPE will scan the list of eNBs with the EARFCN and PCI combination.
- Page 31 Figure 3-21 Cell Lock Lock– Specific PCIs only. Locks the CPE to a designated PCI or PCI range. (Figure 3-22)
-
Page 32: Apn Management
The CPE supports 4 APN configurations. At least one APN (TR-069) must be configured when the CPE/eNB connect to the Baicells CloudCore. In the window (Figure 3-23) you will select the APN number (1-4), enable it, enter an APN Name, select Authentication Type,... -
Page 33: Pin Management
You are limited to 3 tries to enter the correct PIN code before getting locked out. If this happens, contact your service provider (end-users) or Baicells support (service providers). -
Page 34: Security Menu
Figure 3-24 PIN Management Security Menu 3.4.1 Firewall Settings When using a firewall server in the local network, invoke this setting to enable or disable the firewall for this CPE (Figure 3-25). -
Page 35: Mac Filter
Figure 3-25 Firewall 3.4.2 MAC Filter Media Access Control (MAC) Filtering allows you to identify a list of devices either allowed to access or forbidden from accessing the network through the CPE (Figure 3-26). Select Enable to enable MAC filtering, and then determine whether you will allow or forbid the defined MAC addresses to access the network. -
Page 36: Ip Filter
3.4.3 IP Filter Internet Protocol (IP) Filtering allows you to filter services based on the IP address of the source device that is using the CPE to access the network (Figure 3-27). You can define a list of devices either allowed or forbidden from accessing the destination address range or port number range you enter. -
Page 37: Url Filter
Destination Enter the IP address range for the destination device(s) to be filtered, Address Range in the format of x.x.x.x or x.x.x.x/mask. The mask value may be 0 or Destination Port Enter the port number range for the destination device(s) to be Range filtered, in the format of 1000 to 1500, or 1000. -
Page 38: Port Forwarding
3.4.5 Port Forwarding When NAT mode is enabled as the WAN interface type (section 2.2.2), you can redirect a communication request from one address and port number combination to another. Only the IP address on the WAN side is open to the Internet. If a computer on the LAN is enabled to provide services for the Internet (for example, work as an FTP server), port forwarding is required so that all access requests to the external server port from the Internet are redirected to the server on the LAN. -
Page 39: Port Triggering
they must be on the same network segment. Local Port Enter the local port number. Range is 1 to 65,535. 3.4.6 Port Triggering Port Triggering is a configuration option on a router - in this case, the CPE - if it is operating in NAT mode as the WAN interface type (section 2.2.2). - Page 40 translation for certain application layer control/data protocols such as FTP, H.323 ALG, SIP, and PPTP. You can enable the different types of application protocols by clicking on the check box next to the protocol name (Figure 3-31).
-
Page 41: Upnp
Figure 3-31 ALG 3.4.8 UPnP The Universal Plug & Play (UPnP) function provides a set of networking protocols that allows device-to-device networking on a local network. When UPnP is enabled, devices seamlessly and dynamically discover each other’s presence on the network and attach to one another and to network services. -
Page 42: Attack Protection
Figure 3-32 UPnP 3.4.9 Attack Protection The Attack Protection settings provide an additional security measure that helps prevent computer hacker attacks such as TCP SYN FLOOD, UDP FLOOD, and IMCP FLOOD for devices connected to the network through the CPE. In the Security >... -
Page 43: Vpn Menu
VPN Menu The Virtual Private Network (VPN) menu (Figure 3-34) enables you to configure a connection between the CPE and a VPN, e.g., to access a corporate network when telecommuting for work. You can enable a Layer 2 Tunneling Protocol (L2TP) gateway or a Layer 2 network connection to the VPN. - Page 44 Figure 3-36 IPSec Table 3-5 IPSec Field Name Description Enable Click on the check box to enable IPSec Policy Name Enter a policy name using up to 32 characters Remote Gateway IP address of the remote gateway Local Subnet Optional: IP address of the local subnet Remote Subnet Optional: IP address of the remote subnet Pre-Shared Key...
-
Page 45: Openvpn
IKE Encryption des, 3des, aes128, aes192, or aes256 IKE DH Group modp768, modp1024, modp1536, modp2048, or modp4096 md5, sha1, sha256, sha384, or sha512 Authentication ESP Encryption des, 3des, aes128, aes192, or aes256 ESP DH Group none, modp768, modp1024, modp1536, modp2048, or modp4096 md5, sha1, sha256, sha384, or sha512 Authentication Left Identifier... - Page 46 Figure 3-37 OpenVPN Figure 3-38 Server...
-
Page 47: System Menu
Figure 3-39 Client System Menu 3.6.1 NTP The operator's network may use up to 4 Network Time Protocol (NTP) servers to provide correct time-of-day to network devices. In the CPE GUI you can refresh the local time display using the SYNC WITH BROWSER button; select the time zone that the CPE is in; and enable NTP client to use the default or specified NTP servers for synchronization (Figure 3-40). -
Page 48: Account
Figure 3-40 NTP 3.6.2 Account This menu is used to change the login password for the CPE (Figure 3-41). The password must be 5 to 12 characters. Baicells recommends using a combination of upper- and lower-case letters and numbers. -
Page 49: Dynamic Dns
Figure 3-41 Account 3.6.3 Dynamic DNS The dynamic DNS function is to map the user's dynamic IP address to a fixed domain name resolution service. Each time the user connects to the network, the client program will transmit the dynamic IP address of the host to the server program located on the host of the service provider through information transmission. - Page 50 Figure 3-43 Dynamic DNS Global Settings...
- Page 51 Figure 3-44 IPv4 DDNS configuration...
-
Page 52: Web Setting
Figure 3-45 IPv6 DDNS configuration 3.6.4 WEB Setting WEB Setting provides the ability to configure and manage the CPE remotely (Figure 3-46). This is especially helpful when a user calls in for technical assistance. In “错误!未 找到引用源。 错误!未找到引用源。”, you used this Web application with the default URL http://192.168.150.1. -
Page 53: Ftp Auto Upgrade
Figure 3-46 WEB Setting Table 3-6 WEB Setting Field Name Description HTTP Select the check box next to Enable to log in to an HTTP Web address HTTPPort Enter the HTTP port number to be used. Range is 80 to 65,535. Default is port 80. -
Page 54: Tr-069
detect a new version of firmware on the dedicated FTP server, if available, and will automatically upgrade to the new version. If you are using a dedicated FTP server for this purpose, select the Enable check boxes next to FTP Auto Upgrade and Check New FW after setup (Figure 3-47). Enter the FTP server IP address and the Path And File text suffix. - Page 55 ACS server for new information. The range is 20 to 86,400 seconds. CloudKey If using the Baicells CloudCore, enter the operator's unique CloudKey. When the device powers up the first time it will automatically be added to the operator's OMC account.
-
Page 56: Snmp
Field Name Description STUN TR069 supports NAT penetration, and OMC can send TR069 request to CPE Stun Server Nat penetration server address Stun Server Port Nat penetration server port Keep-Alive Interaction cycle between CPE and NAT server Interval 3.6.7 SNMP The Simple Network Management Protocol (SNMP) is used for connecting a device with a Network Management System (NMS) server. - Page 57 Figure 3-49 SNMP Table 3-8 SNMP Field Name Description SNMP Enable the Simple Network Management Protocol by clicking the check box. NMS Address NMS server IP address NMS Port NMS server port number Listening Port CPE port number Trap Community Public or private - identifier to distinguish read/write permissions for data Version...
-
Page 58: Restore/Update
3.6.8 Restore/Update Use the System > Restore/Update menu to reset the CPE to its factory default settings, to manually update the firmware, or to manually update a module within the firmware - meaning to apply a patch to the current firmware (Figure 3-50). Caution: Performing a restore or update action will disrupt service. -
Page 59: Ping Watchdog
Caution: Do not power off the CPE or disconnect it from the computer during an upgrade. To update (upgrade) the CPE to a different firmware version (Figure 3-50): 1. Download the image file from the Baicells support website (Baicells > Support > Downloads), and save it to your computer. -
Page 60: Sas
2. Set the period of time, in seconds, for the ping to timeout. The range is 1-65535 seconds. 3. Enter the number of times to try to ping the address, in the range of 1-65535 times. 4. Enter the maximum number of times the CPE can try the ping but fail before the CPE initiates a reboot. - Page 61 Table 3-9 SAS Info field description Field Name Description Serial number of the product FCC ID FCCID of the product Category Product category (A or B) Radio Technology Antenna technology Antenna Height Antenna type Type Group Type SAS CPE Device Group Category Antenna Gain Antenna gain Cell High...
- Page 62 Figure 3-54 SAS Settings 2. Select SAS access mode. Select Domain Proxy: SAS proxy. Implement SAS access through OMC. Select Direct SAS: SAS direct connection. CPE is directly connected to SAS server. 3. In Direct SAS mode, you need to select SAS registration mode. ...
- Page 63 Figure 3-55 Antenna Parameters Table 3-11 Antenna Parameters Field Name Description Latitude Latitude of the CPE antenna location in degrees Longitude Longitude of the CPE antenna location in degrees Indoor Whether the CPE antenna is indoor or not Deployment Antenna Height The CPE antenna height Antenna Azimuth Boresight direction of the horizontal plane of the antenna in degrees...
-
Page 64: Sas Certificates
Figure 3-56 CPI Settings CPI (Certified Professional Installer) Settings is used to verify the information of the installer. 1. Enter CPI ID or CPI name. 2. Enter the Install Time or click the Auto button. 3. Click Choose file to select CPI certificate file from this computer. 4. -
Page 65: System Messages
3.6.12 System Messages Use this Web-GUI, you can Export System Message, collect real-time system information and transfer system message to PC. Figure 3-58 System Messages 3.6.13 Diagnosis The System > Diagnosis menu provides 3 types of diagnostic tests that may be used for troubleshooting connection issues: Ping and Traceroute (Figure 3-59). - Page 66 Figure 3-59 Diagnosis...
- Page 67 3.6.13.1 Ping Ping is used to manually initiate a ping test to check connection status. Running a ping test will send data packets of a specified size from the CPE over the network to a target IP address. The results of ping determine if there is a connection and if there is any packet loss.
- Page 68 Figure 3-61 Trace Diagnosis Settings Table 3-13 Trace Diagnosis parameters Field Name Description Type The protocol type is ICMP or UDP. Target IP A target IP address for the CPE to send packets to. Maximum Hops The maximum number of hops between network nodes you want the packets to take.
-
Page 69: Reboot
Figure 3-62 Iperf Diagnosis Settings Table 3-14 Iperf Diagnosis parameters Field Name Description Version The version of iperf supports iperf2 and iperf3. Protocol TCP or UDP Target IP Specifies the destination IP for iperf diagnostics Port Specifies the port number for iperf diagnostics Time Iperf diagnostic time Data length... -
Page 70: Logout
Figure 3-63 Reboot Logout When you click on the Logout menu, you are automatically logged out of the CPE and returned to the login screen (Figure 3-64). Figure 3-64 Logout... -
Page 71: Regulatory Compliance
4. Regulatory Compliance FCC Compliance This device complies with part 15 of the FCC Rules. Operation is subject to the following two conditions: (1) This device may not cause harmful interference, and (2) this device must accept any interference received, including interference that may cause undesired operation.
Need help?
Do you have a question about the EG3015M-M30-HP and is the answer not in the manual?
Questions and answers