Table of Contents
Advertisement
Quick Links
Advertisement
Table of Contents

Subscribe to Our Youtube Channel
Related Manuals for urmet domus 5M-Lite HVR Series


Summary of Contents for urmet domus 5M-Lite HVR Series
- Page 1 Mod. 1097 DS1097-010 H.265 HVR WITH HDMI Hybrid HVR 5M LITE/4K Series 5M-Lite HVR Series 4 Can. Sch. 1097/564 8 Can. Sch. 1097/568 16 Can. Sch. 1097/566 4K HVR Series 4 Can. Sch. 1097/604 8 Can. Sch. 1097/608 4K HVR Series 16 Can.
-
Page 2: Table Of Contents
ENGLISH TABLE OF CONTENTS General information ..........................5 Product description ........................5 1.1.1 General features ............................5 Opening the box ........................6 1.2.1 Contents of the box ............................6 Warnings ...........................7 1.3.1 Power................................7 1.3.2 Safety precautions ............................7 1.3.3 Installation precautions ..........................7 1.3.4 Cleaning the device ............................ - Page 3 Record Settings ........................46 3.6.1 Encode ................................ 46 3.6.1.1 Main Stream/ Sub Stream/ Mobile Stream ....................46 3.6.2 Record ................................ 47 3.6.2.1 Record ..............................47 3.6.2.2 Record Schedule ............................. 48 3.6.3 Capture ............................... 49 3.6.3.1 Capture ..............................49 3.6.3.2 Capture Schedule ............................ 49 Alarm Configuration ........................
- Page 4 Video Player for viewing backuped video on PC ................93 Video Player Control ....................... 93 Remote Access via Web Client ......................96 Basic System Environment Requirements ................96 Web Plugin Download and Installation ................... 96 Web Client Manager ....................... 98 Web Interface HVR Accessing via IP Address, URL or Urmet DDNS Account .....
-
Page 5: General Information
PTZ linkage: Matching of one or more preset points on an alarm or motion detection event on Speed Dome Intelligent Video Analysis (only IP channels for 5M-LITE HVR Series and one analog channel at time + IP Channels for 4K HVR Series) -
Page 6: Opening The Box
Here follow a Summarize about the most Features: Function Brief and Description Double video output with monitor, VGA virtual output port or HDMI Output; Support Real time URMET UVS Client Software and MP live surveillance and also support zoom in/out, monitoring auto sequence and PIP display. -
Page 7: Warnings
WARNINGS 1.3.1 POWER Only use the power unit provided to power the device. Check mains rating before plugging the power unit in. Do not pull the cable to unplug the device. Switch the device off before unplugging power unit. This operation must not be performed when the HVR is recording, playing or from the configuration menu. -
Page 8: Description
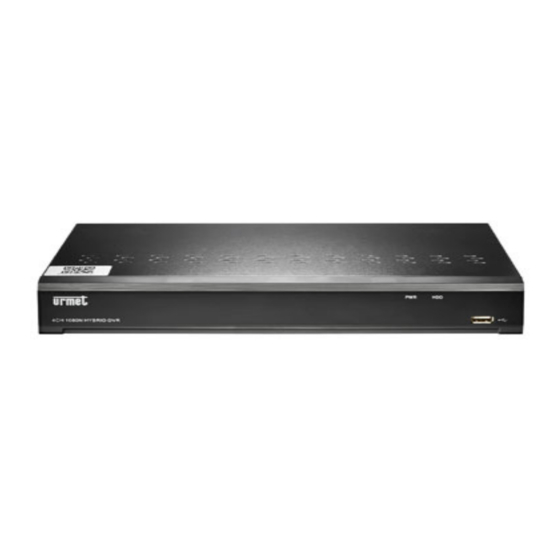
DESCRIPTION FRONT PANEL Please note that HVR stands for Digital Video Recorder Equipment (digital video recording device). 2.1.1 REF. 1097/564-568-566 AND REF. 1097/604-608-616 HVR FRONT PANEL Writing or Number Symbol Function and description indicator When the green LED is on it means that the NVR is powered Power indicator correctly. -
Page 9: Rear Panel
REAR PANEL 2.2.1 REF. 1097/564 AND REF. 1097/604 HVR BACK PANEL Item Physical port Connection method Connect CH1-CH4 (Virtual) video input device (BNC Video inputs interface) Audio Inputs 4CH audio input (RCA interface) Audio Output Audio output (RCA interface); Connect USB mouse USB Port Connect to HDMI monitor HDMI Port... -
Page 10: Ref. 1097/568 Hvr Back Panel
2.2.2 REF. 1097/568 HVR BACK PANEL 2.2.3 REF. 1097/608 HVR BACK PANEL Item Physical port Connection method Connect CH1-CH8 (Virtual) video input device (BNC Video inputs interface) Audio Inputs 8CH audio input CH1-CH8 (RCA interface) Audio Output Audio output (RCA interface); Connect USB mouse USB Port Connect to HDMI monitor... -
Page 11: Ref. 1097/566 Hvr Back Panel
2.2.4 REF. 1097/566 HVR BACK PANEL Item Physical port Connection method Connect CH1-CH16 (Virtual) video input device (BNC Video inputs interface) Audio Inputs 4CH audio input CH1-CH4 (RCA interface) Audio Output Audio output (RCA interface); Connect USB mouse USB Port Connect to HDMI monitor HDMI Port Connect to VGA monitor, such as PC monitor... -
Page 12: Ref. 1097/616 Hvr Back Panel
2.2.1 REF. 1097/616 HVR BACK PANEL Item Physical port Connection method Connect CH1-CH16 (Virtual) video input device (BNC Video inputs interface) Audio Inputs 8CH audio input CH1-CH5 (RCA interface) Connector for audio cable with audio inputs CH5-CH16 Audio Inputs (RCA) Audio Output Audio output (RCA interface);... -
Page 13: Rs485/Sensor/Alarm Port Functions
2.2.1 RS485/SENSOR/ALARM PORT FUNCTIONS Ref. 1097/564-566-604 Ref. 1097/568-608 Ref. 1097/616 Alarm input: Connect [-] port of your sensor to G (GND) pin, and [+] port to channel input according to the alarm device you purchased 1…16. Alarm output: Connect to the two ports marked with “ALARM” PTZ Port: Connect your camera to RS-485A(+) and RS485B(-) accordingly. -
Page 14: Mouse Operation
MOUSE OPERATION The mouse can be used to operate the system in addition to the remote control. The following table shows the possible actions which may differ according to the state and the current system screen. ACTION MODE FUNCTION This activates the Main Menu (pop-up menu) on the lower part of the screen Live display Right click Main Menu or... -
Page 15: Connection Diagram
CONNECTION DIAGRAM Speaker Above diagram is for reference only. The practical connection may be different depending on the HVR you Note: purchased. DS1097-010... -
Page 16: Hvr Osd Menu Settings
HVR OSD MENU SETTINGS After having plugged in the HVR, the system will run the initialisation procedures during which the following image will appear: At the end of the boot-up, the HVR will switch to Live view. FIRST HVR LOGIN For the first time when you run the HVR, you must be required to set your own password immediately in order to protect your privacy. -
Page 17: Live Interface And Pop-Up Menu
LIVE INTERFACE AND POP-UP MENU Camera Title Status Icons System Date & Time Camera Quick Toolbar Task Menu Bar Camera Title To display the camera title: A-: This indicates that the camera connected is an AHD camera T-: This indicates that the camera connected is a TVI camera C-: This indicates that the camera connected is a CVI camera IP: This indicates that the camera connected is an IP camera Status Icons... -
Page 18: Taskbar
3.2.1 TASKBAR Click to open the Main Menu Click to pop up the shutdown options box Click to choose different layout for live view Click to choose more layouts for live view Click to start viewing channels in a sequence Quick playback. -
Page 19: Shutdown / Reboot / Lock Screen Menu
3.2.3 SHUTDOWN / REBOOT / LOCK SCREEN MENU Click the Shutdown button from Taskbar, and the check the further action you want to move. Click OK button, system will require to input the Admin password to authenticate. If you choose Shutdown option, the system will be turned off. If you choose Reboot option, the system will be rebooted. If you choose Manually Lock Screen option, the live viewing screen will be disappeared. -
Page 20: Ptz Control/Utc Control (Remote Camera Unit Control Only For Analog Channel)
3.2.4 PTZ CONTROL/UTC CONTROL (REMOTE CAMERA UNIT CONTROL ONLY FOR ANALOG CHANNEL) After finishing the PTZ setup, you can use the PTZ function to control your PTZ camera. Click left your mouse upon a channel on Live Viewing screen to open Camera Quick Toolbar, and choose the PTZ control icon PTZ control panel will be displayed. -
Page 21: Utc Control
Pointer Click to Start/Stop Preset to cursor Panel Click up/down/left/right to move and set preset points Total Total Display the total number of preset points Number of preset point; Set the time how long the camera will stay in the No./Time No./Time preset point... -
Page 22: Tag Set Up
3.2.6 TAG SET UP Move mouse to any a live channel, then click right button to view tools bar. the Add Customized Tag icon is Click , is show then click is OK. Set the Tag once, the Tag can record one minute, this is default. Tag name may the edit, for example: Notice: User can to select [General], [Sub-periods], [Smart] of [Search] item page and set the Tag event record. -
Page 23: To Search Tag Record Event
3.2.7 TO SEARCH TAG RECORD EVENT Click Start Menu Tag into the Tag event search page, then set Start Time、End Time and Channel Setup Search , click , the all Tag event list is show. Playback: Click to playback Tag record event. •... -
Page 24: Main Menu Guide
MAIN MENU GUIDE After finishing system initialization, click right key of mouse on main interface mode to enter into Pop-up Menu which will appear in the lower part of the screen. The HVR functions are organised by type following the order shown in the following diagram: Analog Channels Channel... - Page 25 Motion Alarm Setting IO Alarm Settings Alarm Configuration Intelligent PTZ Linkage Exception Sound Detection Alarm Schedule Occlusion Detection General Settings PPPOE Network Settings SNMP Wireless Port Configuration DDNS Email Network Configuration Email Email Schedule FTP Schedule IP Filter IP Filter Disk Manage Disk Manage Disk Group...
- Page 26 General Settings Date and Time General Settings Output Configuration Multi-Users Settings Load Default Maintenance Settings Upgrade Parameter Management Auto Reboot System Upgrade IP Camera Maintain Load Default Reboot IPC Information Channel Information Information Record Info Network State DS1097-010...
-
Page 27: Main Menu
MAIN MENU All the HVR functions can be accessed from the Main Menu. If you have not logged in (Main Menu Locked mode), you will need to enter Username and Password as shown in the following figure: For System Login press Unlock button. If press the Forgot Password: button, the system will send an email to the configured address with a code useful to access the system if the password is forgotten. -
Page 28: Analog Channels
3.5.1.1 Analog Channels Use this menu page to enable/exclude the available analogue channels. The various cameras supported on all analogue channels are: Camera AHD 4K, Camera AHD 5M, Camera AHD 4M, Camera AHD 1080P, Camera AHD 720P and Camera 960H. The list of available analogue channels with the respective state is shown in the central part: Enable, Disable. -
Page 29: Protocol Manage
Click Search button to search IP cameras, and then click one of the IP camera in the device list. IP Address/Domain: IP address or domain name of the IP camera • Alias: Name of the IP camera • Position: Position to display the camera name on the screen. •... -
Page 30: Live
RTSP function The RTSP (acronym of Real Time Streaming Protocol) is used to view the video Main Streams/Sub Streams of an IP camera connected to the HVR on a web page of the PC or on the local monitor, through the RTSP port. This is advantageous for managing the live stream of an IP ONVIF camera connected to the HVR. -
Page 31: Image Control
Choose a channel to configure Give a name to the camera Date format to display for the camera (for IP camera only) Time format to display for the camera (for IP camera only) Choose Camera type:AHD/TVI/CVI/AHD-3MP EQ Levels:1(0~50m)/2(50~150m)/3(150~250m)/4(250~350m)/5(350~450m) Hide channel in Live preview To show the camera name in live view screen To show the system time in live view screen Adjust the Hue value for the image color... -
Page 32: Ptz
Choose a channel to configure Select the desired built-in IR cut filter mode to ensure the camera works properly both in the D/N. Set the delay time of IR-CUT switching Check to enable lens flip and angle flip Set the flip angle To enable or disable Backlight compensation Choose the backlight compensation level To enable or disable 3D noise reduction function... -
Page 33: Privacy Zone
3.5.5 PRIVACY ZONE This menu allows you to create privacy zone(s) if you want to partially cover some certain part of the image. You can create up to 4 privacy zones in any size and location on the camera image. Enable the Privacy Zone, and choose how many zones you need. -
Page 34: Pir
3.5.7 Select PIR in the side menu to open a page where to define the methods and actions to be taken in case of motion alarm detection. Click PIR button, Then click setup to configure the motion detection PIR function: Show is Analog Channel and IP Cannel :... -
Page 35: Intelligent
You can set an area for motion detection PIR function by clicking the mouse : The PIR Alarm setup, please to view “Section 3.7.2- PIR Notification” 3.5.8 INTELLIGENT The optional intelligent functions, including PID (Perimeter Intrusion Detection), LCD (Line Crossing Detection),SOD (Stationary Object Detection), PD (Pedestrian Detection), FD (Face Detection), and CC (Cross Counting). - Page 36 Latch Time: To configure the external alarm time when the detection is triggered. • Alarm Out: If your HVR support to connect to external alarm device, you can set to emit an alarm tone. • Show Message: A letter “S” will be displayed on the screen when the PID function is triggered. •...
-
Page 37: Lcd (Line Crossing Detection)
3.5.8.2 LCD (Line Crossing Detection) Line Crossing Detection function detects people, vehicle or other objects which cross a pre-defined virtual line, and some certain actions can be taken when the alarm is triggered. Channel: Select the channel you want to configure •... -
Page 38: Sod (Stationary Object Detection)
Choose one of the Rule Number. It is the number of LCD lines. Maximum 4 lines you can draw. To enable the detection in Rule Switch. Choose a Rule Type: A B: HVR will only detect the action from side A to side B; B A: HVR will only detect the action from side B to side A;... - Page 39 Post Recording: You can set how long after an event occurs that the HVR will continue to record. • Latch Time: To configure the external alarm time when the detection is triggered. • Alarm Out: If your HVR support to connect to external alarm device, you can set to emit an alarm tone. •...
-
Page 40: Pd (Pedestrian Detection)
3.5.8.4 PD (Pedestrian Detection) Pedestrian Detection function detects the moving people in a pre-defined region, and a series of actions can be taken when the alarm is triggered. Channel: to select the channel you want to configure • Switch: to enable or disable the PD function •... -
Page 41: Fd (Face Detection)
Choose one of the Rule Number. It is the number of PD area. Maximum 4 areas you can set for PD function. To enable the detection in Rule Switch. Choose a Rule Type, only Normal available for this detection. Use your mouse to click 4 points in the camera picture to draw a virtual region. The sharp of the region should be a convex polygon. -
Page 42: Cc (Cross-Counting)
Area: Click [Setup] to draw a virtual region in the camera picture. • Choose one of the Rule Number. It is the number of FD area. Maximum 4 areas you can set for FD function. To enable the detection in Rule Switch. Choose a Rule Type, only Normal available for this detection. - Page 43 Choose one of the Rule Number. It is the number of virtual lines you can draw. Maximum 4 lines. To enable the detection in Rule Switch. Choose a Rule Type Object: Will count for only moving objects. Pedestrian: Will count only moving people. Use your mouse to click 2 points in the camera picture to draw a virtual line.
-
Page 44: Sound Detection
3.5.8.7 Sound Detection This function allows to detect the sound if this function is available in Camera. Click into the intelligent setup page, Then Click into the Sound Detection setup page: Channel: To select the channel you want to configure •... -
Page 45: Occlusion Detection
3.5.8.8 Occlusion Detection This function allows to detect the lens occlusion. Click into the intelligent setup page, Then Click into the Sound Detection setup page: Channel: To select the channel you want to configure • Switch: To enable or disable the Sound Detection function •... -
Page 46: Intelligent Analysis Log
3.5.8.10 Intelligent Analysis Log The statistical result can be queried by Daily / Weekly / Monthly / Annual for Cross In & Cross Out. RECORD SETTINGS This subsection describes the configuration of the recording options made available by the HVR. Here follow the sub- menu: Encode Record... -
Page 47: Record
Resolution: This parameter defines how large the recorded image will be. • FPS: This parameter defines the number of frames per second the HVR will record. • Video Encode Type: For IP camera only. HVR support H.264 and H.265. • Bitrate Control: Select the bitrate level. -
Page 48: Record Schedule
3.6.2.2 Record Schedule This menu allows you to specify when the HVR records video and defines the recording mode for each channel. The recording schedule lets you set up a schedule like, daily and hourly by normal (continuous) recording, motion recording, I/O alarm recording &... -
Page 49: Capture
3.6.3 CAPTURE This subsection of the Parameters menu can be used to configure the parameters dedicated to the acquisition of images in alarm conditions and to the programming of the times during which the function must be active. 3.6.3.1 Capture The Capture item is used to configure the parameters for recording the images in alarm condition, the possible options are shown in the following table Enable Capture: Enable or disable automatic capturing on the channel. -
Page 50: Alarm Configuration
ALARM CONFIGURATION This section is dedicated to the set notifications for different alarm events (Motion, PIR, IO Alarm, Intelligent Analysis, PTZ Linkage, Exception, Alarm Schedule) used by the HVR for recording and notifying alarms. Here follow the sub-menu: Motion IO Alarm Intelligent Analysis PTZ Linkage Exception... -
Page 51: Pir Notification
3.7.2 PIR NOTIFICATION This is an optional function, it will appear if Camera supports sensor PIR, you connect external sensor PIR alarm devices to work with the PIR. Select PIR in the side menu to open a page where to define the methods and actions to be taken in case of PIR alarm detection. -
Page 52: Io Sensor Alarm Notification
3.7.3 IO SENSOR ALARM NOTIFICATION For this Menu page please read the description under the following pictures: Now you can perform alarm set based on different status. Here follow a short Notification description: Alarm In: allow you select one desired Alarm No. •... -
Page 53: Intelligent Analysis Notification
3.7.1 INTELLIGENT ANALYSIS NOTIFICATION You can set the Notifications for each Intelligent Analysis Event (PID, LCD, SOD, PD, FD, CC, Sound Detection, Occlusion Detection). Here follow a short Notification description: Channel: this is used to select the channel with which the Intelligent detection function is associated. •... -
Page 54: Ptz Linkage
Send Email: this is used to send the alarm images to the configured email addresses (for more information, see • section “3.8.3 - Email”). Full screen: you can set if the video is displayed in full screen mode when Intelligent Event is detected. •... -
Page 55: Exception
3.7.3 EXCEPTION This menu allows you to set the type of event (i.e. HDD full, Disk Error, Video Loss) that you want the HVR to inform you. Here follow a short Notification description: Event Type: Select the event type from below options: •... -
Page 56: Network Configuration
NETWORK CONFIGURATION The Network section of the Parameters menu can be used to access all the HVR settings for accessing the Internet and the local area network (LAN), the e-mail notification functions, the use of a DDNS (Dynamic DNS) service, and so on. Here follow the Sub menu: General DDNS... -
Page 57: Pppoe
3.8.1.2 PPPoE This is an advanced protocol that allows the HVR to connect to the network more directly via DSL modem. Check the “Enable PPPOE” box, and then enter the User name & Password of the PPPoE. Click Apply to save, system will reboot to active the PPPoE setting. 3.8.1.3 (For future use) Prior using the mobile network, you need to connect a 3G dongle to the HVR. -
Page 58: Snmp
3.8.1.4 SNMP (For future use) SNMP: Simple network manage protocol, open source protocol. SNMP can check the device basic parameter, like IP ,Hardware information, Software information 3.8.1.5 Wireless (For future use) Wireless: HVR connects with wireless USB adapter, it can search and work with wifi directly. DS1097-010... -
Page 59: Port Configuration
3.8.1.6 Port Configuration Web Port: This is the port that you will use to log in remotely to the HVR (e.g. using the Web Client). If the default • port 80 is already taken by other applications, please change it. Client Port: This is the port that the HVR will use to send information through. - Page 60 Take note of the ID of your HVR provided by the URMETDDNS1 or URMETDDNS2 server. IMPORTANT NOTE: A DDNS server other than URMETDDNS can be used. Select from the available options in the list. See the instructions on the user manual of the device and those of the DDNS quick guide (“DDNS Configuration Guide it_en”) which can be downloaded from the Urmet website for more information.
-
Page 61: Email
3.8.3 EMAIL The Email menu can be used to access the parameter configuration for notifying alarms via email. 3.8.3.1 Email Set Email: this is used to enable or disable email parameter configuration. • Encryption: this is used to specify whether communication with the email servers is encrypted or not; the use of a •... -
Page 62: Email Schedule
3.8.3.2 Email Schedule This configuration page can be used, as seen in the other cases, to select on which times and days of the week the HVR must send an email in case of a given event. Channel: this is used to select the channel to be configured. •... -
Page 63: Ftp Schedule
FTP Enable: select the required option to enable or disable operation. • Server IP: enter the address of the FTP server name. • Port: FTP service port. Default value: 21. • Username: user name to access the FTP. • Password: password for accessing the FTP server. •... -
Page 64: Ip Filter
3.8.5 IP FILTER 3.8.5.1 IP Filter You are able to configure the IP FILTER for HVR, from Start Menu Setup Network IP FILTER Enable: Check Enable , you able to setup the Whitelist and Blacklist • Enable Whitelists: Whitelist default is enable, first to check Enable, after you may to setup Start Address and •... - Page 65 Delete: Click , the “Warning!” dialog box is show , click OK and the Address list is delete • : You may set Single Add then click , the Edit Address list is show below. Edit: Click to edit Start Address and End Address, you may set one or several Address for Single Add •...
-
Page 66: Device
DEVICE This section is used to access the configuration and control functions of the devices and services available on the HVR. Click on “Device” (HDD) on the top of the screen to open the following subsections: Cloud 3.9.1 DISK MANAGE In this section, you can configure the internal HDD function. -
Page 67: Disk Group
Click in HDD Status in order to change Disk Type and Disk group: ID Hard Disk: Identification of the HDD (set by system). • Disk Type: this indicates the disc type, possible values: Read Write Disk, Redundant Disk, Read Only Disk •... -
Page 68: Self-Monitoring, Analysis And Reporting Technology) Information
3.9.1.3 S.M.A.R.T. (Self-Monitoring, Analysis and Reporting Technology) information This function can be used to display technical information on the hard drive installed inside HVR. You can also perform a test (there are three types available) to evaluate and detect potential drive errors. It can be used to control the S.M.A.R.T. -
Page 69: 3.10 System
3.10 SYSTEM This section can be used to configure the functional parameters of system. To access, press “System” on the upper part of the screen. The following subsections will appear in the menu underneath: General Multi-User Maintenance IP Camera Maintain Information 3.10.1 GENERAL... -
Page 70: Date And Time
IMPORTANT NOTE: Here follow the max fps that it is possible to record for AHD/Analog Camera for each HVR Model: 1097/564 1097/568 1097/566 720p 1080p 720p 1080p 720p 1080p Lite Lite Lite Lite Lite Lite 25fps 13fps 14fps 12fps 25fps 15fps 18fps 15fps... - Page 71 NTP Settings The NTP (Network Time Protocol) function allows your HVR to automatically sync its clock with a time server. This gives it the ability to constantly have an accurate time setting (your HVR will periodically sync automatically). Check to enable the NTP, and select a Server Address, click Update Now button to manually sync the date &...
-
Page 72: Output Configuration
3.10.1.3 Output Configuration This menu allows you to configure video output parameters. Video Output: To choose the output options: • LIVE-OUT is used to configure the main output parameters. SPOT OUT (only for HVR 4K Series Models): This option is used to configure the spot output parameters. -
Page 73: Multi-User Settings
Transparency: Click and hold the slider left or right to change how transparent the Menu Bar and Main Menu will • appear on-screen. Adjust accordingly. SPOT OUT Choose SPOT-OUT from the Video Output drop-down menu. VGA SPOT: this option can be used to enable or disable the SPOT VGA output. View Setup: It is possible to set Static or Dynamic option. - Page 74 Changing Password To change the password for the administrator or user accounts, click the User Edit icon . The password has to be a minimum of 8 characters and can contain a mixture of numbers and letters. Enter your new password again to confirm, and then click Save to save your new password.
- Page 75 Setting User Permissions The administrator account is the only account that has full control of all system functions. You can enable or disable access to certain menus and functions of each user account. Click the edit icon under Permission tab. •...
-
Page 76: Maintenance Settings
3.10.3 MAINTENANCE SETTINGS In this section, you will be able to search & view the system log, load default settings, upgrade the system, export & import system parameters and manager system auto reboot. 3.10.3.1 The system log shows you important system events, such as motion alarms and system warnings. You can easily create a backup file of the system log for a set time period to a USB flash drive. -
Page 77: Load Default
3.10.3.2 Load Default Reset the HVR settings to its out-of-box state. You can choose to reset all settings at once, or just settings on specific menus. Restoring default settings will not delete recordings and snapshots saved to the hard drive. Check the items you want restore, or check Select All to choose all items. -
Page 78: Parameter Management
3.10.3.4 Parameter Management You can export the main menu settings you have configured to a USB flash drive, or import an exported setting file from USB flash drive to the HVR. Save Settings: Click to save the HVR current system settings to the USB device. You will be required to input •... -
Page 79: Ip Camera Maintain
3.10.4 IP CAMERA MAINTAIN This menu allows you to upgrade the IP camera’s firmware and restore default settings of IP camera. 3.10.4.1 Upgrade IP Camera Choose one of the IP cameras you want to upgrade firmware. • Click Select File select the update file from your USB flash drive, then click OK. •... -
Page 80: Reboot Ipc
3.10.4.3 Reboot IPC This function allows to reboot the IP Camera. Select the IP camera that you want reboot, then Click a warning message will ask to put the password. • Enter password and click “Autheticate” button, the IPC will be rebooted. •... -
Page 81: Channel Information
3.10.5.2 Channel Information View channel information for each connected camera such as alias, mainstream and substream recording specifications, motion detection status & privacy zone. 3.10.5.3 Record Information View recording information for each connected camera such as bitrate, stream type, recording resolution and frame rate (FPS). -
Page 82: Network State
3.10.5.4 Network State View network information. Total Band Width: It shows the HVR’s total input band width for IP cameras. • Used Band Width: It shows the used band width of IP cameras. • DS1097-010... -
Page 83: 3.11 Playback & Backup
3.11 PLAYBACK & BACKUP The Search function gives you the ability to search for and play previously recorded videos as well as snapshots that are stored on your HVR’s hard drive. You have the choice of playing video that matches your recording schedule, manual recordings or motion events only. -
Page 84: Search & Play Video In General
Default Tag/ Add Customized Tag: For major details please refer to section “3.2.6 - Tag Set up” Timeline: Continuous recordings are shown with colored bars to represent different types of recording (legend shown in the bottom-right corner of the display). Use the timeframe options ( ) to view a smaller or larger time period. -
Page 85: Video Clip Backup
3.11.2.1 Video Clip Backup Insert your USB flash or USB DVD Writer drive to the HVR. • Start a video recording playback. • Click icon. • Check the channel(s) you want to make a video clip backup. • Move the mouse cursor to the timeline where you want to start the video clip. •... -
Page 86: Event Search, Playback & Backup
3.11.1 EVENT SEARCH, PLAYBACK & BACKUP Event search lets you view a list of video recordings with the channel, start and end time, and recording type conveniently summarized. You can also quickly back up events to a USB flash drive/USB DVD Writer. To search, play &... -
Page 87: Event Playback Control
Detailed view: You can view the details of the events. In the detailed view mode, you can lock the video events to keep events from being overwritten in the hard drive. Click icon to lock or click to unlock the events. 8. -
Page 88: Sub-Periods Playback
3.11.2 SUB-PERIODS PLAYBACK Sub-periods playback allows you to play multiple normal recordings and motion events simultaneously from a single channel. With normal and event recordings, the video is divided evenly depending on the split-screen mode that has been selected. For example, if the video is an hour long and you have selected Split-screens x 4, each split-screen will play for 15 minutes. -
Page 89: Smart Playback
3.11.3 SMART PLAYBACK Sub-periods playback allows you to play multiple normal recordings and motion events simultaneously from a single channel. With normal and event recordings, the video is divided evenly depending on the split-screen mode that has been selected. For example, if the video is an hour long and you have selected Split-screens x 4, each split-screen will play for 15 minutes. -
Page 90: External File
3.11.1 EXTERNAL FILE This function can be used to search and play the external files present in USB flash drive or USB DVD Writer. 3.11.2 PICTURE SEARCH & VIEW This function can be used to search, play and copy snapshots to a USB flash drive or USB DVD Writer. To search, play &... - Page 91 6. Click icons in the bottom-right corner of the menu to browse between pages of pictures, or input the page you want to browse. 7. You can switch the view of list form in by clicking below icons which is show at the right bottom corner of the screen: Thumbnails view.
-
Page 92: Picture Preview Control
3.11.2.1 Picture Preview Control Picture List, you can select the pictures here. Click button to save your selected pictures to a USB flash drive or CD/DVD support. Click button to view the pictures in slideshow. Press button to exit preview control window and go back to picture search window. Press button to pause, press to resume slideshow. -
Page 93: Video Player For Viewing Backuped Video On Pc
VIDEO PLAYER FOR VIEWING BACKUPED VIDEO ON PC This section will help you to play the backup files with the powerful video player which is attached in the CD. For PC users, please install the software “VideoPlayer_x.x.xx_xxxx_xx_xx.exe”, Minimum System Requirements Intel Pentium 4 or above •... - Page 94 Play List Add files Remove files To choose play mode: play a single file and stop; play all listed files by sequence; repeat one file; repeat files. Filter by file name Hide/Show Playlist Click to open files or load a folder. Play Controls Play Pause...
- Page 95 Capture Settings: Set the format and the path to save snapshots. DS1097-010...
-
Page 96: Remote Access Via Web Client
REMOTE ACCESS VIA WEB CLIENT Use the Web Client to remotely access your HVR at any time via a PC. Before you access the Web Client, you need to ensure that the internet settings of the HVR are configured properly. BASIC SYSTEM ENVIRONMENT REQUIREMENTS The minimum requirements for hardware and OS required to run Web Client are given as below. - Page 97 About First HVR Login from Web Interface put the customized Password and confirm. After installing the plug-in, close & launch again your browser and repeat step 1 to open the login page. Input your user name and password to login the web client. Note: If you use Google Chrome, please use Version V41 or below.
-
Page 98: Web Client Manager
3. Click on "Continue" --> "Install". Enter user name and password for Mac computer, Click on "Install Software" --> "Close" to finish installation. 4. Close Safari and open again to repeat step 1 to open the Web Client login page. WEB CLIENT MANAGER The web client supports to fully control the HVR with administrator account. -
Page 99: Live Interface
User Name: admin Password: 00000000 (please change the password after first login). Enter the correct access credentials if other users were created in the HVR user menu or if the default password was modified. Select [Login] to access device web interface as shown in the screenshot on the bottom left. Note: The Default Password is empty if password on HVR is disabled. - Page 100 Live Video Stream Options: Mainstream: View all live videos using high-quality mainstream video settings. • Substream: View all live videos using middle-quality substream video settings. • Mobile Stream: View all live video using lower-quality mobile stream video settings to conserve bandwidth. •...
-
Page 101: Playback
Live View Control Buttons: Show display page of Layout. Open the images on Live window. Close all the Live channels Original Proportions: Shows live video at the original proportions Stretch: Stretch live video to fit the full area for each channel on screen. To enlarge the web client to full screen. -
Page 102: Playback Control Buttons
To search recordings: Click Playback in the top-right corner of the window. Select a day on the calendar to search for recordings from. Days with recordings appear with a red underline. Select the recording type to search for from the dropdown next to Type, or select All to search for all recordings. To choose the video stream you want to search &... -
Page 103: Remote Settings
Choose the files you want to download, press Start Download button to begin, you will see the download status. Press Stop Download button to stop. Playback Speed. Click to choose the playing speed. Play All Channels: Click to play all channels you have chosen to searched. Only available when the Synchronous playback option is not checked. - Page 104 IP Channels: Display the information of added IPC. It can quickly add the on-line IPC and delete the added IPC, as shown in Picture below. It is also possible to add quickly the Cloud Camera connected to LAN using the [Auto Assign Channels] button.
- Page 105 Image Control (if supported by IP Camera Model): it is possible to set the IP Camera Parameters where possible. PTZ: it is possible to set the correct PTZ settings for PTZ control. DS1097-010...
- Page 106 Motion Detection: allow to configure Sensitivity and set the Area. Details setting should be consistent with HVR local setting. PIR Detection: allow to configure Sensitivity and set the Area about PIR Detection. Detail Settings should be consistent with HVR local setting. DS1097-010...
- Page 107 Privacy zone: Each channel could set up to four privacy zones shown as below. Details parameters please refer to HVR OSD Menu section. If you want to delete one privacy zone, please firstly select one zone, and then click <Clear> button and click <Save> on the right corner. 10.
- Page 108 Note: The Sound Detection function is unavailable. This function depends from Camera Model and it must be supported by camera in order to set it. DS1097-010...
-
Page 109: Record
5.7.2 RECORD Click <Record> option to unfold its sub-options: Record parameter, Schedule and Main/Sub/Mobile Stream. Stream setting: User may set Mainstream, Substream and Mobile Stream as shown in Pictures below. The relevant parameters should be consistent with HVR local setting. Record: Under [Record parameters] option, allow you set channel, record enable, pack time and Pre-record status shown as below. -
Page 110: Alarm Set
Capture: You can capture the pictures automatically complaint with schedule or manually set the parameters as shown in pictures below. Under [Capture Schedule] you can schedule the Capture: Green stand for 24H Capture; Yellow stands for Motion detection, Red stands for I/O triggered record, Violet for PIR Detection. 5.7.3 ALARM SET You can set the notifications (i.e. - Page 111 Note: The Sound Detection function is unavailable. This function depends from Camera Model and it must be supported by camera in order to set it. DS1097-010...
-
Page 112: Network Parameters
5.7.4 NETWORK PARAMETERS Unfold <Network> option to enter into its sub-options: Network, sub stream, Email and DDNS configuration. The model support three network type, including Static, DHCP and PPPoE Static: User could allocate IP and perform Port forwarding for HVR according to different router. When set <UPNP>... - Page 113 DHCP System default <DHCP> as its network type: Set network type to “DHCP” shown as below. Relative parameters should be consistent with HVR local setting. Set network type to “PPPoE”: Its user name and password should be consistent with HVR local setting. DS1097-010...
- Page 114 3G/Wireless/SNMP setting (for future use): Port Configuration: it is possible to set the Port Configuration (i.e. Data Port, HTTP Port) DS1097-010...
- Page 115 DDNS Setting: After user applies for DDNS service shown below, you could enable <DDNS> function under any one network type mode (Static, DHCP and PPPoE). Now you remotely visit the HVR through domain name (http://domain name: port No). Details setting should be consistent with HVR local setting. Email setting: Click [Email setting] option to allow you set alarm email configuration parameters shown as below.
- Page 116 FTP Function: This function is applied together with alarming function. The captured images or alarming recording can be uploaded to FTP server through network. FTP: Enable or disable the function. Server IP: Put the FTP Server Address. Port: FTP service port,default value is 21. Nome Utente: User name for visiting FTP Password: Password for visiting FTP Nome Dir: Directory Name in order to transfer the pictures or record alarms.
-
Page 117: Device
IP Filter: You can set the IP Filter function. Detailed parameters should be consistent with HVR local setting. 5.7.5 DEVICE Click <Device> to unfold its sub-options: HDD and PTZ. HDD: allow you check out HDD status and overwritten time shown below, the overwrite time and recording enabling on ESATA interface as shown here. -
Page 118: System
Cloud Storage: You can set the Cloud Storage parameters for Dropbox and Google Drive Account. Detailed parameters should be consistent with HVR local setting. 5.7.6 SYSTEM Click <System> option to unfold its sub-options: General, Users and information. General: User could check HVR’s language and video system, and also set system time, date format, DST and NTP shown below. - Page 119 Users: Allow you configure user name and password shown below. Details setting should be consistent with HVR local setting. Maintenance HVR: allow to set the Log, Load Default, Firmware Update and Auto Reboot function of HVR. Details setting should be consistent with HVR local setting. DS1097-010...
- Page 120 IP Camera Maintain: allow to set the Firmware Update, Load Default and Auto Reboot function of IP Camera (Firmware Upgrade not available for IP camera with ONVIF Protocol). Details setting should be consistent with HVR local setting. Info/Channel Info: Allow you check out device name, number, type, MAC address, software version, IE version and hardware version shown below.
-
Page 121: Local Setting
LOCAL SETTING Set download locations for recordings and snapshots taken using Web Client, and choose file type for video files. Record Path: Click to browse for and select the folder where you would like the manual video • recordings to be saved on your computer. Download Path: Click to browse for and select the folder where you would like to save the download •... -
Page 122: Mobile Software
MOBILE SOFTWARE Mobile Software is used for the iOS (iPhone, iPad) and Android platforms (Android Smartphone, Tablet). The following is a description of the Mobile Client Software. SMARTPHONE DEVICE 6.1.1 URMET IUVS PLUS MOBILE SOFTWARE Urmet iUVS plus is a TVCC application for iOS and Android on smartphones, pads and tablets that is compatible with all URMET devices, both IPCam (Codec H265) and NVR/HVR (all codecs). - Page 123 Getting Started Download the iUVS app from the Apple Store or Google Play Store and install it. Connect your iPhone, iPad, Android phone or Android tablet to the Internet via the 3G network or WIFI. Start the application to access the “Live” menu. To access the menu, select the icon at the top left Live...
- Page 124 Opening a channel When a device is selected, the list of channels appears. Select a channel, which will be displayed in the main window. Recording a live video stream You can record the stream while viewing a video in live mode. Select and then the channel label to start recording.
- Page 125 PTZ Control PTZ is short for Pan-Tilt-Zoom and refers to camera movement options. Select to open PTZ mode, this will bring up the PTZ control buttons on the live page. Select the arrows to control camera movement from side to side or up and down. The other control buttons allow you to zoom, force, operate the aperture, operate the preset, etc.
- Page 126 Selecting a channel Select the “Remote Playback” button to open the device list, as shown below; select a channel on a device in the list. Selecting the date When you have selected a channel, all dates with recordings will be marked with a dot. Select a date to play the recordings from that day.
- Page 127 10. Record You can record the stream while viewing a video in live mode, as shown above. 11. Images Images opens a gallery of screenshot pictures. 12. Remote Settings Controls on the remote device can be enabled, such as sending e-mail and enabling recording on the device. DS1097-010...
- Page 128 13. Alarm E-mail notification of the devices can be enabled. 14. Device 15. Add or delete a device “Device” allows you to add or delete a device and edit its properties. Select Menu and “Device” or the icon at the top right of the start screen to open the interface shown below and manually add a device To add a new device, select “+”, then Manual Adding, Import Device (via QR Code), Online Device (Device present on network): enter the name of the device, the address (IP, domain name or device ID for the DDNS Urmet account), the...
- Page 129 To add a device using automatic network search: Choose the device and select “Add Device” NOTE: the Data Port (i.e. 9000) must be set up in order for the the Mobile Software to work properly. If the user does not configure the mobile device port, the iUVS Mobile Software will not work. To delete a device from list, select the name of the device you want to delete, then press the delete button next to the device name.
-
Page 130: P2P Function
P2P FUNCTION Once NVR and the network cameras have been configured, for remote viewing on an iPhone or Android smartphone, download the URMET iUVS app from the relevant store. For viewing on an Apple iPad or Android tablet, download the iUVSpad app from the Apple Store or the iUVStab app from the Google Play Store. - Page 131 Fill in the “Password” field entering password (default: 00000000), then press “Save” and wait for about 10 seconds for the NVR LIVE video to automatically load. IMPORTANT NOTE: In addition to P2P mode, the IP camera can also be remotely viewed on a smartphone via the DDNS Urmet service. To do this, the router must be set for port opening and forwarding.
-
Page 132: 1097/564 1097/568 And 1097/566 Specifications (Pal Format)
1097/564 1097/568 AND 1097/566 SPECIFICATIONS (PAL FORMAT) Characteristics Feature 1097/564 1097/568 1097/566 Compression formats Video: H.265 / H.264 Audio: 8kHz*16bit ADPCM 8-CH with BNC video input / 4- 16-CH with BNC video input 4-CH with BNC video input / CH with IP video input / 8-CH with IP video input 2-CH with IP video input (till to 12-CH with IP video... -
Page 133: 1097/604 1097/608 And 1097/616 Specifications (Pal Format)
1097/604 1097/608 AND 1097/616 SPECIFICATIONS (PAL FORMAT) Characteristics Feature 1097/604 1097/608 1097/616 Compression formats Video: H.265 / H.264 Audio: 8kHz*16bit ADPCM 4-CH with BNC video input / 2- 8-CH with BNC video input / 4-CH 16-CH with BNC video input / 8- CH with IP video input with IP video input CH with IP video input... - Page 134 IMPORTANT NOTES (*) About LIVE Display IP Camera, the HVR uses automatically the Main Stream or Sub Stream based on available resources. If the user sets manually the Main Stream LIVE Display, it could be needed disable one or more analog HVR channels or decrease the Main Stream frame rate of IP Camera.
-
Page 135: Maximum Recording Time With 1000Gb Hard Disk
MAXIMUM RECORDING TIME WITH 1000GB HARD DISK REF. 1097/564 - 1097/568 - 1097/566 - 1097/604 - 1097/608 - 1097/616 The following resolution options can be selected on Urmet Hybrid 4M HVR Series: “4K”, “5M”, “5M-Lite”, “4M”, “4M-Lite”, “3M”, “1080P”, “720P” and “WD1” on 1/4/8/16 analogue channels “5M”, “4M”, “3.5M”, “3M”, “1080P”, “960P”... - Page 136 1 recording channel with 5M-Lite resolution (1280x1944) 4 recording channels with 5M-Lite resolution (1280x1944) Variables to be set H.264 Codec H.265 Codec Variables to be set H.264 Codec H.265 Codec H.264 H.265 Frame Time Time Time Time H.264 H.265 Frame Time Time Time...
- Page 137 8 recording channels with 4M-Lite resolution (1280x1440) 16 recording channels with 4M-Lite resolution (1280x1440) Variables to be set H.264 Codec H.265 Codec Variables to be set H.264 Codec H.265 Codec H.264 H.265 Frame Time Time Time Time H.264 H.265 Frame Time Time Time...
- Page 138 8 recording channels with 1080P resolution (1920×1080) 16 recording channels with 1080P resolution (1920×1080) Variables to be set H.264 Codec H.265 Codec Variables to be set H.264 Codec H.265 Codec H.264 H.265 Frame Time Time Time Time H.264 H.265 Frame Time Time Time...
- Page 139 IP channels with Private, U-IPCy and ONVIF protocol: 1 recording channel with 4K resolution (3840×2160) 4 recording channels with 4K resolution (3840×2160) Variables to be set H.264 Codec H.265 Codec Variables to be set H.264 Codec H.265 Codec H.264 H.265 Frame Time Time...
- Page 140 8 recording channels with 4M resolution (2592 × 1520) 16 recording channels with 4M resolution (2592x1520) Variables to be set H.264 Codec H.265 Codec Variables to be set H.264 Codec H.265 Codec H.264 H.265 Frame Time Time Time Time H.264 H.265 Frame Time...
- Page 141 8 recording channels with 3M resolution (2048×1520) 16 recording channels with 3M resolution (2048×1520) Variables to be set H.264 Codec H.265 Codec Variables to be set H.264 Codec H.265 Codec H.264 H.265 Frame Time Time Time Time H.264 H.265 Frame Time Time Time...
- Page 142 8 recording channels with 960P resolution (1280 × 960) and 720P 16 recording channels with 960P resolution (1280 × 960) and resolution (1280 x 720) 720P resolution (1280 x 720) Variables to be set H.264 Codec H.265 Codec Variables to be set H.264 Codec H.265 Codec H.264...
-
Page 143: 10 Troubleshooting
10 TROUBLESHOOTING Q: What can I do if the system does not detect the HDD? A: Check if the power supply system is properly connected and data cord and power cables are securely connected, and if something wrong with the HDD interface. Or you may check if your HDD is supported by referring to the specifications or descriptions. -
Page 144: 11 Usage Maintenance
A: Please check the alarm setting, check if motion detection function is enabled and object motion is detected all the time and if I/O alarm is set as Always Off. Besides, refer to corresponding HDD alarm setting. 17. Q: Why can’t I stop recording by pressing “STOP” button or click “Stop Recording” in context menu? A: Pressing Stop or Stop Recording can only stop manual record. -
Page 145: Appendix: Active X Installation
APPENDIX: ACTIVE X INSTALLATION If the installation of an ActiveX component is required, follow the procedure below. Before performing the connection to the PC, activate IE protection configuration, following the procedure below: Double click the icon to open Internet Explorer browser. The following display will appear (or, however, the default page). - Page 146 Select the area “Trusted sites”. Click on “Custom Level” and check if the following items: “Initialize and script Active X controls not marked as safe” is selected as “Enable” or “ • Prompt” “Download insigne Active X controls” is selected as “Enable” or “Prompt” •...
- Page 147 The following screen will appear. It will be needed to add the Device IP Address(Example: http://192.168.36.40) in the filed “Add Web Site to the Zone”. Add the device IP address in the field click on “Add”. NOTE Do not select the item: “Require server (https:) verification for all sites in this zone”. Close the window selecting “Exit”...
-
Page 148: Glossary
GLOSSARY ADPCM Acronym of Adaptive Delta Pulse Code Modulation, a digital audio compression technique. Automatic Gain Control is a function to improve viewing in poor light conditions. Acronym of Analog High Definition, a protocol used for high-resolution transmissions on video coaxial cable. Automatic Motion Recording is the capability of starting a video recording when the system identifies motion in the image framed by the camera. - Page 149 Port In IT networks, port forwarding is the operation for transferring (forwarding) data from one Forwarding computer to another via a specific communication port. This technique may be used to allow an external user to reach a host with a private IP address (in a LAN) by means of a port of the public IP of the same.
- Page 150 DS1097-010...
- Page 151 DS1097-010...
- Page 152 DS1097-010 Area tecnica URMET S.p.A. servizio clienti +39 011.23.39.810 10154 TORINO (ITALY) http://www.urmet.com VIA BOLOGNA 188/C e-mail: info@urmet.com Telef. +39 011.24.00.000 (RIC.AUT.) MADE IN CHINA +39 011.24.00.300 - 323 DS1097-010...
Need help?
Do you have a question about the 5M-Lite HVR Series and is the answer not in the manual?
Questions and answers