urmet domus 1093 User Manual
16 channel video dvr h.264
Hide thumbs
Also See for 1093:
- Quick manual (152 pages) ,
- User manual (104 pages) ,
- User manual/instructions (80 pages)
Table of Contents
Advertisement
Quick Links
Advertisement
Table of Contents

Related Manuals for urmet domus 1093


Summary of Contents for urmet domus 1093
- Page 1 Mod. 1093 DS1093-059 16 CHANNEL VIDEO DVR H.264 Ref. 1093/045SN USER MANUAL...
-
Page 2: Table Of Contents
TABLE OF CONTENTS General information ..........................5 Product description ........................5 1.1.1 General features ..........................5 Opening the package........................7 1.2.1 Contents of the package ........................7 Warnings ............................7 1.3.1 Power ..............................7 1.3.2 Safety precautions ..........................7 1.3.3 Installation precautions......................... - Page 3 Playing Back a Recording ........................31 Understanding the Playback Interface..................31 Playing Back from Search......................32 Playing Back from Live Preview ....................33 Playing Back from System Log....................34 Playing Back Frame-by-Frame ....................34 Using Digital Zoom........................34 Backing up Recorded Files ......................... 35 Exporting Files ...........................
- Page 4 Snapshot Capture ..........................81 15.10 Log Search ..........................82 15.11 Local Configuration........................ 83 15.12 Remote Configuration......................83 Specifications (Pal format) ........................84 Maximum recording time with 500GB hard disk ................86 17.1 Ref. 1093/045SN ........................86 Glossary ..............................89 FAQ ................................ 89 DS1093-059...
-
Page 5: General Information
PRODUCT DESCRIPTION URMET Domus DVR DVS series 1093/045SN, product is digital video recorder capable of recording several cameras on internal hard disk while showing live camera feed at the same time. Alternatively, up to four recorded cameras can be shown at the same time. - Page 6 • Supports multi-level user management, each user can have individual DVR access rights. • Powerful DVR log, including operation, alarm and exception log. IMPORTANT NOTE (*) Contact an authorised Service Centre for increasing the recording capacity of 1093/045SN device. DS1093-059...
-
Page 7: Opening The Package
OPENING THE PACKAGE Check that the packing and the contents are not visibly damaged. Contact the retailer immediately if parts are either missing or damaged. Do not attempt to use the device in this case. Send the product back in its original packing if it is damaged. -
Page 8: Hard Disk
1.3.6 IMAGE RECORDING This device was designed to record images, not as a burglar alarm. URMET Domus S.p.A. cannot be held liable for loss or damage following theft sustained by the user. Make a test recording before using the device to make sure that is working correctly. Please note that URMET Domus S.p.A. -
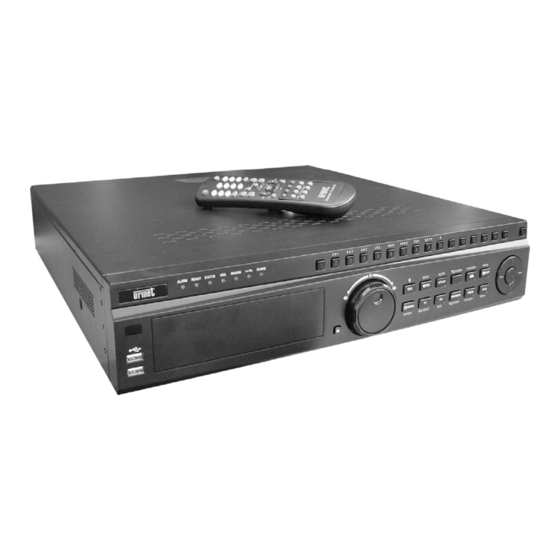
Page 9: Description Of The Parts
DESCRIPTION OF THE PARTS There are numerous ways to navigate and operate your DVR. You may use the Front Panel Controls, the included IR (Infra-Red) Remote, a Mouse and the Soft Keyboard. FRONT PANEL Figure 1. DVR Front Panel Controls The controls on the front panel include: Power Button: Powers DVR on/off. - Page 10 MENU/WIPER Button: Pressing the MENU/WIPER button will return the user to the Main menu (after • successful login). Pressing and holding the button for 5 seconds will turn off audible key beep. The MENU/WIPER button will also bring up Sensitivity Interface settings. In PTZ Control mode, the MENU/WIPER button will start wiper (if applicable).
-
Page 11: Rear Panel
REAR PANEL Figure 2. Rear Panel Diagram Item Description BNC connectors for analog video input. VIDEO IN BNC connectors for analog audio input. AUDIO IN BNC connector for monitor. If HDMI is connected, interface is deactivated, If VGA is VIDEO connected, interface is for video output only. -
Page 12: Ir Remote Control
IR REMOTE CONTROL Figure 3. IR remote control The keys on the remote control closely resemble the ones found on the front panel. Referring to Figure 3, they include: POWER Button: Same as POWER button on front panel DEV Button: Enables/Disables Remote Control. Alphanumeric Buttons: Same as Alphanumeric buttons on front panel. -
Page 13: Mouse
MOUSE 1 - Left button 2 - Scroll wheel 3 - Right button Figure 4. mouse and control buttons (picture as indication only) A regular 3-button (Left/Right/Scroll-wheel) USB mouse can also be used with this DVR. To use a USB mouse: Plug USB mouse into one of the USB ports on the front panel of the DVR. -
Page 14: Using The Soft Keyboard
USING THE SOFT KEYBOARD When a mouse is used to perform task on the DVR, clicking on a text input field will bring up the Soft Keyboard, shown in Figure 5. Figure 5. Soft Keyboard The buttons on the soft keyboard represents: Lowercase: Designates lowercase input is being used. -
Page 15: Product Application Diagram
PRODUCT APPLICATION DIAGRAM Figure 1. Product Application Diagram DS1093-059... -
Page 16: General Settings
GENERAL SETTINGS Proper startup and shutdown procedures are crucial to expanding the life of your DVR. SWITCH-ON To startup your DVR: Ensure the power supply is plugged into an electrical outlet. It is HIGHLY recommended that an Uninterruptible Power Supply (UPS) be used in conjunction with the unit. Turn on the switch on rear panel After startup, the Status indicator LED will remain green. -
Page 17: Rebooting And Locking Your Dvr
REBOOTING AND LOCKING YOUR DVR While in the Shutdown menu (Figure 1), you may also reboot or lock your DVR. Locking your DVR will return you to the Live Preview mode, which will require an user name and password to exit out of it. The Reboot button will reboot your DVR. - Page 18 Navigate to the Admin Password input field. Enter the admin password into the Admin Password input field. By default, the password is 12345. To change the admin password, check the New Admin Password checkbox. Enter the new password and confirm the password in the given fields. Click the Next button.
- Page 19 Select the Schedule tab, shown in Figure 6. Figure 6. Schedule Settings Click the Edit button. This will open up a new recording schedule, shown in Figure 7. Check both the Enable Schedule and All Day checkbox. This will enable the recording schedule and have it record continuously all day.
-
Page 20: Setting Date & Time
To configure network settings, click the Enter button. Enter the IP Address, Subnet Mask and Default Gateway. Click the OK button to return to the Setup Wizard. If all the settings are entered as desired, click the Done button to finish and exit the Setup Wizard. Congratulations! You’ve completed the Setup Wizard. -
Page 21: Watching A Live Preview
WATCHING A LIVE PREVIEW The Live Preview mode is automatically started after the DVR boots up. It is also at the very top of the menu hierarchy, thus hitting the ESC multiple times (depending on which menu you’re on) will bring you to the Live Preview mode. UNDERSTANDING LIVE PREVIEW ICONS There are multiple icons on each display in Live Preview mode to indicate different camera status. -
Page 22: Using The Mouse In Live Preview
USING THE MOUSE IN LIVE PREVIEW Many features of the Live Preview can be quickly accessed by clicking the right-button of the mouse (shown in Figure 2). These features include: • Single Camera: Switch to a full screen display of the selected camera. Camera can be selected from a drop down list. -
Page 23: Configuring Live Preview Displays
CONFIGURING LIVE PREVIEW DISPLAYS Live Preview displays can be customized to your own needs. These settings can be accessed by entering the Display Settings menu. Figure 4. Display Settings Note: Spot out only has a window division. To access the Display Settings menu: Click the MENU button. -
Page 24: Setting Camera Order
SETTING CAMERA ORDER Setting the camera order allows you to logically position cameras for more efficient monitoring of your own individual location. Note: Spot out only has one window division Figure 5. Camera Order Setting To set the camera order: Enter the Display Settings menu, shown in Figure 5 (Menu >... -
Page 25: Configuring Settings For Recording
CONFIGURING SETTINGS FOR RECORDING There are multiple ways to setup your DVR for recording. They include setting up a recording schedule, triggering a recording by motion detection and/or a sensor alarm, and manually starting the recording. INITIALIZING RECORD SETTINGS Before setting your DVR up for recording, certain settings should be configured first. The steps to configuring these settings are: If you have not initialized a HDD either through the Setup Wizard or through HDD management, you must do so before proceeding. -
Page 26: Scheduling A Recording
Set additional record settings: • Pre-Record: Sets the time in seconds to pre-record before the actual recording begins. • Post-Record: Sets the time in seconds to post-record after the actual recording has ended. • Recording Expired Time: Sets the expiration time in days for recorded video. Recordings after expiration time would be deleted. -
Page 27: Starting A Manual Recording
Select recording Type. Recording type can be based on time and triggered by motion detection and/or alarm. Motion detected and alarm triggered recordings are further explained in Configuring Alarms. Click the OK button to finish configuration. 10. Repeat steps 3-9 for other cameras or copy settings from one schedule to the next under the Copy To section. -
Page 28: Setting Hdd To Read-Only
Search for desired recording by entering search parameters. Search parameters include Camera #, Video/File Type, and Start/End Time. Click the Search button. A list of recordings (similar to Figure 7), matching the search parameters will be displayed. Select the file you would like to lock/unlock. Click on the Lock button to lock file. -
Page 29: Configuring Advanced Hdd Settings
Click the Property button. This will take you to the Property Settings menu, shown in Figure 9. Figure 9. HDD Property Settings Menu 5. Set HDD to Read-Only. 6. Click the OK button. The HDD is now read-only. Note: When a HDD is set to read-only, no more recordings can be written to the disk. In order to enable recordings on that particular disk again, you must set the HDD to R/W (Read/ Write) in the HDD Property Settings menu. - Page 30 Click the OK button to save settings and return to the previous menu. Figure 11. HDD Property Settings Navigate to the Record Settings menu by clicking Menu > Setting > Record Setting. Click on the General tab. Select the Camera to be used for redundancy. Next to More Settings, click on the Set button.
-
Page 31: Playing Back A Recording
PLAYING BACK A RECORDING You must first search for recordings to play them back. There are multiple ways to search for recordings, including searching for them by time, by channel, by file type and by log. UNDERSTANDING THE PLAYBACK INTERFACE There are various controls on the Playback interface that makes viewing recordings more efficient. -
Page 32: Playing Back From Search
PLAYING BACK FROM SEARCH To playback files from a video search: Enter into the Video Search menu by clicking Menu > Video Search. Set the search parameters by selecting cameras to search, video/file type and the start/end time (as shown in Figure 3). Figure 3. -
Page 33: Playing Back From Live Preview
Play button to view the day’s recording for the selected channel. You may also select additional channels (1093/045SN supports up to 16-ch) for playback from the channel list on the right hand side of the Playback interface, as shown in Figure 5. -
Page 34: Playing Back From System Log
PLAYING BACK FROM SYSTEM LOG You may also playback recordings from the System Log. To playback video from the System Log: Enter the Log Search menu by clicking Menu > Maintenance > Log Search (shown in Figure 6). Figure 6. Log Search Menu Set Major Type setting to Information. -
Page 35: Backing Up Recorded Files
BACKING UP RECORDED FILES Recorded files can be backed up to various devices, such as USB flash drives, USB HDDs or a DVD writer. EXPORTING FILES To export recorded files: Enter the Export Video menu (shown in Figure 1) by clicking Menu > Video Export. Figure 1. - Page 36 Select device to export to from drop-down list (USB Flash Drive, USB HDD, DVD Writer). If backup device is not recognized: • Click the Refresh button. • Reconnect device. • Check for compatibility from vendor. Click Start to begin backup process, shown in Figure 4. Figure 4.
-
Page 37: Exporting Video Clips
EXPORTING VIDEO CLIPS You may also select video clips to export directly during Playback. A maximum of 30 clips can be selected for each channel. To export video clips during Playback: • Using the Mouse: Enter into the Playback interface (See Playing Back a Recording). Using the Clip Start/Stop button in the Playback Control Panel, select the start and end of the video clip during playback. -
Page 38: Configuring Alarms
CONFIGURING ALARMS SETTING UP MOTION DETECTION Set up properly, using motion detected recording will increase the number of days your DVR is able to record. It will only record relevant events rather than recording everything, making searching for an event easier. To set up motion detection: Enter Camera Setting: Enter the Camera Settings interface by navigating to Menu >... - Page 39 Set the Motion Detection Sensitivity, shown in Figure 3. The higher the sensitivity value, the higher the sensitivity. Figure 3. Motion Sensitivity Setting Click OK to return to the Camera Settings menu. Click the Handle button to open the Exception Handle menu, shown in Figure 4. Select the Triggered Camera tab Figure 4.
-
Page 40: Setting Up Sensor Alarms
SETTING UP SENSOR ALARMS Recordings can also be triggered from an external sensor alarm device. To setup sensor alarms: Enter into the Alarm Management menu by navigating to Menu > Setting > Alarm, shown in Figure 5. Figure 5. Alarm Management Menu Select the Alarm Input # and click the Set button. - Page 41 Select cameras to trigger for recording when alarm occurs by checking the checkboxes under the desired cameras, as shown in Figure 7. Figure 7. Triggered Cameras Menu Click the OK button to complete setup. You may now add a schedule to start recording when an alarm is triggered (See Scheduling a Recording). Alarm outputs may also be configured in the Alarm Management menu.
-
Page 42: Triggering Alarm Outputs Manually
Select the output you would like to configure and click the Set button. This will bring up the settings page for the selected channel (Figure 9). Figure 9. Alarm Output Settings Configure the settings for selected output. Select OK to save and exit. Note: If the Hold For option is selected as Manually Stop, the alarm will only stop when you manually stop it (See Triggering Alarm Outputs Manually). -
Page 43: Detecting Video Loss
DETECTING VIDEO LOSS Your DVR can be setup to detect video loss and trigger an action. To setup video loss detection: Enter Camera Settings menu by clicking Menu > Setting > Camera. Select camera under Channel # to configure video loss detection for and click the Set button. Select the Advanced tab. -
Page 44: Detecting Video Tampering
DETECTING VIDEO TAMPERING Video tampering (i.e. moving camera to a different position) can also be detected and set to trigger an action on your DVR. To setup video tempering detection: Enter Camera Management/Settings menu by clicking Menu > Setting > Camera. Select camera under Channel # to configure video loss detection for and click the Set button. -
Page 45: Setting Exception
Click the Handle button to enter the Exception Handle menu, shown in Figure 15. 10. Select the Handle tab to configure exceptions handling. Exception trigger options are further explained in the next section (See Understanding Exception Trigger Options). Figure 15. Exception Handle Menu 11. -
Page 46: Understanding Exception Trigger Options
9.6.1 UNDERSTANDING EXCEPTION TRIGGER OPTIONS When setting up exception handlers for such features as motion detection and sensor alarms, you may select triggering options to alert you of these exceptions. The triggering options that you may select include: • Pop-up Image on Monitor: When an alarm is triggered, the local monitor (VGA or BNC monitor) will display an image under Live Preview mode. -
Page 47: Configuring Network Settings
10 CONFIGURING NETWORK SETTINGS Network settings must be configured before you’re able to use your DVR over the network. 10.1 CONFIGURING BASIC SETTINGS To configure basic network settings: Enter the Network Settings menu, shown in Figure 1 by clicking Menu > Setting > Network. Figure 1. -
Page 48: Configuring Pppoe Settings
10.2 CONFIGURING PPPOE SETTINGS Your DVR also allows for Point-to-Point Protocol over Ethernet (PPPoE) access. To set up PPPoE access: Enter the Network Settings menu by clicking Menu > Setting > Network. Select the General tab. Set the IP address and subnet mask to 0, as shown in Figure 3. When the PPPoE connection is successfully established, the IP address will be added automatically. -
Page 49: Configuring Ddns
Click the Set button next to PPPoE to enter PPPoE settings menu, shown in Figure 5. Figure 5. PPPoE Settings Check the PPPoE checkbox to enable feature. Enter User Name, Password, and Confirm Password for PPPoE access. PPPoE credentials can be obtained from your network administrator. -
Page 50: Configuring An Ntp Server
Select DDNS Type. There are three different DDNS type to choose from, IpServer, PeanutHull and DynDNS. • IpServer: Enter Server Address for IpServer. • PeanutHull: Enter User Name and Password obtained from the PeanutHull website (Figure 6). • DynDNS: Enter Server Address for DynDNS (i.e. members.dyndns.org) (Figure 7). Under DVR Domain Name, enter the domain obtained from the DynDNS web site. -
Page 51: Configuring A Remote Alarm Host
10.5 CONFIGURING A REMOTE ALARM HOST With a remote alarm host set, the DVR will send a signal to the host when an alarm is triggered. The remote alarm host must have the Network Video Surveillance software installed. To set up a remote alarm host: Enter Network settings menu by clicking Menu >... -
Page 52: Configuring Server And Http Ports
10.7 CONFIGURING SERVER AND HTTP PORTS If you would like to change the server and HTTP ports from the default settings, you can do so in the Network Settings menu. The default server port is 8000 while the default HTTP port is 80. To change the default ports: Enter the Network Settings menu by clicking Menu >... -
Page 53: Configuring E-Mail Settings
10.8 CONFIGURING E-MAIL SETTINGS To configure E-mail settings: Enter the Network Settings menu by clicking Menu > Setting > Network. Select the Advanced tab. Click the Set button next to E-mail to enter the E-mail menu. The E-mail menu is shown in Figure 12. Figure 12. -
Page 54: Ptz Controls
11 PTZ CONTROLS 11.1 NAVIGATING PTZ MENUS PTZ menus can be navigated through with either the mouse or the front panel/remote. For quick access to certain PTZ settings, right clicking with the mouse in a display while in PTZ control mode will bring up the PTZ settings menu. This menu is shown in Figure Figure 1. -
Page 55: Configuring Ptz Settings
11.2 CONFIGURING PTZ SETTINGS Settings for a PTZ camera must be configured before it can be used. Before proceeding, verify that the PTZ and RS-485 of the DVR are connected properly. To configure PTZ settings: Enter the PTZ Settings menu by clicking Menu > Setting > PTZ. The PTZ Settings menu is shown in Figure 2. -
Page 56: Customizing Presets
11.3.2 CUSTOMIZING PRESETS Presets can be set to move your PTZ camera to a desired preset location at the click of a button. To setup and use custom PTZ presets: Enter the PTZ Control interface, shown in Figure 3 by clicking PTZ in the mouse menu or the PTZ button on the front panel. - Page 57 In the Patrol Management menu, you may: • Configure Patrol: Select a Patrol Number to set. Select valid presets (See Customizing Presets) and click the Set button to enter the Patrol configuration menu. A sequence should have at least 2 valid presets. Set the Key Point No., Duration, and Speed (Figure 6).
-
Page 58: Customizing Patterns
11.3.4 CUSTOMIZING PATTERNS Patterns can be setup by recording the movement of the PTZ. To setup and use PTZ patterns: Enter the PTZ Control interface, shown in Figure 3 by clicking PTZ in the mouse menu or the PTZ button on the front panel. -
Page 59: Camera Management
12 CAMERA MANAGEMENT 12.1 CONFIGURING OSD SETTINGS On Screen Display (OSD) settings can be configured in the Camera Management menu. The OSD is shown in each display during Live Preview mode and includes the time and date as well as the camera name. To configure OSD settings: Enter the Camera Management/Settings menu, shown in Figure 1 by clicking Menu >... -
Page 60: Adjusting Display Settings
Check the Mask checkbox to enable feature. Click the Area Settings button to enter Area Settings menu. Setup mask area, as shown in Figure 3. Up to 4 areas can be set. Figure 3. Setting Mask Area Select OK to save and exit mask setup. 12.3 ADJUSTING DISPLAY SETTINGS Display settings such as the brightness, contrast, saturation and hue can also be adjusted in the Camera Management menu. -
Page 61: Managing Hdds
13 MANAGING HDDS 13.1 INITIALIZING HDDS A newly installed hard disk drive (HDD) must be first initialize before it can be used with your DVR. Initializing the HDD will erase all data on it. To initialize a HDD: Enter the HDD Management menu, shown in Figure 1 by clicking Menu > HDD. Figure 1. -
Page 62: Setting Hdd Status
13.3 SETTING HDD STATUS You may change the behavior of your HDD by changing its status. The status of a HDD can be set to redundancy, read-only or read/write (R/W). 13.3.1 SETTING HDD TO READ-ONLY A HDD can be set to read-only to avoid important recorded files from being overwritten when the HDD becomes full. To set a HDD to read-only: Enter the HDD Management menu by clicking Menu >... -
Page 63: Checking Hdd Status
13.4 CHECKING HDD STATUS You may check the status of any of the installed HDDs on your DVR at anytime. To check the status of a HDD: 1. Enter the HDD Management menu by clicking Menu > HDD. 2. The status of your HDD is listed under the Status column. If the status is listed as Normal or Hibernate, the HDD is in working order. -
Page 64: Configuring Hdd Alarms
6. Select log item to view and click the Details button. A detail listing of SMART information, as shown in Figure 6 will be displayed. Figure 6. SMART Information 13.5 CONFIGURING HDD ALARMS HDD alarms can be set to trigger when an HDD is uninitialized or in an abnormal state. To set HDD alarms: Enter Exception menu, shown in Figure 7 by clicking Menu >... -
Page 65: Dvr Management
14 DVR MANAGEMENT 14.1 CONFIGURING GENERAL SETTINGS General settings such as the system language can be configured in the General Settings menu of your DVR. To configure general settings: Enter the General Settings menu, shown in Figure 1 by clicking Menu > Setting > General. Figure 1. -
Page 66: Configuring Rs-232 Port Settings
Configure settings, including: • Device Name: Name to use for DVR. • Device No.: Device number to use for DVR. • CVBS Output Brightness: Video output brightness. • Transparency: Menu transparency. • Operation Timeout: Set timeout time for menu inactivity. For example, if timeout time was set to 5 minutes, after 5 minutes of inactivity in the General Settings menu, you’ll be returned to the Live Preview. -
Page 67: Managing User Accounts
14.3 MANAGING USER ACCOUNTS By default, your DVR comes with one user account, the Administrator account. The Administrator user name is admin and the password is 12345. The default password for Administrator should be changed right away for security reasons. The Administrator has the authority to add, delete or configure parameters for many of the system functions. - Page 68 Select the Permission button to enter the Privilege Settings menu, shown in Figure 6. Figure 6. Privilege Settings Menu Configure privileges for local settings under Local Permission tab. The local settings include: • Local Log Search: Search and view logs of DVR. •...
-
Page 69: Deleting A User
Click on the Channel Permission tab to configure channel privileges, as shown in Figure 8. The channel settings include: Figure 8. Channel Privileges Menu • Remote Live View: Select and view live video over the network. • Local Manual Record: Locally start and stop manual recording on any of the channels. •... -
Page 70: Modifying A User
14.3.3 MODIFYING A USER To modify a user: Enter the User Settings menu by clicking Menu > Settings > User. Select user to modify. Click the Modify button to enter the Modify menu, shown in Figure 9. Figure 9. Modify User Menu Edit user information. -
Page 71: Updating System Firmware
14.5 UPDATING SYSTEM FIRMWARE The firmware on your DVR can be updated using two methods. These methods include updating via an USB device or over the network via a FTP server. To update via an USB device: Connect USB device to DVR. The firmware file must be located in the root directory of your USB device. Enter the Firmware Update menu, shown in Figure 11 by clicking Menu >... -
Page 72: Restoring Default Settings
Network information such as IP address, subnet mask and gateway will not be restored. 14.7 VIEWING SYSTEM INFORMATION To view system information: Enter into the Information menu, shown in Figure 14 by clicking Menu > Maintenance > Information. Select OK to exit to the previous screen. 1093/045SN DS1093-059... -
Page 73: Viewing System Logs
14.8 VIEWING SYSTEM LOGS Many events of your DVR are logged into the system logs. To access the system logs and search for these events: Enter the Log Search menu, shown in Figure 15 by clicking Menu > Maintenance > Log Search. Figure 15. - Page 74 Log files can also be exported onto a USB device. To export a log file, connect a USB device to the DVR, select the log file to export and click the Export button. This will take you to the Log Search Export menu, shown below in Figure 17.
-
Page 75: Urmet Web Server
15 URMET WEB SERVER 15.1 INTRODUCTION Web server, which requires Activex control compatible in the browser. When access the device which contains V2.3 web server from IE browser for the first time, an OCX package will be downloaded and registered to your PC/laptop. The compatible resolution of display can be 1024x768, 1152x864, 1280x768, etc. -
Page 76: Live Preview
15.3 LIVE PREVIEW The main page appears when log on to the device successfully: Function Tabs PTZ buttons Cameras List Video Parameters Function Buttons Function Buttons: Buttons Description Buttons Description Single camera 4 cameras divisions 9 cameras divisions 16 cameras divisions 25 cameras divisions Stop All Snapshot capture... -
Page 77: Start/Stop Preview
15.3.2 START/STOP PREVIEW Select icon to preview the desired camera, icon will be indicated if successfully get the video, otherwise, failure information will pop up. Click the icon again you can stop previewing the corresponding camera. Besides, you can click to navigate to the next page or to the last page. -
Page 78: Recording And Snapshot Capture
15.4 RECORDING AND SNAPSHOT CAPTURE In the live preview , the user can start manual recording or capture snapshots if needed. Note: if you stop playing video, the recording will stop as well. To choose the saving path for recording and snapshot, you need to navigate to Config page, shown as following figure: 15.4.1 MANUAL RECORDING... -
Page 79: Voice Talk
15.5 VOICE TALK The Bi-directional voice talk can be set up between back-end and front-end. Click icon which is next to the camera list to start voice talk, the icon will be indicated and changed to , click this icon again to stop voice talk. Note: the audio preview will closed automatically once voice talk has been set up. -
Page 80: Playback
15.8 PLAYBACK Buttons Description Buttons Description Play Stop Slow down Speed up Single frame Snapshot capture Video clip Open sound 15.9 ARCHIVE SEARCH To Search the archive that stored in HDD: Select the desired camera firstly. Select the date on calendar, click to switch year while click to select the month. -
Page 81: Snapshot Capture
15.9.2 SNAPSHOT CAPTURE Enter configuration page and set saving path for downloaded files and snapshot: During playback, user can click to capture a snapshot, in addition, click will start to save a video clip and a saving path window will pop up, the icon will be indicated and changed to , click this icon again to stop clipping. -
Page 82: Log Search
15.10 LOG SEARCH Click Log tab to enter log search interface: Function Tabs Log Display list Search panel Note: make sure that there is HDD installed and working properly in the front-end device. To search device’s log information: Navigate to Log Search page firstly, select the log type and then enter certain time period in the filed, click you will get search result. -
Page 83: Local Configuration
15.11 LOCAL CONFIGURATION When click the Config tab, following page will appear: Configuration Parameters Description Protocol Type Select a protocol for streaming The size of file packing The max. size of each manual recording file Select main stream or sub stream for net Stream Type preview Select proper settings for streaming to fit... -
Page 84: Specifications (Pal Format)
16 SPECIFICATIONS (PAL FORMAT) Item Specifications Triplex digital video recorder with network Product type H.264 Compression algorithm PAL (compatible with black and white cameras) Video standard H 15625 Hz / V 50 Hz Image preview 704 x 576 resolution “4CIF”, “DCIF” “2CIF”, ”CIF”, “QCIF” Recording resolution Full screen and multiscreen (main video output) / Full screen (SPOT) Live... - Page 85 Relay output Max. n. of unicast ** network connections (TCP,UDP,RTP) Motion detector Event Encoding VoIP Watermark Yes (for redundant recording and backup using external HDD) e-SATA Email with picture attachment Yes (full USB control: add – rename – delete – play video) USB port control Digital Zoom Live and playback...
-
Page 86: Maximum Recording Time With 500Gb Hard Disk
17 MAXIMUM RECORDING TIME WITH 500GB HARD DISK 17.1 REF. 1093/045SN The following resolution options can be selected on Urmet DVR DVS 1093/045SN: 4CIF”, “DCIF”, “2CIF”, ”CIF” and “QCIF” on all channels IMPORTANT NOTE The times shown in the following tables refer to recordings made on all channels setting the bit rate and frame rates shown. - Page 87 2CIF RESOLUTION (704x288) Lots of motion Little motion Variables to be set Results Variables to be set Results Bitrate Frame rate HD Time HD Time Bitrate Frame rate HD Time HD Time (in Kbps) (in fps) (in hours) (in days) (in Kbps) (in fps) (in hours)
- Page 88 4CIF RESOLUTION (704x576) Lots of motion Little motion Variables to be set Results Variables to be set Results Bitrate Frame rate HD Time HD Time Bitrate Frame rate HD Time HD Time (in Kbps) (in fps) (in hours) (in days) (in Kbps) (in fps) (in hours)
-
Page 89: Glossary
18 GLOSSARY • Dual Stream: Dual stream is a technology used to record high resolution video locally while transmitting a lower resolution stream over the network. The two streams are generated by the DVR, with the main stream having a maximum resolution of 4CIF and the sub-stream having a maximum resolution of QCIF. - Page 90 NOTE ................................................................................................................................................................................................................................................................................................................................................................................................................................................................................................................................................................................................................................................................................................................................................................................................................................................................................................................................................................................................................................................................................................DS1093-059...
- Page 91 NOTE ................................................................................................................................................................................................................................................................................................................................................................................................................................................................................................................................................................................................................................................................................................................................................................................................................................................................................................................................................................................................................................................................................................DS1093-059...
- Page 92 Prodotto in Cina su specifica URMET Domus Made in China to URMET Domus specification DS1093-059 SEDE FILIALI URMET DOMUS S.p.A. 20151 MILANO – V. Gallarate 218 10154 TORINO (ITALY) Tel. 02.380.111.75 - Fax 02.380.111.80 VIA BOLOGNA 188/C 00043 CIAMPINO (ROMA) V. L.Einaudi 17/19A Telef.
Need help?
Do you have a question about the 1093 and is the answer not in the manual?
Questions and answers