Table of Contents
Advertisement
Quick Links
Advertisement
Table of Contents

Related Manuals for ASCOM d83


Summary of Contents for ASCOM d83
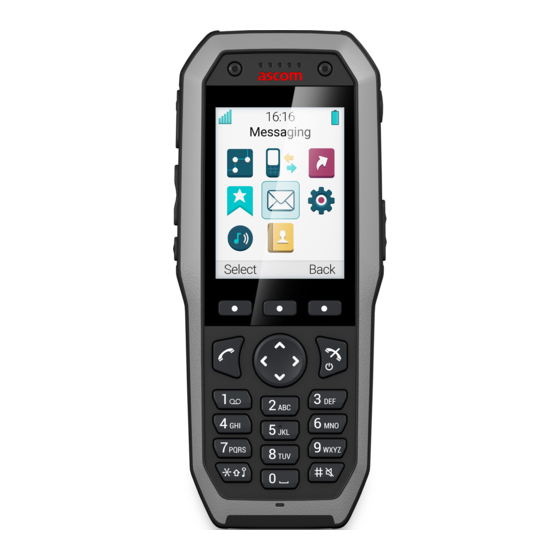
- Page 1 CONFIGURATION MANUAL Ascom d83 DECT Handset...
- Page 2 CONFIGURATION MANUAL Ascom d83 DECT Handset Abbreviations and Glossary Abbrevations and Glossary Acoustic Location Signal A loud audio signal used for localizing the handset. Bluetooth Low Energy Wireless technology that uses the same 2.4 GHz radio frequencies as classic Bluetooth, with low bandwidth. For example, used for location with BLE beacons.
- Page 3 CONFIGURATION MANUAL Ascom d83 DECT Handset Unite Module Common name for Integrated Message Server (IMS3), Unite Connectivity Manager (Unite CM) and Unite Communication Server (Unite CS). User ID User ID identifies a set of user parameters that can be saved and managed. It can be moved together with user parameters between handsets.
-
Page 4: Table Of Contents
CONFIGURATION MANUAL Ascom d83 DECT Handset Contents 1 Introduction............................ 1 Functionality Matrix ......................1 2 Getting Started ..........................4 WinPDM ..........................4 Device Manager........................4 2.2.1 Via Chargers ......................4 2.2.2 Over-the-Air via IP-DECT ..................5 Device Management in Multiple Systems................6 3 Handset Installation and Configuration....................7 Preparing WinPDM or Device Manager for Handset Handling..........7... - Page 5 CONFIGURATION MANUAL Ascom d83 DECT Handset 5.9.1 Always Displayed....................19 5.9.2 Predefined and Configurable Functions ..............19 5.9.3 Advanced Functions ....................20 5.9.4 Custom In Call Functions ..................20 5.9.5 Creating and Hiding a Soft Key to an In Call Function ..........21 5.10...
- Page 6 CONFIGURATION MANUAL Ascom d83 DECT Handset 5.33.2 Examples of TTR and TTP Settings ................ 47 5.33.3 Broadcast and Multicast Messaging..............50 5.34 Message Templates ......................50 5.34.1 Configure the Handset for Message Templates ............. 50 5.34.2 Create Message Template Texts ................50 5.35 Name Presentation......................
-
Page 7: Introduction
Introduction Introduction This document is a guide for installing, configuring and maintaining Ascom d83 DECT handsets. The handset can be used immediately, but it is highly recommended to install the Windows Portable Device Manager (WinPDM) or use the centralized Device Manager available in the Unite module. This enables customization of the behavior of the handset to suite each user profile and the specific PBX used in the system. - Page 8 CONFIGURATION MANUAL Introduction Ascom d83 DECT Handset Centralized management Personalized menus Easy replaceable battery Easy replacement of handset Handset restrictions Bluetooth Telephony Push to Talk (PTT) Procedure call Voicemail access Microphone on/off during call Five predefined emergency numbers Messaging Mini messaging...
- Page 9 CONFIGURATION MANUAL Ascom d83 DECT Handset Introduction BLE location Location, base stations DECT Location Basic LED (Red/Green/Orange) Multicolor LED For Talker, it can deliver a rough location of the handset in response to a 'Poll location' request from an external system.
-
Page 10: Getting Started
CONFIGURATION MANUAL Getting Started Ascom d83 DECT Handset Getting Started The handset can be configured by inserting it into a DP1 desktop programmer or a CR3 Advanced Charging Rack. The charger is connected via USB or ethernet to the WinPDM/Device Manager. For IP-DECT systems, the handset can be configured over-the-air. -
Page 11: Over-The-Air Via Ip-Dect
CONFIGURATION MANUAL Getting Started Ascom d83 DECT Handset Figure 2. Configuration of handsets via Device Manager and chargers PQRS WXYZ Client Device Manager 2.2.2 Over-the-Air via IP-DECT There is no external equipment needed besides Device Manager and IP-DECT. Please proceed to chapter 3 Handset Installation and Configuration, page Figure 3. -
Page 12: Device Management In Multiple Systems
CONFIGURATION MANUAL Getting Started Ascom d83 DECT Handset Device Management in Multiple Systems When changing the Device Management system parameter to another system, the handset loses the connection to the IP-DECT system for a few seconds. In WinPDM/Device Manager, select the Number tab. -
Page 13: Handset Installation And Configuration
CONFIGURATION MANUAL Handset Installation and Configuration Ascom d83 DECT Handset Handset Installation and Configuration This section describes the recommended procedure for installing and configuring handsets. There are several ways to install a handset, but the procedures described here ensure simple maintenance of the system. -
Page 14: Manual Handset Installation In Dect System
Subscribe the handset to the IP-DECT system. For information about the subscription procedure, refer to the User Manual, Ascom d83 DECT Handset, TD 93434EN. During the subscription procedure, the handset User ID is automatically set to the same as the extension number. -
Page 15: Maintenance
CONFIGURATION MANUAL Ascom d83 DECT Handset Maintenance Maintenance Definitions In the replacement descriptions, the handsets are defined as: • Old handset: the handset to be replaced, possibly damaged but still working. • New handset: the replacement handset that uses the settings downloaded from the old handset. -
Page 16: Replacement Procedure Choice Guide
Manager, Parameter Migration or Easy Replacement. Use the following list as a guide to choose which procedure to use. • If a handset needs to be replaced due to a broken display for example, refer to the User Manual, Ascom d83 DECT Handset, TD 93434EN. -
Page 17: Handset Replacement With Device Manager In Dect System
Subscribe the new handset with the same extension number as the old handset. The subscription procedure is described in the User Manual, Ascom d83 DECT Handset, TD 93434EN. During the subscription procedure, the handset User ID is automatically set to be the same as the extension number. -
Page 18: Handset Replacement With Winpdm In Dect System
The example below shows how to migrate parameters from Ascom d81 to Ascom d83 handset: If WinPDM is used, place d83 handset into the DP1 Desktop Programmer. In the Templates tab, select the template used for Ascom d81 handset that you want to use for parameter migration. -
Page 19: Dect Frequency Band Configuration
CONFIGURATION MANUAL Ascom d83 DECT Handset Maintenance DECT Frequency Band Configuration The Frequency Band Configuration is normally done during the first deployment of the device. It can be changed only after a factory reset. To change the operating frequency band, the following preconditions must be fulfilled: •... -
Page 20: Handset Configuration
CONFIGURATION MANUAL Handset Configuration Ascom d83 DECT Handset Handset Configuration This chapter describes settings in parameter definition files (.def). These files are regularly updated and settings may change slightly. For example "On" to "Enable", or a parameter can be moved to another directory. -
Page 21: Save A Handset Configuration As A Template
CONFIGURATION MANUAL Handset Configuration Ascom d83 DECT Handset 5.1.3 Save a Handset Configuration as a Template Handset settings can be saved as a template. Please note that this template does not include contacts and other personal data. The template only contains configuration data. -
Page 22: Central Phonebook
CONFIGURATION MANUAL Handset Configuration Ascom d83 DECT Handset Central Phonebook If the system is equipped with a messaging server with a phonebook service, the Central Phonebook on that server can be accessed from the handset. The number to be used is set to default 999999. It can be changed by editing parameters in a Number or a template. -
Page 23: Upload A Local Phonebook File
The menu is described in User Manual, Ascom d83 DECT Handset, TD 93434EN. In addition to the default Call services functions, up to 10 extra system specific call services can be defined by codes. -
Page 24: Call Diversion
CONFIGURATION MANUAL Handset Configuration Ascom d83 DECT Handset Call Diversion User friendly call diversion menus can be configured in the handset using WinPDM/Device Manager. These menus can then be selected in the handset by selecting Calls → Call services → Divert calls. -
Page 25: In Call Menu
CONFIGURATION MANUAL Handset Configuration Ascom d83 DECT Handset − Deactivation code - the system specific code required to deactivate the absence (for example “#23#”). − PBX date format for user input - the PBX supported date format to be sent to the PBX when activating an absence reason containing a date (for example “Vacation”). -
Page 26: Advanced Functions
CONFIGURATION MANUAL Handset Configuration Ascom d83 DECT Handset Switch call Switch between calls. Transfer call Transfer a call. Conference call Make a conference call. Callback May be requested if the called party is engaged. When the called party becomes available, the calling party receives a callback from the PBX. -
Page 27: Creating And Hiding A Soft Key To An In Call Function
CONFIGURATION MANUAL Handset Configuration Ascom d83 DECT Handset • The characters # and * • P – Pause • H – Hook (auto disconnection) • U – The handset prompts for user input. Numerical characters may also be entered as input (procedure call). -
Page 28: Own Line Settings
CONFIGURATION MANUAL Handset Configuration Ascom d83 DECT Handset 5.10 Own Line Settings Use own line settings if the same phonebook is to be used in different systems and in different countries. The own line settings enables: • Calling numbers stored with a “+” sign for the international access code. The same local phonebook can be used in different countries. -
Page 29: Customize The Menu
CONFIGURATION MANUAL Handset Configuration Ascom d83 DECT Handset The parameter Writing language can be set to match the uploaded language. The parameter controls: • The characters available for text input • The sort order in the phonebook This parameter is only used when an uploaded language is set. The Parameter can be found in the Settings folder. -
Page 30: Enable Or Disable Switch Off Function
CONFIGURATION MANUAL Handset Configuration Ascom d83 DECT Handset If the user tries to decrease the level lower than what is defined in Minimum allowed volume, the following pop-up appears: Volume reset to the lowest level allowed. 5.15.2 Enable or Disable Switch Off Function A user can be prevented from turning off a handset by performing the following steps: Select Customization →... -
Page 31: Allow Or Disallow Incoming Messages
CONFIGURATION MANUAL Handset Configuration Ascom d83 DECT Handset From the drop-down menu associated with the parameter, select one of the following: − Yes - Retain the default and allow the user to access call functions. − No - Prevent the user from accessing call functions. -
Page 32: Action When Handset Is Placed In Charger
CONFIGURATION MANUAL Handset Configuration Ascom d83 DECT Handset 5.16 Action when Handset is Placed In Charger 5.16.1 In Charger Action when not in Call The handset can be configured to perform an action when it is placed in a charger. The selected action is only performed when no call is established. -
Page 33: Clear Lists When Inserted In Charger
CONFIGURATION MANUAL Handset Configuration Ascom d83 DECT Handset In the Call behaviour drop-down list, select one of the following: − No action - no action is performed when handset is placed in charger. − End - the handset disconnects calls when placed in charger. -
Page 34: Ble Location
− BLE UUID filter defines the UUID that the handset should scan for. − BLE UUID type defines whether BLE beacons have been configured with Ascom UUID or Custom UUID. If a custom UUID is used, this UUID must be entered in the BLE UUID filter parameter, and the BLE special location bit parameter can optionally also be set. - Page 35 By default, beacons with UUID set to “d87b32bd-cc0e-437a-81b3-383833bc5ff8” (Ascom UUID) will be detected by d83 handsets when BLE UUID type is set to Ascom. If your installation is using another UUID, the parameter BLE UUID type should be set to Custom and the parameter BLE UUID filter in the WinPDM/Device Manager needs to be set accordingly.
-
Page 36: Dect Location
CONFIGURATION MANUAL Handset Configuration Ascom d83 DECT Handset Figure 4. BLE Location Information BLE Location info RSSI: -47 MP: -20 1: 00000004*,00000s 2: 3C908002*,00004s 3: 00000004*,00004s 4: 3C908002*, 00014s dc: 00000 lc: 00000 Back The information on the screen is updated every second. -
Page 37: Handset Users
CONFIGURATION MANUAL Handset Configuration Ascom d83 DECT Handset All locations are stored in the same list. If different location devices are in range, the priority order is as follows: • IR • DECT • LF • BLE 5.21.1 Handset Users For handset users, DECT location is used to indicate the location of the handset in critical situations when the handset alarm button is pressed. -
Page 38: Ir Location
CONFIGURATION MANUAL Handset Configuration Ascom d83 DECT Handset DECT Location Indications When the DECT Location info screen is opened, the handset can be configured to provide additional indications to the support engineer as the handset is carried into a valid location. A beep indication can be activated to indicate when valid locations are received. - Page 39 CONFIGURATION MANUAL Handset Configuration Ascom d83 DECT Handset • IR location indications IR Location Data To configure the handset to provide IR location data, perform the following procedure: Press the Menu soft key. Select Calls. Select Admin menu. The Admin menu is only visible if the Admin menu is activated. To activate the Admin menu, 6.1.1 Activating the Admin Menu, page...
- Page 40 CONFIGURATION MANUAL Handset Configuration Ascom d83 DECT Handset Zone Presence Configuration The Zone presence feature tracks handset location with IR beacons making zones. When entering a zone, the handset sends a message with location history to the system. If Zone presence is enabled, the location message is sent at handset startup even if the handset is not in the range of any zone.
-
Page 41: Lf Location
CONFIGURATION MANUAL Handset Configuration Ascom d83 DECT Handset − IR beacon ID 0x0030 belongs to the zone range: 0x0030 & 0xF000 = 0x0000. − IR beacon ID 0x0F40 belongs to the zone range: 0x0F40 & 0xF000 = 0x0000. 5.23 LF Location The LF location feature is used to keep track and report the location of DECT handsets. -
Page 42: Special Location
CONFIGURATION MANUAL Handset Configuration Ascom d83 DECT Handset • L1- L4: The four last valid location IDs. If the handset is in the range of several LF location devices, the location ID with highest difference between the measured signal strength and threshold value is regarded as the current location (L1). -
Page 43: Poll Location
CONFIGURATION MANUAL Handset Configuration Ascom d83 DECT Handset The Admin menu is only visible if the Admin menu is activated. To activate the Admin menu, 6.1.1 Activating the Admin Menu, page From the Admin menu, select Location info. Select All Location info. All location information is displayed in the handset display as shown in Figure 7. -
Page 44: Push Button Alarm
CONFIGURATION MANUAL Handset Configuration Ascom d83 DECT Handset • Indicate triggered alarm with LED If the parameter “Silent alarm” is set, no indication is shown when an alarm has been sent or received. • Indicate triggered alarm with beeper signal If the parameter “Silent alarm”... -
Page 45: Call Predefined Number Without Sending Alarm
CONFIGURATION MANUAL Handset Configuration Ascom d83 DECT Handset • Text indication for alarm on multiple press • Define multiple press • ALS If the parameters “ALS” and “Silent alarm” are set, no ALS is triggered after an alarm has been sent. -
Page 46: Pull-Cord Alarm
In a template or Number in PDM/Device Manager, the parameters for activation are found at: Alarm → Pull-cord alarm The alarm can also be activated in the handset, refer to the User Manual, Ascom d83 DECT Handset, TD 93434EN. Parameters in the current version are: •... -
Page 47: Use Multifunction Button As Ptt Button
5.23 LF Location, page 5.31 Use Multifunction Button as PTT Button Ascom d83 Handset has two multifunction buttons called Multifunction Button 1, located on the left side, and Multifunction Button 2, located on the right side when looking at the screen. -
Page 48: Messaging Settings
CONFIGURATION MANUAL Handset Configuration Ascom d83 DECT Handset The way incoming calls are answered can be configured. The parameters can be found at: Settings → Answering. • Answer automatically Determines if the incoming call is answered automatically. • Answer automatically template If Answer automatically is enabled, automatic answering can be applied to specific numbers using templates. - Page 49 CONFIGURATION MANUAL Handset Configuration Ascom d83 DECT Handset • Message alert Determines the message sound for incoming messages. A predefined melody (Message 1 - Message 7) or a beep code that represents a certain sound can be selected. For more information about how to configure sounds with beep codes, see 5.33.1 Configure Message Alerts with Beep Codes, page...
- Page 50 CONFIGURATION MANUAL Handset Configuration Ascom d83 DECT Handset • Time to Prioritize (TTP) Determines how long messages keep their priority status. The TTP starts when a message is displayed. If a user presses any key when a message is displayed, the TTP is reset. If receiving a message with higher priority than the displayed message, the message with lower priority is placed in queue and its TTP is paused.
-
Page 51: Configure Message Alerts With Beep Codes
CONFIGURATION MANUAL Handset Configuration Ascom d83 DECT Handset Table 1 Call priority vs PTT/Call setup priority (continued) Yes, immediately since the PTT priority is set to 1 and also is higher than Call priority. Yes, after 10 seconds since the PTT priority is higher than Call priority. - Page 52 CONFIGURATION MANUAL Handset Configuration Ascom d83 DECT Handset The handset plays the original message alerts that are mapped to the beep codes. Select Settings → Sound and Alert. In the Message alert drop-down list, select Beeps according to beep code.
-
Page 53: Examples Of Ttr And Ttp Settings
CONFIGURATION MANUAL Handset Configuration Ascom d83 DECT Handset Select Settings → Custom Sounds → Custom Sound X (where X represent 1 - 10). Set the following parameters: − Label - The name of the custom sound (required). The name is visible when mapping the custom sound to a beep code later on. - Page 54 CONFIGURATION MANUAL Handset Configuration Ascom d83 DECT Handset Example 2 This example describes the message handling with the following message settings: • TTP – 20 seconds • TTR – Close manually It is recommended to use these settings in case the user needs not to be interrupted for 20 seconds while reading a message, unless a message with a higher priority is received.
- Page 55 CONFIGURATION MANUAL Handset Configuration Ascom d83 DECT Handset Figure 10. Message Handling without Manually Closing a Message Messaging Inbox Prio 2 New me ssag es New me ssag es TTP expired TTR expired Prio 2 Prio 1 Prio 2 Prio 2...
-
Page 56: Broadcast And Multicast Messaging
CONFIGURATION MANUAL Handset Configuration Ascom d83 DECT Handset Figure 11. Messages Displayed in Chronological Order Regardless of Priority New messages Prio 2 14:02 Messaging Inbox Prio 1 Prio 1 Prio 2 14:02 13:59 13:59 Prio 2 Prio 1 14:02 13:59... -
Page 57: Name Presentation
CONFIGURATION MANUAL Handset Configuration Ascom d83 DECT Handset Click on a Template <n>. Position the cursor in Value column and click the mouse button. An editable text field opens. Type a message of maximum 50 characters in the text field. -
Page 58: Services
CONFIGURATION MANUAL Handset Configuration Ascom d83 DECT Handset • Add name internal and external call: Additional detail about the caller is displayed if there is information about the caller in the local phonebook. If there is no entry for the caller in the phonebook, only the display management text is displayed. -
Page 59: Emergency Call Numbers
CONFIGURATION MANUAL Handset Configuration Ascom d83 DECT Handset 5.38 Emergency Call Numbers Up to five different phone numbers may be reserved for emergency calls. These numbers can always be called even when the phone or key locks are active. If emergency numbers of varying length are used, care must be taken to ensure that longer numbers do not begin with the same digits and ordering used by a shorter number. -
Page 60: Configuration Of Headset Button
CONFIGURATION MANUAL Handset Configuration Ascom d83 DECT Handset In the Headset type drop-down list, select the corresponding headset type to be used. If User headset profile is selected, see User headset profile, page User headset profile If the preconfigured headset profiles does not match the headset or the audio performance is unsatisfactory, a headset profile can be configured in the following way: Select Connections →... -
Page 61: Display New Messages And Call Information Upside Down
The Owner ID might not be displayed depending on the setting in 5.42 Display Management Layout, page The Owner ID can also be configured via the handset menu. Refer to User Manual, Ascom d83 DECT Handset, TD 93434EN. 5.44 Screen Saver The handset screen saver can be configured to display information or turn off the backlight so that no information is shown. -
Page 62: Profiles
Select the settings to be edited. For example Sound and alerts, Soft keys etc. If required, select the profile to be activated in the handset by selecting User Profiles → Active Profile. Profiles can also be configured via the handset menu. Refer to the User Manual, Ascom d83 DECT Handset, TD 93434EN. - Page 63 CONFIGURATION MANUAL Handset Configuration Ascom d83 DECT Handset Select System Profiles → System Profiles Sub Groups → Alarm settings group → Alarm settings X → Alarm on long press. − Alarm type for long press - Determines the alarm type to be sent when long pressing the alarm button.
- Page 64 CONFIGURATION MANUAL Handset Configuration Ascom d83 DECT Handset From the pull down menus associated with each parameter, select the required values for: − Ring volume: Select “Silent” or one of the volume levels between 1, the lowest, and 8, the highest.
-
Page 65: Shortcuts
When programming Soft keys both name and function must be set. A hot key configured to the Data Send service is also available during the call. Shortcuts can also be configured via the handset menu. Refer to the User Manual, Ascom d83 DECT Handset, TD 93434EN. -
Page 66: Shared Phone
CONFIGURATION MANUAL Handset Configuration Ascom d83 DECT Handset Select Shortcuts. Select the required shortcut parameter: − Hot keys 2 through 9 and “Hook Off” − Soft Keys “Left”, “Middle” and “Right” − Navigation keys “Up”, “Down”, “Left” and “Right” − Multifunction buttons Select the Read Only attribute for the selected parameter and from the drop-down menu select: −... -
Page 67: Shared Phone Takeover
In Shared - device ext. mode the user authentication is done through Unite system. For more information about how to log on a handset, refer to the User Manual, Ascom d83 DECT Handset, TD 93434EN. -
Page 68: Push-To-Talk (Ptt) Group Call
CONFIGURATION MANUAL Handset Configuration Ascom d83 DECT Handset Authorization codes should be carefully guarded to prevent careless and unauthorized takeovers that can render the shared phone unusable for a user who has had his or her handset taken over. If a device is configured to operate as shared phone with device extension: The user code is a personal user ID which a system administrator defines in the Unite PS. - Page 69 CONFIGURATION MANUAL Handset Configuration Ascom d83 DECT Handset The locking and unlocking characteristics of the keypad can be defined by configuring following parameters in the WinPDM/Device Manager and navigating to Settings → Locks: • Automatic key lock. One of the following options may be configured: −...
-
Page 70: Administration
* < < * < The Admin menu is displayed. Other menus are described in the User Manual, Ascom d83 DECT Handset, TD 93434EN. Quick Access to the Handset Device Information For quick access to device information, short codes can be used in idle mode. To display this information, enter the following codes in the handset. -
Page 71: Troubleshooting
CONFIGURATION MANUAL Troubleshooting Ascom d83 DECT Handset Troubleshooting This section contains information about how to solve common operational problems and information about warnings you may receive. Go through the following lists to troubleshoot problems. If this checklist does not solve the problem, contact the system administrator. -
Page 72: Display Information
CONFIGURATION MANUAL Troubleshooting Ascom d83 DECT Handset Display Information The following error messages can be shown in the handset display: Fault Probable cause Action or comment The handset is in range, but has Switch off the handset and then No access no access rights. -
Page 73: Error Messages In Winpdm
CONFIGURATION MANUAL Troubleshooting Ascom d83 DECT Handset There is no Voicemail number Define a Voicemail number via Voicemail number not defined in the handset. the WinPDM/Device Manager. defined The parameter Encryption 1) Disable the Encryption Could not encrypt Required is enabled in the Required parameter in handset;... -
Page 74: Related Documents
Related Documents Ascom d83 DECT Handset Related Documents Data Sheet, Ascom d83 DECT Handset, TD 93418EN, TD 93419EN, TD 93420EN User Manual, Ascom d83 DECT Handset, TD 93434EN Quick Reference Guide, Ascom d83 DECT Handset, TD 93447EN Installation and Operation Manual, Portable Device Manager (WinPDM), Windows Version, TD 92325EN... -
Page 75: Document History
Updated information about BLE parameters and Beacon scan in 5.20 BLE Location, page 01 December Added information related to d83 Protector Lite. 2021 Added information about “Display calling party number together with name” parameter in 5.35.2 Display Management Parameters, page 11 October 2021 First released version. -
Page 76: Appendix A Configure Custom Sounds
CONFIGURATION MANUAL Configure Custom Sounds Ascom d83 DECT Handset Appendix A Configure Custom Sounds Before configuring custom sounds, it is recommended to have a basic knowledge on notes. For the details, refer to the table below: Table 7 Elements, Melody strings, and parameters for melodies... - Page 77 CONFIGURATION MANUAL Configure Custom Sounds Ascom d83 DECT Handset Table 8 Elements, Melody strings, and parameters for melodies Element Sub-element Values Note > Iss notes (sharp notes) Duration 0 (Full-note) 1 (1/2-note) 2 (1/4-note) 3 (1/8-note) 4 (1/16-note) 5 (1/32-note) Silence >...
-
Page 78: Customize The Default Handset Beeps
CONFIGURATION MANUAL Configure Custom Sounds Ascom d83 DECT Handset Table 9 Explanation of the Melody string example (continued) Short pause The melody within brackets is repeated 3 times before the handset plays the rest of the melody. Long pause Customize the Default Handset Beeps If it is required to create a custom sound out of any of the default handset beeps ( and Enhanced beeps 1–7),... -
Page 79: Appendix B Handset Message Handling Capacity
CONFIGURATION MANUAL Handset Message Handling Capacity Ascom d83 DECT Handset Appendix B Handset Message Handling Capacity The handset has a received message capacity for the different types of messages described in the following table. The indicated capacities are based on typical message type lengths. If handsets regularly receive longer messages, the resulting indicated capacities must be reduced. - Page 80 Ascom (Sweden) AB Grimbodalen 2 SE–417 49 Göteborg Sweden Phone +46 31 55 93 00 www.ascom.com...
Need help?
Do you have a question about the d83 and is the answer not in the manual?
Questions and answers