Table of Contents
Advertisement
Quick Links
Advertisement
Chapters
Table of Contents

Related Manuals for Segway FUGLEMAN UT10 2022


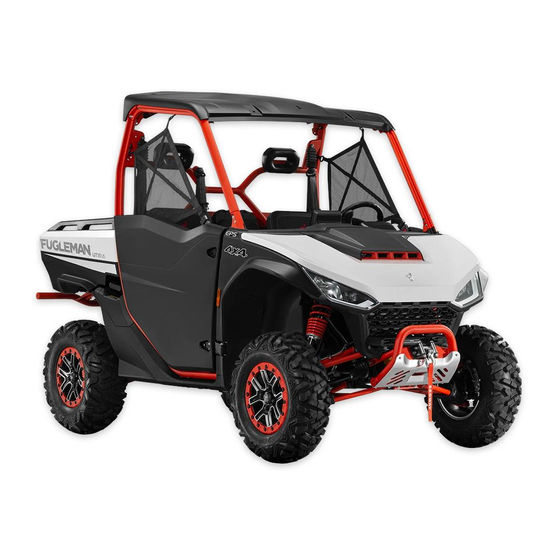
Summary of Contents for Segway FUGLEMAN UT10 2022
- Page 2 WARNING WARNING Read, understand, and follow all of the instructions and safety precautions in this manual and all product labels. Failure to follow the safety precautions could result in serious injury or death. WARNING WARNING The engine exhaust from this product contains chemicals known to the State of California to cause cancer, birth defects or other reproductive harm.
- Page 3 WELCOME Thank you for buying this Segway. Segway Powersports off-road vehicles will bring you a new driving experience. For your driving safety, read this manual before riding. This manual contains a large number of safety instructions, operation instructions, maintenance instructions and safety warnings.
- Page 4 Bluetooth® is a registered trademark of Bluetooth Sig, Inc. QR Codes® is a registered trademark of DENSO WAVE INCORPORATED. Unless noted, trademarks are the property of Segway Powersports Inc. Copyright 2020 Segway Powersports Inc. All information contained within this publication is based on the latest product information at the time of publication.
-
Page 5: Table Of Contents
TABLE OF CONTENTS TABLE OF CONTENTS SAFETY INTRODUCTION VEHICLE DEVICE OPERATION MAINTENANCE, STORAGE AND TRANSPORTATION SPECIFICATIONS TROUBLESHOOTING EMISSION CONTROL SYSTEM WARRANTY... - Page 6 WARNING Failure to adhere the warnings and safety precautions contained in this manual will result in severe injury or death. Your SEGWAY POWERSPORTS vehicle is not toy and it can be hazardous to operate. This vehicle handles differently than cars, trucks or off-road vehicles.
- Page 7 • Always wear a helmet, eye protection, gloves, long-sleeve shirt, long pants and over-the-ankle boots. • Never operate this vehicle under the influence of drugs or alcohol, as these conditions impair judgement and reduce the operator's ability to react. • Complete the new operator driving procedures outlined this manual.
- Page 8 The meaning of these signs: WARNING WARNING indicates a hazardous situation which, if not avoided, could result in death or serious injury. CAUTION CAUTION, used with the safety alert symbol, indicates a hazardous situation which, if not avoided, could result in minor or moderate injury.
-
Page 9: Safety Introduction
SAFETY INTRODUCTION IMPORTANT ON-PRODUCT LABELS ......3 Hang Tag ..............3 Warning labels .............5 SEVERE INJURY OR DEATH ........10 IMPORTANT SAFETY INFORMATION ......13 Reading the manual ........... 13 Safe driving age ............14 Riding equipment ............15 Using alcohol or drugs..........17 Vehicle modification .......... - Page 10 SAFETY INTRODUCTION SAFETY INTRODUCTION Failure to follow the warnings and safety precautions in this manual may result in serious injury or death. It can be dangerous to operate an off-road vehicle and is driven differently from other vehicles, such as motorcycles and automobiles. If proper precautions are not taken, a collision or rolled-over may occur during normal maneuvers such as turning, climbing, or overcoming obstacles.
-
Page 11: Important On-Product Labels
SAFETY INTRODUCTION SAFETY INTRODUCTION IMPORTANT ON-PRODUCT LABELS This vehicle comes with a hang tag and labels containing important safety information. Any person who rides this vehicle should read and understand this information before riding. Hang Tag This hang tag is not to be removed before sale. - Page 12 SAFETY INTRODUCTION SAFETY INTRODUCTION...
-
Page 13: Warning Labels
If you purchased a used Segway UTV in the United States, your UTV can be enrolled through www.rohva.org. For more information about recreational off-road vehicle safety in the United States, visit www.rohva.org, call the Consumer Product Safety... - Page 14 SAFETY INTRODUCTION SAFETY INTRODUCTION...
- Page 15 SAFETY INTRODUCTION SAFETY INTRODUCTION FOR CANADA...
- Page 16 SAFETY INTRODUCTION SAFETY INTRODUCTION...
- Page 17 SAFETY INTRODUCTION SAFETY INTRODUCTION...
-
Page 18: Severe Injury Or Death
SAFETY INTRODUCTION SAFETY INTRODUCTION SEVERE INJURY OR DEATH Can result if you do not follow these instructions: • The minimum recommended driving age for this vehicle is 16 years. • Never operate this vehicle without wearing an approved motorcycle helmet that fits properly. •... - Page 19 SAFETY INTRODUCTION SAFETY INTRODUCTION could be injured. • Always keep both hands on the steering wheel when driving. • Always go slowly and be careful when operating on unfamiliar terrain. Always be alert to changing terrain conditions when driving the vehicle. •...
- Page 20 SAFETY INTRODUCTION SAFETY INTRODUCTION • Always check for obstacles before operating in a new area. • Do not brake abruptly when carrying loads in the cargo bed. • Always use the size and type of tires specified in this manual. •...
-
Page 21: Important Safety Information
SAFETY INTRODUCTION SAFETY INTRODUCTION IMPORTANT SAFETY INFORMATION Reading the manual WARNING WARNING Driving an Vehicle improperly increases the risk of accidents. The driver must know how to drive the vehicle correctly in different situations and on different terrain. Before driving the vehicle, all drivers must complete the required driving safety training. -
Page 22: Safe Driving Age
SAFETY INTRODUCTION SAFETY INTRODUCTION Safe driving age WARNING WARNING The minimum recommended driving age for this vehicle is 16 years. Children under the age of 16 must not drive this vehicle. Not to drive the vehicle without proper driving training. Training courses are required. -
Page 23: Riding Equipment
SAFETY INTRODUCTION SAFETY INTRODUCTION Riding equipment WARNING WARNING For your safety,we strongly recommend that you always wear an approved motorcycle,eye protection,boots,gloves,long pants,and a long-sleeved shirt or jacket whenever you ride. Although complete protection is not possible,wearing proper gear can reduce the chance of injury when you ride. Helmet Wearing a helmet can prevent head injuries. - Page 24 SAFETY INTRODUCTION SAFETY INTRODUCTION WARNING WARNING Driving Vehicle after drinking or taking drugs may adversely affect a driver's judgment, reaction time, balance, and feelings. Do not drink alcohol or take drugs before or during driving.
-
Page 25: Using Alcohol Or Drugs
SAFETY INTRODUCTION SAFETY INTRODUCTION Using alcohol or drugs WARNING WARNING Operating this vehicle after consuming alcohol or drugs could adversely affect operator judgment, reaction time, balance and perception. Never consume alcohol or drugs before or while operating this vehicle. -
Page 26: Vehicle Modification
SAFETY INTRODUCTION SAFETY INTRODUCTION Vehicle modification WARNING WARNING We strongly recommend that consumers do not attempt to increase vehicle speed or use any equipment that increases the power of the vehicle. If any equipment is added to the vehicle, or if any modifications are made to the vehicle to increase the vehicle speed or power, the all-terrain vehicle warranty is terminated. -
Page 27: Passengers
SAFETY INTRODUCTION SAFETY INTRODUCTION Passengers WARNING WARNING Do not carry passengers unless you have operated the vehicle for at least two hours and have completed the new operator driving instructions outlined on page 71. Passengers must always sit in the passenger seat with the seat belt secured. Carrying more than two passenger in a three-seater vehicle affects the operator's ability to operate and operate control, increasing the risk of loss of control and accidents or rollovers. -
Page 28: Contact With Exhaust
SAFETY INTRODUCTION SAFETY INTRODUCTION Contact with exhaust WARNING WARNING Engine exhaust is toxic and can cause loss of consciousness or death in a short time. Do not start or run a motor in a closed space. The engine exhaust of this product contains chemicals that cause cancer, birth defects or other reproductive damage, and you can only drive it outside the room or in a well-ventilated place. -
Page 29: Seat Belts
SAFETY INTRODUCTION SAFETY INTRODUCTION Seat Belts Riding in this vehicle without wearing the seat belt may increase the risk of serious injury in the event of rollover, loss of control, other accidents, or sudden stop. Seat belts may reduce the severity of injury in these circumstances. -
Page 30: Loading On The Vehicle
SAFETY INTRODUCTION SAFETY INTRODUCTION Loading on the vehicle The weight of cargo and passengers affects the running and stability of the vehicle. For your own safety and the safety of others, think carefully about how to safely operate the vehicle when loaded with passengers and cargo. -
Page 31: No Passengers In The Cargo Box
SAFETY INTRODUCTION SAFETY INTRODUCTION No Passengers in the cargo box Passengers in the cargo box may cause the vehicle fall over or collide, which may cause injury or more serious accidents. Never let passengers in the cargo box when operating the vehicle. Passengers must be seated in passenger seats with fixed seat belts. -
Page 32: Operating At Excessive Speed
SAFETY INTRODUCTION SAFETY INTRODUCTION Operating at Excessive Speed Operating this vehicle at excessive speeds increases the operator’s risk of losing control. Always operate at a speed that’s appropriate for the terrain, visibility, operating conditions and your skills and experience. Turning Improperly Turning improperly could cause loss of traction, loss of control, accidents or rollover. -
Page 33: Descending Hills Improperly
SAFETY INTRODUCTION SAFETY INTRODUCTION Descending Hills Improperly Improper descending a hill could cause loss of control or rollover. Always follow proper procedures for traveling down hills as described in this owner’s manual. See page 77. Crossing Hillsides Driving on a sidehill is not recommended. Improper operation could cause the loss of control or rollover. -
Page 34: Vehicle Device
VEHICLE DEVICE VEHICLE ACTIVATION ..........28 Vehicle Unlock ............29 APP Function ..............30 PARTS AND CONTROL ..........31 FRONT PANEL ............... 33 Ignition Lock/Start Button ........33 Switchs ...............34 Combination Switch ..........36 Toggle switch for Two-wheel drive or Four-wheel drive ..37 Electronic power steering(EPS)... - Page 35 VEHICLE DEVICE Fuel tank cap ..............50 Gear Shift Selector ............ 51 Brake pedal and accelerator pedal ......52 Parking brake .............54 Roll-Overprotective Structures(ROPS) ....55 INSTRUMENT PANEL ........... 56 Instrument Indicator Light/Warning Light ....57 Diagnostic displays code definitions ......61...
-
Page 36: Vehicle Activation
The new vehicle must be activated on the APP for the first time if equipped with vehicle DTS, otherwise the engine will not start. IOS mobile phone search “Segway powersports” to download application from “APP STORE” ,Android mobile phone first download "Google play", and then search “Segway powersports”... -
Page 37: Vehicle Unlock
VEHICLE DEVICE VEHICLE DEVICE Vehicle Unlock There are three ways to unlock a vehicle: Mechanical key (preferred) 2. APP remote unlock vehicle APP Remote Unlock is based on 4G network. As long as the area covered by the network, you can use the remote unlock function in the APP to unlock the vehicle. -
Page 38: App Function
VEHICLE DEVICE VEHICLE DEVICE APP Function This app is a program designed for users who have the Segway Powersports vehicle. Main features: driving control analysis, vehicle data analysis... Detail information see Segway Powersports APP User Manual. -
Page 39: Parts And Control
VEHICLE DEVICE VEHICLE DEVICE PARTS AND CONTROL Front Bumper Handrails ROPS Cargo Box Muffler Tailgate Rear Bumper Cargo Box Flip Handle Fuel Cap Cab Net/Door... - Page 40 VEHICLE DEVICE VEHICLE DEVICE Light Switch AWD Switch Instrument Cluster Gear Shifter/Selector Storage Box Storage Box DC Socket Switch Ignition Parking Brake Start Button 12 Volt Socket...
-
Page 41: Front Panel
VEHICLE DEVICE VEHICLE DEVICE FRONT PANEL Ignition Lock/Start Button MODE1 MODE2 MODE1: Ignition Lock Turn the key to the position "ON": the vehicle is energized and the electrical components of the vehicle can be used. Turn the key to the position “OFF”: the whole vehicle circuit is disconnected and the engine stops. -
Page 42: Switchs
VEHICLE DEVICE VEHICLE DEVICE Switchs Emergency shutdown Switch Emergency Switch Mode Switch Override Switch On-Command Four-Wheel Drive Switch Emergency shutdown Switch “ ”:Engine Stop “ ”:Engine Start Vehicle launch Depress the brake pedal when the gear is in "P" gear or "N" gear. - Page 43 VEHICLE DEVICE VEHICLE DEVICE The vehicle stop Put the shift lever in the "P" position and turn on the parking brake 2. Press the flameout switch “ ” , and the engine will stop. Emergency Switch Use this switch when the vehicle is in an emergency. Press the switch to the "...
-
Page 44: Combination Switch
VEHICLE DEVICE VEHICLE DEVICE On-Command Four-Wheel Drive Switch(if equipped) “ ”Rear wheel differential lock “ ”4WD(Unlock) Toggle switch for Two-wheel drive or Four-wheel drive Handle switch... -
Page 45: Toggle Switch For Two-Wheel Drive Or Four-Wheel Drive
VEHICLE DEVICE VEHICLE DEVICE 2 x 4 patterns When the two-four-wheel drive switch is in the two-wheel drive state, the whole vehicle is only driven by the rear wheel, and the front wheel has no power output. The meter shows the symbol "... - Page 46 VEHICLE DEVICE VEHICLE DEVICE Combination Switch As shown in the picture above, turn the end of the lever to turn on the lights “ ”:Front position lights, tail lights, license plate lights and dashboard lights are turned on. “ ”:Turn the switch to this position, the headlights are placed on the low beam.
-
Page 47: Electronic Power Steering(Eps
After the key switch is turned to the "OFF" position, the EPS system will be turned off. If the EPS indicator light continues to light up after the engine is started, it means that the EPS system has failed. Please contact your Segway Powersports dealer. -
Page 48: 12V Socket
VEHICLE DEVICE VEHICLE DEVICE 12V Socket The vehicle is equipped with two 12V sockets. Located in the middle of the front panel of the vehicle. The power socket can be used for 12V accessories with a working current of less than 10A. Output power: 120W Top: USB interface Bottom: DC interface Open the lid... -
Page 49: Seat
VEHICLE DEVICE VEHICLE DEVICE Seat The driver’s seat can be adjusted forwards and backwards, before driving. Adjust the position of the seat so that the driver’s back can touch the seat back, and the driver’s feet can step on the brake pedal and accelerator pedal. -
Page 50: Driver Seat Removal/Installation
VEHICLE DEVICE VEHICLE DEVICE Driver seat removal/installation Driver seat removal seat lock pin Move the seat lock pin to the outside. 2. Gently pull the seat forward, and pull out the cable connector under the seat. Remove the seat from the vehicle. Driver seat installation Plug the cable connector under the seat. -
Page 51: Passenger Seat Removal
VEHICLE DEVICE VEHICLE DEVICE Passenger Seat removal Passenger seat Passenger seat cover Lift the front end of the seat to remove the seat from the vehicle. The seat cover is located under the passenger seat. After the passenger seat is removed, hold the seat cover with both hands Move it upwards and remove the seat cover. -
Page 52: Seat Headrest Adjustment
VEHICLE DEVICE VEHICLE DEVICE Seat Headrest Adjustment The seat headrest can be adjusted. When the upper row of headrest holes are fixed, the headrest position is low. When the lower row of headrest holes are fixed, the headrest position is high. -
Page 53: Steering Wheel
MAINTENANCE,STORAGE AND TRANSPORTATION Steering Wheel The steering wheel can be tilted up or down to meet the driver's driving preferences. Steering wheel angle adjustment : After raising the steering column adjustment lever toward the steering wheel, do not loosen it. Move the steering wheel up or down to adjust to a suitable position, hold the steering wheel, and release the adjustment pole. -
Page 54: Seat Belt
MAINTENANCE,STORAGE AND TRANSPORTATION Seat Belt Fasten your seat belt as soon as you get in the vehicle. The seat belt can effectively protect the driver and the passenger. In the event of an accident, the seat belt can reduce the risk of injuries. - Page 55 Damage, wear, or stiffness. If any damage is found, please contact a Segway Powersports dealer for replacement. Clean the dirt or debris on the seat belt, wipe the belt with mild soap and water. Never use bleach, dyes or household detergents.
-
Page 56: Door (Safety Net)
Replace any worn or damaged parts in time. New parts can be obtained from your authorized Segway Powersports dealer. Safety Net The safety net has five fixed points, the front lock is movable, and the remaining four are fixed installation, can not be quickly removed. -
Page 57: Storage Box
VEHICLE DEVICE VEHICLE DEVICE Storage Box Front storage box Tooling are placed in this box. Middle storage box Passenger backrest storage box This box can be removed. Click the upper part of box and lift it out. Meanwhile, move upper left and right buckles of box to open this box. -
Page 58: Fuel Tank Cap
VEHICLE DEVICE VEHICLE DEVICE Fuel Tank Cap The fuel tank cap is located in the front right of the vehicle. WARNING Always gas up fuel type as per requirement. Do not smoke while refueling or it may ignite the fuel and cause fire hazard. -
Page 59: Gear Shift Selector
VEHICLE DEVICE VEHICLE DEVICE Gear Shift Selector Different operation modes correspond to different gears. After selecting the gear, Check the indicator light on the instrument panel to ensure that the gear has been switched to the desired position. See the table below for the tap position description: Low speed High speed Neutral... -
Page 60: Brake Pedal And Accelerator Pedal
VEHICLE DEVICE VEHICLE DEVICE Brake Pedal and Accelerator Pedal Brake pedal Accelerator pedal Brake pedal Step on brake pedal to select gear, reduce speed, or stop the vehicle. Use this brake pedal when you start the engine. If you want to reduce speed or stop the vehicle, step on the brake pedal with your right foot. - Page 61 VEHICLE DEVICE VEHICLE DEVICE Accelerator pedal Step on accelerator pedal downward to increase engine speed. If you want to increase speed or keep speed, use your right foot to hold the accelerator pedal. If you want to decrease speed, loosen your accelerator pedal. The accelerator pedal is spring load style.
-
Page 62: Parking Brake
VEHICLE DEVICE VEHICLE DEVICE Parking brake Whenever a person leaves the vehicle, the parking brake must be turned on to put it in the parking system working status Parking handle Parking button Turn on the parking brake: When parking the car, first park the car on a suitable road, step on the brake pedal to make the car stand still, and then hold the T-shaped parking handle with your hand and pull it up until your foot releases the brake The vehicle is still in a reliable stationary state when... -
Page 63: Roll-Overprotective Structures(Rops)
3471: 2008 rollover performance. If there is any damage to the vehicle's rollover protection device, please contact Segway Powersports. The dealer thoroughly inspects the ROPS or replaces it. No device can assure occupant protection in the event of a rollover. -
Page 64: Instrument Panel
VEHICLE DEVICE VEHICLE DEVICE INSTRUMENT PANEL The instrument panel provides the operator with the vehicle information, and the driver should understand the meaning of the various indicators, warning lights and display content information on the instrument table, to understand the vehicle status. NOTICE The combination meter may be damaged by using a high-pressure cleaner. -
Page 65: Instrument Indicator Light/Warning Light
VEHICLE DEVICE VEHICLE DEVICE Instrument Indicator Light/Warning Light Indicator lights and warning lights on the instrument indicate the status of the vehicle's systems. The figure below shows all the lights and warning lights. The ignition lock switch is set to “ON” mode, the indicator is switched on, and all warnings on the indicator,The light will be briefly lit for 1 second. - Page 66 Thermometer shows the engine water temperature. C engine water temperature low H engine water temperature high Time Display After the vehicle is bound to the "Segway Powersports" APP, the time displayed on the dashboard will be automatically synchronized to the local time Subtotal Mileage The dashboard does not have the function of clearing subtotal mileage, please clear the subtotal mileage through "Segway...
- Page 67 VEHICLE DEVICE VEHICLE DEVICE Indicator light/warning indication light Instructions status This light reminds the operator to ensure that all riders wear helmets and safety belts before work. The driver's Safety Belt seat belt is equipped with a seat belt interlocking device. If the seat belt is not secured, the vehicle speed will be limited to 15 MPH (24 km/h) This light is on when oil pressure is too...
- Page 68 VEHICLE DEVICE VEHICLE DEVICE This lamp illuminates when the High Beam High Beam headlamp switch is set to high beam. The front light, tail light, license plate Position light Position light light and instrument panel light are on. Power icon on The icon will light on when the APP Bluetooth Bluetooth power is used.
-
Page 69: Diagnostic Displays Code Definitions
VEHICLE DEVICE VEHICLE DEVICE Diagnostic displays code definitions This area displays the code information of electrical components, circuits issues of the vehicle in case of failure or abnormality, please contact your dealer for any abnormalities or problems with this type of vehicle. Fault Code Display Area Failure System... - Page 70 VEHICLE DEVICE VEHICLE DEVICE P0691 11 Fan 1 Control Circuit Low P0480 13 Fan 1 Control Circuit P0629 12 P0629 12 Fuel Pump “A” Control Circuit High Fuel Pump “A” Control Circuit High P0628 11 P0628 11 Fuel Pump “A” Control Circuit Low Fuel Pump “A”...
- Page 71 VEHICLE DEVICE VEHICLE DEVICE P0122 16 Throttle/Pedal Position Sensor/Switch “A” Circuit Low Throttle/Pedal Position Sensor/Switch “A” Circuit P0121 29 Range/Performance P0223 17 Throttle/Pedal Position Sensor/Switch “B” Circuit High P0222 16 Throttle/Pedal Position Sensor/Switch “B” Circuit Low Throttle/Pedal Position Sensor/Switch “B” Circuit P0221 29 Range/Performance P2106 12 Throttle Actuator Control System Forced Limited Power...
- Page 72 VEHICLE DEVICE VEHICLE DEVICE P0606 00 ECM/PCM Processor P0606 62 ECM/PCM Processor P0606 96 Function monitoring: fault of ECU ADC - Null Load Test Pulse P0606 97 function monitoring: fault of ECU ADC - test voltage P0606 47 function monitoring:fault of ECU monitoring modul error P0606 17 Reported OverVoltage of VDD5 P0606 16 Reported UnderVoltage of VDD5 P0606 49 Diagnostic fault check to report “WDA active”...
- Page 73 VEHICLE DEVICE VEHICLE DEVICE E0001 No midpoint of torque is written E0002 No end point of rotor angle is written E0003 Memory read write failure E0004 The main torque sensor is disconnected E0005 Abnormal output of main torque sensor E0006 The secondary torque sensor is disconnected E0007 Abnormal output of secondary torque sensor...
- Page 74 VEHICLE DEVICE VEHICLE DEVICE T0001 GPS module failure T0002 4G module failure T0003 Bluetooth module failure T-BOX T0004 Sensor failure T0005 Power CAN failure T0006 Body CAN failure A0001 Left front wheel speed error signal A0002 Right front wheel speed error signal A0003 Left rear wheel speed error signal A0004...
-
Page 75: Operation
OPERATION OPERATION BASIC DRVING GUIDE ..........69 Trail Etiquette ............69 Know your riding area/tread lightly .......70 Vehicle Break-In Period ..........70 Brake System Break-In Period ........70 Belt Break-In Period ...........70 New Operator Driving Procedures ......71 Driving with Passengers ..........72 Starting the Vehicle ...........73 Park the Vehicle ............73 Braking ................73 Parking the vehicle .............74... - Page 76 OPERATION OPERATION PRE-RIDE INSPECTION ..........80 HAULING CARGO ............82 Belt life ................ 84 Towing loads ............... 84 Maximum loading capacity ........85 Dumping the cargo box ..........85 Loading guidelines ............. 86 Trailer ................86 WINCH OPERATION ............. 88 Winch Operation ............
-
Page 77: Basic Drving Guide
OPERATION OPERATION This section provides basic operating instructions, including how to start and stop the vehicle, driving skills and precautions when driving on different roadways. Even if you've ridden other off-road vehicles, you must take time to familiarize yourself with how the vehicle operates. Practice in flat and wide areas until you are familiar with this all-terrain vehicle. -
Page 78: Know Your Riding Area/Tread Lightly
OPERATION OPERATION Know your riding area/tread lightly Familiarize yourself with all laws and regulations concerning the operation of this vehicle in your area. Respect the environment in which you ride your vehicle. Find out where the designated riding areas are by contacting your dealer, a local riding club, or local officials. -
Page 79: New Operator Driving Procedures
OPERATION OPERATION New Operator Driving Procedures Before operating this vehicle, read and understand the owner's manual and all warning and instruction labels. 2. Perform a pre-ride check. Do not carry goods during this period. 4. Do not carry passengers until you have driven the car for at least two hours. -
Page 80: Driving With Passengers
OPERATION OPERATION Avoid sharp turns • Don’t turn when stepping on the accelerator . • Don’t swerve when driving the vehicle. • Operate according to your skills conditions and terrain. • Do not jump the vehicle or perform any other driving stunts. Driving with Passengers Finish the overview of the new operator driver on the page 71. -
Page 81: Starting The Vehicle
OPERATION OPERATION Starting the Vehicle Depress the brake pedal when the gear is in "P" gear or "N" gear. 2. Turn the ignition key into " ON " position. Press the flameout switch “ ” 4. Press the "start" button for 1.5 seconds to 2 seconds,the engine start Before starting your vehicle, please wear the cycling equipment, ensure the doors are closed and that both passenger and... -
Page 82: Parking The Vehicle
OPERATION OPERATION Parking the vehicle Stop the vehicle on a level surface. When parking inside a garage or other structure, be sure that the structure is well ventilated and that the vehicle is not close to any source of flame or sparks, including any appliance with pilot lights. 2. -
Page 83: Driving Through Water
OPERATION OPERATION Driving through water Your vehicle can operate through water with a maximum recommended depth equal to floor level. Follow these precautions when operating through water: NOTICE Major engine damage can result if the vehicle is not thoroughly inspected after operating in water. Perform the services outlined in the Periodic Maintenance Chart. -
Page 84: Driving In Reverse
OPERATION OPERATION Driving in reverse Follow these precautions when operating in reverse: Always check for obstacles or people behind the vehicle. 2. Apply the throttle lightly. Never open the throttle suddenly. Back slowly. 4. Apply the brakes lightly for stopping. Avoid making sharp turns. -
Page 85: Driving Downhill
OPERATION OPERATION ascending or descending a hill. 2. Always travel straight uphill. Keep both feet on the floor. 4. Always check the terrain carefully before ascending any hill. Never climb hills with excessively slippery or loose surfaces. Proceed at a steady rate of speed and throttle opening. Never open the throttle suddenly. -
Page 86: Driving On A Sidehill (Sidehilling)
OPERATION OPERATION Driving on a sidehill (sidehilling) Driving on a sidehill is not recommended. Improper procedure could cause loss of control or overturn. Avoid crossing the side of any hill unless absolutely necessary. If crossing a sidehill is unavoidable, follow these precautions: Slow down. -
Page 87: Engine Break-In Guidelines
OPERATION OPERATION S l ow l y re l e a s e t h e b ra ke p e d a l a n d m a ke s u re t h e transmission is in PARK before exiting the vehicle. 6. -
Page 88: Operation
OPERATION OPERATION PRE-RIDE INSPECTION Perform a pre-ride inspection before each ride to detect any potential problem that could occur during operation. The pre- ride inspection will help you monitor component wear and deterioration before they become a problem. Correct any problems that you discover to reduce the risk of a breakdown or accident.Inspection Items. - Page 89 OPERATION OPERATION Check the length of the seat belt for damage and check Seat belt whether the latch is in normal operation Inspect doors and latches for Net door wear or damage...
-
Page 90: Hauling Cargo
OPERATION OPERATION HAULING CARGO WARNING WARNING Overloading the vehicle or carrying cargo improperly can alter vehicle handling and may cause loss of control or braking instability. Always follow these precautions when hauling cargo: Never exceed the stated load capacity for this vehicle. Reduce speed and allow greater distances for braking when hauling cargo. - Page 91 OPERATION OPERATION WARNING SECURE ALL LOADS BEFORE OPERATING. Unsecured loads can create unstable operating conditions, which could result in loss of control of the vehicle. OPERATE ONLY WITH STABLE AND SAFELY ARRANGED LOADS. When handling off-centered loads that cannot be centered, securely fasten the load and operate with extra caution.
-
Page 92: Belt Life
OPERATION OPERATION on warning labels and in this manual. Never exceed the maximum capacities specified for your vehicle. Belt life To extend belt life, use low gear when hauling or towing heavy cargo. Towing loads WARNING WARNING Towing improperly can alter vehicle handling and may cause loss of control or brake instability. -
Page 93: Maximum Loading Capacity
OPERATION OPERATION Maximum loading capacity Don’t over the maximum loading capacity: Vehicle Model SGW1000F 1500 Ibs. (680 kg) Maximum weight capacity 1000 Ibs. (454 kg) Maximum cargo load 2500 Ibs. (1134 kg) Horizontal Maximum 220 Ibs. (100 kg) traction Vertical Dumping the cargo box To dump the cargo box, do the following: Select a level site to dump the cargo box. -
Page 94: Loading Guidelines
OPERATION OPERATION Release the tailgate latches. 8. Stand clear and pull up on the cargo box release lever. 9. Lift the front of the cargo box to dump the cargo. 10 . Lower the cargo box and push down securely to latch. 11. - Page 95 OPERATION OPERATION the vehicle when not in use. When towing a load be reminded that the towing weight does not include the towing device. • The total load (weight on the operator, accessories, cargo and trailer) shall not exceed the maximum capacity of the vehicle.
-
Page 96: Winch Operation
OPERATION OPERATION WINCH OPERATION If your vehicle is equipped with a winch, please read this manual before installation and use to understand and be familiar with the relevant safety precautions and operating instructions. WARNING WARNING The user must read and understand the operating instructions and warnings of this owner's manual. - Page 97 OPERATION OPERATION to be rolled on one end of the barrel and may damage the rope or winch. • Note that the rope-drawing capacity of the winch is the maximum rope- drawing capacity of the first layer, do not operate the winch with overload capacity past this amount of rope.
- Page 98 OPERATION OPERATION rope. • When using the winch to move the load, place the vehicles transmission in neutral and apply the brake of the vehicle and place wedges under each wheel. When the hoist is working, the vehicle engine should be operated to charge the battery.
- Page 99 OPERATION OPERATION • When the winch is in use, be sure to start the vehicle engine and set the gear position to "N." • When the winch is working, it will draw voltage, so you must start the vehicle and step on the accelerator lightly to avoid damage to the battery.
-
Page 100: Winch Operation
OPERATION OPERATION Winch Operation Manual Release switch of Winch Manual release switch of Winch • When the winch manual release switch is turned clockwise, the winch cable can be pulled out manually. • When the winch manual release is switched (turned counterclockwise), the winch can be controlled by the switch. - Page 101 OPERATION OPERATION Remove the control switch from the passenger armrest storage and connect the control switch to the power interface of the winch located at the front of the vehicle. Open the waterproof cover of the power interface of the winch switch.
-
Page 102: Maintenance,Storage And Transportation
MAINTENANCE,STORAGE AND TRANSPORTATION PERIODIC MAINTENANCE .......... 97 LUBRICATING OIL ............102 Front service lid ............103 Cargo Box ..............104 Lift cargo bed .............105 ENGINE OIL MAINTENANCE PROGRAM ....106 Oil Recommendation ..........107 Engine Oil Level Check ..........108 Changing Engine Oil & Filter ........110 Drain the Engine Oil ........... - Page 103 MAINTENANCE,STORAGE AND TRANSPORTATION Radiator coolant ............127 BRAKE SYSTEM ............128 Brake Fluid ..............129 Brake Pads ..............130 TIRE ................131 Tire Pressure .............. 131 Tread Depth ............... 131 When to Replace a tire: ..........132 Replace the Tires ............132 Wheel Removal ............133 Tire Replacement Size ..........134 SHOCK ABSORBER ADJUSTMENT ......
- Page 104 MAINTENANCE,STORAGE AND TRANSPORTATION Battery Removal ............150 Battery Charging ............151 Battery Installation ............ 152 FUSE ................154 Fuse Box ..............155 Fuse/Relay Distribution and Rated Amperage ..156 Fuse Box Replacement ..........158 APPEARANCE CARE ............ 159 Vehicle Washing ............159 Vehicle Storage ............
-
Page 105: Periodic Maintenance
Inspect, clean, lubricate, adjust and replace parts as necessary. When in the need for replacement parts, use genuine Segway Powersports parts available from your authorized Segway Powersports dealer. Service and adjustments are important for proper vehicle operation. - Page 106 WARNING Improperly performing the procedures marked with a D could result in component failure and lead to serious injury or death. Have an authorized Segway Powersports dealer or other qualified person perform these services. Perform all services at whichever maint...
- Page 107 MAINTENANCE,STORAGE AND TRANSPORTATION MAINTENANCE INTERVAL (WHICHEVER COMES FIRST) ITEM REMARKS MILES HOURS CALENDAR (MI/KM) Steering Pre-Ride Front suspension Pre-Ride Visually inspect, test, Rear suspension Pre-Ride or check components. Tires/ Wheels/ Pre-Ride Make adjustments and/ fasteners or schedule repairs Brake fl uid level Pre-Ride when required Brake system...
- Page 108 MAINTENANCE,STORAGE AND TRANSPORTATION MAINTENANCE INTERVAL (WHICHEVER COMES FIRST) ITEM REMARKS MILES HOURS CALENDAR (MI/KM) ► Brake pad wear 10 H Monthly 100 (160) Inspect periodically Battery 20 H Monthly 200 (320) Check terminals. clean. test Inspect. cycle key to pressurize Fuel System 20 H Monthly...
- Page 109 MAINTENANCE,STORAGE AND TRANSPORTATION MAINTENANCE INTERVAL (WHICHEVER COMES FIRST) ITEM REMARKS MILES HOURS CALENDAR (MI/KM) Radiator Inspect. clean external ► 100 H 12 M 1000 (1600) (if applicable) surfaces Cooling hoses ► 100 H 12 M 1000 (1600) Inspect for leaks (if applicable) ►...
-
Page 110: Lubricating Oil
MAINTENANCE,STORAGE AND TRANSPORTATION LUBRICATING OIL Check and lubricate all components at the intervals listed in the periodic maintenance chart. Items not listed in the chart should be lubricated in the general lubrication interval. The rocker arm is lubricated at the factory and does not require additional lubrication. -
Page 111: Front Service Lid
MAINTENANCE,STORAGE AND TRANSPORTATION Front service lid Hold the front service lid and lift it upward. Open the lid.Fuse box, coolant filling port, located under the front service lid. -
Page 112: Cargo Box
MAINTENANCE,STORAGE AND TRANSPORTATION Cargo Box WARNING Do not carry passengers on cargo container.Whenloading the goods, Do not carry passengers on cargo container.Whenloading the goods, do not exceed the maximum load of the container. . do not exceed the maximum load of the container Cargo box tailgate Open the tailgate by lifting the handle of the rear door panel. -
Page 113: Lift Cargo Bed
MAINTENANCE,STORAGE AND TRANSPORTATION Lift cargo bed The cargo bed release handles are available on the left and right sides of the vehicle. Lift the cargo bed release handle to raise the cargo bed. The lock hook of the container will spring open. The cargo bed will slowly tilt upwards and stop automatically when it reaches the turning limit. -
Page 114: Engine Oil Maintenance Program
If the oil level starts to rise, change the oil immediately. Monitor the oil level, if it continues to rise, stop using it and determine the cause. Your Segway Powersports dealer can assist. WARNING... -
Page 115: Oil Recommendation
MAINTENANCE,STORAGE AND TRANSPORTATION Oil Recommendation The oil filter must be changed every time the oil is changed. It is recommended to use 10W/40-SJ four-cycle oil or similar oil for this engine. Follow the manufacturer's recommendations for ambient temperature operation. Please refer to the lubricant guide section for fluid recommendations, capacity. -
Page 116: Engine Oil Level Check
MAINTENANCE,STORAGE AND TRANSPORTATION Engine Oil Level Check NOTICE Running the engine with an improper oil level can cause serious engine damage. Park the vehicle on a level ground. 2. Turn the open the cargo box. Start the vehicle and let the engine idle for 5 minute,stand for 30 seconds. - Page 117 MAINTENANCE,STORAGE AND TRANSPORTATION Upper Line Lower Line Oil Filler cap 8. After cleaning the oil dipstick, insert and install it again. 9. If the oil level is near or below the lower level mark, • Flip the cargo container (see page 105). •...
-
Page 118: Changing Engine Oil & Filter
Do not dispose used oil and filters in domestic garbage, sewers or on the ground. For information on oil recycling or scrapping, please consult your Segway Powersports dealer. Do not put used engine oil in a place where children can reach. -
Page 119: Drain The Engine Oil
MAINTENANCE,STORAGE AND TRANSPORTATION Drain the Engine Oil Oil drain position 2 Oil drain position 1 Oil Drain Plug O-ring Oil Filter Strainer O-ring Oil Drain Plug There are two places on the engine where the oil can be drained, and both places should be drained, otherwise the waste oil cannot be drained completely. - Page 120 MAINTENANCE,STORAGE AND TRANSPORTATION Oil drain position 2 The oil drain position 2 is located inside the left cover assembly. Remove the flange bolt M6×16 and step bolts on the left cover assembly first, then remove the left cover assembly, and the oil drain position 2 can be seen.
-
Page 121: Replace Oil Filter/Oil Strainer
MAINTENANCE,STORAGE AND TRANSPORTATION Replace Oil Filter/Oil Strainer IMPORTANT Change the oil filter and clean the oil strainer with each oil change Change the oil filter and clean the oil strainer with each oil change Change the Oil filter The oil filter is under the cargo box, Refer to fluid recommendations for capacity and plug torque. -
Page 122: Oil Strainer Cleaning
MAINTENANCE,STORAGE AND TRANSPORTATION Oil Strainer Cleaning Oil drain plug O-ring Oil filter Torque Drain Plug: 11.8-14.8ft·lb. (16~20N.m ) Remove the drain plug, take off the O-ring, and remove the oil strainer. 2. Clean the strainer and allow to dry. Install new O-rings and reinsert the clean oil strainer... -
Page 123: Add Engine Oil
MAINTENANCE,STORAGE AND TRANSPORTATION Add Engine Oil Turn the open the cargo box (page 105), and add engine oil cover underneath. Unscrew the oil cap counterclockwise. 2. Add an appropriate amount of the recommended type of oil type and be careful to do not overfill it. The correct oil level is between the upper level and the lower level marks on the dip stick. -
Page 124: Front/Rear Gearbox (Demand Drive)Fluid
4WD is the primary mode of all-wheel drive operations. NOTICE If the front gearbox makes too much noise during 4WD operation, change the demand drive fluid. If the noise continues, see your Segway Powersports dealer. Use the recommended oil type. The use of other oil may result in improper operation. -
Page 125: Check The Rear Gear Box Oil Level
MAINTENANCE,STORAGE AND TRANSPORTATION Check the Rear Gear Box Oil Level Park the vehicle on the level ground. Put the vehicle to a stop. 2. With a rag, remove and pull out the oil dipstick. Clean the dipstick. 4. Re-insert the dipstick completely. Check the oil level as shown in the figure above. -
Page 126: Front/Rear Gearbox Oil Change
MAINTENANCE,STORAGE AND TRANSPORTATION Front/Rear Gearbox Oil change Place a container under the vehicle oil drain to collect the waste oil. 2. Position the vehicle on a horizontal surface, and remove the drain plug and o-ring. After the oil is drained, reinstall the drain plug using new washer. -
Page 127: Add Gear Oil
MAINTENANCE,STORAGE AND TRANSPORTATION Add gear oil Filling Plug o-ring Oil Dipstick o-ring Torque Drain Plug: 11.8-14.8ft·lb. (16~20N.m ) Position the vehicle on a horizontal plane. 2. Place the drain tray under the differential. Remove the drain plug.Allow the fluid to drain completely. 4. -
Page 128: Cvt Belt
MAINTENANCE,STORAGE AND TRANSPORTATION CVT belt Replace the CVT drive belt according to the specified time listed in the vehicle maintenance schedule. If the belt is damaged, it should be replaced. When replacing the belt, clean the CVT housing pipe, clutch and the engine compartment for debris. -
Page 129: Drying The Cvt
MAINTENANCE,STORAGE AND TRANSPORTATION Insert the handle of the CVT belt replacement tool and pull the handle outward to open the CVT driven wheel. Remove the drive belt from the CVT driven wheel and driving wheel. If there are debris in the engine CVT inner box, please remove all debris completely. -
Page 130: Spark Plug
NOT fully open the throttle during this operation. 4. Shift gears to the low range and test for belt slippage. If the belt still slips, repeat the process. 6. Visit your Segway Powersports dealer if your vehicle needs service. SPARK PLUG Refer to the specification below for the recommended spark plug type and clearance specifications. -
Page 131: Spark Plug Inspection
MAINTENANCE,STORAGE AND TRANSPORTATION Spark Plug Inspection The spark plug condition indicates how the engine is running. Check or change the spark plugs within the maintenance time shown in the periodic maintenance schedule. CAUTION Allow the engine to cool before attempting to remove the spark plug for inspection. - Page 132 MAINTENANCE,STORAGE AND TRANSPORTATION The spark plug is located under the cargo box. Please refer to page 105 to open the cargo box. When replacing the spark plugs, please replace both spark plugs at the same time. Remove the ignition coil fixing bolts. 2.
-
Page 133: Coolant
MAINTENANCE,STORAGE AND TRANSPORTATION COOLANT The coolant circulates in the engine cooling system, taking away the excess heat generated during the engine operation and making the engine operate at normal operating temperature. Maintaining the coolant will allow the cooling system to work properly and prevent freezing, overheating, and corrosion. -
Page 134: Coolant Bottle
MAINTENANCE,STORAGE AND TRANSPORTATION Coolant bottle The coolant bottle is located under the front access cover. Check the liquid level of the coolant bottle from the lower left side of the front panel of the vehicle. 2. If the liquid level is low, add the corresponding type of coolant.Coolant should be in the bottle remain level between minimum MIN and maximum mark MAX on the liquid (as the liquid cools). -
Page 135: Radiator Coolant
MAINTENANCE,STORAGE AND TRANSPORTATION Radiator coolant To ensure that the coolant maintains its ability to protect the engine, we recommend the system each five (5) years completely drained and new antifreeze 50/50 premix added. CAUTION Steam escaping can cause burns.Do not disassemble pressure relief cap when there is temperature or heat in the engine.The engine must be allowed to cool down before the pressure cap is removed. -
Page 136: Brake System
MAINTENANCE,STORAGE AND TRANSPORTATION BRAKE SYSTEM The front and rear brakes are hydraulic disc brakes that are activated by pressing the brake pedal with your foot. These brakes are self-regulating. As the brake pads wears away, the brake fluid level will drop. Leakage in the system will also cause the fluid level to drop. -
Page 137: Brake Fluid
MAINTENANCE,STORAGE AND TRANSPORTATION check the dealer's service before operation with your Segway Powersports dealer befor further operation. Brake Fluid Use the recommended brake fluid: Brake Oil DOT4 No adjustment is required for the hydraulic assisted braking system. Check the brake oil level of the auxiliary braking system frequently. -
Page 138: Brake Pads
MAINTENANCE,STORAGE AND TRANSPORTATION The brake fluid level is most suitable between the Max and Min level indicators. If it is lower than the Min indicator, add the recommended brake fluid and observe the fluid level. Check whether the brake pads are worn. NOTICE Brake fluid can damage plastic and painted surfaces and should be added with caution. -
Page 139: Tire
MAINTENANCE,STORAGE AND TRANSPORTATION TIRE Tire Pressure Driving a vehicle with the incorrect tire pressure may result in the following consequences: • Reduced fuel efficiency • Reduced driving comfort and shortened tire life • Reduction in safety reduction When checking tire pressure, use the following instructions: Recommended Front wheels Rear wheels... -
Page 140: When To Replace A Tire
• Tires can have air leaks and cannot be normally repaired due to the size or position of the area of the leak. If you are not sure, consult your Segway Powersports dealer. Replace the Tires When the tire tread wear has reached the replacement mark or the tire is damaged due to an external impact, the damaged tire should be replaced. -
Page 141: Wheel Removal
MAINTENANCE,STORAGE AND TRANSPORTATION Wheel Removal Torque to Specification: Mounting nuts: 74~88ft. lbs. ( ( 100~120N m ) ) Torque Mounting nuts: 74~88ft. lbs. 100~120N·m Stop the engine. 2. Put the gear shifter in "P" position. Lock parking brake. 4. Lift the side of the vehicle by placing a suitable jack under the frame. -
Page 142: Tire Replacement Size
MAINTENANCE,STORAGE AND TRANSPORTATION CAUTION The loose nut may cause the tire to fall off during operation, which may cause an accident or rollover. Always ensure that all nuts are tightened to the required value 74~88 ft.lbs. (100~120N·m ). Do not use lubricating oil or grease on wheel bolts or wheel nuts. -
Page 143: Shock Absorber Adjustment
MAINTENANCE,STORAGE AND TRANSPORTATION SHOCK ABSORBER ADJUSTMENT The spring adjustment sleeve of the hydraulic shock absorber there are 5 adjustment positions, the spring can be adjusted according to different terrain and loading conditions, if you feel too soft and too hard, it can be adjusted by the spring table adjustment. -
Page 144: Lubrication
MAINTENANCE,STORAGE AND TRANSPORTATION LUBRICATION The vehicle's front suspension, rear suspension, drive shaft and balance parts are installed with grease fitting. If you see the label below, there is a grease spot nearby. These parts on the vehicle need sufficient lubrication. Lubrication can reduce the wear of these parts, and increase the service life of the vehicle. -
Page 145: Front/Rear Drive Axle Dustcover
MAINTENANCE,STORAGE AND TRANSPORTATION Front/Rear Drive Axle Dustcover Check for cuts, damage or grease leakage in the front and rear drive Axle dust boots. If you find an damage or grease leakage, please contact your Segway Powersports dealer for replacement. -
Page 146: Air Filter
MAINTENANCE,STORAGE AND TRANSPORTATION AIR FILTER The vehicle utilizes a two-stage air filtration system. The air passes through the primary filter first and then the secondary air filter last. This two-stage air filtration system fully meets the needs of the engine. The air filter core shall be replaced regularly according to the periodic maintenance table. -
Page 147: Air Filter Inlet Cap And Cvt Inlet Mesh Fabric
MAINTENANCE,STORAGE AND TRANSPORTATION The air filter is located at the bottom right of the cargo box, turn the cargo box over to open. Press the plastic buckle on the air filter cover, and pull out the air filter cover 2. Pull out the air filter box . Take out the filter element from the box, clean or replace the filter element according to the cleanliness of the filter... - Page 148 MAINTENANCE,STORAGE AND TRANSPORTATION Check the air filter inlet cap and CVT inlt mesh fabric every day. The air filter inlet cap and CVT inlt mesh fabric is located at the bottom right of the cargo box, turn the cargo box over to open. clean it if necessary, and replace it if damaged.
-
Page 149: Lamp
MAINTENANCE,STORAGE AND TRANSPORTATION LAMP CAUTION Poor lighting can result in reduced visibility while driving. Please clean the headlamps frequently and replace non-working headlamps promptly. To ensure optimum visibility and saftey, make sure the lights are properly adjusted. Change the headlight LED lights LED lights consist of multiple lights. - Page 150 MAINTENANCE,STORAGE AND TRANSPORTATION CAUTION Hot ingredients can cause skin burns. Allow the lights to cool before doing maintenance. DO NOT touch the headlight shade bulb glass. Fingerprints on the glass can to cause premature failure. Execute the following procedure: Remove the headlamp shade expansion screw and remove the headlamp cover with the tool.
-
Page 151: Replace Taillight/Rear Turn Light
MAINTENANCE,STORAGE AND TRANSPORTATION broken bulb. 4. Reinstall the new light into the new bulb and turn on the headlight. Test whether headlight is working properly. 5. Press the fixed spring on both sides to make the spring pop out of the slot. 6. -
Page 152: High Beam Adjustment
The headlight beam can be adjusted slightly up/down. Use the following procedure to make adjustments. CAUTION The following pictures are for reference only. Your model may be slightly different. It is best for a Segway Powersports dealer to adjust if conditions permit. - Page 153 MAINTENANCE,STORAGE AND TRANSPORTATION Place the vehicle on a level surface with the headlight approximately 33 ft. (10 m) from a wall. 2. Measure the distance from the floor to the center of the headlights and mark the walls at the same height. Apply the brakes.
- Page 154 MAINTENANCE,STORAGE AND TRANSPORTATION Adjust the headlight beam upwards and downwards To raise the headlight beam, turn the headlight adjusting screw counterclockwise. To lower the headlight beam, turn the headlight speed adjustment screw clockwise. Adjust the headlight beam left and right The headlight beam can be adjusted from left or right.
-
Page 155: Spark Arrester
MAINTENANCE,STORAGE AND TRANSPORTATION SPARK ARRESTER Spark arrester prevents random sparks from entering other parts of the vehicle. Regular maintenance can prevent carbon accumulation, maintenance will reduce engine performance if the maintenance is not done. WARNING WARNING Make sure the exhaust pipes are cool. Ensure that there are no combustible materials in the area when maintaining the vehicle. - Page 156 MAINTENANCE,STORAGE AND TRANSPORTATION Remove the 3 fastening bolts on the muffler spark suppressor 2. Remove the muffler spark suppressor. Use a non-synthetic brush to clean the arrester screen. A synthetic brush may melt if components are warm. If necessary, blow debris from the screen with compressed air. Inspect the screen for wear and damage.
-
Page 157: Battery
MAINTENANCE,STORAGE AND TRANSPORTATION BATTERY Due to natural discharge and leakage effects of some electrical equipment, the 12V battery will discharge gradually even when the vehicle is not in use. If the vehicle is parked for a long time, the 12V battery may discharge and may not start. Please charge the battery slowly one time a month if not in use. -
Page 158: Battery Removal
MAINTENANCE,STORAGE AND TRANSPORTATION Battery Removal NOTICE If the electrolyte overflows, immediately wash it off with a solution of 1 tablespoon baking soda and 1 cup water to prevent damage to the vehicle. The battery is located under the middle of the seat. If you want to replace or maintain the battery, please remove the passenger seat and cover (see page 43 for details). -
Page 159: Battery Charging
MAINTENANCE,STORAGE AND TRANSPORTATION Remove the 2 battery pull straps 2. Turn up the Protective rubber sleeve. Remove the battery negative pole screw and disconnect the black (negative) battery cable. 4. Remove the battery positive pole screw and disconnect the red (positive) battery cable. Remove the battery. -
Page 160: Battery Installation
MAINTENANCE,STORAGE AND TRANSPORTATION cable to a separate clamp. Battery Installation NOTICE To reduce the chance of sparks, disconnect the black (negative) cable first. When reinstalling the battery, install the black (negative) cable last. Clean battery cables and terminals with a hard wire brush. Corrosion can be removed with a solution of 1 cup water and 1... - Page 161 MAINTENANCE,STORAGE AND TRANSPORTATION tablespoon baking soda.Rinse well and dry thoroughly. 2. Put the battery in the tray. Connect and tighten the red (positive) cable. 4. Connect and tighten the black (negative) cable. Install the battery press plate. 6. Tighten the battery clamp bolt. Verify that cables are properly wired.
-
Page 162: Fuse
MAINTENANCE,STORAGE AND TRANSPORTATION FUSE All circuits on the vehicle have fuses to protect electrical equipment from damage caused by high current (short circuit or overload). If any of the electrical parts do not work, the fuse may have blown. If this happens, check and replace the fuse if necessary. You can consider electrical faults, first check whether the fuse needs to be replaced, if it is found to have blown, replace the blown fuse. -
Page 163: Fuse Box
MAINTENANCE,STORAGE AND TRANSPORTATION Fuse Box The fuse box is located under the front instrument panel. Remove the front panel repair cover as shown in page 103. After the front panel repair cover has been removed, the fuse box is located at the bottom. Move the clasp on the left and right sides of the fuse box cover. -
Page 164: Fuse/Relay Distribution And Rated Amperage
MAINTENANCE,STORAGE AND TRANSPORTATION Fuse/Relay Distribution and Rated Amperage There is a. You can refer to the fuse distribution label on the top of the fuse box cover to find a fuse of the same power for replacement. Rated amperage of fuse/relay and distribution... - Page 165 MAINTENANCE,STORAGE AND TRANSPORTATION Fuse/Relay Power LOCK FUSE HEAD LIGHT FUSE 12V C P S FUSE FUEL PUMP FUSE 12V-IG FUSE SW-IG fuse ECU-IG fuse SIG-IG fuse EPS-IG fuse MAIN FUSE ECU FUSE EPS fuse FAN FUSE REMOTE POWER-ON RELAY 12V 20A AUXILIARY START RELAY 12V 20A IG1 RELAY...
-
Page 166: Fuse Box Replacement
MAINTENANCE,STORAGE AND TRANSPORTATION Fuse Box Replacement To prevent an accidental short circuit, turn the ignition switch to the (OFF) position and check or replace the fuse(s). To check or replace the circuit fuse, pull out the old fuse with a puller. -
Page 167: Appearance Care
MAINTENANCE,STORAGE AND TRANSPORTATION APPEARANCE CARE Vehicle Washing High pressure water can damage parts and remove paint and decals. Cover or plug the exhaust outlet prior to washing your vehicle. 2. Fill a bucket with water. Mix in a mild, neutral detergent, such as dish washing liquid or a product made especially for washing motorcycles or automobiles. -
Page 168: Specifications
SPECIFICATIONS SPECIFICATIONS TECHNICAL PARAMETERS OF VEHICLE ....161 VEHICLE IDENTIFICATION NUMBER ......165 The frame nameplate ..........167... - Page 169 SPECIFICATIONS SPECIFICATIONS TECHNICAL PARAMETERS OF VEHICLE Parameters Item SGW1000F-U1 VEHICLE 121 in×63 in×81.3 in. Length×width×height (3075 mm×1599 mm×2065 mm) Wheelbase 82.1 in. (2085 mm) Front axle track 53.1 in. (1310mm) Rear axle track 51.9 in. (1320 mm) Curb weight 1653.5 lbs. (750 kg) Ground clearance 12.6 in.
- Page 170 SPECIFICATIONS SPECIFICATIONS POWER/TRANSMISSION Engine type Double cylinder Liquid cooling 4 strokes Engine model 293MY-1 Displacement 1000 CC Compression ratio 10.9 : 1 Bore×Stroke 93 mm×73.6 mm Starting method Electric start Ignition type Eletcricity (ECU) Spark plug type NGK CPR7EA /TORCH B7RTC Spark plug clearance Spark plug clearance 0.7-0.9 mm...
- Page 171 SPECIFICATIONS SPECIFICATIONS Rr. Bridge 3.3125 TIRE Aluminum rim(14×6.5)or Fr. Wheel Steel rim(14×6.0) Rim type (Specifi cation) Aluminum rim(14×7.0)or Rr. Wheel Steel rim(14×7.5) Fr. Wheel 27×9.00 - 14 27×9.00-14 Tire type (Specifi cation) Rr. Wheel 27×9.00R14 27×11.00R14 Fr. Wheel 15.0 PSI. (103 Kpa) Tire pressure Rr.
- Page 172 SPECIFICATIONS SPECIFICATIONS ELCTRIC Headlight 55W×2-32000cd(H4) Fr. Position LED×2 light Headlight Daytime LED×2 Running Light Rr.Brake light Red 21W (P21/5W) Rr. Position Tail light Red 5W(P21/5W) light Maintenance-free/lead acid Battery(Capacity) (12V 32Ah) Dashboard TFT screen(LCD screen,optional) Winch(lb/m) 3500(2500)(4500)...
- Page 173 SPECIFICATIONS SPECIFICATIONS VEHICLE IDENTIFICATION NUMBER Record the frame identification code and engine serial code in the spaces provided for assistance when ordering spare parts from a dealer or for reference in case the vehicle is stolen. Frame identification code...
- Page 174 SPECIFICATIONS SPECIFICATIONS Engine serial code...
- Page 175 SPECIFICATIONS SPECIFICATIONS The frame nameplate The nameplate shows the basic characteristics information which include VIN code. It needs the VIN when the vehicle requires activate in the first time.
-
Page 176: Troubleshooting
TROUBLESHOOTING TROUBLESHOOTING Drive belt and cover problems ........169 Engine doesn’t turn over ........... 171 Engine pings or knocks ..........171 Engine stops or loses power ........172 Engine turns over, fails to start ......... 172 Engine backfires ............173 Engine runs irregularly, stalls or misfires ....174 Engine runs irregularly, stalls or misfires .... -
Page 177: Drive Belt And Cover Problems
TROUBLESHOOTING TROUBLESHOOTING With all the challenges you cna encounter off-road,there's chance that sometime something may go wrong. This section gives practical advice to help you deal with a wide range of problems. Take time to read this section before you ride. Drive belt and cover problems Possible Cause Solution... - Page 178 TROUBLESHOOTING TROUBLESHOOTING Possible Cause Solution Shift the transmission to low range, and Shift the transmission to low range, and carefully use fast, aggressive throttle carefully use fast, aggressive throttle Stuck in mud or Stuck in mud or application to engage clutch. WARNING: application to engage clutch.
-
Page 179: Engine Doesn't Turn Over
TROUBLESHOOTING TROUBLESHOOTING Engine doesn’t turn over Possible Cause Solution Check for fouled plugs or foreign Check for fouled plugs or foreign Poor engine Poor engine material in gas tank, fuel lines, or material in gas tank, fuel lines, or performance performance throttle. -
Page 180: Engine Stops Or Loses Power
TROUBLESHOOTING TROUBLESHOOTING Engine stops or loses power Possible Cause Solution Clean radiator screen and core if Clean radiator screen and core if equipped equipped Overheated engine Overheated engine Clean engine exterior Clean engine exterior See your dealer See your dealer Engine turns over, fails to start Possible Cause Solution... -
Page 181: Engine Backfires
TROUBLESHOOTING TROUBLESHOOTING Clogged fuel injector Clogged fuel injector Clean or replace new fuel injector Clean or replace new fuel injector Low battery voltage Low battery voltage Recharge battery to 12.5 VDC Recharge battery to 12.5 VDC Mechanical failure Mechanical failure See your dealer See your dealer Engine backfires... -
Page 182: Engine Runs Irregularly, Stalls Or Misfires
TROUBLESHOOTING TROUBLESHOOTING Engine runs irregularly, stalls or misfires Possible Cause Solution Fouled or defective spark Fouled or defective spark Inspect, clean and/or replace spark Inspect, clean and/or replace spark plugs plugs plugs plugs Worn or defective spark Worn or defective spark See your dealer See your dealer plug wires... -
Page 183: Engine Runs Irregularly, Stalls Or Misfires
TROUBLESHOOTING TROUBLESHOOTING Engine runs irregularly, stalls or misfires Possible Cause Solution Kinked or plugged fuel Kinked or plugged fuel Inspect and replace Inspect and replace vent line vent line Incorrect fuel Incorrect fuel Replace with recommended fuel Replace with recommended fuel Clogged air filter Clogged air filter Inspect and clean or replace... -
Page 184: Engine Stops Or Loses Power
TROUBLESHOOTING TROUBLESHOOTING Engine stops or loses power Possible Cause Solution Out of fuel Out of fuel refuel refuel Kinked or plugged fuel Kinked or plugged fuel Inspect and replace Inspect and replace vent line vent line Water present in fuel Water present in fuel Replace with new fuel Replace with new fuel... -
Page 185: Emission Control System
EMISSION CONTROL SYSTEM EMISSION CONTROL SYSTEM SOURCE OF EXHAUST EMISSIONS ......178 EXHAUST EMISSION CONTROL SYSTEM ....178 CRANKCASE EMISSION CONTROL SYSTEM .... 178 NOISE CONTROL SYSTEM .......... 178... - Page 186 EMISSION CONTROL SYSTEM EMISSION CONTROL SYSTEM SOURCE OF EXHAUST EMISSIONS The combustion process produces carbon monoxide(CO),oxides of nitrogen(NOx)and hydrocarbons(HC).Control of hydrocarbons and oxides of nitrogen is very important because, under certain conditions, they react to form photochemical smog when subjected to sunlight. Carbon monoxide does not react in the same way, but it is toxic.
-
Page 187: Warranty
WARRANTY WARRANTY WARRANTY..............180 LIMITED WARRANTY POLICY ........181... - Page 188 INC. cannot deny warranty solely for the lack of receipts or for your failure to ensure the performance of all scheduled maintenance. You are responsible for presenting your UTV to a Segway dealer as soon as a problem exists. The warranty repairs should be completed in a reasonable amount of time, not to exceed 30 days.
- Page 189 SEGWAY Operator’s Manual. SEGWAY gives a ONE (1) YEAR limited warranty for recreational use of the vehicle. For commercial use, SEGWAY gives a NINETY (90) DAY limited warranty.
- Page 190 This warranty shall not apply to any vehicle repaired or altered outside the SEGWAY factory or authorized SEGWAY dealership or service center or in any way so as in SEGWAY’s judgment to a ect its stability or reliability. This warranty shall not apply to...
- Page 191 The remedies set forth in this warranty are the only remedies available to any person under this warranty. SEGWAY shall have no liability to any person for incidental, consequential or special damages of any description, whether arising out of express or implied warranty or any other contract, negligence, or other tort or otherwise.
Need help?
Do you have a question about the FUGLEMAN UT10 2022 and is the answer not in the manual?
Questions and answers
how do i get to the battery UT10 6 passenger suv 2023 its dead need to charge it .
To access the battery on a Segway FUGLEMAN UT10 2022 for charging, follow these steps:
1. Locate the battery tray in the vehicle.
2. Remove any securing components, such as the battery press plate and clamp bolt.
3. Disconnect the black (negative) cable first to reduce the risk of sparks.
4. Disconnect the red (positive) cable.
5. Clean the battery terminals if needed before charging.
6. Charge the battery using an appropriate charger.
7. After charging, reinstall the battery by connecting the red (positive) cable first, then the black (negative) cable.
8. Secure the battery with the press plate and clamp bolt.
9. Verify that all connections are properly tightened.
This answer is automatically generated
What size bolts for muffler shield 22 Fugleman thanks
what is the orange button on the dash next to the 4 wheel drive selector switch do