Table of Contents
Advertisement
Quick Links
Advertisement
Table of Contents

Related Manuals for VETRON 5064


Summary of Contents for VETRON 5064
- Page 1 5064 / 5164 » SERVICE MANUAL 02/2021...
- Page 3 5064 / 5164 » SERVICE MANUAL 02/2021...
- Page 4 VETRON | TYPICAL GmbH inadmissible and punishable. VETRON | TYPICAL GmbH is only liable for damage caused by intent or gross negligence on the part of the manufacturer. Moreover, liability is excluded.
-
Page 5: Table Of Contents
05. TECHNICAL DATA 06. TRANSPORT - PACKAGING - DISPOSAL - STORAGE FIRST COMMISSIONING / DECOMMISSIONING 02. OPERATING ELEMENTS 01. OVERVIEW 02. VETRON OPERATING FIELD P107 03. HOTKEY 04. ELCTRONIC HANDWHEEL & FEED BUTTON 05. CONTROL & MAIN SWITCH 06. PEDAL 07. - Page 6 02. CONTINUOUS WELDING AT CONSTANT SPEED 02.01. CONTINUOUS WELDING AT DYNAMIC SPEED 02.02. INTERVAL WELDING AT CONSTANT SPEED 02.03. SPOT WELDING 02.04. CUT & SEAL AT CONSTANT SPEED 02.05. CUT & SEAL AT DYNAMIC SPEED 02/2021 VETRON 5064 Welding Machine...
- Page 7 08. ADJUSTMENT 01. IMPORTANT ADVISE REGARDING ADJUSTMENT 02. LATERAL ADJUSTMENT OF THE SONOTRODE 03. MACHINE PARAMETERS 04. RESETTING THE MACHINE PARAMETERS 05. HEIGHT MEASURING SYSTEM 06. PNEUMATIC CONNECTION 07. PULLER 09. SUPPORT 01. SUPPORT FORMULAR 02/2021 VETRON 5064 Welding Machine...
- Page 8 CONTENTS 02/2021 VETRON 5064 Welding Machine...
-
Page 9: Preface
The machine must be disconnected from the mains. » Work on parts that are under tension should be avoided. » For repairs, only spare parts approved by VETRON may be Exceptions are regulated by EN 50110. After maintenance used. In case of infringement the guarantee expires. -
Page 10: Symbolism
This symbol indicates that there is an increased risk of burning here. MAGNET! This symbol indicates that there is a magnet field. SAFETY SCREW! This symbol displays that this screw should not be loosened. INFORMATION! This symbol displays information. 02/2021 VETRON 5064 Welding Machine... -
Page 11: Danger Notes
Make sure that you have su cient safety distance between the fingers and the anvil and sonotrode wheel. Risk of injury due to lifting and lowering and the material being pulled in by the anvil and sonotrode wheel. 02/2021 VETRON 5064 Welding Machine... -
Page 12: Product Introduction / Intended Use / Conformity Declaration
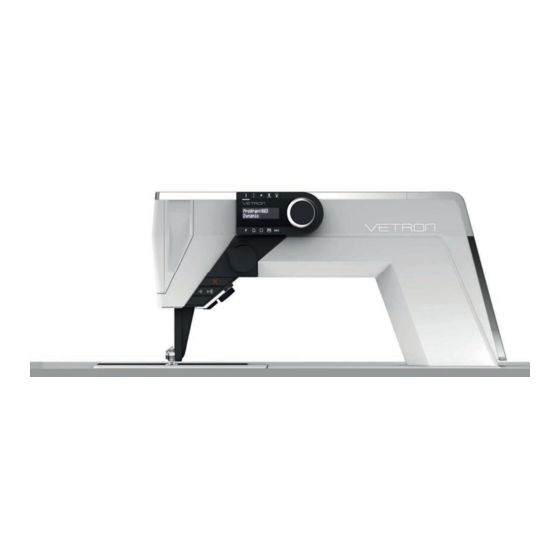
The VETRON 5064 and 5164 (longarm version) with its worldwide unique selling features emerges as the perfect partner for ultrasonic welding techniques. The calibrated height sensor measures the distance between anvil- and sonotrode wheel over the entire perimeter. -
Page 13: Technical Data
01. PREFACE 05. TECHNICAL DATA Vetron 5064 / 5164 (Standard - Longarm) Type Ultrasonic Welding Machine Ultrasonic frequency 35 kHz Welding seam width standard up to 13 mm Anvil Ø (titan or steel) 25/45 mm Sonotrode Width up to 13 mm Max. -
Page 14: Transport - Packaging - Disposal - Storage
02. Switch o the machine at the control. 03. Pull out the mains plug. 04. Disconnect the machine from the compressed air, if available. 05. Clean the machine if necessary. 06. If possible, cover the machine to avoid soiling. 02/2021 VETRON 5064 Welding Machine... -
Page 15: Operating Elements
02. OPERATING ELEMENTS 01. OVERVIEW OPERATING FIELD (p.14) HOTKEYS (p.15) ELECTRONIC HANDWHEEL & FEED BUTTON (p.16) CONTROL (p. 17) DONGLE (p. 17) PEDAL (p. 18) 02/2021 VETRON 5064 Welding Machine... -
Page 16: Vetron Operating Field P107
02. OPERATING ELEMENTS 02. VETRON OPERATING FIELD P107 The operating field indicates the current operating states. Operation takes place via continuous dialog between control and operator. Depending on the operating state, di erent texts are displayed. The following functions are assigned to the BUTTONS ABOVE AND BELOW THE DISPLAY: TECHNOLOGIES: 1. -
Page 17: Hotkey
If the second power stage is activated, the adjacent LED is lit up. CUSTOMIZABLE BUTTON This button can be used to manually advance work steps in interval programs. Pushing the button longer: Sonotrode and wheel runs backwards. Turning direction is adjustable. - Adjustable in Basicparameter M104. 02/2021 VETRON 5064 Welding Machine... -
Page 18: Elctronic Handwheel & Feed Button
In the following, the operating type is indicated by the following icons: Pressing the handwheel: (Function can be customized via program parameters) Turning the handwheel: FEED BUTTON Pulling the button changes the welding direction with welding function. 02/2021 VETRON 5064 Welding Machine... -
Page 19: Control & Main Switch
02. OPERATING ELEMENTS 05. CONTROL & MAIN SWITCH MACHINE MAIN SWITCH ON / OFF USB - PORT Identify yourself using the provided USB dongle. 02/2021 VETRON 5064 Welding Machine... -
Page 20: Pedal
02. OPERATING ELEMENTS 06. PEDAL IDLE POSITION WELDING, Speed depending on programming: » Constant » Dynamic (speed via pressure on pedal) LIFT UPPER TRANSPORT WHEEL 02/2021 VETRON 5064 Welding Machine... -
Page 21: Light
02. OPERATING ELEMENTS 07. LIGHT DISPLAY STEP DESCRIPTION » LIGHT ON/OFF The VETRON head module is equipped with LED lighting. The corresponding LED on Press the LIGHT button the display lights up. » ADJUST LIGHT INTENSITY The correspoding LED lights up on the display. - Page 22 02. OPERATING ELEMENTS 02/2021 VETRON 5064 Welding Machine...
-
Page 23: Welding Wheels
WELDING WHEEL NUMBER (here: 11002, 14403, 11005) PROFILE respectively surface – for the generation of di erent welding seams DIAMETER The welding wheels o ered by VETRON are available with Ø 25mm or Ø 45mm. 02/2021 VETRON 5064 Welding Machine... -
Page 24: Welding Wheels
Cutting wheels cut weldable materials and weld the cutting edges. The di erent cutting wheels are characterized by the following properties: CUTTING WHEEL NUMBER (here: 20001) PROFILE The cutting wheels o ered by VETRON are available with di erent cutting angles. Examples: 60° 45° 75°... -
Page 25: Puller Wheels
INSTALLATION: 01. If needed, slide the puller wheels from the left, right, or from both sides onto the respective cutting or welding wheel. 02. Next, install this unit according to section WHEEL CHANGE (chapter 03.09.). 02/2021 VETRON 5064 Welding Machine... - Page 26 03. WELDING WHEELS 02/2021 VETRON 5064 Welding Machine...
-
Page 27: Commissioning & Welding
Please observe the following requirements for an optimum welding result: » Select material, which is weldable (thermoplastics) and clean in the seam area. Furthermore, the material to be welded must be suitable for processing using the VETRON 5064 with respect to thickness and consistency. -
Page 28: Default Program
If you use your machine for the first time, or if you reset the operating program, the default pro- gram is automatically called up after the determination of the upper and lower reference points (chapter 04.06). Otherwise, activation follows the description under 04.10. CHANGE PROGRAM. 02/2021 VETRON 5064 Welding Machine... -
Page 29: Access Rights
» Wheel change The administrator has access to all functions and can assign access rights using the respective PC program. The “VETRON OPERATOR MANAGEMENT” program is stored on the administrator dongle and functions as follows: 01. Insert DONGLE 1 (Administrator) into the USB slot of the computer. -
Page 30: First Commissioning
Sonotrode could be destroyed Before turning machine o , YOU HAVE TO RE- Remove the welding wheel to prevent it MOVE THE WELDING WHEEL! from hitting the sonotrode. Switch OFF the CONTROL by using the main switch. 02/2021 VETRON 5064 Welding Machine... -
Page 31: Select Language
Turn the JOG KEY COUNTERCLOCKWISE, until LANGUAGE SELECTION is shown. » Confirm The following can be selected: » English » Italian » In order to change the language. » German » Spanish » French » Confirm 02/2021 VETRON 5064 Welding Machine... -
Page 32: Wheel Change
(3mm) and pull it from the bolt (image 1). Preferably in the enclosed storage box. INFO: Use grease recommended by Grease the bolt. VETRON only. (INTERFLON Fin Grease LS2, article no. 8546). Slide new anvil wheel onto the bolt and tighten it using the Allen key (image 2). - Page 33 You can read the concentricity tolerance of the welding wheel in the display. P123 = The program number used Machine ready for operation last is activated. ADVICE: The measuring process cannot be interrupted. Do not switch the machine o during the measurement! 02/2021 VETRON 5064 Welding Machine...
-
Page 34: Change Program
“Save” button. » CANCEL ADVICE: When the ESC button is pressed during the program selection, the display returns to point 1. 02/2021 VETRON 5064 Welding Machine... -
Page 35: Cooling Set
» stronger cooling » weaker cooling The cooling switches at welding start on, and automatically together with the fans of sonotrode unit o . 02/2021 VETRON 5064 Welding Machine... -
Page 36: Welding - Manual Intervention During Welding
In order to manually WELD INTO THE OTHER DIRECTION, pull the backward welding button. This function is particularly suited for overwelding at the end of a weld seam. Handwheel In order to TRAVEL a distance FORWARD OR BACKWARD WITHOUT ULTRASOUND, turn the handwheel. 02/2021 VETRON 5064 Welding Machine... -
Page 37: Continuous Welding Programs
The wheel matches the technology of the program. ADVICE: If your access rights level is 1, you can overwrite Machine ready for operation. the wheel stored in the program with the currently used wheel by pressing on the “Save” button. 02/2021 VETRON 5064 Welding Machine... -
Page 38: Interval Welding Programs
(here: N01) is shown (in live mode). If the first work step is finished, the display automatically switches to the next step. 02/2021 VETRON 5064 Welding Machine... - Page 39 If you canceled the interval program and would like resume welding from a certain position, pro- ceed as follows. » Turn the HANDWHEEL to travel without ultrasound. » Using the CUSTOMIZABLE BUTTON on the head module, you can skip work steps. 02/2021 VETRON 5064 Welding Machine...
-
Page 40: Spot Welding
The wheel matches the technology of the program. ADVICE: If your access rights level is 1, you can overwrite Machine ready for operation. the wheel stored in the program with the current- ly used wheel by pressing on the “Save” button. 02/2021 VETRON 5064 Welding Machine... -
Page 41: Cut & Seal
The wheel matches the technology of the program. ADVICE: If your access rights level is 1, you can overwrite Machine ready for operation. the wheel stored in the program with the current- ly used wheel by pressing on the “Save” button. 02/2021 VETRON 5064 Welding Machine... -
Page 42: Chain Welding Program
As soon as the current work step is completed, activate the change as described under point 6 (in our example, the change takes automatically place via the traveled distance). Subsequently, the next work step is automatically initiated..02/2021 VETRON 5064 Welding Machine... - Page 43 If you canceled the interval program and would like resume welding from a certain position, proceed as follows: » Turn the HANDWHEEL to travel without ultrasound. » Using the CUSTOMIZABLE BUTTON on the head module, you can skip work steps. * The knee button is available as an option. 02/2021 VETRON 5064 Welding Machine...
-
Page 44: Error Messages During Welding
Add interval(s) to program E16 Index overrun Memory full Call VETRON E17 EEPROM PAR R/W error Head Base PCB damage Change PCB, call VETRON E19 Parameter default load Some parameters loaded with full default value Click to continue 02/2021 VETRON 5064 Welding Machine... - Page 45 » Check B2 plug connection to fan switch. If necessary, replace fan switch or connection cable. » Check B2 connection on the Vetron control YSC-8340 and replace control or connection cable if necessary. 02/2021 VETRON 5064 Welding Machine...
- Page 46 04. COMMISSIONING & WELDING 02/2021 VETRON 5064 Welding Machine...
-
Page 47: Programming
ADVICE: In order to completely cancel program creation, press the “NEW PROGRAMM“ button: » Next, to following confirmation prompt is shown: Confirm if you would like to exit the program without saving. Otherwise, select „NO“. 02/2021 VETRON 5064 Welding Machine... -
Page 48: Continuous Welding At Constant Speed
Insert material. As soon as you are done, confirm with » The lower value indicates the current distance » Confirm. from welding wheel to sonotrode. 0 m m Change VALUE Enter the MAX. WELDING SPEED. » 02/2021 VETRON 5064 Welding Machine... - Page 49 TEST*, whether the maximum power is correctly set. If the value is coorrect, confirm with » SAVE (chapter 05.05.) * You can test the settings (welding gap, speed, and power) at any time, while adjusting the values. 02/2021 VETRON 5064 Welding Machine...
-
Page 50: Continuous Welding At Dynamic Speed
TEST* wheter the gap is correctly set. If the value is correct, confirm with » AUTOMATIC gap adjustment » Mark AUTOMATIC » Confirm AUTOMATIC Insert material As soon as you are done, confirm » The lower value indicates the current distance » Confirm from welding wheel to sonotrode 02/2021 VETRON 5064 Welding Machine... - Page 51 TEST*, whether the minimum power is correctly set. If the value is correct, confirm with » SAVE (chapter 05.05.) * You can test the settings (welding gap, speed, and power) at any time, while adjusting the values. 02/2021 VETRON 5064 Welding Machine...
-
Page 52: Interval Welding At Constant Speed
Otherwise, repeat the section determination by pres- sing the ESC button and repeat the last two steps. Define using the shown button, whether the » first section should be traveld with or without ultrasound or with power stage 2. 02/2021 VETRON 5064 Welding Machine... - Page 53 If you canceled the interval program and would like resume welding from a certain position, proceed as follows: Turn the HANDWHEEL to travel without ultrasound. » » Using the CUSTOMIZABLE BUTTON on the head module, you can skip work steps. 02/2021 VETRON 5064 Welding Machine...
-
Page 54: Spot Welding
TEST*, whether the power is correctly set. If the value is correct, confirm with » SAVE (chapter 05.05.) * You can test the settings (welding speed and power) at any time, while adjusting the values. 02/2021 VETRON 5064 Welding Machine... -
Page 55: Cut & Seal At Constant Speed
TEST*, whether the power is correctly set. If the value is correct, confirm with » SAVE (chapter 05.05.) * You can test the settings (welding speed and power) at any time, while adjusting the values. 02/2021 VETRON 5064 Welding Machine... -
Page 56: Cut & Seal At Dynamic Speed
TEST*, whether the minimum power is correctly set. If the value is correct, confirm with » SAVE (chapter 05.05.) * You can test the settings (welding speed and power) at any time, while adjusting the values. 02/2021 VETRON 5064 Welding Machine... -
Page 57: Create Program Chain
Switching via the CUSTOMIZABLE BUTTON on the head module Select SOFT KEY » » Confirm SOFT KEY Switching via LIFTING THE WHEEL VIA PEDAL » Select WHEEL LIFTING » Confirm WHEEL LIFTING Switching via HANDWHEEL » Select HANDWHEEL 02/2021 VETRON 5064 Welding Machine... - Page 58 If you canceled the interval and would like resume welding from a certain position, proceed as follows: » Turn the HANDWHEEL to travel without ultrasound. » Using the CUSTOMIZABLE BUTTON on the head module, you can skip work steps. 02/2021 VETRON 5064 Welding Machine...
-
Page 59: Save
E / O » Cancel » In order to change the program name > » Confirm or » Cancel » CANCEL ADVICE: In order to go one step back during saving, press the “ESC BUTTON”: » 02/2021 VETRON 5064 Welding Machine... -
Page 60: Program Change Via Parameters
E / O the Parameters menu. You would like to save the existing program with the changes applied, or to save it under a di erent program number » Press the “SAVE“ button (chapter 05.05.) 02/2021 VETRON 5064 Welding Machine... - Page 61 ADVICE: In order to completely cancel changing the program, press the “PARAMETERS” button » Next, to following confirmation prompt is shown: Confirm if you would like to exit the program without saving. Otherwise, select “NO“. 02/2021 VETRON 5064 Welding Machine...
-
Page 62: Program Parameter List
• • • Generator power • • • • P W R Minimum • • • generator power Maximum • • • generator power P W R 008 Feed • • • S E D 02/2021 VETRON 5064 Welding Machine... - Page 63 Measure between the wheel and the sonotrode Selection: Constant and Interval: 60% 60/100 Spot-, Cut & Seal-, chain welding and all dynamic Technology: 100% at DYNAMIC speed only at DYNAMIC speed only m/min Welding speed 02/2021 VETRON 5064 Welding Machine...
- Page 64 Nummerical Input: Step N1 • • Section Ultrasound ON/OFF/Boost • • • • Transition to next step Insert working range • • Delete working range • • Nummerical Input: Step N2 Section • • • • Ultrasound ON/OFF/Boost 02/2021 VETRON 5064 Welding Machine...
- Page 65 The next work steps are automatically shifted to the back. The current work step is deleted. The next work steps are automatically shifted to the front. Value from programming Selection: ON | OFF | BOOST 02/2021 VETRON 5064 Welding Machine...
- Page 66 I C . Lifting delay • • • • • • • T ME Wheel type • • • • • • • Wheel - equivalent width • • • • • • • I WI 02/2021 VETRON 5064 Welding Machine...
- Page 67 The gap is stepwise (linearly) increased. At the end, the wheel travels down again Time between welding end and “upper anvil wheel” position in sec Wheel-Number (readable from the table) Wheel-Number (readable from the table) 02/2021 VETRON 5064 Welding Machine...
-
Page 68: Machine Paramter List
– gap determination G p: Pressure during automatic – gap determination G p: Initial gap for automatic gap measurement Material thickness factor – Pedal value for pedal -1 – Pedal value for pedal 0 – 02/2021 VETRON 5064 Welding Machine... - Page 69 Power value when automatic gap measuring Pressure determitation when automatic gap measuring Start gap when automatic gap measuring Gap factor at automatic gap measuring Pedal position, you can adjust it if necessary Pedal position, you can adjust it if necessary 02/2021 VETRON 5064 Welding Machine...
- Page 70 Anvil upper position – previously Anvil backlash – Welding wheel height Determined 0,50 – change per full step previously a / t Welding wheel height change Determined 0,05 – per encoder pulse previously Puller referenz position 02/2021 VETRON 5064 Welding Machine...
- Page 71 Diameter of the zero wheel (required for sensor calibration, stepper motor version) Number of the teeth of the gears on the sonotrode Maximum value for P014/Anvil is in the upper end position Advice: These values shouldn‘t be changed! Referenz position from puller 02/2021 VETRON 5064 Welding Machine...
- Page 72 Current lowering of the – sonotrode stepper motor Current lowering of the – welding wheel stepper motor Current lowering of the – welding wheel stepper motor Current lowering of the – welding wheel lifting motor 02/2021 VETRON 5064 Welding Machine...
- Page 73 The number of times the cylinder has been operated, how many strokes the machine has made Set current: 1 = lowered / cold 1 = power saving mode on 2 = full current/ warm 2 = power saving mode o 02/2021 VETRON 5064 Welding Machine...
- Page 74 – Pressure type – Pedal flip-flop – Encoder correction – Language – – – – a g a Max. LED brightness – 904 Gap correction – o re 999 Cold start – Co d S 02/2021 VETRON 5064 Welding Machine...
- Page 75 You can choose: GERMAN | ENGLISH | FRENCH | SPANISH | ITALIAN brightness limit Gap correction between wheel and sonotrode 1 = Reset height measuring system parameters 2 = Reset factory settings (reset all informations and programs) 02/2021 VETRON 5064 Welding Machine...
-
Page 76: Cancel
ESC button in order to change previously entered values. If you would like to completely exit the “New program” function, press the “New program” button. » The details, how to cancel, are described at the end of the respective chapter. 02/2021 VETRON 5064 Welding Machine... -
Page 77: Administration
The number of the current machine. If you would » Confirm like to copy a program, which was created on a di erent machine, select it using the Jog key. » In order to select the program to be copied » Confirm 02/2021 VETRON 5064 Welding Machine... - Page 78 Jog key. Please wait, until all programs are copied onto your USB dongle. Next, the display automatically switches to the current program again. Machine is ready for operation. 02/2021 VETRON 5064 Welding Machine...
- Page 79 DEFAULT SETTING: The number of the current machine. If you would » Confirm like to copy the parameters of a di erent machine, select them using the Jog key. 02/2021 VETRON 5064 Welding Machine...
-
Page 80: Update The Operating Program
Wait a second and press the JOG KEY. » » Confirm You want to update the COMPLETE firmware e d n » Press the “PARAMETER“ button 1/5: Update 1 of 5 Turn the machine on the main switch OFF and ON again. 02/2021 VETRON 5064 Welding Machine... -
Page 81: Maintenance & Care
Remove possibly adhering welding residues using a brass wire brush. ADVICE: Use brass wire brushes for cleaning only. Otherwise you may damage the sonotrode and the welding wheel. 02/2021 VETRON 5064 Welding Machine... -
Page 82: Fan
Risk of burns in the case of contact with the sonotrode! ADVICE: Make sure that the generator fan is unobstructed. In the case of high contamination levels you must equip the fan with respective filters! 02/2021 VETRON 5064 Welding Machine... -
Page 83: 03. Grease
01. Remove the fastening screw 02. Fill the bolt through the tapped hole with the supplied grease. 03. Now tighten the screw again. ADVICE: One time a week minimal! Only suitable high-performance grease use, for example Interflon Grease HD2 02/2021 VETRON 5064 Welding Machine... - Page 84 07. MAINTENANCE & CARE 02/2021 VETRON 5064 Welding Machine...
-
Page 85: Adjustment
If you perform individual work steps only, you must always also consider the previous and next chapter. CAUTION! Disconnect the machine from the electrical power grid prior to any adjustments. Risk of injury due to unintentional startup of the machine! 02/2021 VETRON 5064 Welding Machine... -
Page 86: Lateral Adjustment Of The Sonotrode
02. LATERAL ADJUSTMENT OF THE SONOTRODE ADVICE! In order to optimally use the complete welding width, you can shift the VETRON welding unit respectively the sonotrode sideways. Despite the extreme hardness of the sonotrode, damage to the surface of the sonotrode due to high pressure and energy may particularly occur in the case that thick materials are welded. -
Page 87: Machine Parameters
» Confirm » Turn the Jog key counterclockwise in order to find the parameter list. » Confirm The first machine parameter is shown. The M in M103 indicates that this parameter is a machine parameter. 02/2021 VETRON 5064 Welding Machine... -
Page 88: Resetting The Machine Parameters
In order to set the value to “1 or 2” 2 = Reset factory settings (reset all informations and programs) » Confirm Switch the CONTROL OFF and ON again After a new start, the machine using the main switch. parameters are reset. 02/2021 VETRON 5064 Welding Machine... -
Page 89: Height Measuring System
Remove the cover. head part. Release sensor carrier Turn on the machine. Tighten screws slightly. » Press the Button "PARAMETER" e v c » To get to the "SERVICE" indicator. » Confirm. » Confirm. 02/2021 VETRON 5064 Welding Machine... - Page 90 ENC position initzialize automatically. » press and the machine is ready for e v c Mount the cover again. operation. ATTENTION! To avoid damage to the magnetic stripe there should be a gap between sensor and magnetic stripe. 02/2021 VETRON 5064 Welding Machine...
-
Page 91: Pneumatic Connection
03. The pressure of the anvil wheel on pressure control valve is factory set to 3.5 bar. CAUTION The maximum pressure of the pressure control valve is 4 bar! Higher pressure can damage the welding unit. 02/2021 VETRON 5064 Welding Machine... -
Page 92: 07. Puller
Loosen the nuts from the throttle valves & and turn the adjustment screws » the Speed becomes LESS » UP / DOWN SPEED ADJUSTMENT » the Speed becomes MORE » Tighten nuts after the adjustment 02/2021 VETRON 5064 Welding Machine... -
Page 93: Support
We will then process your complaint in our quality department and send you feedback as soon as possible. Thank you very much for your understanding and your e orts in advance. Kind regards, Your Vetron Typical Europe Team 1. CUSTOMER: Name: Country:... - Page 94 VETRON TYPICAL EUROPE GmbH Clara-Immerwahr-Str. 6 67661 Kaiserslautern, Germany Tel.: +49 6301 320 75-0 Fax: +49 6301 320 75-11 info@vetrontypical.com www.vetrontypical.com...
- Page 95 VETRON TYPICAL EUROPE GmbH Clara-Immerwahr-Str. 6 67661 Kaiserslautern, Germany Tel.: +49 6301 320 75-0 Fax: +49 6301 320 75-11 E-mail: info@vetrontypical.com www.vetrontypical.com...
Need help?
Do you have a question about the 5064 and is the answer not in the manual?
Questions and answers