Table of Contents
Advertisement
Quick Links
Advertisement
Table of Contents

Subscribe to Our Youtube Channel
Related Manuals for VETRON 5390


Summary of Contents for VETRON 5390
- Page 1 5390 » INSTRUCTION MANUAL 07/2018...
- Page 3 5390 » INSTRUCTION BOOK 07/2018...
- Page 4 VETRON | Typical GmbH inadmissible and punishable. VETRON | Typical GmbH is only liable for damage caused by intent or gross negligence on the part of the manufacturer. Moreover, liability is excluded.
- Page 5 01. OVERVIEW 02. OPERATING PANEL 03. HOTKEYS 04. ELECTRONIC HANDWHEEL & REVERSE SEWING 05. CONTROL & MAIN SWITCH 06. PEDAL 07. LIGHT 08. MACHINE START 09. PROGRAM CHANGE 10. DIRECT ACCESS 07/2018 VETRON 5390 - POST BED MACHINE - INSTRUCTION BOOK...
- Page 6 06. PROGRAMADMINISTRATION WITHOUT USB DONGLE 07. PROGRAMADMINISTRATION WITH USB DONGLE 08. UPDATE THE OPERATING PROGRAM 06. WIRING DIAGRAM 01. VETRON 8340 CONTROL BOX 07. ERROR CODES 01. SUPPORT FORMULAR 02. ERROR MESSAGES 07/2018 VETRON 5390 - POST BED MACHINE - INSTRUCTION BOOK...
-
Page 7: Safety Instructions
» For repairs, only spare parts approved by VETRON may be used. In case of infringement the guarantee expires. » The machines are to be used only for the purpose intended. - Page 8 This symbol indicates that there is an increased risk of burning here. MAGNET! This symbol indicates that there is a magnet field. INFORMATION! This symbol displays information. ADVICE! This symbol indicates important information. 07/2018 VETRON 5390 - POST BED MACHINE - INSTRUCTION BOOK...
-
Page 9: Danger Notes
Risk of injury when machine is tilted back. SAFETY PRECAUTIONS The eye protection can be ordered optionally, but must not be removed after installation without consultation with the operator. The fi nger guard must not be removed! 07/2018 VETRON 5390 - POST BED MACHINE - INSTRUCTION BOOK... -
Page 10: Intended Use
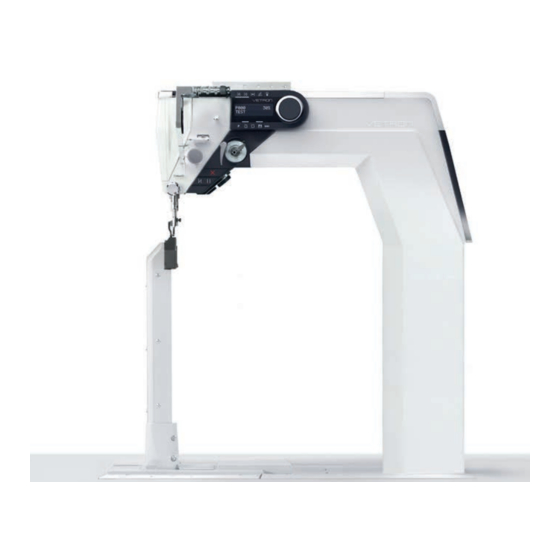
Damage due to non-intended use is not covered by the manufacturer‘s liability! The VETRON 5390 and its subclasses are 1- needle lockstitch sewing machine with direct drive and triple feed. Use the machines only according to their technical data and for medium to heavy ma- terials such as jeans, leather, etc.. -
Page 11: Technical Data
640 x 200mm Netto weight 80 kg Gross weight 114kg Operating voltage AC 220-240V / 50-60Hz Rated power 1200W Noise indication 80dB(A) Versions and subclasses can be found under: www.vetrontypical.com 07/2018 VETRON 5390 - POST BED MACHINE - INSTRUCTION BOOK... -
Page 12: First Commissioning
02. Pull out the mains plug. 03. Disconnect the machine from the compressed air supply, if available. 04. Clean the machine if necessary. 05. If possible, cover the machine to avoid soiling. 07/2018 VETRON 5390 - POST BED MACHINE - INSTRUCTION BOOK... -
Page 13: Machine Description
02. MACHINE DESCRIPTION 01. OVERVIEW OPERATING PANEL P000 TEST HOTKEYS ELECTRONICS AND SEWING REVERSE CONTROL DONGLE PEDAL 07/2018 VETRON 5390 - POST BED MACHINE - INSTRUCTION BOOK... -
Page 14: Operating Panel
Turning changes the values; pressing the JOG KEY enters the value. In the following, the operating type is indicated by the following icons: Input = Press the JOG KEY: Change = Turn the JOG KEY: 07/2018 VETRON 5390 - POST BED MACHINE - INSTRUCTION BOOK... - Page 15 If the backtack function is activated, the following backtack is switched o once by pushing the key. STITCH LENGTH If the second stitch length is activated, the corresponding LED is lit up. CUSTOMIZABLE BUTTON Default: Toggle foot stroke level (see parameter M085) 07/2018 VETRON 5390 - POST BED MACHINE - INSTRUCTION BOOK...
-
Page 16: Reverse Sewing
In the following, the operating type is indicated by the following icons: Pressing the handwheel: stitch-for-stitch function / needle positioning Turning the handwheel: REVERSE SEWING Pulling the button changes the sewing direction. 07/2018 VETRON 5390 - POST BED MACHINE - INSTRUCTION BOOK... - Page 17 02. MACHINE DESCRIPTION 05. CONTROL & MAIN SWITCH MACHINE MAIN SWITCH Switches the machine ON / OFF USB-PORT Identify yourself using the provided USB dongle. 07/2018 VETRON 5390 - POST BED MACHINE - INSTRUCTION BOOK...
-
Page 18: Idle Position
CONSTANT SEWING SPEED (adjustable via parameter M502) VARIABLE SEWING SPEED FROM 0-100% OF THE CHOSEN MAXIMUM SPEED (depending on sewing program) SEWING FEET LIFT SEAM END PROCEDURE ACTIVATION (depending on sewing program) 07/2018 VETRON 5390 - POST BED MACHINE - INSTRUCTION BOOK... -
Page 19: Light On/Off
Change LIGHT INTENSITY light intensity of the light are changed. After 2 seconds without further input, the value is set and the current program number is shown. Machine is ready for operation. 07/2018 VETRON 5390 - POST BED MACHINE - INSTRUCTION BOOK... -
Page 20: Machine Start
The red and white control lights at the machine head are flashing during automatic movement. 03. The sewing light is automatically switched on. 04. The machine is now ready for use. 07/2018 VETRON 5390 - POST BED MACHINE - INSTRUCTION BOOK... -
Page 21: Program Change
03. Turn the JOG KEY to the left or right to choose the desired program number. 04. Confi rm your choice by pushing the JOG KEY again. 05. The machine is now ready for use. 07/2018 VETRON 5390 - POST BED MACHINE - INSTRUCTION BOOK... -
Page 22: Direct Access
» Top feed stroke » Top feed pressure » Bobbin thread counter (only display) » Edge guide distance » Current sewing speed (only display) » Current needle position in degrees (only display). 07/2018 VETRON 5390 - POST BED MACHINE - INSTRUCTION BOOK... -
Page 23: Operation Of The Machine
Before activating the machine by the X-button make sure to remove sewing material or other items below the sewing feet if necessary and follow the instructions displayed on the control panel. 07/2018 VETRON 5390 - POST BED MACHINE - INSTRUCTION BOOK... - Page 24 02. By turning the JOG KEY the sewing feet can be moved. 03. By loosening screws the sewing feet can be exchanged. NOTICE! Push the X-button or switch the machine on again and follow the instructions displayed on the control panel. 07/2018 VETRON 5390 - POST BED MACHINE - INSTRUCTION BOOK...
-
Page 25: Threading The Machine
Now you can thread the machine according to the picture. NOTICE! Push the X-button or switch the machine on again and follow the instructions displayed on the control panel. 07/2018 VETRON 5390 - POST BED MACHINE - INSTRUCTION BOOK... - Page 26 06. The bobbin thread tension can be adjusted at screw NOTICE! Push the X-button or switch the machine on again and follow the instructions displayed on the control panel. 07/2018 VETRON 5390 - POST BED MACHINE - INSTRUCTION BOOK...
-
Page 27: Winding The Bobbin Thread
There should be a gap from 1 mm between thread and bobbin edge. NOTICE! If necessary, the bracket can be slightly bended to the left or right to optimize the thread flow to the bobbin. 07/2018 VETRON 5390 - POST BED MACHINE - INSTRUCTION BOOK... - Page 28 06. Check the needle bar rise. (refer to chapter 03.12. of the adjustment manual). If confirmed, the machine is ready for use again. NOTICE! Push the X-button or switch on the machine again and follow the instructions displayed on the control panel. 07/2018 VETRON 5390 - POST BED MACHINE - INSTRUCTION BOOK...
- Page 29 04. The machine is ready for use again. CRUSHING Crushing and bruising can occur, when the machine is moved to the operating position, between the machine and the table 07/2018 VETRON 5390 - POST BED MACHINE - INSTRUCTION BOOK...
-
Page 30: Maintenance Intervals
In the following chapter we will introduce you to the most important mainte- nance areas to be checked daily & before each use. Detailed maintenance and cleaning instructions can be found in the respective adjustment instruc- tions in chapter 04. 07/2018 VETRON 5390 - POST BED MACHINE - INSTRUCTION BOOK... -
Page 31: Oil Level Check
If you get oil on your skin, make sure you clean it o the skin thoroughly. In case you should swallow the oil seek medical attention immediately. Or call the service hotline: +49 631 / 2014 - 460 07/2018 VETRON 5390 - POST BED MACHINE - INSTRUCTION BOOK... -
Page 32: Cleaning The Machine
For more cleaning tilt the machine back and clean the guard tank. NOTICE! If you tilt the machine during power on, a gravity sensor automatically switches the machine into “BLOCKED MODE”. This is noted on the display. 07/2018 VETRON 5390 - POST BED MACHINE - INSTRUCTION BOOK... -
Page 33: Sewing Drive
The timing belts can be reached easily in this position. NOTICE! If you tilt the machine during power on, a gravity sensor automatically switches the machine into “BLOCKED MODE”. This is noted on the display. 07/2018 VETRON 5390 - POST BED MACHINE - INSTRUCTION BOOK... -
Page 34: Pneumatic System
» Unscrew the water seperator » Unscrew the filter cartridge Wash the filter shell and cartridge with cleaning fluid (no solvent) and blast clean. » Re-assemble the maintenance unit. Check for system leaks. 07/2018 VETRON 5390 - POST BED MACHINE - INSTRUCTION BOOK... - Page 35 T he t hread t ension, f oot p res- sure and stitch length will be adjusted with increasing material With the VETRON, these settings are made by step motors, they thickness. can exactly reproduce the desired setting. All settings for e.g.
- Page 36 Turn the JOG KEY to select the desired parameter. Push the JOG KEY. The parameter will fl ash and can be changed by turning the JOG KEY. Pushing the JOG KEY again will store your input. 07/2018 VETRON 5390 - POST BED MACHINE - INSTRUCTION BOOK...
- Page 37 The appropriate LED will shine on the display. ► Parameter 1 appears on the display. Now you can change the name. ► Turn the JOG KEY to the right. You will get to the program parameters. 07/2018 VETRON 5390 - POST BED MACHINE - INSTRUCTION BOOK...
- Page 38 Switching over can be done with key or the electronic handwheel 021 Foot stroke 2 It can also be done with a knee lever (optional) or with the automatic switch parameter 027. 07/2018 VETRON 5390 - POST BED MACHINE - INSTRUCTION BOOK...
- Page 39 The stroke on a alternate machine are normally changed by pressing a 027 Automatic stroke switch button or with a knee lever. The VETRON can do this also automatically with the foot pedal. By activating parameter 027 it will activate the facility. When...
-
Page 40: Thread Tension
The thread tension on conventional machines is adjusted with a spring. The reproduction of the desired thread tension is di cult. The VETRON sets the thread tension with a step motor. The task of the tension spring is taken over by a elastomer. -
Page 41: Maximum Rotation Speed
Sewing speed will be regulated by the posititon of the pedal. Function 2 = CONSTANT Constant sewing speed as selected in parameter 041. 041 Maximum speed The maximum speed will be entered here. 07/2018 VETRON 5390 - POST BED MACHINE - INSTRUCTION BOOK... - Page 42 Automatic foot pressure control On conventional machines the foot pressure is generated by a spring and will be adjusted seldom. The VETRON also generates the foot pressure with a spring, but the spring is pre-stressed by a step motor with gear (parameter 050). In di erent programs can di erent foot pressure be applied.
- Page 43 Operation mode CONSTANT 4 mm 2 mm 30% adjusted Material thickness in mm Foot pressure High percentage in % Low percentage Operation mode 1-100% (Pressure increase over speed) 30% adjusted Speed 07/2018 VETRON 5390 - POST BED MACHINE - INSTRUCTION BOOK...
- Page 44 Parameter 078 can only be selected when the position of stitch placing 078 Target stitch position is activated in parameter 085, 086 or 087. The position of the needle point above the material will be set with this parameter. 07/2018 VETRON 5390 - POST BED MACHINE - INSTRUCTION BOOK...
- Page 45 STROTG = Foot stroke for this program. (By pressing the key you will switch to the 2 stroke. Pressing it again will change back to the 1 stroke). 07/2018 VETRON 5390 - POST BED MACHINE - INSTRUCTION BOOK...
- Page 46 086 Handwheel function ( Same functions as parameter 085, when the electronic handwheel is pushed 087 Knee switch function You have the same function as parameter 085, when the knee switch is pushed. 07/2018 VETRON 5390 - POST BED MACHINE - INSTRUCTION BOOK...
-
Page 47: Thread Clamp
The stitches will be exactly in the same position with the stitch in stitch backtack. The feeding will be switched when the machine is standing still. It will be used for visible backtacks with high quality. 07/2018 VETRON 5390 - POST BED MACHINE - INSTRUCTION BOOK... -
Page 48: Start Backtack
(parameter 010) (e.g. 4.0 mm). -4.0 mm = When the stitch length for A in backtack is entered in the minus range this part of the backtack will be done in reverse. 07/2018 VETRON 5390 - POST BED MACHINE - INSTRUCTION BOOK... - Page 49 After changing the bobbin you have to press the safety switch (X Key) to reset the bobbin thread counter. 07/2018 VETRON 5390 - POST BED MACHINE - INSTRUCTION BOOK...
-
Page 50: End Backtack
(parameter 010) (e.g. 4,0mm). -4.0 mm = When the stitch length for B in backtack is entered in the minus range this part of the backtack will done in reverse. 07/2018 VETRON 5390 - POST BED MACHINE - INSTRUCTION BOOK... -
Page 51: Chain Program
A chain program will be used when di erent operations on a work piece are done one after the other. The machine will set itself automatically for the next work step. 07/2018 VETRON 5390 - POST BED MACHINE - INSTRUCTION BOOK... - Page 52 = The next work step will be initiated by pressing the key (see next page) Electronic handwheel = The next work step will be initiated by pressing the electronic handwheel (see next page) 07/2018 VETRON 5390 - POST BED MACHINE - INSTRUCTION BOOK...
- Page 53 = The switch will take place (if part of the program) after the end backtack and thread trimming (picture 3). The next seam starts with a backtack (picture 4) (if part of the program). Picture 3 Picture 4 07/2018 VETRON 5390 - POST BED MACHINE - INSTRUCTION BOOK...
- Page 54 Push the JOG KEY to accept your selection. Choose number for this program. ► Push the JOG KEY to accept your selection. Enter program name or number on the display. 07/2018 VETRON 5390 - POST BED MACHINE - INSTRUCTION BOOK...
- Page 55 Summary chain program: Up to 10 chain links PROGRAMM SEAM START SEAM SWITCH OVER OPTION END OF SEAM 07/2018 VETRON 5390 - POST BED MACHINE - INSTRUCTION BOOK...
- Page 56 Turn the JOG KEY to select a letter or number. Up to 15 letters or numbers can be entered. ► Push the JOG KEY to jump to the next free space. 07/2018 VETRON 5390 - POST BED MACHINE - INSTRUCTION BOOK...
- Page 57 YES or NO. Y S N E / O D l t e e e ► Push the JOG KEY to confi rm selection. The display will show COPY PROGRAM. 07/2018 VETRON 5390 - POST BED MACHINE - INSTRUCTION BOOK...
- Page 58 Is the dongle inserted into the USB-Port, a fi le with the serial number of the machine will be opend automatically. In this way you can transfer program from one machine to another. Serial number and program can be selected and transfered to the appropriate machine. Please use only VETRON USB Dongle to secure a safe transfer of data. DISPLAY...
- Page 59 Turn the JOG KEY to select the relevant machine. 0 1 4 ► Push the JOG KEY ► Turn the JOG KEY to select the desired program. ► Push the JOG KEY 07/2018 VETRON 5390 - POST BED MACHINE - INSTRUCTION BOOK...
- Page 60 COPY ALL PROGRAMS FROM USB TO MACHINE ► Push the JOG KEY > 0 3 0 Your machine number will be shown on the display in brackets. 07/2018 VETRON 5390 - POST BED MACHINE - INSTRUCTION BOOK...
- Page 61 Push the JOG KEY All data will be tranfered to the machine. > NEVER remove the USB dongle while data is transfered. Display will show CONFIGURATION USB ---> MASCHINE. > 07/2018 VETRON 5390 - POST BED MACHINE - INSTRUCTION BOOK...
- Page 62 Appears. Turn machine o ! Turn machine on again. Now the machine with the new update can be operated on. INFO: If there isn‘t any information on DONGLE, „Error“ appears! 07/2018 VETRON 5390 - POST BED MACHINE - INSTRUCTION BOOK...
-
Page 63: Wiring Diagram
06. WIRING DIAGRAM 01. VETRON 8340 CONTROL BOX 07/2018 VETRON 5390 - POST BED MACHINE - INSTRUCTION BOOK... - Page 64 06. WIRING DIAGRAM 02. POWER CONNECTION BLOCK DIAGRAM 07/2018 VETRON 5390 - POST BED MACHINE - INSTRUCTION BOOK...
- Page 65 06. WIRING DIAGRAM 03. 8640 STEPPER DRIVER TERMINAL 07/2018 VETRON 5390 - POST BED MACHINE - INSTRUCTION BOOK...
- Page 66 06. WIRING DIAGRAM 04. 8340 MAIN TERMINAL MAIN DRIVE 07/2018 VETRON 5390 - POST BED MACHINE - INSTRUCTION BOOK...
- Page 67 06. WIRING DIAGRAM 05. VETRON 5XXX HEAD PCB 07/2018 VETRON 5390 - POST BED MACHINE - INSTRUCTION BOOK...
- Page 68 06. WIRING DIAGRAM 06. VETRON 5XXX HEAD ADAPTER PCB 07/2018 VETRON 5390 - POST BED MACHINE - INSTRUCTION BOOK...
-
Page 69: Error Codes
Please send the defective part(s) and completed dokument to: Vetron Typical Europe GmbH Clara-Immerwahr-Str. 6 67661 Kaiserslautern / Germany Phone: +49 (0)6301 320 75-0 Fax: +49 (0)6301 320 75-1 Or contact us by mail: support@vetrontypical.com 07/2018 VETRON 5390 - POST BED MACHINE - INSTRUCTION BOOK... -
Page 70: Error Messages
Disable hold torque, check if turning the machine Main drive hold position overload with the mechanical handwheel is smooth while machine is initialized Main drive current sample Replace control box 07/2018 VETRON 5390 - POST BED MACHINE - INSTRUCTION BOOK... - Page 71 Post bed switch / Edge guide height Y-X guide endposition Switch » Measure end switch function not connected or motor is blocked in Init position Stepper driver DE software incompatible Apply latest software update 07/2018 VETRON 5390 - POST BED MACHINE - INSTRUCTION BOOK...
-
Page 72: Firmware Update Error
Only use USB sticks recommended by VETRON » Check the folder structure on the USB stick 2008 no type info » Copy the firmware data to your USB stick again 07/2018 VETRON 5390 - POST BED MACHINE - INSTRUCTION BOOK... - Page 73 07. ERROR CODES 02. ERROR MESSAGES 07/2018 VETRON 5390 - POST BED MACHINE - INSTRUCTION BOOK...
- Page 74 VETRON TYPICAL EUROPE GmbH Clara-Immerwahr-Str. 6 67661 Kaiserslautern, Germany Tel.: +49 6301 320 75-0 Fax: +49 6301 320 75-11 info@vetrontypical.com www.vetrontypical.com...
- Page 75 VETRON TYPICAL EUROPE GmbH Clara-Immerwahr-Str. 6 67661 Kaiserslautern, Germany Tel.: +49 6301 320 75-0 Fax: +49 6301 320 75-11 E-mail: info@vetrontypical.com www.vetrontypical.com...
Need help?
Do you have a question about the 5390 and is the answer not in the manual?
Questions and answers