Table of Contents
Advertisement
Quick Links
Advertisement
Table of Contents

Subscribe to Our Youtube Channel
Related Manuals for VETRON 5374


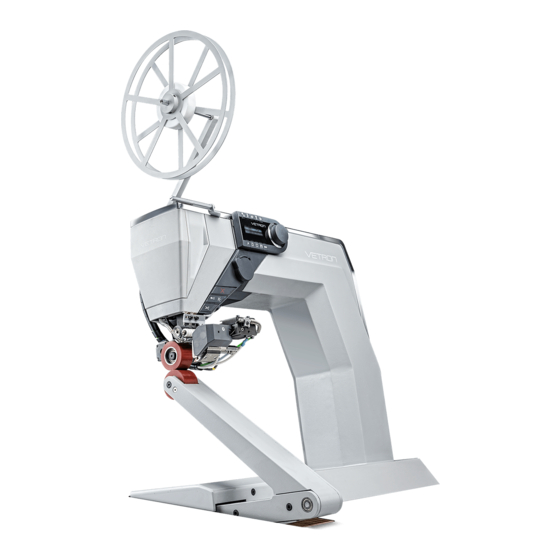
Summary of Contents for VETRON 5374
- Page 1 5374 » SERVICE MANUAL 02/2021...
- Page 3 5374 » SERVICE MANUAL 02/2021...
- Page 4 VETRON | Typical GmbH inadmissible and punishable. VETRON | Typical GmbH is only liable for damage caused by intent or gross negligence on the part of the manufacturer. Moreover, liability is excluded.
-
Page 5: Table Of Contents
05. TECHNICAL DATA 06. TRANSPORT - PACKAGING - DISPOSAL - STORAGE FIRST COMMISSIONING / DECOMMISSIONING 02. OPERATING ELEMENTS 01. OVERVIEW 02. VETRON OPERATING FIELD P107 03. HOTKEYS 04. ELECTRONIC HANDWHEEL & FEED BUTTON 05. CONTROL & MAIN SWITCH 06. PEDAL... - Page 6 02. DELETE / COPY PROGRAMS 03. COPY MACHINE PARAMETERS 04. UPDATING THE OPERATING PROGRAM 06. PROGRAM- & MACHINE PARAMETER 01. PROGRAM- & MACHINE PARAMETER SETTING 02. PROGRAM PARAMETER LIST 03. MACHINE PARAMETER LIST 04. RESETTING THE MACHINE PARAMETERS 02/2021 Vetron 5374 HotAir-Welding...
- Page 7 08. ADJUSTMENT 01. IMPORTANT INFORMATION REGARDING ADJUSTMENT 02. PNEUMATIC CONNECTION 03. ADJUST THE ARM 04. CHANGE FEEDING WHEELS 05. KNIFE CHANGE 06. CHANGE NOZZLE 07. NOZZLE DISTANCE 08. HEIGHT MEASURING SYSTEM 09. SUPPORT 01. SUPPORT FORMULAR 02/2021 Vetron 5374 HotAir-Welding...
- Page 8 02/2021 Vetron 5374 HotAir-Welding...
-
Page 9: Preface
» Work on parts and equipment that are live is not permitted. The machine must be disconnected from the mains. » For repairs, only spare parts approved by VETRON may be used. In case of infringement the guarantee expires. » The machines are to be used only for the purpose intended. -
Page 10: Symbolism
This symbol indicates that there is an increased risk of burning here. MAGNET! This symbol indicates that there is a magnet field. SAFETY SCREW! This symbol displays that this screw should not be loosened. INFORMATION! This symbol displays information. 02/2021 Vetron 5374 HotAir-Welding... -
Page 11: Danger Notes
Make sure you have enough finger clearance to the hot air nozzle Risk of injury due to heating of the material and the nozzle. CRUSHING! Bruises and crushing by the tape feed Risk of injury by adjusting the nozzle and pulling in the material. 02/2021 Vetron 5374 HotAir-Welding... -
Page 12: Product Introduction / Intended Use / Conformity Declaration
Hotair welding machines are typically used to strengthen and seal seams in the textile and leather industry. The innovation of the VETRON hotair welding machine is based on the development of a new air he- ater in combination with consistent reduction of heat losses and a newly designed air nozzle. The air supply can be stopped at any time without damage of the heater. -
Page 13: Technical Data
01. PREFACE 05. TECHNICAL DATA Vetron 5374 / 5474 (Standard - Cylinder) Type Hot Air - Welding Puller wheel width 26 mm Upper puller wheel Ø 45 mm Lower puller wheel Ø 25/45 mm Tape width 5 - 25 mm Max. -
Page 14: Transport - Packaging - Disposal - Storage
01. Switch o the machine at the control. 02. Pull out the mains plug. 03. Disconnect the machine from the compressed air, if available. 04. Clean the machine if necessary. 05. If possible, cover the machine to avoid soiling. 02/2021 Vetron 5374 HotAir-Welding... -
Page 15: Operating Elements
02. OPERATING ELEMENTS 01. OVERVIEW OPERATING FIELD HOTKEYS ELECTRONIC HANDWHEEL & FEED BUTTON CONTROL DONGLE PEDAL 02/2021 Vetron 5374 HotAir-Welding... - Page 16 02. OPERATING ELEMENTS 02. VETRON OPERATING FIELD P107 P001 Temp.200C Test The operating field indicates the current operating states. Operation takes place via continuous dialog between control and operator. Depending on the operating state, di erent texts are displayed. The following functions / technology are assigned to the BUTTONS ABOVE AND BELOW THE DISPLAY:...
- Page 17 When the LED is lit, the function is active. If triggered light illuminates. The material can be transported forwards or backwards with the electronic handwheel. CUTTING By pushing the switch the tape can be manual cut. 02/2021 Vetron 5374 HotAir-Welding...
- Page 18 In the following, the operating type is indicated by the following icons: Pressing the handwheel: (Function can be customized via program parameters) Turning the handwheel: FEED BUTTON The material can be manual transported by pulling the button. Speed is dynamic. 02/2021 Vetron 5374 HotAir-Welding...
-
Page 19: Control & Main Switch
02. OPERATING ELEMENTS 05. CONTROL & MAIN SWITCH MACHINE MAIN SWITCH ON / OFF USB-PORT Identify yourself using the provided USB dongle. 02/2021 Vetron 5374 HotAir-Welding... -
Page 20: Pedal
02. OPERATING ELEMENTS 06. PEDAL IDLE POSITION WELDING, Speed depending on programming: » Constant » Dynamic (speed via pressure on pedal) WELDING END Lift upper transport roller; Tape is cut o 02/2021 Vetron 5374 HotAir-Welding... -
Page 21: Commissioning & Welding
02. The material to be welded and the ambient temperature are decisive for all welding equipment settings. For this reason, optimum settings can be determined using weld tests only. 02/2021 Vetron 5374 HotAir-Welding... -
Page 22: Default-Programm
If you use your machine for the first time, or if you reset the operating program, the default program is automatically called up after the determination of the upper and lower reference points. Otherwise, activation follows the description under 03.10. CHANGE PROGRAM. 02/2021 Vetron 5374 HotAir-Welding... -
Page 23: Access Rights
» Program selection The administrator has access to all functions and can assign access rights using the respective PC program. The “VETRON OPERATOR MANAGEMENT” program is stored on the administrator dongle and functions as follows: 01. Insert DONGLE 1 (Administrator) into the USB slot of the computer. -
Page 24: First Commissioning
04. All safety covers must be mounted. 05. Be sure that the air pressure is min. 6 bar. 1.) In the case of deviations, the machine must NOT be started up! 2.) Connect the machine to a grounded power socket only! 02/2021 Vetron 5374 HotAir-Welding... -
Page 25: Switching On/Off
Before turning machine o , welding process should be finished. Switch OFF the CONTROL by using the main switch. Graphics of this kind are to be regarded as examples. » the displayed serial numbers or similar can deviate from the current state. 02/2021 Vetron 5374 HotAir-Welding... -
Page 26: Select Language
The corresponding LED on the display lights up. » Turn the JOG KEY COUNTERCLOCKWISE, until LANGUAGE SELECTION is shown. » Confirm The following can be selected: »English » In order to change the language. »German »French » Confirm 02/2021 Vetron 5374 HotAir-Welding... -
Page 27: Change Program
Machine is ready for operation. programs are identical. P D L Remove material and press the pedal Temperature is recalibrated » CANCEL ADVICE: During program change if ESC-Button is pushed, display will be set back to number 1. 02/2021 Vetron 5374 HotAir-Welding... -
Page 28: Error Messages
Restart, check cables E13 Position read error Stepper position read error E14 Interval memory full Maximum interval reached E15 No interval programmed Interval programm without interval setting Add interval(s) to program E16 Index overrun Memory full Call Typical 02/2021 Vetron 5374 HotAir-Welding... - Page 29 Cable broken, bad connection, Restart, Check cables Stepdriver multifunction E22 Anvil motor E23 Sonotrode motor E24 Power supply overload No response from Hot Bus cable, no power Check bus cable & electronic power switch Air box 02/2021 Vetron 5374 HotAir-Welding...
- Page 30 03. COMMISSIONING & WELDING 02/2021 Vetron 5374 HotAir-Welding...
-
Page 31: Programming
In order to set new program. » Confirm when curser is on arrow. > » Confirm. » In order to enter 0-9, A-Z. » Confirm when curser is on arrow. P D L Remove material and press the pedal 02/2021 Vetron 5374 HotAir-Welding... -
Page 32: Cancel
» ADVICE: In order to completely cancel program creation, press the “NEW PROGRAM” button: » Next, to following confirmation prompt is shown Confirm if you would like to exit the program without saving. Otherwise, select “NO”. 02/2021 Vetron 5374 HotAir-Welding... - Page 33 Y S N E / O » Cancel » In order to change the program name > » Confirm, or » Cancel » CANCEL ADVICE: In order to go one step back during saving, press the “ESC-button”: » 02/2021 Vetron 5374 HotAir-Welding...
- Page 34 ESC button in order to change previously entered values. If you would like to completely exit the “NEW PROGRAM” function, press the “NEW PROGRAM” button. The details, how to cancel, are described at the end of the respective chapter. 02/2021 Vetron 5374 HotAir-Welding...
-
Page 35: Program Change Via Parameters
E / O the Parameters menu. You would like to save the existing program with the changes applied, or to save it under a di erent program number. » Press the “SAVE” button“ SAVE (see chapter 04.02.) 02/2021 Vetron 5374 HotAir-Welding... - Page 36 » CANCEL ADVICE: In order to completely cancel changing the program, press the “PARAMETERS” button: » Next, to following confirmation prompt is shown: Confirm if you would like to exit the program without saving. Otherwise, select “NO“. 02/2021 Vetron 5374 HotAir-Welding...
-
Page 37: Administration / Update
The number of the current machine. If you would » Confirm like to copy a program, which was created on a di erent machine, select it using the Jog key. » In order to select the program to be copied » Confirm 02/2021 Vetron 5374 HotAir-Welding... -
Page 38: Delete / Copy Programs
Jog key. Please wait, until all programs are copied onto you USB dongle. Next, the display automatically switches to the current program again. Machine is ready for operation. 02/2021 Vetron 5374 HotAir-Welding... -
Page 39: Copy Machine Parameters
In order to select the machine, whose your machines. parameters should be copied DEFAULT SETTING: The number of the current machine. If you would » Confirm like to copy the parameters of a di erent machine, select them using the Jog key. 02/2021 Vetron 5374 HotAir-Welding... -
Page 40: Updating The Operating Program
Wait a second an press the JOG KEY. » » Confirm You want to update the COMPLETE firmware e d n » Press the “PARAMETER“ button 1/5: Update 1 of 5 Turn the machine on the main switch OFF and ON. 02/2021 Vetron 5374 HotAir-Welding... -
Page 41: Program- & Machine Parameter
» Turn the JOG KEY clockwise, in order to find the parameter list The first machine parameter is shown. » Confirm. The M in M401 indicates that this parameter is f n . a machine parameter. 02/2021 Vetron 5374 HotAir-Welding... -
Page 42: Program Parameter List
2 0C 027 Pre heat • • 028 Pre heat air • • 029 Stop to Nozzle Out • • N L O T 030 Post to heat • • T TO 031 Stop gap • • 02/2021 Vetron 5374 HotAir-Welding... - Page 43 Air flow for preheating the upper wheel (P027) Time at the seam interruptions (without cutting) untill the nozzle retracts Time at welding breaks, until the tempreature reduction began Raising the upper wheel in Pedal position 0 at welding breaks 02/2021 Vetron 5374 HotAir-Welding...
-
Page 44: Machine Parameter List
430 Gap / Step – – – – Gap /Encoder – – – – p l e 4 mm Top wheel type Post heating Tape pull back 10.000 2000 0Ltr Minimal air flow 02/2021 Vetron 5374 HotAir-Welding... - Page 45 Values are determined when the machine is started up. The calibration transfers these into the basic parameters. Wheel diameter Time how long temperature is pending on (for faster cycle times) Tape pulls back after the cut Minimum air flow of the nozzle 02/2021 Vetron 5374 HotAir-Welding...
- Page 46 Max. welding speed m/min Current lowering bottom – f c r 808 Current lowering top – f c r Current lowering lift – L ft f C r Current lowering pressure – P ess f C r 02/2021 Vetron 5374 HotAir-Welding...
- Page 47 Period of time after cutting until raising the wheel. Limitation of the maximum welding speed (transfer into the program parameters) Current setting: 1 = lowered, cold 1 = power saving mode ON 0 = fully energized, warm 0 =power saving mode OFF 02/2021 Vetron 5374 HotAir-Welding...
- Page 48 V r i n e s o H rdw Serial number – – – – S ria u b r 998 Administration USB – U er d n l o g e 999 Cold start – C ld 02/2021 Vetron 5374 HotAir-Welding...
- Page 49 Serialnumber of the machine on/o ; Administrator access to all parameters Operator access only to welding & program selection 1 = Reset height measuring system parameters 2 = Reset factory settings (reset all informations and programs) 02/2021 Vetron 5374 HotAir-Welding...
-
Page 50: Resetting The Machine Parameters
In order to set the value to “1 or 2” 2 = Reset factory settings (reset all informations and programs) » Confirm Switch the CONTROL OFF and ON again After a new start, the machine using the main switch. parameters are reset. 02/2021 Vetron 5374 HotAir-Welding... -
Page 51: Maintenance & Care
Risk of burns in the case of contact with the nozzle! Clean the wheels and nozzle as needed. ADVICE: Nozzle, feed wheels and cutter must be cept clean. Remove the adhesive residue (e.g. with a knife), Feed wheels e.g. clean with acetone. 02/2021 Vetron 5374 HotAir-Welding... -
Page 52: Lubricate The Wheels
05. Fill the bolt by the thread hole, with the provided grease 06. Then screw the screw back in and tighten. ADVICE: Carry out at least once a week! Only suitable high-performance grease use, for example Interflon Grease HD2 02/2021 Vetron 5374 HotAir-Welding... -
Page 53: Adjustment
If you perform individual work steps only, you must always also consider the previous and next chapter. CAUTION! Disconnect the machine from the electrical power grid prior to any adjustments. Risk of injury due to unintentional startup of the machine! 02/2021 Vetron 5374 HotAir-Welding... -
Page 54: Pneumatic Connection
01. Connect the machine to the compressed air system. 02. The operating pressure at the filter control valve is 6 bar. 03. The pressure of the anvil wheel on pressure control valve is factory set to 3.5 bar. 02/2021 Vetron 5374 HotAir-Welding... -
Page 55: Adjust The Arm
. 02. Loosen the four screws and screw under the table. 03. Now position the arm axcial to the feed wheel 04. Tighten the screws & and attach the cover. 02/2021 Vetron 5374 HotAir-Welding... -
Page 56: Change Feeding Wheels
06. Put the new feed wheel on. The pin has to be directly in the groove. (The wheel is no longer rotatable) 07. At the end tighten the screw 02/2021 Vetron 5374 HotAir-Welding... -
Page 57: Knife Change
ASSEMBLY 07. Proceed in reverse order, like 01. - 06. described. 08. By turning the drive belt, make sure that the guide runs cleanly in the tape feed wheel 02/2021 Vetron 5374 HotAir-Welding... -
Page 58: Change Nozzle
. Carefully substract the temperature sensor and ensure that the sensor may not fall down. 05. At last loosen the screw at the matching holder and carefully lift out the nozzle. 02/2021 Vetron 5374 HotAir-Welding... - Page 59 The wire must protrude 3mm from the eyelet. 03. Tighten the nut 04. Now tigthen the collar screw and the nut NOTICE: Check that the nozzle position did not change. 05. Now proceed in reverse order, as described in the dismantlement (01.-03.). 02/2021 Vetron 5374 HotAir-Welding...
-
Page 60: Nozzle Distance
01. Loosen the nut 02. Turning the locking screw in one direction changes the distance. To the right the distance becomes bigger, to the left it‘ll be smaller. 03. If you have set the necessary distance, tighten the nut 02/2021 Vetron 5374 HotAir-Welding... -
Page 61: Height Measuring System
» Loosen sensor bearers » Turn on the machine » Tighten the screws slightly » Press the "PARAMETER" button e v c e v c » to reach to the "SERVICE" indicator 02/2021 Vetron 5374 HotAir-Welding... - Page 62 Mount the cover again. operation. NOTICE: To avoid damage to the magnetstripe there should be a gap bet- ween sensor and magnetic stripe 02/2021 Vetron 5374 HotAir-Welding...
-
Page 63: Support
We will then process your complaint in our quality department and send you feedback as soon as possible. Thank you very much for your understanding and your e orts in advance. Kind regards, Your Vetron Typical Europe Team 1. CUSTOMER: Name: Country:... - Page 64 02/2021 Vetron 5374 HotAir-Welding...
- Page 65 VETRON TYPICAL EUROPE GmbH Clara-Immerwahr-Str. 6 67661 Kaiserslautern, Germany Tel.: +49 6301 320 75-0 Fax: +49 6301 320 75-11 info@vetrontypical.com www.vetrontypical.com...
- Page 66 VETRON TYPICAL EUROPE GmbH Clara-Immerwahr-Str. 6 67661 Kaiserslautern, Germany Tel.: +49 6301 320 75-0 Fax: +49 6301 320 75-11 E-mail: info@vetrontypical.com www.vetrontypical.com...
Need help?
Do you have a question about the 5374 and is the answer not in the manual?
Questions and answers