Table of Contents
Advertisement
Quick Links
Advertisement
Table of Contents

Related Manuals for ICS Tunnel Master Jr.


Summary of Contents for ICS Tunnel Master Jr.
- Page 1 Tunnel Master® Jr. User Manual - Version 5.0...
- Page 2 Information in this manual is subject to change without notice. Companies, names and data used in examples within the manual are fictitious unless otherwise noted. No part of this manual may be reproduced or transmitted in any form or by any means, electronic or mechanical, for any purpose without the express written permission of Innovative Control Systems, Inc.
-
Page 3: Table Of Contents
Contents Version Considerations ..........................1 Hardware Features ............................. 2 Planning for Installation .......................... 3 Controller Box Dimensions ........................4 Entry Keypad Dimensions ........................4 Relay Box Mounting ..........................5 Relay Box Wiring ............................5 Low Voltage Layout ........................... 6 Initialize and Clear Settings ........................6 24 Outputs .............................. - Page 4 Configure Wash Settings ........................37 About Countdown Times ........................38 Outputs ................................38 Output Settings ............................41 Service Settings ............................43 Change or Set Services ..........................44 Assign Outputs to Services ........................45 Operating Procedures ..........................47 Main Wash Menu ............................47 Wet Down Wash............................48 Processing Cars ............................49 Entrance Keypad Functions ........................50 Entrance Keypad Buttons ........................51 Entrance Keypad to Process Vehicles (Non-Stacking) ..............52 Entrance Keypad to Process Vehicles (Stack) .................53...
-
Page 5: Version Considerations
Many of the TMJ system features were integrated at the request of current car wash operators. We welcome your feedback and want to assure you that ICS will always remain committed to being the industry leader in car wash controller and management systems. -
Page 6: Hardware Features
The Tunnel Master® Jr. hardware is designed to withstand the harsh environments and hard use of a busy car wash. As an ICS customer, you benefit from a thoroughly researched and developed car wash controller. This manual will enable the operator to have an active part in the control and operation of your car wash facility with the many Tunnel Master®... -
Page 7: Planning For Installation
Power for the Tunnel Master® Jr. and any peripherals must come from the dedicated UPS „ as supplied by ICS. The Tunnel Master® Jr. and peripheral equipment must be properly grounded. „ Test connections in the manual override position prior to system start-up. -
Page 8: Controller Box Dimensions
Max. Amps .02 Amps — Power Supply .02 Amps Power must come from a dedicated ICS transformer. IP Rating IP65 The Tunnel Master® Jr. is rated for total protection against dust and strong jets of water from all directions, limited ingress permitted. -
Page 9: Relay Box Mounting
Relay Box Mounting The relay box must be securely mounted to the wall in the equipment room of the car „ wash. The relay box is designed to be located in a dry, non-corrosive environment. The relay box must be located so that conduit connections can be easily made, and the „... -
Page 10: Low Voltage Layout
*** THIS DRAWING IS NOT TO SCALE. THIS DRAWING IS MEANT ONLY TO NETWORK CABLE SHOW THE TYPES OF WIRING THAT MUST BE RUN BETWEEN PIECES OF ICS EQUIPMENT. THE INDIVIDUAL RUNNING THE WIRING MUST ENSURE THAT AMPLE WIRE IS AVAILABLE AT EITHER END TO FACILITATE TERMINATION. - Page 11 13. After the factory reset, move DIP switch 6 back to the Off position. 14. Press the Reset button. The TMJ display shows the “System Shut Down” message. 15. After completing these instructions, contact ICS Technical Support at 800-246-3469 to clear the “System Shut Down” message. Tunnel Master® Jr. User Manual...
-
Page 12: 24 Outputs
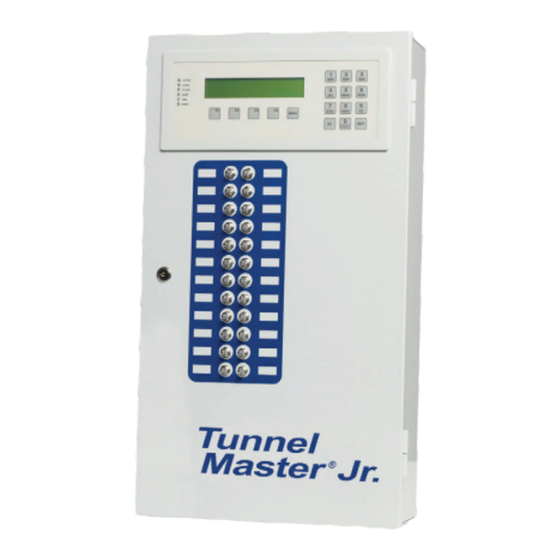
24 Outputs The Tunnel Master® Jr. relay box is the control center for firing the various outputs or services in the wash tunnel like the soap foamer, reclaim motor, and more. The Tunnel Master® Jr. Controller relay box provides automatic, computer controlled, or manual firing of the outputs. The relay box can control up to 24 outputs. -
Page 13: Tunnel Master Jr. Relay Box Interior
Tunnel Master Jr. Relay Box Interior Each relay has circuits to control both 24 V AC and 120 V AC simultaneously so that a service sign as well as the service solenoid can be operated from the same relay. Each relay can be programmed to flash, eliminating the need for field installed flashing „... -
Page 14: Pulse/Proximity Switch Wiring
Pulse/Proximity Switch Wiring IMPORTANT: The pulse switch is a critical input for the Controller. It signals the system that the conveyor is moving and is the measuring device from which the system knows when to turn equipment devices on and off. See wash equipment vendor for location of the switch. -
Page 15: Gate Switch (Electric Eye) Wiring
Gate Switch (Electric Eye) Wiring IMPORTANT: The Gate switch is the second critical input device to the Relay Box. It is usually an electric eye system or some type of vehicle position detector located just before the first piece of wash equipment. This switch signals the Controller that a vehicle is starting through the tunnel. -
Page 16: Tire Switch Wiring
Tire Switch Wiring IMPORTANT: This circuit is used if the customer has purchased a tire position switch from the equipment vendor. The switch enables the Controller software to turn equipment on and off as each of the vehicle’s tires pass that piece of equipment. In order for this to work properly, the tire switch should be located in line with the gate switch. -
Page 17: Entrance Management System Wiring
Entrance Management System Wiring IMPORTANT: This circuit is used if the customer has purchased a treadle switch from the equipment vendor. The Entrance Management System in the Tunnel Master® Jr. allows a roller to be fired automatically upon seeing a second 24V input on Input 10. At the same time, an output can be set to fire and the roller can be delayed. -
Page 18: Roller Locator Wiring
Roller Locator Wiring IMPORTANT: You can add a roller locator to the Tunnel Master® Jr. to keep your rollers from jamming your conveyor. In order to do this, a roller locator switch must be installed on your conveyor to signal the presence of a roller. When a roller locator is used, the Tunnel Master®... - Page 19 The diagram shows how to wire the Panic Stop Circuit into the Controller. NOTE: ICS sells a conveyor enable box which makes wiring the Panic Stop Circuit a lot easier. Figure 2-12. Panic Stop Circuit Wiring Tunnel Master® Jr. User Manual...
-
Page 20: Anti-Collision Wiring
Anti-Collision Wiring IMPORTANT: The anti-collision on the Tunnel Master® Jr. is a function to help prevent cars from running into each other at the exit end of the tunnel. In order for this to work you need an anti- collision device mounted in the tunnel at the spot where you could have a potential collision. The process consists of two variables in order for the Tunnel Master®... -
Page 21: Input Wiring Designations
Input Wiring Designations Examples: Gate, Anti-Collision, Roller Detect, etc. TMJ Input Designations Clock sink Clock source Gate input Entrance Mgt. Treadle Prox switch power Tire detect input Anti-Collision Roller locator switch Panic input External Roller *All input devices must complete a 24VAC circuit to the input. -
Page 22: Push Button Wiring
NOTE: This feature is for non-ICS tunnel controllers. If the Tunnel Master® Jr. is going to utilize a Push †... - Page 23 TM Junior Push Button Wiring First 8 buttons (4 Rows and 4 Columns) Service 1 Service 5 Input 5 Service 2 Service 6 Input 6 Service 3 Service 7 Input 7 Service 4 Service 8 Input 8 24VAC Inputs 1-8 Common Figure 2-16.
- Page 24 TM Junior Push Button Wiring Second 8 Buttons (4 Rows and 4 Columns) Service 9 Service 13 Input 5 Service 10 Service 14 Input 6 Service 11 Service 15 Input 7 Service 12 ALL CLEAR Input 8 24VAC Inputs 1-8 Common Figure 2-17.
-
Page 25: Relay Box Jumper Settings
Relay Box Jumper Settings The following figure and table will explain the location and purpose of the various jumpers, switches, Relay Box Circuit and controls on the Relay Box circuit board. This board is located on the inside of the Relay Box door. Contrast Control for front of box LED display... - Page 26 Jumper Default Setting Function Not in use. BIAS High (+) set ON for the Main Relay box only. 3 position jumper should be on 2-pins to select 485 Communication (Up). 3 position jumper should be on 2-pins to select 485 Communication (Up). Transmit terminating resistor.
-
Page 27: Dip Switch Settings
DIP Switch Settings The following image and table will show the Relay Box Dip switch and the various settings that may be used. The DIP switch settings in the table are for normal operations. The ON position is marked with an arrow and is always up. A 24 Output Relay Box will ship as ADDR1. If you were to add a second Relay Box to the system, it should be addressed as ADDR9. - Page 28 Figure 3-2 from the separate transformer. If there is only one transformer, terminate power from Electrician must run a single-twisted pair, 24AWG shielded COMM cable (can be purchased from „ ICS) through 3/4” conduit from the 485 terminal to the Entrance Keypad. Chapter 3: Entrance Keypad Installation Tunnel Master® Jr. User Manual...
-
Page 29: Communication Cable Terminations
485 LOWER TIER 232 LOWER TIER 485 LOWER TIER 232 LOWER TIER 485 LOWER TIER DATA PORT COM PORT DATA PORT COM PORT ICS SUPPLIED 24/4 DATA PORT COM PORT COMM CABLE SHIELD DRAIN ICS SUPPLIED 24/4 COMM CABLE ICS SUPPLIED 24/4... - Page 30 Electrician must run a single-twisted pair, 12 AWG shielded Comm cable (can be purchased „ from ICS) through the above 3/4” conduit from the first Entrance Keypad to the second Entrance Keypad. There is a terminal block (NETWORK 485), located on each of the keypad circuit boards labeled „...
-
Page 31: Entrance Keypad Jumper Settings
The jumper functions are displayed with their normal settings. By default, the keypad is address 5. There is no reason to change this unless advised by ICS. If you have two keypads, the second is set to address 6. Jumper... -
Page 32: Jumper - J3
Jumper - J3 The following figure will show the EPROM Chip in the down position covering pins 1 & 2 corresponding to the letters EPC. Pin 2 Pin 1 Figure 3-4. Jumper - J3 Entrance Keypad DIP Switch Settings The following picture and table will show the Entrance Keypad DIP switch and the various settings that may be used. -
Page 33: Tunnel Master Jr. Display And Keypad
Tunnel Master® Jr. car wash controller. The Tunnel Master® Jr. controller contains unique features usually found only in high-end full-service wash controller systems. Features like ICS copyrighted anti-theft software, integration with a Panic Stop circuit, and Wet Down which can be used for quick morning wash checkouts. - Page 34 Keypad Indicator Light Function Button Name +5V DC This light should be lit at all times indicating that the Tunnel Master Jr. has good power. LOGIC This light should be blinking in a steady rapid beat indicating that the system is sending and receiving logic information within the system.
-
Page 35: Set Or Change Password
Set or Change Password NOTE: Forgot the password? Contact ICS Technical Support at 800-246-3469. † Setting a password is optional. If you have set a Password, the user is required to enter that password in order to access menu options. This feature allows you to restrict access to the menus in the Tunnel Master® Jr. -
Page 36: Set Date Time
Set Date Time The first item to program is the correct date and time for the system. This is menu option #5 in the Configure Wash menu. The time will be important in that other programming options such as when to automatically bump a shift will need the correct time set to accomplish the process at the correct time of day. -
Page 37: Configure Wash Menu
Configure Wash Menu Before any washes can be processed, the user must configure the wash. There are many items to be configured including the actual tunnel setup all the way to setting up services. Each item must be configured accurately if the wash is to operate properly. The following is a list of menu options in the Configure Wash menu and a brief explanation of their function. -
Page 38: Wash Settings
Wash Settings The Wash Settings menu option is where important information about the user’s specific car wash equipment is programmed. Important features such as the anti-theft program and Wet Down options are set in this menu. The following is a list of menu items within the Wash Settings menu option and a brief explanation of their function. - Page 39 Wash Setting Field Description Auto Pulse Enter Y for yes, N for no, if the user wishes the system to simulate a pulse in the event of pulse switch failure. Note: This feature will activate as soon as Y is entered and the user hits save. Enter Y for yes, N for no, allows operator to decide if logo switch is wired low Invert Gate or high.
- Page 40 If you do not have a push button station, this option is disregarded. Console Debug This is a debug utility that ICS may use to track system activity. This should be set to N if you are using the Tunnel Master® Jr. Interface. Header 1 Enter information desired to display on the first line on the top of reports and receipts.
-
Page 41: Configure Wash Settings
The number of times the Tunnel Master® Jr. has been reset. For information purposes only. Expire Days For ICS use only. Table 4-6. Wash Settings Menu Descriptions Configure Wash Settings Before any washes can be processed, the user must configure the wash. Each item must be configured accurately if the wash is to operate properly. -
Page 42: About Countdown Times
Step Action Screen Displays Using the numeric keypad, press the 0 key to select EqptMeasurementInInches?Y_ _ _ _ _ _ Y for Yes or press the 0 key again for N for No. NOTE: Review Tunnel Master Jr. display and F1=PREV F2=NEXT F3=RESET F4=SAVE keypad function buttons. - Page 43 Menu Function Type Use the “0” button to advance to select the option desired. M = Mandatory, relay will activate for any service sold that is set as a Base. S = Selective, relay will activate only when a service set as an Extra Service is sold along with a Base service.
- Page 44 Menu Function Extend Enter the number of pulses or inches, depending on the setup choice in Wash Settings, for how far past the actual length of the vehicle the piece of equipment should stay on. NOTE: The extend must be greater than the pulse length when the equipment is measured in inches.
-
Page 45: Output Settings
Output Settings Follow these procedures to set or change the settings for the Outputs in the Tunnel Master® Jr. Controller software. Step Action Screen Displays Press the MENU button from the [1] Bump Shift [4] View Counts main screen display. [2] Wet Down Wash [5] Print Reports [3] Configure Wash... - Page 46 Step Action Screen Displays Press the ENT button on the display Output 01 Name Roller pad to advance to the next setting. Start 0084 Type _ Part _ _ Flash _ Extend _ _ _ _ Look _ _ _ Wet _ Panic _ - _ _ F1=PREV F2=NEXT F3=ERASE F4=SAVE Repeat steps 8 and 9 until the Output 01 Name Roller...
-
Page 47: Service Settings
Service Settings The following table is a list of menu items within the Services menu and a brief explanation of their function: Menu Item Function Service Enter a numeric value of 01 up to 16. These numbers represent the wash services options that will be available and their location on the Entrance Keypad. -
Page 48: Change Or Set Services
Change or Set Services Step Action Screen Displays Press the MENU button from the [1] Bump Shift [4] View Counts main screen display. [2] Wet Down Wash [5] Print Reports [3] Configure Wash Press the numeric key 3 to select the [1] Service [4] Wash Settings Configure Wash menu option. -
Page 49: Assign Outputs To Services
Step Action Screen Displays Using the numeric buttons enter the Service 01 Name GOLD WASH Price 9.99 Type B Rate 1 desired tax rate option, 0, 1, 2, or 3. F1=PREV F2=NEXT F3=ERASE F4=SAVE Press the F4 button to save the Service 01 Name GOLD WASH Price 9.99 Type B Rate 1 service. - Page 50 Step Action Screen Displays Press the Using the numeric Service 03 buttons enter in the number Outputs 05 corresponding to the Selective or Deselective output the user wishes to have activated when this service is processed. button on the display pad to advance to the next setting.
-
Page 51: Operating Procedures
Chapter 5: Operating Procedures Operating Procedures The Operating Procedures chapter will provide the user with an explanation of how to operate their Tunnel Controller, process customer vehicles and review operations through the reports available. The instructions will follow a logical trail through a day’s operations beginning with the opening process. Proper operation will ensure operators that they will obtain accurate reports and prevent potential employee errors or possible theft. -
Page 52: Wet Down Wash
Wet Down Wash The Wet Down process is the first step that the opening person should do to prepare the wash for the first customer. When selected, the process is setup to activate all relays (outputs) which have been designated to turn on during the Wet Down cycle. -
Page 53: Processing Cars
Chapter 6: Entrance Keypad The Entrance Keypad is the service/output station at the front of the car wash. Services sold to the customer are entered into the Entrance Keypad. „ Vehicles are processed at the front of the wash with Entrance Keypad. „... -
Page 54: Entrance Keypad Functions
Entrance Keypad Functions In order to utilize the full functionality of the Entrance Keypad, it is very important that the electrician adhere to the wiring instructions provided with the Tunnel Master® Jr. relay box. Power indicator After selecting light. When lit, service(s), but before indicates power to the Roller button,... -
Page 55: Entrance Keypad Buttons
The car icon is on the Roller button and when selected will activate the roller relay. In ICS-POS mode, when the AC button is selected, the stack displays in blinking Led lights on the numeric buttons. Number one is the closest to the tunnel entrance. -
Page 56: Entrance Keypad To Process Vehicles (Non-Stacking)
Entrance Keypad to Process Vehicles (Non-Stacking) These are the steps to follow for a non-stacking system. Step Non-Stacking Action Keypad Response On the numeric keypad, press the button The red indicator light will light up indicating the input has associated with the service the customer has been accepted. -
Page 57: Entrance Keypad To Process Vehicles (Stack)
Entrance Keypad to Process Vehicles (Stack) For Stack with Keypad Only, these are the steps to follow: Status Step Non-Stacking Action Keypad Response Ready Press the numeric button The red indicator light will light up indicating the input has associated with the service that the been accepted. -
Page 58: Change Service And/Or Add Retract
Change Service and/or Add Retract To modify a car’s service in the stack, follow these instructions: 1. On the keypad, press the AC button. The flashing lights indicate how many cars are in the stack. The lights flash for 5 seconds. Number 1 being closest to the tunnel entrance. -
Page 59: View Service Counts For The Current Shift
View Service Counts for the Current Shift There will be times during the course of daily operations that management personnel will want to review sales counts. From the View Counts menu, this option allows the user to quickly determine how many of each service option have been processed during the current shift. -
Page 60: Bump A Shift Or Manually Close Current Shift
It is very important that one of the two options be used each day. Failure to close a shift will result in car and service counts being inaccurate, as they would run multiple days into one shift. You may also close your shift by pressing the up arrow on the entrance keypad. -
Page 61: Mounting And Installation Of The Printer
Chapter 7: Optional Printer Installation The thermal printer is utilized by the Tunnel Master® Jr. system for both the report and as a receipt printer. These printers can be purchased as an option to the base system or purchased and added to the system after initial installation. -
Page 62: Report Printer Wiring
Tighten all wires on the circuit board in the relay box to 20 pound-inches (2.3 n-m.) Over „ torquing may cause enclosure breakage. Connect the 120 VAC power supply (provided by ICS) to the dedicated 120 VAC outlet and „ the report printer. -
Page 63: System Diagnosis
Check the Power light in the upper right hand corner of the keypad to verify that it is lit. If the light is „ not lit then the keypad is not receiving power from the ICS Tunnel Master® Jr. Relay Box Controller. Check the Logic light in the upper right hand corner of the keypad. This light should be blinking „... -
Page 64: Entrance Keypad Diagnostics
Gate - With the conveyor running and a vehicle passing through the gate switch (electric „ eye), the Gate indicator light should stay lit the entire time a vehicle is activating the gate switch. If this function is not operating properly, you can go in to the wash settings and change the Auto Gate to Y. - Page 65 Symptom Cause Remedy Check position of relay toggle Move switch to down position. switch. No power to Relay Box. Check 120VAC power to relay box. Pulse / Gate not operating correctly. See “Wash Controller Input Check” on page 59. No relays firing. Ribbon cable is loose.
- Page 66 Symptom Cause Remedy Rollers keep coming up. Check the pulse switch. Please refer to Wash Controller Input Check. Equipment timing is off. Check the pulse switch. Please refer to Wash Controller Input Check. My receipts are not printing. Printer is turned off. Confirm printer is turned on and error light is off.
-
Page 67: Relay Box, 1 Keypad, And 1 Printer
Appendix The following three appendixes are three different scenarios you might have at your car wash. 1 Relay box, 1 Keypad, and 1 Printer Tunnel Master® Jr. Controller Equipment Layout & Addressing 1 Relay Box, 1 Keypad, Report/Receipt Printers (See System Installation Guide for wiring instructions) Relay Box/Controller Report Printer Entry Keypad... -
Page 68: Relay Boxes, 1 Keypad, And 1 Printer
2 Relay boxes, 1 Keypad, and 1 Printer Tunnel Master® Jr. Controller Equipment Layout & Addressing 2 Relay Boxes, 1 Entry Keypad, Report/Receipt Printer (See System Installation Guide for wiring instructions) Relay Box/Controller 2nd Relay Box Entry Keypad Report/Receipt Printer Equipment Room Equipment Room Wash Entrance... -
Page 69: Relay Boxes, 2 Keypads, And 2 Printers
2 Relay Boxes, 2 Keypads, and 2 Printers Tunnel Master® Jr. Controller Equipment Layout & Addressing 2 Relay Boxes, 2 Entry Keypads, Report/Receipt Printer (See System Installation Guide for wiring instructions) Relay Box/ Report 1st Entry 2nd Entry Receipt Controller Relay Box Printer Keypad...
Need help?
Do you have a question about the Tunnel Master Jr. and is the answer not in the manual?
Questions and answers