
Related Manuals for ETC ColorSource Raceway


Summary of Contents for ETC ColorSource Raceway
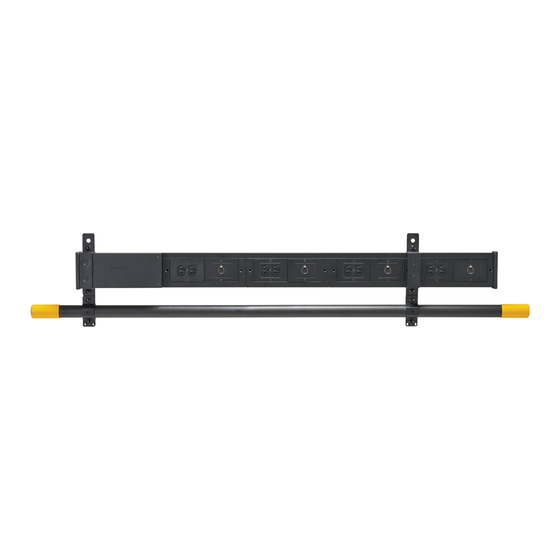
- Page 1 ColorSource Raceway Installation Manual Part Number: 7199M2100 Rev: C Released: 2019-07...
- Page 2 To vie w a list of ET C t ra d em ar ks a nd pa te nt s, go t o etcconnect.com/ ip. A ll o t h e r t r a d e m a r k s , b o t h m a r k e d a n d no t m a r k e d , a r e t h e p r o p ert y o f t h ei r r es p e c ti v e o w ne r s .
-
Page 3: Table Of Contents
Unistrut suspension (optional) ....21 Assemble ETC aluminum batten......22 Attach batten to hanger brackets . - Page 4 Update firmware ........34 ColorSource Raceway Installation Manual...
-
Page 5: Introduction
WARNING: RISK OF ELECTRIC SHOCK! This warning statement indicates situations where there is a risk of electric shock. All ETC documents are available for free download from our website: etcconnect.com. Please e-mail comments about this manual to: TechComm@etcconnect.com. Introduction... -
Page 6: Help From Etc Technical Services
Help from ETC Technical Services If you are having difficulties, and your problem is not addressed by this document, try the ETC support website at support.etcconnect.com or the main ETC website at etcconnect.com. If none of these resources are sufficient, contact ETC Technical Services directly at one of the offices identified below. -
Page 7: Before You Begin
When mounting the ColorSource Raceway, position brackets no more than 10 ft (3 m) apart. Maximum load (suspended mount) The batten on the ColorSource Raceway supports a distributed load of 150 lb (68 kg) and a point load of 65 lb (30 kg) across a 10 ft (3 m) span (see image below). -
Page 8: Specifications
• Ethernet (passive connector) Mounting bracket types The following brackets are available for mounting the ColorSource Raceway. All hanger brackets that support a batten are compatible with ETC aluminum batten and 1.5 in (1.9 in OD) Schedule 40 steel pipe. Integrated... - Page 9 Integrated Description and Supports Type Image work light Part Number batten? mounting? Batten Accessory for Prodigy FlyPipe Mount FlyPipe Prodigy FlyPipe mount page 25 Suspended Mount Hanger Bracket (7199A1021) Suspended mount, Dual batten suspended mount, or Prodigy RACA mount page 19 Suspended Mount Hanger Bracket for Termination Box...
- Page 10 Hanger Bracket (7199A1026) Suspended mount, Dual batten suspended mount, or Prodigy RACA mount page 19 Dual Batten Suspended Mount Hanger Bracket for Termination Box (7199A1027) Suspended mount, Dual batten suspended mount, or Prodigy RACA mount page 19 ColorSource Raceway Installation Manual...
- Page 11 Integrated Description and Supports Type Image work light Part Number batten? mounting? Prodigy RACA Mount Front view Hanger Bracket (8000A1185) Suspended mount, Dual batten suspended mount, or Prodigy RACA mount page 19 Prodigy RACA Mount Hanger Bracket for Front view Termination Box (8000A1186) Suspended...
-
Page 12: Check Shipment Before Assembly
ColorSource Raceway in the correct location. After you open the packages, examine the contents for any damage from shipping. Wire between sections should be undamaged. Metal parts should be free from dents or scratches. Contact your ETC project manager or Customer Service at an Help from ETC Technical ETC office if you discover any problems. -
Page 13: Assembly
Assembly Assemble ColorSource Raceway Take the folded ColorSource Raceway out of the packaging and lay it out straight, face down, on a flat surface. Leave the foam shipping collars on as long as possible to protect the sections during assembly. Junction brackets are pre-attached to one end of each section. -
Page 14: Installation
Installation Wall/ceiling mount Identify the locations where the ColorSource Raceway will be supported. Make sure that the termination box will not be enclosed in mounting brackets. CAUTION: Verify that the mounting structure is capable of supporting the weight of the ColorSource Raceway. -
Page 15: Catwalk Mount
Catwalk mount To mount the ColorSource Raceway on a catwalk, the catwalk railing centers must be within 10½–18½ inches (27–47 cm) of each other. Identify the locations on the catwalk railings where the ColorSource Raceway will be supported. Make sure that the termination box will not be enclosed in mounting brackets. - Page 16 When both upper and lower U-bolts are positioned appropriately, tighten all U-bolt nuts. Attach the lower raceway hardware to the mounting brackets as shown below. Set the ColorSource Raceway into the lower raceway hardware, and secure by attaching the upper raceway hardware.
-
Page 17: Grid Mount
Grid mount The grid mount hardware allows you to support the ColorSource Raceway on a grid or above a single pipe, either in a vertical or horizontal orientation. You can also attach a work light to a grid mount bracket. - Page 18 Install the ColorSource Raceway: Vertical orientation a: Identify the locations on the grid where the ColorSource Raceway will be supported, and then attach the brackets to the grid using the provided U-bolts and nuts. Make sure that the termination box will not be enclosed in mounting brackets.
-
Page 19: Install Grid-Mount Brackets With Work Lights
Install grid-mount brackets with work lights Determine whether you will mount the ColorSource Raceway using the brackets in the vertical orientation or horizontal orientation, and then attach the transition-box base to the bracket mounting plate as shown below. Note: The orientation of the transition box differs between the vertical and horizontal orientation of the grid mount brackets. - Page 20 Assemble the bracket hardware in either the vertical or horizontal orientation. Vertical orientation Assemble raceway hardware Assemble mounting hardware Finished bracket Horizontal orientation Assemble raceway hardware Optional anti-rotation stabilizer, not intended for support Assemble mounting hardware Finished bracket ColorSource Raceway Installation Manual...
- Page 21 Identify the location of the work-light connectors on the ColorSource Raceway. You will attach the brackets adjacent to the work-light connector faceplates. Attach brackets to the ColorSource Raceway (see images below). Attach the bracket mounting plate/transition-box base assemblies and remaining hardware to the brackets (see images below).
- Page 22 7: Attach mounting hardware (Work light cable not displayed) Connect work lights Attach the work lights to the brackets as shown below. Then continue to page 29 Vertical orientation Horizontal orientation 8: Attach work light to bracket ColorSource Raceway Installation Manual...
-
Page 23: Suspended Mount, Dual Batten Suspended Mount, Or Prodigy Raca Mount
The illustrations in this section show the suspended mount, but the installation steps are the same for the suspended mount, the dual suspended mount, and the Prodigy RACA mount. Identify the locations where the ColorSource Raceway will be supported, and align the hanger brackets to the closest positions. Suspended-mount hanger brackets or Prodigy RACA mount hanger brackets must be aligned in between faceplates (see image below). - Page 24 Secure the hanger brackets around the ColorSource Raceway using the provided carriage bolts and nuts. Hanger bracket Hanger bracket, Finished hanger bracket side view Hanger bracket with work light Hanger bracket with Finished hanger bracket with transition box, side view...
-
Page 25: Install Hanger Adapter On Suspended-Mount Hanger Brackets For Threaded Rod Or Unistrut Suspension (Optional)
Install hanger adapter on suspended-mount hanger brackets for threaded rod or Unistrut suspension (optional) If you are hanging the ColorSource Raceway from threaded rods or from Unistrut framing hardware, attach the hanger adapter to the top of each suspended-mount hanger bracket. -
Page 26: Assemble Etc Aluminum Batten
Note: If you need to adjust the batten length, use a saw to cut the batten. Make sure that the cut is straight and perpendicular. ETC recommends a mitering chop saw with a metal cutting blade for best results. Take each batten segment out of the shipping container and lay it out straight on a flat surface. -
Page 27: Attach Batten To Hanger Brackets
Attach batten to hanger brackets Lay the batten in the hanger brackets. Ensure that the batten is positioned with the internal support in a vertical orientation. (Witness lines on the batten should be positioned on the top and bottom of the batten.) Attach the batten clamp hardware and secure it using the provided carriage bolts and nuts. - Page 28 Identify the location of the work-light connectors on the ColorSource Raceway. You will attach the work lights to the brackets that are closest to the connector. Note: You should have already installed a transition-box base on the bracket that will support the work light.
-
Page 29: Prodigy Flypipe Mount
Prodigy FlyPipe mount Identify the locations on the FlyPipe where the ColorSource Raceway will be supported. Make sure that the termination box will not be enclosed in mounting brackets. Raise or lower the FlyPipe to a working height. Position the FlyPipe brackets on either side of the FlyPipe and secure with the provided screws and lock washers. -
Page 30: Attach Work Lights To Prodigy Flypipe
Attach work lights to Prodigy FlyPipe Identify the location of the work-light connectors on the ColorSource Raceway. You will attach the work lights to the FlyPipe near the connector. Attach the mounting hardware to the work lights, but do not tighten. -
Page 31: Add A Batten Accessory To Prodigy Flypipe
CAUTION: Using channel hardware with springs can cause severe damage to FlyPipe. ETC recommends using channel nuts without springs. Insert the M10 strut nut into the bottom of the FlyPipe. Turn the nut 90 degrees and set it into the FlyPipe tracks (see images below). - Page 32 (Work light cable not displayed) Identify the location of the work-light connectors on the ColorSource Raceway. You will attach the work lights to the brackets that are closest to the connector. Attach the work light to the appropriate bracket using the provided hardware (see image below),...
-
Page 33: Connect Work Lights
Suspended mount, Dual batten suspended mount, or Prodigy RACA mount page Connect the work light to the ColorSource Raceway using the attached cable (see image below). Are you mounting the ColorSource Raceway to FlyPipe? • Yes—Continue to step 4. • No—Attach the provided cable guide bushings to the work-light cable. Position the two bushings in the openings in the transition-box base, and coil any excess cable in the transition box. - Page 34 Position the transition-box cover on the base and secure with the provided hardware. Secure the cable connection point with the work-light connector retaining cover. 4: Attach the retaining cover 3: Attach the transition-box cover Finished work light, transition-box cover, and work-light connector retaining cover ColorSource Raceway Installation Manual...
-
Page 35: Connect Power And Data
Connect power and data There are different versions of the termination box for the ColorSource Raceway: a hardwired termination box, and termination boxes that support different varieties of connectors. Each version is available in two different orientations: to mount to the left end or to the right end of the ColorSource Raceway. - Page 36 • For fine stranded wire (for example, SO multi-cable): Strip wires, and then use a small flat- blade screwdriver to open the terminals and insert the wires. For ColorSource Raceway installations with separate power for work lights, data, or both, follow the same wiring instructions as above using the installed stacked terminals.
-
Page 37: Connector Versions
The ColorSource Raceway termination box can support the following connector combinations: • LKS Data connector • Socapex connector + 5-pin XLR connector • Socapex connector + RJ45 connector Connect the appropriate cables to the connectors on the ColorSource Raceway termination box. Connect power and data... -
Page 38: Dmx Active Pass-Thru Connectors
The LED returns to its normal operating state when the firmware update is complete. Update firmware You can update the DMX Active Pass-thru connectors over RDM. ETC recommends using UpdaterAtor UpdaterAtor software to manage software updates. For more information on UpdaterAtor, see the Software Quick Guide , which you can download for free from etcconnect.com. - Page 39 DMX Active Pass-thru Connectors...
- Page 40 Holzkirchen, DE +49 (80 24) 47 00-0 Rome, IT +39 (06) 32 111 683 Hong Kong +852 2799 1220 Paris, FR +33 1 4243 3535 etcconnect.com Support etcconnect.com/contactETC © 2019 Electronic Theatre Controls, Inc. Trademark and patent info: etcconnect.com/ip Product information and specifications subject to change. ETC intends this document to be provided in its entirety. 7199M2100 Rev C Released 2019-07...
Need help?
Do you have a question about the ColorSource Raceway and is the answer not in the manual?
Questions and answers