Table of Contents
Advertisement
Advertisement
Table of Contents

Related Manuals for ETC Acclaim 100 series


Summary of Contents for ETC Acclaim 100 series
- Page 1 Lighting control system Version 2.03...
-
Page 3: Table Of Contents
Table of Contents Chapter 1 Introduction Acclaim 100 features ........1 Using this manual . - Page 4 [Chase] ..........24 Cross faders .
-
Page 5: Acclaim 100 Features
Chapter 1 Introduction Welcome to Acclaim 100 from Electronic Theatre Controls. Acclaim 100 combines easy-to-use manual control with sophisticated electronic features. The Acclaim 100 is available in four versions, each with a different channel configuration: • Model 112 with 12 control channels •... -
Page 6: Using This Manual
Using this manual This manual provides operating instructions for the Acclaim 100. The following chapters are included: Chapter 1 Introduction Acclaim 100 capabilities, user manual conventions and customer support information. Chapter 2 Installation Instructions for installing Acclaim 100 Chapter 3 Learning the basics Tutorial on working with scenes, submasters and chases Chapter 4 Reference Description of console key functions and menu options in alphabetical... -
Page 7: Customer Service
If you have problems with your system, please follow these steps: 1. Check the User Manual . 2. If you do not find the answer in the manual, call your local dealer or ETC Technical Services . Please have the following information available before you call: •... - Page 8 Chapter 1 Introduction...
-
Page 9: Installation
Chapter 2 Installation This chapter includes installation instructions for the Acclaim 100 including the following procedures: • Installing your Acclaim 100 console • Connecting Acclaim 100 to dimmers Installing your console With reference to the back panel illustration below, install your Acclaim 100 as follows : 1. -
Page 10: Attaching Dimmers
Attaching dimmers The Acclaim 100 provides USITT standard, DMX512 output through a five- pin connector located on the console’s back panel. This dimmer output port can control 12, 24, 36, or 48 dimmers, depending on the Acclaim model you purchase. Connector XLR 5 pin female Pinout... -
Page 11: Chapter 3
Chapter 3 Learning the basics This chapter includes lessons on Acclaim 100's features: scenes, submasters and chases. Each lesson is described briefly below. • Lesson 1 describes the Acclaim 100 keyboard. • Lesson 2 describes how to create scenes and run manual and timed crossfades. -
Page 12: Learning The Basics
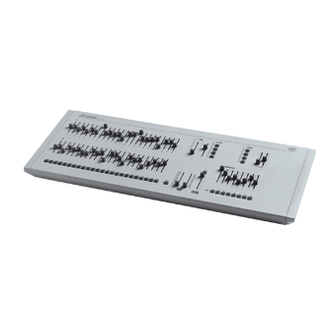
Lesson 1: Acclaim 100 keyboard This lesson familiarizes you with the Acclaim 100 keyboard, shown on the next page. Channel potentiometers Channel pots set individual channels' output levels. For more information see page 24. Time potentiometers Time pots control the speed at which a timed crossfade takes place. For more information see page 29. - Page 13 Acclaim 100 User Manual...
-
Page 14: Lesson 2: Creating And Working With Scenes And Crossfades
Lesson 2: Creating and working with scenes and crossfades A scene is a group of channels set at specific levels to create a look on stage. The Acclaim 100 console has two rows of control channel potentiometers that allow you to create two different scenes -- scene A and scene B. -
Page 15: Example
Example Follow this example to create scenes A and B and run a manual crossfade between the two scenes. Before you start, make sure Grandmaster is set at 10 and [B/O] LED is not lit. Action Effect 1. Move scene A and B cross Sets output of all channels at zero faders to 0 . -
Page 16: Timed Crossfades
Timed crossfades Sometimes you may prefer to change scenes using timed crossfades. Because they are not controlled by physical movement of the cross faders, timed crossfades are generally smoother than manual fades, especially when the fade takes place over a relatively long time. The primary difference between manual and timed cross fades is the role of the cross faders. -
Page 17: Example
Example Follow this example to create scenes A and B and run a timed crossfade between the two scenes. Before you start, make sure Grandmaster is set at 10 and [B/O] LED is off. Action Effect 1. Move scene A and B cross Sets output of all channels at zero faders to 0. -
Page 18: Lesson 3: Creating And Working With Submasters
Lesson 3: Creating and working with submasters A submaster is a group of channels recorded at specific levels in a submaster potentiometer. The Acclaim 100 console is equipped with eight submaster potentiometers, or pots. Each submaster pot allows you to proportionally control the output of the channels in a submaster. Submasters enable you to save looks that you use often and to access them easily. -
Page 19: Creating And Recording Submasters
Creating and recording submasters Creating a submaster involves setting channel levels to create a scene then recording those settings in a submaster pot. All channels that are live on stage when the submaster is recorded become part of the submaster. Be sure that only the channels you want to be part of the submaster are on stage when you record the look. -
Page 20: Controlling Submasters
Controlling submasters There are three ways to bring a submaster up on stage. You can use the submaster pot, the submaster bump button, or the submaster [Solo] button. Submaster pot To use the submaster pot, set the pot at the desired output level. As you move it from 0 to 10, the output level increases from zero to 100 percent. -
Page 21: Lesson 4: Using [Solo]
Lesson 4: Using [Solo] [Solo] lets you use the channel bump buttons to select a channel or group of channels and raise them to 100 percent output while suppressing all other channel outputs to a level of zero. Channels that are part of a submaster are not affected by [Solo]. -
Page 22: Lesson 5: Creating And Working With Chases
Lesson 5: Creating and working with chases A chase is an effect in which a group of channels are flashed to full intensity one at a time, and in a predetermined sequence. The sequence continues to run until it is disabled on the console. You can use the chase feature to create marquee or runway effects. -
Page 23: Example
Example Follow this example to create a chase: Action Effect 1. Press [Chase]. [Chase] LED lights, indicating that a chase is being created. 2. Press channel bump Enters channels 1, 2 and 3 in chase. buttons [1], [2] and [3]. 3. -
Page 24: Modifying Chase Rate And Output Level
Modifying chase rate and output level While a chase is running, you can modify its speed and intensity using the Rate and Level pots. Using the Level pot When you record a chase with Acclaim 100, all channels are automatically entered at full intensity regardless of the channel pot setting. -
Page 25: Stepping Through A Chase
Stepping through a chase Press [Step] to proceed through a chase one channel at a time. If you do not stop the chase before pressing [Step], the chase immediately advances to the next chase channel, then continues at the programmed rate. -
Page 26: Recording A Chase While A Chase Is Running
Recording a chase while a chase is running You can record a new chase while an active chase is running without affecting the active chase. The procedure is the same as described previously. The existing chase continues to run until you press [Chase] to record the new channel sequence, at which point the new chase starts. -
Page 27: Reference
Chapter 4 Reference This reference chapter lists all Acclaim 100 buttons and features in alphabetical order. Listings include a description of the feature and instructions for using it. Blackout Acclaim 100 has two [B/O] (black out) buttons. The Grandmaster [B/O] blacks out all console output. -
Page 28: Bump Buttons
Bump buttons A bump button immediately raises its corresponding channel or submaster to full output level when you press it. Levels remain at full for as long as you press the bump button. Bump buttons are also used to record chases and submasters, and to activate [Solo]. -
Page 29: Cross Faders
Cross faders Cross faders are independently operated potentiometers that set output levels for scenes A and B. You can use the cross faders to control either manual or timed crossfades. To bring up scene A and fade out scene B at the same time, push faders up simultaneously. -
Page 30: Level Potentiometer
Level potentiometer The Level potentiometer controls output levels of channels in a chase. If a channel is included in both a scene and a chase, the Level pot setting affects its output only when it is flashed as part of a chase sequence. When channels are recorded in a chase, they are automatically recorded at full intensity. -
Page 31: Reverse [Rev]
Reverse [Rev] [Rev] lets you reverse the direction of a chase in progress; it does not stop the chase. You do not need to stop the chase before you press [Rev] in order to reverse its direction. Example A chase running through channels 1 through 5 consecutively runs channels 5 through 1 after you press [Rev]. -
Page 32: Submaster Potentiometers
Submaster potentiometers Acclaim 100 has eight submaster potentiometers, or pots. You can record a submaster in each pot. To record a submaster in a submaster pot, follow these steps: 1. Adjust channel pots to create the desired scene on stage. 2. -
Page 33: Time Potentiometers
Time potentiometers The two Time pots control the duration of crossfades. Each one controls the fade time of the cross fader immediately below it on the console. They can be set separately to program different fade rates for each scene. The numbers 0 to 5m between the two pots indicate fade durations of from zero to five minutes. - Page 34 Chapter 4 Reference...
-
Page 35: Appendix A Specifications
Appendix A: Specifications Output options • DMX512 digital output through 12, 24, 36, or 48 control channels, depending on model Controls • Manual and timed crossfades • Channel potentiometers • Two rows of 12, 24, 36, or 48 each depending on model •... - Page 36 Appendix A: Specifications...
-
Page 37: Appendix B Limited Warranty
ETC’s acceptance of any order is expressly ETC’s sole responsibility under this warranty made conditional on Customer’s assent to such shall be to repair or replace at ETC’s option such terms and conditions. Such terms and parts as shall be determined to be defective on conditions will constitute the entire agreement ETC’s inspection. - Page 38 (30) days. Claims for shortage or damaged must be made ETC shall not be liable for late delivery and/or within ten (10) days. Equipment is carefully inability to perform due to unforeseen packed and delivered in good condition to the circumstances or conditions, including our carrier.
- Page 40 Electronic Theatre Controls North America 3030 Laura Lane • Middleton, Wisconsin 53562, USA • Tel: (+1) 608 831 4116 • Fax: (+1) 608 836 1736 Europe 5 Victoria Industrial Estate, Victoria Road • London, W3 6UU, England • Tel: (+44) 181 896 1000 • Fax: (+44) 181 896 2000 Asia Room 605-606, Tower III, Enterprise Square, 9 Sheung Yuet Road •...
Need help?
Do you have a question about the Acclaim 100 series and is the answer not in the manual?
Questions and answers