
Subscribe to Our Youtube Channel
Related Manuals for Commtest Instruments vb Series

Summary of Contents for Commtest Instruments vb Series
- Page 1 sales@artisantg.com artisantg.com (217) 352-9330 | Click HERE Find the GE / Commtest vb3000 at our website:...
- Page 2 vbSeries Instrument Reference Guide Revision 13/10/06 Artisan Technology Group - Quality Instrumentation ... Guaranteed | (888) 88-SOURCE | www.artisantg.com...
- Page 3 All rights reserved. No part of this book may be reproduced, stored in a retrieval system, or transmitted, in any form or by any means, electronic, mechanical, photocopying, recording, or otherwise, without the prior written permission of Commtest Instruments Ltd. For information, contact: Commtest Instruments Ltd...
-
Page 4: Table Of Contents
Contents Section 1: Introduction..........1 Standard Features ..............2 Standard Kit Items ..............3 Balancing Kit Items ..............3 Summary of Parts ..............4 Instrument Icons ..............5 Precautions ................6 Operating Overview ..............8 Onsite Analysis (Measure Mode) ..........8 Recording .................. - Page 5 Section 3: Onsite Analysis - Measurement Menu ..28 Walk-through: Taking Measurements in Measure Mode ..29 Using Quick Setup Menus ............ 31 1. Spectrum Quick Setup............32 2. Waveform Quick Setup............33 3. Demodulation Quick Setup............ 34 Default Parameters..............36 Using Automated Menus............
- Page 6 Setting the Duration..............80 Setting Other Parameters............80 Section 5: Recording Data .........81 Walk-through: Taking Recordings......... 82 Reviewing Recordings ............84 Erasing Recordings............... 85 Transferring Recordings from the Instrument ....... 85 Tagging Items ............... 86 Autorepeat ................88 Section 6: Using Routes..........89 What is a Route? ..............
- Page 7 Creating a Parameter Set............114 Copying a Machine..............116 Erasing a Machine..............117 Erasing a Point, Direction/Axis or Parameter Set ....118 Renaming a Machine, Point or Direction/Axis ......119 Maintaining Data Integrity..........119 Attaching Notes to an Item..........120 Selecting a Note from a List ............121 Removing a Note from an Item ..........
- Page 8 Change Radius................140 ISO 1940 Limits ...............140 6. Load/Save Balancing Data ..........141 7. Print Report..............143 Section 10: Balancing Walk-through.......145 Step 1. Set Balancing Parameters........146 Step 2. Initial Reading............146 Step 3. Trial Weight Reading ..........149 Step 4. Balancing..............153 Step 5.
- Page 9 Halt After Recording ..............172 Backlight Off Delay ..............175 vb Structure Lock..............176 Left-handed Start Key for Auto Routes ........176 Section 12: Troubleshooting ........177 Contacting Technical Support..........177 Resetting the Instrument............. 177 Power Problems..............177 Data Transfer Problems............178 Data Problems ..............178 Other Problems..............
-
Page 10: Section 1: Introduction
Section 1: Introduction This Instrument Reference Guide is the companion manual to the Ascent Software Reference Guide. This book has been formatted to allow you to quickly and easily learn how to use your vb instrument. Please keep this book for future reference and read it before operating your vb instrument. -
Page 11: Standard Features
Standard Features • DSP for fast, accurate calculations • 24-bit A/D converter providing high-precision measurements • Displacement, velocity, and acceleration measurements • Frequency and time domain measurements • 8.5 MB non-volatile memory capable of storing up to 8192 recordings (32 MB for vb3000) •... -
Page 12: Standard Kit Items
Standard Kit Items • Protective boot with strap • Power transformer (13.5 ± 1.5) V DC, 1 A output • DC car adapter 12 V DC output • USB Ascent security dongle (parallel dongle available on request) • USB to serial adapter •... -
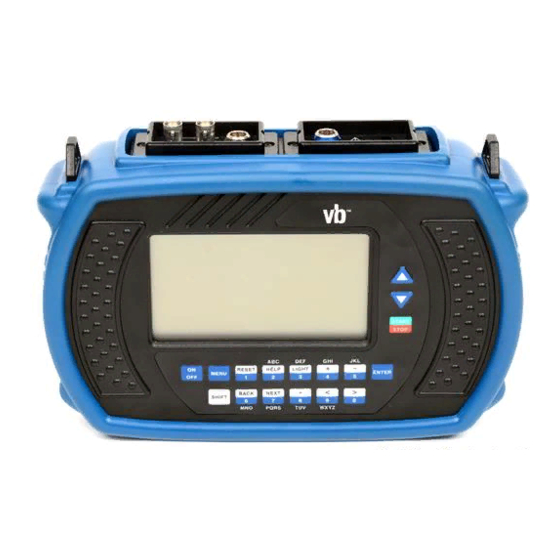
Page 13: Summary Of Parts
Summary of Parts Section 1: Introduction Artisan Technology Group - Quality Instrumentation ... Guaranteed | (888) 88-SOURCE | www.artisantg.com... -
Page 14: Instrument Icons
Instrument Icons The instrument is in spectra recording mode. The instrument is in spectra review mode. The instrument is in route mode. The instrument is waiting for the hardware to stabilize before taking a measurement. There is a note attached to this item. This item is tagged. -
Page 15: Precautions
Precautions Please read and understand this section before operating your instrument. Heed all warnings and recommendations to prevent data loss, data inaccuracy, damage to the instrument, or injury to yourself. Do not attach sensors to any object with a high potential voltage i.e. - Page 16 Transfer data stored in the instrument to a PC before reprogramming the instrument. PROFLASHING the instrument instrument with new firmware may erase all data stored in the instrument. ® When using an ICP type accelerometer, ensure that the drive current is turned on otherwise the measurements will be incorrect.
-
Page 17: Operating Overview
Operating Overview The instrument can be used to perform the following tasks: • Taking live measurements for onsite analysis of vibration spectra and waveforms • Recording of vibration data for transferral to a PC • Single and dual plane balancing Onsite Analysis (Measure Mode) Vibration spectra and waveforms are measured and analyzed onsite. -
Page 18: Recording
Recording Vibration recordings are taken for all monitored machines and then transferred to a PC for analysis. The instrument guides the person taking the recordings through a pre-defined data recording sequence. This is to simplify the task and minimize mistakes. The data recording sequence is contained in a recording ‘route’. -
Page 19: Balancing
Balancing Rotating mass imbalance problems are analyzed and corrected onsite. A rigid rotor can be balanced in one or two planes. The following steps are involved: • An initial measurement of the imbalance is taken. • A trial weight is attached to the balancing plane and another measurement is taken. -
Page 20: Section 2: Basic Operation
Section 2: Basic Operation This section describes how to perform basic operations on your instrument. You will learn to: • Power up the instrument • Navigate through initial screens • Select an option • Display and use pop-up menus • Enter and edit text and numbers •... -
Page 21: Powering Up
Powering Up • Press the key to power up the instrument or turn it off. The following screen is displayed at power up. The displayed firmware version and creation date will reflect the currently installed firmware in your instrument. Updated firmware versions can be downloaded from www.commtest.com. -
Page 22: Menu Navigation
Menu Navigation Most screens found on the instrument follow a standard format, making menu navigation easy and intuitive. The following diagram shows the components of a typical screen: The menu title is displayed at the top of each screen. The name of the currently selected folder/route/machine etc is displayed. -
Page 23: Returning To A Previous Screen
Returning to a Previous Screen • From most menus, press to return to the previous screen. Pressing the key will also normally return you to the previous screen (or the Main Menu depending on your current location). Selecting an Option •... -
Page 24: Displaying Pop-Up Menus
Displaying Pop-up Menus • Wherever appears at the bottom of the screen, you can press to display a pop-up list of all the available options for the current menu. In the following example, pressing in the Select Machine Menu displays these options: 1 Tag (tag or untag this machine) 2 Edit (change the name of the machine) 3 Notes (add, view or erase notes) -
Page 25: Entering Text And Numbers
Entering Text and Numbers To enter text or numbers press the corresponding number/character key. As with a mobile phone, the character options for each key are displayed with subsequent key presses (e.g. the first press of the ’3’ key displays ‘3’, the second press displays ‘D’, the next press displays ‘E’... -
Page 26: Entering Numerical Values
• Press twice to enter a space between words if required. • Press to save when you have finished entering or editing your text. Entering Numerical Values To enter numerical values press the appropriate number key. It is not necessary to enter decimal points as they are placed automatically. Example: To enter the value 7.5 •... -
Page 27: Other Name Editing Commands
Other Name Editing Commands Cancels the current edit screen and retains the original name. Moves the cursor forward. Moves the cursor backward. Inserts a 0 at the current cursor position or deletes the character at the cursor position. Inserts a space at the current position. Deletes the character at the current position. -
Page 28: Supported Sensor Types
Supported Sensor Types The instrument can take measurements using a wide range of sensors. The sensitivities and types of measurement that can be taken by each sensor are summarized in the following table. Note: Velocity, displacement and current sensor types are only applicable to the vb3000 instrument. - Page 29 Note: Once a sensor has been defined as a particular sensor type e.g. accelerometer, you will not be able to change the sensor's details to a different type if it has been used to take recordings that are still stored in the instrument. The vb instrument will associate the stored measurements with the sensor that was used to record them and display a 'Sensor is in use' message.
-
Page 30: Mounting Sensors
Mounting Sensors Your choice of sensor mounting will affect the accuracy and therefore the repeatability of vibration measurements. For optimal measurement results, accelerometers and velocity sensors should be mounted using a threaded stud or adhesive mounting pad and stud rather than relying on magnets. Permanent mounting of accelerometers is described in Permanent Mounting (page 22). -
Page 31: Permanent Mounting
magnetic accelerometer base or via a threaded stud on the machine surface. The accelerometer should not move independently of the machine part it is attached to. • Oriented correctly as vibration can differ greatly with respect to direction. • Attached to exactly the same position as before if this is an ongoing study of a particular measurement point (mark the position if necessary). -
Page 32: Tachometer Setup
Tachometer Setup The tachometer provides the instrument with information on the speed of rotation and the angle at which the rotor is vibrating. The angle is measured from a fixed reference mark on the rotor and is called the ‘phase angle’. To balance a rotor it is necessary to consider not just the amplitude of vibration but also the phase angle. - Page 33 • Position the sensor slightly away from the centerline of the rotating machine part in order that it is not 'blinded' by reflections from the surface of the machine part. The sensor should be positioned within the measurement range shown in the following diagram.
-
Page 34: Using A Strobe
If your strobe light has a BNC connector and gives a TTL output (0 to 5) V you can purchase a suitable cable from Commtest Instruments Ltd via your distributor. For other types of connectors and signals please consult the FAQ (Frequently Asked Questions) articles on the Commtest website www.commtest.com. -
Page 35: Tach Signal From A Keyphasor
Tach Signal from a Keyphasor® If your machine has a proximity-probe based tachometer sensor (e.g. ® Keyphasor ), this can be used as the tach signal for your vb instrument. The sensor should have a buffered front-panel BNC output, to ensure the vb instrument's measurements can’t interfere ®... -
Page 36: Tips For Taking Measurements
Tips for Taking Measurements • Measurements should always be taken using the machine operating mode that is typical for that machine (the typical load and running speed). This is to ensure that the loads on the components, such as bearings, are the same as those that define their wear. -
Page 37: Section 3: Onsite Analysis - Measurement Menu
Section 3: Onsite Analysis - Measurement Menu This section describes the procedures for measuring vibration and performing onsite analysis. You will learn to: • Take frequency domain measurements (spectra) • Take time domain measurements (waveforms) • Take demodulation measurements • Use the tachometer to gather speed, amplitude and phase data •... -
Page 38: Walk-Through: Taking Measurements In Measure Mode
Walk-through: Taking Measurements in Measure Mode Onsite analysis using Measure Mode involves watching a machine's vibration on-screen as it occurs and analyzing the measurement on the instrument (rather than recording the vibration then transferring it to Ascent for later analysis using the software). This method of measuring allows you to take a quick look at a machine's vibration patterns without having to save the recording or create a machine and points etc. - Page 39 • To start the measurement press • Wait for the sensor and vb hardware to settle. When the settling time has elapsed or the hardware has settled measuring begins and the spectrum, waveform or tachometer reading is displayed and continually updated. (You can press while the instrument is settling to cancel the remaining settling time but this is not recommended as...
-
Page 40: Using Quick Setup Menus
Using Quick Setup Menus The instrument's quick setup menus automate most of the measurement set up process for spectra, waveforms and demodulation measurements. These measurements are free run so you can record for as long or short a length of time as you wish. Most parameters are set for you - you are only required to adjust a few settings. -
Page 41: Spectrum Quick Setup
1. Spectrum Quick Setup • From the Main Menu press Measure, to open the Measurement Menu. • From the Measurement Menu press Spectrum Quick Setup. The only parameter you need to set is the Fmax value. This can be done in two ways: Press to display the Machine Running Speed Menu then use the number keys to enter an RPM value. -
Page 42: Waveform Quick Setup
Setting your own parameters Option Custom Setup allows you to customize this menu to use your own settings instead of the factory defaults. See Custom Setups (page 57) for more information. 2. Waveform Quick Setup • From the Main Menu press Measure, to open the Measurement Menu. -
Page 43: Demodulation Quick Setup
• Once the duration is set press to return to the quick setup menu then press to take the measurement. When a measurement has been taken it can be analyzed immediately on the instrument (see Analyzing Measurements on page 55) or stored for later analysis (see Storing Measurements on page 54). - Page 44 • Press to display the Set Demodulation Bandwidth Menu and use to select a value. • Press to return to the quick setup menu and set the Fmax. This can be done in two ways: Press to display the Machine Running Speed Menu then use the number keys to enter an RPM value.
-
Page 45: Default Parameters
Default Parameters When using the quick setup menus the following parameters are automatically applied. Spectrum Waveform Demodulation Domain Frequency Time Frequency Window Hanning Hanning Quantity User defined User defined Accel Spectral 1024 samples Lines Fmin 1 Hz (60 CPM) 1 Hz (60 CPM) Fmax Automatic Automatic... -
Page 46: Using Automated Menus
Using Automated Menus Advanced operations can be carried out using the automated setups available from the Measurement Menu. You need only set one or two parameters yourself and the instrument will automatically apply default parameters that are optimized for the settings you specify. As with the quick setup menus, any of the default parameters can be changed before or during measuring. -
Page 47: Tachometer Display
4. Tachometer Display The Tachometer Display option displays a readout of the machine speed and the amplitude and phase angle of the 1X vibration. This can be used to: • Verify the machine running speed • View the phase angle of the vibration relative to the tach signal •... -
Page 48: Time Synchronous Averaging
This running values screen will display the RPM and the equivalent value in Hz. With the sensor connected, the vibration level will also be displayed along with its phase angle relative to the tachometer signal. Setting your own parameters Option Custom Setup allows you to customize this menu to use your own settings instead of the factory defaults. - Page 49 The duration value can be set in three ways: Press to display the Machine Running Speed Menu then use the number keys to enter an RPM value. The duration will be set to the time it takes the machine to make 20 revolutions.
-
Page 50: Bump Test
6. Bump Test The bump test is a useful vibration analysis technique to help identify resonance frequencies in a machine's structure. It requires ‘bumping’ (i.e. hitting) the machine structure when the machine is stopped, while taking a peak hold measurement. Careful selection of the mallet or hammer is required along with the strength and direction of the bump to ensure that suitable frequencies are injected into the structure without causing damage. -
Page 51: Coast-Down/Run-Up Recordings
To store the measurement see Storing Measurements (page 54). Note: In free run mode with peak hold averaging, the instrument will continue sampling and displaying the peak values for each spectral line. Tips: With the spectrum displayed press to move the cursor and check the frequency of any resonance peaks found. - Page 52 The only parameter you need to set is the Fmax value. This can be done in two ways: Press to display the Machine Running Speed Menu then use the number keys to enter an RPM value. The Fmax will be set to 10 x the RPM (or rounded up to the closest value).
-
Page 53: Cross Channel Phase
The measurement location should now contain a large number of measurements. These can now be transferred to the Ascent software for display as a waterfall chart. Simple bode plots can also be created provided the tachometer was used during recording. To store the measurements see Storing Measurements (page 54). - Page 54 Recommendations 1. Determine the exact frequency of interest by using spectra to identify high amplitude peaks at specific frequencies. 2. Position the channel 1 sensor in a location which has high vibration at this frequency. Do not move this sensor once testing has started.
- Page 55 The only parameter you need to set is the frequency of interest - this is typically the machine running speed. • Press to enter the RPM then to continue. • Press to begin measuring both channels. The instrument will perform a spectral peak search at the entered frequency (machine speed or any frequency of interest) on the channel 1 signal.
-
Page 56: Fault Types And Their Phase Relationships
Fault Types and their Phase Relationships Misalignment - high amplitude peaks will appear at 1X, 2X and sometimes 3X the running speed. Look for a 180° (± 30°) phase change across the coupling in the axial direction (for angular misalignment) or radial direction (for parallel (offset) misalignment). Bearing misalignment (cocked bearing) will cause a twisting motion in the axial direction. - Page 57 the two phases may no longer be 90° apart (assuming that the structure has a different natural frequency in either direction). Eccentric belt pulley - a high amplitude peak will appear at 1X the running speed of the pulley. Look for a phase change of either 0° or 180°...
-
Page 58: Long Time Waveform
9. Long Time Waveform Note: This functionality is only available to vb3000 users. Long time waveforms allow you to take a continuous recording over a very long time period (over 17 hours), making it particularly useful for capturing transients. Recordings are taken continuously without any gap until the memory is full or until you manually stop recording. - Page 59 • From the Main Menu press Measure then display the Long Time Waveform Menu. • Press to display the Set Fmax Menu and use to select a value. If the waveform is later transferred to the software and displayed as a spectrum, this Fmax value will be used on the chart.
- Page 60 • Press to select a machine, point and direction to save the recording to. (We recommend saving each long time waveform to a new measurement location as this makes it easier to delete them individually.) • Press to begin recording and press again when you wish to stop recording.
- Page 61 This means that a lengthy waveform will appear as several 409 600 sample recordings. • To create a high resolution spectrum of a waveform, from the Ascent navigator select the schedule entry that contains the long time waveform and plot one of the recording 'chunks'. •...
-
Page 62: Default Parameters
Default Parameters When using the automated menus, the following parameters are automatically applied. Tach Time Bump Coast- Cross Display Synchronous Test down/ Channel Averaging Run-up Phase Domain Frequency Time Frequency Frequency Frequency Window Hanning Hanning Hanning Hanning Spectral User defined Lines Fmin 1 Hz... -
Page 63: Storing Measurements
Storing Measurements • After taking a measurement, with the spectrum, waveform or tachometer reading displayed press to open a pop-up window containing the Record option. • Press to record the measurement. You will then need to either select a machine, point and direction to save the measurement to or create these now. -
Page 64: Analyzing Measurements
Analyzing Measurements The spectrum/waveform/tachometer reading is displayed on the instrument screen once a measurement has been taken. Spectra and waveforms displayed on the instrument can be analyzed in the following ways: Displaying the amplitude/frequency of a peak • To read the vibration amplitude or level corresponding to a particular frequency or time press to move the cursor to that frequency or time value. - Page 65 Displaying frequency/time difference between peaks • To display the frequency difference or time difference between two peaks press to position the main cursor at one of the peaks. • Press then to anchor a datum cursor at the peak. • Press to position the main cursor at the other peak.
-
Page 66: Custom Setups
Changing display options • To change the display options of a spectrum or waveform in order to view the spectrum or waveform more clearly, press to access the Display Options Menu. See Setting the Display Options (page 59) for more information. Custom Setups Any of the instrument's quick setup or automated menus can be customized to use your preferred settings. - Page 67 • Change the parameters as required then press to save your custom settings. If you forget to save the settings the parameters will revert back to their previous settings after you take a measurement. You cannot save settings that conflict with the type of measurement you are trying to create e.g.
-
Page 68: Setting The Display Options
Setting the Display Options Display options control the way a measurement is displayed on the instrument such as showing the frequency in Hz or CPM, or setting the amplitude type to rms, Ø-peak or peak-peak. • To access the Display Options Menu, from the Main Menu press Measure then press twice. - Page 69 Frequency Unit Available units are Hz and CPM/kCPM. The frequency unit Hz, is equivalent to ‘cycles per second’ and kCPM stands for ‘kilocycles per minute’. Amplitude Scale Either linear or log scale can be chosen for the bottom axis. The linear amplitude scale can be used in most cases. The log scale (base 10) is more useful for displaying vibration with both very large and very small amplitudes.
- Page 70 Log Range Used to specify the left axis range when the amplitude scale is set to log. Velocity Max Velocity max, acceleration max, displacement max or current max is the highest amplitude value that will be displayed on the amplitude axis. If the linear amplitude scale is selected this value can be set to automatic.
-
Page 71: Section 4: Manual Setup Measurement Parameters
Section 4: Manual Setup Measurement Parameters This section describes the different parameters used to take measurements and how to apply them. You will learn to: • Set spectrum parameters • Set waveform parameters Section 4: Manual Setup Measurement Parameters Artisan Technology Group - Quality Instrumentation ... Guaranteed | (888) 88-SOURCE | www.artisantg.com... -
Page 72: Setting Measurement Parameters
Setting Measurement Parameters To take a completely manual measurement (i.e. you set all parameters yourself) use the Manual Setup option. • From the Main Menu press Measure then press select Manual Setup. This opens the Set Parameters Menu. • Change the parameter settings as required. Alternatively select a pre-existing parameter set by pressing . - Page 73 Note: When you set the parameters for a measurement you cannot choose settings that conflict with the type of measurement you are trying to create e.g. if you are measuring acceleration you cannot select a current sensor. If you try to take the measurement the instrument will display an 'Invalid Combination' message and no measurement will be taken.
-
Page 74: Setting Spectrum Parameters
Setting Spectrum Parameters A vibration spectrum is a chart of vibration amplitude versus vibration frequency. The vibration spectrum of a machine component shows the frequencies at which the component is vibrating and the amplitude of vibration at each of these frequencies. vb spectra consist of discrete spectral lines displayed at fixed frequency intervals. -
Page 75: Setting The Measurement Mode
Setting the Measurement Mode • From the Set Parameters Menu press When in the Measurement Mode Menu: Domain toggles the Domain between Frequency (spectra), Time (waveform) and Demod (demodulation). Quantity toggles the amplitude quantity between Displacement, Velocity, Acceleration and Current (Acceleration is the only option available when the Domain is set to Demod). -
Page 76: Setting The Number Of Spectral Lines
Window Measured data is usually not directly used to generate a spectrum but is first modified using a 'window' function. Windowing compensates for known limitations of the mathematical process (FFT) that transforms the data into a spectrum. Multiplying data by a window function prevents spectral lines from smearing or leaking into one another, thereby making the data block appear like a complete wave. -
Page 77: Setting The Fmax
Setting the Fmax The Fmax is the maximum frequency displayed on the spectrum i.e. the frequency range, starting from zero, over which vibration amplitudes are displayed. The unit Hz is equivalent to cycles per second (1 Hz = 60 cycles per minute). •... - Page 78 Using the vb instrument to calculate the Fmax • From the Set Fmax Menu press • Press to display the Enter Orders Menu and use the number keys to enter a value. A value of 10, for example, will display 10 order of the running speed. •...
- Page 79 • Press to enter a default running speed (RPM) of the machine. The instrument will automatically select the appropriate Fmax value to display at least the specified number of orders. • Press to return to the Set Fmax Menu or press the key twice to return to the Set Parameters Menu.
-
Page 80: Setting The Fmin
Setting the Fmin The purpose of the Fmin setting is to eliminate the 'ski-slope' effect from the low frequency end of the spectra. All spectral lines below the Fmin value will be set to zero and will not be included in the overall rms calculation. -
Page 81: Averaging
Averaging • From the Set Parameters Menu, press to display the Averaging Menu. Setting the Number of Averages The larger the number of spectra used for averaging, the more any noise spikes in vibration signals are reduced and the more accurately true spectral peaks are represented. -
Page 82: Setting The Average Type
Setting the Average Type When vibration is measured, several spectra are usually measured and then averaged to produce an average vibration chart. The averaging process minimizes the effect of random variations or noise spikes that are inherent in vibration signals. Averaging is applied to amplitude values, not to the frequency range. -
Page 83: Setting The Overlap Percentage
Setting the Overlap Percentage Overlapping is a means of collecting and displaying data more quickly. As vibration measurements are collected a percentage of the new data is combined (overlapped) with each subsequent measurement. The higher the overlap percentage, the less newly acquired data is needed to generate a spectrum and thus the faster the spectrum can be displayed. -
Page 84: Setting The Trigger Type
Ask for RPM If the machine RPM is available at the time of recording, for example from an installed rev counter or a hand held tachometer, the user can be instructed to enter the RPM via the vb instrument keypad. When Ask for RPM is selected, the user will be prompted to enter the machine RPM before taking the recording. -
Page 85: Selecting The Channel(S) For Taking Measurements
• Press to change the Source between Internal and Tach. • Press to change the trigger Mode between Free Run and Single. • Press to close this menu and continue. Selecting the Channel(s) for Taking Measurements • From the Set Parameters Menu press to cycle through the channel(s) to be used, CH1, CH2 or CH1 &... - Page 86 • Press to toggle the Sensor Type between acceleration, velocity, displacement and current. • Press to edit the Sensitivity of the sensor. The range of sensitivities will vary depending on the selected sensor unit. • Press toggle the Unit measured by the sensor. •...
-
Page 87: Setting Waveform Parameters
Setting Waveform Parameters A vibration waveform is a chart of how vibration level changes with time. A vibration waveform shows the vibration level at any particular time during the measurement period. vb waveforms are discrete charts represented by a series of equally spaced discrete sample points connected by straight lines. -
Page 88: Setting The Number Of Samples
Setting the Number of Samples • From the Set Parameters Menu, when Time mode is selected press to cycle the number of samples between 1024, 2048, 4096 or 8192 (16 384 for the vb3000). The resolution of the waveform increases with the number of samples used i.e. -
Page 89: Setting The Duration
Setting the Duration The duration of a waveform is the total time period over which information may be obtained from the waveform. The unit ms is short for ‘millisecond’ (i.e. a thousandth of a second). The duration values that you can select are dependent on the number of samples you selected earlier (see previous topic). -
Page 90: Section 5: Recording Data
Section 5: Recording Data This section describes the procedures for recording vibration data on the instrument and transferring it to Ascent on a PC. You will learn to: • Take recordings • Review recordings • Erase recordings • Transfer recorded data to the PC •... -
Page 91: Walk-Through: Taking Recordings
Walk-through: Taking Recordings The following instructions assume that you have already created the machines you intend to take recordings of. Warning: Take care of personal safety when taking recordings in industrial environments. Follow all safety regulations at all times. Also read Precautions (page 6) before attempting to take recordings. •... - Page 92 • In the Select Parameter Set Menu highlight the parameter set for which recordings are to be taken. If all is selected a recording will be sequentially taken for each tagged parameter set. If none of the parameter sets are tagged and all is selected a recording will be taken for all parameter sets.
-
Page 93: Reviewing Recordings
When you have finished taking recordings at all measurement locations you can review the recordings on the instrument (see next topic, Reviewing Recordings) or transfer them to a PC for detailed analysis using the Ascent software. Reviewing Recordings • From the Main Menu press to access the Select Machine Menu. -
Page 94: Erasing Recordings
Resetting an incorrect RPM If the RPM was specified incorrectly when a recording was taken this can be corrected either in the vb instrument or in the Ascent software. • With the spectrum or waveform displayed press display the Enter Rotor Speed Menu. •... -
Page 95: Tagging Items
• If you are shown this Prepare for Receive window, select the folder you wish to transfer and click OK. • To transfer more than one folder at a time click the 'Receive multiple folders' box then tick the box beside each folder that you want to receive. - Page 96 • Press to highlight the item in the list then press to tag it. Example: To tag a machine: • From the Main Menu press to display the Select Machine Menu. • Press to select the machine and press Note: Only items with at least one parameter set can be tagged. To untag an item •...
-
Page 97: Autorepeat
Autorepeat Autorepeat is used to take the same recording repeatedly with a short, user-specified delay between recordings. This option is ideal for taking coast-down/run-up recordings. The instrument will take recordings continuously until you choose to stop. • From the Main Menu press Record then choose a machine, point and direction. -
Page 98: Section 6: Using Routes
Section 6: Using Routes This section outlines the procedures for managing routes with your instrument. You will learn to: • Use a route to take recordings • Take off-route recordings • Name a route • Erase a route Section 6: Using Routes Artisan Technology Group - Quality Instrumentation ... -
Page 99: What Is A Route
What is a Route? A route is an ordered list of measurement locations that a user follows when taking recordings. When the instrument is operated using an Auto Route, the user is guided through each measurement location according to the sequence. By using a route, the task of taking recordings becomes much simpler and the potential for mistakes can be minimized. -
Page 100: Walk-Through: Taking Recordings Using A Route
Walk-through: Taking Recordings Using a Route Once the first recording has been taken you will automatically be moved to the next location on the route. You can take recordings for all other measurement locations sequentially, or jump to various entries on the route. •... -
Page 101: Reviewing Data During A Route
Notes: • In the Auto Route Menu you can press to view or edit notes for the measurement location. • Press to view/edit the display options for recorded spectra/waveforms. • Press to view the parameter sets at this measurement location. •... - Page 102 This opens the Select Parameter Set Menu. The review option is displayed in the bottom right corner. • Press to review the recording. • When you have finished reviewing press again to return to the previous menu. • Press to return to the Auto Route. You will be returned to the location where you left the route and the next unrecorded location will be displayed.
-
Page 103: Skipping Route Entries
Skipping Route Entries • To skip a measurement location press • To return to the previous measurement location, press • To move forwards or backwards by an entire machine, rather than just a measurement location, press Jumping to a Specific Machine You can 'jump' to a particular machine anywhere within a route. -
Page 104: Off-Route Recordings
• to highlight a machine then press select it and return to the route. The first location at this machine is displayed. • To move forwards or backwards by 10 machines press . Use to move to the beginning or end of the machine list. Off-route Recordings When collecting data, you may decide to take additional measurements that are not part of the route sequence. -
Page 105: Naming/Renaming A Route
Naming/Renaming a Route • From the Main Menu press to display the Select Route Menu. • Press to highlight desired route then press to edit. • Press to clear the current name then type in a new name for the route. •... -
Page 106: Erasing An Entire Route
Erasing an Entire Route Warning: The following procedure erases all route entries. Erasing a route does not erase the machines that make up the route entries. • From the Main Menu press to display the Select Route Menu. • Press to highlight the route to be erased and press . -
Page 107: Keypad Schedule Entries
Keypad Schedule Entries A special type of measurement can be created that requires the person collecting the data to enter a numeric value via the keypad rather than a vibration measurement. These special measurements are called keypad schedule entries and can be used to record additional information about your machines such as temperature or motor current. - Page 108 • Either include the parameter set in a route or press from the Select Parameter Set Menu to take a recording. • Type in the numeric value and press . Decimal points will be placed automatically as you enter digits from left to right. Note that the value entered can be either positive (+) or negative (-);...
-
Page 109: Section 7: Advanced Operation
Section 7: Advanced Operation This section outlines the procedures for performing advanced operations with your instrument. You will learn to: • Take demodulated recordings • Analyze demodulated data • Take dual channel measurements • Set and display baseline values Section 7: Advanced Operation Artisan Technology Group - Quality Instrumentation ... -
Page 110: Demodulation
Demodulation A useful technique for measuring and analyzing data is demodulation. The demodulation process looks for repetitive patterns created by impact events that lie embedded within the time waveform. The process works by extracting the low amplitude, high frequency impact signals and then tracing an 'envelope' around these signals to identify them as repetitions of the same fault. -
Page 111: Setting Demodulation Parameters
Setting Demodulation Parameters The bandwidth determines which range of frequencies the demodulation process will use. It is recommended that the following procedure is followed to determine an appropriate bandwidth. • Take a 'quick snapshot' measurement using the following parameters: Domain: Freq Quantity: Accel... -
Page 112: Analyzing Demodulation Data
Setting up the demodulation measurement • From the Main Menu press to display the Measurement Menu. • Press to use the Demodulation Quick Setup Menu (see Demodulation Quick Setup on page 34). • Press then to set all parameters manually using the Measurement Mode Menu. -
Page 113: Dual Channel Simultaneous Measurements
Dual Channel Simultaneous Measurements The vb instrument can measure two channels simultaneously. Dual channel measurements must be taken in measure mode (rather than record mode) and then saved to an appropriate machine location. Because the instrument has to buffer and manipulate twice the data, some of the more memory intensive operations are not available. -
Page 114: Setting Baselines
• Press to record both channels then select the machine, point and direction for channel 1. • Press to store the channel 1 measurement. The instrument will beep and display the message 'Recorded CH1 - Now record CH2'. • Select a different location for the channel 2 measurement. to navigate back through the machine and point menus if necessary. -
Page 115: Section 8: Creating Machines
Section 8: Creating Machines This section describes the procedures for creating machines within the instrument. You will learn to: • Create and manage folders • Create machines, points and locations • Create parameter sets • Copy a machine • Erase machines, points and locations •... -
Page 116: Vb Data Structure
vb Data Structure Instead of analyzing data onsite, you can also record the data on your instrument and analyze the data later. If many machines need to be analyzed recommend that recordings be taken of all machines before any analysis is done. Analysis is best carried out away from machines in safe, quiet environments. -
Page 117: Creating A Machine Data Structure
A route is an ordered list of measurement locations that a user follows when taking recordings. It contains a sequential list of the machines to be monitored. A folder is a container that can be used to identify and group machines. -
Page 118: Working With Folders
Working with Folders Selecting a folder from the list loads it into current memory. Any new machines you create will automatically be stored in this folder until you select another folder. • From the Main Menu press • Press to display the Select Folder Menu. If you have not yet created any folders, the screen will contain the default folder (Unnamed folder) and numbered slots labeled - new -. - Page 119 To create a folder • Press to scroll to one of the slots labeled - new - then press to display the Edit Name Menu. • Enter a name for the folder by choosing characters from the keyboard (see Entering Text and Numbers on page 16, for details of how to do this).
-
Page 120: Creating A Machine
Creating a Machine • From the Main Menu press . The Select Machine Menu displays a list of numbered memory locations. If you have not yet created any machines, the screen will contain numbered slots labeled - new -. • Press to scroll to one of the slots labeled - new - then press... -
Page 121: Creating A Point
Creating a Point • Select a machine as described in the previous topic: Creating a Machine (page 111). • From the Select Machine Menu press • Press to highlight a point. • Press to display the Edit Name Menu. • Enter a name for the point by choosing characters from the keyboard (see Entering Text and Numbers on page 16, for details of how to do this). -
Page 122: Creating A Direction/Axis
Creating a Direction/Axis • Create a point as described in the previous topic: Creating a Point (page 111). • From the Select Point Menu press • Press to highlight a direction/axis. • Press to select the highlighted direction/axis. All points share the same direction names. The first six default direction names cannot be edited. -
Page 123: Creating A Parameter Set
Creating a Parameter Set A parameter set is a user-defined group of measurement parameters that are used to take a measurement. Once a parameter set has been created in the instrument it will be added to the list in the Select Parameter Set Menu. - Page 124 If the direction/axis already has a parameter set defined the Select Parameter Set Menu will be displayed. • To review a parameter set, highlight it in the Select Parameter Set Menu and press to review its parameter values. • To review the parameter set's most recent recording press Note: When taking recordings, only the single trigger type can be selected because you are limited by the number of lines specified in your parameter set.
-
Page 125: Copying A Machine
Copying a Machine If you have many identical machines you can save a lot of set up time by using the instrument's copy function. Copying a machine creates a new machine with the same named points, directions and parameter sets. Any recordings taken on the original machine are not copied to the new machine. -
Page 126: Erasing A Machine
Erasing a Machine Erasing a machine will remove all its points, directions and recordings permanently from memory. Note: Any parameter sets used by the machine will not be removed but will remain in the Select Parameter Set Menu so they can be applied to other recordings. -
Page 127: Erasing A Point, Direction/Axis Or Parameter Set
Erasing a Point, Direction/Axis or Parameter Set Erasing points and other items is performed in the same manner as erasing machines. • From the Main Menu press to display the Select Machine Menu. • Press to highlight the machine containing the item to be erased. -
Page 128: Renaming A Machine, Point Or Direction/Axis
Renaming a Machine, Point or Direction/Axis • Select the machine, point or direction/axis. • Press to enter the Edit Name Menu. • Press to clear the current name then type in a new name. • Press to save the name and return to the previous screen. -
Page 129: Attaching Notes To An Item
Attaching Notes to an Item A 16-character note can be attached to each item on the recording list: machines, points, directions/axes and recordings. To view or edit the note for an item: • From the Main Menu press then press till you have the correct menu displayed. -
Page 130: Selecting A Note From A List
Selecting a Note from a List When you are in the Notes Menu, pre-defined notes can be added to a machine, point, direction/axis or recording. • From the Notes Menu (see previous topic: Attaching Notes to an Item on page 120) press to display the Edit Notes Menu. -
Page 131: Removing A Note From An Item
Removing a Note from an Item • Highlight the item with the note attached then press enter the Notes Menu. • If there is more than one note attached to the item press to highlight the note you wish to remove. •... -
Page 132: Section 9: Balancing Rotors
Section 9: Balancing Rotors This section describes the procedure for performing balancing operations on your instrument. You will learn to: • Understand the balancing process • Set balancing parameters • Perform trial readings • Perform balancing • Review balance readings •... -
Page 133: Introduction
Introduction The instrument can be used to balance rotors that are rigid but not rotors that flex significantly at their operating speeds. An imbalanced rotor is one that has an uneven mass distribution that causes the rotor to vibrate when it is rotated. Balancing a rotor means correcting the uneven mass distribution by adding or removing weight to/from precisely calculated positions on the rotor. -
Page 134: The Balancing Process
Whether a rotor should be balanced in one plane or two planes depends on the dimensions and operating speed of the rotor. The following guideline is commonly used: Rotor Length to Operating Speed Balancing Technique Diameter Ratio 1000 RPM or less Single plane balancing 0.5 or less More than 1000 RPM Dual plane balancing... -
Page 135: The Tachometer
The Tachometer The tachometer provides the instrument with information regarding the rotational speed of a rotor and the angle at which the rotor is vibrating. The angle is measured from a fixed reference mark on the rotor and is called the ‘phase angle’. To balance a rotor it is necessary to consider not just the amplitude of vibration but also the phase angle. -
Page 136: Set Balancing Parameters
Example of Balancing Menu with recordings Pressing from this menu erases the current measurement data in a two stage process. The first press erases the trim balance readings. The second press erases both initial and trial weight readings. The rest of this section describes the Balancing Menu options. Balancing Walk-through (page 145) will explain how to use these options when performing a balance job. -
Page 137: Number Of Planes
Number of Planes (vb3000 and vb2000 only) • Press to toggle the number of balance planes to use. Balancing Units The Balancing Units Menu allows you to select different balancing units. Available units are: (press the appropriate number key to toggle the setting) Displacement Velocity... -
Page 138: Remove Trial Weight(S)
Against rotation (AR) means that if the rotor is turning forward then you place your weights backwards from the reference point (i.e. in the opposite direction of the rotor’s rotation). Ensure that with the rotor stationary, you measure angles in the direction specified. - Page 139 # Fixed Positions Establish a fixed number of attachment points (e.g. drilled and tapped holes) that are equally spaced on a fixed radius from the center of the rotation. • Press to highlight your selection then press to continue. If choosing Circumference Arc or # Fixed Positions this will open a sub-menu where you can specify the total circumference or numbers of points.
-
Page 140: Advanced Balance Options
Advanced Balance Options • Press to open the Advanced Balance Options Menu. Filter B/W Selects Normal or Narrow filter bandwidth for vibration measurement. The Normal option takes faster measurements, allows better stability, and should be used except where background sources of vibration noise exist very close to the frequency (within 150 RPM) of the rotating equipment being balanced. -
Page 141: Trial Readings (Single/Dual Plane)
2. Trial Readings (Single/Dual Plane) The Trial Readings Menu allows for the initial measurements to be performed before beginning the balancing of the machine. • The Trial Readings Menu is accessed by pressing from the Balancing Menu. The diagram shows a dual plane balance job after initial and trial readings have been taken. -
Page 142: Trial Weight Reading (Left Trial Reading)
Trial Weight Reading (Left Trial Reading) Used to take a trial weight reading in single plane balancing and the left trial weight reading in dual plane balancing. The diagram shows the factory default values for trial weight mass (1.00) and angle (0°). Note: Your trial weight must be of a sufficient mass to change the rotor imbalance so that the instrument can perform its calculations accurately (the industry norm is approximately 30% change in... -
Page 143: Suggest Trial Weight Angle
Suggest Trial Weight Angle This tool aids you in determining where on the rotor to place the trial weight after an initial reading has been taken. The aim is to reduce the initial vibration in order to maximize the accuracy of the trial weight readings. - Page 144 • After the initial reading has been taken press Suggest Trial Weight Angle. • Press to enter the tachometer-to-reference-mark angle. On the rotor, measure the angle between the tachometer reflective tape and your weight reference mark. If these marks are aligned with each other enter zero. •...
-
Page 145: Initial
Initial Allows the initial reading to be manually input without having to use the instrument to record the measurement directly from the machine. Left Left (or Trial for single plane balancing) allows the trial or left trial readings to be manually input. Right This option is only available for dual plane balancing and allows the right trial readings to be manually input. -
Page 146: Perform Trim Balance
Perform Trim Balance Used to take a measurement of the machine after the weight has been added or removed from the rotor. Perform Trim Balance confirms the balance level achieved after the weights were positioned. After another measurement is taken, the Balance Menu will display the new balancing requirements. -
Page 147: Review Readings
4. Review Readings Review Readings reviews the results of the Initial Reading, Trial Reading, and latest Trim Balance Reading. These values can be saved to, or loaded from data storage as described in Load/Save Balancing Data (page 141). • The Review Readings Menu is accessed by pressing from the Balancing Menu. -
Page 148: Suggest Trial Weight
Suggest Trial Weight This tool aids you in determining the appropriate amount of suggested balance weight to use based on the weight, diameter and rotor speed of the machine being balanced. The calculator works out a suitable trial weight to cause a significant change from the initial reading. -
Page 149: Combine Weights
Combine Weights This tool allows the user to combine two weights into a single weight at one angle. This calculation can be performed many times to combine all trim weights into one weight and angle. The user must define the weight and angle of the two beginning balance masses. Change Radius This tool takes a single point balance solution and allows you to find a new balance weight based on a change in radius for the existing... -
Page 150: Load/Save Balancing Data
6. Load/Save Balancing Data The instrument is capable of saving up to 10 balancing jobs to machines in its memory. Initial readings, trial readings, trim readings and completed balances can be stored. • The Load/Save Balancing Data Menu is accessed by pressing from the Balancing Menu. - Page 151 Load balancing data from this machine into the instrument’s current memory. The stored data includes the parameter settings, the initial and trial readings, and trim readings. Caution: This operation will overwrite any data already in current memory. Edit the name of the machine. The screen prompts indicate what options are available for data entry (see Entering Text and Numbers on page 16).
-
Page 152: Print Report
7. Print Report Detailed balancing reports are normally produced from Ascent using the Report menu. However, you also have the option of using a thermal printer to print directly from the instrument. Within the instrument, two report types are available: STANDARD and EXTENDED. - Page 153 • Press to select the report type. • Press to print the report. Section 9: Balancing Rotors Artisan Technology Group - Quality Instrumentation ... Guaranteed | (888) 88-SOURCE | www.artisantg.com...
-
Page 154: Section 10: Balancing Walk-Through
Section 10: Balancing Walk- through This walk-through guides you through the process of balancing a rotor using single and dual plane balancing. Dual plane balancing requires all the steps relating to single plane balancing and includes extra instructions marked with You will learn to: •... -
Page 155: Step 1. Set Balancing Parameters
Step 1. Set Balancing Parameters • Check the battery capacity of the instrument and if it is less than 30%, charge the battery pack (see Battery Management on page 161). • From the Main Menu press to access the Balancing Menu. - Page 156 • Start the machine and let the rotor settle to its normal operating speed. Since the vibration level is dependent on the speed of the rotor it is important to take all readings while the rotor is operating at its normal speed. •...
- Page 157 After a few seconds, the instrument displays the speed of the rotor in RPM and Hz, the vibration level due to the imbalance (i.e. amplitude at 1X the rotor speed), and the phase angle of the vibration. Note that our recording shows an amplitude of 3.8 mm/s. The aim is to reduce this to an acceptable level.
-
Page 158: Step 3. Trial Weight Reading
Step 3. Trial Weight Reading • Stop the machine. • Establish a reference mark on the balancing plane. This will be used to measure the angular position of the trial weight and the final balance weights. The reference mark can be at any position around the balancing plane. - Page 159 • Press to access the Trial Weight Reading Menu. • Press to enter your own Trial weight mass. Use the number keys to enter a value then press to continue. The Left Trial Reading Menu replaces the Trial Weight Reading Menu for dual plane balancing. Section 10: Balancing Walk-through Artisan Technology Group - Quality Instrumentation ...
- Page 160 • Press to enter the angular position of the trial weight with respect to the reference mark. (If using circumference arc or fixed positions for your weight position reference system, enter the trial weight point or trial arc.) Use the number keys to enter a value then press to continue.
- Page 161 The Trial Readings Menu is now updated to display both the Initial and Trial reading measurements. Perform the same procedure for the Right plane by attaching a trial weight to the designated right plane. If the option 'Remove Trial Weight' is set to YES then the Left Trial weight must be removed before performing the Right Trial reading.
-
Page 162: Step 4. Balancing
Step 4. Balancing With Initial and Trial Readings completed the main Balancing Menu will display the Balance option. • Press to access the Balance Menu. The instrument displays the weight required to correct the initial imbalance and the angular position at which it must be attached. As an alternative to attaching a correction weight, you could also remove the same amount of weight half a revolution (180º) away from where you would attach the correction weight. -
Page 163: Step 5. Trim Balance
Step 5. Trim Balance • Replace safety covers, start the machine again and let the rotor settle to its normal operating speed. • Press to perform a Trim Balance. After a few seconds the instrument displays the vibration level with the imbalance corrected. -
Page 164: Tips For Balancing
• At any point in the process it is possible to save the balancing data to a machine in the current data folder. To save the recordings, return to the Balancing Menu and press Load/Save Balancing Data. Select a machine and press Save, to save the balancing data. -
Page 165: Section 11: Utilities
Section 11: Utilities This section describes how to use the utility functions of your instrument. You will learn to: • Print from the instrument • Adjust the LCD display • Set the date and time • Manage the instrument battery pack •... -
Page 166: Printing From The Instrument
Printing from the Instrument The optional Seiko DPU-414-30B printer is not included with the standard vb kit. Connecting and setting up the printer to the instrument is outlined as follows: • Plug the printer cable D connector into the printer serial input and the 5 pin connector plug into the instrument's RS232 port. - Page 167 To set the virtual DIP SW, begin with the DPU-414-30B switched off and complete the following procedures: • Slide the power switch to ON while pressing the ON LINE button. • Release the ON LINE button after a list of the current settings starts printing out.
-
Page 168: Dpu-414-30B 'Virtual' Dip Switch Settings
As soon as switch number 8 of DIP SW3 is set, the printer writes the settings to memory regardless of which button is pressed. DPU-414-30B 'Virtual' DIP Switch Settings DIP SW Switch Function Switch Status Settings DIP SW1 Input = Serial Essential Printing Speed = High Optional... -
Page 169: Adjusting The Lcd Screen
Adjusting the LCD Screen Adjusting the Contrast • From the Main Menu press and hold to darken the LCD. • Press and hold to lighten the LCD. If the screen flickers when the cursors or highlight bar are moved rapidly, make the LCD darker. Restoring the Default Contrast •... -
Page 170: Battery Management
• To cycle to a particular item, press . The item will flash to show that it is selected. • to change the value of the currently selected item. • Press to save changes and exit. All recordings are date and time stamped according to the clock shown in the Date &... -
Page 171: Checking The Battery Charge And Voltage
Warning: Do not detach the battery pack from the instrument for more than 2 hours as this will drain the backup component, thereby causing data and setting to be lost. Warning: Before charging the battery pack, ensure that the power transformer used is an approved instrument power transformer 13.5 V ±... -
Page 172: Charger Control
Charger Control This menu allows manual control of the battery charge function. The current battery voltage and charging state are displayed. Charge Battery Manually begins battery charging cycle. Recondition Battery Fully discharges and then automatically recharges the battery. Fresh Battery Inserted Resets the battery capacity scale percentage to 100% at the current battery voltage. -
Page 173: Reconditioning The Battery Pack
• From the Main Menu press Battery Management. • Press Charger Control. • Press to begin charging. A flashing 'CHARGING' message will be displayed. If there is no power coming from the power transformer a flashing 'NO CHARGER' message will be displayed. If this happens, check that the mains power is turned on and the battery adapter is connected properly. -
Page 174: Fresh Battery Inserted
• Press to recondition the battery. Discharging is indicated by the flashing 'DISCHARGING' message on the screen. The instrument automatically proceeds to charge the battery once the battery pack is fully discharged. Fresh Battery Inserted This resets the battery capacity scale percentage to 100% at the current battery voltage. -
Page 175: Replacing The Battery Pack
Replacing the Battery Pack • Lift the boot stand. • Unscrew the battery pack using a suitable screwdriver and screw in the new one. Warning: Ensure that the battery pack is securely fastened but not over-tightened. Memory Management Instrument Memory The vb3000 has a standard memory size 32 MB that can store up to 11 000 recordings depending on recording type as shown below. - Page 176 All other vb instruments have a standard memory size of 8.5 MB that can store up to 8192 recordings depending on recording type as shown below: Recording Resolution Maximum Number of Recordings Type NO Phase Data WITH Phase Data 400 - line 8192 4096 800 - line...
-
Page 177: Checking The Memory Used
Checking the Memory Used • From the Main Menu, press to access the Folder Management Menu. The percentage of memory used is displayed in the middle of the screen. Note: If more than 98% of the memory is used, you will need to erase some recordings before further recordings can be taken. - Page 178 • From the Main Menu, press Folder Management. • Press Erase Data in ALL Folders. • Press to erase all data (recordings). You will be prompted to confirm the erasure. • Press again to confirm or to cancel. The Erase all Folders Menu displays with a message confirming there are no recordings in memory.
-
Page 179: Erasing All Machines
Erasing all Machines Warning: The following procedure erases all machines (including all the points, directions, and parameter sets in the machines). The procedures for erasing individual machines, points, directions or parameter sets are covered in section 4. Erasing all machines is a two-stage process. Before erasing all machines, all recordings must first be erased. -
Page 180: Upgrading Firmware Using Proflash
Upgrading Firmware Using Proflash To upgrade the instrument to the latest version of firmware you PROFLASH the instrument with a new firmware file. • To view your instrument's firmware version, turn the instrument off then on again. The current firmware version is displayed at power up. -
Page 181: Other Options
Most of the tasks involved with PROFLASHING are carried out from within the Ascent software. Refer to the Ascent on-line help for detailed instructions on how to PROFLASH your instrument. (From the Ascent menu select Help>Index, then type 'Proflash' to display the help file). - Page 182 When Halt After Recording is turned ON the spectrum or waveform remains on the display until you choose to take the next recording. If Halt After Recording is OFF recordings will only be displayed for two seconds before the instrument returns automatically to the Select Parameter Set Menu (or the Auto Route Menu if you are recording a route).
- Page 183 Baseline warnings (Applies to vb3000 only) You can set Halt After Recording to prompt you when a new recording is significantly above or below the baseline overall level. This can be used to provide a basic check of data validity e.g. if the overall level of the new recording is very different from the baseline you may not have taken the measurement correctly.
-
Page 184: Backlight Off Delay
• To turn on the Halt After Recording warning, from the Main Menu press to access the Options Menu. • Press to toggle the option between ON / OFF and 'tight' / 'relaxed' warnings. Halt After Recording 'relaxed' Halt After Recording 'tight' Backlight Off Delay Backlight Off Delay allows you to reduce the battery's power consumption by turning the backlight off after a specified number of... -
Page 185: Vb Structure Lock
vb Structure Lock This feature prevents machine or point names, routes or folders from being edited or accidentally deleted by unauthorized persons. Notes, machine, points and directions can still be added, but cannot be deleted when the instrument has the Structure Lock turned ON. To lock the instrument •... -
Page 186: Section 12: Troubleshooting
Section 12: Troubleshooting Contacting Technical Support If you have any problems please contact Commtest support staff directly for assistance. Our e-mail address is help@commtest.com. We also provide a searchable knowledge base of frequently asked questions (FAQ) on our website. • The knowledge base can be found at www.commtest.com. -
Page 187: Data Transfer Problems
Data Transfer Problems Symptom Cause Remedy Ascent unable to transfer Data transfer cable not Check cable connections data and 'Transfer failed' properly connected or Ascent Error dialog is Data transfer cable Test COM port availability displayed on the computer connected to wrong with instrument and use computer COM port an available COM port... -
Page 188: Other Problems
Other Problems Symptom Cause Remedy Reset the instrument Instrument does not Electrostatic discharge respond to any key press exceeds 8 kV 'DSP cmd' Memory conflict Turn the instrument off and on again. If the 'DSP no ack' problem persists, send the 'DSP not rdy' instrument to an authorized dealer for... -
Page 189: Appendix 1: List Of Abbreviations
Appendix 1: List of Abbreviations Alternating Current Analog-to-Digital Channel COM port Computer Serial Port (1 to 4) Cycles per minute Direct Current Digital Signal Processor Electro-Static Discharge Fast Fourier Transform Fmax Maximum Frequency Fmin Minimum Frequency Hertz In or " Inches International Organization for Standardization Kilobytes... -
Page 190: Appendix 2: Specifications
Appendix 2: Specifications Specifications Model vb3000 Remarks Sensor Input Number of channels Accelerometers 2-wire, low impedance piezoelectric, 100 mV/g nominal Commonly termed 'ICP® type'. Sensitivity (8.5 to 2300) mV/g Velocity sensors 100 mV/in/s (4 mV/mm/s) nominal Sensitivity (8.5 to 2300) mV/in/s = (0.34 to 90.55) mV/mm/s Displacement sensors 100 mV/mil (4 mV/µm) nominal Sensitivity (8.5 to 2300) mV/mil = (0.34 to 90.55) mV/µm... - Page 191 Revised 13 October 2006. While every effort has been made to provide the most accurate information we advise that information in this document may contain technical inaccuracies or typographical errors. Commtest Instruments Ltd may at any time and without notice make improvements and/or changes in the products described in this information.
- Page 192 Specifications Model vb2000 Remarks Accelerometer Input Number of channels Type 2-wire, low impedance piezoelectric Commonly termed 'ICP® type' Sensitivity 100 mV/g nominal Sensitivity 8.5 mV/g to 2300 mV/g Connector Safety feature: Break-free inline connector Input impedance >100 kΩ Voltage swing AC coupled input, allows for ±...
- Page 193 Revised 22 November 2005. While every effort has been made to provide the most accurate information we advise that information in this document may contain technical inaccuracies or typographical errors. Commtest Instruments Ltd may at any time and without notice make improvements and/or changes in the products described in this information.
- Page 194 Specifications Model vb1000 Remarks Accelerometer Input Number of channels Type 2-wire, low impedance piezoelectric Commonly termed 'ICP® type' Sensitivity 100 mV/g nominal Sensitivity 8.5 mV/g to 2300 mV/g Connector Safety feature: Break-free inline connector Input impedance >100 kΩ Voltage swing AC coupled input, allows for ±...
- Page 195 Revised 22 November 2005. While every effort has been made to provide the most accurate information we advise that information in this document may contain technical inaccuracies or typographical errors. Commtest Instruments Ltd may at any time and without notice make improvements and/or changes in the products described in this information.
- Page 196 Revised 22 November 2005. While every effort has been made to provide the most accurate information we advise that information in this document may contain technical inaccuracies or typographical errors. Commtest Instruments Ltd may at any time and without notice make improvements and/or changes in the products described in this information.
- Page 197 Revised 22 November 2005. While every effort has been made to provide the most accurate information we advise that information in this document may contain technical inaccuracies or typographical errors. Commtest Instruments Ltd may at any time and without notice make improvements and/or changes in the products described in this information.
-
Page 198: Index
balance weight calculations • Index balancing menu • 126 circumferance arc • 129 fixed positions • 129 initial reading • 125, 126, 132 printing a report • 143, 157 setting parameters • 127 tips on • 155 Acceleration • 66 trial readings •... - Page 199 Custom setups • 57 initial reading • 126 saving • 57 machines all • 170 individual • 117 notes • 122 Data structure • 107 parameter set • 118 creating • 108 points • 118 Date and time • 160 recordings Deleting all •...
- Page 200 erasing • 126 erasing • 122 Instrument removing from an item • 122 cleaning • 6 viewing • 120 power transformer • 6 repairing • 6 Invalid combinations • 63 Off-route recordings • 95 ISO 1940 • 140 Orders • 68 displaying •...
- Page 201 Recordings • 107 analyzing • 55 erasing resolution • 65 all • 168 setting parameters • 65 individual • 85 spectral lines • 65 reviewing • 84 Strobe • 25, 27 taking • 82 Remove trial weights • 129 Renaming an item • 119 Tachometer •...
- Page 202 samples • 78, 80 setting the number • 79 setting parameters • 78 Windowing • 66, 78 WR with rotation • 128, 136 Zooming • 55 Index 193 Artisan Technology Group - Quality Instrumentation ... Guaranteed | (888) 88-SOURCE | www.artisantg.com...
Need help?
Do you have a question about the vb Series and is the answer not in the manual?
Questions and answers