2gig Technologies EDGE User Manual
Security & smart home system
Hide thumbs
Also See for EDGE:
- Installation manual (68 pages) ,
- Quick start manual (36 pages) ,
- Manual (32 pages)
Table of Contents
Advertisement
Quick Links
Advertisement
Table of Contents

Related Manuals for 2gig Technologies EDGE


Summary of Contents for 2gig Technologies EDGE
- Page 1 2GIG EDGE Security & Smart Home System USER GUIDE...
-
Page 2: Table Of Contents
Force Bypassing a Sensor . . . . . . . . . . . . . . . . . . . . . . . . . . . . . . . . . . . . . . . . . . . . . . . . . . . . . . . . . . . . . . . . . . . . . . . . . . . . . . . . . . . . .23 2GIG EDGE User Guide... - Page 3 Use the Quick Exit Button . . . . . . . . . . . . . . . . . . . . . . . . . . . . . . . . . . . . . . . . . . . . . . . . . . . . . . . . . . . . . . . . . . . . . . . . . . . . . . . . . . . . . .25 In the Event of an Exit Error .
- Page 4 Risk of Noise Induced Hearing Loss . . . . . . . . . . . . . . . . . . . . . . . . . . . . . . . . . . . . . . . . . . . . . . . . . . . . . . . . . . . . . . . . . . . . . . . . . . . . .59 2GIG EDGE User Guide...
-
Page 5: Introduction
INTRODUCTION This guide is designed for end users of the 2GIG EDGE Security & Smart Home System . It provides general system information, safety precautions, and step-by-step instructions for operating the system . It is intended for use only by 2GIG EDGE owners whose system has been professional installed in a residential or commercial setting by an authorized 2GIG alarm dealer . - Page 6 AC power failures and outages . » USB Port: A convenient USB port at the top of the 2GIG EDGE Panel that can be used with a USB thumb drive (not supplied) to update the system’s firmware. See Firmware Update, pg .
-
Page 7: Safety Precautions And Notations
. For example, a Glass Break Detector and a Passive Infrared Motion Detector . NOTE: A variety of 2GIG and GoControl branded devices are compatible with the 2GIG EDGE Security & Smart Home System . Sensors manufactured by other companies may also be compatible with the system . -
Page 8: Setup And Installation
SETUP AND INSTALLATION The 2GIG EDGE Security & Smart Home System must be installed by a qualified technician who is either employed by, or under contract with, a 2GIG alarm dealer . The alarm must always be installed in accordance with your country’s national electrical installation regulations and/or all applicable codes in the local jurisdiction . - Page 9 Use and Care of the System To care for the system, observe the following: » Humidity and Liquids Do not expose the system to water, rain, extreme humidity, perspiration, or other liquids . The optimum humidity range for the system is 9-90% non-condensing . »...
-
Page 10: Limitations Of Alarm Products
Although installing an alarm system may make homeowners eligible for lower insurance rates, an alarm system is not a substitute for insurance . Homeowners, property owners, and renters should continue to act prudently in protecting themselves and continue to insure their lives and property . 2GIG EDGE User Guide... -
Page 11: Panel Led Behavior
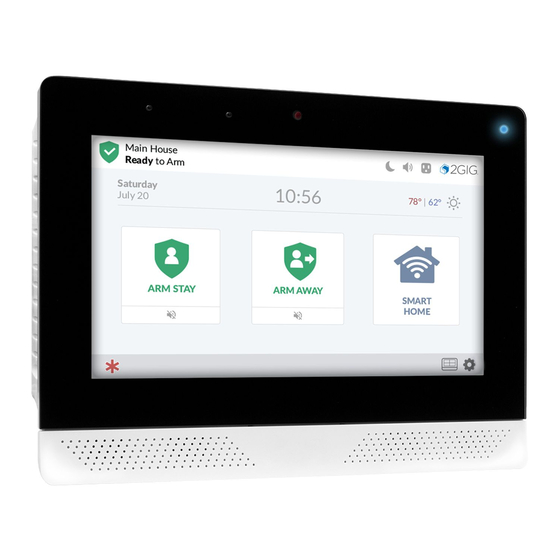
PANEL LED BEHAVIOR The 2GIG EDGE panel has a single LED light on the top right corner . Depending on the panel's alarm status, the multi- colored LED that will flash blue, white or red (see Alarm Status table below). -
Page 12: The Touchscreen
Indicates system information . ❽ Smart Home Tap for Smart Home options . ❾ Smart Areas Icon Tap to access Smart Areas status and arm/disarm options . ❿ Settings Icon Tap for access to the Settings menu . 2GIG EDGE User Guide... -
Page 13: System Status Messages
System Status Messages At the top-left of the screen, different messages appear to reveal the current system state . System Status Messages This table describes the different system status messages on the system . This system status message . . . Indicates that . -
Page 14: Notifications
. Reading Incoming Messages Messages > Reading Messages Your security provider has the ability to transmit messages about the installed 2GIG EDGE system . When transmitting messages to the system, your security provider can: » Mark a Message as Public (read by any user) or Private (opened only by users who know the Master User Code) . -
Page 15: Marking A Message As Read
4 . Tap the desired message to open it . Enter Your Code to Read the Message 5 . If the message was marked as private, enter your system’s Master User Code . 6 . When the message appears, read the text . Marking a Message as Read Messages >... -
Page 16: Emergency Button/Indicator
Tap the System Settings button ( ) on the Home screen to reveal the System Settings menu and access general settings for the 2GIG EDGE Security & Smart Home System . To learn about the options in this menu, System Settings, pg . -
Page 17: Responding To Trouble Alerts
To ensure that all system components are operating under optimal conditions, the system continually polls all of the wired and wireless sensors paired with the system . It also continuously checks the 2GIG EDGE Panel to ensure that it is operating properly . -
Page 18: Burglary Protection
The system is also programmed by the installer to notify you about different events . For example, when you open a perimeter door, it transmits a status message to the 2GIG EDGE Panel . The panel then shows that the door is open and the system announces the door’s voice descriptor . -
Page 19: Bypassed Sensors
The installer can pair your system with one or more wireless keyfobs to give you the ability to arm/disarm your system away from, but within range of, the Control Panel using the keyfob’s buttons . The 2GIG EDGE Security & Smart Home System can be paired to work with a maximum of 32 wireless keyfobs . -
Page 20: Sample Burglary Alarm Plan
DINING BATH CP: CONTROL PANEL DW: DOOR/WINDOW SENSOR PIR: MOTION DETECTOR GB: GLASS BREAK SENSOR RK: REMOTE KEYPAD ES: EXTERNAL SIREN DC: DOORBELL CAMERA GARAGE TH: THERMOSTAT MAIN AND SIDE GARAGE DOOR SENSORS (WITH ENTRY/EXIT DELAY) 2GIG EDGE User Guide... -
Page 21: Arming The System
Force Bypassing, pg . 23 . TIP: If you have purchased a keyfob (or multiple fobs) to control the 2GIG EDGE Security & Smart Home System, you can also arm the system using your keyfob . See Arming the System Using a Keyfob, pg . -
Page 22: Arm The System (Away Mode)
10 arm itself in Stay Mode . seconds . Once the countdown expires, occupants will not be able to enter or exit through protected doors and windows without triggering the burglary alarm or Entry Delay . 2GIG EDGE User Guide... -
Page 23: Force Bypassing
Opening a Sensor When the System is Disarmed When a protected door or window is opened while the system is disarmed, the 2GIG EDGE Panel responds as WARNING!! A bypassed burglary protection sensor follows: does NOT provide security protection when the »... - Page 24 . This changes the system’s status back to System Not System Not Ready to Arm—Sensors Not Ready List Ready to Arm and moves the sensor to the Sensors Not Ready list . 2GIG EDGE User Guide...
-
Page 25: Use The Quick Exit Button
If you arm the system and an Exit/Entry door is left in a violated state or condition at the time the Exit Delay countdown expires (for example, the door you exit from doesn’t close behind you), the 2GIG EDGE Panel sounds the local alarm and the Entry Delay countdown begins . -
Page 26: Disarming The System
The system is disarmed . If protected doors and windows are closed, the system sounds the System Disarmed, Ready to Arm announcement . If protected doors or windows are open, the system sounds the System Disarmed Not Ready to Arm announcement . 2GIG EDGE User Guide... -
Page 27: Disarm The System
Disarm the System Disarm the System When the system is armed, the Armed (Stay or Away) screen is displayed . To disarm the system: 1 . Tap the DISARM button . 2 . To disarm with Facial Recognition, align the user’s face within the frame of the camera, slightly moving the head from side to side . - Page 28 5 . Tap UPDATE . Facial Recognition Profile - Update NOTE: More than one Update may need to be performed, An update option will be created with each "Face not recognized" event, Each must be updated separately . 2GIG EDGE User Guide...
-
Page 29: Transmit A User Duress Report
6 . Tap to select/deselect new images captured by Update Profile - Select Images the panel's camera to associate them with the current profile. 7 . Confirm that the photos belong to the person who's profile is being updated. Photos are associated with the user code used to disarm panel after a Facial Recognition update event . -
Page 30: Transmit A Duress Signal When System Is Disarmed
. For ANSI/SIA CP-01-2010 compliance, the default setting is 30 seconds . For UL 1023: Household Burglar Alarm Units compliance, this setting may be configured to a maximum of 45 seconds . 2GIG EDGE User Guide... -
Page 31: Clearing An Alarm
Clearing an Alarm If an alarm occurs while you are away, the 2GIG EDGE Panel’s Piezo Sounder will sound for a preset amount of time (as defined by the Burglary Bell Cutoff Time and/or the Fire Bell Cutoff Time) . Upon entry, the system emits repeated beeps to warn you that an alarm was set off while you were away . -
Page 32: Clear The Alarm History
After an alarm is activated on the system while you are way, a notification message appears in the Alarm History . To clear the alarm history: 1 . Tap the Message system icon . Then tap Alerts . 2GIG EDGE User Guide... -
Page 33: Emergency Features
2 . Review the Alarms list . Then tap CLEAR Alarms Screen ALARM HISTORY . Emergency Features 24-Hour Alarm Buttons 24-Hour Alarm Buttons Three 24-hour alarm buttons can be shown or hidden by the installer on the Control Panel’s touchscreen: Panic, Fire, and Emergency . -
Page 34: Activate An Emergency Alarm
Bypasses: Keeps a record of when zone sensors are bypassed and unbypassed . » Alerts: Keeps a record of when the 2GIG EDGE Panel or a zone issue an alert . For example, low battery, AC power loss, or tamper conditions . -
Page 35: Filtering History
At the History screen, tap one or more check boxes to add or remove filters. System Info System Info Screen The System Info screen shows the following information about your 2GIG EDGE Panel (depending on the features that are active in your system): » » Serial Number Z-Wave Version »... -
Page 36: Fire And Carbon Monoxide Protection
The system’s fire and emergency protection features are always protecting the premises . NOTE: A professional installer must ensure that all Smoke/Heat Alarms are installed in compliance with all national, regional, and local laws, statutes, and guidelines . 2GIG EDGE User Guide... -
Page 37: Silence A False Fire Alarm
NOTE: For Smoke/Heat Alarms and CO Detectors, the Clear Alarm History button will not permit you to clear any history until the 2GIG EDGE Panel receives a message from the sensor that it has returned to normal operations . NOTE: If Smart Areas are configured, the Fire Alarm must be acknowledged and cleared in each Smart Area. This can be done at a keypad assigned to that area or by using the Smart Areas button on the home screen . -
Page 38: Alarm .Com Setup
ALARM .COM SETUP The Alarm .com mobile app allows you functional access to your 2GIG EDGE system using your Apple iOS or Android™ smart phone . To get started, download the app from the Apple App Store or on Google Play . -
Page 39: Video
Video View Live Video, save video clips set rules for recording or adjust video settings . Automation Click Add New Rule to set a Trigger, Action and Timeframe for the new automated action . Once a Rule is created, you can set Schedules, Scenes, Arming Schedules and setup Auto Re- Arming . -
Page 40: Settings
Login . Account Management Edit Account Information, System Information and Property Information . Devices Manage devices and settings . Geo-Services Create geo-fences and configure location features. Visit www .alarm .com for more feature information . 2GIG EDGE User Guide... -
Page 41: The Alarm .Com Mobile App
THE ALARM .COM MOBILE APP Arming When the system is disarmed, the System DISARMED screen ( ) is displayed . To arm the system, tap SYSTEM DISARMED ( ) . Tap Arm (Stay) or Arm (Away) . When armed, Safe ARMED (STAY or AWAY) is displayed with a red icon ( Disarming When the system is armed, the Armed (Stay or Away) (... -
Page 42: System Settings
SYSTEM SETTINGS Settings Icon on Home Screen At the Home Screen, tap the Settings Icon ( ) to view 2GIG EDGE Panel Settings . Settings - Screen Option Screen Settings - Screen Use the Screen feature to adjust the screen brightness, backlight timeout, screensaver features and to place the touchscreen into Clean Mode . -
Page 43: Clean Screen
Screensaver: My Photos Screen Saver - Replace Photos 1 . On the Screensaver option, tap > . 2 . To display your own photos: a . Create a folder on a USB flash drive named: “Slideshow” . NOTE: The USB flash drive must be formated FAT/FAT32 . -
Page 44: Network
Screen, and tap CONNECT . Forget Network Wireless Network Setup Tapping FORGET NETWORK disconnects the 2GIG EDGE Panel from the wireless network and erases the password so that it will not automatically reconnect to the network . 2GIG EDGE User Guide... -
Page 45: Join Other Network
Join Other Network Join Other Network Tapping Join Other Network allows you to join a network not shown in the list . 1 . Return to the Wireless Network screen . 2 . Tap JOIN OTHER NETWORK . 3 . Enter the wireless network name, then tap NEXT . Other Network Name 4 . -
Page 46: Wps
WPS Button Tapping WPS allows you to connect securely to routers that support WPS . 1 . Tap WPS on 2GIG EDGE Panel . 2 . Tap Connect . WPS Authentication Started 3 . Locate and press the WPS on your router . 2GIG EDGE Panel will securely connect with the router . -
Page 47: Users
Users Settings The Users menu lets you add, edit, and delete users from the system . NOTES: To use this feature, you must know the Master User Code . The system may be configured for 4 or 6-digit pin codes . Consult with your installer to determine the pin code length of the system . -
Page 48: Capture A Profile
Facial Recognition feature . Biometric Information Privacy Policy and Consent Capture a Profile Capturing Your Profile 1 . At the Capture Your Profile Screen, tap BEGIN to get started . 2GIG EDGE User Guide... -
Page 49: Profile - Facial Recognition
Profile - Facial Recognition Facial Recognition - Step 1 1 . On-screen instructions guide you through the process of capturing your profile. 2 . The subsequent profile steps will instruct you to Capture Profile slightly move your head in specific directions to complete the Facial Recognition process . -
Page 50: Capturing Your Avatar
Facial Recognition Modes Recognition Modes you’d like to use with Facial Recognition, then tap NEXT . 6 . Tap NEXT . Assign Bluetooth Device 7 . The panel scans for discoverable Bluetooth Scanning for Bluetooth Devices devices . 2GIG EDGE User Guide... - Page 51 8 . Once the phone is found, tap > to the right of the Assign Bluetooth Device phone name . NOTE: Make sure your phone is in Pairing Mode . If the phone doesn't appear in the list of available devices, tap RESCAN .
-
Page 52: Editing A User
2 . Tap the pencil icon ( ) next to the Duress user . 3 . At the Edit Duress User screen, tap the Active Activate Duress Code toggle button next to Account Status to activate Duress code setup . 2GIG EDGE User Guide... -
Page 53: Enable Facial Recognition
4 . Enter a new Duress Code . Enter Duress Code 5 . Confirm the new code. Confirm Duress Code Duress Code Added 6 . If desired, tap the pencil icon ( ) next to Display Name to change “Duress” to another name . NOTE: To change an existing Duress Access Code, tap the pencil icon ( ) for Access Code,... -
Page 54: Smart Home Settings
Smart Home Settings Refer to the 2GIG EDGE Smart Home manual . Bypass Sensors Bypass Sensors You can manually bypass a sensor using the Bypass Sensors button( ) in the System Settings menu . When you need to bypass one or more perimeter or interior sensors, it is most common to manually bypass the sensor . -
Page 55: Chimes
Chimes Sensor Chimes The master user can assign chimes to sensors to provide notification anytime a sensor is opened. 1 . At the System Settings screen, tap Sensor Chimes ( Select Sensor Chime 2 . Select a sensor from the list . 3 . -
Page 56: Date & Time
1 . Tap Sensor Tests ( ) . This places the 2GIG EDGE Panel into Walk Test Mode and transmits a Walk Test Started report to the Central Station . 2 . At the Sensors Test screen, review the list of sensors installed with your system . -
Page 57: Panel Tests
Panel Tests Panel Tests Tests the function of the 2GIG EDGE Panel’s audio and status LED . 1 . Tap Panel Tests ( 2 . Tap Button LED Test; Emergency, White . A confirmation message appears. 3 . Tap one of the following buttons: •... -
Page 58: Network Tests
. 3 . Tap UPDATE to begin the USB update process . NOTE: Red icons next to a specific requirement indicates that the test failed . Remedy the error, then repeat steps 1 through 3 . 2GIG EDGE User Guide... -
Page 59: Limited Warranty
Copyright © 2021 Nortek Security & Control LLC. All Rights Reserved. U.S. Patent D727,857. Australian Patent No. 357098. Additional Patents Pending. The 2GIG, 2GIG EDGE, GoControl, and Linear logos are registered trademarks of Nortek Security & Control LLC in the United States and/or other countries. Other Nortek Security &... - Page 60 A L A R M D E A L E R I N F O R M A T I O N Company Name: Your Account Number: Installation Date: 10029908 Rev-A 2GIG EDGE User Guide...
Need help?
Do you have a question about the EDGE and is the answer not in the manual?
Questions and answers