Steelcase c:scape Manual
Non-sliding desk and supports
Hide thumbs
Also See for c:scape:
- Manual (24 pages) ,
- Replacement manual (5 pages) ,
- Quick manual (2 pages)
Table of Contents
Advertisement
Quick Links
"CUTOUT" VERSION
WORKSURFACE
If you have a problem, question, or request, call
your local dealer, or Steelcase Line 1 at
888.STEELCASE (888.783.3522)
for immediate action by people who want to help you.
(Outside the U.S.A., Canada, Mexico, Puerto Rico,
and the U.S. Virgin Islands, call: 1.616.247.2500)
Or visit our website: www.steelcase.com
©
2013 Steelcase Inc.
Grand Rapids, MI 49501
U.S.A.
Printed in U.S.A.
Furniture should be installed in sequence shown below.
1
BEAM
"SCALLOP" VERSION
WORKSURFACE
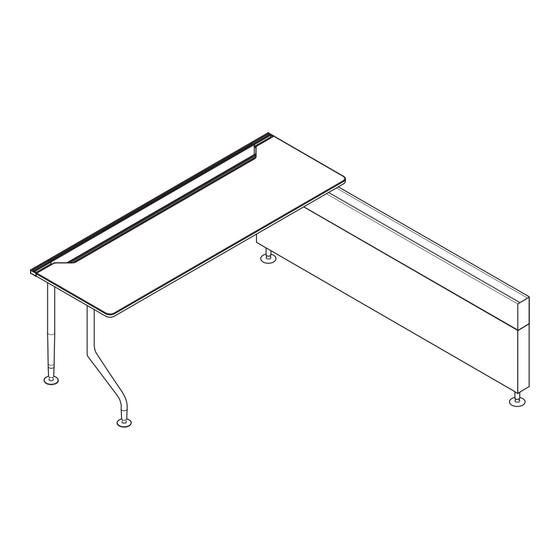
c:scape
™
Non-Sliding Desk and Supports
2
3
4
MID STORAGE
DESKING
POWER
THIS INSTALLATION SEQUENCE IS HERE.
Topic
5
6
LOW STORAGE
PRIVACY
Table of Contents
Page
2
3-4
5
6
7
8
9
10
11
12
13
14
15
16
17
18-19
20-21
Page 1 of 21
939505503 Rev A
Advertisement
Table of Contents

Related Manuals for Steelcase c:scape


Summary of Contents for Steelcase c:scape
-
Page 1: Table Of Contents
Ensuring a Level Surface Freestanding Application If you have a problem, question, or request, call Mounted Perpendicular to Beam your local dealer, or Steelcase Line 1 at Mounted Perpendicular to Storage 888.STEELCASE (888.783.3522) Back-to-Back Desks Perpendicular to Beam for immediate action by people who want to help you. -
Page 2: Un-Cartoning And Supporting
Un-Cartoning and Supporting Remove cartoning/packaging materials. NOTE: The ‘cutout’ version worksurface will have a felt liner for the connect zone trough. NOTE: There is one (1) package inside the understructure frame. Do not throw this away!! a. Hardware package. Rest understructure on some type of supports. -
Page 3: Attaching And Adjusting Legs
Attaching Legs NOTE: It's easier to pre-set the heights of the legs before attaching them to the frame (see next page). Post legs attach in the "A" position. "L" legs attach in the 24" or 30" position depending on the depth of the worksurface being applied. - Page 4 Major Vertical Minor Vertical Adjusting Legs Adjustment Adjustment Loosen set screw using a 3/32" hex drive, Spin glide base to adjust raise or lower to desired height and tighten screw. glides. Glide has 3/4" of adjustment. NOTE: Ensure set screw is properly seated in detent of desired height.
-
Page 5: Adjusting Height Of Tether Brackets
TIP: Tether brackets arrive from the factory adjusted for a 28-1/2" desk height. USE "S" POSITION Adjusting Height of WHEN ATTACHING TO LOW STORAGE Tether Brackets USE "B" POSITION WHEN ATTACHING Loosen set screws using a TO BEAM 3/32" Allen/hex drive. Loosen until upper "L"... -
Page 6: Assembling Tether Brackets To Beam
Beam Storage Unit w/ Connect Zone Assembling Tether Brackets to Beam or Storage Rail NOTE: If tether is in lowest 2 positions, tether will stick down below the reveal and trap skin on. Beams and storage rails have Mount skin first, then lower tether holes on their undersides, for discrete brackets. -
Page 7: Locating Tether Brackets To The Beam (Perpendicular Application)
16-1/2" 2" Locating Tether Brackets BEAM to the Beam (Perpendicular Application) Locate the desired position along the beam for the back edge of the desk. TETHER BRACKET First tether should be 2" from the position to “CUTOUT” VERSION SHOWN the edge of the tether. Attach tether to beam. Next tether should be 16-1/2"... -
Page 8: Locating Tether Brackets To The Beam
Locating Tether Brackets to the Beam (Parallel Application) Locate the desired position along the beam for TETHER the edge of the desk. BRACKET First tether should be 2" LENGTH OF DESK -6" from that position to the edge of the tether. Attach BEAM tether to beam. -
Page 9: Attaching Desk To Tether Brackets
Attaching Desk to Tether Brackets 3/8-16 X 3/4" BOLT Place the understructure onto the tether brackets. Align mounting holes of end support with holes in tethers. Connect together using two (2) 3/8-16 x 3/4" bolts. Tighten securely using a 3/16" hex drive. Page 9 of 21 939505503 Rev A... -
Page 10: Installation Of Electrical Power And Data
&/or data into the desk understructure. 939549924 c:scape Modular Desk Power and Data 939549925 c:scape Desk Hardwire Power 939549926 c:scape Desk Connect Zone Power Strip 939549927 c:scape Receptacles - Desk, Base or Storage CUTOUT CUTOUT Page 10 of 21... -
Page 11: Installing Worksurface To Understructure
Installing Worksurface to Understructure SPACER Place the six (6) spacers into the holes on the understructure as shown. Place the worksurface onto the understructure and align with the pilot holes that are on the bottom of the worksurface. Install six (6) #10-10 x 1” truss head wood screws as shown. -
Page 12: Ensuring A Level Surface
Ensuring a Level Surface (Adjusting Desk Front) (To remove any bow in top if necessary) Loosen front screw with a 3/16" hex driver. Slide bracket forward until worksurface is level. Tighten screw. ADJUSTING DESK FRONT Page 12 of 21 939505503 Rev A... -
Page 13: Freestanding Application
Freestanding Application Rest understructure on supports. Pre-set the height of legs and attach. If you are installing a ‘cutout’ version worksurface, you will need to install the felt liner into the connect zone trough. Install any electrical (RPT's). Install worksurface onto understructure. -
Page 14: Mounted Perpendicular To Beam
3/8-16 X 3/4" BOLT Mounted Perpendicular to Beam Attach legs to understructure •Posts use "A". •"L" leg uses 24" or 30" depending on worksurface depth. Attach tethers to beam •1st tether is 2" from back edge of desk. •2nd tether is 16-1/2" edge to edge of 1st tether. -
Page 15: Mounted Perpendicular To Storage
3/8-16 X 3/4" BOLT Mounted Perpendicular to Storage Attach legs to understructure •Posts use "A". •"L" leg uses 24" or 30" depending on worksurface depth. Loosen set screw on each tether bracket assembly and remove upper ‘L’ bracket. Attach the lower tether assemblies to storage. -
Page 16: Back-To-Back Desks Perpendicular To Beam
21" Back-to-Back Desks 21" Perpendicular to Beam Attach legs to understructure •"L" leg uses 24" or 30" depending on worksurface depth. •Attach shared plate to top of post leg. NOTE: You need to lower leg height by 1 detent (1/2"). •Attach shared support plate "G"... -
Page 17: Mounted Parallel To Beam
Mounted Parallel to Beam Attach legs to understructure •"L" leg uses 24" or 30" depending on worksurface depth. Attach tethers to beam •1st tether 2" from desired edge of desk location. •2nd tether specing depends on width of desk and types of attachment: -Single desk: 6"... - Page 18 3/8-16 X 3/4" BOLT Benching - Mounted Parallel to Beam Tethered to Storage Attach leg to understructure. •"L" leg uses 24" or 30" depending on worksurface depth. Attach tethers to beam. •Sub-assemble tether "position B" and shared plate center position. •Lower shared tether 1 detent (1/2") to account for plate.
-
Page 19: Benching - Mounted Parallel To Beam Tethered To Storage
3/8-16 X 3/4" BOLT Benching - Mounted Parallel to Beam Tethered to Storage (continued) Install power and data components. Install worksurface onto understructure. Lower worksurface assembly into tether brackets on storage unit. Lower to proper height and tighten set screws on tether bracket. -
Page 20: Most Common Desking Applications
DESK DESK TETHER SHARED POST "L" LOW STORAGE BEAM UNDERSTRUCTURE BRACKET SUPPORT PLATE (w/ CONNECTION ZONE) Component Key Most Common Desking Applications NOTE: All applications on this sheet assume a 24" deep desk. If a 30" deep desk is used, replace 24 with 30. Desk Understructure Freestanding Tethered to Beam... - Page 21 DESK DESK TETHER SHARED POST "L" LOW STORAGE BEAM UNDERSTRUCTURE BRACKET SUPPORT PLATE (w/ CONNECTION ZONE) Component Key Most Common Desking Applications NOTE: All applications on this sheet assume a 24" deep desk. If a 30" deep desk is used, replace 24 with 30. Desk Understructure Tethered to Beam Parallel Tethered Perpendicular...
Need help?
Do you have a question about the c:scape and is the answer not in the manual?
Questions and answers