Table of Contents
Advertisement
Advertisement
Chapters
Table of Contents
Troubleshooting

Subscribe to Our Youtube Channel
Summary of Contents for Conair Carousel Plus D Series
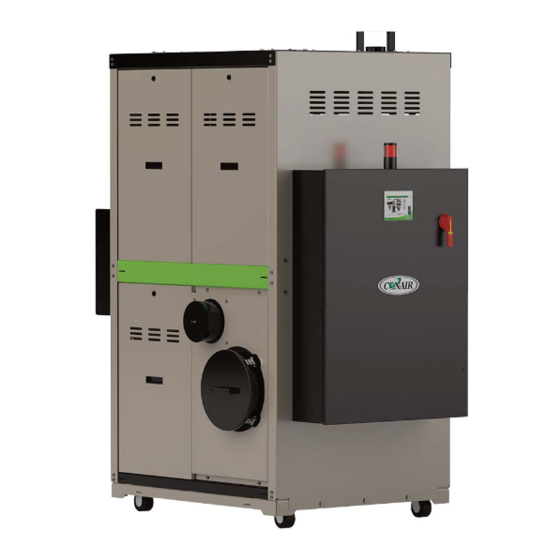
- Page 1 www.conairgroup.com U S E R G U I D E U GD 071 -091 9 Carousel Plus Dryer D Series Models 600 through 5000 with DC-C TouchView Technology Corporate Office: 724.584.5500 Instant Access 24/7 (Parts and Service): 800.458.1960 Parts and Service: 814.437.6861...
- Page 2 Application File Name: DISCLAIMER: Conair nor its employees shall be liable for errors contained in this User Guide or for inciden- tal, consequential damages in connection with the furnishing, performance or use of this information. Conair makes no warranty of any kind with regard to this information, including, but not limited to the implied warranties of merchantability and fitness for a particular purpose.
-
Page 3: Table Of Contents
How the Carousel Plus Dryer System works ......2-4 Specifications: Carousel Plus D Series Dehumidifying Dryers........2-6 I n s t a l l a t i o n Unpacking the boxes . - Page 4 (W1300-5000) ......... . 3-17 Mounting a loader on the hopper .
- Page 5 Tr o u b l e s h o o t i n g Before beginning ..........6-2 A few words of caution .
- Page 6 l Ta b l e o f C o n t e n t s...
- Page 7 S E C T I O N I n t r o d u c t i o n P u r p o s e o f t h e u s e r g u i d e ....1 - 2 H o w t h e g u i d e i s o r g a n i z e d .
-
Page 8: I N T R O D U C T I O N
P u r p o s e o f t h e U s e r G u i d e This User Guide describes the Conair Carousel Plus Dryer with TouchView Technology and explains step-by-step how to install, operate, maintain and repair this equipment. -
Page 9: Using The Carousel Plus Dryer With Your System
U s i n g t h e C a r o u s e l P l u s D r y e r w i t h Yo u r S y s t e m The Conair Carousel Plus Dryer with TouchView Technology used within your system is factory configured to be used as a central dryer or in conjunction with ResinWorks or a dedicated hopper using a Heater Pack or GasTrac. -
Page 10: At T E N T I O N
AT T E N T I O N : R e a d t h i s s o n o o n e g e t s h u r t We design equipment with the user’s safety in mind. You can avoid the potential hazards identified within this system by following the procedures outlined below and elsewhere in the User Guide. -
Page 11: Attention: Read This So No One Gets Hurt
AT T E N T I O N : R e a d t h i s s o n o o n e g e t s h u r t ( c o n t i n u e d ) We design equipment with the user’s safety in mind. -
Page 12: How To Use The Lockout Device
A lockable device has been provided to isolate this product from potentially hazardous electricity. Lockout is the preferred method of isolating machines or equipment from energy sources. Your Conair product is equipped with the lockout device pictured. To use the lockout device: Stop or turn off the equipment. -
Page 13: D E S C R I P T I O N
S E C T I O N D e s c r i p t i o n W h a t i s t h e C a r o u s e l P l u s D r y e r ? ... . . 2 - 2 Ty p i c a l a p p l i c a t i o n s . -
Page 14: Typical Applications
(ResinWorks) with separate heat source for each hopper. Dryer on the floor, hopper(s) connected to Conair GasTrac delivery air heater. The Carousel Plus D Series Dryer can be used successfully in applications that require: • A contamination-free drying environment. •... - Page 15 NOTE: The aftercooler reduces the temperature of air returning from the drying hopper, improving the efficiency of the desiccant. NOTE: All Carousel Plus D Series 600+ Dryers use an aftercooler located after the process blower. D e s c r i p t i o n l...
- Page 16 H o w I t W o r k s The Process (Drying) Cycle Process air from the hopper is pulled into the dryer, through the process filter and then into the process blower inlet. Air exits the process blower and then enters the aftercooler, then passes through the desiccant wheel, where moisture is removed.
- Page 17 H o w I t W o r k s ( c o n t i n u e d ) Power Purge D2400, 4000 and 5000 models have a Power Purge (cooling fan) feature integral to the desiccant wheel assembly. Protected under United States Patent No.
-
Page 18: Specifications: Carousel Plus D Series
S p e c i f i c a t i o n s : C a r o u s e l P l u s D S e r i e s D e h u m i d i f y i n g D r y e r s See the next page for illustrations 2 - 6 l D e s c r i p t i o n... - Page 19 S p e c i f i c a t i o n s : C a r o u s e l P l u s D S e r i e s D e h u m i d i f y i n g D r y e r s ( c o n t i n u e d ) D e s c r i p t i o n l 2 - 7...
- Page 20 2 - 8 l D e s c r i p t i o n...
-
Page 21: I N S T A L L A T I O N
S E C T I O N I n s t a l l a t i o n Unpacking the boxes ....... 3-2 Preparing for installation. -
Page 22: Unpacking The Boxes
U n p a c k i n g t h e B o x e s The Carousel Plus D Series Dryer comes in one to four boxes, depending on the model and options ordered. The box(es) could include (depending on the options selected): NOTE: Depending on what •... -
Page 23: Preparing For Installation
P r e p a r i n g f o r I n s t a l l a t i o n The Carousel Plus D Series Dryer is easy to install if you plan the location and prepare the mounting area properly. -
Page 24: Positioning The Dryer On The Floor
I n s t a l l i n g t h e R e g e n e r a t i o n E x h a u s t Desiccant Cable Tie C o v e r The Carousel Plus D Series Dryer’s regeneration exhaust cover must be installed. To install the regeneration exhaust cover: Remove the exhaust cover that is attached to the dryer’s shipping pallet. -
Page 25: Connecting The Setback Rtd Probe
C o n n e c t i n g t h e D e l i v e r y A i r R T D P r o b e The delivery air RTD probe monitors the temperature of the drying air as it enters the hopper. If the probe is not installed correctly, temperature readings will be inaccurate. -
Page 26: Installing The Return Air Inlet And Air Outlet Adapters
O u t l e t A d a p t e r s ( D 1 3 0 0 - 5 0 0 0 ) The Carousel Plus D Series Dryer’s return air inlet and air outlet adapters will be removed when the dryer is shipped To install the return air inlet and air outlet adapters: Remove the return air inlet and air outlet adapters that are attached to the dryer’s... -
Page 27: C O N N E C T I N G T H E M A I N Po W E R
Maximum working distance is 100 feet {30 meters}. Consult Conair or a quali- fied electrician to deter- mine gauge of wire required for distance. I n s t a l l a t i o n l... -
Page 28: Opening The Dryer Doors
O p e n i n g t h e D r y e r D o o r s ( D 1 3 0 0 - 5 0 0 0 ) Carousel Plus D Series 600-5000 Dryers de- signed after December 2012 will have lock- ing removable side panels. -
Page 29: Connecting The Air Hoses To A Single Hopper
C o n n e c t i n g t h e A i r H o s e s t o a S i n g l e H o p p e r ( D 1 3 0 0 - 5 0 0 0 ) Depending on how your dryer was configured, using the two flexible hoses or the hard piping kit provided, connect the inlet of the Heater Pack and outlet of the drying hopper to the dryer. -
Page 30: Connecting The Air Hoses To Resinworks
C o n n e c t i n g t h e A i r H o s e s t o a R e s i n - W o r k s Using the two flexible hoses provided, connect the delivery air and return air manifolds of the ResinWorks to the dryer. -
Page 31: Connecting The Drying To The Hopper
NOTE: Because the D600 - 5000 models require a separate heat source for the delivery air, all references to this heat source will be identified as a Heater Pack, or a Conair “HTC” (Hopper Temperature Controller). When using this dryer with an HTC, reference the User Guide supplied with the HTC for installation instructions. -
Page 32: Connecting Air Hose Adapters
C o n n e c t i n g A i r H o s e A d a p t e r s Depending on the hopper you purchased you may need to install an air hose adapter to con- NOTE: Adapters should be nect the hopper to your dryer. - Page 33 If a manual shut off valve is used, it should be mounted on the inlet TIP: If an optional flow line. Conair recommends that both the control is also being in- supply and return water lines have a shut stalled with the aftercooler, off valve.
- Page 34 If a manual shut off valve is used, it should be mounted on the inlet line. Conair recommends that a IMPORTANT: If an optional flow con- manual shut off valve be used on both trol is also being installed with the the supply and return lines.
-
Page 35: C H E C K I N G F O R P R O P E R A I R F L O W
C h e c k i n g f o r P r o p e r A i r F l o w IMPORTANT: This procedure must be performed before loading material into the hopper. CAUTION: If the airflow direction is incorrect due to improper phase connection, material from the hopper can be pulled back into the dryer, causing permanent damage to this equipment. - Page 36 NOTE: On initial test (first time in Dryer I/O Test Mode) use the arrows to select the blower and press enter, then holding the on/off button runs the blower and releasing it stops the blower. 3 - 1 6 l I n s t a l l a t i o n...
- Page 37 C h e c k i n g f o r P r o p e r A i r F l o w ( c o n t i n u e d ) WARNING: All wiring, dis- If airflow is incorrect disconnect power, follow proper lockout procedures and swap any connects and fuses should 2 of the 3 incoming main power wires.
-
Page 38: Mounting A Loader On The Hopper
M o u n t i n g a L o a d e r o n t h e H o p p e r If you have a Conair loader or vacuum receiver, you can use the flange and mounting clips provided on the top of the hopper. -
Page 39: Testing The Installation
Te s t i n g t h e I n s t a l l a t i o n You have completed the installation. Now it’s time to make sure everything works. Check to ensure that there is no material in the drying hopper. If you have mounted an optional vacuum receiver on the hopper, disconnect the material inlet hose at the source. - Page 40 3 - 8 l I n s t a l l a t i o n...
-
Page 41: O P E R A T I O N
S E C T I O N O p e r a t i o n The Dryer System control panel ....... . . 4-2 How to navigate the control screens . - Page 42 D r y e r S y s t e m C o n t r o l Pa n e l On power-up, the Carousel Plus Dryer control displays the initial system Home screen. NOTE: The bottom of the Home screen displays valuable infor- mation, including the current date and time, the HMI software...
-
Page 43: How To Navigate The Control Screens
H o w t o N a v i g a t e t h e C o n t r o l S c r e e n s Navigate through the DC-C control screens by touching any navigation "buttons". Navigation Buttons Touching the navigation buttons will take the user... - Page 44 H o w t o N a v i g a t e t h e C o n t r o l S c r e e n s ( c o n t i n u e d ) The user name, password and other information can be entered using the pop-up keyboard window that appears when an appropriate field is touched.
- Page 45 H o w t o N a v i g a t e t h e C o n t r o l S c r e e n s ( c o n t i n u e d ) All beveled grey buttons on the DC-C control screen are selectable and will direct you to an- other screen.
-
Page 46: Dc-C Control Panel
T h e D C - C C o n t r o l Pa n e l Below is a screen from the DC-C while in operation. This screen is shown as a sample of functionality of a typical DC-C screen. See the functional descriptions below. The follow- ing pages are helpful in understanding how to use the DC-C Control. -
Page 47: Operation - Resinworks Configuration
O p e r a t i o n - R e s i n W o r k s C o n f i g u r a t i o n The following pages (screen flow charts, screen descriptions, and basic operation) describe the operation of the dryer when factory configured as a ResinWorks dryer attached to multi- ple hoppers, or as a central dryer attached to one or multiple hoppers with delivery air heat at each hopper. -
Page 48: Control Function Flow Charts
C o n t r o l F u n c t i o n F l o w C h a r t s F r o m t h e H o m e s c r e e n Navigation Help Active... -
Page 49: Control Functions Flow Chart
C o n t r o l F u n c t i o n F l o w C h a r t s F r o m t h e N a v i g a t i o n s c r e e n Dryer Settings Hopper... -
Page 50: Control Functions Flow Chart
C o n t r o l F u n c t i o n F l o w C h a r t s F r o m t h e N a v i g a t i o n s c r e e n Dryer Settings Active... - Page 51 C o n t r o l F u n c t i o n F l o w C h a r t s F r o m t h e S e t u p s c r e e n Navigation Pop up - from edit...
- Page 52 C o n t r o l F u n c t i o n F l o w C h a r t s F r o m t h e A l a r m s c r e e n Alarms Home Acknowledge...
- Page 53 C o n t r o l F u n c t i o n F l o w C h a r t s F r o m t h e Tr e n d S e l e c t i o n s c r e e n Temperature Navigation Dewpoint...
- Page 54 C o n t r o l F u n c t i o n F l o w C h a r t s F r o m t h e L o g i n / L o g o u t s c r e e n Home Login Screen 4 - 1 4...
- Page 55 C o n t r o l F u n c t i o n D e s c r i p t i o n s - R W C o n f i g u r a t i o n Home Screen Navigation Buttons Touching the navigation...
- Page 56 C o n t r o l F u n c t i o n D e s c r i p t i o n s - R W C o n f i g u r a t i o n ( c o n t i n u e d ) Navigation Screen To access the Hopper Set-up Selection screen:...
- Page 57 C o n t r o l F u n c t i o n D e s c r i p t i o n s - R W C o n f i g u r a t i o n ( c o n t i n u e d ) Hopper Set-up Screen NOTE: Depending on...
- Page 58 C o n t r o l F u n c t i o n D e s c r i p t i o n s - R W C o n f i g u r a t i o n ( c o n t i n u e d ) Hopper Setpoint Settings screen NOTE: Depending on which options...
- Page 59 C o n t r o l F u n c t i o n D e s c r i p t i o n s - R W C o n f i g u r a t i o n ( c o n t i n u e d ) Dryer Settings screen To access the ResinWorks Dryer Settings screen:...
- Page 60 C o n t r o l F u n c t i o n D e s c r i p t i o n s - R W C o n f i g u r a t i o n ( c o n t i n u e d ) Autostart Setup screen NOTE: Proper login is required to...
- Page 61 C o n t r o l F u n c t i o n D e s c r i p t i o n s - R W C o n f i g u r a t i o n ( c o n t i n u e d ) ResinWorks Hopper Setup screen To access the ResinWorks Hopper Setup screen:...
- Page 62 NOTE: Hopper names can be Press the enter button when changed multiple times as neces- complete. sary. Conair recommends naming the hopper using whatever system Use steps 1 through 3 to works for your application. Some change the name of each hop-...
- Page 63 C o n t r o l F u n c t i o n D e s c r i p t i o n s - R W C o n f i g u r a t i o n ( c o n t i n u e d ) Communications screen Press the Edit VNC button,...
- Page 64 C o n t r o l F u n c t i o n D e s c r i p t i o n s - R W C o n f i g u r a t i o n ( c o n t i n u e d ) I/O Test screen NOTE: Proper login is required to change these settings.
- Page 65 C o n t r o l F u n c t i o n D e s c r i p t i o n s - R W C o n f i g u r a t i o n ( c o n t i n u e d ) Alarm Setup screen NOTE: Proper login is required to change these settings.
- Page 66 Conair. When drying monitor is installed, low and high temperature alarms is visible and can be Conair’s Instant Access set at the same or different points in the dry- 24/7 Parts and Service ing hopper. number is 800-458-1960.
- Page 67 C o n t r o l F u n c t i o n D e s c r i p t i o n s - R W NOTE: Depending on your DC-C C o n f i g u r a t i o n ( c o n t i n u e d ) configuration, and system secu- rity, different users may not be...
- Page 68 C o n t r o l F u n c t i o n D e s c r i p t i o n s - R W C o n f i g u r a t i o n ( c o n t i n u e d ) Dry Air Temperature Trend To access the Dry Air Temperature...
- Page 69 C o n t r o l F u n c t i o n D e s c r i p t i o n s - R W C o n f i g u r a t i o n ( c o n t i n u e d ) NOTE: Using the scroll backward and scroll foward...
- Page 70 C o n t r o l F u n c t i o n D e s c r i p t i o n s - R W C o n f i g u r a t i o n ( c o n t i n u e d ) Alarms When an alarm occurs, an audible sound will be trig-...
- Page 71 O p e r a t i o n l 4 - 3 1...
- Page 72 C o n t r o l F u n c t i o n F l o w C h a r t s F r o m t h e H o m e s c r e e n Navigation Help Active...
- Page 73 C o n t r o l F u n c t i o n F l o w C h a r t s F r o m t h e N a v i g a t i o n s c r e e n Dryer Settings Active...
- Page 74 C o n t r o l F u n c t i o n F l o w C h a r t s F r o m t h e A l a r m s c r e e n Alarms Home Alarm Message Pop-up...
- Page 75 C o n t r o l F u n c t i o n F l o w C h a r t s F r o m t h e Tr e n d S e l e c t i o n s c r e e n Temperature Navigation Heater on...
- Page 76 C o n t r o l F u n c t i o n F l o w C h a r t s F r o m t h e S e t u p s c r e e n Navigation Pop up - from edit...
- Page 77 C o n t r o l F u n c t i o n F l o w C h a r t s F r o m t h e L o g i n / L o g o u t s c r e e n Home Log-in O p e r a t i o n l...
-
Page 78: Control Function Descriptions - Stand Alone Configuration
C o n t r o l F u n c t i o n D e s c r i p t i o n s - S t a n d A l o n e C o n f i g u r a t i o n Dryer Navigation Screen NOTE: On this Home screen, live data is displayed. - Page 79 C o n t r o l F u n c t i o n D e s c r i p t i o n s - S t a n d A l o n e C o n f i g u r a t i o n ( c o n t i n u e d ) Dryer Settings Screen To access the Dryer Detail screen:...
- Page 80 C o n t r o l F u n c t i o n D e s c r i p t i o n s - NOTE: Depending on which options your dryer has been configured with, S t a n d A l o n e C o n f i g u r a t i o n and whether or not you have the ( c o n t i n u e d ) Drying Monitor enabled, your...
- Page 81 C o n t r o l F u n c t i o n D e s c r i p t i o n s - S t a n d A l o n e C o n f i g u r a t i o n ( c o n t i n u e d ) Dryer HMI screen To access the Dryer Options screen:...
- Page 82 C o n t r o l F u n c t i o n D e s c r i p t i o n s - S t a n d A l o n e C o n f i g u r a t i o n ( c o n t i n u e d ) Autostart Setup screen NOTE: Proper login is required to...
- Page 83 C o n t r o l F u n c t i o n D e s c r i p t i o n s - S t a n d A l o n e C o n f i g u r a t i o n ( c o n t i n u e d ) Alarm Setup screen To access the Alarm Setup screen:...
- Page 84 C o n t r o l F u n c t i o n D e s c r i p t i o n s - S t a n d A l o n e C o n f i g u r a t i o n ( c o n t i n u e d ) Digital Output Test screen To access the Test screen:...
- Page 85 C o n t r o l F u n c t i o n D e s c r i p t i o n s - S t a n d A l o n e C o n f i g u r a t i o n ( c o n t i n u e d ) Alarms When an alarm occurs, an audible sound will be triggered...
- Page 86 Improper setting sequence or values will result in loss of communications. Always record your new settings before making any changes. Always set the PLC first! NOTE: Conair’s default IP address To apply new Ethernet settings: setting for the DC-C control is 10.1.11.6 as shown in the graphic...
- Page 87 C o n t r o l F u n c t i o n D e s c r i p t i o n s - S t a n d A l o n e C o n f i g u r a t i o n ( c o n t i n u e d ) Trending NOTE: Depending on your DC-C...
- Page 88 C o n t r o l F u n c t i o n D e s c r i p t i o n s - S t a n d A l o n e C o n f i g u r a t i o n ( c o n t i n u e d ) Dry Air Temperature Trend To access the Dry Air Temperature...
- Page 89 C o n t r o l F u n c t i o n D e s c r i p t i o n s - S t a n d A l o n e C o n f i g u r a t i o n ( c o n t i n u e d ) Material Temperature Trends To access the Material Temperature Trends screen:...
- Page 90 4 - 5 0 l O p e r a t i o n...
- Page 91 O p e r a t i o n l 4 - 5 1...
-
Page 92: Dc-C System Security Levels
NOTE: Proper login may be re- quired to view certain screens or make changes to various Enter your username and settlings. Conair recommends password. Finish by pressing that the administrator logs in the Sign In button. first and changes the admin password. -
Page 93: Starting The Dryer
S t a r t i n g t h e D r y e r To start the dryer: Turn on the main power to the dryer and system components. Check to make sure that all disconnect dials are in the “ON” position. Fill the drying hopper with material. - Page 94 Any changes to the setpoint temperature once the dryer is operating will affect the on time value. To minimize energy usage, Conair recommends using the lowest setpoint tempera- ture that is required to dry your material and maintain the required material throat tempera- ture.
-
Page 95: Stopping The Dryer
S t o p p i n g t h e D r y e r The DC-C Dryer control is programmed to follow a procedure for proper stopping the dryer. Once the stop button has been pressed (or the Autostop time is reached), the heaters will be turned off (RW hopper heaters, heater pack, or other hopper heater) and the dryer blower will continue to run until the regen temperature reaches the factory set cooldown setpoint. -
Page 96: Stopping The Dryer In An Emergency
S t o p p i n g t h e D r y e r i n a n e m e r g e n c y To stop the dryer in an emergency: Rotate the rotary disconnect to the OFF position. Power will be immediately discon- nected from the control and the dryer. -
Page 97: M A I N T E N A N C E
S E C T I O N M a i n t e n a n c e P r e v e n t a t i v e m a i n t e n a n c e c h e c k l i s t ... 5 - 2 C h e c k i n g t h e d e w p o i n t . -
Page 98: Preventative Maintenance Checklist
P r e v e n t a t i v e M a i n t e n a n c e C h e c k l i s t Routine maintenance will ensure optimum operation and performance of the D Series Carousel Plus Dryer. - Page 99 P r e v e n t a t i v e M a i n t e n a n c e C h e c k l i s t ( c o n t i n u e d ) •...
-
Page 100: Checking The Dewpoint
C h e c k i n g t h e D e w p o i n t It is a good idea to monitor the dewpoint performance of your dryer periodically with a cali- brated portable dewpoint monitor, to ensure it is performing at maximum capacity. Even if your dryer has a dewpoint readout, comparing it to a portable instrument periodically will confirm that the dewpoint sensor and readout is performing properly. -
Page 101: Cleaning The Hopper
C l e a n i n g t h e H o p p e r CAUTION: Hot surfaces. Always protect yourself from hot surfaces inside and outside the dryer and drying hopper. IMPORTANT: The area inside the hopper is a confined The hopper, spreader cone, and discharge assembly should be cleaned thoroughly between space. -
Page 102: Cleaning The Process Filter
If the filter has been used and cleaned several times, it probably needs to be replaced with a new filter for Conair’s Instant Access optimum efficiency. 24/7 Parts and Service number is 800-458-1960. - Page 103 C l e a n i n g t h e P r o c e s s F i l t e r ( c o n t i n u e d ) C a r o u s e l P l u s D - s e r i e s D r y e r s 6 0 0 - 5 0 0 0 Place the clean filter in the dryer, and use the wing nut and washer to hold the filter in place.
-
Page 104: Cleaning The Regeneration Filter
OSHA and other safety regulations pertaining to ciency. Replace filters with the use of compressed air. a new filter when neces- sary. Conair’s Instant Access 24/7 Parts and Service number is 800-458-1960. Outside the U.S., dial 814-437-6861. -
Page 105: C L E A N I N G T H E A F T E R C O O L E R C O I L S
C l e a n i n g t h e A f t e r c o o l e r C o i l s You need to clean the aftercooler coils to keep them working efficiently. Cleaning frequency depends on the type and amount of material you process. - Page 106 C l e a n i n g t h e A f t e r c o o l e r C o i l s ( c o n t i n u e d ) Clean the assembly using a mild soap and water. Let the assembly dry thoroughly before installation.
-
Page 107: Inspecting Hoses And Gaskets
I n s p e c t i n g H o s e s a n d G a s k e t s Loose or damaged hoses and gaskets can allow moisture to seep into the closed-loop drying system. Follow the hose routing of all the hoses within the dryer and inspect all hoses, clamps, fittings, and gaskets. -
Page 108: Cleaning The Precooler Coils
C l e a n i n g t h e P r e c o o l e r C o i l s You need to clean the precooler coils to keep them working efficiently. Cleaning frequency depends on the type and amount of material you process. Stop the dryer and lockout the main power. -
Page 109: Cleaning The Volatile Trap On The
C l e a n i n g t h e Vo l a t i l e Tr a p o n t h e D e m i s t e r ( D 6 0 0 - 1 0 0 0 ) Stop the dryer and lockout the main power. -
Page 110: Cleaning The Volatile Trap On The
C l e a n i n g t h e Vo l a t i l e Tr a p o n t h e D e m i s t e r ( D 1 3 0 0 - 5 0 0 0 ) Stop the dryer and lockout the main power. -
Page 111: Cleaning The Dc-T Hmi Screen
C l e a n i n g t h e D C - D H M I S c r e e n Dirt, grease, or dust on the screen can make it difficult to see and use. Periodically clean the screen to keep dirt from accumulating on the screen. - Page 112 5 - 1 6 l M a i n t e n a n c e...
-
Page 113: Tr O U B L E S H O O T I N G
S E C T I O N Tr o u b l e s h o o t i n g B e f o r e b e g i n n i n g ..... . . 6 - 2 A f e w w o r d s o f c a u t i o n . -
Page 114: Before Beginning
B e f o r e B e g i n n i n g You can avoid most problems by following the recommended installation and maintenance procedures outlined in this User Guide. If you do have a problem, this section will help you determine what caused it and how to fix it. -
Page 115: A Few Words Of Caution
B e f o r e B e g i n n i n g ( c o n t i n u e d ) o Find the wiring and equipment diagrams that were shipped with your dryer. These diagrams are the best reference for correcting a prob- lem. -
Page 116: How To Identify The Cause Of A Problem
H o w t o I d e n t i f y t h e C a u s e o f a P r o b l e m Most dryer malfunctions are indicated in the pop up Alarm bar at the top of the control screen. - Page 117 H o w t o I d e n t i f y t h e C a u s e o f a P r o b l e m ( c o n t i n u e d ) When an alarm message is displayed: Press the “Acknowledge Alarm”...
- Page 118 H o w t o I d e n t i f y t h e C a u s e o f a P r o b l e m ( c o n t i n u e d ) Press the “Alarm Log”...
-
Page 119: Shutdown Alarms
S h u t d o w n A l a r m s When an alarm condition appears on the control screen, it may be a shutdown NOTE: Some alarms can be set for or a passive alarm. If the alarm is a shutdown alarm, the dryer will shutdown shutdown or passive. - Page 120 S h u t d o w n A l a r m s Central If an alarm occurs, a red dialog box is displayed on the dryer’s touch screen control. The When supplied for central dryer will shut down automatically to prevent damage to the equipment or personnel. The di- drying applications, these alog box will indicate whether the alarm is a shut down alarm or a passive alarm.
- Page 121 S h u t d o w n A l a r m s Central If an alarm occurs, a red dialog box is displayed on the dryer’s touch screen control. The When supplied for central dryer will shut down automatically to prevent damage to the equipment or personnel. The di- drying applications, these alog box will indicate whether the alarm is a shut down alarm or a passive alarm.
- Page 122 S h u t d o w n A l a r m s Central If an alarm occurs, a red dialog box is displayed on the dryer’s touch screen control. The When supplied for central dryer will shut down automatically to prevent damage to the equipment or personnel. The di- drying applications, these alog box will indicate whether the alarm is a shut down alarm or a passive alarm.
- Page 123 S h u t d o w n A l a r m s If an alarm occurs, a red dialog box is displayed on the dryer’s touch screen control. The dryer will shut down automatically to prevent damage to the equipment or personnel. The di- alog box will indicate whether the alarm is a shut down alarm or a passive alarm.
- Page 124 S h u t d o w n A l a r m s If an alarm occurs, a red dialog box is displayed on the dryer’s touch screen control. The dryer will shut down automatically to prevent damage to the equipment or personnel. The di- alog box will indicate whether the alarm is a shut down alarm or a passive alarm.
- Page 125 S h u t d o w n A l a r m s If an alarm occurs, a red dialog box is displayed on the dryer’s touch screen control. The dryer will shut down automatically to prevent damage to the equipment or personnel. The di- alog box will indicate whether the alarm is a shut down alarm or a passive alarm.
- Page 126 S h u t d o w n A l a r m s If an alarm occurs, a red dialog box is displayed on the dryer’s touch screen control. The dryer will shut down automatically to prevent damage to the equipment or personnel. The dialog box will indicate whether the alarm is a shut down alarm or a passive alarm.
- Page 127 S h u t d o w n A l a r m s If an alarm occurs, a red dialog box is displayed on the dryer’s touch screen control. The dryer will shut down automatically to prevent damage to the equipment or personnel. The di- alog box will indicate whether the alarm is a shut down alarm or a passive alarm.
-
Page 128: Passive Alarms
Pa s s i v e A l a r m s If an alarm occurs, a red dialog box is displayed on the dryer’s touch screen control. The Central dryer continue to operate, but this problem could prevent correct drying of your material. When supplied for central The dialog box will indicate whether the alarm is a shut down alarm or a passive alarm. - Page 129 Pa s s i v e A l a r m s If an alarm occurs, a red dialog box is displayed on the dryer’s touch screen control. The dryer continues to operate, but this problem could prevent correct drying of your material. The dialog box will indicate whether the alarm is a shut down alarm or a passive alarm.
- Page 130 Pa s s i v e A l a r m s If an alarm occurs, a red dialog box is displayed on the dryer’s touch screen control. The dryer continues to operate, but this problem could prevent correct drying of your material. The dialog box will indicate whether the alarm is a shut down alarm or a passive alarm.
- Page 131 Pa s s i v e A l a r m s If an alarm occurs, a red dialog box is displayed on the dryer’s touch screen control. The Central dryer continues to operate, but this problem could prevent correct drying of your material. The dialog box will indicate whether the alarm is a shut down alarm or a passive alarm.
- Page 132 For more information The control board has failed. on updating your dryer to Replace the control board. utilize this and other fea- tures, contact Conair. Conair’s Instant Access 24/7 Parts and Service number is 800-458-1960. Outside the U.S., dial 814-437-6861.
- Page 133 Pa s s i v e A l a r m s If an alarm occurs, a red dialog box is displayed on the dryer’s touch screen control. The dryer continues to operate, but this problem could prevent correct drying of your material. The dialog box will indicate whether the alarm is a shut down alarm or a passive alarm.
-
Page 134: Additional Alarms
HMI. Dryer board failure. Cycle power to the dryer control board. Call Conair Service. Conair’s Instant Access 24/7 Parts and Service number is 800-458-1960. Outside the U.S., dial 814-437-6861. There is no software revision Loose connection or wiring is not cor-... - Page 135 Defect in the main control board. Replace main control board. Conair’s Instant Access 24/7 Parts and Service number is 800-458-1960. Outside the U.S., dial 814-437- 6861. Tr o u b l e s h o o t i n g l...
-
Page 136: Dewpoint Troubleshooting
Conair Parts at (800) 458 1960 for the addition of a volatile trap. Analog option board/sensor malfunction Verify dryer dewpoint readings with a calibrated portable dewpoint meter. -
Page 137: Poor Material Drying Troubleshooting
If your Conair dryer is equipped with the Setback feature, you should familiarize yourself with it, and make use of it. If not, you may want to contact Conair to determine if it can be added to your dryer. - Page 138 Po o r M a t e r i a l D r y i n g Tr o u b l e s h o o t - i n g ( c o n t i n u e d ) Once it is determined which of the four requirements that is not being satisfied, refer to the following list of possible causes and solutions.
- Page 139 Po o r M a t e r i a l D r y i n g Tr o u b l e s h o o t - i n g ( c o n t i n u e d ) Residence Time - The time your material supplier has determined that the material in use must be heated to its drying temperature to achieve proper drying.
- Page 140 Po o r M a t e r i a l D r y i n g Tr o u b l e s h o o t - i n g ( c o n t i n u e d ) Airflow - The airflow in the process drying circuit must be adequate to carry and distribute the heat throughout the entire bed of material inside the hopper.
- Page 141 -20 to -40° F {-29 to -40° C}. If your dryer does not have United States, call: a dewpoint readout, you can check the dewpoint with a portable dewpoint instru- (814) 437 6861 ment. Conair sells a variety of portable dewpoint meters. Contact Conair Parts. Problem Possible cause Solution Low regeneration temperature.
-
Page 142: Replacing Fuses
C h e c k i n g o r R e p l a c i n g Te m p e r a t u r e S e n s o r s The Carousel Plus D Series Dryer uses RTD sensors to monitor the temperatures of the return IMPORTANT : Always refer to the wiring diagrams air, the regeneration outlet, and the regeneration inlet. -
Page 143: Checking Heater Solid State Relays
C h e c k i n g H e a t e r S o l i d S t a t e R e l a y s CAUTION: Always disconnect and lock out the main power sources before making electrical connections. -
Page 144: Replacing The Regeneration Heater
R e p l a c i n g t h e R e g e n e r a t i o n H e a t e r ( D 6 0 0 - 1 0 0 0 ) Stop the dryer, disconnect the power, and follow proper lockout procedures. - Page 145 R e p l a c i n g t h e R e g e n e r a t i o n H e a t e r ( W 6 0 0 - 1 0 0 0 ) ( c o n t i n u e d ) Compare the markings on the outside of the regeneration heater tube to ensure the new one has the same voltage and kW ratings as the original heater...
- Page 146 R e p l a c i n g t h e R e g e n e r a t i o n H e a t e r ( D 1 3 0 0 - 2 4 0 0 ) Stop the dryer, disconnect and lockout the main power.
- Page 147 R e p l a c i n g t h e R e g e n e r a t i o n H e a t e r ( D 1 3 0 0 - 2 4 0 0 ) ( c o n t i n u e d ) Slide the original insulation over the new heater, or if the insulation was cut for removal, wrap the cut insulation sleeve around the new heater tube and secure it with heat tape.
- Page 148 R e p l a c i n g t h e R e g e n e r a t i o n H e a t e r ( D 3 2 0 0 - 5 0 0 0 ) Stop the dryer, disconnect and lockout the main power.
- Page 149 R e p l a c i n g t h e R e g e n e r a t i o n H e a t e r ( D 3 2 0 0 - 5 0 0 0 ) ( c o n t i n u e d ) Loosen the lower clamps that secure the tubing to the dryer bracket.
-
Page 150: Replacing The Desiccant Wheel Assembly
R e p l a c i n g t h e D e s i c c a n t W h e e l A s s e m b l y ( D 6 0 0 - 1 0 0 0 ) When desiccant becomes clogged or contaminated, you should replace the desiccant wheel to ensure optimum performance. - Page 151 R e p l a c i n g t h e D e s i c c a n t W h e e l A s s e m b l y ( D 6 0 0 - 1 0 0 0 ) ( c o n t i n u e d ) Lift the new desiccant wheel into the dryer frame, being sure it is oriented properly.
- Page 152 R e p l a c i n g t h e D e s i c c a n t W h e e l A s s e m b l y ( D 1 3 0 0 - 5 0 0 0 ) If you need to service the desiccant wheel assembly (wheel, motor, belts, etc.), use the fol- lowing procedure to remove the entire assembly from the dryer.
- Page 153 R e p l a c i n g t h e D e s i c c a n t W h e e l ( D 1 3 0 0 - 5 0 0 0 ) When desiccant becomes clogged or contaminated, you should replace the desiccant wheel to ensure optimum performance.
- Page 154 R e p l a c i n g t h e D e s i c c a n t W h e e l ( D 1 3 0 0 - 5 0 0 0 ) ( c o n t i n u e d ) On the motor side of the wheel assembly, while noting the number of turns, relieve the tension on the drive bolt by loosening the nut above the tension spring until the belt can be slipped off the motor sprocket.
- Page 155 R e p l a c i n g t h e D e s i c c a n t W h e e l ( D 1 3 0 0 - 5 0 0 0 ) ( c o n t i n u e d ) Place the belt on your new wheel unless you are replacing the belt at the same time, in which case you should put the new belt on the new wheel.
-
Page 156: Replacing The Desiccant Wheel Motor
R e p l a c i n g t h e D e s i c c a n t W h e e l M o t o r ( D 6 0 0 - 1 0 0 0 ) Stop the dryer, disconnect and lockout the main power. - Page 157 R e p l a c i n g t h e D e s i c c a n t W h e e l M o t o r ( D 1 3 0 0 - 5 0 0 0 ) Stop the dryer, disconnect and lockout the main power.
- Page 158 R e p l a c i n g t h e D e s i c c a n t W h e e l M o t o r D 1 3 0 0 - 5 0 0 0 ) ( c o n t i n u e d ) Slip the belt onto the sprocket, and adjust the tension spring nut to its original position.
-
Page 159: Appendix
Customer ment. Your Conair sales representative also can help analyze the nature of your problem, assuring that Service or Parts Department for a it did not result from misapplication or improper use. -
Page 160: Equipment Guarantee
E q u i p m e n t G u a r a n t e e Conair guarantees the machinery and equipment on this order, for a period as defined in the quotation from date of shipment, against defects in material and workmanship under the normal use and service for which it was recommended (except for parts that are typically replaced after normal usage, such as filters, liner plates, etc.). - Page 161 E l e c t r i c a l C a b l e a n d C o n d u i t S i z i n g C h a r t f o r D S e r i e s D r y e r s w i t h P r o c e s s H e a t Dryer Voltage Size of AWG...
- Page 162 E l e c t r i c a l R e q u i r e m e n t s a n d P r o c e s s H e a t e r I n f o r m a t i o n f o r D - S e r i e s D r y e r s w i t h P r o c e s s H e a t Process Motor (HP) Regen Motor (HP)
- Page 163 Appendix Drying Monitor DM-4 For use with D Series Dryers with DC-C Control Corporate Office: 724.584.5500 Instant Access 24/7 (Parts and Service): 800.458.1960 Parts and Service: 814.437.6861 A p p e n d i x l C - 1...
- Page 164 Z e r o M e c h a n i c a l S t a t e ( Z M S ) CAUTION: Before performing maintenance or repairs on this product, you should disconnect and lockout electrical power sources to prevent injury from unexpected energizing or start- During maintenance, it is essential that the system be put into a state which eliminates the possibility of components making an unexpected and dangerous movement.
- Page 165 DC-C. This independent version is called the DM4-i. On the DM4-i version of Drying Monitor, an independent TouchView control provides the operator interface. For more information on the DM4-i version of the Drying Monitor, contact Conair. Last RTD...
- Page 166 H o w t h e D r y i n g M o n i t o r Wo r k s The Drying Monitor consists of stainless steel, 6-zone, temperature probes installed in drying hoppers that sense the specific temperature profile of the hoppers and compares their profiles to the requirements needed for proper drying in a specific hopper for a spe- cific material.
- Page 167 Conair hoppers are typically out- fitted to readily receive a DM probe. Non-Conair or older Conair hop- pers will require adaptation for probe installation according to instruc- tions supplied in this manual.
- Page 168 RT D S e n s o r Po s i t i o n s i n t h e H o p p e r RTD’s will be referred to in this user guide and on your DM display as T1, T2, T3, T4, T5, and T6.
- Page 169 The DM is also available as a independent option, with its own TouchView con- trol panel, to monitor up to 30 hoppers. Contact Conair for more information on the DM4-i. A p p e n d i x l...
- Page 170 #18169902: Packaging for the DM system can be varied depending upon what has been ordered, so Contact Conair Parts 1 800 458 1960 carefully inventory all items. From outside of the United States, call: Carefully remove all components from their shipping containers.
- Page 171 P r e p a r i n g f o r I n s t a l l a t i o n In addition to mounting the probe into the hopper, each hopper will be equipped with IMPORTANT: The DC-C an RTD Junction Box.
- Page 172 There are three mounting methods for the probe: Select Mounting Method 1 if you purchased a new Conair CH series drying hop- per equipped with a factory-installed coupling for the probe. Select Mounting Method 2 if you are installing the probe and coupling in a drying hopper that has enough overhead clearance to insert the probe from the top of the hopper.
- Page 173 M o u n t i n g M e t h o d 1 (New Conair hopper with Factory Installed coupling) Insert the probe through the coupling in the top of the drying hopper. Screw the fitting into the coupling. Tighten with a wrench.
- Page 174 M o u n t i n g M e t h o d 2 (Drying hopper with enough overhead clearance to insert probe from the top of the hopper) Reference the drawings at the end of this user guide and select the drawing that reflects your installation.
- Page 175 M o u n t i n g M e t h o d 3 (Not enough overhead clearance to insert the probe from the top of the hopper) Reference the drawings at the end of this user guide and select the drawing that reflects your installation.
- Page 176 M o u n t i n g M e t h o d 3 ( c o n t i n u e d ) Place the gasket over the probe hole. Connector Place the adapter plates over the gasket and secure them to the hopper with three 10-32 UNF screws.
- Page 177 P r e p a r i n g f o r E l e c t r i c a l I n s t a l l a t i o n Using the ModBus cables provided, connect the RTD box to the heat source being used (HTC, ResinWorks, Gastrac...
- Page 178 N a v i g a t i n g t h e D C - C w i t h D r y i n g M o n i t o r E n a b l e d ( R e s i n Wo r k s C o n f i g u r a t i o n ) The System Home screen on the dryer.
- Page 179 T h e D r y i n g M o n i t o r S c r e e n s o f t h e D C - C ( R W C o n f i g u r a t i o n ) Date and Time This area displays the current date and time.
- Page 180 C o n f i g u r i n g t h e D C - C f o r D M O p e r a t i o n Before using the DM functionality of your DC-C dryer control, the DC-C must be set to communicate to your installed Drying Monitor hardware.
- Page 181 N a v i g a t i n g t h e D M I n d i v i d u a l H o p p e r S c r e e n s Detailed Hopper View ✐...
- Page 182 N a v i g a t i n g t h e D M S c r e e n s f r o m t h e H o p p e r Te m p e r a t u r e C o n t r o l ( G a s Tr a c , R e s i n Wo r k s , o r H T C ) DM Settings Alarm Time: Select to enter the amount of time in seconds...
- Page 183 S e t t i n g U p Yo u r D M : T h e B a s i c s - A l a r m L o c a t i o n ( S i m p l e ) The Alarm Location establishes the location in the drying hopper where the actual drying temperature is within a certain range of the process temperature.
- Page 184 S e t t i n g U p Yo u r D M : T h e B a s i c s - A l a r m L o c a t i o n ( A d va n c e d ) Why would an operator want to use the Advanced method for selecting an RTD to use as the Alarm Location? The ✐...
- Page 185 S e t t i n g U p Yo u r D M : T h e B a s i c s - A l a r m L o c a t i o n ( A d va n c e d ) ( c o n t i n u e d ) The DM also automatically sets the Alarm Band.
- Page 186 S e t t i n g U p Yo u r D M : T h e B a s i c s - A l a r m S e t p o i n t Alarm Setpoint The alarm setpoint is automatically established on the “Hopper Settings”...
- Page 187 S e t t i n g U p Yo u r D M : T h e B a s i c s - A l a r m S e t p o i n t ( c o n t i n u e d ) From Stand Alone Dryer Screen Procedure Press the Navigation button.
- Page 188 D r y i n g H o p p e r M a t e r i a l C h a n g e What happens when there is a drying hopper material change? Change the process temperature. For example, let’s say the process temperature is changed to 205°F from 225°F.
- Page 189 M a t e r i a l R e a d y I n t e r l o c k Fe a t u r e The Drying Monitor option on your Carousel Plus dryer allows you to utilize Conair's Material Ready feature.
- Page 190 D r y i n g H o p p e r Vo l u m e b y M o d e l N u m b e r Hopper RTD Distance Volume up to RTD Drying Hopper Diameter Volume (ft.³) RTD Position from the top position (ft.³)
- Page 191 D r y i n g H o p p e r Vo l u m e b y M o d e l N u m b e r ( c o n t i n u e d ) Hopper RTD Distance Volume up to RTD...
- Page 192 D r y i n g H o p p e r Vo l u m e b y M o d e l N u m b e r ( c o n t i n u e d ) Hopper RTD Distance Volume up to RTD...
- Page 193 D r y i n g H o p p e r Vo l u m e b y M o d e l N u m b e r ( c o n t i n u e d ) Hopper RTD Distance Volume up to RTD...
- Page 194 U n d e r s t a n d i n g B u l k D e n s i t y Bulk density is the weight of material in pellet form, where the material has a lot of free space between pellets.
- Page 195 Any of these variables can effect how your drying system’s particular trending curves and data will be displayed: • hopper size and length/diameter relationship ✐ NOTE: Conair recommends • drying system and heat/air delivery capability that users familiarize • bulk density of material being dried themselves with these •...
- Page 196 I n t e r p r e t i n g D r y i n g M o n i t o r Tr e n d C u r v e s - N o r m a l O p e r a t i o n ✐...
- Page 197 I n t e r p r e t i n g D r y i n g M o n i t o r Tr e n d C u r v e s - N o r m a l O p e r a t i o n ( c o n t i n u e d ) ✐...
- Page 198 I n t e r p r e t i n g D r y i n g M o n i t o r Tr e n d C u r v e s - M a t e r i a l F l o w p r o b l e m s If material flow through the drying hopper is slowed down (a decrease in material through- put), the difference in temperature readings between T1 and T5 will steadily decrease.
- Page 199 I n t e r p r e t i n g D r y i n g M o n i t o r Tr e n d C u r v e s - L o a d i n g p r o b l e m s If the loading function stops (no new material being supplied to the hopper) while normal operation is underway, T5 and T6 will increase in temperature as the heat-consuming mate- rial level in the hopper decreases.
- Page 200 I n t e r p r e t i n g D r y i n g M o n i t o r Tr e n d C u r v e s - L o a d i n g p r o b l e m s ( c o n t i n u e d ) When automatic loading is restored, (new material is once again supplied to the hopper), T3 through T5 will initially drop in temperature from exposure to the new, colder material com-...
- Page 201 I n t e r p r e t i n g D r y i n g M o n i t o r Tr e n d C u r v e s - P r o b l e m s w i t h H e a t S u p p l y Problems with the heat supply (reduced temperature) to the drying hopper initially show up as a reduction in T1 and T2 temperature readings.
- Page 202 I n t e r p r e t i n g D r y i n g M o n i t o r Tr e n d C u r v e s - A i r S u p p l y P r o b l e m s Problems with the air supply to the drying hopper (I.E: clogged filters or blocked drying air supply line) initially show up as a reduction in the T5, T4, and eventually T3 temperature readings since the air flow is no longer strong enough to carry the drying heat up through...
- Page 203 I n t e r p r e t i n g D r y i n g M o n i t o r Tr e n d C u r v e s - A c t u a l D M Tr e n d A n a l y s i s Below is an actual trend analysis used by a PET bottle processor to find the cause of overnight process variations.
- Page 204 P r e v e n t a t i v e m a i n t e n a n c e s c h e d u l e No specific maintenance schedule is required for the Drying Monitor since there are no moving parts.
- Page 205 W h a t t h e D r y i n g M o n i t o r C a n Te l l Yo u The DM monitors the temperature profile of the material in the hopper using six Resistance Temperature Device (RTD) sensors.
- Page 206 U n d e r s t a n d i n g A l a r m s The DM monitors each hopper and will give you an alarm if the temperature falls below your established alarm setpoint. See Operation: Setting Up Your DM: The Basics- Alarm Setpoint for more information about setting the alarm setpoint.
- Page 207 D r y i n g M o n i t o r P r o b l e m s Symptom Possible cause Solution ❒ Check integrity of cable connec- Hopper data does not Connection to RTD(s) in hop- display per(s) is incorrect or discon- tions from drying monitor panel to...
- Page 208 C - 4 6 l A p p e n d i x...
Need help?
Do you have a question about the Carousel Plus D Series and is the answer not in the manual?
Questions and answers