Avaya G250 Installation And Upgrade Manual
Media gateway
Hide thumbs
Also See for G250:
- Administration manual (840 pages) ,
- Reference (812 pages) ,
- Administration (720 pages)

Subscribe to Our Youtube Channel
Related Manuals for Avaya G250


Summary of Contents for Avaya G250
- Page 1 Installation and Upgrade for the Avaya G250 Media Gateway 03-300434 Issue 1.1 June 2005...
- Page 2 • System administration documents Warranty • Security documents Avaya Inc. provides a limited warranty on this product. Refer to your • Hardware-/software-based security tools sales agreement to establish the terms of the limited warranty. In • Shared information between you and your peers addition, Avaya’s standard warranty language as well as information...
- Page 3 A reorder tone is received. operations or procedures that could affect the operation of the Avaya attests that this registered equipment is capable of providing users equipment. If this happens, the telephone company will provide advance access to interstate providers of operator services through the use of notice in order for you to make necessary modifications to maintain access codes.
- Page 4 Declarations of Conformity United States FCC Part 68 Supplier’s Declaration of Conformity (SDoC) Avaya Inc. in the United States of America hereby certifies that the equipment described in this document and bearing a TIA TSB-168 label identification number complies with the FCC’s Rules and Regulations 47 CFR Part 68, and the Administrative Council on Terminal Attachments (ACTA) adopted technical criteria.
-
Page 5: Table Of Contents
Prepare required equipment ......Obtain the G250 serial number ...... - Page 6 Mounting the G250 on a wall ......Placing the G250 on a table ......
- Page 7 Connect the trunk ....... . . Configure the trunk on the G250 ......
- Page 8 Connect the WAN line ....... Configure the WAN line on the G250 ..... . .
- Page 9 Several telephones stop working......No power on the G250 ....... . .
- Page 10 ........189 10 Installation and Upgrade for the Avaya G250 Media Gateway...
-
Page 11: About This Book
You can download the latest version of Installation and Upgrades for the Avaya G250 Media Gateway from the Avaya Web site. You must have access to the Internet, and a copy of Acrobat Reader must be installed on your personal computer. -
Page 12: Downloading This Book
A danger statement indicates the presence of a hazard that can result in severe DANGER: personal injury or death if the hazard is not avoided by following the instructions provided. 12 Installation and Upgrade for the Avaya G250 Media Gateway... -
Page 13: Related Resources
A security alert calls attention to a situation that can increase the potential for SECURITY ALERT: unauthorized use of a telecommunications system. Related resources For more information on the Avaya G250 Media Gateway and related features, see the following books: Title Number... -
Page 14: Technical Assistance
For help with: Feature administration and system applications, call the Avaya Technical Consulting ● Support System at 1-800-225-7585 Maintenance and repair, call the Avaya National Customer Care Support Line at ● 1-800-242-2121 Toll fraud, call Avaya Toll Fraud Intervention at 1-800-643-2353 ●... -
Page 15: Sending Us Comments
Sending us comments Sending us comments Avaya welcomes your comments about this book. To reach us by: Mail, send your comments to: ● Avaya Inc. Product Documentation Group Room B3-H13 1300 W. 120th Ave. Westminster, CO 80234 USA E-mail, send your comments to: ●... - Page 16 About this book 16 Installation and Upgrade for the Avaya G250 Media Gateway...
-
Page 17: Chapter 1: Introduction
Chapter 1: Introduction This guide explains how to install and upgrade the Avaya G250 Media Gateway and contains the following chapters: Chapter 2: Before you install. Describes how to prepare for an installation of the G250. ● Chapter 3: Installing the Avaya G250 Media Gateway. - Page 18 Introduction 18 Installation and Upgrade for the Avaya G250 Media Gateway...
-
Page 19: Chapter 2: Before You Install
Chapter 2: Before you install Read this chapter carefully before you begin the installation. If you are installing the G250 at a customer site, read this chapter before going to the customer site. This chapter includes: Before going to the site on page 19 ●... -
Page 20: Prepare Required Equipment
A crosspoint screwdriver if rack mounting or wall mounting the G250 ● If you will mount the G250 on a flat wall: screws to fasten the G250 to the wall ● If you will mount the G250 on a non-flat wall: ●... -
Page 21: Obtain Rfa Access
● sales_market, services-voice, training tools and procedures to select RFA (or go directly to: http://rfa.avaya.com). Associates should point their browsers to the Avaya Associate portal (or go directly to ● http://rfa.avaya.com). Contractors should point their browsers to Avaya.com (or go directly to http:// ●... -
Page 22: Download License And Authentication Files To Your Laptop
This IP address is required for configuring remote access to a modem on the S8300B or G250. If you need to configure remote access to both the G250 and the S8300B, follow this procedure twice, once for the G250 and once for the S8300B. - Page 23 6. In the Session Type field, select Installation Script Administration. 7. In the Product Type field, select G250 MEDIA GATEWAY if you want to configure remote access for the G250, or S8300B MEDIA SERVER if you want to configure remote access for the S8300B.
-
Page 24: Download Recent Firmware
The G250 may be installed in a 19" rack, mounted on a wall, or placed on a sturdy table. Installation instructions are provided in Chapter 3: Installing the Avaya G250 Media Gateway. -
Page 25: Power Verification
In these cases, access to the G250 Media Gateway is gained by the use of a tool (such as a lock and key) or other means of security. -
Page 26: Unpacking
Before you install Unpacking The G250 chassis and accessories are shipped in a box. The package should contain the following items: One empty Avaya G250 Media Gateway chassis, with blanking plates over empty module ● slots. One accessories box, containing: ●... - Page 27 Unpacking 5. Verify that all necessary elements have been received and are in good condition. If there are missing or damaged elements, contact your project manager. The planning documentation will list contact information for key personnel. If you have any questions about the equipment order, or if the equipment has been damaged, contact your project manager.
- Page 28 Before you install 28 Installation and Upgrade for the Avaya G250 Media Gateway...
-
Page 29: Chapter 3: Installing The Avaya G250 Media Gateway
Chapter 3: Installing the Avaya G250 Media Gateway This chapter describes the physical installation of the G250. Perform the following steps in the order in which they are listed: Step 1: Mount the G250 chassis on page 29 ● Step 2: Install the media modules on page 34 ●... -
Page 30: Mounting The G250 In A Rack
The G250 mounts in a standard 19-inch rack. If the G250 is to be mounted in a rack, you can fasten the G250 to the rack either at the front of the G250 or at the middle. In either case, mounting brackets must be attached to the G250. - Page 31 The mounting bracket with cable guides is useful for cable management. You can attach the mounting bracket with cable guides to the front of the G250 at one side, as shown in the following figure. If you are fastening the chassis to the rack at the front, use the mounting bracket with cable guides as one of the two front brackets.
- Page 32 4. Tighten the mounting screws. Avoid overtightening. 5. Verify that ventilation vents are not obstructed. At this point, you have mounted the G250 chassis in the rack and are ready to insert media modules as required in the planning documentation.
-
Page 33: Mounting The G250 On A Wall
To mount the G250 on a wall, use the two mounting brackets without cable guides. If the wall is flat, you can screw the G250 directly to the wall. If the wall is not flat, screw a plywood board (415 x 465 mm, 20 mm thick) to the wall with wood screws, and fasten the G250 to the board. -
Page 34: Step 2: Install The Media Modules
● MM342 in slot V2 ● Allocating slots You insert media modules into the slots marked V1 and V2 on the G250 front panel, shown in Figure 4 below. Tip: The slot positions and names are the same on the G250 and the G250-BRI. -
Page 35: Inserting The S8300B Media Server Module
Use a screwdriver to ensure the captive screws are securely tightened to prevent damage to the equipment. You can only insert the S8300B in slot V1 on the left side of the G250 Media Gateway. Issue 1.1 June 2005... - Page 36 To prevent access to electrical hazards by unauthorized personnel and to ensure DANGER: continued compliance to radiated emissions requirements, all captive screws must be securely tightened such that they cannot be loosened without the use of a tool. 36 Installation and Upgrade for the Avaya G250 Media Gateway...
-
Page 37: Inserting Media Modules
To insert a media module: 1. Remove the blank plate from the empty bay. 2. Position the media module before the selected bay on the front of the G250 chassis and engage both sides of the module in the interior guides. -
Page 38: Step 3: Attach Ground Conductors
If a power cord accompanies the G250, use that cord whenever possible. The customer must select a location for the G250 Media Gateway installation that is no more than 16 feet (5 m) from an approved ground. If this location requirement is not met, the customer must contact a licensed electrician to install a Supplementary Ground Conductor per Article 250 of the National Electrical Code (NEC). -
Page 39: Approved Grounds
Step 3: Attach ground conductors The customer will need to provide a means of connecting this Supplementary Ground Conductor to an approved ground according to Article 250 of the National Electrical Code (NEC). DANGER: For custumer-installed euipment, failure to install the Supplementary Ground DANGER: Connector will void the Product Safety certifications (UL and the CE Mark) on the product, as well as allow a hazard to be present that could result in death or... -
Page 40: Connect The Safety Ground
4. Attach the Supplementary Ground Conductor to an approved ground. 5. Connect the AC power cable to the inlet receptacle on the rear of the chassis. You have now mounted the fully equipped G250 Media Gateway and connected to electrical ground conductors. You are now ready to connect power. -
Page 41: Step 4: Connect Power To The G250
1. Connect the power cable to the power connector on the G250 back panel. 2. Plug the power cable into a mains socket. The G250 is now powered. The PWR LED on the front panel lights. The CPU LED lights up if the firmware is running. - Page 42 Installing the Avaya G250 Media Gateway 42 Installation and Upgrade for the Avaya G250 Media Gateway...
-
Page 43: Chapter 4: Connecting Devices
Chapter 4: Connecting devices This chapter describes how to connect external endpoint devices to the G250, and install the coupled bonding conductor. Devices can be connected to the ports on the front panels of the installed media modules and to the fixed front panel ports. -
Page 44: Connecting A Switch Or A Network Data Port
● the data port of an IP telephone connected to a PoE port on the G250 ● one of the following ports on the front panel of the Avaya G250 Media Gateway chassis: ● the ETH LAN PoE ports ●... -
Page 45: Connecting An Ip Telephone
To connect an IP telephone: 1. Wire a telephone port to a LAN port on the G250. If the IP telephone will be powered through the G250, make sure you use a ETH LAN PoE port on the G250. In this case, you do not need to plug the IP telephone into a power supply. -
Page 46: Connecting An Analog Trunk
Connecting an analog trunk To connect an analog trunk: 1. Connect the trunk to one of the ports labelled TRUNK on the G250. Note: For an analog DID trunk, you can not use a TRUNK port on theG250. Instead, Note: you must connect the trunk to one of the ports marked LINE. -
Page 47: Step 2: Connect To The Wide Area Network (Wan)
Step 2: Connect to the Wide Area Network (WAN) Since the G250 contains an internal router, you can connect the G250 directly to a WAN endpoint device. You can also connect a WAN endpoint device to the G250 via an external router. -
Page 48: Connecting An E1/T1 Wan Link
Connecting an E1/T1 WAN link You must connect the E1 or T1 WAN line to the Avaya MM340 media module. To connect the WAN line, plug the WAN line into the E1/T1 port on the MM340 media module. This port is marked E1/T1. -
Page 49: Step 3: Install The Coupled Bonding Conductor
Step 3: Install the Coupled Bonding Conductor Step 3: Install the Coupled Bonding Conductor The Coupled Bonding Conductor (CBC) provides mutual inductance coupling between the CBC and the telephone cables that are exposed to lightning. The conductor can be a 10 AWG (4 mm ) wire tie wrapped to the exposed cables, a metal cable shield around the exposed cables, or six spare pairs from the exposed cable. -
Page 50: Step 4: Install The Avaya Partner Contact Closure Adjunct
To implement the contact closure feature, you connect an Avaya Partner Contact Closure Adjunct box to the CC port on the G250 chassis. The adjunct box provides two contact closures that can be operated in either a "normally closed" or "normally open" state. The contact closures can control auxiliary devices such as devices that automatically lock or unlock doors or voice recording units. -
Page 51: Chapter 5: Connecting And Enabling A Modem For Remote Access
Chapter 5: Connecting and enabling a modem for remote access This chapter describes how to connect and enable a modem on the G250. You can connect a modem to the G250 to enable configuration from a remote location. If an S8300B is installed in the G250, leave a modem connected permanently to enable reporting of alarms to remote locations. -
Page 52: Enabling And Connecting A Serial Modem
3. Plug one end of the provided flat RJ-45 to RJ-45 cable into the provided DB-9 adapter. 4. Plug the RJ-45 connector at the other end of the cable into the CON port of the G250. 5. Plug the DB-9 end of the flat cable into the COM port of the laptop computer. - Page 53 Connecting and enabling a modem (G250 without S8300B) Figure 9: COM Port Selection screen 8. Select the COM port on the laptop that you are using to connect to the G250. 9. Click Continue. The G250 Wizard Usage Options screen appears.
- Page 54 Connecting and enabling a modem for remote access Figure 10: G250 Wizard Usage Options screen 10. Select Enable the modem for remote installation. 11. Click Continue. The G250 Modem Type Selection screen appears. 54 Installation and Upgrade for the Avaya G250 Media Gateway...
- Page 55 Connecting and enabling a modem (G250 without S8300B) Figure 11: G250 Modem Type Selection screen 12. Select Serial Modem. 13. Click Continue. The G250 Serial Modem Configuration screen appears. Issue 1.1 June 2005...
- Page 56 Automatic Registration Tool (ART) for the RAS IP address on page 22. 18. In the Confirm CHAP Secret field, reenter the CHAP secret key. 19. Click Continue. The Connect Modem screen appears. 56 Installation and Upgrade for the Avaya G250 Media Gateway...
-
Page 57: Test The Modem Connection
24. Connect the flat cable to the DB-25 connector on the modem. Test the modem connection Dial into the modem to verify that you can authenticate to the modem. The G250 is now prepared for remote configuration via the modem. Issue 1.1 June 2005... -
Page 58: Connecting And Enabling A Modem (G250 With S8300B)
5. If you require a USB CD-ROM drive to download software upgrades, connect the USB CD-ROM drive to the remaining available USB port on the S8300B module. The G250 is now prepared for remote configuration using Avaya Installation Wizard (Avaya IW) via the USB modem. - Page 59 5. Enter your S8300B initial entry username in the Logon ID box. 6. Click Logon. The password field appears. 7. Enter your password in the password field, and click Logon. The main menu for Avaya Integrated Management appears. Issue 1.1 June 2005...
- Page 60 Figure 15: Integrated Management Main Menu 8. From the Integrated Management main menu, select Launch Maintenance Web Interface. The Maintenance Web Pages Notice page appears, with a navigation menu at the left. 60 Installation and Upgrade for the Avaya G250 Media Gateway...
-
Page 61: Change The Modem Settings On The Configure Server Maintenance Web
Change the modem settings on the Configure Server Maintenance web pages If you have an Avaya Maintenance contract, change the modem settings on the Configure Server Maintenance Web Pages. To change the modem settings: 1. Select Configure Server from the left-hand menu on the Maintenance web page. The Back Up Data page appears. -
Page 62: Connect And Enable The Usb Modem
If your installation includes an S8300B Media Server module, you need to connect the USB modem to the S8300B. After the G250 is configured, you can leave the modem permanently connected to enable the S8300B to report alarms to remote locations. -
Page 63: Test The Modem Connection
3. When prompted, provide the rasaccess login and password in the Terminal Window. 4. Close the Terminal Window to complete the connection. Refer to Job Aid: Creating Additional Remote Access Logins, 03-300451 on the Avaya Support site for additional information about creating and testing remote logins. - Page 64 Connecting and enabling a modem for remote access 64 Installation and Upgrade for the Avaya G250 Media Gateway...
-
Page 65: Chapter 6: Configuring The G250
Gateway CLI Reference Guide, 555-245-201. The G250 can be configured at the customer site via a laptop connected to the CON port of the G250 or from a remote location via a modem. For information about connecting and enabling a... - Page 66 Configuring the G250 66 Installation and Upgrade for the Avaya G250 Media Gateway...
-
Page 67: Chapter 7: After Installation
Test data connectivity by pinging the IP address of each device to test the device's connectivity within the network and outside the network. Test local data connectivity on-site by checking that you can send an email between two PCs that are connected to the G250. Test telephone connectivity as follows: Test each telephone. -
Page 68: Testing Trunks
If you have an S8300B media server module installed in the G250 and configured as an LSP, you need to perform a test to make sure that the LSP takes over control of the G250 if the G250 becomes disconnected from the primart media server. - Page 69 In the Primary Controller IP address screen, enter all the required IP addresses for the primary controller type. There may be a delay after running Avaya IW until the LSP is registered with the primary MGC and the translations are file synchronized.
-
Page 70: Step 2: Remove The Installation Equipment
The modem (for installations without an S8300B module only) ● Note: If you have an S8300B media server module installed in the G250, leave the Note: modem connected to enable reporting of alarms to remote locations. The installation is now complete. -
Page 71: Chapter 8: Upgrading Media Modules And Devices
Chapter 8: Upgrading media modules and devices This chapter describes how to add new media modules and endpoint devices to a G250 that is already installed. When adding new devices to the G250, consult your project manager for topology requirements for specific ports to be connected to specific devices. -
Page 72: Adding S8300B Modules
You can hot-insert WAN and LAN modules. This means you can add a WAN or LAN module to the Avaya G250 Media Gateway while the system is running, but the G250 resets when you add the module. However, hot insertion is not recommended in most cases. Because hot insertion resets the G250, any translation and other data that is in the running configuration but has not been saved to the startup configuration will be lost. -
Page 73: Adding A Lan Device
● connects. If the LAN device is connected to an IP telephone, note the extension of the telephone to which the LAN device connects, and the slot and port number on the G250 to which the telephone connects. Configuration may be performed on site by connecting a laptop computer connected to the CON port of the G250, or remotely via a modem connected to the G250 or S8300B. -
Page 74: Adding A Telephone
● Configuration may be performed on site by connecting a laptop computer connected to the CON port of the G250, or remotely via a modem connected to the G250 or S8300B. For information about preparing a modem, see Chapter 5: Connecting and enabling a modem for remote access on page 51. -
Page 75: Adding A Trunk
● Order the trunk When you order the trunk: Make sure to install the trunk near the physical location of the Avaya G250 Media ● Gateway. Make sure that the telephone service provider installs the trunk and verifies that the trunk ●... -
Page 76: Configure The Trunk On The G250
● Configuration may be performed on site by connecting a laptop computer connected to the CON port of the G250, or remotely via a modem connected to the G250 or S8300B. For information about preparing a modem, see Chapter 5: Connecting and enabling a modem for remote access on page 51. -
Page 77: Connect The Wan Line
Configure the WAN line on the G250 When you add a new WAN line, note the following information for software configuration: slot and port number on the Avaya G250 Media Gateway to which the WAN line connects ● Configuration may be performed on site by connecting a laptop computer to the CON port of the G250, or remotely via a modem connected to the G250 or S8300B. - Page 78 Upgrading media modules and devices 78 Installation and Upgrade for the Avaya G250 Media Gateway...
-
Page 79: Chapter 9: Upgrading The Avaya Communication Manager Software
2. Connect the USB modem to either of the two USB ports in the Avaya S8300B Media Server. Issue 1.1 June 2005... -
Page 80: Upgrading The Software Without A Cd-Rom Drive
Chapter 5: Connecting and enabling a modem for remote access on page 51. 3. Connect a USB CD-ROM drive to the free USB port on the Avaya S8300B Media Server. Then, insert the CD-ROM provided by Avaya into the CD-ROM drive. Upgrading the software without a CD-ROM drive You can upgrade the Avaya Communication Manager software without a CD-ROM drive by downloading the upgrade software or installing it from a laptop computer. -
Page 81: Chapter 10: Upgrading The G250 Firmware
Chapter 10: Upgrading the G250 firmware You can upgrade software on the Avaya G250 Media Gateway. Software used to control the Avaya G250 Media Gateway itself and firmware for the media modules installed on the G250 is called firmware. Note:... -
Page 82: Upgrading G250 Firmware Using Avaya Software Update Manager
3. Set up a TFTP server on the G250 network. See Setting up a TFTP server on page 87. The GIW runs the CLI commands on the G250 so the G250 can obtain the files from the TFTP server. 4. Download the G250 firmware files to the TFTP server. See... -
Page 83: Upgrading G250 Firmware And Avaya Communication Manager Software Using Avaya Installation Wizard (Iw)
Manager software using Avaya Installation Wizard (IW) For a G250 with an S8300B installed, you can use Avaya IW to upgrade G250 firmware and Avaya CM software. You can run Avaya IW from a remote location if the software is loaded locally. -
Page 84: Upgrading G250 Firmware Using The Cli
CLI Commands for upgrading G250 firmware You can use one of the following commands to upload an upgrade file to the G250. For each of these commands, include the full path of the file and the IP address of the FTP or TFTP host as parameters. - Page 85 TFTP service in the Set LAN Security parameters of your web server. The following example uploads a firmware version with the path and file name C:\G250.net from an FTP server with the IP address 149.49.134.153 to Bank A of the G250: copy ftp SW_imageA C:\G250.net 149.49.134.153...
-
Page 86: Preparing Installation Worksheets
G250 Processor MMANALOG (Integrated Analog) TFTP server values Enter the TFTP server information in the following table: Table 5: Global Settings for TFTP Server TFTP Server IP TFTP Server Address Directory 86 Installation and Upgrade for the Avaya G250 Media Gateway... -
Page 87: Setting Up A Tftp Server
To set up a TFTP on the LAN: 1. On the hard drive of the local PC, create a directory into which you will load the G250 firmware. It is recommended that you call the directory C:\tftp. -
Page 88: Downloading G250 Firmware Files To A Local Tftp Server
- Click OK. Downloading G250 firmware files to a local TFTP server This section describes how to download the individual firmware files from the Avaya website to a TFTP server on the local network with the G250. If you are upgrading... -
Page 89: Installing Firmware From The Tftp Server On The S8300B Media Server
Instead of using a separately configured TFTP server on the LAN, you can use the TFTP server capability of an S8300B Media Server to stage the firmware for upgrading the G250. To do this, you must copy the individual firmware files to the /var/home/ftp/pub directory on the S8300B Media Server using the Download Files Web page on the S8300B Media Server. - Page 90 7. At the Linux prompt, type ls, and press <Enter>. A list of files in the directory appears. 8. Check the directory to make sure the firmware files you want to install are listed. 90 Installation and Upgrade for the Avaya G250 Media Gateway...
-
Page 91: Chapter 11: Upgrading Ip Phone Configuration And Firmware Files
(upgrade and settings) files of the IP phones. You can use both Avaya Installation Wizard and GIW to upload IP phone files to the TFTP Server located on the G250 Media Gateway. The TFTP server supports requests to read files from a special directory ("/phonedir/") for phone images and scripts. -
Page 92: Administering The Upgrade
CAUTION: To activate a change in RAM allocation to the TFTP server, reset is required. CAUTION: Upon reset, any phone image files stored in RAM are erased. 92 Installation and Upgrade for the Avaya G250 Media Gateway... - Page 93 ● copy tftp phone-script. Note: The G250 uses the SSH protocol to support the use of SCP for secure file Note: transfer. When using SCP, the G250 is the SCP client, and an SCP server must be configured on the management station. For more information about establishing an SCP session, see Administration of the Avaya G250 Media Gateway, 555-245-501.
-
Page 94: Tftp Ip Telephone Upgrade Example
4. Reset the G250 using the reset command. G250-001(super)# reset This command will reset the device *** Reset the device *** - do you want to continue (Y/N)? y Resetting the device... 94 Installation and Upgrade for the Avaya G250 Media Gateway... - Page 95 G250-001(super)# no ip tftp-server Done! 6. Copy the script files for the 46xx IP phone family using the copy scp phone-script command: G250-001(super)# copy scp phone-scriptA 46xxupgrade.txt 192.168.49.10 Confirmation - do you want to continue (Y/N)? y Username: root Password: Beginning download operation ...
- Page 96 9. Enable the TFTP server to allow loading of the new files to the IP phone using the ip tftp-server command. G250-001(super)# ip tftp-server Done! 10. Reset the phones and wait for the installation to be completed. 96 Installation and Upgrade for the Avaya G250 Media Gateway...
- Page 97 G250-001(super)# no ip tftp-server Done! 2. Copy the boot image files for the 4620 IP phone using the copy ftp phone-image command. G250-001(super)# copy ftp phone-imageA pub\bbla20_1817.bin 192.168.49.10 Username: root Password: Beginning download operation ... This operation may take up to 20 seconds.
-
Page 98: Failure Scenarios And Repair Actions
You are trying to upload a Upload from a different Wrong operation parameters file from an empty bank. bank. or other operation already in Download a file to the progress, please try again" bank. 98 Installation and Upgrade for the Avaya G250 Media Gateway... -
Page 99: Upgrading Considerations
Upgrading Considerations Upgrading Considerations The following are some considerations that affect the user when upgrading IP phone configuration and upgrade files: Configuration files, such as upgrade script and setting files, are copied to the phone ● configuration banks in NVRAM, while phone images are stored in RAM. Note: Image files are cleared if you reset the gateway. - Page 100 Upgrading IP phone configuration and firmware files 100 Installation and Upgrade for the Avaya G250 Media Gateway...
-
Page 101: Chapter 12: Troubleshooting
If the telephone still does not work, go on to the next step. 4. Check the module on the Avaya G250 Media Gateway to which the telephone is connected. Check whether the physical connection is loose, and tighten the connection if necessary. If the telephone still does not work, go on to the next step. -
Page 102: Several Telephones Stop Working
If some telephones in the network stop working, but others continue to work, the problem could be with a trunk or with one of the modules in the G250. If the telephones that don't work are IP telephones connected to the PoE ports, the problem could be that PoE is disabled on certain ports, or that too many or a bad selection of PoE ports are being used, or that the power supply to the PoE ports is not working. -
Page 103: A Trunk Stops Working
For information on the various modules and their LEDs, see Appendix A: Front panel description on page 105. 3. Check the ALM LED on the Avaya G250 Media Gateway chassis. If it is lit, there may be a system-wide problem. Issue 1.1 June 2005... - Page 104 Troubleshooting 104 Installation and Upgrade for the Avaya G250 Media Gateway...
-
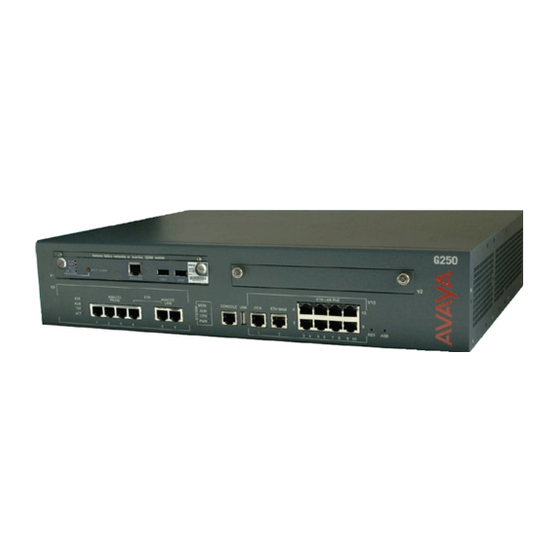
Page 105: Appendix A: Front Panel Description
Reset and recover from the alternate bank ● The first section in this appendix describes the front panel of the Avaya G250 Media Gateway chassis, without any media modules. The subsequent sections describe the front panels of the modules that you can insert in the Avaya G250 Media Gateway. -
Page 106: Media Module Slots
One standard media module slot for the MM340 or MM342 (V2) ● For information about the different media modules that can be housed in the media module slots, see Allocating slots on page 34. 106 Installation and Upgrade for the Avaya G250 Media Gateway... -
Page 107: System Leds
The front panel of the Avaya G250 Media Gateway chassis System LEDs The system LEDs show the status of the Avaya G250 Media Gateway. The following table shows the meaning of the system LEDs when they are lit: Table 7: System LEDs... -
Page 108: Analog Telephone Ports And Leds
The contact closure port (CCA) is wired as an RJ-14 port, but uses an RJ-45 network jack. This port is used to support the G250's Contact Closure feature. The Contact Closure feature is a controllable relay providing dry contacts for various applications. To implement the Contact Closure feature, connect an Avaya Partner System Contact Closure Adjunct™... -
Page 109: Router Port (Eth Wan)
G250 using the other version. This is particularly important when uploading new versions. By default, when you turn on or reset the G250, the G250 loads firmware from Bank B. This default setting can be changed by the system administrator. -
Page 110: The Front Panel Of The Avaya S8300B Media Server
3. Release the reset button. 4. Release the ASB button. For example, if the G250 is configured to load firmware from Bank B, use the steps listed above to reset the G250 to load the firmware from Bank A instead. -
Page 111: Port Leds
In addition, the front panel of the S8300B has a LED labeled OK TO REMOVE, which is connected to a button labeled SHUT DOWN. This LED indicates that the S8300B has been shut down, and can be removed from the G250 chassis. Do not attempt to remove the S8300B without instructions from a specially trained technician. -
Page 112: Leds
MSG for the slot Test Green A port is being initialized or a loopback is present Activity Yellow At least one PPP/Frame Relay session is active Signal Green The physical connection is up 112 Installation and Upgrade for the Avaya G250 Media Gateway... -
Page 113: The Front Panel Of The Avaya Mm342 Media Module
The front panel of the Avaya MM342 media module The front panel of the Avaya MM342 media module The MM342 media module provides one USP WAN access port and supports the following WAN interface types: V.35/ RS449 ● X.21 ●... - Page 114 Front panel description 114 Installation and Upgrade for the Avaya G250 Media Gateway...
-
Page 115: Appendix B: Technical Specifications
Appendix B: Technical specifications This appendix provides technical specifications for the G250 and for compatible power cords. G250 Media Gateway specifications The table of technical specifications provides detailed information on the physical dimensions and tolerances of the G250 Media Gateway. -
Page 116: Power Cord Specifications
Technical specifications Power Cord Specifications Following are specifications for power cords suitable for use with the G250: For North America: The cordset must be UL Listed/CSA Certified, 18 AWG, 3-conductor (3rd wire ground), type SJT. One end is to be terminated to an IEC 60320, sheet C13 type connector rated 10A, 250V. -
Page 117: G250-Bri Pinouts
G250-BRI Pinouts G250-BRI Pinouts Table 10shows the G250-BRI printouts. Table 10: G250-BRI pinouts G250 RJ-45 DTE View DCE View RJ-45 pin No connection No connection No connection No connection No connection No connection No connection No connection Issue 1.1 June 2005... - Page 118 Technical specifications 118 Installation and Upgrade for the Avaya G250 Media Gateway...
-
Page 119: Appendix C: Running The Avaya Installation Wizard (Avaya Iw)
S8300B Media Server, operating in either ICC or LSP mode. You can use Avaya IW to configure the Avaya G250 Media Gateway or to upgrade an installed S8300B with new Avaya Communication Manager (ACM) software and/or G250 firmware. If you... - Page 120 Running the Avaya Installation Wizard (Avaya IW) 5. Select the Launch Installation Wizard link from the home page. The Overview screen appears: 120 Installation and Upgrade for the Avaya G250 Media Gateway...
-
Page 121: Preliminary Screens
Preliminary screens Preliminary screens View the preliminary screens: 1. When you access the Avaya IW, the first screen that appears is the Overview screen: Issue 1.1 June 2005... - Page 122 Running the Avaya Installation Wizard (Avaya IW) 2. Click Continue. The Avaya IW performs system auto-discovery and displays the results on the following screen: 122 Installation and Upgrade for the Avaya G250 Media Gateway...
-
Page 123: Mgc Configuration And Upgrade
Media Gateway Controller (MGC). The primary MGC is the MGC that the G250 searches for first to provide call processing services to the G250. Install an LSP that is associated with an S8700 Primary Controller. Select this option ●... - Page 124 S8300B media server as a Local Surviving Processor (LSP) and to configure an external Avaya S8500 Media Server as the primary MGC. In this case, the installed S8300B will provide backup call processing services to the G250 in case of connection failure to the primary MGC.
- Page 125 MGC configuration and upgrade 2. Click Continue. If you are configuring a new MGC, the Confirm New Installation screen appears, as shown below. If you are upgrading an existing MGC, the Avaya Communication Manager Software screen appears. See Upgrading an existing MGC on page 130.
- Page 126 Running the Avaya Installation Wizard (Avaya IW) 3. Click Continue. The Checklist screen appears. The Checklist screen displays a list of required and optional items you need to configure the G250. For details, see Chapter 2: Before you install on page 19.
- Page 127 MGC configuration and upgrade 4. Click Continue. The NVRAM INIT screen appears. This screen allows you to restore all factory default settings. Issue 1.1 June 2005...
- Page 128 Running the Avaya Installation Wizard (Avaya IW) 5. Click Continue. The Date/Time screen appears. This screen allows you to reset the G250's date and time. 128 Installation and Upgrade for the Avaya G250 Media Gateway...
- Page 129 MGC configuration and upgrade 6. Click Continue. The Product ID screen appears. If you are configuring a new G250, enter the product ID in the ID field and select Assign the new product ID. Issue 1.1 June 2005...
-
Page 130: Upgrading An Existing Mgc
Upgrading an existing MGC Follow these steps to upgrade an existing MGC: 1. Click Continue. The Avaya Communication Manager Software Upgrade screen appears. This screen allows you to upgrade the Communication Manager software on the S8300B installed in the G250. - Page 131 2. If you want to use the currently installed version of Avaya Communication Manager software, move on to step 6. If you want to upload aa new release of Avaya Communication Manager, click Upload New Release. The Software Update screen appears. This screen allows you to install Avaya Communication Manager updates.
- Page 132 6. Click Continue. The Install Unicode Phone Message Files screen appears. This screen allows you to install files that provide unicode messages for display sets that are in the desired unicode language format. 132 Installation and Upgrade for the Avaya G250 Media Gateway...
- Page 133 7. Click Continue. The Media Server - IP Addresses screen appears. If your S8300B media server is already configured, the Avaya IW should detect and display its address information in this screen. If not, you must enter the required information.
-
Page 134: Configuring The Primary Controller Ip Addresses
Enter the required IP address(es) for the primary controller. 2. Click Continue. The Optional Services screen appears. Select the services you want. 134 Installation and Upgrade for the Avaya G250 Media Gateway... - Page 135 Configuring the primary controller IP addresses 3. Click Continue. If you selected Uninterruptible Power Supply (UPS) in the Optional Services screen, the Uninterruptible Power Supply (UPS) screen appears. Enter the required information. Issue 1.1 June 2005...
- Page 136 Domain Name Service (DNS) screen appears. Enter the required information. 5. Click Continue. If you selected Network Time Protocol (NTP) in the Optional Services screen, the Network Time Protocol (NTP) screen appears. Select an NTP option. 136 Installation and Upgrade for the Avaya G250 Media Gateway...
- Page 137 22. 7. Click Continue. The Translation Source screen appears. This screen allows you to generate Avaya Communication Manager translation information. This feature provides basic translations for administration of extension ranges, trunk types, routes, class of service, feature access codes, trunk access codes, station button assignment, and several other parameters.
- Page 138 For information on these files, see Download License and Authentication Files to Your Laptop on page 22. 138 Installation and Upgrade for the Avaya G250 Media Gateway...
-
Page 139: Gateway Configuration
For Gateway configuration: 1. Click Continue. The IP Addresses screen appears. This screen displays the G250's ID, as well as the type of media module residing in each slot of the G250's chassis. To continue, click the icon corresponding to the G250 in the Action column. - Page 140 Community String field, specify a name for the SNMP read community access name to assign to the G250. In the Read Write Community String field, specify a name for the SNMP write community access name to assign to the G250. Re-enter the strings in the Re-enter Community String fields for confirmation.
- Page 141 Gateway configuration 4. Click Continue. The SNMP V3 screen appears. 5. Complete all fields if you want to configure and SNMPv3 user. Otherwise leave all fields blank. Issue 1.1 June 2005...
- Page 142 Media Gateway Controllers (MGCs) that will provide call processing services for the G250. You must specify a primary MGC in the first IP address box. You can specify up to three backup MGCs in the optional IP address boxes, in priority order. The G250 searches for the primary MGC first.
-
Page 143: Firmware Configuration
The Firmware screen appears. This screen displays the currently installed firmware versions on the G250 and its media modules, as well as the most recent available versions. To upgrade firmware, select the modules you want to upgrade and click Continue. - Page 144 Enter the file path of the file you want to upload, or use the Browse button to locate the file. 3. Then, click Continue to upload the file. 4. The Firmware screen re-appears. 144 Installation and Upgrade for the Avaya G250 Media Gateway...
-
Page 145: Tftp Server Configuration
Gateway configuration TFTP server configuration For TFTP server configuration: 1. To configure the G250 server, clear all the boxes in the Select column and click Continue on the Firmware page. The TFTP Server screen appears. 2. If you want to upload configuration and firmware files for IP phones to the G350 TFTP Server, do the following: a. - Page 146 If a green circled checkmark is displayed in the Uploaded column, the file has already been uploaded. 4. Cick Continue. The files are uploaded and the Gateway License screen appears. 146 Installation and Upgrade for the Avaya G250 Media Gateway...
-
Page 147: Gateway License Configuration
Gateway configuration Gateway license configuration For gateway license configuration: 1. To configure the G250 license, click Continue on the TFTP Server screen. The Gateway License screen appears. Issue 1.1 June 2005... -
Page 148: Modem Configuration
For modem configuration: 1. To configure the G250 modem, click Continue on the Gateway License screen. The G250 Modem Type Selection screen appears. Select the modem type you want to use. For more information on using a modem with the G250, see... -
Page 149: Telephony Configuration
Gateway configuration 3. If you selected Serial Modem, enter the required information in the G250 Serial Modem Configuration screen, then click Continue. Telephony configuration For telephony configuration: 1. To configure the G250's telephony parameters, click Continue from the applicable modem configuration screen. - Page 150 Running the Avaya Installation Wizard (Avaya IW) 2. Click Continue. The Import Custom Template screen appears. This screen allows you to configure telephony translation defaults for the Avaya IW. 150 Installation and Upgrade for the Avaya G250 Media Gateway...
- Page 151 Gateway configuration 3. Click Continue. The Call Routing screen appears. Enter the required call routing information. 4. Click Continue. The Extension Ranges screen appears. To add a range, click Add Extension Range and enter the starting and ending extensions for the range. If you want this range to be used to route calls over an IP trunk, select Private Networking.
-
Page 152: Trunk Configuration
The Cross-Connects screen appears. If your trunk cross-connects have been completed, click Continue to proceed with trunk configuration. If your trunk cross-connects have not been completed, it is strongly recommended to exit the Avaya IW and complete all cross-connects before proceeding with trunk configuration. - Page 153 Gateway configuration 2. Click Continue. The IP Trunk List screen appears. This screen displays all IP trunks configured on the G250. To refresh this list, click Refresh. Issue 1.1 June 2005...
-
Page 154: Adding A Trunk
Add IP Trunk and repeat this step. When you are finished adding trunks, click Continue or select an action from the Actions column to modify an existing trunk. 154 Installation and Upgrade for the Avaya G250 Media Gateway... -
Page 155: Modifying Trunk Parameters
Gateway configuration Modifying trunk parameters To modify the trunk's parameters: 1. Click the configuration icon in the Actions column of the IP Trunk List screen. The IP Trunk Configuration screen appears, with the trunk's current parameters displayed. 2. Modify the trunk parameters and click Continue. The IP Trunk List appears. Select an additional action from the Actions column, or click Continue to proceed to the CO Trunk List screen. -
Page 156: Modifying Ip Route Configuration
Modify these ranges, if any, and click Continue. The IP Trunk List appears. Select an additional action from the Actions column, or click Continue to proceed to the CO Trunk List screen. See Configuring a trunk media module on page 159. 156 Installation and Upgrade for the Avaya G250 Media Gateway... -
Page 157: Displaying Trunk Status
Gateway configuration Displaying trunk status To display the trunk's IP route configuration: 1. Click the trunk status icon in the Actions column of the IP Trunk List screen. The IP Trunk Status screen appears. 2. The IP Trunk Status screen displays the operational status of the trunk. To refresh the information, click Refresh. -
Page 158: Removing A Trunk
A message appears asking if you want to remove the trunk. 2. Click OK to remove the trunk. Select an additional action from the Actions column, or click Continue to proceed to the CO Trunk List screen. 158 Installation and Upgrade for the Avaya G250 Media Gateway... -
Page 159: Configuring A Trunk Media Module
The CO Trunk List screen appears. This screen lists trunk media modules detected in the G250 and allows you to configure a media module and run diagnostics. To configure or run diagnostics on a trunk media module, click the Actions icon for the module. -
Page 160: Endpoint Installation
Click Continue from the CO Trunk List screen, or ● Click Endpoints from the main menu. ● The Endpoint Installation screen appears. You can access endpoint installation information from this screen. 160 Installation and Upgrade for the Avaya G250 Media Gateway... -
Page 161: Alarm Configuration
1. Click Alarming from the main menu. The Modem Status & Configuration screen appears. This screen detects any modem connected to the G250. The screen also displays the results of tests performed on the modem. You can perform the following actions from this screen: Click Reset to reset the modem. - Page 162 INADS IP address. In the Community Name field, enter an SNMP community access string. Check the Alarm abbreviation checkbox if you want to enable SNMP alarm abbreviation. 162 Installation and Upgrade for the Avaya G250 Media Gateway...
-
Page 163: Password And Final Screens
1. Click Continue from the SNMP Configuration screen. The Change Root Password screen appears. This screen allows you to change the root password on the G250. 2. Click Continue. The Finish Up screen appears. This screen allows you to save the installation log file to your laptop. - Page 164 Running the Avaya Installation Wizard (Avaya IW) 3. Click Continue. If you have not installed an allocation license file, a warning appears reminding you to install this file. 164 Installation and Upgrade for the Avaya G250 Media Gateway...
- Page 165 Gateway configuration 4. Click Continue. The Verify Gateway Installation screen appears. This screen displays a list of CLI commands that you can use to verify the G250 configuration. The following figure shows a portion of the Verify Gateway Installation screen.
- Page 166 Gateway Device Manager, an application that allows you to configure the WAN Router and perform other advanced configuration tasks. 6. Click Continue. The Congratulations! screen appears to inform you that the installation is complete. To exit the Avaya IW, click Finish. 166 Installation and Upgrade for the Avaya G250 Media Gateway...
- Page 167 Gateway configuration 7. The Exit AIW screen appears. Issue 1.1 June 2005...
- Page 168 Running the Avaya Installation Wizard (Avaya IW) 168 Installation and Upgrade for the Avaya G250 Media Gateway...
-
Page 169: Appendix D: Running The Gateway Installation Wizard (Giw)
Appendix D: Running the Gateway Installation Wizard (GIW) If you did not install an S8300B in the G250, you can use the Gateway Installation Wizard (GIW) to perform the configurations required to complete the installation. GIW prompts you for all the configurations required to complete the installation. - Page 170 3. Plug one end of the provided flat RJ-45 to RJ-45 cable into the provided DB-9 adapter. 4. Plug the RJ-45 connector at the other end of the cable into the CON port of the G250. 5. Plug the DB-9 end of the flat cable into the COM port of the laptop computer.
- Page 171 Run the Gateway Installation Wizard (GIW) 9. Click Continue. The G250 Wizard Usage Options screen appears. 10. Select Continue the installation using this wizard. Issue 1.1 June 2005...
- Page 172 Running the Gateway Installation Wizard (GIW) 11. Click Continue. The Initializing the Components screen appears. 12. Check Initialize the Gateway Installation Session. 172 Installation and Upgrade for the Avaya G250 Media Gateway...
- Page 173 Run the Gateway Installation Wizard (GIW) 13. Click Continue. The Import Electronic Preinstallation Worksheet screen appears. 14. If you have an EPW on your laptop (see Obtain the Electronic Preinstallation Worksheet (EPW) on page 24), check Import EPW. If you are using GIW to upgrade files, do not check Import EPW.
- Page 174 Running the Gateway Installation Wizard (GIW) 16. Click Continue. The IP Addresses screen appears. The IP Addresses screen displays information about the G250 automatically detected, such as what media modules are installed in the media modules slots. 17. If you are using GIW only to upgrade firmware, continue with step 30.
- Page 175 19. In the PMI screen, specify the details of the Primary Management Interface (PMI) for the G250. The PMI is used as the IP address of the G250 for specific management functions. If you do not know which interface to designate as the PMI, check with your project manager.
- Page 176 Running the Gateway Installation Wizard (GIW) 20. Click Continue. The SNMP screen appears. 21. In the SNMP V1 screen, specify SNMP V1 community strings for Read Only and Read Write access. 176 Installation and Upgrade for the Avaya G250 Media Gateway...
- Page 177 Run the Gateway Installation Wizard (GIW) 22. Click Continue. The SNMP V3 screen appears. 23. If you want to configure an SNMP V3 user on the G350, do the following: a. In the User Name field, enter a string of up to 32 characters representing the SNMP V3 user.
- Page 178 26. Specify the IP addresses of up to three additional MGCs, optionally, in the subsequent boxes. 27. Specify Transition Point information. 28. Click Ping Test to test the accessibility of each MGC. 29. Click Continue. You return to the IP addresses screen. 178 Installation and Upgrade for the Avaya G250 Media Gateway...
- Page 179 Run the Gateway Installation Wizard (GIW) 30. Click Continue. The Firmware screen appears. 31. Upload any firmware upgrades you need to install to your TFTP server. 32. In the TFTP Address field, enter the address of your TFTP server. 33. In the TFTP Directory field, enter the name of the directory on the TFTP server in which the upgrade files are located.
- Page 180 If you selected FTP or SCP, enter the username and password in the Username and Password fields, and re-enter the password for confirmation in the Re-enter Password field. 180 Installation and Upgrade for the Avaya G250 Media Gateway...
- Page 181 Run the Gateway Installation Wizard (GIW) 38. Click Continue. 39. In the Select column, check any files you wish to upload. If you selected SCP as your upload protocol, the checkboxes for the phone images are disabled. If a green circled checkmark is displayed in the Uploaded column, the file has already been uploaded.
- Page 182 Running the Gateway Installation Wizard (GIW) 40. Click Continue. The files are uploaded and the Gateway License screen appears. 182 Installation and Upgrade for the Avaya G250 Media Gateway...
- Page 183 52. 42. If you do not need to connect a modem to the G250, select None. 43. If you do need to connect a modem to the G250, select the type of modem you want to connect. Issue 1.1 June 2005...
- Page 184 48. In the CHAP Secret field, enter the CHAP secret key obtained using the ART tool. See the Automatic Registration Tool (ART) for the RAS IP address on page 22. 49. In the Confirm CHAP Secret field, reenter the CHAP secret key. 184 Installation and Upgrade for the Avaya G250 Media Gateway...
- Page 185 50. Click Continue. The Change Root Password screen appears. 51. If you would like to change the password on the G250 Media Gateway, enter the current password in the Current Password field, enter a new password in the New Password field, and re-enter the new password in the Confirm New Password field.
- Page 186 You have completed GIW. Follow the on-screen instructions if you want to save the installation log file. Further configurations, as described in this screen, can now be performed either remotely, via a modem that you enabled with GIW, or locally. 186 Installation and Upgrade for the Avaya G250 Media Gateway...
-
Page 187: Connect A Modem, If Necessary
Connect a modem, if necessary Connect a modem, if necessary If you enabled a serial modem on the G250 during your GIW session, you can now connect the modem. To connect a serial modem: 1. Connect the serial modem to a working telephone line. - Page 188 Running the Gateway Installation Wizard (GIW) 188 Installation and Upgrade for the Avaya G250 Media Gateway...
-
Page 189: Index
....USP WAN link ..Avaya G250 Manager, upgrading Java applet ..... . Avaya G250 Media Gateway Connecting devices . - Page 190 ..resources for technical assistance ..technical assistance within the US ..technical assistance worldwide 190 Installation and Upgrade for the Avaya G250 Media Gateway...
- Page 191 ..Physical description Tabletop installation of the G250 chassis ......
- Page 192 ....stops working ..... WAN port 192 Installation and Upgrade for the Avaya G250 Media Gateway...
Need help?
Do you have a question about the G250 and is the answer not in the manual?
Questions and answers