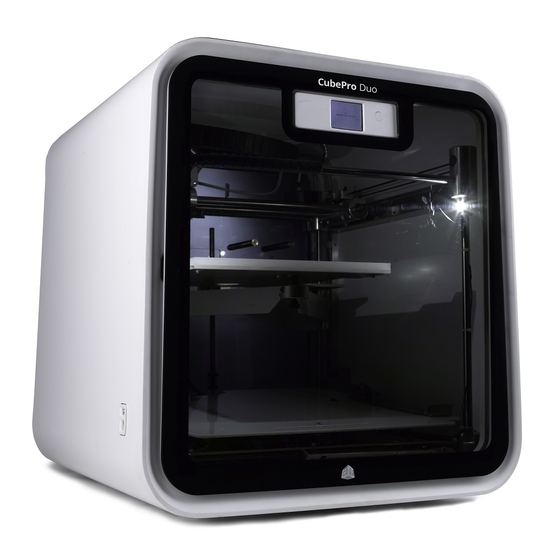
3D Systems CubePro Setting Up
Hide thumbs
Also See for CubePro:
- User manual (89 pages) ,
- Replacement manual (52 pages) ,
- Repair manual (40 pages)
Advertisement
Quick Links
Unpacking And Setting Up Your CubePro
Contents
*The number of cartridges depends on the ordered configuration.
NOTE: The appearance of some components may vary.
Unpacking And Initial Setup
CAUTION: Due to the size and weight of the printer, this procedure may
require more than one person. Ensure there are enough people to safely and
comfortably move the printer to its final location.
NOTE: Ensure that you save all foam and packing material for the future
repacking of your CubePro. Transporting the printer without original packing
materials may damage the printer
1.
Carefully cut the straps if applicable and then pull the tabs on all four release clips.
NOTE: There is one release clip on each side of the box.
Advertisement

Related Manuals for 3D Systems CubePro


Summary of Contents for 3D Systems CubePro
- Page 1 final location. NOTE: Ensure that you save all foam and packing material for the future repacking of your CubePro. Transporting the printer without original packing materials may damage the printer Carefully cut the straps if applicable and then pull the tabs on all four release clips.
- Page 2 Pull the handles (A) and remove the release clips from the outer box. Lift the box away from the printer. Remove the accessories tray (A).
- Page 3 Remove the upper foam supports (A) from the printer. Pull the protective bag down around the printer and remove the printer assembly from the lower foam support. Position the printer where it will be used.
- Page 4 NOTE: Ensure the printer is placed in a location where its size and weight will be properly supported. Unpack the top layer of the accessories tray. NOTE: Depending on the printer configuration, the arrangement of the accessory boxes may differ. Unpack the power cord (A), the spacer (B), material cartridge, tool kit and Cube Glue(C).
- Page 5 CAUTION: The print pad is fragile. Exercise caution when handling the print pad. Open the front door. Cut away the zip ties (A) and remove the foam tubing from the print jet area. NOTE: For illustration purposes only, the door was removed from the image. Do not attempt to remove the door from the printer.
- Page 6 Using a 4mm hex head driver, attach the mounting posts to the jet wiper assembly with the supplied screws and washers. NOTE: Tighten the screws until the posts are secure. CAUTION: Do not over-tighten the screws. The jet wiper assembly can break if the screws are over-tightened.
- Page 7 Mount the jet wiper mounting posts to the back panel of the printer through the keyhole slots. NOTE: Slide the mounting pins downward. Align the jet wiper assembly bottom tab (A) with the slot in the floor (B) and slide the jet wiper assembly downward.
- Page 8 Press the power on/off switch (A) to power on the CubePro. Press the on/off button (A) beside the LED screen to power on the CubePro touchscreen display. Press the touchscreen to navigate to the main menu.
-
Page 9: Setup And Activation
Enter a name for your printer. Scroll to the letters you wish to select by pressing the arrow symbols on each side of the screen. Press the letters to select them. Select the checkmark to continue. If you do not wish to name your CubePro, press SKIP to move to the next screen and continue with step 4. - Page 10 Connect your printer to your wireless network. Use the up or down arrow to scroll to your network choice. Select your network. NOTE: If your network is password protected, the printer will first prompt you to enter the password. NOTE: The printer can also connect to an ad hoc network, a decentralized network that wirelessly connects a local computer to the printer directly.
- Page 11 Navigate to http://3dsystems.com/shop/cubepro/activate. NOTE: The serial number of your printer will appear on the printer’s touchscreen display. Take note of the serial number. You will need it to activate your printer. The serial number can also be found on a label adhered to the right side of the printer near the power on/off...
- Page 12 NOTE: You can access the User Guide, software for either Windows or Apple operating systems, and free creations. After receiving your activation code during the registration and warranty activation process, enter your 4-digit code in the touchscreen display. Select the checkmark continue.
- Page 13 To install cartridges and perform a test print, select START. NOTE: Install the cartridge in cartridge bay 1 on the left side of the printer. Open the packaging and remove the thumbscrew from the new cartridge. Select the checkmark to continue. Pull out 12”/30 cm of material from the material cartridge.
- Page 14 Cut off 2”/5 cm of print material from the end. Select the checkmark to continue. NOTE: Ensure the material is not bent or creased. If the material is not straight, pull out the damaged material from the cartridge. Cut off and dispose the portion that is not straight.
- Page 15 (1) Push the front of the cartridge into place. (2) Then, push the cartridge handle downward until the cartridge is fully seated in its cartridge bay mount. Select the checkmark to continue. NOTE: Ensure the front of the cartridge (A) where the material exits is seated under the clamp roller and between the vertical alignment pins in the cartridge bay.
- Page 16 NOTE: If the test print file uses a color that is not installed in the printer, select the checkmark to enable the printer to change the color of the print to a color currently installed. Apply two thin layers of Cube Glue to the print pad. Select the checkmark to continue.
- Page 17 NOTE: Print jet 1 will begin to heat. NOTE: The printer will begin printing the welcome message test print. Select the checkmark to continue to go to the main menu.
-
Page 18: Connecting Via Usb Cable
The printer can connect to a computer running Windows® 8.1 or Windows 10 using a standard USB A to USB B cable. You can use the CubePro Print Client to prepare your files for printing or you may also use any PC application that is Windows 3D print compatible. -
Page 19: Menu Overview
Once the driver has been installed, you can verify that it installed properly when you see the printer icon in the Devices and Printers section of the control panel. NOTE: You can also view 3D Systems CubePro under Printers in the Device Manager. - Page 20 Print / Setup PRINT allows the user to print a creation stored either on a USB mass storage device or from the CubePro software. SETUP allows the user to configure the printer, connect to a wireless or ad hoc network, install cartridges, or view the printer status.
-
Page 21: Print Plate Calibration
installed cartridges. Print Plate Calibration MOVE JETS allows the user to manually move the print jets in the X and Y directions. LEVEL PLATE is a utility that assists in leveling the print pad to the print jets. Print Jet Calibration CONTROL JETS allows the user to test the operation of the extruders and print jets. - Page 22 LIGHT allows the user to turn on or off the print jet LEDs. The other interior LEDs are managed by the firmware when the CubePro is powered on. Advanced Selecting the FIRMWARE icon allows the user to update their firmware either with a file...
- Page 23 touchscreen display.
Need help?
Do you have a question about the CubePro and is the answer not in the manual?
Questions and answers