3D Systems Cube User Manual
3d printer
Hide thumbs
Also See for Cube:
- User manual (121 pages) ,
- Quick start manual (32 pages) ,
- Lesson (15 pages)

Related Manuals for 3D Systems Cube


Summary of Contents for 3D Systems Cube
- Page 1 Cube ® 3D Printer 2nd generation User Guide See inside for use and safety information.
-
Page 2: Table Of Contents
Download and install Cube Software for Windows . . . . . . . . . . . . . . . . . -
Page 3: Introduction
Cube 3D Printer . The warranty period for the Cube 3D Printer is ninety (90) days and shall start on the date your Cube 3D printer is activated . -
Page 4: Important Safety Information
• When the Cube is operating, the print tip on the Print Jet becomes hot; avoid touching this area until it has cooled down . • Do not change color of material during printing; doing so may damage the Cube . - Page 5 Stellen Sie sicher, dass kleine 3D-Drucke für kleine Kinder nicht zugänglich sind. Diese 3D-Drucke bergen eine mögliche Erstickungsgefahr für kleine Kinder. • Wenn der Cube-Drucker in Betrieb ist, wird die Druckdüse am Print Jet heiß; vermeiden Sie es, diesen Bereich zu berühren, bis er abgekühlt ist. •...
- Page 6 No modifique ninguna medida de seguridad ni realice modificaciones a la impresora Cube. Hacerlo está prohibido y anula la garantía . • El uso de materiales de impresión o de piezas impresas en 3D que no sean componentes auténticos de 3D Systems puede anular la garantía . •...
- Page 7 . • Ne pas modifier les dispositifs de sécurité ou apporter des modifications au Cube. Cela est interdit et annule la garantie. • L’utilisation de matériaux d’impression ou d’imprimés en 3D autres que les composants 3D Systems d’origine peut entraîner l’annulation de la garantie .
- Page 8 3D, poiché questi potrebbero costituire un pericolo di soffoca- mento . • Durante l’attività di Cube, la puntina di stampa del getto d’inchiostro si riscalda; evitare il contatto con quest’area fino al completo raffreddamento . •...
- Page 9 3D-prints kunnen komen. Deze 3D-prints houden potentieel verstikkingsgevaar in voor jonge kinderen. • Wanneer de Cube in werking is, wordt de printtip op de Print Jet heet . Raak dit oppervlak niet aan totdat het is af- gekoeld .
- Page 10 Det er påkrævet at en voksen holder opsyn; hold nøje øje med børn og træd ind hvis det er nødvendigt for at undgå po- tentielle sikkerhedsproblemer og at sikre at Cube bruges rigtigt . Sørg for at små børn ikke har adgang til små 3D prints .
- Page 11 高熱面の危険: このシンボルサインの近くまたはプリントジェット部には表面が高熱となっている部分がありま す。触れないように注意してください。高熱面で火傷することになります。 要注意: データの喪失、機器の損傷、または人身傷害を引き起こすような何かが起こる場合もあることを示しま す。 要注意: 人身傷害を引き起こす可能性のある危険個所を示します。 SIK 安全ガイドライン • 本項の安全ルールのすべてに従い、また本書のすべての要注意および警告事項を守ってください。 • 安全機能を修正したり、Cube に改変を加えたりしないでください。そうすることは禁じられており、保証は無効にな ります。 • 純正 3D Systems コンポーネント以外のプリント材料や 3D プリントの使用は、保証を無効にする場合があります。 • 大人の監視が必要です。子供が使用している時には身近で見守り、安全上の問題を未然に防ぎ、Cube が適切に使用さ れるよう、必要に応じて介入するようにしてください。小型の 3D プリントが幼児の手に届くことのないようにして ください。これらの 3D プリントは幼児にとっては、のどを詰まらせる危険物となります。 • Cube が動作中は、プリントジェット上のプリントチップが熱くなります。その部分が冷めるまでは、触れないように してください。 • プリント中に材料の色を変更しないでください。そうすると Cube を損傷させることがあります。...
-
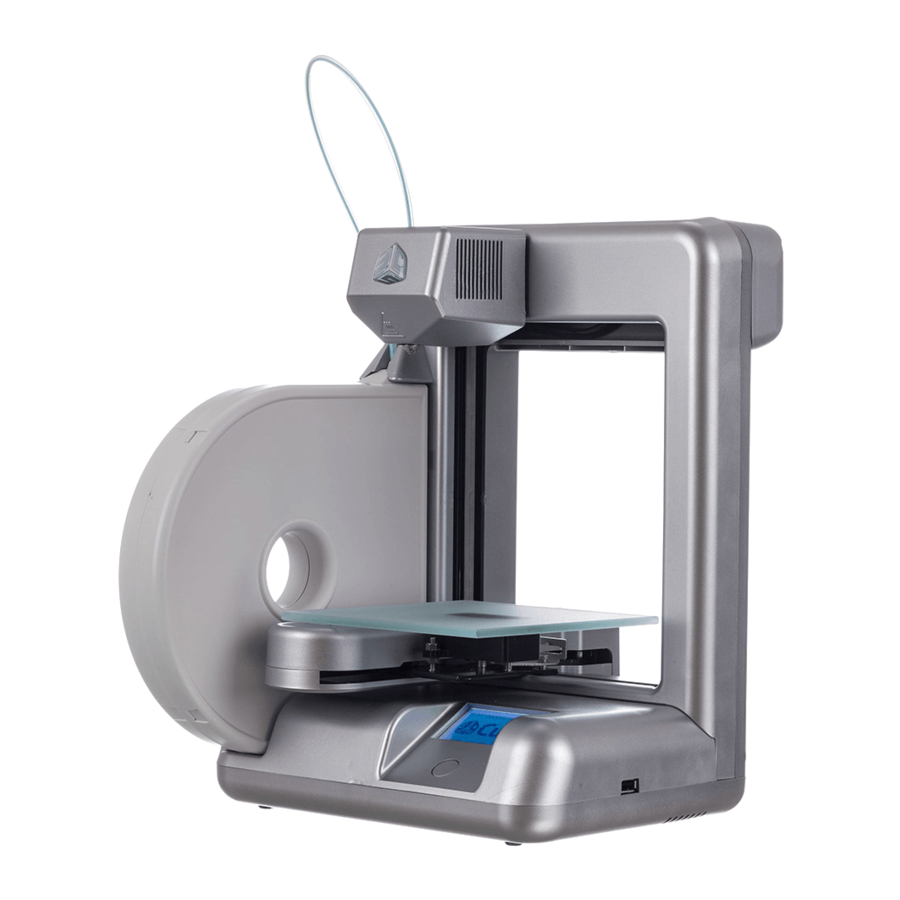
Page 12: Cube 3D Printer Features
CUBE 3D PRINTER FEATURES The Print Jet print tip heats the material and produces a thin flowing material of plastic creating layers that adhere to the Print Pad . After each layer is produced, the Print Pad lowers so that a new layer can be drawn on top of the last . This process continues until the last layer on the top of the creation is jetted . -
Page 13: At A Glance
AT A GLANCE Cube Tube Print Jet Print Pad Operator’s Touchscreen ON/OFF Push-Button Power Switch & Menu Function Material Cartridge Fuse Power Cord Connection USB Port* USB Connection** *For firmware update only. **For loading Cube build files only. BACK RIGHT SIDE... -
Page 14: Requirements For Your Cube
• Processor: Multi-core processor - 2 GHz or faster • Outlet requirements: 100-240 Volts, at 50/60 Hz. per core • Cube electrical rating: 24V DC, 3 .75 amp . • System RAM: 2 GB • Screen Resolution: 1024x768 MATERIAL STORAGE •... -
Page 15: Unpacking And Setting Up Your Cube
. Lift top of carton up and remove . Lift foam from the top of Cube . Remove foam from the midsection and below the plate by gently pulling out from the front . Remove Cube from box . -
Page 16: Link Your Cube To Your Cubify Account
Activate My Cube tab . An activation code will then be sent to the email account you used to register . This code will be used to unlock your Cube so that you can get your 3D printing underway . -
Page 17: Unlock Your Cube
Cubify account . A copy of the code should also be sent to your email . Make sure your Cube is plugged in . Press the button on the front panel to turn it on . It may take a few seconds for it to warm up . -
Page 18: Download And Install Cube Software For Mac Osx
NOTE: Safari users will not have to unzip the dmg; it unzips as it downloads. • It is necessary to download the Cube software in order to be able to import .stl or .creation files and convert them to .cube files. •... -
Page 19: Cubify Software Overview
CUBIFY SOFTWARE OVERVIEW Cubify Software allows you manipulate your design before sending it to the Cube for printing . It simulates the Cube’s Print Pad so you can orient, scale, re-size and rotate the 3D print to get the best result when printing. Become familiar with the software and understand the functions before starting your first print. - Page 20 SET UP A COMPUTER (AD HOC) NETWORK An ad hoc network is a temporary connection to your Cube through your computer or wireless smart phone . Ad hoc networks can only be wireless, so you must have a wireless network adapter installed in your computer to setup or join an ad hoc network .
-
Page 21: Wi-Fi Set-Up
USB cable and connect the cable to the Cube USB port located on the back of the Cube (again, these instructions will be displayed on the screen) . Connect the other end of cable to your computer’s USB port . -
Page 22: Setting Print Jet Gap
There must be an appropriate distance between the print tip and the Print Pad to make sure the first printed layer sticks properly . When the Cube is operating, the print tip on the Print Jet nozzle becomes hot; avoid touching this area until it has cooled down. -
Page 23: Material Cartridge Installation
Tilt cartridge so that bottom of cartridge is resting on cartridge holder . Slide cartridge in the holder ensuring that top of cartridge feeder is seated into the Cube feeder . Do not slide cartridge without tilting, doing so can cause damage to t he Cube Feeder . -
Page 24: Printing Preparation
START A PRINT AFTER APPLICATION. ADHESIVE SHOULD STILL BE WET AT START OF PRINT. Find the CubeStick in the original packaging . Remove Print Pad from the Cube . Apply a thin, even coat of adhesive on the entire top surface of the Print Pad. (Don’t over-apply!) Check the Print Pad after applying the adhesive to make sure there aren’t any gaps where the adhesive was not... -
Page 25: Printing Your First Creation
To get started printing your first creation; the creation files that were downloaded when you activated your account or a .stl file will need to be converted to a .Cube file. This is the machine code file that the Cube printer will read to build your creation . -
Page 26: Printing Your First Creation
If you are using your USB Memory Stick to download your Cube file, please install the USB Memory Stick into the USB port on your computer. Open the file folder where your Cube file is located and save it on the USB Memory Stick. -
Page 27: Replacing Material Cartridge
Do not change color of material or cartridge during printing; doing so may damage the Cube. After being instructed by the touchscreen, pull Cube Tube away from top of Print Jet . Do not pull the material out until the touch screen instructs you to do so . -
Page 28: Cloud Printing From Cubify .Com
(refer to PRINTING WITH WI-FI CONNECTION, page 25) . If a Cube is discovered in your network, you have a choice of printing now or decline printing . If you select print now, your print will start printing on the Cube you selected in the network . -
Page 29: Maintaining Your Cube
MAINTAINING YOUR CUBE CLEANING THE EXTERIOR • Clean the Cube’s exterior with a lint free cloth and water . Dampen the cloth with water and wipe the outer surfaces of any debris that is visible . CLEANING THE PRINT PAD •... -
Page 30: Print Pad Leveling Instructions
PRINT PAD LEVELING INSTRUCTIONS Your Print Pad may become un-leveled when transporting your Cube . If this occurs, please follow these instructions to level your Print Pad for optimum creation experience . The Print Pad pad can be leveled with the two adjusting bolts located underneath the front and back of the pad . - Page 31 3D Systems, Inc . 333 Three D Systems Circle | Rock Hill, SC | 29730 Cubify .com ©2013 3D Systems, Inc . All rights reserved . The 3D Systems logo, Cube and Cubify are registered trademarks of 3D Systems, Inc .
Need help?
Do you have a question about the Cube and is the answer not in the manual?
Questions and answers