Table of Contents
Advertisement
Advertisement
Table of Contents

Related Manuals for 3D Systems CubeX Duo


Summary of Contents for 3D Systems CubeX Duo
- Page 1 CubeX 3D printer User guide See inside for use and safety information.
-
Page 2: Table Of Contents
Safety guidelines . . . . . . . . . . . . . . . . . . . . . . . . . . . . . . . . . . . . . . . . . . . . . . . . . . . . . . . . . . . . . . . . . . . . . . . . . . . . . . . . . . . . . . . . . . . . . . . . . . . . . . . . . 4 CUBEX 3D PRINTER FEATURES AND BENEFITS CubeX 3D printer properties . - Page 3 Caustic soda method . . . . . . . . . . . . . . . . . . . . . . . . . . . . . . . . . . . . . . . . . . . . . . . . . . . . . . . . . . . . . . . . . . . . . . . . . . . . . . . . . . . . . . . . . . . . . . . . . . 28 CUBEX MAINTENANCE Restoring roughness to the Print Pad .
-
Page 4: Copyright
CubeX 3D Printer . The warranty period for the CubeX 3D printer is the shorter of (i) 90 days from the date your CubeX 3D printer is activated or (ii) 24 months after the CubeX 3D Printer is shipped from 3D Systems to the end customer or intermediary . -
Page 5: Important Safety Information
CubeX’s appropriate use . Ensure small 3D prints are not accessible to young children . 3D prints are potential choking hazards for young children. • When the CubeX is operating, the tip of the material dispenser (Print Jet) becomes hot; avoid touching this area until it has cooled down . -
Page 6: Cubex 3D Printer Features And Benefits
CUBEX 3D PRINTER FEATURES AND BENEFITS The CubeX 3D Printer creates the model by pulling filament from the cartridge through the print jets via the delivery tubes. The filament is then jetted through the print jet tip in a thin string of molten plastic. The print jet movement is coordinated by the print plate, which lowers incrementally after each layer is deposited so a new layer can be drawn on top of the last, building the part up . -
Page 7: At A Glance
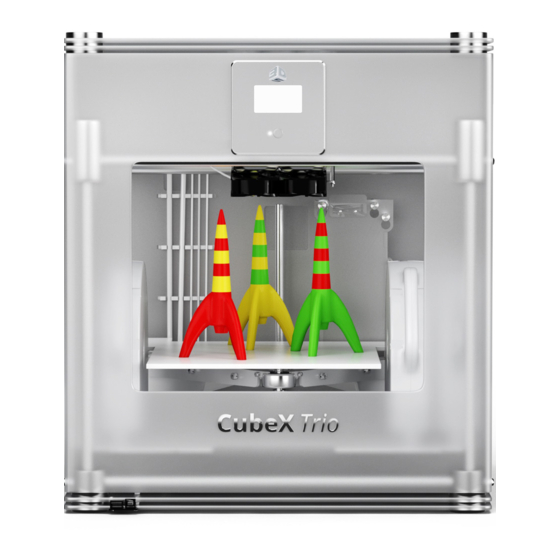
Get acquainted with your CubeX 3D Printer before you begin printing. This section identifies the important areas that will be discussed throughout this guide . CubeX Duo is depicted for illustration purposes only . Locations of important areas are the same for the Cube X and Cube X Trio . -
Page 8: Requirements For Your Cubex
• 36kg (79 lbs) • 37kg (81 .5 lbs) Duo Software: • 38kg (84 lbs) Trio • CubeX Client Software, available at Cubify.com Minimum hardware requirements (a PC with these Electrical requirements: minimum requirements will be required to run the software): •... -
Page 9: Unpacking Your Cubex
. (Fig . 1) Fig . 1 With two people, remove CubeX from the box, lift from the metal frame on both sides of the printer . Place CubeX on a table . (Fig . 2) Fig . - Page 10 Remove the “Warning” label from the touchscreen . (Fig . 11) Fig . 11 12 . Press the Control button, the CubeX Activation Screen will appear . You will need to register and activate your CubeX to unlock the printer . (Fig . 12)
-
Page 11: Activate Your Cubex And Link To Your Cubify Account
• Enter the SERIAL NUMBER; the serial number is located on the interior back wall and on the back of the CubeX frame . (Fig . 15) • Enter the CubeX ID; this ID can be found on the upper right corner of the CubeX touchscreen and click ACTIVATE . (Fig . 15) Fig . -
Page 12: Removing The Remaining Packing Materials
REMOVING THE REMAINING PACKAGING MATERIALS Using left / right arrows on the touch screen, navigate to the MOVE menu . (Fig . 18) Fig . 18 Using the up arrow on the right side of screen, move the print plate up far enough to remove the foam . -
Page 13: Cubex Main Menu Overview
TOUCHSCREEN Tap on the touchscreen to navigate to the main menus using the arrows on the bottom corners of the touchscreen . To return to the touch screen, pressing the control button . PRINT View the .cubex files that are saved on your memory stick and select a .cubex file to print. PRINT INFO Provides Material Cartridge status and printing status during the printing process . -
Page 14: Installing The Print Pad
Fig . 25 CHECKING THE X,Y,Z AXIS During shipping your CubeX, the X, Y and Z axes may have come out of alignment. Before starting your first creation, please verify that the X, Y and Z axes are aligned . -
Page 15: Checking The Z-Gap Between The Print Jet Tip And The Print Pad
CAUTION: Do not overdrive the print jet tip into the print pad. Doing so can cause damage to the print jet. NOTE: If more than one print jet is equipped on your CubeX, use the first print jet to set the gap. -
Page 16: Replacing A Material Cartridge
Thread the filament under the cartridge clamp bar and into the feed tube. (Fig. 35) Fig . 35 Install the new cartridge from the side of CubeX and into the cartridge bay . (Fig . 36) Fig . 36 Push filament between the front of cartridge and the eyelet, through the feed tube and up to the printjet . -
Page 17: Create A Test Print
Print a test print using one of the creation files that you downloaded from Cubify.com to ensure that your printer is functioning properly . Insert the USB stick containing your .CUBEX file (creation files) into the USB port on the CubeX . (Fig . 42) Fig . -
Page 18: Install Your Cubify Invent Software
Your Cubify Invent license code is on the “Your Cubify Invent” card located in the Cubify toolkit . Your USB stick can also be found in the toolkit . Plug the USB provided with your CubeX into your computer and click on “Cubify_ Invent .exe” to download the software to your computer . (Fig . 47) Fig . -
Page 19: Cubex Software Overview
Fig . 57 CUBEX SOFTWARE OVERVIEW • The CubeX software is used to create the .cubex files that your CubeX will use to create your parts. The software allows you to orient, scale, re-size and rotate the part before printing . (Fig . 58) Fig . -
Page 20: Cubex Software User Interface
Close the open .cubex file Save Print File Save the current open .cubex file SCALE GEOMETRY % Scale Scale your part before creating the .cubex file To mm Change a part from inches to mm To inches Change a part from mm to inches... -
Page 21: View Tab
THE CUBEX. HOW TO OPEN FILES IN THE CUBEX SOFTWARE The CubeX software has three different possible ways to open .stl files. A single part file, multiple single part files on one Print Pad and a multi-part file assembly. • A single part file consists of one .stl file with one shell on a Print Pad. -
Page 22: Opening A Single Part File
• A multiple single part file consist of multiple .stl files opened onto one Print Pad, these can be selected as one, two or three shells . • A multi-part assembly file consist of multiple .stl files designed to create one assembly part. These can be treated as one, two or three shells . -
Page 23: Positioning Multiple Parts
The second part will open in the center of the bed and appear to be merged with the first part. (Fig. 67) Fig . 67 POSITIONING MULTIPLE PARTS • Manual positioning: Right click and hold on one of the parts, you can now drag it around the bed (when using this method the bed will automatically switch to top view) . -
Page 24: Using The Shell Selector Tool
When all the .stl files are open, click the done button to finish the assembly file. This file can now be treated as one .stl file with multiple shells. (Fig. 75) Fig . 75 USING THE SHELL SELECTOR TOOL The Shell Selector tool is used to select which Print Jets print which parts of a multi-material part/multiple parts on a Print Pad . -
Page 25: Rotating A Part
• 0.5mm: This layer height is faster than 0 .1mm but is slightly lower quality . • 0.5mm: The CubeX 3D Printers fastest resolution . This layer height has a lower quality than 0 .1mm and 0 .25mm but has a much faster print time . -
Page 26: Saving A .Cubex File For Printing
Your file can be saved on the USB stick or your computer. Choose the location you wish to save the .cubex file, give it a suitable name and click “Save.” Transfer the .cubex file to your USB stick for printing or save it on your USB stick . (Fig . 86) Fig . -
Page 27: Finishing Your Creation
Rinse your creation under hot water to ensure all of the Magic CubeX Glue paste has been removed . To clean the Print Pad, rinse the pad under hot water to clean off any remaining Magic CubeX Glue paste . -
Page 28: Removing Supports With The Ultrasonic Support Removal Tank
REMOVING SUPPORTS WITH THE ULTRASONIC SUPPORT REMOVAL TANK (sold separately) Caustic soda can burn if handled improperly. Never handle caustic soda without using all of the supplied Personal Protective Equipment (PPE): gloves, goggles and tongs . If caustic soda touches the skin, wash it away immediately . -
Page 29: Caustic Soda Method
CAUSTIC SODA METHOD Caustic soda can burn if handled improperly. Never handle caustic soda without using all of the supplied Personal Protective Equipment (PPE): gloves, goggles and tongs. If caustic soda touches the skin, wash it away immediately. If caustic soda touches the eyes, immediately use an eyewash treatment. Never operate the unit without water in the cleaning tank. -
Page 30: Cubex Maintenance
CUBEX MAINTENANCE RESTORING ROUGHNESS TO THE PRINT PAD To restore roughness to the Print Pad, run the sandpaper included in your toolkit diagonally across the bed corner to corner in both directions . (Fig . 94) Fig . 94 LEVELING THE JET WIPER HEIGHT... - Page 31 Touch the ‘Clockwise’ and ‘Counter-clockwise’ buttons to automatically LEVEL BED move the carriage around the corners of the print area . (Fig . 98) Fig . 98 From the side of the printer, observe any changes in distance between the Print Plate and the Print Jet during each movement along the side of the Print Plate .
-
Page 32: Fine-Tuning Your Print Pad
UNBLOCKING THE CUBEX PRINT JET TIP If your CubeX will not jet material, you can unblock the print jet tip by going into ‘PJ-CONN’ from the main menu and heating the tip to 260°C . Using the 0 .5mm drill bit from the tool kit (a drill is not needed), feed the drill bit into the print jet tip, being careful not to bend the drill bit . -
Page 33: Updating Cubex Firmware
Fig . 108 • Make sure the print jet is clean . For cleaning instructions, see ‘MAINTAINING YOUR CUBEX > Cleaning the Print Jet’) . • Starting with a gap between the Print Pad and the print jet, move the Print Pad towards the print jet using the up (+) “SET Z HEIGHT”... - Page 34 . (Fig . 116 & 117) Fig . 116 Fig . 117 11 . Navigate to the settings tab to the CubeX software and press the Firmware update button . (Fig . 118) Fig . 118 12 . The CubeX software will then open windows explorer . Navigate to the firmware you wish to install and open it.
-
Page 35: Restoring The Settings Your Cubex 3D Printer Firmware From V1.01
CubeX) . Once it is re-activated turn off the CubeX 3D Printer . Plug the USB stick into the CubeX 3D Printer and turn it on, touch the screen and you will receive a notification of your settings being restored . - Page 36 Download the CubeX calibration file from Cubify.com . CALIBRATION FILE Print the CubeX calibration file as you would any other print file. READING THE The lines on the calibration print are offset by 0 .1 mm . The amount of misalignment can...
- Page 37 3D Systems, Inc . 333 Three D Systems Circle | Rock Hill, SC | 29730 Cubify .com ©2013 3D Systems, Inc . All rights reserved . The 3D Systems logo, CubeX and Cubify are registered trademarks of 3D Systems, Inc .
Need help?
Do you have a question about the CubeX Duo and is the answer not in the manual?
Questions and answers