
Related Manuals for FLASHFORGE 3D PRINTER Hunter


Summary of Contents for FLASHFORGE 3D PRINTER Hunter
- Page 1 FlashForge Corporation FlashForge Hunter 3D Printer User Guide 0086-0579-82273989 Hunter User Guide | www.flashforge.com...
-
Page 2: Table Of Contents
Chapter 3. Unpacking ........................17 Chapter 4 . Hardware Assembly....................... 22 4.1 Pour Photopolymer Resin into Vat ..................22 4.2 Plug in Power Cable & turn on the Hunter ................ 23 4.3 Screen ..........................24 4.4 Build Plate Leveling......................31 Chapter 5: About Software ....................... - Page 3 FlashForge Hunter. Even if you are familiar with earlier FlashForge machines or 3D printing technology, we still recommend that you read through this guide, as there is lots of important information about the Hunter for you to get a better 3D experience.
- Page 4 Increase the separation between the equipment and receiver. Connect the equipment into an outlet on a circuit different from that to which the receiver is connected. Consult the dealer or an experienced radio/TV technician for help. Hunter User Guide | www.flashforge.com 0086-0579-82273989...
-
Page 5: Introduction
Introduction Notes: ·Please read FlashForge Hunter 3D Printer User Guide carefully before use. ·The User Guide is written based on Windows 7 OS. ·The version of the FlashDLPrint is the latest. The FlashForge Hunter 3D Printer User Guide contains the information needed for you to set up and use this device. -
Page 6: Notice
· Electricity Safety ① Always use the Hunter with a properly grounded outlet. Do not refit Hunter plug. ② Do not use Hunter in damp or wet locations. Do not expose Hunter to burning sun. ③ Do not abuse the cable. - Page 7 FlashForge. · Photopolymer Resin Storage Unused photopolymer resin needs to be stored in a dark, dry, cool place, and out of the reach of children. Hunter User Guide | www.flashforge.com 0086-0579-82273989...
- Page 8 FlashForge shall not be liable for errors contained herein for incidental consequential damages in connection with furnishing, performance or use of this material This document contains proprietary information protected by copyright. Copyright © 2017 FlashForge Corp. All Rights Reserved Hunter User Guide | www.flashforge.com 0086-0579-82273989...
-
Page 9: Chapter 1: 3D Printing Technology
Digital Light Processing (DLP) is a new method of 3D printing. It is also the method that the Hunter uses. It works by first digitally processing the image signal, and then projecting the light to the photosensitive resin van to get a solid model according to the irradiation projection. - Page 10 3D printers. FlashDLPrint is the slicing software used for the FlashForge Hunter. Using FlashDLPrint, you can prepare files to be SVGX files for printing. Then the files can be transferred to your Hunter via USB cable, USB stick or Wi-Fi. Hunter User Guide | www.flashforge.com 0086-0579-82273989...
-
Page 11: Chapter 2 . About Hunter
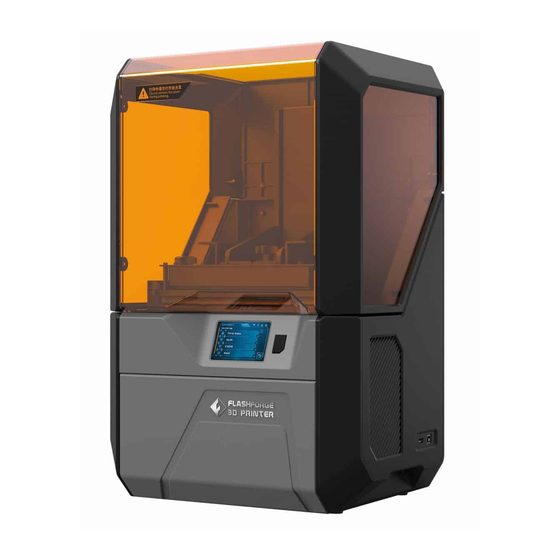
Chapter 2 . About Hunter 2.1 About Your Hunter 2.1.1 Main view: 1. Light Shield 7. Touch Screen Button 2. Z-Aixs 8. Touch Screen 3. Platform Screw 9. USB Cable Input 4. Build Plate 10. USB Stick Input 5. Vat Film Screw 11. - Page 12 Photopolymer Resin Accessories Kits Spare Screw Kits (500ml) Filter screen Accessories Kits Contents: Hexagon Wrench (2.5mm*1/3mm*1/5mm*1), Phillips Screwdriver, USB Stick, Plastic Tweezers. Spare Screw Kits: Hexagon Socket Head Cap Screws, Flat Washer, Spring Washer. Hunter User Guide | www.flashforge.com 0086-0579-82273989...
- Page 13 15 of the Quick Start Guide(Clean and remove the model). Soft Cloth Used when doing the cleaning. Photopolymer Resin Used for printing, detailed instruction in unpacking and hardware assembly chapter of the user manual. Filter screen Hunter User Guide | www.flashforge.com 0086-0579-82273989...
- Page 14 Spring Washer A small part installed on resin vat, please refer to page 18 of the Quick Start Guide or flashforge support team before you take installation/maintenance steps, for printer and user good. Hunter User Guide | www.flashforge.com 0086-0579-82273989...
- Page 15 2.1.3 Terms The surface on which the Hunter builds an object. Build Plate The three dimensional amount of space that an object Build Volume will use once it is completed. The largest build volume of Hunter is 120*67.5*150mm. Resin Vat Which is used to store photopolymer resin.
- Page 16 Build Speed 10 mm/h Software FlashDLPrint Input: 3MF/STL/OBJ/FPP/FDP/SLC Support Formats Output: SVGX Win XP/Vista/7/8/10、Mac OS、Linux 560*360*320mm Product Dimensions Net Weight 17.8Kg AC Input Input: 100V-240VAC, 47-63Hz Power: 65W Connectivity USB cable, USB stick, WiFi Hunter User Guide | www.flashforge.com 0086-0579-82273989...
-
Page 17: Chapter 3. Unpacking
(Note: Make sure you read the whole unpacking guide.) 1. (3-1)Put Hunter package on the clean, tidy workbench, using a knife to cut the tape from the bottom. (3-2)Set the Hunter upright, lay the white foam on the floor and lift the carton. - Page 18 (2.5mm*1/3mm*1/4mm*1), Phillips screwdriver, USB stick. 5. (3-5) Tilt the Hunter to the left and remove the foam on the right. And vice versa remove the foam on the left. Hunter User Guide | www.flashforge.com...
- Page 19 6. (3-6)There is a carton box in each foam, eace holds a 500ml bottle of photopolymer resin, another includes a power adapter. 7. (3-7) Remove the plastic bag, the seal is on the bottom. 8. (3-8) Remove the clear protection film. Hunter User Guide | www.flashforge.com 0086-0579-82273989...
- Page 20 10. (3-10) Tear off the protection film on the foam. 3-10 11. (3-11) Hold the circled place with hands, then lift it up until the bottom foam is raised above the resin vat. 3-11 Hunter User Guide | www.flashforge.com 0086-0579-82273989...
- Page 21 12. (3-12) Take out the foam block, there is a rinse bucket in the foam, which contains a pair of gloves. 3-12 13. (3-13) Cut the white ties that hold the Z-axis. 3-13 Now you have finished unpacking, you can see the complete Hunter 3D printer and accessories. Hunter User Guide | www.flashforge.com 0086-0579-82273989...
-
Page 22: Chapter 4 . Hardware Assembly
The Hunter comes pre-assembled and is almost ready-to-print (ARP). All you need to do is to plug into the electronic power and pour the photopolymer resin. It will only take between 5 to 10 minutes before you can start up the Hunter and prepare for your first 3D print! 4.1 Pour Photopolymer Resin into Vat... -
Page 23: Plug In Power Cable & Turn On The Hunter
4.2 Plug in Power Cable & turn on the Hunter (4-4) Connect power cable and power adapter. (4-5) Plug the power cable into the outlet on the back of Hunter and turn on the power switch. Hunter User Guide | www.flashforge.com... -
Page 24: Screen
Copy: To copy the files to the local memory card from the USB stick. Start: start to print this model; Back. Hunter User Guide | www.flashforge.com 0086-0579-82273989... - Page 25 Abort printing: To stop printing. Print detail: File name; Material: The printing material; Total layer: The total layer of the model; Layer height: The layer height of the model; Build time: The time of printing the model; Back. Hunter User Guide | www.flashforge.com 0086-0579-82273989...
- Page 26 Mode: Choose print speed mode; Film: Monitor FEP film lifetime; Residue: Remove residue; About: Information about printer; Back. Printer Status: UV Shield: Open/Close; Temperature; Projector Hours: To show the hours that projector has worked; Back. Hunter User Guide | www.flashforge.com 0086-0579-82273989...
- Page 27 SSID: To enter the hotpsot name; Password: enter hotspot password; Back. Z Move: Move up: To move the z-axis up; Move down: To move the z-axis down; Homing: Back to initial point; Zero: Back to zero point; Back. Hunter User Guide | www.flashforge.com 0086-0579-82273989...
- Page 28 [Yes] and wait for the build platform moving. Move up: To move the z-axis up; Move down: To move the z-axis down; Back. After tapping [Back], the printer will start homing. Hunter User Guide | www.flashforge.com 0086-0579-82273989...
- Page 29 Please contact us before focusing. Language: To select the display language. Update: To show the update information, in network connection will promoted to update the firmware if there is available latest version. Mode: Choose print speed mode. Hunter User Guide | www.flashforge.com 0086-0579-82273989...
- Page 30 Film: Turn on to monitor FEP film lifetime. Remind users to change the film. Please click “Reset film” after changing the FEP film. Residue: Remove residue in resin vat. About: It displays the basic information about the device. Hunter User Guide | www.flashforge.com 0086-0579-82273989...
-
Page 31: Build Plate Leveling
4.4.2 Manually tighten the platform screw which is located in the middle and above the build plate,manually tighten the two vat film screws which is located on the right/left of resin vat. Showed in the picture below: Hunter User Guide | www.flashforge.com 0086-0579-82273989... - Page 32 4.4.3 Turn on the Hunter printer, Tap[Settings]—Tap[Z Move] on the touch screen(Showed in the picture below), make sure the present number on [Z Move] interface is Z:150.00MM, Otherwise do not do the following leveling operation!Please contact Flashforge to set this number back to Z:150.00MM in Hunter’s factory mode under the...
- Page 33 (Do not use too much strength or push too hard! ), meanwhile tighten the screw which is loosened in previous step 4.4.1 with a 4mm hexagon wrench. The screw is located on the right and above the build plate, showed in the picture below: Hunter User Guide | www.flashforge.com 0086-0579-82273989...
- Page 34 4.4.6 Tap[Homing] on the Z Move interface(Showed in the picture below). Build plate leveling operation has completed! Hunter User Guide | www.flashforge.com 0086-0579-82273989...
-
Page 35: Chapter 5: About Software
1. Decompress the zipped file or start the installation program, and then install the software according to the prompts. 2. Start the software with the start menu shortcut or by clicking the software icon. Hunter User Guide | www.flashforge.com 0086-0579-82273989... -
Page 36: Exploring Flashdlprint
! After starting FlashDLPrint, you need to select the target machine type first. When you start FlashDLPrint, a dialog box will pop up. Just need to select FlashForge Hunter in the machine type list and click [OK]. You can also change the machine type via clicking [Print]--[Machine type]. - Page 37 Scaling the size of your object Cut the model into several parts Print it directly with your Hunter or export to your USB stick. 5.2.3 Loading You can load a model file or Gcode file into your FlashDLPrint by the following six...
- Page 38 Method 1: Click the [View] menu and select [Home View] Method 2: Click the [View] button on the left, click it again and you will see the viewing options, you can click [Reset]. ④ Show Model Outline Hunter User Guide | www.flashforge.com 0086-0579-82273989...
- Page 39 Click one ring and rotate on the present axis, you will see the rotation angle and direction in the center of circle. In this way, you could make the model rotate on X/Y/Z axis. Hunter User Guide | www.flashforge.com 0086-0579-82273989...
- Page 40 5.2.8 Left-click on the model to select it and double-click on the [Cut] icon to set the cut plane. The direction and position are available for setting. ①Draw with Mouse ②X Plane Hunter User Guide | www.flashforge.com 0086-0579-82273989...
- Page 41 ③Y Plane ④Z Plane 5.2.9 Supports After loading the model, click [Edit]--[Supports] or click the Supports icon directly, then you will enter the support edit mode (5-7). Click [Back] to exit when you finish editing. Hunter User Guide | www.flashforge.com 0086-0579-82273989...
- Page 42 0. The highest is 100mm. Cross connection: cross connection between supports to increase supports intensity. Y-shaped connection: Y-shaped connection between supports to increase supports intensity,thus reducing inner support and save resin. Hunter User Guide | www.flashforge.com 0086-0579-82273989...
- Page 43 Bottom support only: generate supports at the bottom of the model only. Bottom thickness: used to judge which part of the bottom needs generating supports. The thinnest is 0.1mm, the thickest is 150.0mm. Exterior only: generate supports which can contact with build plate only. Hunter User Guide | www.flashforge.com 0086-0579-82273989...
- Page 44 Hunter User Guide | www.flashforge.com 0086-0579-82273989...
- Page 45 ② Print when slice done: Print or not when slice done ③ Material type: Choose according to the type of model. Users can choose “customer materials” to change parameters to apply to the third party resin. Hunter User Guide | www.flashforge.com 0086-0579-82273989...
- Page 46 Shell Thickness: To set the shell thickness value between 1mm to 10mm. c. Infill Thickness: To set the infill thickness value between 0.5mm to 5mm. Others To set the space between support and model. Hunter User Guide | www.flashforge.com 0086-0579-82273989...
- Page 47 .fpp or .stl and .obj. For .stl and .boj, models are integrated as one (include support part). If load it again, only the position of the model was saved, not included the printing parameters. ③ Preferences Hunter User Guide | www.flashforge.com 0086-0579-82273989...
- Page 48 Allows users to undo the recent edits by the following two methods: Method 1: Click [Edit]--[Undo]. Method 2: Press the shortcut Ctrl+Z. ② Redo Allows users to redo the most recent edit you have undone to your model file by the following two methods Hunter User Guide | www.flashforge.com 0086-0579-82273989...
- Page 49 ⑧ Repair Models Click [Edit]--[Repair Models] to repair models. ⑨ Supports Click [Edit]--[Supports] to enter supports setting interface. ⑩Leading Hole: Click [Edit]--[Leading Hole] to add hole in the mode to let uncured resin out of Hunter User Guide | www.flashforge.com 0086-0579-82273989...
- Page 50 5.2.13 Print Menus ① Connect Machine You can connect the Hunter with your PC via a USB cable or WiFi. Note: The machine icon on the bottom right displays the connection status: Connected Disconnected 5-14 Method 1:Connect Via USB Cable a.
- Page 51 1. Turn on Hunter. Turn on Wi-Fi on the Hunter. Tap [Tools]-[Setting]-[WiFi]-[WiFi ON]. 3. Connect Hunter with an available WiFi signal, which is also connected by your computer. 4. Click [Print]-[Connect Machine], it will pop up box, then select Wi-Fi in the Connect mode.
- Page 52 ② Disconnect Hunter Click [Print]--[Disconnect] to disconnect your PC and Hunter. 5.2.14 Help Menus ① First Run Wizard ② Help Contents:Click [Help]--[Help Contents], you can read the help contents. ③Check for Updates:Click [Help]--[Check for Update] to detect the available updates online.
-
Page 53: Chapter 6: Printing
This chapter will provide a step-by-step guide on turning a 3D model into a physical reality. 6.1 Generate Gcode File Double-click [FlashDLPrint] icon to open FlashDLPrint software. (6-2)Click [Print]-[Machine Type] and select FlashForge Hunter (6-3) Click [Load] icon, select .stl 3D files shown as follow: Hunter User Guide | www.flashforge.com 0086-0579-82273989... - Page 54 [on platform]-[Center] icon. 图6-4 Note:If the model is in the correct position, there is no need to do this step. (6-5) Click [Print] icon to set the printing parameters. The default parameters is Hunter User Guide | www.flashforge.com 0086-0579-82273989...
-
Page 55: Methods Of Printing
7. Save the file at any location, and the object will start slicing. 8. After slicing the object, it will automatically upload the gcode to the Hunter. Printing from USB stick 1. Click [Print], and a printing options screen will show up. -
Page 56: Model Processing
1.1.2, hunter will support light engine protect function, which will extend light engine’s the usable life. Please follow the steps below to turn off the power: first turn off the touch screen button, and then turn off power button in the back of Hunter. 6.3 Model Processing... - Page 57 Attention: As the metal scraper is sharp, please remove the model with care. Notice: Do not pour used resin back to the photopolymer resin bottle. Do not pour used resin into domestic sewage. Hunter User Guide | www.flashforge.com 0086-0579-82273989...
-
Page 58: Update Firmware
(prepared above) into the USB stick slot on Hunter. Flip the power switch on the back of printer to ON position, turn on the Hunter printer by pressing the black button on the right of printer’s touch screen, automatic updating interface will show on touch screen.(Make sure power is not turned off during this... - Page 59 USB stick. Method 2:Update via Internet Make sure power is not turned off during updating! 1. Connect the Hunter printer to Internet via WiFi connection. 2. Tap [Settings] and then tap [Update] on the touch screen.
- Page 60 3. Find a new version firmware, Tap [Download] 4. After download success, Tap [Update] Hunter User Guide | www.flashforge.com 0086-0579-82273989...
- Page 61 5. Hunter printer will update automatically. When “Update success, reboot...” notice showed on printer’s touch screen, Hunter printer will reboot automatically and complete the firmware updating. (Make sure power is not turned off during this step!) NOTICE! When reboot the printer for the first time after successful updating with either method above, FLASHFORGE 3D PRINTER symbol will show for twice, then printer will enter the normal start-up interface.
-
Page 62: Chapter 7: Supports And Service
FlashForge team is on standby and ready to help you overcome any challenges you may have with your Hunter. If the issues or questions are not covered in this User Guide, you can seek for solutions on our official website or contact us via telephone.
Need help?
Do you have a question about the Hunter and is the answer not in the manual?
Questions and answers