Pitney Bowes SendPro C Operator's Manual
Hide thumbs
Also See for SendPro C:
- Operator's manual (226 pages) ,
- User manual (129 pages) ,
- Quick reference manual (18 pages)

Related Manuals for Pitney Bowes SendPro C


Summary of Contents for Pitney Bowes SendPro C
- Page 1 Shipping & Mailing Postage Meters SendPro® C, SendPro®+ PCN 8H00 Operator Guide US English Edition SV63317 Rev D PDF August 2019...
- Page 2 Except as provided in writing, duly signed by an officer of Pitney Bowes, no license either express or implied, under any Pitney Bowes or third party’s patent, copyright or other intellectual property rights is...
-
Page 3: Table Of Contents
Creating and printing a trackable label Setting up a wired network connection on Tracking a shipment SendPro C, SendPro+ Model with PCN 8H00 43 Using cost accounts to charge back Trackable Setting up a wireless (WiFi) network Labels postage costs... - Page 4 Using the Trackable Labels address book Sending a First-Class letter envelope on About cost accounts for Trackable Labels SendPro C, SendPro+ Model with PCN 8H00 93 Turning Trackable Label cost accounts on or Sending a large First-Class® envelope SendPro C, SendPro+ Model with PCN 8H00 93...
- Page 5 Envelope Printing Multi-level Envelope Printing accounts Creating a custom text message for your mail Turning Envelope Printing account on SendPro C, SendPro+ model with PCN passwords on and off 8H00 Creating an Envelope Printing account Adding a custom text message to your...
- Page 6 Cleaning the print nozzles A - SendPro Online Checking the ink level Installing the ink cartridge Importing Addresses Change the ink waste pad on the SendPro C, Exporting Addresses SendPro+ Model with PCN 8H00 Importing Cost Accounts Cleaning the printhead...
- Page 7 Note for California Customers Only on all Models C - Third party software Third party software Pitney Bowes Operator Guide August 2019...
-
Page 8: Quick Start Guide
Sending a First-Class letter envelope on SendPro C, SendPro+ Model with PCN 8H00 Sending a large First-Class® envelope SendPro C, SendPro+ Model with PCN 8H00 Sending Certified Mail on SendPro C, SendPro+ Model with PCN 8H00 Sending an international letter on SendPro C, SendPro+ Model with PCN 8H00 Sending mail using a Certificate of Mailing on SendPro®... -
Page 9: Finding The Product Code Number (Pcn) And Serial Number
To locate the (1) Product Code Number (PCN) and the (2) 7-digit serial number, check the label on the rear of the meter or under the display cover as shown here. Note that the serial number is blurred out here for security reasons. Pitney Bowes Operator Guide August 2019... -
Page 10: Navigating The Home Screen On The Sendpro C, Sendpro
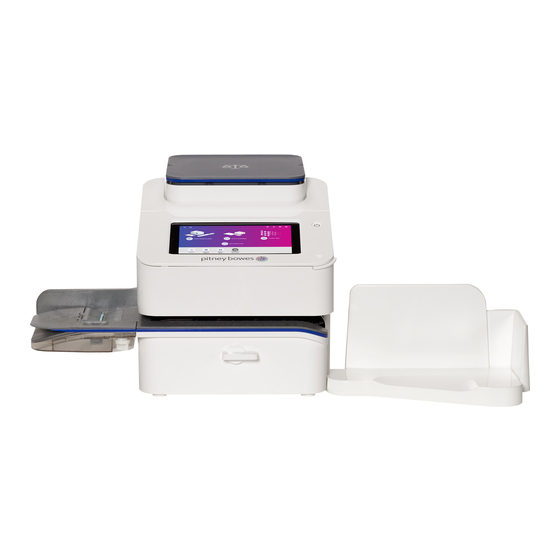
Navigating the Home screen on the SendPro C, SendPro+ The Home screen on the SendPro C, SendPro+ machine provides the starting point for creating either a trackable shipping label or printing postage on an envelope. For general purpose envelopes and post cards, print postage by tapping (1) Envelope Printing. For important large envelopes or packages using USPS, USP®, or FedEx®... - Page 11 This toolbar allows you to view and change settings and defaults values for your machine and the Trackable Labels and Envelope Printing applications. Back - Return to the previous screen. Home - Return to the Home screen from anywhere in Trackable Labels or Envelope Printing. Pitney Bowes Operator Guide August 2019...
-
Page 12: Print A Trackable Label Or Print Postage On An Envelope
Profile - View your profile (name and email for Trackable Label account), log out, or lock your SendPro C device. Print a trackable label or print postage on an envelope With SendPro® C you can create either a trackable shipping label or print postage on an envelope. For a shipping label, tap Trackable Labels on the Home screen. - Page 13 Quick start guide Use Trackable Labels for: USPS flat rate envelopes Thick envelopes Poly mailers USPS non flat rate envelopes Boxes USPS flat rate boxes USPS non flat rate boxes Tube Pitney Bowes Operator Guide August 2019...
- Page 14 Quick start guide Use Envelope Printing for: Large envelopes Standard envelopes and postcards Pitney Bowes Operator Guide August 2019...
-
Page 15: Creating And Printing A Trackable Label
Quick start guide Creating and printing a trackable label 1. Tap Trackable Labels on the Home screen. 2. Tap the carrier you want to use. For example, tap USPS. Pitney Bowes Operator Guide August 2019... - Page 16 4. If you have enabled cost accounts on your SendPro® C, you must provide an account. If this field contains an account, verify the account is correct. To change or add an account, tap on the Cost Account field and select an account from the list. 5. Tap Continue. Pitney Bowes Operator Guide August 2019...
- Page 17 To select one from the address book, tap the Address icon in the upper right corner of the screen as shown here. 7. Tap Continue. 8. Tap a package type. For example, Box or Envelope. Pitney Bowes Operator Guide August 2019...
- Page 18 If you do not have a scale, tap on the Weight field and enter the value using the keypad and then tap Apply. 10. Tap Continue. 11. Tap the service you want to use, in this example, Priority Mail. Pitney Bowes Operator Guide August 2019...
- Page 19 12. Tap Add additional service to add extra services. If you are not adding any special services, go to step 14. 13. Select the extra service, in this example, Signature Confirmation. 14. You can continue to add additional services if necessary. Tap Apply when done. 15. Tap Print. Pitney Bowes Operator Guide August 2019...
-
Page 20: Tracking A Shipment
You can assign the costs for a trackable label to an account when you create the trackable label. In order to use cost accounts to charge back your Trackable Labels postage costs you need to turn on the cost accounts feature. Pitney Bowes Operator Guide August 2019... -
Page 21: Adding A Single Trackable Labels Cost Account
Note: To import or export multiple cost accounts, use your SendPro® C user ID to log into SendPro Online. In your web browser, go to https://login.pitneybowes.com/sendpro and sign in with your SendPro C user ID and password. 1. Tap the plus sign + in the upper left corner of the Cost Accounts screen. -
Page 22: Printing Postage On Envelopes
3. Tap Class to view the class and any extra services. 4. Tap the weight icon to view the weighing options (enter weight manually or using a scale). 5. Tap the date to view the date options. Pitney Bowes Operator Guide August 2019... - Page 23 You can also choose to only seal envelopes without printing any postage. Scroll down to view additional options. Pitney Bowes Operator Guide August 2019...
-
Page 24: Sending A First-Class Letter Envelope On Sendpro C, Sendpro+ Model With Pcn 8H00
Sending a First-Class letter envelope on SendPro C, SendPro+ Model with PCN 8H00 If you are unsure of your SendPro C, SendPro+ model number, refer to Related topics. 1. Tap Envelope Printing on the Home screen. 2. If you have the accounting feature enabled on your machine: a. -
Page 25: Sending A Large First-Class® Envelope Sendpro C, Sendpro+ Model With Pcn 8H00
(large envelope) according to the USPS. If your mailpiece weighs more than 3.5 oz, the SendPro C, SendPro+ automatically sets the class to Large Envelope regardless of the dimensions. If the mailpiece weighs less than 3.5 oz but has the dimensions of a flat, you need to manually select Large Envelope when you choose the class. - Page 26 If the mailpiece if less than 3.5 oz, but has the dimensions of a flat: 1. Tap on the Home icon in the global toolbar. 2. Scroll back up to the Envelope Printing icon and tap on it. Pitney Bowes Operator Guide August 2019...
-
Page 27: Sending Certified Mail On Sendpro C, Sendpro+ Model With Pcn 8H00
Sending Certified Mail on SendPro C, SendPro+ Model with PCN 8H00 If you are unsure of your SendPro C, SendPro+ model number, refer to Related topics. Not all extra services like Certified Mail are available for all classes and only certain services can be combined. -
Page 28: Sending An International Letter On Sendpro C, Sendpro+ Model With Pcn 8H00
Sending an international letter on SendPro C, SendPro+ Model with PCN 8H00 If you are unsure of your SendPro C, SendPro+ model number, refer to Related topics. 1. Tap Envelope Printing on the Home screen. 2. If you have the accounting feature enabled on your machine: a. -
Page 29: Sending Mail Using A Certificate Of Mailing On Sendpro® C, Sendpro®+ Model With Pcn 8H00
Sending mail using a Certificate of Mailing on SendPro® C, SendPro®+ Model with PCN 8H00 If you are unsure of your SendPro C, SendPro+ model number, refer to Related topics. Purchase a Certificate of Mailing when you need to have proof that you’ve sent a letter or package. - Page 30 10. Take the mail pieces and the printed form to the Post office. They will apply a round stamp proof of induction mark that serves as legal proof that your items have been mailed. Related topics Finding the Product Code Number (PCN) and serial number Pitney Bowes Operator Guide August 2019...
-
Page 31: Using Usps Special Services
Graphic ads are also known as ads, slogans or logos. Examples include PLEASE OPEN IMMEDIATELY, RECYCLE and Season's Greetings. Note: At this time, you cannot add your own custom graphics to your SendPro C meter. Before you begin: Weigh your envelope, select a class, and select any special services required. -
Page 32: How To Process Err In Envelope Printing On Sendpro C, Sendpro
Quick start guide How to process ERR in Envelope Printing on SendPro C, SendPro+ Tracking services are available when you use the weighing platform or Manual Weight entry method. The following steps are based on using Priority class and the Electronic Certified service with Electronic Return Receipt (ERR). -
Page 33: Using The Weighing Platform For Envelope Printing
9. Tap Apply. 10. Feed the envelope through the machine. Sealing envelopes This procedure describes how to seal envelopes whether you are printing postage on the envelopes or only sealing the envelopes (no postage). Pitney Bowes Operator Guide August 2019... -
Page 34: Sealing The Envelope Only, Bypass All Printing
1. Tap Envelope Printing on the Home screen. 2. Tap Print Mode on the lower left side of the Envelope Printing mail screen. You may have to swipe up on the screen to see this option. Pitney Bowes Operator Guide August 2019... -
Page 35: Filling The Moistener Tank
6. Insert the new ink cartridge and close the cover. The cartridge repositions itself and the Mail Printer Maintenance screen re-displays. 7. Perform a print test to ensure you get a good test print pattern. Pitney Bowes Operator Guide August 2019... -
Page 36: Printing A Test Pattern
Important: Only use genuine Pitney Bowes ink cartridges. Non-Pitney Bowes cartridges can damage your meter. If you need ink, order a genuine Pitney Bowes replacement ink cartridge. When your meter shows the low ink warning an ink cartridge will be ordered for you automatically, if you are enrolled in the AutoInk program. -
Page 37: Supplies, Ink Cartridges, And Options
Deluxe Cleaning Kit with Duster (canned air) CK0-3 Small Cleaning Kit with Duster (canned air) CK0-2 Office Equipment Cleaner CK0-4 Small Business Cleaning Kit (without canned air) CK0-1 Supply Pack for SendPro C 516-1 (check PCN and description) Pitney Bowes Operator Guide August 2019... - Page 38 6WB-F Direct Thermal Labels 4" x 6" (6 rolls) 745-1 Ink Cartridges Description Capacity Part Code Number (PCN) SendPro C red fluorescent ink cartridge 17 ml SL-798-0 SendPro C red fluorescent ink cartridge 35 ml 793-5 Optional Accessories Description Part Code Number (PCN)
-
Page 39: Accessing The Sendpro® Care Application
SendPro C, SendPro+. If your SendPro C, SendPro+ has a PCN model number of 8H00, you can access the SendPro Care app by tapping on the help icon (?) in the global toolbar, or by tapping on the Help button in the application drawer. - Page 40 To see how you can download the SendPro Care app to your mobile device, use a browser on your PC and go to https://www.pitneybowes.com/us/campaign/sendprocare-app.html. Related topics: Navigating the Home screen on the SendPro C, SendPro+ Finding the Product Code Number (PCN) and serial number Pitney Bowes...
- Page 41 This page intentionally left blank.
- Page 42 2 - Connectivity information In this section Setting up a wired network connection on SendPro C, SendPro+ Model with PCN 8H00 Setting up a wireless (WiFi) network connection Connecting to a hidden Wi-Fi network Deleting a Wi-Fi network Checking your network connection...
-
Page 43: Connectivity Information
Setting up a wired network connection on SendPro C, SendPro+ Model with PCN 8H00 If you are unsure of your SendPro C, SendPro+ model number, refer to Related topics. For information about the connection settings required on your network, contact your IT department. -
Page 44: Setting Up A Wireless (Wifi) Network Connection
Setting up a wireless (WiFi) network connection For information about the connection settings required on your network, contact your IT department. Refer to the SendPro C connectivity guide for additional information. 1. Tap the Settings (gear) icon in the global toolbar. -
Page 45: Connecting To A Hidden Wi-Fi Network
1. Tap the Settings (gear) icon in the global toolbar. 2. Tap Wi-Fi in the Device & Network section to see a list of available networks. 3. Tap the Add Network button at the top of the Wi-Fi screen. Pitney Bowes Operator Guide August 2019... -
Page 46: Deleting A Wi-Fi Network
6. Tap Connect when done. Deleting a Wi-Fi network 1. Tap the Settings (gear) icon in the global toolbar. 2. Tap Wi-Fi in the Device & Network section to see a list of available networks. Pitney Bowes Operator Guide August 2019... -
Page 47: Checking Your Network Connection
These provide updates on rate information, sync your transaction data, and refill postage funds for the Envelope Printing and Trackable Labels applications. Pitney Bowes Operator Guide August 2019... -
Page 48: Checking The Mac Address For Wired And Wireless Networks
1. Tap the Settings (gear) icon in the global toolbar. 2. Tap Wi-Fi. 3. The MAC address appears above the list of wireless networks. Wired: 1. Tap the Settings (gear) icon in the global toolbar. 2. Tap Wired (Ethernet). Pitney Bowes Operator Guide August 2019... - Page 49 1. Tap the Settings (gear) icon in the global toolbar. 2. Scroll down to the "Advanced Device Options" section and tap About This C-Series. 3. Scroll down to the "Base Network Info" section and locate the Mac Address field. This contains the Pitney Bowes Operator Guide August 2019...
-
Page 50: Setting Up A Proxy Server
Refer to the SendPro C Connectivity Guide for additional information. You can view or download the guide at the Pitney Bowes support site. - Page 51 This page intentionally left blank.
- Page 52 In this section Creating or disabling the security PIN Adjusting time zone and location code Adjusting display brightness Setting up Energy Saver on SendPro C, SendPro+ Model with PCN 8H00 Managing your Pitney Bowes USPS Postage Funds Using USPS Informed Delivery...
-
Page 53: Managing Your Machine
4. At the prompt, enter your current security PIN. To manually lock your machine: 1. Tap the user profile icon in the top right corner of the global toolbar. 2. Tap Lock this Device. Pitney Bowes Operator Guide August 2019... -
Page 54: Adjusting Time Zone And Location Code
2. Tap Display Brightness in the Device & Network section of the screen. 3. Move the slider to adjust the brightness. 4. Tap the Back button or Home icon to exit the Settings screen. Pitney Bowes Operator Guide August 2019... -
Page 55: Setting Up Energy Saver On Sendpro C, Sendpro+ Model With Pcn 8H00
Setting up Energy Saver on SendPro C, SendPro+ Model with PCN 8H00 If you are unsure of your SendPro C, SendPro+ model number, refer to Related topics. 1. Tap the Settings (gear) icon in the global toolbar. 2. Tap Energy Saver. - Page 56 1. Tap on the Informed Delivery icon in the application drawer at the bottom of the Home screen. 2. Enter your USPS.com Username and password. If this is the first time you are using Informed Delivery on your SendPro C you will be requested to verify your USPS account. Follow the prompts to complete the verification process.
-
Page 57: Installing Your Sendpro C, Sendpro
Managing your machine Installing your SendPro C, SendPro+ 1. What's in the box. Pitney Bowes Operator Guide August 2019... - Page 58 Managing your machine 2. Caution a. Do not connect the SendPro C to a power source yet. b. Be sure to grab the entire feeder and not just the flap. 3. Unpack SendPro C a. Remove all the packing materials from your machine.
- Page 59 4. Install the printhead and ink cartridge. a. Open the cover to access the ink carriage. b. Remove the packing tape from the ink carriage and open the guard. c. Unwrap the printhead and remove the protective strip. Pitney Bowes Operator Guide August 2019...
- Page 60 ! Performing this step correctly is critical in preventing damage to the system. f. Unwrap the ink cartridge and make sure you remove the silver foil strip from the ink cartirdge. g. Install the ink cartridge and close the guard. Pitney Bowes Operator Guide August 2019...
- Page 61 Managing your machine h. Close the cover. 5. Connect the SendPro C, SendPro+ to a power source and continue the installation a. Connect your machine to a power source and turn on the power switch. b. Wait for the system startup..Then tap "Get Started" on the touchscreen and continue the installation steps.
-
Page 62: Installing A Scale
Managing your machine Installing a scale If you did not install a scale when you installed your SendPro C meter you can do it at any time later. To access step-by-step installation instructions for compatible scales: 1. Tap the Settings (gear) icon in the global toolbar. - Page 63 6. Once the upload completes, a confirmation message is displayed. 7. Tap Got It to close the message. 8. Select another log to upload, or swipe down from the top of the screen and then tap on the Home icon to exit. Pitney Bowes Operator Guide August 2019...
- Page 64 4 - Using Trackable Labels In this section Signing in and out of Trackable Labels Creating and printing a trackable label Creating a trackable label from the address book Creating a new trackable label sender address Changing the sender address for Trackable Labels Creating an international trackable label Printing a USPS return trackable label Printing a USPS scan form...
-
Page 65: Using Trackable Labels
The user that is currently signed in displays. 2. Select Sign out. To sign into Trackable Labels tap on the Trackable Labels icon on the Home screen. You will be prompted to enter a name and password. Pitney Bowes Operator Guide August 2019... -
Page 66: Creating And Printing A Trackable Label
Using Trackable Labels Creating and printing a trackable label 1. Tap Trackable Labels on the Home screen. 2. Tap the carrier you want to use. For example, tap USPS. Pitney Bowes Operator Guide August 2019... - Page 67 4. If you have enabled cost accounts on your SendPro® C, you must provide an account. If this field contains an account, verify the account is correct. To change or add an account, tap on the Cost Account field and select an account from the list. 5. Tap Continue. Pitney Bowes Operator Guide August 2019...
- Page 68 To select one from the address book, tap the Address icon in the upper right corner of the screen as shown here. 7. Tap Continue. 8. Tap a package type. For example, Box or Envelope. Pitney Bowes Operator Guide August 2019...
- Page 69 If you do not have a scale, tap on the Weight field and enter the value using the keypad and then tap Apply. 10. Tap Continue. 11. Tap the service you want to use, in this example, Priority Mail. Pitney Bowes Operator Guide August 2019...
- Page 70 12. Tap Add additional service to add extra services. If you are not adding any special services, go to step 14. 13. Select the extra service, in this example, Signature Confirmation. 14. You can continue to add additional services if necessary. Tap Apply when done. 15. Tap Print. Pitney Bowes Operator Guide August 2019...
-
Page 71: Creating A Trackable Label From The Address Book
5. Follow the steps for creating and printing a trackable label. Creating a new trackable label sender address 1. From the Home screen, tap Address Book. 2. Tap Recipients and select Senders. 3. Tap +. Pitney Bowes Operator Guide August 2019... -
Page 72: Changing The Sender Address For Trackable Labels
Enter where the item was made To add additional items tap Save and Add. If you are finished adding items, tap Save. Select the necessary AES Exemption information. For further information please refer to the USPS.com Postal Explorer. Pitney Bowes Operator Guide August 2019... -
Page 73: Printing A Usps Return Trackable Label
3. Slide down to "Scan Form and Manifest Printing" and tap on the check box for Enable scan form printing. 4. When you are ready to print the scan form, use your SendPro C user ID to sign in to SendPro Online. In your web browser, go to https://login.pitneybowes.com/sendpro and sign in with your SendPro C user ID and password. -
Page 74: Reprinting A Usps, Ups Or Fedex Trackable Label
Note: For UPS and FedEx, when you cancel a trackable label the postage is not credited. Instead, it is just not applied to your UPS or FedEx invoice. 1. Tap the History icon in the application drawer on the Home screen. Pitney Bowes Operator Guide August 2019... - Page 75 4. Tap the shipment to open the details screen. 5. Tap Request Refund. 6. Select the agree box to agree to the conditions and then tap Continue. Pitney Bowes Operator Guide August 2019...
- Page 76 5 - Managing Trackable Labels In this section Use SendPro Online to perform these tasks for your SendPro C machine Using the Trackable Labels address book About cost accounts for Trackable Labels Turning Trackable Label cost accounts on or off...
-
Page 77: Managing Trackable Labels
Setting up and managing a FedEx account in SendPro Online and on the SendPro C Printing Printing international labels (this can be done on your SendPro C device if you have an 8 1/2 x 11" 1E50 laser printer connected to it) -
Page 78: Using The Trackable Labels Address Book
2. Tap the slider in the upper right so that it turns blue and ON display. If you want to make sure every trackable label is assigned an account, tap in the check box for Require cost account for all shipments. Pitney Bowes Operator Guide August 2019... -
Page 79: Changing The Default Refill Amounts For Trackable Labels
To search for an address, type a portion of the contact (name, company, street, etc.) in the text field next to All. The address book displays matching addresses. Sort the address book by tapping Sort by and selecting how you want to sort (by Full Name, Street, City ...) Pitney Bowes Operator Guide August 2019... -
Page 80: Adding New Addresses To Trackable Labels Address Book
Open the Trackable Label address book by tapping on the Address Book icon in the application drawer at the bottom of the Home screen. Delete an address by tapping on the address and then on the Delete icon shown here.Tap OK to confirm you want to delete the address. Pitney Bowes Operator Guide August 2019... -
Page 81: Editing Addresses In The Trackable Label Address Book
Adding a single Trackable Labels cost account Open your Trackable Label cost accounts by tapping the Cost Accounts icon in the application drawer at the bottom of the Home screen. This opens the Cost Accounts screen. Pitney Bowes Operator Guide August 2019... -
Page 82: Modifying A Trackable Label Cost Account
Note: To import or export multiple cost accounts, use your SendPro® C user ID to log into SendPro Online. In your web browser, go to https://login.pitneybowes.com/sendpro and sign in with your SendPro C user ID and password. 1. Tap the plus sign + in the upper left corner of the Cost Accounts screen. -
Page 83: Refilling Trackable Labels Postage
In order to use the FedEx carrier for trackable labels, you need to set up your FedEx account using SendPro® Online. You cannot set up a FedEx account on your SendPro® C meter. In your web browser, go to https://login.pitneybowes.com/sendpro and sign in with your SendPro C user ID and password. -
Page 84: Setting Up Your Ups Account
In order to use the UPS carrier for trackable labels, you need to set up your UPS account using SendPro® Online. You cannot set up a FedEx account on your SendPro® C meter. In your web browser, go to https://login.pitneybowes.com/sendpro and sign in with your SendPro C user ID and password. -
Page 85: Managing Trackable Labels Email Notifications
4. Tap the check box for I want to use the same recipient address for all of my return labels. 5. Enter the address in the fields provided using the keypad on the screen. Tap the green check mark when done. Pitney Bowes Operator Guide August 2019... -
Page 86: Determining How You Spend Your Postage
4. To list by cost accounts, tap the menu button next to All Shipments column and select Summary by Cost Account. Withdrawing money from your Trackable Labels account If you need to withdraw your funds from your Trackable Labels account, please call 1-877-213-7284 and select option 3. Pitney Bowes Operator Guide August 2019... - Page 87 This page intentionally left blank.
-
Page 88: Using Envelope Printing
Sending a First-Class letter envelope on SendPro C, SendPro+ Model with PCN 8H00 Sending a large First-Class® envelope SendPro C, SendPro+ Model with PCN 8H00 Sending Certified Mail on SendPro C, SendPro+ Model with PCN 8H00 Sending an international letter on SendPro C, SendPro+ Model with PCN 8H00... -
Page 89: Printing Postage On Envelopes
Using Envelope Printing Adding a graphic to your envelope in Envelope Printing Creating a custom text message for your mail on SendPro C, SendPro+ model with PCN 8H00 Adding a custom text message to your envelope or tape Editing or deleting a custom text message on SendPro C, SendPro+ model with PCN 8H00... -
Page 90: Checking Your Available Envelope Printing Postage
You can check your Envelope Printing postage balance on your meter at any time. Your available postage is displayed on the Postage Balance button on the top of the Envelope Printing screen. View the amount available for postage in your Reserve or Purchase Power account: Pitney Bowes Operator Guide August 2019... -
Page 91: Refilling Postage For Your Envelope Printing Balance
Refer to Related topics below for information on troubleshooting connection issues. To refill your postage: 1. Tap Envelope Printing on the Home screen. 2. Tap Postage Balance. 3. Tap Refill Postage. Pitney Bowes Operator Guide August 2019... -
Page 92: Using Accounts To Charge Back Envelope Printing Postage Costs
7. Tap Done. 8. Your updated postage balance displays on the Envelope Printing screen. The SendPro C uses two separate postage accounts, one for Trackable Labels and one for Envelope Printing. The funds for one cannot be used for the other. -
Page 93: Sending A First-Class Letter Envelope On Sendpro C, Sendpro+ Model With Pcn 8H00
Sending a First-Class letter envelope on SendPro C, SendPro+ Model with PCN 8H00 If you are unsure of your SendPro C, SendPro+ model number, refer to Related topics. 1. Tap Envelope Printing on the Home screen. 2. If you have the accounting feature enabled on your machine: a. - Page 94 (large envelope) according to the USPS. If your mailpiece weighs more than 3.5 oz, the SendPro C, SendPro+ automatically sets the class to Large Envelope regardless of the dimensions. If the mailpiece weighs less than 3.5 oz but has the dimensions of a flat, you need to manually select Large Envelope when you choose the class.
-
Page 95: Sending Certified Mail On Sendpro C, Sendpro+ Model With Pcn 8H00
Finding the Product Code Number (PCN) and serial number Sending Certified Mail on SendPro C, SendPro+ Model with PCN 8H00 If you are unsure of your SendPro C, SendPro+ model number, refer to Related topics. Pitney Bowes Operator Guide August 2019... -
Page 96: Sending An International Letter On Sendpro C, Sendpro+ Model With Pcn 8H00
Finding the Product Code Number (PCN) and serial number Setting up a mailer ID Sending an international letter on SendPro C, SendPro+ Model with PCN 8H00 If you are unsure of your SendPro C, SendPro+ model number, refer to Related topics. Pitney Bowes Operator Guide August 2019... -
Page 97: Printing A Future Date
4. Tap Apply when you see the future date highlighted on the calendar. 5. The Envelope Printing screen displays the future date. 6. Place your envelope on the deck to automatically print your postage with a future date. Pitney Bowes Operator Guide August 2019... -
Page 98: Omitting The Date From Envelope Printing For Sendpro C, Sendpro+With Model Pcn 8H00
Omitting the date from Envelope Printing for SendPro C, SendPro+with model PCN 8H00 If you are unsure of your SendPro C model number, refer to Related topics. This feature is only available for Meter Reply Mail when used with First-Class Retail Metered classes which includes: Letter, Non-Machinable Letter, Large Envelope and Postcard. -
Page 99: Re-Dating Your Mail
1. Tap Envelope Printing on the Home screen. 2. Scroll down and tap Print Mode on the left side of the Envelope Printing screen. 3. Tap Date Correction. 4. Tap Apply. 5. Tap on the date and the calendar displays. Pitney Bowes Operator Guide August 2019... -
Page 100: Using Usps Special Services
7. Tap Apply. Entering weight manually for Envelope Printing Use this procedure when you know the weight of a mailpiece and you are not using the integrated weighing platform. Pitney Bowes Operator Guide August 2019... - Page 101 7. Tap Class on the Envelope Printing screen. If necessary, select Start Over to display all of the class options. 8. Select the class. 9. Select the type of package or envelope. 10. Select any special services required. 11. Tap Apply. 12. Feed the envelope through the machine. Pitney Bowes Operator Guide August 2019...
-
Page 102: Using The Weighing Platform For Envelope Printing
3. Select Seal Only. 4. Tap Apply. 5. Place your envelope face up, flap down into the feeder. Be sure to slide the envelope flap under the edge of the feed deck Pitney Bowes Operator Guide August 2019... -
Page 103: Sealing Envelopes
2. When feeding an envelope, be sure to slide the envelope flap under the edge of the feed deck, so the moistener can wet the flap. Note: If the moistener tank is full and your envelopes do not seal correctly, clean or replace the moistener brush and wick. Pitney Bowes Operator Guide August 2019... -
Page 104: Zeroing The Scale
Tap the check box for Insurance and then enter the amount, tap Apply. 4. To confirm, tap Apply. 5. Place the envelope on the feed deck and the machine automatically feeds the envelope and prints the postage including insurance. Pitney Bowes Operator Guide August 2019... -
Page 105: How To Process Err In Envelope Printing On Sendpro C, Sendpro
Using Envelope Printing How to process ERR in Envelope Printing on SendPro C, SendPro+ Tracking services are available when you use the weighing platform or Manual Weight entry method. The following steps are based on using Priority class and the Electronic Certified service with Electronic Return Receipt (ERR). -
Page 106: Adding A Graphic To Your Envelope In Envelope Printing
Graphic ads are also known as ads, slogans or logos. Examples include PLEASE OPEN IMMEDIATELY, RECYCLE and Season's Greetings. Note: At this time, you cannot add your own custom graphics to your SendPro C meter. Before you begin: Weigh your envelope, select a class, and select any special services required. -
Page 107: Creating A Custom Text Message For Your Mail On Sendpro C, Sendpro+ Model With Pcn 8H00
SendPro C, SendPro+ model with PCN 8H00 If you are unsure of your SendPro C, SendPro+ model number, refer to Related topics. You can create a custom text message for your envelope or mailpiece. The message can be up to 5 lines with each line containing a maximum of 20 characters. - Page 108 13. Tap the back arrow on the global toolbar to return to the Home screen. Related topics Finding the Product Code Number (PCN) and serial number Adding a custom text message to your envelope or tape Pitney Bowes Operator Guide August 2019...
-
Page 109: Adding A Custom Text Message To Your Envelope Or Tape
Adding a custom text message to your envelope or tape If you are unsure of your SendPro C, SendPro+ model number, refer to Related topics. Before you begin: Weigh your envelope, select a class, and select any special services required. - Page 110 5. Feed the envelope or tape strip through the machine. Related topics Finding the Product Code Number (PCN) and serial number Creating a custom text message for your mail on SendPro C, SendPro+ model with PCN 8H00 Pitney Bowes Operator Guide...
-
Page 111: Editing Or Deleting A Custom Text Message On Sendpro C, Sendpro+ Model With Pcn 8H00
Editing or deleting a custom text message on SendPro C, SendPro+ model with PCN 8H00 If you are unsure of your SendPro C, SendPro+ model number, refer to Related topics. 1. Tap on the + Graphic icon on the Envelope Printing screen. - Page 112 5. Tap Apply when done. Related topics Finding the Product Code Number (PCN) and serial number Creating a custom text message for your mail on SendPro C, SendPro+ model with PCN 8H00 Adding a custom text message to your envelope or tape Pitney Bowes...
-
Page 113: Printing A Graphic On Your Envelope Without Printing Postage
Printing only the date and time in Envelope Printing 1. Tap Envelope Printing on the Home screen. 2. Tap Print Mode. 3. Select Date and Time Stamp. 4. Tap Apply. 5. Feed the envelope through the machine. Pitney Bowes Operator Guide August 2019... - Page 114 7 - Managing Envelope Printing In this section Confirming your meter update for Envelope Printing Changing the default refill amounts in Envelope Printing Uploading Envelope Printing transactions Clearing or resetting the number of mailpieces you've sent in Envelope Printing Performing USPS postal inspections for Envelope Printing Updating postal rates or software for Envelope Printing Viewing the total Envelope Printing postage spent Viewing the Envelope Printing postage refill history...
-
Page 115: Managing Envelope Printing
2. Type “confirm rate update” in the search field. 3. Click on Confirm Your Rate Update | Pitney Bowes. 4. Scroll down to and click on SendPro C-Series (C200, C300, C400). 5. Locate your Product Code Number (PCN) and 7-digit serial number. Refer to... -
Page 116: Uploading Envelope Printing Transactions
If the meter prompts you to upload more than three times, please contact technical support. Manual upload of your Envelope Printing transactions: 1. Tap the Settings (gear) icon in the global toolbar. 2. Scroll down to the Envelope Printer Settings section. Pitney Bowes Operator Guide August 2019... - Page 117 3. Tap the SyncUSPS Transaction Data button. A series of messages appears on your display, starting with "Preparing Transaction Data" followed by "Sending Transaction Data". The message "No Sync Required" appears if there are no new transactions to upload. Pitney Bowes Operator Guide August 2019...
-
Page 118: Clearing Or Resetting The Number Of Mailpieces You've Sent In Envelope Printing
Note: Be certain that you want to delete the piece count information, as you cannot restore the deleted data. Performing USPS postal inspections for Envelope Printing You are automatically notified 1. When a postal inspection is required, you are notified automatically by a message on your Home screen. Pitney Bowes Operator Guide August 2019... -
Page 119: Updating Postal Rates Or Software For Envelope Printing
Keep your meter turned on and connected to your network to get your automatic updates, as updates are downloaded during the evening hours. Manual postal rate updates: 1. Tap Rates and Updates on the bottom of the Home screen. Swipe the screen up to access the second row of buttons. Pitney Bowes Operator Guide August 2019... - Page 120 Note: Prices and dates are used for reference only. These prices and dates may change with each postal change. Manual software updates: 1. Tap Rates and Updates on the bottom of the Home screen. Swipe the screen up to access the second row of buttons. Pitney Bowes Operator Guide August 2019...
- Page 121 2. If an update is available, the meter displays a progress bar showing the status of the download and installation. 3. Once the download and install process completes, you see the message "Finalizing Update". Pitney Bowes Operator Guide August 2019...
-
Page 122: Viewing The Total Envelope Printing Postage Spent
Use this warning as a reminder to add more postage to your machine. 1. Tap Envelope Printing on the Home screen. 2. Tap Postage Balance. 3. Tap Refill Settings. 4. Tap the Low postage threshold button. Pitney Bowes Operator Guide August 2019... -
Page 123: Setting Up A Mailer Id
The ZIP code printed by your postage meter should be either your ZIP code or the ZIP code of the post office picking up your mail. If your machine prints an incorrect ZIP code, a new one must be downloaded. This procedure is performed by a Pitney Bowes representative. Contact technical support for assistance. Managing accounts for Envelope Printing... -
Page 124: Multi-Level Envelope Printing Accounts
Sub account - If you create sub accounts for a top level account, the sub accounts become the lowest level in your account hierarchy. Postage gets charged to the sub accounts. Example: Account - Engineering; Sub account - Software Account - Engineering; Sub account - Industrial Design Pitney Bowes Operator Guide August 2019... -
Page 125: Turning Envelope Printing Account Passwords On And Off
2. Tap Account on the left side of the Mail screen. 3. To access the manage Accounts screen, tap the menu icon in the upper right corner of the screen. 4. Tap Manage Accounts in the drop-down menu. Pitney Bowes Operator Guide August 2019... -
Page 126: Creating An Envelope Printing Account
(Optional) To create a password for this account, tap in the Password field. Passwords are case sensitive, can be alphanumeric, and must be four characters in length. You will need to enter this password to edit or process mail against the account. Pitney Bowes Operator Guide August 2019... -
Page 127: Editing An Envelope Printing Account
10. Tap OK to return to your Accounts screen. 11. Tap the back arrow to return to your list of accounts. 12. Tap to select an account. To return to the Mail screen without changing your account selection, tap Cancel. Pitney Bowes Operator Guide August 2019... -
Page 128: Deleting An Envelope Printing Account
10. Tap the back arrow at the top of the screen to return to the list of accounts. 11. You can select an account from the list by tapping on it. To return to your Mail screen without changing your account selection, tap Cancel. Pitney Bowes Operator Guide August 2019... - Page 129 This page intentionally left blank.
- Page 130 8 - View Print Reports In this section Printing a receipt when refilling postage for Envelope Printing Viewing the total Envelope Printing postage spent Viewing the Envelope Printing postage refill history Printing a report for the number of mailpieces sent in Envelope Printing Printing Envelope Printing funds report Running Envelope Printing account reports...
-
Page 131: View Print Reports
2. Tap the History & Reports icon. 3. Tap the Refill History report in the Envelope Printing Reports section. 4. Tap on a postage refill to open a Refill Receipt. Note: At this time, you can only view the report. Pitney Bowes Operator Guide August 2019... -
Page 132: Printing A Report For The Number Of Mailpieces Sent In Envelope Printing
1. Tap Envelope Printing on the Home screen. 2. Tap the Pieces button in the Mail screen. 3. Tap Print Report. 4. Tap SendPro C Envelope Printer. 5. Feed the envelope through the machine. 6. A funds report prints showing the total number of pieces sent. -
Page 133: Running Envelope Printing Account Reports
View Print Reports 4. Tap SendPro C Envelope Printer. 5. Feed an envelope through the machine. Running Envelope Printing account reports 1. Tap Envelope Printing on the Home screen. 2. Tap Account on the left side of the screen. 3. Tap the menu icon in the upper right corner of the screen. - Page 134 7. Tap on the option button in front of the report to select it, for example, Account Summary. 8. Tap Next. 9. Tap Actions or View Reports at the bottom of the screen. 10. Tap Email Report. Pitney Bowes Operator Guide August 2019...
-
Page 135: Setting The Envelope Printing Account Report Period
3. Tap the menu icon in the upper right corner of the screen. 4. Tap Manage Accounts. 5. Tap on the Reports link under the Accounts section. This opens the Reports screen. 6. Tap Report period. Pitney Bowes Operator Guide August 2019... -
Page 136: Setting The Envelope Printing Account Report Preferences
7. Tap to select how you want accounts identified: by Name or by Code. 8. Tap to select the account level you want to report at: Account, Sub account or Sub sub account. 9. Tap OK to return to the Reports screen. Pitney Bowes Operator Guide August 2019... -
Page 137: Viewing The Trackable Labels History
The details screen shows the sender and recipient address, the cost account, purchase date and the package type. You can also use this screen to reprint the label, request a refund (USPS), void the label (UPS and FedEx), or create a return label (USPS). Pitney Bowes Operator Guide August 2019... -
Page 138: 9 - Mail Machine Maintenance
Printing a test pattern Cleaning the print nozzles Checking the ink level Installing the ink cartridge Change the ink waste pad on the SendPro C, SendPro+ Model with PCN 8H00 Cleaning the printhead Installing the printhead Cleaning the moistener brush and wick assembly... -
Page 139: Check The Postage Print Quality On The Sendpro C, Sendpro+ Model With Pcn 8H00
Check the postage print quality on the SendPro C, SendPro+ Model with PCN 8H00 If you are unsure of your SendPro C, SendPro+ model number, refer to Related topics. To check the quality of the postage printed on an envelope or tape strip: 1. -
Page 140: Cleaning The Print Nozzles
Checking the ink level If you are unsure of your SendPro C, SendPro+ model number, refer to Related topics. Pitney Bowes Operator Guide... -
Page 141: Installing The Ink Cartridge
Important: Only use genuine Pitney Bowes ink cartridges. Non-Pitney Bowes cartridges can damage your meter. If you need ink, order a genuine Pitney Bowes replacement ink cartridge. When your meter shows the low ink warning an ink cartridge will be ordered for you automatically, if you are enrolled in the AutoInk program. -
Page 142: Change The Ink Waste Pad On The Sendpro C, Sendpro+ Model With Pcn 8H00
Change the ink waste pad on the SendPro C, SendPro+ Model with PCN 8H00 If you are unsure of your SendPro C, SendPro+ model number, refer to Related topics. You will receive a message at the top of the Envelope Printing home screen approximately 30 days before the ink waste tank becomes full. - Page 143 If that fails to clear the message, contact Pitney Bowes support. If the message no longer appears on the screen follow these steps: If you need a replacement waste pad, use the Supplies app to purchase the pad.
-
Page 144: Cleaning The Printhead
Related topics Finding the Product Code Number (PCN) and serial number Ordering supplies from your SendPro C, SendPro+ Model with PCN 8H00 Cleaning the printhead If you clean the print nozzle and you still get a bad test print pattern, try cleaning the printhead. Please have your Product Code Number (PCN) and serial number ready. - Page 145 Mail Machine Maintenance 7. Squeeze the tabs on either side of the printhead. 8. Lift and tilt the printhead gently to the right. Pitney Bowes Operator Guide August 2019...
- Page 146 Mail Machine Maintenance 9. Pull the printhead up and out of the holder. Pitney Bowes Operator Guide August 2019...
- Page 147 10. Note the location of the plastic alignment tabs and the orientation of the printhead so that you can reinstall it properly after cleaning. 11. Clean off the printhead by wiping surface of the print head shown here with a dry, lint-free cloth or foam swab. Pitney Bowes Operator Guide August 2019...
- Page 148 13. Reinsert the printhead by squeezing the tabs on either side of the printhead and sliding the plastic alignment pins into the lower slot of the printhead holder. 14. Gently push the printhead into place until it snaps into position. Pitney Bowes Operator Guide August 2019...
-
Page 149: Installing The Printhead
4. Lift the cover; the ink cartridge moves to the front position. 5. Flip the ink cartridge guard open. 6. Remove the ink cartridge as shown on the label to the right of the cartridge holder. Pitney Bowes Operator Guide August 2019... - Page 150 Mail Machine Maintenance 7. Squeeze the two gray tabs on either side of the printhead. 8. Lift and tilt the printhead gently to the right. Pitney Bowes Operator Guide August 2019...
- Page 151 Mail Machine Maintenance 9. Pull the old printhead up and out of the holder. Pitney Bowes Operator Guide August 2019...
- Page 152 Mail Machine Maintenance 10. Note the location of the plastic alignment tabs and the orientation of the printhead so that you can install the new printhead correctly. Pitney Bowes Operator Guide August 2019...
- Page 153 12. Insert the printhead by squeezing the tabs on either side of the printhead and sliding the plastic alignment pins into the lower slot of the printhead holder. 13. Gently push the printhead into place until it snaps into position. Pitney Bowes Operator Guide August 2019...
-
Page 154: Cleaning The Moistener Brush And Wick Assembly
Cleaning the moistener brush and wick assembly If the moistener tank is full and your envelopes are not sealing properly, clean the moistener brush and wick. 1. Unscrew the plastic thumbscrew under the moistener base. Pitney Bowes Operator Guide August 2019... - Page 155 Mail Machine Maintenance 2. Lift the moistener brush assembly off the top of the moistener base. 3. Turn the assembly over and slide the moistener brush out of the holder. Pitney Bowes Operator Guide August 2019...
- Page 156 6. Clean the brush and wick with water and rinse thoroughly. 7. Place the wick back in the metal grate, and replace the grate in the moistener base. 8. Slide the moistener brush back into the holder. Pitney Bowes Operator Guide August 2019...
-
Page 157: Filling The Moistener Tank
Sealing issues can be caused by: not enough sealant in the moistener tank not placing the envelope correctly on the feed deck problems with the moistener brush or wick Use this checklist to avoid envelope sealing issues: Pitney Bowes Operator Guide August 2019... -
Page 158: How To Properly Feed Envelopes
Otherwise, the moistener cannot wet the flap. If the moistener tank is full, and your envelopes are still not sealing correctly, clean or replace your moistener brush and wick. How to properly feed envelopes When feeding mail: Pitney Bowes Operator Guide August 2019... -
Page 159: Managing Product Email Notifications
Make sure and remove all the dust and debris. Managing product email notifications Instructions Your meter can send you email notifications when: Its ink level is low Its funds are low Pitney Bowes Operator Guide August 2019... -
Page 160: Moving Your Sendpro C, Sendpro+ Meter
It experiences an error To receive or stop receiving these emails: 1. Sign in to your account on pitneybowes.com. If you do not have a Pitney Bowes Your Account login, see Signing up for a pitneybowes.com account. 2. Find the meter in the Your Products section. If it is not listed, select (+) View more or (+) Add them now. - Page 161 This page intentionally left blank.
-
Page 162: 10 - Supplies
10 - Supplies In this section Ordering supplies from your SendPro C, SendPro+ Model with PCN 8H00 Supplies, ink cartridges, and options... -
Page 163: Ordering Supplies From Your Sendpro C, Sendpro+ Model With Pcn 8H00
Ordering supplies from your SendPro C, SendPro+ Model with PCN 8H00 If you are unsure of your SendPro C, SendPro+ model number, refer to Related topics. You can order supplies directly from your SendPro C, SendPro+ device using the Supplies app. - Page 164 You are taken to a Checkout screen where you confirm or change the delivery address and the shipping method. Confirm your method of payment. Review and complete your order on the Review Order screen. Tapping Add to Cart adds the item to your shipping cart. Pitney Bowes Operator Guide August 2019...
- Page 165 Tap on Order Now and you are taken directly to the Review Order screen. If you enrolled in AutoInk, the service automatically orders ink for you. Related topics Finding the Product Code Number (PCN) and serial number Pitney Bowes Operator Guide August 2019...
-
Page 166: Supplies, Ink Cartridges, And Options
Deluxe Cleaning Kit with Duster (canned air) CK0-3 Small Cleaning Kit with Duster (canned air) CK0-2 Office Equipment Cleaner CK0-4 Small Business Cleaning Kit (without canned air) CK0-1 Supply Pack for SendPro C 516-1 (check PCN and description) Pitney Bowes Operator Guide August 2019... - Page 167 6WB-F Direct Thermal Labels 4" x 6" (6 rolls) 745-1 Ink Cartridges Description Capacity Part Code Number (PCN) SendPro C red fluorescent ink cartridge 17 ml SL-798-0 SendPro C red fluorescent ink cartridge 35 ml 793-5 Optional Accessories Description Part Code Number (PCN)
- Page 168 Supplies Pitney Bowes Operator Guide August 2019...
- Page 169 This page intentionally left blank.
- Page 170 11 - Machine Information In this section USPS requirements Key in Postage Sections of the meter impression Postal Security Device Parts of the machine Connections on the back of the machine Specifications...
-
Page 171: Machine Information
System computer automatically performs a postal inspection. The postage tape you use must meet USPS specifications. Key in Postage Due to USPS regulations, there is no Key in Postage available on the SendPro® C meters. Pitney Bowes Operator Guide August 2019... -
Page 172: Sections Of The Meter Impression
The postage meter on your mailing system is a Postal Security Device (PSD) that secures your postage funds, incorporating the latest technology approved by USPS. This technology eliminates the need for USPS to perform physical inspections, thereby making your mailing system easier and more convenient for you to use. Pitney Bowes Operator Guide August 2019... -
Page 173: Parts Of The Machine
7. Paper jam lever - Normally engaged. If a stall occurs on the transport deck, turn this to disengage the rollers and clear the envelope, post card or tape strip. 8. Envelope stacker - This is where mail is deposited after the postage is applied to the piece of mail. Pitney Bowes Operator Guide August 2019... -
Page 174: Connections On The Back Of The Machine
Machine Information Connections on the back of the machine All SendPro C models have these connection options: 1. USB port type A host - use for: External printer Barcode scanner External scale 2. USB port, type B host - use for: Service operations 3. - Page 175 Self-adhesive, dual tape strip for use on mailpieces that are too thick/large to run in the machine. Ideal for adding postage to oversized envelopes, priority mail and packages. Postal Inscriptions: Up to 60 inscriptions preloaded on the machine Graphics: Up to 60 graphic ads on the machine Pitney Bowes Operator Guide August 2019...
-
Page 176: 12 - Technical Support
12 - Technical Support In this section Contacting Pitney Bowes... -
Page 177: Contacting Pitney Bowes
Note that the serial number is blurred out here for security reasons. Be sure to have the following information available before contacting Pitney Bowes Technical Support:R Provide a description of the problem... - Page 178 Contact Technical and Account Support: Visit our website at (copy the URL and paste it into a browser): http://pitneybowes.com/us/support/products/sendpro-c200-c300-c400-meter-support.html For the Pitney Bowes Supply Line Web support: Visit our website at (copy the URL and paste it into a browser): http://pitneybowes.com/us/support/products/sendpro-c200-c300-c400-meter-support.html Click on Shop at the top of the page.
- Page 179 This page intentionally left blank.
-
Page 180: A - Sendpro Online
A - SendPro Online In this section Importing Addresses Exporting Addresses Importing Cost Accounts Exporting Cost Accounts Exporting a History Report Setting up and Managing a UPS Account Setting up and Managing a FedEx Account Managing Users Inviting Users Viewing Locations in SendPro Online and on the SendPro C/SendPro+ Creating an international trackable label Printing a USPS scan form... -
Page 181: Importing Addresses
Address Book, uncheck Replace my current Address Book data with my imported data. If you use a shared address book, the replace option is not available. 7. Select Continue. Pitney Bowes Operator Guide August 2019... - Page 182 SendPro requires the first and last names to be in a single field called Name. If the first and last names are in separate columns in your data file, you can use Excel's concatenate function to put them into a single column. For assistance with this function,see the Joining name columns section Pitney Bowes Operator Guide August 2019...
- Page 183 (A2," ",B2), where A is your First Name column and B is your Last Name column. 3. Press Enter. The column should be filled in with the first and last name separated by a space. Pitney Bowes Operator Guide August 2019...
- Page 184 6. Copy the column (press Ctrl+c, right-click and choose Copy, or click the Copy button on the Home tab). 7. Right-click in the first cell in the second new Name column (cell D1 in this example) and choose the Values (V) button under Paste Options. Pitney Bowes Operator Guide August 2019...
-
Page 185: Exporting Addresses
Exporting Addresses Use SendPro® Online to export the addresses from your address book to a .csv file. If you use a SendPro Tablet or SendPro C/SendPro+, the addresses from its address book will be included as part of this export file. -
Page 186: Exporting Cost Accounts
SendPro Tablet will be exported using SendPro Online. Cost Accounts that were created in Trackable Labels on a SendPro C/SendPro+ meter will be exported using SendPro Online. Accounts that were created in Envelope Printing on a SendPro C/SendPro+ meter will not appear in SendPro Online and cannot be exported. -
Page 187: Setting Up And Managing A Ups Account
Setting up and Managing a UPS Account Use SendPro Online to set up your UPS account. After you set up your UPS account, you can use it for other SendPro products such as the SendPro C/SendPro+. Setting up a UPS account Only users with the role of Admin can perform this procedure. -
Page 188: Setting Up And Managing A Fedex Account
Setting up and Managing a FedEx Account Use SendPro Online to set up your FedEx account. After you set up your FedEx account, you can use it for other SendPro products such as the SendPro C/SendPro+. Setting up a FedEx account Note: Only users with the role of Admin can perform this procedure. - Page 189 SendPro on the meter in order to access FedEx shipping functions. Managing a FedEx account Changing the nickname of an account: 1. Select Settings > Shipping Carriers. 2. Select the Manage link next to the account you wish to update. Pitney Bowes Operator Guide August 2019...
-
Page 190: Managing Users
Use SendPro® Online to view users' status and change user roles. Users created in SendPro Online can be used to sign in to the Trackable Label application on a SendPro C/SendPro+. Only users with the role of Admin can perform this procedure. For multi-location subscriptions, only users with the role of Admin and Location Admin can perform this procedure. - Page 191 If you have a multi-location subscription, you can change the Location for users with the role of User. The Location Admin's location cannot be changed. To request a location change for and Account Admin or Location Admin, contact your Pitney Bowes sales representative. To view the permissions definitions for each role: 1.
-
Page 192: Inviting Users
Use SendPro® Online to invite/add users. Users created in SendPro Online can be used to sign in to the SendPro Tablet and the Trackable Label application on SendPro C/SendPro+ meters. Only users with the role of Admin can perform this procedure. The user who signs up for SendPro Online will have the role of Admin. -
Page 193: Viewing Locations In Sendpro Online And On The Sendpro C/Sendpro
The Default Location is the SendPro account owner’s (Admin) location. Note: The Locations cannot be changed on this screen. To add, change or remove Locations, contact your Pitney Bowes sales representative. Creating an international trackable label Important note: In order to print an international label you need to connect your SendPro® C to an 8 1/2 x 11"... -
Page 194: Printing A Usps Scan Form
3. Slide down to "Scan Form and Manifest Printing" and tap on the check box for Enable scan form printing. 4. When you are ready to print the scan form, use your SendPro C user ID to sign in to SendPro Online. In your web browser, go to https://login.pitneybowes.com/sendpro and sign in with your SendPro C user ID and password. -
Page 195: Comparing Carrier Rates
PDF viewer will be used. Comparing Carrier Rates To compare the cost to ship a package with different carriers using the Shipping Rate Selector: 1. On the home screen, select the Shipping Rate Selector tile. Pitney Bowes Operator Guide August 2019... - Page 196 United States, select the destination country from the drop-down menu. 4. Enter the package dimensions and weight and click Continue. 5. To compare rates, select each carrier on the left side to view the available shipping options from that carrier. Pitney Bowes Operator Guide August 2019...
- Page 197 8. If you did not select an address from your address book in step 3, enter the Recipient Address now, or use the address book icon to select the recipient from the address book. 9. (Optional) Select the Email the tracking number box to email the tracking number to the recipient. Pitney Bowes Operator Guide August 2019...
- Page 198 10. Select a cost account from the Cost Account menu. If Cost Accounts are required for all shipments, this field is required. If Cost Accounts are not required, this is optional. 11. Select Print to print the label. Print the label as you normally would. Pitney Bowes Operator Guide August 2019...
-
Page 199: B - Safety
B - Safety In this section Lithium Ion Battery Agency Compliance Information Important Safety Notes Note for California Customers Only on all Models... -
Page 200: Lithium Ion Battery
This product contains a lithium ion battery. The battery must be recycled or disposed of properly. If you are leasing this product, you must return it to Pitney Bowes. Alternatively, contact your local waste disposal or recycle facility for instructions on how to dispose of it properly. - Page 201 The cabinet encloses hazardous parts. If you should drop or otherwise damage the unit, call Pitney Bowes. Use only Pitney Bowes approved ink, tape strips, and cleaners. To obtain Material Safety Data Sheets (MSDS) for OSHA requirements, please go to www.pb.com/msds. When prompted, enter the product name, manufacturer, the Pitney Bowes MSDS Number, or reorder number of the item you are interested in.
- Page 202 Servicing Please refer to the warranty information if problems occur. For reference purposes, the Pitney Bowes U.S. Service Center contact address is: Pitney Bowes Inc., 3001 Summer Street, Stamford, CT, 06926. All inquiries can be done by calling 1-800-522-0020 and following the telephone prompts. Customer Service Representatives are available Monday through Friday, 8:00 AM - 8:00 PM ET.
- Page 203 C - Third party software In this section Third party software...
- Page 204 Third party software Third party software Third party software may have been incorporated into this product by Pitney Bowes Inc. (“PBI”) under permission from PBI’s licensors. Any special terms and conditions that apply to such software are provided below: This product contains the following software: Okhttp3 which is licensed under the Apache License, Version number 2.0.
- Page 205 The source code for this software is available from https://github.com/JamesNK/Newtonsoft.Json. MaterialChips which is licensed under the Apache License, Version number 2.0. The license can be downloaded from: http://www.apache.org/licenses/LICENSE-2.0.html. The source code for this software is available from https://github.com/DoodleScheduling/android-material-chips. Pitney Bowes Operator Guide August 2019...
- Page 206 Linux kernel under the terms of the GPL, without charge except for the cost of the media, shipping, and handling, upon written request to PBI. Such requests should be sent by e-mail to iptl@pb.com. Pitney Bowes Operator Guide August 2019...
Need help?
Do you have a question about the SendPro C and is the answer not in the manual?
Questions and answers