Ingenico iCT250 Merchant Manual
Td
Hide thumbs
Also See for iCT250:
- Operating manual (116 pages) ,
- Quick reference manual (44 pages) ,
- Read me next (38 pages)

Related Manuals for Ingenico iCT250


Summary of Contents for Ingenico iCT250
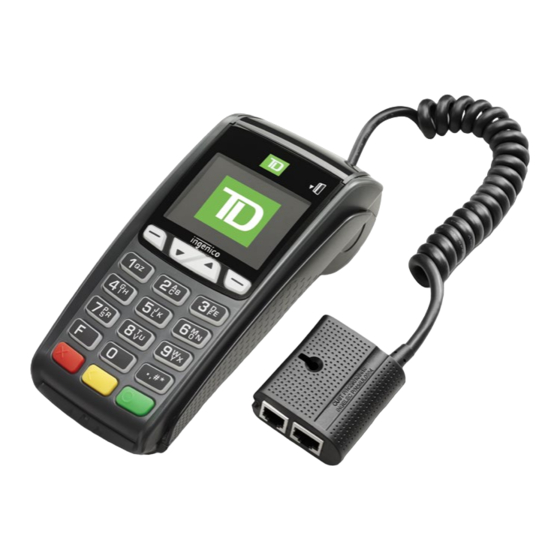
- Page 1 TD iCT250 Merchant Guide For the TD iCT250 • with PINpad • without PINpad * PINpad not shown...
- Page 2 COPYRIGHT 2016 by The Toronto-Dominion Bank © This publication is confidential and proprietary to The Toronto-Dominion Bank and is intended solely for the use of Merchant customers of TD Merchant Solutions. This publication may not be reproduced or distributed, in whole or in part, for any other purpose without the written permission of an authorized representative of The Toronto-Dominion Bank.
-
Page 3: Table Of Contents
The TD iCT250 Solution ........ - Page 4 Return ......................... 14 Receipts .
- Page 5 Reprint last receipt ..................29 Reprint older receipt ..................29 Transaction options ....................29 Card present ....................
- Page 6 This page left blank on purpose. - iv -...
-
Page 7: Welcome To Td Merchant Solutions
TD iCT250 Merchant Guide About the TD iCT250 Welcome to TD Merchant Solutions This is a new and exciting product that offers new functionality for you, the merchant. The following materials will provide helpful information about the equipment, its features and TD Merchant Services. Please ensure you read this guide so that you become familiar with the capabilities of the TD iCT250 and how it can support your business needs. By now your terminal will be installed, initialized and configured. Now it’s time for you to learn more about its features and capabilities. Section 1 outlines the terminal’s basic functions. In section 2 you will learn about your responsibilities as a merchant. Financial transactions are covered in section 3 and section 4 covers reporting. Section 5 covers administration and the configuration of your terminal and troubleshooting steps are in section 6. Who should use this guide? You would use this guide if you perform transactions on a TD iCT250 terminal during the course of your daily business. The TD iCT250 Solution The terminal is solely for the you, the Merchant. You will use the terminal to initiate transactions for customer’s using credit or debit cards. Depending on your settings, some card types may not be accepted by your terminal. Please please go to our online documentation at www.TDMerchantSolutions.com/ResourceCentre to learn how to use other cards. There are two potential configurations for the TD iCT250 solution. Terminal only Terminal and PINpad 16: 20 16: 20... -
Page 8: Hardware
Hardware The Terminal Paper chamber flap F unction keys T he / F1 and / F2 keys can be used as shortcuts and to select onscreen options. Navigation keys U se the arrow keys to navigate up and down the screens and menus. Command keys Cancel 16: 20 Correction or paper advance 05/04/2014 MODEM and shortcut to the Transactions screen. F key T he is the shortcut to the Main Menu screen and used to switch between entering letters and numbers for certain functions like user names or receipt banners. Card readers I nsert chipped cards Swipe cards Contactless cards Default shortcut keys... -
Page 9: Screens
TD iCT250 Merchant Guide About the TD iCT250 Screens Idle screen and icons The default screen is called the Idle screen. It displays a lot of important information and different ways to access your terminal’s functionality. On it there are numerous important icons. They are: Communication icon 10:52 T he icon indicates whether the 05/04/2014 terminal is connected to the network. It will be TD APP one of two colours: » Green (connected) or » White (disconnected). Lock (security) T he icon will be closed or open. If you don’t see the closed lock, do not use this terminal and contact the TD Merchant Solutions Help Desk to report it as a tampered device. -
Page 10: Admin Menu Screen
• Reprint Menu • Maintenance 3 - Trans Recall Menu • Other Functions For a list of all the admin functions on available on the 4 - Setup Menu terminal, refer to the Quick Start Guide for a complete menu breakdown. The Communications Adapter Cord to terminal The communication adapter is the bridge between your terminal and its power and data in one connection. Ports The adapter has four ports and they are: Data cable to the TD iCT250 Power Internet In Phone Line In Communication options The TD iCT250 solution offers two options for communications: dial-up or Ethernet. You as the merchant can set this however you wish to suit your existing place of business’ setup. To learn more about Communication options see “Communications” on page 23. - 4 -... -
Page 11: The Pinpad
TD iCT250 Merchant Guide About the TD iCT250 The PINpad This is an optional piece of hardware. When connected to your terminal it is used by the customer to enter information and select options regarding the transaction. If you don’t have a PINpad, the customer will use the terminal to enter information. Function keys T he / F1 and / F4 keys can be used to select onscreen options. Welcome / Bonjour Navigation keys U se the and keys to navigate the screens and menus. Command keys » Cancel CANC iPP320 ANNUL » / Correction SAV / EP CORR »... -
Page 12: Cardholder Privacy And Security
Cardholder Privacy and Security Please refer to the Cardholder Privacy sheet in your Merchant welcome kit. It contains important information about your responsibilities to your customers and their personal and transaction information. Terminal security It is the Merchant’s responsibility to secure the terminal, any user IDs or passwords and to prevent unauthorized use. In any event the Merchant will be liable for any unauthorized use of the terminal or any user IDs or passwords. There are three user security settings: No security (Default) Medium Security High Security • N o access restriction to the • A ccess is restricted to certain • A ccess is restricted to certain terminal functionality listed features by a supervisor or features by a manager ID and below. manager ID and password. password. The following functions can be protected medium or high security. • Batch reports • Business day reports •... -
Page 13: Call For Authorization
TD iCT250 Merchant Guide Responsibilities Call for authorization Sometimes, due to a communication or security issue, a transaction cannot or should not be completed. This transaction may require that you call for authorization to ensure that the card is in good standing and that the transaction can be completed. See the list of messages and events below that will cause you to call for authorization. W h e n eve r Ac t io n …the CALL FOR AUTH D on’t attempt the transaction again. message is seen. C all for a voice authorization immediately. (No comm error seen) …the CALL FOR AUTH T ry again the transaction again. message is seen. (Comm error seen) P ress the OK or Cancel key and call for a voice authorization. …the card number on the P ress the Cancel key and call for a voice authorization immediately. screen does not match the 10 authorization. In this situation, you may be dealing with a equest a CODE number embossed on the... -
Page 14: Transaction Records
Transaction records The terminal can store up to: • 1 0 business days of detailed transactions • 45 days of totals • 9 99 transactions per batch and • 2 000 transactions per business day Storing cardholder receipts Merchants are responsible for retaining all receipts to respond to cardholder inquiries. The following are guidelines you should use when storing them. Store receipts: • ...in a dark, secure area with limited access for at least one year • . ..in envelopes arranged by date in a secured filing cabinet work well. If you have several terminals use a separate envelope(s) for each terminal. • ...as long as you retain cash register tapes for direct payment transactions You receipts could become unreadable if you: • store receipts in plastic coated containers • expose them to direct heat or cold sources •... -
Page 15: Financial Transactions
TD iCT250 Merchant Guide Financial Transactions Financial Transactions The TD iCT250 solution can perform the following transactions: • Sale • Phone / Mail sale • Sale with tip • Force post • Sale with cashback • Refund • Sale with partial authorization • Void • Sale with split tender * T hese optional transactions and others, such as pre-authorizations are covered in our online documentation at www. TDMerchantSolutions.com/ResourceCentre. PINpad Transactions When a PINpad is connected to the terminal the customer will use it exclusively to enter information and make selections. For the transactions in this document we show the customer PINpad key options. If you only have a terminal, the customer will also use the terminal to enter information. • Depending on your security settings, you may be required to enter a supervisor ID and password to proceed with any transaction. -
Page 16: Sale (Credit Card)
Sale (credit card) Press / F1. Enter the total dollar amount for the sale and press OK. If you have tips enabled you will see the following steps. Tip (optional) Customer confirms the dollar amount and presses Yes or No. C ustomer enters/selects the tip amount/option and presses OK. Customer confirms the dollar amount and presses Accept or Change. P erform one of the following payment methods: Insert, Swipe, Contactless or Manual Entry. Contactless T he customer taps their contactless-enabled credit card on the contactless card reader. The customer may be required to swipe or insert their card in some cases. A sk the customer if they would like a receipt: Yes or No. T he screen shows that authorization number, the transaction total and the receipts print if requested. Insert card The customer inserts their credit card. - Page 17 TD iCT250 Merchant Guide Financial Transactions ENTER AMOUNT (optional) SELECT PAYMENT METHOD INSERT CONTACTLESS SWIPE MANUALLY ENTRY ENTER # and DIFFERENT PAYMENT EXP. DATE REQUIRED? IMPRINT CARD ENTER PIN MESSAGE ENTER CVD? RECEIPTS (optional) CREDIT / PARTIAL AUTH? DEBIT / CASH...
-
Page 18: Sale (Debit Card)
Sale (debit card) P ress / F1. ENTER nter the dollar amount and press OK. AMOUNT I f you have tips enabled you will see the following steps. Tip (optional) C ustomer confirms the dollar amount and CONFIRM presses Yes or No. AMOUNT C ustomer enters/selects the tip amount/ option and presses OK. C ustomer confirms the dollar amount and presses Accept or Change. SELECT PAYMENT P erform one of the following payment methods: METHOD Insert / Swipe or Contactless. Contactless INSERT or TAP CARD T he customer taps their contactless- SWIPE CARD (optional) enabled debit card. The customer may be required to swipe or insert their DIFFERENT... -
Page 19: Force Post (Sale Or Phone / Mail)
TD iCT250 Merchant Guide Financial Transactions Force post (sale or phone / mail) This option is only used when you can’t process a credit card sale normally through the network whether due to communication problem or that the force post is requested via the terminal. Before you perform this transaction you must call the TD Merchant Help Desk at 1-800-363-1163 and receive an authorization number. P ress OK Force Post Force Sale Force Ph/Mail. Enter the dollar amount and press OK. entry. -
Page 20: Return
by Account # (credit cards only) T his recalls any transaction for the entered card account number in the open batch. wipe the credit card or enter the card account number and press OK. Scroll to the transaction and press Select. Go to step 3. by Invoice # T his recalls the transaction for the entered invoice number. E nter the invoice number that you want to recall and press OK. Go to step 3. by Trace # T his only recalls the transaction connected to the trace number in the open batch. E nter the trace number that you want to recall and press OK. Go to step 3. V erify that the it is the correct transaction information on the screen and do one of the following: Press Void to cancel the transaction and print the voided receipts. Press Back to select a different transaction. Press Cancel to exit the screen. Return You can only perform a return on a transaction that has already been submitted for reimbursement. Debit returns are disabled by default. If you wish to activate debit returns on your terminal please call the TD Merchant Solutions Help Desk at 1-800-363-1163. -
Page 21: Receipt Codes
TD iCT250 Merchant Guide Financial Transactions Reprint Last S elect which copy you want to reprint (Merchant, Customer or Both) and press OK. The receipt reprints and is noted as a duplicate. Reprint Previous Select one of the following options: croll through the available receipts, select the desired one and press OK. Go to step 3. Invoice # Enter the invoice number and press OK. Go to step 3. Account # number and press OK. Go to step 3. wipe the card or enter the account Approval Code Enter the approval code and OK. Go to step 3. Select which receipt to reprint (Merchant, Customer or Both) and press OK. The receipt reprints and is noted as a duplicate. Receipt codes Tra n s a c t io n t y p e... -
Page 22: Receipt Examples
Receipt examples The information that you will use the most is noted and explained on the previous page. Merchant Name Merchant Name Address Address City, Province City, Province Merchant Number Merchant Number Terminal ID Terminal ID SALE SALE 06-16-2016 12:41:02 06-16-2016 12:41:02 Acct # 476173******0010 Acct # 455763******1632 Card Type DP Card Type Name: nnnnnnnnn Name: nnnnnnn A00000000980840 Trace # 010103... -
Page 23: Reporting
TD iCT250 Merchant Guide Financial Transactions • S ends any stored transactions (SAFs). • Checks for mail, and downloads. • Closes all open batches. • D ownloads available updates. • Prints selected reports. • S tarts a new business day on the terminal by opening a new batch. A batch is a group of transactions that you must submit to the issuer to accept in order for you to be paid. Once you close the batch or perform and end of day, these transactions are sent to the issuer for settlement and then they will deposit the funds into your account. -
Page 24: Batch Reports
Do one of the following: nter an Operator ID and press OK. P ress OK for a report of all operators. Go to step 3. D ecide how to retrieve the report (Display or Print). I f you selected Display, you will be able to cycle through the details by selecting Prev or Next. If you selected Print, the your report will begin to print. Batch reports These reports are for all transactions performed within a particular batch. This is generally used when you have multiple shifts using the same terminal. This allows you to pull reports at the end of a particular shift and acts like a shift close function, but it does not close the day on the terminal. It then prints a report showing transactions performed on the terminal since the last Day Close. T he following chart shows what each report displays. Re p o r t Re p o r t d et ail s Terminal Detail • By card type • For current or previous batch Terminal Balancing • By card type • For current or previous batch P ress . -
Page 25: Emv Reports
TD iCT250 Merchant Guide Reporting nter the end date for the report and press OK. nter the end time for the report and press OK. D ecide how to retrieve the report (Display or Print). I f you selected Display, you will be able to cycle through the details by selecting Prev or Next. If you selected Print, the your report will begin to print. EMV reports The EMV reports are used for troubleshooting and you only print these out if requested by the Help Desk. Also, if you do print these out, some can be quite long so repeated printings will make you use more paper than normal. Recent error report log This report will display all errors that occurred on the terminal in the past 10 days. P ress / Admin key Other Functions Recent Error Rep. . , # * S elect whether you want to print or save the errors (Print or File). T he recent error report will be printed or saved as per your selection. Activity log The activity log provides the ability to display, print or delete a report log showing all restricted access activity on the terminal. P ress / Admin key Other Functions Activity Log. . , # * ID and press OK. -
Page 26: User Management
U s e r Ty p e C a p a bilit ie s S p e c ial N o te s Manager • C an access all features and functions, • A maximum of 10 Managers are allowed per including transaction processing, all terminal reports and all menus • Be aware of who you grant Manager access to • C an set up Supervisor and Operator IDs • Consists of an ID, Password and optional Name • O nly Managers have access to the Activity Log Supervisor... -
Page 27: Operator Wording
TD iCT250 Merchant Guide Administration and Configuration Press . , # * / Admin key Setup Menu User Setup View & Delete. • Each ID will be listed by user id, user name (optional) and user type. • The user type remains operator and labelled as an O even if you change the operator wording to another label. -
Page 28: Functions Enabled/Disabled By Td Merchant Solutions
Press . , # * / Admin key Maintenance. S elect which type of download you want to do (1 - Host 1 Param.DL or 2 - Host 2 Param.DL). If you selected Host 1 Param.DL follow these instructions: Press OK. he terminal begins the download and continues running until Parameter Download Completed appears on the screen. If you selected Host 2 Param.DL follow these instructions: Select what type of download this is (Full or Partial). T he terminal begins the download. It will show a percentage complete counter until complete when it shows the message Host 2 Download Completed. Your terminal will automatically reboot. Your terminal starts up and the parameter download is complete. Functions enabled/disabled by TD Merchant Solutions The following settings are available, but you must call the TD Merchant Services Help Desk to enable/disable them. Fu n c t io n S et t in g s E x pla n at io n Auto Logoff Timer On/Off... -
Page 29: Configuration Reports
TD iCT250 Merchant Guide Administration and Configuration Fu n c t io n S et t in g s E x pla n at io n End of Day On/Off Enables/disables supervisor protection Manual Account # on this function. Batch Reports Business Day Reports... -
Page 30: Dial Up
S elect the desired option (1- Terminal IP, 2- Gateway IP, 3- IP SubMask, 4- Primary DNS IP or 5- Secondary DNS IP). hen you select any of the above options, enter the IP address and press OK. For a static IP address you must complete all of the above information. A ll of the addresses are 12 digits long and supplied by your Internet service provider (ISP). Leading zeros are not usually provided or required to be entered. It is four groups of 1 to 3 numbers separated by decimal points. Please ensure that you enter the decimal points in your IP addresses as they do not auto-populate. The IP address is now saved. Dial up Use this option to change the dial up communications setting. Press / Admin key Setup Menu Communications Dial Menu. . , # * S elect the desired option (1 - Prefix Code or 2 - LD Prefix or 3 – Pre-Dial or 4 - Dial Retry or 5 – DialTone 6 – Baud or 7 – Dial Mode). -
Page 31: Keystroke Sounds
TD iCT250 Merchant Guide Administration and Configuration Keystroke sounds T his option allows you to enable or disable the beeps when keys are pressed. P ress / Admin key Setup Menu Customization Hardware Options Key Beep. . , # * Select the desired option (1 - All Off or 2 - All On or 3 - Invalid Only). » Off – The terminal will beep on every key press. This is the default. » A ll On – The terminal won’t beep when keys are pressed. » I nvalid Only – The terminal will only beep when an invalid action is performed. The new keystroke sounds are now changed to your selection. Terminal backlight This option allows you determine when the screen light is on. P ress . , # * / Admin key Setup Menu Customization Hardware Options Backlight. -
Page 32: Cashback Presets
MaxCashbackAmt Use this option to set the maximum allowable cashback amount that a customer can receive. Enter a maximum allowable Cashback amount and press OK. The maximum allowable cashback amount has been set. EnablePresets Use this option to enable preset cashback amounts. Cashback presets are enabled. Configure Presets Use this option to configure preset cashback amounts. S elect the cashback preset option that best suits your needs. See below for all the cashback preset examples. Cashback presets are set. Cashback presets Use this option to configure preset cashback amounts. Whenever you do a Host 2 Download, you will overwrite the cashback options with what is on the server. To ensure that your tip settings aren’t overwritten, we suggest you call TD Merchant Solutions Help Desk to change them. -
Page 33: Other Tip Options
TD iCT250 Merchant Guide Administration and Configuration Other tip options There are various tip formats that you can use on the TD iCT250. They are: Tip F o r m at Di s play E x pla n at io n Percentage The customer can enter a tip as a percentage of the overall sale. Enter 0% to leave no tip. Dollar Amount The customer can enter a tip as a dollar amount. Enter $0 to leave no tip. Percentage or Dollar 1 - % The customer can select whether they want to enter their tip as a dollar Entry amount or a percentage of the overall sale. -
Page 34: Receipt Options
Receipt options Use these options to configure your receipts. • Receipt banner • Reprint last customer receipt • Preprint receipt • Reprint last receipt • Receipt delay • Reprint older receipt • Receipt order Receipt banner This option allows you to add a short slogan or advertising to the bottom of all receipts printed from a terminal. • The receipt banner must be added to each terminal that you want to use it on. • The more lines you add to the banner, the more paper will be used when you print a receipt. If you print a large number of receipts daily, your paper usage may be significantly higher than what you’re accustomed to. -
Page 35: Reprint Last Customer Receipt
TD iCT250 Merchant Guide Administration and Configuration Reprint last customer receipt This transaction is used to reprint the last customer receipt before another transaction is processed. This is a quick way to reprint the last customer receipt. If you need to reprint a merchant receipt see the transaction below. Press 0 key. C onfirm you want to reprint the last receipt (Yes or No). The last customer receipt reprints. Reprint last receipt This option is used to reprint the last merchant or customer receipt before another transaction is processed. P ress . , # * / Admin key Reprint Menu Reprint Last. S elect which receipt is to be reprinted (1 – Merchant Copy, 2 – Customer Copy or 3 – Both). The last receipt reprints. Reprint older receipt This option is used to reprint a receipt printed before the last receipt since the last end of day close. Previous. P ress . -
Page 36: Partial Authorization
Partial authorization A partial authorization occurs when a payment is attempted for a transaction and there are insufficient funds in the account to cover the full amount. The issuer returns an authorization for the amount available in the account, leaving the merchant to obtain an additional form of payment from the customer for the balance. P ress / Admin key Setup Menu Customization Transaction Prompts Partial . , # * authorization. S elect the desired option (On or Off). The default setting is off. T he partial authorization feature is enabled/disabled. Transaction limit This option creates a transaction dollar amount limit for the terminal. This is a useful option to limit transaction amounts P ress . , # * / Admin key Setup Menu Customization Transaction Options High Amount Limit. S elect the desired option (1 - Off or 2 - Limit or 3 – Limit w/Password). » Off – This is the default setting. Go to step » Limit – This is a hard limit and no transactions are allowed above this amount. Go to step 3. » Limit w/password – This is a soft limit that requires a password to bypass. Go to step 3. E nter the high amount limit and press OK. If you already have one set, it will be displayed in the bottom-right corner of the screen. -
Page 37: Troubleshooting
TD iCT250 Merchant Guide Troubleshooting Troubleshooting With any equipment, sometimes problems occur. With the TD iCT250 terminal, error messages are displayed on screen with a short description. Below is a list of error messages that you could see on the terminal screen and the actions required to resolve them. Error codes “A” E r r o r c o d e s E x pla n at io n Ac t io n r e q uir e d Already In... - Page 38 “C” E r r o r c o d e s E x pla n at io n Ac t io n r e q uir e d Connection Failure Other issues can cause communication Press Cancel and try again. Press CANC Key failure such as internal dialing errors. And Try Again Customer to Insert The cardholder attempted to swipe a Press OK or Cancel to cancel the Chip Card...
- Page 39 TD iCT250 Merchant Guide Troubleshooting “I” E r r o r c o d e s E x pla n at io n Ac t io n r e q uir e d Input Must Be At Least 1 Character...
- Page 40 “M” E r r o r c o d e s E x pla n at io n Ac t io n r e q uir e d Maximum # of Entries Reached The maximum number of User IDs To enter additional IDs, some IDs will (100) has been reached. have to be deleted. Memory Almost Full The terminal is close to the limit of Perform an end of day.
- Page 41 TD iCT250 Merchant Guide Troubleshooting “N” E r r o r c o d e s E x pla n at io n Ac t io n r e q uir e d Not Completed The attempted transaction or function Re-attempt the transaction or did not complete successfully. function. Not Completed The terminal cancelled the Request a different card.
-
Page 42: Hardware Troubleshooting
“ T” E r r o r c o d e s E x pla n at io n Ac t io n r e q uir e d Transaction Cancelled You have cancelled the transaction. Transaction Already Void transaction is attempted on a Voided transaction that has already been voided. Transaction Transaction not allowed for that type Request a different card. -
Page 43: Terminal Information
TD iCT250 Merchant Guide Troubleshooting Terminal information This option displays the terminal ID of the device, the software version installed and the date it was installed or upgraded. This is generally only used when calling to the Help Desk. Press / Admin key Maintenance System Info. . , # * Press to print the information. The report will display. Configuration reports This option allows you to print a report that shows which configurable options have been enabled on a specific terminal. This is generally only used when calling to the Help Desk or if you want to compare settings between two or more of your terminals. Press . , # * / Admin key Setup Menu Config. Reports. S elect one of the options (1- Communications, 2- Customization, 3- Host 1 Settings, 4- Host 2 Settings or 5 - BIN Ranges). Print the report (Yes or No). The report prints. - 37 -... - Page 44 This page left blank on purpose. - 38 -...
-
Page 45: Appendices
TD iCT250 Merchant Guide Appendices Appendices Entering letters and special characters Whenever you have are requested to enter a letter or special character, such as a receipt banner or creating a user ID, follow these steps. Press Correction to change any entry. S p e c ial c ha ra c te r s L e t te r s S pa c e s P ress the key that has the P ress 0 key. P ress the /Admin key. -
Page 46: Maintaining The Terminal And Pinpad
Maintaining the terminal and PINpad • D on’t place them on a magnetized pad — this will cause them to malfunction. • R outinely clean them with a damp cloth so that spills don’t get into the inner workings. • Use TD-approved cleaning cards for the chip and magnetic card readers. Storing the terminal and PINpad • T hey must be stored in temperatures between 0° and 50° Celsius. • Do not leave them outdoors overnight, especially in the winter. - 40 -... - Page 47 Call Centre Information Please call the TD Merchant Solutions Help Desk at 1-800-363-1163. We would be happy to answer any questions you may have. Authorization: 24 hours a day, seven days a week Terminal Inquiries: 24 hours a day, seven days a week General Merchant Inquiries: Monday – Friday, 8 a.m. – 8 p.m. ET Printer / Stationery Supplies: Monday – Friday, 8 a.m. – 5 p.m. ET Documentation Portal This Guide covers the most commonly used information in order to get you started. Your terminal has more features and functionality to explore on our documentation portal www.TDMerchantSolutions.com/ResourceCentre...
- Page 48 (535394) (0816)
Need help?
Do you have a question about the iCT250 and is the answer not in the manual?
Questions and answers
how to change address on the header of the ingenico ict250