
Related Manuals for ETC ColorSource ThruPower


Summary of Contents for ETC ColorSource ThruPower
- Page 1 ColorSource ThruPower User Manual Version 1.2.0 Part Number: 7121M1200-1.2.0 Rev: A Released: 2019-03...
- Page 2 To view a list of ET C tr ad e m a r k s a n d p a t e n t s , g o t o etcconnect.com/ip. A l l o t h e r t r a d e m a r k s , b o t h m a r k e d a n d no t m a r k e d , a r e t h e p r o p ert y o f t h ei r r es p e c ti v e o w ne r s .
-
Page 3: Table Of Contents
Document conventions ........1 Help from ETC Technical Services ......2 Overview . - Page 4 Outputs cannot be turned off ......22 Appendix B Menu flow chart ....23 ColorSource ThruPower User Manual...
-
Page 5: Introduction
RISK OF ELECTRIC SHOCK! This warning statement indicates situations where there is a risk of electric shock. ETC user documents are designed for printed or electronic use. However, there are many advantages to using the electronic (PDF) versions. In addition to the benefits of a PDF (such as word search, bookmarks, and commenting tools) you can click on headings in the Table of Contents and jump to the desired page. -
Page 6: Help From Etc Technical Services
To search more widely, try the ETC website at etcconnect.com. If your questions are not sufficiently addressed by these resources, contact ETC Technical Services directly at one of the offices identified below. Emergency service is available from all ETC offices outside of normal business hours. -
Page 7: Overview
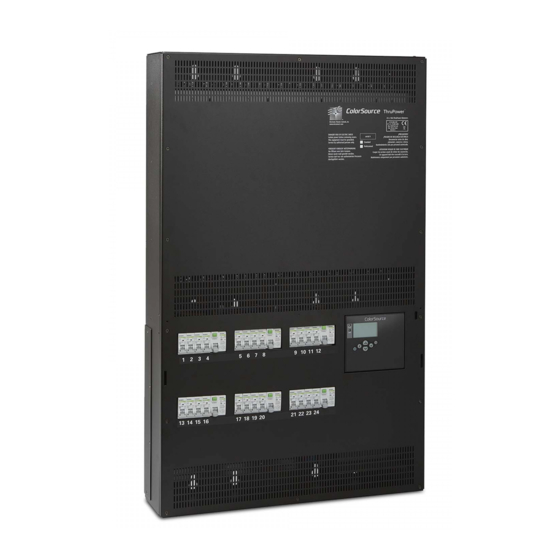
Overview The ColorSource ThruPower is designed to provide professional quality dimming, packaged for venues that require affordable, professional quality wall-mount dimming in low noise environments. The cabinet may be installed with or without other system components making it a cost-effective power solution. -
Page 8: 24-Circuit Models (Standard Only)
• Removable cable entry panel at top of enclosure • User-selectable dimming curves, including Mod Square Law, Linear, Preheat, and Fluorescent • Dual-pole or single-pole, C-curve, DIN-rail mount circuit breaker for each output • Emergency contact input ColorSource ThruPower User Manual... -
Page 9: Option Kits
This equipment is intended to be serviced and installed by suitably qualified personnel only. Option kits The following option kits are available for the ColorSource ThruPower. Model Part Number Option... -
Page 10: Menus And Configuration
Chapter 1 Menus and configuration User interface The ColorSource ThruPower user interface and menu structure provide you with an easy, intuitive setup with multiple built-in language options. LCD Screen Power LED Power DMX LED Keypad LED indicators Power The power LED has four indication patterns: •... -
Page 11: Keypad
DMX Loss Behaviour Record DMX Snapshot When configuring the ColorSource ThruPower: Navigate the menus using the [Increase] (+) or [Decrease] (–) buttons. If a complete row is highlighted, the (+) or (–) button will move up or down through rows. If the right hand section of a row is ... -
Page 12: Initial Power-Up Display
The first time you apply power to the cabinet, you are asked to choose a language for the operating system. Choose Language English Français Deutsch Espanol ThruPower configuration Configure the ThruPower operational behaviors through the Mode menu. See Mode on page 11. Mode Dimmer Relay TPAuto Always On ColorSource ThruPower User Manual... -
Page 13: Menu Structure
Following initial start-up and the selection of a language, the Home screen becomes the primary display when the ColorSource ThruPower is turned on. From anywhere in the menu system, you can return to the Home screen at any time by pressing the [Home] (<<) button. The display returns to the See UI Home screen after 2 minutes of inactivity unless you change the default UI Timeout value. -
Page 14: Settings Menu
Settings Output Setup General Settings About Used to set DMX-related parameters. Output Setup Used to set output-related parameters. General Settings Used to configure standard features of the ColorSource ThruPower cabinet. About Displays the current software versions. ColorSource ThruPower User Manual... -
Page 15: Dmx
The DMX menu is used to set the DMX mode and related parameters, as well as the DMX loss behavior. Mode Start Address DMX Start DMX Loss Behaviour Record DMX Snapshot Mode The Mode menu allows you to switch between Start Address and Patch. To select the mode: ... - Page 16 Use the [Increase] (+) or [Decrease] (–) button to select a higher or lower dimmer channel. Dimmers are numbered 1–12 or 1–24, depending on the ColorSource ThruPower channel count. Initially, the DMX address is patched consecutively with the dimmer channel. If the DMX address ...
-
Page 17: Output Setup
Home screen. DMX Snapshot ColorSource ThruPower has a feature that allows you to record a DMX snapshot and to use this snapshot as a DMX source when the Emergency contact input is active. This allows the unit to bring on luminaires that require a DMX input to output light, either in an emergency situation or as a single “preset”... - Page 18 The Curve menu allows you to select and apply one of Linear four curves. Preheat Fluorescent The ColorSource ThruPower is capable of dimming or switching multiple load types, including incandescent, low voltage, and 2-wire fluorescent. You can choose from four output curves: ColorSource ThruPower User Manual...
- Page 19 100% 100% 100% Control Input 100% Control Input Mod-Square: The mod-square curve provides a Linear: The linear curve provides a non-linear relationship between control level and linear relationship between input voltage. For most tungsten lamps, this provides control level and output voltage. the best relationship between brightness and level, and is the default.
-
Page 20: General Settings
The Threshold menu option allows you to set the percentage level at which the relay switches on, within a range of 1-99% when the circuit is in relay mode. The default value is 1%. General Settings The General Settings menu is used to configure standard features of your ColorSource ThruPower cabinet. General Settings... - Page 21 ) button. Relay Delay Relay Delay allows you to set a delay that the ColorSource ThruPower uses to sequence relays on and off. This helps minimize the effects of inrush when the system is switching electronic or LED loads on relays.
-
Page 22: About
Dimmer 1 thru 24 Level 100% Release All Set dimmer levels in the Test menu For testing, you can set all dimmers to the same level, or set dimmers individually or in groups to different levels. ColorSource ThruPower User Manual... - Page 23 In the Set menu option, press the [Enter] ( ) button. This activates the dimmers you chose, at the level you selected. This can be verified on the Home screen, by pressing the [Home] (<<) button. ColorSource ThruPower Dimmer level display System OK...
- Page 24 This turns off all the dimmers, ending the test. This can be verified on the Home screen, by pressing the [Home] (<<) button. ColorSource ThruPower System OK DMX Start = 1 L1: OK L2: OK L3: OK V#.#.#.#.#.# ColorSource ThruPower User Manual...
- Page 25 Disconnect power from the ColorSource ThruPower. Remove the front cover of the cabinet and detach the ground wire. Vacuum dust from the interior of the cabinet. Use compressed air from a can to blow dust from the circuit boards to avoid possible damage from electrostatic discharge.
- Page 26 Replacement parts The following field-replaceable parts are used in the ColorSource ThruPower. Field replacements are available from ETC or may be purchased at your local electrical supply house. Location Part ETC Part Number Power Input Board, Location F1 Fuse, 2 A 250 V F 5x20mm...
- Page 27 Menu flow chart Home Screen Bar Graph Shows active dimmer levels, as DMX Mode many as 12 or 24, depending ColorSource ThruPower In Start Address mode: on the ColorSource model. DMX Start = xxx System OK In Patched mode: DMX Start = 1...
- Page 28 Hold Last Look Wait: 0 min 3 sec Fade: 0 min 3 sec Mode Start Address DMX Start DMX Loss Behaviour DMX Loss Behaviour Mode: Wait and Fade Wait: 0 min 3 sec Fade: 0 min 3 sec ColorSource ThruPower User Manual...
- Page 29 Mode Dimmer Output Setup Relay From Dimmer: 1 to 1 TPAuto Mode: Dimmer Always On Curve: Mod-Square Emergency Threshold Curve Mod-Square Linear Preheat Fluorescent General Settings Backlight Auto UI Timeout (min): Restore Defaults Language English Relay Delay (ms): Are you sure? This Inrush Protect: will restore all Restore Defaults...
- Page 30 ColorSource ThruPower User Manual...
- Page 32 Holzkirchen, DE +49 (80 24) 47 00-0 Rome, IT +39 (06) 32 111 683 Hong Kong +852 2799 1220 Paris, FR +33 1 4243 3535 etcconnect.com Support etcconnect.com/contactETC © 2019 Electronic Theatre Controls, Inc. Trademark and patent info: etcconnect.com/ip Product information and specifications subject to change. ETC intends this document to be provided in its entirety. 7121M1200-1.2.0 Rev A Released 2019-03...
Need help?
Do you have a question about the ColorSource ThruPower and is the answer not in the manual?
Questions and answers