CAB EOS2 Operator's Manual
Hide thumbs
Also See for EOS2:
- Operator's manual (15 pages) ,
- Service manual (20 pages) ,
- Configuration manual (64 pages)
Table of Contents
Advertisement
Advertisement
Table of Contents

Related Manuals for CAB EOS2


Summary of Contents for CAB EOS2
- Page 1 Operator's Manual EOS2 / EOS5 Label Printer Made in Germany...
- Page 2 Edition: 09/2018 - Part No. 9003246 Copyright This documentation as well as translation hereof are property of cab Produkttechnik GmbH & Co. KG. The replication, conversion, duplication or divulgement of the whole manual or parts of it for other intentions than its original intended purpose demand the previous written authorization by cab.
-
Page 3: Table Of Contents
Table of Contents Introduction ............................4 Instructions ............................... 4 Intended Use ............................4 Safety Instructions ............................ 5 Environment ............................. 5 Installation .............................. 6 Device Overview ............................6 Unpacking and Setting-up the Printer ...................... 8 Connecting the Device ..........................8 2.3.1 Connecting to the Power Supply ...................... -
Page 4: Introduction
Introduction Instructions Important information and instructions in this documentation are designated as follows: Danger! Draws attention to an exceptionally great, imminent danger to your health or life due to hazardous voltages. Danger! Draws attention to a danger with high risk which, if not avoided, may result in death or serious injury. Warning! Draws attention to a danger with medium risk which, if not avoided, may result in death or serious injury. -
Page 5: Safety Instructions
Introduction Safety Instructions The device is configured for voltages of 100 to 240 V AC. It only has to be plugged into a grounded socket. • • Only connect the device to other devices which have a protective low voltage. • Switch off all affected devices (computer, printer, accessories) before connecting or disconnecting. •... -
Page 6: Installation
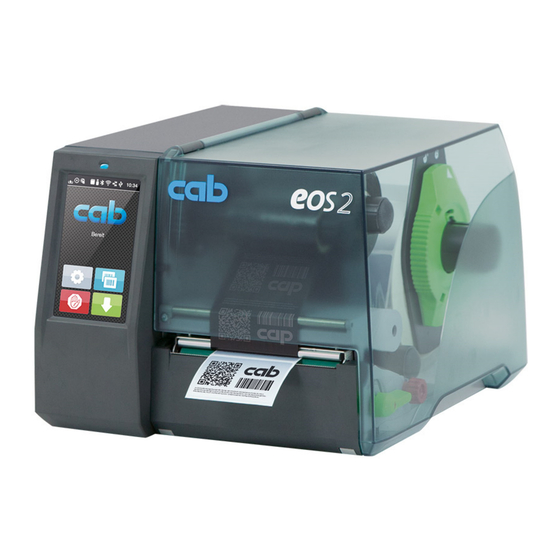
Installation Device Overview EOS2 EOS5 1 Cover 2 Margin stop 3 Roll retainer 4 Ribbon supply hub 5 Ribbon take-up hub 6 Roller 7 Print unit 8 Touchscreen-Display Figure 1 Overview... - Page 7 Installation 9 Label sensor 10 Printhead retainer with printhead 11 Margin stop 12 Knob for adjusting the guides 13 Knob for adjusting the label sensor 14 Lever for locking the printhead 15 Tear-off plate 16 Print roller Figure 2 Print unit 17 Power switch 18 Power connection jack 19 Slot for SD card...
-
Page 8: Unpacking And Setting-Up The Printer
Installation Unpacking and Setting-up the Printer Lift the label printer out of the box. Check label printer for damage which may have occurred during transport. Set up printer on a level surface. Remove foam transportation safeguards near the printhead. ... -
Page 9: Touchscreen-Display
Touchscreen-Display The user can control the operation of the printer with the control panel, for example: • Issuing, interrupting, continuing and canceling print jobs, Setting printing parameters, e.g. heat level of the printhead, print speed, interface configuration, language and • time of day ( Configuration Manual), • Control stand-alone operation with a memory module ( Configuration Manual), Update the firmware ( Configuration Manual). •... - Page 10 Touchscreen-Display With special software or hardware configurations additional symbols appear on the start screen: Printing on demand Printing on demand Direct cut without print job within print job with cutter installed (accessory) Figure 5 Optional symbols on the start screen Release printing of a single label within a Release a direct cut without media feed print job including cutting...
-
Page 11: Navigation In The Menu
Touchscreen-Display Navigation in the Menu Start level Selection level Parameter/function level Figure 7 Menu levels To open the menu select on the start screen. Select a theme in the selection level. Several themes have substructures again with selection levels. To return from the current level to the upper one select . -
Page 12: Loading Material
Loading Material Loading Media from Roll Figure 9 Loading media from roll 1. Turn ring (2) at the margin stop (1) counterclockwise, so that the arrow points to the symbol , and thus release the margin stop. 2. Remove the margin stop (1) from the roll retainer (4). 3. -
Page 13: Adjusting The Label Sensor
Loading Material Adjusting the Label Sensor Note! When the printer is delivered the label sensor is positioned in the middle of the paper feed. Thus, the label sensor must only be adjusted if materials with the following characteristics are used: Material with reflex or cut-out marks, which are not in the middle. -
Page 14: Loading Transfer Ribbon
Loading Material Loading Transfer Ribbon Note! With direct thermal printing, do not load a transfer ribbon; if one has already been loaded, remove it. Figure 11 Guide Adjustment Figure 12 Loading Transfer Ribbon 1. Clean the printhead before loading the transfer ribbon ( 6.3 on page 18). 2. -
Page 15: Setting The Feed Path Of The Transfer Ribbon
Loading Material Setting the Feed Path of the Transfer Ribbon Transfer ribbon wrinkling can lead to print image errors. The transfer ribbon deflection (2) can be adjusted so as to prevent wrinkles. Figure 14 Setting the feed path of the transfer ribbon Note! The adjustment is best carried out during printing. Turn screw (1) with torx wrench TX10 and observe the behavior of the ribbon. •... -
Page 16: Printing Operation
After printing the label is torn-off manually. For this the printer is equipped with a tear-off plate. Printing in Cutting Mode For EOS2 and EOS5 cutters are available as accessory. With the cutter installed labels and endless material can be cut-off automatically after printing. -
Page 17: Cleaning
Cleaning Cleaning Information Danger! Risk of death via electric shock! Disconnect the printer from the power supply before performing any maintenance work. The label printer requires very little maintenance. It is important to clean the thermal printhead regularly. This guarantees a consistently good printed image and plays a major part in preventing premature wear of the printhead. -
Page 18: Cleaning The Printhead
Cleaning Cleaning the Printhead Cleaning intervals: direct thermal printing - every media roll change thermal transfer printing - every ribbon roll change Substances may accumulate on the printhead during printing and adversely affect printing, e.g. differences in contrast or vertical stripes. Attention! Printhead can be damaged! Do not use sharp or hard objects to clean the printhead. -
Page 19: Fault Correction
Fault Correction Error Display The appearance of an error will be shown on the display: Figure 17 Error display The error treatment is pending on the error type 7.2 on page 19. The display offers the following possibilities to continue after an error occurred: Repeat The print job will be continued after clearing the error cause. - Page 20 Fault Correction Error message Cause Remedy No label found Press Repeat repeatedly until printer recognizes the There are labels missing on the label material next label on the material. The label format as set in the software Cancel current print job. does not correspond with the real label Change the label format set in the software.
-
Page 21: Problem Solution
Fault Correction Problem Solution Problem Cause Remedy Transfer ribbon deflection not adjusted Adjust the transfer ribbon deflection. Transfer ribbon creases 4.4 on page 15 Transfer ribbon too wide Use a transfer ribbon slightly wider than the width of label. Print image has smears or Printhead is dirty Clean the printhead. -
Page 22: Media
Media Media Dimensions Labels Endless material / Shrink tubes Figure 18 Media dimensions Dim. Designation Dim. in mm Label width 10 - 116 with multi-lane labels 5 - 57 Label height 5 - 1000 Tear-off length > 30 Cut length >... -
Page 23: Device Dimensions
Media Device Dimensions Gap sensor & Reflective sensor Printhead Tear-off edge Cut edge Figure 19 Device dimensions Dim. Designation Dim. in mm Distance printhead - tear-off edge 13,7 Distance printhead - cut edge 20,3 Print width 203 dpi 108,0 300 dpi 105,7 Distance gap/reflective sensor - middle of paper track -58 - 0... -
Page 24: Reflex Mark Dimensions
Media Reflex Mark Dimensions Labels with reflex marks Endless material with reflex marks virtual label front edge reflex mark Reflex mark dimensions Figure 20 Dim. Designation Dim. in mm Label distance > 2 Distance between print zones > 2 Width of reflex mark > 5 Height of reflex mark 3 - 10 Distance mark - middle of paper track -58 - 0 Distance virtual label front edge - actual label 0 up to A / recommended : 0... -
Page 25: Cut-Out Mark Dimensions
Media Cut-out Mark Dimensions Labels with cut-out marks Endless material with cut-out marks for marginal cut-out marks minimum liner thickness 0,06 mm Figure 21 Cut-out mark dimensions Dim. Designation Dim. in mm Label distance > 2 Distance between print zones >... -
Page 26: Licenses
Licenses Reference to the EU Declaration of Conformity The printers EOS2 and EOS5 comply with the relevant fundamental regulations of the EU Rules for Safety and Health: • Directive 2014/35/EU relating to electrical equipment designed for use within certain voltage limits •... -
Page 27: Index
Index Cleaning Unpacking...........8 information ........17 printhead ........18 print roller ........17 Voltage..........5 Connecting .........8 Contents of delivery ......8 Cut-out marks ........25 Device dimensions ......23 Device overview .........6 Endless material .......22 Environment ........5 Errors correction ........19 messages ........19 types ...........19 Important information......4 Intended use ........4 Lithium battery ........5 Loading labels ........12... - Page 28 This page was left blank intentionally.
Need help?
Do you have a question about the EOS2 and is the answer not in the manual?
Questions and answers
We are useing a Cab Eos 2 to print label but have now got an issue, after chaning the thermal fillament ribbon, The rewind roller isn't turning while printing which leads to the filiment jamming which then caused the printer to go into an error state and ask for the ribbion to be removed. I have attached an image of the way I have the filament setup. Its stange because the roller works when doing a test print.
The rewind roller on the CAB EOS2 printer may not turn after changing the thermal filament ribbon if the printer is set to direct thermal printing but a transfer ribbon is still loaded. In this case, the printer expects no ribbon to be present. To fix this:
- Remove the ribbon if using direct thermal printing.
- If thermal transfer printing is intended, ensure the printer is correctly set to transfer printing in the software or printer configuration.
Incorrect ribbon loading or configuration mismatch can cause the rewind roller to stop functioning.
This answer is automatically generated