Table of Contents
Advertisement
Advertisement
Table of Contents

Related Manuals for CAB e4


Summary of Contents for CAB e4
- Page 1 Operator's Manual Barcode/Label printer The Economy Class.
-
Page 2: Table Of Contents
Getting Started ............6 intended purpose - in particular the procurement of spare Connecting the Printer ..........6 parts for products sold by cab - demand the previous written Installing the Printer Driver ........6 authorisation by cab. The Label designing Software eLabel .......7 Trademark Loading Labels ............7... -
Page 3: Introduction
Introduction 1.1 Instructions 1.4 Safety Instructions Important information and instructions in this documentation • The device is confi gured for voltages of 100 to 240 V are designated as follows: AC. It only has to be plugged into a grounded socket. •... -
Page 4: Product Description
Material Labels, continuous material on rolls or leporello, thermal and standard paper, cardboard, foils: The e4 comes with the free PC label design software “eLabel”. PE, PP, PVC, PA, PI This full version allows the professional design of labels, incl. -
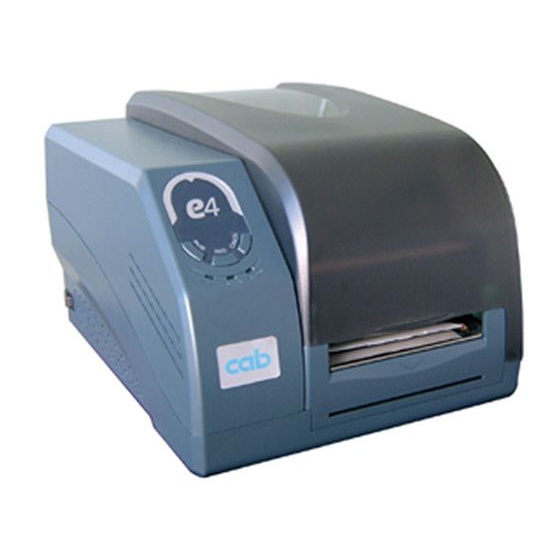
Page 5: Device Overview
Product Description 2.2 Device Overview 1 Control panel 6 Print module 11 Media feed roller 16 DIP switches 2 Cover 7 Media holder 12 Bottom case 17 USB port 3 Ribbon unwinding unit 8 Media guide 13 Media exit path 18 Main switch 4 Printhead 9 Unlocking button of the... -
Page 6: Getting Started
Select "Start" -> "Settings" -> "Printer and Faxes" -> "Add a printer". Select "Network Printer" or "Local Printer". Select the corresponding connection, e.g. LPT1 (parallel port). Select "Have Disk..." and go to the directory containing the printer driver. Select the printer model, e.g. cab e4/200, and follow the instructions. -
Page 7: The Label Designing Software Elabel
Getting Started 3.3 The Label designing Software eLabel Each e4 printer is supplied with eLabel, a high-performance label designing software application. The printer driver has to be installed before eLabel can be installed. The software is on the supplied CD ROM. Updates can be downloaded from http://www.cabgmbh.com as and when required. -
Page 8: Positioning The Media Sensor
Getting Started 3.5 Positioning the Media Sensor 1 Media sensor 3 Media 2 Media sensor cover 4 Spaces between labels Release the printhead module and swing it up. Take the cover (2) off the media sensor (1). Position the media sensor (1) so that the relevant labels pass centrally over it, and the sensor can alternately detect labels and the spaces between them. -
Page 9: Loading The Transfer Ribbon
Getting Started 3.6 Loading the Transfer Ribbon Warning! Risk of material damage. When inserting the transfer ribbon ensure that the coated side faces the labels, as otherwise the printhead can become soiled. Ensure that the media is winding in the same direction as shown in the illustration. 1 Ribbon spindle 5 Ribbon loading knob 2 Ribbon roll... -
Page 10: Operation
Operation 4.1 Operator Controls Power Switch The power switch is located on the left-hand side of the printer. Position 0: Position I: DIP Switches Switch off the printer before setting the DIP switches. DIP switch Functions Remarks Direct thermal print Print settings OFF: Thermal transfer print... -
Page 11: Operating Functions
Operation 4.2 Operating Functions Normal mode FEED A label is fed forward. PAUSE The current print job has paused, MEDIA fl ashing. Paused print job resumed. CANCEL The current print job has been stopped. Continue printing after rectifying fault. System mode In system mode, the printer cannot accept any commands from the PC. -
Page 12: Cleaning
Cleaning Danger! Danger from electric shock! Switch off the printer before starting any maintenance work. Warning! Risk of damage! Only use cleansers approved by the manufacturer. The manufacturer shall not be liable for damage caused by the use of other cleansers. •... -
Page 13: Troubleshooting
Troubleshooting 6.1 Error Messages A fault is indicated by one or two of the three LEDs fl ashing. Possible cause Recommended solutions Remarks READY and MEDIA Failure to detect gap between Check media path Check the software setting LEDs fl ashing labels or refl... -
Page 14: Interfaces
Interfaces 7.1 RS 232 Serial Baud rate: 9600, 19200, 38400, 57600 (Setting by DIP switches 7 - 8) Data format: Always 8 data bits, 1 start bit and 1 stop bit Parity: Always non parity Flow control: RTS/CTS (Hardware fl ow control), ®... -
Page 15: Ethernet Interface
Interfaces 7.3 Ethernet Interface Handshake: TCP/IP Connector type: RJ45 Standard IP address: 199.9.9.196. Only connect the printer if the standard IP address has not been assigned elsewhere, change the other assignment if necessary. Confi gure the IP address of the printer Switch off printer. - Page 16 The IP address of the printer can be checked by a self-test printout. Setting up the printer driver Select the cab printer driver in the operating system under "Start" -> "Settings" -> "Printers and Faxes", and add a new standard TCP/IP connection in the properties under "Ports".
-
Page 17: Ascii Table
Interfaces Enter the IP address of the printer in the wizard to add a TCP/IP connection. Enter standard as the device type, and follow the further instructions of the wizard. 7.4 ASCII Table ´ “ XOFF & ‘ < >... -
Page 18: Index
Index Printhead holder .........5 Accessories ........5 Labels Printhead resolution......4 Height ...........4 ASCII table ........17 Printing method ........4 Loading .........7 Print module ........5 Material .........4 Print quality problems .......13 Material thickness ......4 Barcodes ..........4 Material weight ......4 Print speed .........4 Bottom case........5 Material width ........4 Print width ...........4 Media roll ........4...
Need help?
Do you have a question about the e4 and is the answer not in the manual?
Questions and answers