CAB a2+ Configuration Instructions
Barcode/label printer
Hide thumbs
Also See for a2+:
- Operator's manual (36 pages) ,
- Operating instructions manual (40 pages) ,
- User configuration manual (56 pages)

Related Manuals for CAB a2+


Summary of Contents for CAB a2+
- Page 1 PRODUCT MARKING AND BARCODE IDENTIFICATION Barcode/Label Printer Configuration Instructions Edition 5/06...
- Page 2 All rights, including those regarding the translation, are reserved. No part of this document may be reproduced in any form (print, photocopy or any other method) or edited, copied or distributed electronically without written permission from cab Produkttechnik GmbH & Co KG Karlsruhe.
-
Page 3: Table Of Contents
A2+/A4+/A6+/A8+ Table of contents Product description ..........5 Overview . - Page 4 A2+/A4+/A6+/A8+ External keyboard ..........63 Connecting external keyboard .
-
Page 5: Product Description
A2+/A4+/A6+/A8+ Product description Product description Overview The A2 , A4 , A6 and A8 Label Printers are available as thermal direct printers or transfer printers. With thermal printing, heat from the printhead results in printing to a heat-sensitive print medium. With thermal transfer printing, heat from the printhead causes the color layer of a transfer ribbon to be transferred to the print medium. -
Page 6: Overview Of Types
A2+/A4+/A6+/A8+ Product description 1.2.3 Thermal direct printer The label printer is only equipped for printing heat-sensitive print media. Thermal transfer printing is not possible. 1.2.4 Transfer printer For printing various media from paper to plastic using thermal transfer printing. The transfer printer can also be used for thermal direct printing. -
Page 7: Technical Data
A2+/A4+/A6+/A8+ Product description Technical data These technical data specifications reflect the knowledge available at the time of printing. We reserve the right to make modifications. Standard Option A2 + A4 + A4.3 + A6 + A8 + 1. Printhead Printing method Thermal transfer Thermal direct Print resolution dpi Print speed up to mm/s... - Page 8 Manager 869, EBCDIC 500, ISO 8859-1 up to -10 cab-Card Manager and -13 up to -16, WinOEM 720, UTF-8, cab Label software cablabel R2 Lite Macintosh Roman, DEC MCS, K0I8-R. All cablabel R2 Pro West and East European latin, cyrillic,...
-
Page 9: Parts Of The Printer
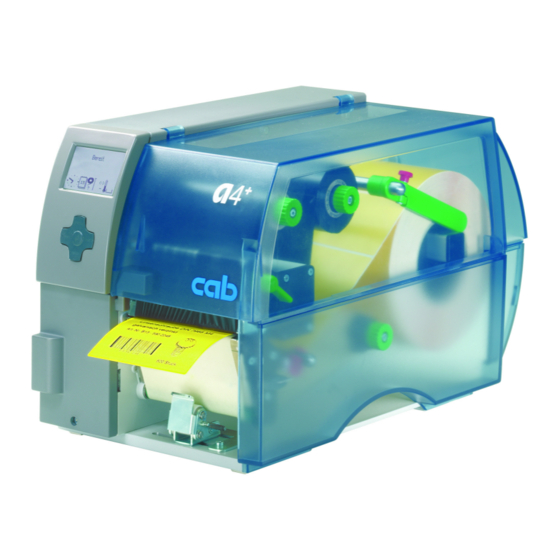
A2+/A4+/A6+/A8+ Product description Parts of the printer The following illustrations show the important parts for the example using the A4 Label Printer with internal rewinder (peel-off version). The details of other printer versions may vary. Major differences are indicated in the following. Parts of the label printer Cover Core adapter... -
Page 10: Accessories
Accessories 1.5.1 External supply hubs and rewinders A variety of external supply hubs and rewinders are available for large print jobs. See cab catalog “A Barcode/Label Printer“ . 1.5.2 Cutter The cutter accessory cuts labels or endless media right after printing, after a certain number of labels or after the print job. -
Page 11: Print Media
Applicator A 1000 Applicator A 1000 is used to transfer labels being printed to a product. The transfer occurs via a stamp moved with a pneumatic cylinder between the home and labeling positions. See cab catalog “A Barcode/Label Printer“ . Print media 1.6.1... -
Page 12: Label Formats
A2+/A4+/A6+/A8+ Product description 1.6.2 Label formats Before ordering label media, note the following permissible dimensions: Fig. 3: Label dimensions Dim. Designation, all dimensions in [mm] Label width 4–60 4–116 50–176 50–220 Label width in peel-off mode 25–60 25–116 50–176 — Width of liner or endless medium 25–65 20–120... -
Page 13: Software
1.7.2 Windows printer driver You can obtain cab printer drives for various versions of Windows from your dealer or the internet. The internet address is found in the current cab brochures. Using the cab printer driver, you can control the label printer from almost any Windows application. -
Page 14: Connecting Label Printer To Computer
A2+/A4+/A6+/A8+ Connecting label printer to computer Connecting label printer to computer You can choose from the following options for connecting a computer to the label printer: • Direct connection to the serial RS-232 interface (8) (see "2.1" on Page 14). •... -
Page 15: Connecting Label Printer Via Ethernet Interface
A2+/A4+/A6+/A8+ Connecting label printer to computer 2.1.2 Pin assignment of connection jack of the RS-232 interface On the back of the printer there is a 9-pin SUB-D jack for the serial RS-232 interface. Designation Function Carrier Detect Transmit Data Receive Data Data Terminal Ready (not connected) Ground Data Set Ready (not connected) -
Page 16: Adjusting Windows Printer Setting
A2+/A4+/A6+/A8+ Connecting label printer to computer 2.2.1 Print services Raw-IP and LPD in MS Windows The print services Raw-IP and LPD are not available in all operating systems. In general, special tools are required to set up print services. Information on this can be obtained from your dealer. Print service Windows 98/ME Windows 2000... -
Page 17: Connecting Label Printer Via Usb Interface
A2+/A4+/A6+/A8+ Connecting label printer to computer Connecting label printer via USB interface The high-speed USB interface allows the label printer to be operated via a USB interface of a computer running the operating system Windows 98, Windows ME, Windows 2000 or Windows XP. Windows 95 and Windows NT 4.0 do not support USB interfaces. -
Page 18: Offline Menu
A2+/A4+/A6+/A8+ Offline menu Offline menu Structure of the offline menu The offline menu contains setting options on several levels for configuring the label printer to meet your needs. In addition, the offline menu features test functions for supporting the configuration or checking the function of the label printer. -
Page 19: Navigating The Offline Menu
A2+/A4+/A6+/A8+ Offline menu Navigating the offline menu You can control all settings and functions in the offline menu with the navigator pad. ⇒ Press the menu button to switch from Ready mode to the offline menu. ⇒ Press the button to select menu items on a menu level or to select values on the parameter level. -
Page 20: Service Key
You can also insert the service key while the device is switched Fig. 6: Inserting the service key Contact your cab dealer for information on how to obtain the service key. Indication in this document In this document, parameters and functions which are only accessible when the service key is inserted... -
Page 21: Configuration
A2+/A4+/A6+/A8+ Configuration Configuration Configuration via the operating panel A host of parameters for configuring the printer are found in the Setup menu of the offline menu. Your printer is mainly configured via the operating panel during initial commissioning and when making major changes to the operational conditions. -
Page 22: Device Settings
A2+/A4+/A6+/A8+ Configuration 4.1.2 Device settings 1. Press the menu button. 2. Select Setup > Machine param. Parameter Meaning Default Printhead pos. X Shifting of the entire print image perpendicular to the direction of paper flow. 0.0 mm The absolute shifting of the print image perpendicular to the direction of paper flow is limited to the difference between the label width and the print- head width set in the software. -
Page 23: Printing Parameters
A2+/A4+/A6+/A8+ Configuration 4.1.3 Printing parameters 1. Press the menu button. 2. Select Setup >Print param. Parameter Meaning Default Heating value for compensating for the differing thermal behavior of print- Heat level heads. Changing this value is then especially necessary if the printing intensity has changed after replacing the printhead. - Page 24 A2+/A4+/A6+/A8+ Configuration Parameter Meaning Default On: With a correctable error and corresponding troubleshooting, the label Error-Reprint being printed when the error occurs is repeated. Off: Print job is continued with the next label. Printing of another label with the information of the previous print job by Pause reprint pressing the pause button.
- Page 25 A2+/A4+/A6+/A8+ Configuration 4.1.4 Interfaces 1. Press the menu button. 2. Select Setup > Interfaces. Parameter Meaning Default Definition of the primary card slot. Select one of the card slots on the back Default card Compact- of the printer with CompactFlash or PC-Card or the card slot in the exter- slot Flash nal operating panel with Ext.
-
Page 26: Status Line
Displays the current "Pay Per Print" funds in the form of a horizontal bar. PPP funds "Pay Per Print" is a method of paying for printer leasing by buying consum- ables from cab. Displays the current memory used in the form of a vertical bar. Used memory... - Page 27 A2+/A4+/A6+/A8+ Configuration Parameter Meaning Default Displays the current input buffer used in the form of a vertical bar. Input buffer Icon displayed while an installed memory card is being accessed. Card access Displays the current data transfer in the form of a falling drop. Data transfer Tab.
-
Page 28: Configuration Via The Printer Website
A2+/A4+/A6+/A8+ Configuration Configuration via the printer website The parameters accessible via the operating panel can also be set via the website contained in the firm- ware of the printer. In addition, other parameters for the Ethernet interface are accessible there. You can access the printer website with a Java-capable browser (e.g. - Page 29 A2+/A4+/A6+/A8+ Configuration Status tab Fig. 7: "Status" tab on the printer website The following information is contained in the top section of the "Status" tab: • Printer type • Firmware version • Bootloader version • Printhead temperature and temperature of CPU •...
- Page 30 A2+/A4+/A6+/A8+ Configuration The "Ready" event provides information on when the printer was switched on. The buttons on the bottom line of the "Status" tab have the following functions: Button Function Display Opens a window which shows the current printer display. You can set the update interval on the scale below the display.
- Page 31 A2+/A4+/A6+/A8+ Configuration Setup tab On the "Setup" tab, you can set all the configuration parameters which are also accessible via the oper- ating panel in the Setup menu. In addition, other parameters for the Ethernet interface can be set (see below).
- Page 32 A2+/A4+/A6+/A8+ Configuration Information is not updated automatically while the "Setup" tab is open. Updating occurs when the tab is changed or by clicking the Update button. The following parameters for the Ethernet interface can only be accessed via the printer website: Parameter Meaning Default...
- Page 33 A2+/A4+/A6+/A8+ Configuration System messages tab Status and error messages can be sent automatically to the SNMP manager or via e-mail to the selected addresses immediately after they occur via the Ethernet interface. You can select the messages to be sent and the destination addresses on the "System messages" tab. Fig.
- Page 34 A2+/A4+/A6+/A8+ Configuration The settings are not accepted until the Transfer button is clicked. If you switch to another tab before- hand, the settings are lost. Printer status line tab On the "Printer status line" tab, you can select the status parameters which are to be displayed on the printer status line.
- Page 35 A2+/A4+/A6+/A8+ Configuration Fonts tab The most important parameters of the fonts available in the printer are listed on the "Fonts" tab. The table contains both the original fonts in the printer and other fonts loaded into the printer. Fig. 11: "Fonts" tab on the printer website The parameters correspond to those in the Font list menu and are described in Table 18 on Page 41.
- Page 36 The contents of the display correspond with those of the Device list and are described in Table 19 on Page 43. Help tab When the "Help" tab is selected, an internet connection to the support page of the cab website is opened. Configuration Instructions Edition 5/06...
-
Page 37: Test Functions
A2+/A4+/A6+/A8+ Test functions Test functions Overview The printer is equipped with different test functions providing information on: • the most important configuration parameters • the fonts available in the printer • important hardware components and connected peripheral devices • the print image quality and state of the thermal printhead •... -
Page 38: Short Status
A2+/A4+/A6+/A8+ Test functions Short status The Short status menu provides an overview of important status information in the display of the printer. 1. Press the menu button. 2. Select Short status menu. 3. Scroll through the individual lines with the buttons. - Page 39 A2+/A4+/A6+/A8+ Test functions Printhead pos. X 5.0 mm Printhead pos. Y 0.0 mm Number of labels 10931 (Service: 10631 Fig. 13: Status print From address is displayed if the SMTP server is "On" or the service key is inserted Recipients are displayed if SNMP is "On" or the service key is inserted Optional assemblies which are displayed with the service key inserted even if they are not installed Service data only displayed when the service key is inserted...
- Page 40 A2+/A4+/A6+/A8+ Test functions The Status print contains the following information: Symbol Information • Device type • Version and creation date of the firmware • Version and creation date of the system loader (bootloader) Current values of selected local settings (see "4.1.1" on Page 21). Current values of selected device settings (see "4.1.2"...
-
Page 41: Font List
A2+/A4+/A6+/A8+ Test functions Font list The Font list function prints the most important parameters of the fonts available in the printer in tab- ular form. The table contains both the original fonts in the printer and other fonts loaded into the printer. The printout occurs using the heat level and print speed specified in the Setup >... -
Page 42: Device List
A2+/A4+/A6+/A8+ Test functions Device list The Device list function prints out the most important information on hardware components of the printer and connected devices. The printout occurs using the heat level and print speed specified in the Setup > Print param. menu. The printout occurs without taking the label gaps into consideration. -
Page 43: Printhead Profile
A2+/A4+/A6+/A8+ Test functions Name Information • Type and serial number of the CPU PCB • Revision of CPU PCB and FPGA Resolution and heating point number of the installed thermal printhead. I/F [x] Type of interfaces installed x: Number of interface USB [a] Type and revision of installed USB devices [b/c]... - Page 44 A2+/A4+/A6+/A8+ Test functions Fig. 16: Printhead profile Configuration Instructions Edition 5/06...
-
Page 45: Ascii Dump Mode
A2+/A4+/A6+/A8+ Test functions ASCII Dump Mode ASCII Dump Mode offers the option of checking incoming control sequences at the interface when working with direct programming. The incoming commands at the printer are printed out as text. In addi- tion, a corresponding error message is printed out immediately after an error occurs. The printout occurs using the heat level and print speed specified in the Setup >... -
Page 46: Test Grid
A2+/A4+/A6+/A8+ Test functions Example: In the following two figures, the printout in Monitor mode is contrasted with the "normal" printout of a label. f r e e w r i t i n g t u r n p r i n t e d w i t h A 4 + Fig. -
Page 47: Label Profile
A2+/A4+/A6+/A8+ Test functions Fig. 20: Example test grid Label profile The Label profile function carries out a longer label advance. It saves the values measured by the label sensor here and then prints them out in two diagrams. The printout is used to check label detection in conjunction with the optical properties of the label medium. - Page 48 A2+/A4+/A6+/A8+ Test functions Fig. 21: Label profile Coordinate in the direction of paper flow at which the label start was detected Type of peripheral device connected Information for the firmware developer Width of the negative derivative in motor increments Stroke between start and end of the negative derivative Scale factor for the derivative diagram Service information for adjusting the label sensor Method of label detection (transmitted light/reflex bottom)
- Page 49 A2+/A4+/A6+/A8+ Test functions 5.9.1 Event log Access only when service key is inserted! The label printer saves the following events in the Event log: • Hardware fault • Printhead replacement with a change in resolution • Adjustment of the label sensor •...
- Page 50 A2+/A4+/A6+/A8+ Test functions 5.9.2 Print IFFS contents Access only when service key is inserted! The IFFS (Internal Flash File System) is found on a Flash EPROM in the label printer. The memory is used for long-term storage of programs and is conceived for "read-only" access. You can print an over- view of the IFFS contents with the Print directory function.
-
Page 51: Service Functions
A2+/A4+/A6+/A8+ Service functions Service functions Performing firmware update The firmware of the printer is saved in a Flash EPROM. You can update the firmware using the following functions: • Firmware upd.: Copy a firmware file from a computer connected to one of the interfaces of a label printer (see "6.1.1"... -
Page 52: Clearing Service Counter
A2+/A4+/A6+/A8+ Service functions The selected firmware file is copied. A progress indicator is displayed while the firmware is being cop- ied. OK appears in the display once copying is successfully completed. 10.Press the ↵ button. 6.1.3 Error messages during the firmware update If an error occurs during the update, one of the following error codes is shown in the display: Error code Meaning... -
Page 53: Adjusting Label Sensor
A2+/A4+/A6+/A8+ Service functions 5. Use the buttons to select Yes. 6. Press the ↵ button. The data recorded by the service counter is set to the value 0. You can use the status print to check whether the values were reset. The service counter values are listed in parentheses under the total counter values there. -
Page 54: Saving Nvram
A2+/A4+/A6+/A8+ Service functions Saving NVRAM Access only possible with CF memory card and service key inserted! You can save the printer configuration to a CompactFlash memory card with the Save NVRAM function. 1. Insert CompactFlash card. 2. Insert service key into an USB master interface. 3. -
Page 55: Changing Oem Name
A2+/A4+/A6+/A8+ Service functions Changing OEM name Access only when service key is inserted! You can change the device designation with the OEM Name function. 1. Insert service key into a USB master interface. 2. Press the menu button. 3. Select Service > OEM Name menu. 4. -
Page 56: Ftp Printer Management
A2+/A4+/A6+/A8+ FTP printer management FTP printer management Using the File Transfer Protocol (FTP), you can manage and transfer files on the network via the Ether- net interface. You will require an FTP program (FTP client) which supports the "binary" transfer mode to manage the printer. -
Page 57: Directory Structure Of The Ftp Server
A2+/A4+/A6+/A8+ FTP printer management Directory structure of the FTP server The files accessible via FTP are found in several folders: Folder name Contents iffs Contents of the IFFS (Internal Flash File System). When logging on with the user- name "root", the contents of the IFFS can be managed. system Firmware file of the printer execute... -
Page 58: Memory Cards
• Type 1 CompactFlash card up to a maximum size of 1 GB in the corresponding card slot of the printer or in the external operating panel (cab accessory) • PC card (PCMCIA) in the corresponding card slot of the printer Insertion and removal Fig. -
Page 59: Formatting
A2+/A4+/A6+/A8+ Memory cards Formatting If the memory card has not been preformatted in a suitable way, you must format it in the following man- ner: • Formatting in the printer via the Format card (see "8.4.4" on Page 62) menu item. •... -
Page 60: Memory Card Functions In The Offline Menu
A2+/A4+/A6+/A8+ Memory cards Memory card functions in the offline menu Accessing the Memory card menu is only possible if a memory card is installed. You can still only operate the card slot set in the menu Interfaces > Default card slot via the operating panel (see "4.1.4"... - Page 61 A2+/A4+/A6+/A8+ Memory cards 8.4.3 Copy memory card You can copy all the data from one memory card to another with the Copy memory card function. Copying between memory cards with different memory capacities is possible. You can also use memory cards which already contain data as a destination medium.
- Page 62 A2+/A4+/A6+/A8+ Memory cards 8.4.4 Format card You can delete all data from a memory card with the Format card function. This reformats the memory card. This is why you can also use the Format card function if the Unknown card or Structural err.
-
Page 63: External Keyboard
A2+/A4+/A6+/A8+ External keyboard External keyboard You can connect an external keyboard or compatible input device (e.g. barcode scanner) directly to the printer. Using an external keyboard facilitates the entry of variable data while processing print jobs and printing from the memory card. Input prompts and the data received from the keyboard are shown in the display. - Page 64 A2+/A4+/A6+/A8+ External keyboard Some special characters cannot be shown in the display of the printer. In the case, they are replaced by a character similar to the special character. When using a scanner ensure that the same character set is set for both the scanner and the printer. Country-specific special characters: The following country-specific special characters are entered with the [Alt] key pressed.
- Page 65 A2+/A4+/A6+/A8+ External keyboard Deutschland Schweiz Italia France Suisse España United Kingdom Belgie Danmark Suomi Ceska republika Characters between vertical lines (| / |, | * |) are entered with the corresponding keys on the numerical keypad of the keyboard. Other special characters: A special character in the ZZ column can be entered by first entering the corresponding character in the Z1 column and then entering the character in the Z2 column while pressing the [Alt] button.
-
Page 66: Index
A2+/A4+/A6+/A8+ Index Index Label sensor ......23 Label software ......13 Activating a PIN . - Page 67 A2+/A4+/A6+/A8+ Index Select character set table ....25 Serial interface ..... . . 14 Tear-off mode .
- Page 68 A2+/A4+/A6+/A8+ Index Configuration Instructions Edition 5/06...
Need help?
Do you have a question about the a2+ and is the answer not in the manual?
Questions and answers