Epson SC-B7000 Series Service Manual
Large format color inkjet printer
Hide thumbs
Also See for SC-B7000 Series:
- User manual (101 pages) ,
- Quick start manual (2 pages) ,
- Setup manual (32 pages)
Table of Contents
Advertisement
Quick Links
See also:
User Manual
Advertisement
Table of Contents

Related Manuals for Epson SC-B7000 Series


Summary of Contents for Epson SC-B7000 Series
- Page 1 SERVICE MANUAL Large Format Color Inkjet Printer SC-F7000 Series SC-B7000 Series Confidential SEIJ12010...
- Page 2 The contents of this manual are subject to change without notice. All efforts have been made to ensure the accuracy of the contents of this manual. However, should any errors be detected, SEIKO EPSON would greatly appreciate being informed of them.
- Page 3 2. MAKE CERTAIN THAT THE SOURCE VOLTAGES IS THE SAME AS THE RATED VOLTAGE, LISTED ON THE SERIAL NUMBER/RATING PLATE. IF THE EPSON PRODUCT HAS A PRIMARY AC RATING DIFFERENT FROM AVAILABLE POWER SOURCE, DO NOT CONNECT IT TO THE POWER SOURCE.
-
Page 4: Chapter 1 Product Description
This manual describes basic functions, theory of electrical and mechanical operations, maintenance and repair procedures of the printer. The instructions and procedures included herein are intended for the experienced repair technicians, and attention should be given to the precautions on the preceding page. SC-F7000 Series/SC-B7000 Series were designed based on SC-S30600 series. The most of the C H E C K P O I N T mechanical structures and functions are the same as those of SC-S30600. - Page 5 Symbols Used in this Manual Various symbols are used throughout this manual either to provide additional information on a specific topic or to warn of possible danger present during a procedure or an action. Be aware of all symbols when they are used, and always read NOTE, CAUTION, or WARNING messages. Indicates an operating or maintenance procedure, practice or condition that is necessary to keep the product’s quality.
- Page 6 Revision Status Revision Date of Issue Description March 14, 2013 First release Confidential...
-
Page 7: Table Of Contents
SC-F7000 Series/SC-B7000 Series Revision A Contents Chapter 1 PRODUCT DESCRIPTION Chapter 3 DISASSEMBLY & ASSEMBLY 1.1 Product Description .................... 10 3.1 Overview ......................43 3.1.1 Precautions ....................43 1.2 Basic Specifications .................... 12 3.1.2 Cautions After Assembling ............... 45 1.2.1 Basic Specifications ................... 12 3.1.3 Orientation Definition ................ - Page 8 SC-F7000 Series/SC-B7000 Series Revision A 4.6 Image & Test Print ................... 102 4.15.3 Panel Setting Reset & Job History Reset ..........122 4.15.4 Panel LCD Operation Check ..............122 4.7 Counter Reset ....................102 4.15.5 Panel Buttons Operation Check ............. 122 4.8 References ......................
- Page 9 C H A P T E R PRODUCT DESCRIPTION Confidential...
-
Page 10: Product Description
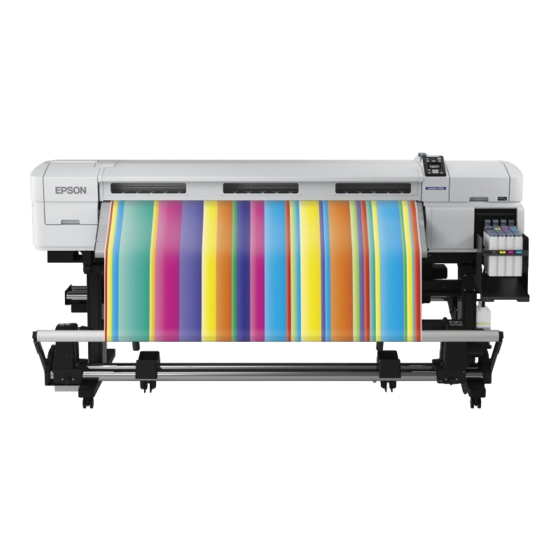
Supports RIP made by 3rd parties If ink gets into your mouth, wash it well and immediately EPSON driver is not provided for Windows nor for Mac. consult a physician. Do not touch the printed media with your hands. - Page 11 SC-F7000 Serie/SC-B7000 Series Revision A Improvement of reliability/durability Head life: 6,840 billion shots/1 line • Ink flow rate: 270 L/BK+M • Operating life of the printer: 3 years or 67,500 m (64 inches/720x720 dpi/Bi-d) Figure 1-1. External View PRODUCT DESCRIPTION...
-
Page 12: Basic Specifications
SC-F7000 Serie/SC-B7000 Series Revision A 1.2 Basic Specifications 1.2.2 Electric Specifications Table 1-4. Electric specifications 1.2.1 Basic Specifications Item Specification Rated voltage AC 100 to 240 V Table 1-3. Basic specifications Rated frequency 50 to 60 Hz Item Specification Rated current 1.0A to 0.5A... -
Page 13: Ink Specifications
SC-F7000 Serie/SC-B7000 Series Revision A 1.2.3 Ink Specifications Ink Pack Table 1-5. Ink Pack Item Specification Form Dedicated ink pack (standing pouch) Black system: Black Ink colors Color system: Yellow, Magenta, Cyan Cartridge life See the date printed on the package (at normal temperature) -
Page 14: Printing Specifications
SC-F7000 Serie/SC-B7000 Series Revision A 1.3 Printing Specifications PRINTABLE AREA Note *1: The value selected for [Side Margin (Left)] in the setup menu. The default value is 1.3.1 Supported Media 5mm. Choose a [Side Margin (Left)] over 10 mm when using media holding plates. -
Page 15: Hardware Specifications
SC-F7000 Serie/SC-B7000 Series Revision A 1.4 Hardware Specifications WEIGHT Table 1-8. Weight This section provides the printer dimensions and shows the main components. Item SC-F7000 Series SC-B7000 Series 1.4.1 Dimensions and Weight Main body 145 kg Standard Roll Unit 19.5 kg... -
Page 16: Part Names
SC-F7000 Serie/SC-B7000 Series Revision A 1.4.3 Part Names Table 1-9. Front side Name FRONT SIDE Adjuster Waste ink bottle Waste ink tube Ink tank Slider Lock lever Chip unit check lamp AC inlet LAN port USB port Maintenance cover (right) - Page 17 SC-F7000 Serie/SC-B7000 Series Revision A SLIDER INSIDE Figure 1-6. Front Side Table 1-10. Slider Name Slider Ink inlet cover Figure 1-7. Inside Chip unit Table 1-11. Inside Name Print head Media holding plate Cutter groove Pressure rollers Platen Wiper cleaner...
- Page 18 SC-F7000 Serie/SC-B7000 Series Revision A BACK Figure 1-8. Back Table 1-12. Back Name Drive switch Roll holder Roll holder fixing screw Lift lever Loading guide Roll support Handle PRODUCT DESCRIPTION Hardware Specifications Confidential...
-
Page 19: Control Panel
SC-F7000 Serie/SC-B7000 Series Revision A 1.5 Control Panel Table 1-13. Control panel Name Function CONTROL PANEL 1 Power button Turns the printer ON or OFF. ON: The power is ON. Flashing: The printer is receiving data, performing head 2 Power light cleaning, or other operations during shut-down. - Page 20 SC-F7000 Serie/SC-B7000 Series Revision A Table 1-14. LCD Name Function Display Description The status of the chip unit is indicated as follows. Ready to print. An error occurred. The chip unit could not be recognized or it is not 3 Chip unit status compatible with the printer.
-
Page 21: Setup Menu
SC-F7000 Serie/SC-B7000 Series Revision A 1.5.1 Setup Menu Table 1-15. Setup Menu Menu Menu Item/Setting Values (shaded one is the default) Explanation Selects [On] to indicate and record the remaining amount of the set media, or [Off] to set it to off. When [On] is selected, [Length], [Remaining Alert] and Remaining Setup [Print Remaining Length] are displayed to be set. - Page 22 SC-F7000 Serie/SC-B7000 Series Revision A Table 1-15. Setup Menu Menu Menu Item/Setting Values (shaded one is the default) Explanation Printable Side Out Choose [Printable Side Out] or [Printable Side In] according to how the media Roll Type is rolled. Printable Side In...
- Page 23 SC-F7000 Serie/SC-B7000 Series Revision A Table 1-15. Setup Menu Menu Menu Item/Setting Values (shaded one is the default) Explanation Sets a time period to pause the Print Head movement for drying the ink Drying Time Per between 0.0 to 10.0 seconds. Depending on the media type and density,...
- Page 24 SC-F7000 Serie/SC-B7000 Series Revision A Table 1-15. Setup Menu Menu Menu Item/Setting Values (shaded one is the default) Explanation Sets the side margin from the media’s right end while the media is set in the printer. The media’s right end differs depending on [Media End Check] setting in the Setup Menu as follows.
- Page 25 SC-F7000 Serie/SC-B7000 Series Revision A Table 1-15. Setup Menu Menu Menu Item/Setting Values (shaded one is the default) Explanation Selects the execution timing for the periodical check pattern printing from [Off] or one of the values between per [1] page to per [10] pages. When this is set to [Off], the periodical check pattern printing is not executed.
- Page 26 SC-F7000 Serie/SC-B7000 Series Revision A Table 1-15. Setup Menu Menu Menu Item/Setting Values (shaded one is the default) Explanation Prints the check patterns. Check them visually and execute head cleaning Nozzle Check Print when blurring or space can be seen.
- Page 27 SC-F7000 Serie/SC-B7000 Series Revision A Table 1-15. Setup Menu Menu Menu Item/Setting Values (shaded one is the default) Explanation Sets the date and time for the internal clock. The set time is used for printing Date And Time MM/DD/YY HH:MM the job status and the printer status.
-
Page 28: Serviceman Mode
SC-F7000 Serie/SC-B7000 Series Revision A 1.5.2 Serviceman Mode The Serviceman Mode is intended to be used by a service person for servicing the printer. HOW TO START & QUIT Turn the printer on by pressing the [Menu], [Back], and [OK] buttons together. - Page 29 SC-F7000 Serie/SC-B7000 Series Revision A Menu Explanation Class Feed Amount 1 Feed Speed 1 Feed Amount 2 Feed Speed 2 Life Used only in manufacturing processes. Not used in service operations. Wait Life Count PGtyp PG++ Wait Life Count Display Count...
- Page 30 C H A P T E R TROUBLE SHOOTING Confidential...
-
Page 31: Overview
SC-F7000 Serie/SC-B7000 Series Revision A 2.1 Overview 2.1.1.2 Recurrence check of the trouble Check if the trouble the user claims recurs with the returned printer. This section explains the basic procedure for troubleshooting problems on the printer If the F/W was not the latest, with the user's agreement, update the F/W to the quickly and efficiently. -
Page 32: Troubleshooting Procedure
SC-F7000 Serie/SC-B7000 Series Revision A 2.1.2 Troubleshooting Procedure 2.1.3.2 If necessary to escalate the trouble case Make a report with the following data. Refer to the following items according to the observed symptom, carry out the corresponding troubleshooting following the procedures described in the next sections. -
Page 33: Remedies For Maintenance Requests
SC-F7000 Serie/SC-B7000 Series Revision A 2.2 Remedies for Maintenance Requests This section describes the remedies for maintenance requests. Maintenance requests do not effect the printer’s operation; therefore, you can continue the current printing. When a maintenance request error occurs, the printer displays on the LCD a hexadecimal code of “NNNN” which correspond to the bit numbers assigned to error statuses as shown in the table below. -
Page 34: Remedies For Service Call Error
SC-F7000 Serie/SC-B7000 Series Revision A 2.3 Remedies for Service Call Error The following tables explains the Service Call error messages and remedies. Table 2-2. Troubleshooting for Service Call Error Code Error Name Cause Check Item Remedy Ink Tubes life error Refer to the service manual of SC-S30600 series. - Page 35 SC-F7000 Serie/SC-B7000 Series Revision A Table 2-2. Troubleshooting for Service Call Error Code Error Name Cause Check Item Remedy Wrong color ink was filled in the ink tank. Check if wrong color ink is filled (check if Discard the current ink tank, and clean the...
- Page 36 SC-F7000 Serie/SC-B7000 Series Revision A Table 2-2. Troubleshooting for Service Call Error Code Error Name Cause Check Item Remedy I2C communication error between elements on Refer to the service manual of SC-S30600 series. 1A50 ASIC and MAIN I2C communication error between elements on 1A51 Refer to the service manual of SC-S30600 series.
-
Page 37: Remedies For Print Quality Troubles
SC-F7000 Serie/SC-B7000 Series Revision A 2.4 Remedies for Print Quality Troubles The CR lock is released and the CR Unit moves to the full side, then the printer turns off automatically. (Page 56) Refer to the service manual of SC-S30600 series. -
Page 38: Trouble On Paper Feeding
SC-F7000 Serie/SC-B7000 Series Revision A 17. Select Tube inner cleaning. 35. If the error persists, replace the Print Head. Select the corresponding color rows, and press the [Run] button to fill the cleaning liquid. (Page 117) 2.5 Trouble on Paper Feeding 18. -
Page 39: Other Troubles
SC-F7000 Serie/SC-B7000 Series Revision A 2.6 Other Troubles Due to the structure of this printer, you cannot replace only one C H E C K tank. Therefore, replacement of the tanks should be made P O I N T Refer to the service manual of SC-S30600 series. - Page 40 SC-F7000 Serie/SC-B7000 Series Revision A Lower the lock levers. 24. Select Switch between Ink cartridges and Ink tanks. Select the corresponding color rows and tank, and press the [Run] button to Start the service program and select Resolution of mixing ink error from validate the ink tanks.
-
Page 41: Trouble On Service Program
SC-F7000 Serie/SC-B7000 Series Revision A 2.7 Trouble on Service Program Refer to the service manual of SC-S30600 series. 2.8 Trouble on NVRAM Viewer Refer to the service manual of SC-S30600 series. TROUBLE SHOOTING Trouble on Service Program Confidential... - Page 42 C H A P T E R DISASSEMBLY & ASSEMBLY Confidential...
-
Page 43: Overview
SC-F7000 Serie/SC-B7000 Series Revision A 3.1 Overview 3.1.1 Precautions Before starting the disassembly or reassembly of the product, read the following This chapter describes procedures for disassembling the main components of SC- precautions given under the headings “WARNING” and “CAUTION”. - Page 44 SC-F7000 Serie/SC-B7000 Series Revision A The power switch for this printer is installed on the secondary Locate the printer on a stable and flat surface. W A R N I N G C A U T I O N side of the power circuit; therefore, the power is always Use only recommended tools for disassembly, assembly or supplied unless the power cable is unplugged.
-
Page 45: Cautions After Assembling
SC-F7000 Serie/SC-B7000 Series Revision A 3.1.2 Cautions After Assembling 3.1.3 Orientation Definition The terms used for indicating the orientation/direction throughout this chapter are as The ink-path-related components or parts should be firmly and C A U T I O N follows. -
Page 46: Recommended Tools
SC-F7000 Serie/SC-B7000 Series Revision A 3.1.4 Recommended Tools To protect this product from damage, use the tools indicated in the following table. For the tools required to perform the adjustment, refer to “Tools/Consumables for Adjustments” in Chapter 4. Table 3-1. Tools... -
Page 47: Parts Diagram
SC-F7000 Serie/SC-B7000 Series Revision A 3.2 Parts Diagram Left Rear Cover (p. 58) Left Upper Cover (p. 58) Upper Cover (p. 58) Left Cover (p. 58) Panel Unit (p. 58) Left Lower Cover (p. 58) Right Upper Cover (p. 58) Left Front Cover (p. - Page 48 SC-F7000 Serie/SC-B7000 Series Revision A Front Cover L Sensor (p. 58) Detects the Open/Closed status of the Front Cover. Front Cover R Sensor (p. 58) Detects the Open/Closed status of the Front Cover. R Maintenance Cover Sensor (p. 58) Detects the Open/Closed status of the Right Maintenance Cover.
- Page 49 SC-F7000 Serie/SC-B7000 Series Revision A Sub-D Board (p. 59) Relays the connection between the Main Board and the Print Head. Sub-E Board (p. 59) Controls heaters. Sub Board (p. 59) Relays the connection between the Main Board and electric parts/components. See “6.1 Block Wiring...
- Page 50 SC-F7000 Serie/SC-B7000 Series Revision A Damper Kit (p. 61) PW Sensor (p. 78) Detects the width of paper on the platen. This is a reflective photo interrupter and detects the difference of the amount of reflection between paper (white) and the platen (black).
- Page 51 SC-F7000 Serie/SC-B7000 Series Revision A Wiper (p. 57) Cleans the nozzle surface of the Print Head. Wiper Cleaner (p. 57) Ink Tube (p. 78) Wipes off ink attached on the Wiper. Pump Cap Unit (p. 71) Includes the wiper section and the sucking section, and maintains the Print Head.
- Page 52 SC-F7000 Serie/SC-B7000 Series Revision A Media Loading Lever (p. 81) Media Loading Lever Sensor (p. 81) Detects the position of the Media Loading Lever. Driven Roller Assy (p. 81) PF Motor (p. 81) The motor to drive the Feed Roller.
- Page 53 SC-F7000 Serie/SC-B7000 Series Revision A Roll Paper Holder (p. 82) Roll Receiver Assy (p. 82) Roll Unit (p. 82) Sub-F Board (Roll) (p. 82) ATC Motor (p. 82) Relays the connection between the Main Board and the Roll Feeds forward (normal rotation) and rewinds (reverse Unit.
- Page 54 SC-F7000 Serie/SC-B7000 Series Revision A Reel Motor (p. 83) Rewinds the media. Roll Paper Holder (p. 83) Tension Bar Upper Sensor / Tension Bar Lower Sensor (p. 83) Reel Unit (p. 83) Detects the position of the Tension Bar to control the rewinding operation of the Reel Motor.
-
Page 55: Disassembly Flowchart
SC-F7000 Serie/SC-B7000 Series Revision A 3.3 Disassembly Flowchart Refer to the service manual for SC-S30600 series. DISASSEMBLY & ASSEMBLY Disassembly Flowchart Confidential... -
Page 56: Disassembly And Assembly Procedure
SC-F7000 Serie/SC-B7000 Series Revision A 3.4 Disassembly and Assembly Procedure This section describes procedures for disassembling the components allowed to be disassembled. Unless otherwise specified, disassembled units or components can be reassembled by reversing the disassembly procedure. 3.4.1 Preparation for Servicing 3.4.1.1 Unlocking the CR Unit... -
Page 57: Consumables/Accessories
SC-F7000 Serie/SC-B7000 Series Revision A 3.4.2 Consumables/Accessories 3.4.2.2 Wiper Cleaner Turn the printer on. 3.4.2.1 Wiper Press the [Menu] button, select Head Maintenance, and press the [OK] button. Turn the printer on. The CR Unit moves to the left end. -
Page 58: Housing
SC-F7000 Serie/SC-B7000 Series Revision A 3.4.3 Housing 3.4.3.11 Upper Cover Refer to the service manual for SC-S30600 series. 3.4.3.12 Board Box Cover 3.4.3.1 Panel Unit Refer to the service manual for SC-S30600 series. Refer to the service manual for SC-S30600 series. -
Page 59: Electric Circuit Components
SC-F7000 Serie/SC-B7000 Series Revision A 3.4.4 Electric Circuit Components 3.4.4.1 Main Board Refer to the service manual for SC-S30600 series. 3.4.4.2 Main-B Board Refer to the service manual for SC-S30600 series. 3.4.4.3 Power Supply Board Refer to the service manual for SC-S30600 series. -
Page 60: Carriage Mechanism/Ink System Mechanism
SC-F7000 Serie/SC-B7000 Series Revision A 3.4.5 Carriage Mechanism/Ink System Mechanism 3.4.5.1 CR Cover Refer to the service manual for SC-S30600 series. DISASSEMBLY & ASSEMBLY Disassembly and Assembly Procedure Confidential... - Page 61 SC-F7000 Serie/SC-B7000 Series Revision A 3.4.5.2 Damper Kit REPLACEMENT When replacing/removing this part, refer to “4.1.2 Adjustment A D J U S T M E N T Remove the Left Rear Cover. (p58) R E Q U I R E D Items and the Order by Repaired Part”...
- Page 62 SC-F7000 Serie/SC-B7000 Series Revision A AFTER REPLACEMENT Joint Rubbers Install the four ink cartridges for service. (p79) Ink Path Holder Assy Ink Path Joint Turn the printer on. Select Cleaning. Select and all channels and press the [Run] button to perform CL3.
- Page 63 SC-F7000 Serie/SC-B7000 Series Revision A 3.4.5.3 Print Head Select Switch between Ink cartridges and Ink tanks. Select All channels Ink Cartridge for service and press the [Run] button to make Ink Cartridge for When replacing/removing this part, refer to “4.1.2 Adjustment service available.
- Page 64 SC-F7000 Serie/SC-B7000 Series Revision A Turn off the printer. Remove the ink tanks. Remove the four screws (one each) that secure the ink tank. 10. Loosen the four screws inside the ink holder. Just loosen the screws, but do not remove them.
- Page 65 SC-F7000 Serie/SC-B7000 Series Revision A 12. Install the four ink cartridges for service. REPLACEMENT 13. Lower all the lock levers. Select Auto CR unlock & move CR to full column side. 14. Start the printer in the Serviceman Mode. Press the [Run] button.
- Page 66 SC-F7000 Serie/SC-B7000 Series Revision A Remove the three screws that secure the Damper Kit. 10. Attach the hooks of the Damper Kit to the frame as shown. A) Silver M3x10: 3 pcs Remove the FFC clamp. Release the FFC from the hooks.
- Page 67 SC-F7000 Serie/SC-B7000 Series Revision A 11. Remove the FFC clamp. AFTER REPLACEMENT 12. Remove the three screws, and remove the Print Head. Start the printer in the Serviceman Mode. C) Silver M3x8 screw (Bit No.1): 3 pcs Turn on the printer while pressing [Menu] + [Back] + [OK].
- Page 68 SC-F7000 Serie/SC-B7000 Series Revision A Select Head ID Input. Select Cleaning. Input the head rank ID and press the [Write] button. (p109) Select and all channels and press the [Run] button to perform CL3. Figure 3-24. [Head ID Input] screen Figure 3-25.
- Page 69 SC-F7000 Serie/SC-B7000 Series Revision A 17. Select Switch between Ink cartridges and Ink tanks. 23. Secure the ink tanks with the four screws (one each). (p64) Select All channels Ink Tank and press the [Run] button to validate the ink 24.
- Page 70 SC-F7000 Serie/SC-B7000 Series Revision A 3.4.5.4 Head FFC Refer to the service manual for SC-S30600 series. 3.4.5.5 Head Relay FFC Refer to the service manual for SC-S30600 series. 3.4.5.6 CR FFC Refer to the service manual for SC-S30600 series. 3.4.5.7 CR Scale Refer to the service manual for SC-S30600 series.
- Page 71 SC-F7000 Serie/SC-B7000 Series Revision A 3.4.5.14 Pump Cap Unit When replacing/removing this part, refer to “4.1.2 Adjustment A D J U S T M E N T Cable Cover R E Q U I R E D Items and the Order by Repaired Part” (p86) and make sure to perform the specified operations including required adjustment.
- Page 72 SC-F7000 Serie/SC-B7000 Series Revision A 10. Remove the three screws that secure the Pump Cap Unit. B) Silver M4x8 S-tite screw with built-in washer: 3 pcs 11. Pull the Pump Cap Unit frontward to disengage the hook, and remove the Pump Pump Cap Unit Cap Unit avoiding contact with the CR shaft or any other parts.
- Page 73 SC-F7000 Serie/SC-B7000 Series Revision A 3.4.5.15 Ink Holder 12. Start the printer in the Serviceman Mode. Turn on the printer while pressing [Menu] + [Back] + [OK]. When replacing/removing this part, refer to “4.1.2 Adjustment A D J U S T M E N T 13.
- Page 74 SC-F7000 Serie/SC-B7000 Series Revision A 12. Disconnect the cable of the Reel Unit. 13. Remove the five screws, and remove the Right Rear Cover. Clamp A) Silver M4x10 S-tite screw with washer: 4 pcs B) Silver M3x6 screw: 1 pcs No.42...
- Page 75 SC-F7000 Serie/SC-B7000 Series Revision A 14. Remove the screw that secures the joint. 16. Disconnect the FFC from the rear of the Ink Holder. C) Silver M3x6 screw with built-in washer: 1 pcs 17. Remove the four screws that secure the Ink Holder.
- Page 76 SC-F7000 Serie/SC-B7000 Series Revision A When installing the joint, confirm the following. - Rear side of Holder- Before installing the joint, make sure the two Joint Rubbers are attached to it. Before attaching the Joint Rubbers, let them get wet with cleaning liquid.
- Page 77 SC-F7000 Serie/SC-B7000 Series Revision A AFTER REPLACEMENT Install the four ink cartridges for service. (p79) Turn on the printer. Discard the waste ink. Reset the counter for the waste ink bottle from the control panel. Maintenance Waste Ink Counter [OK]...
- Page 78 SC-F7000 Serie/SC-B7000 Series Revision A 3.4.5.16 Ink Tube Refer to the service manual for SC-S30600 series. 3.4.5.17 CR Unit Refer to the service manual for SC-S30600 series. 3.4.5.18 Oil Pad Holder Refer to the service manual for SC-S30600 series. 3.4.5.19 PW Sensor Refer to the service manual for SC-S30600 series.
- Page 79 SC-F7000 Serie/SC-B7000 Series Revision A 3.4.5.20 Ink Tank/Cartridge This section describes the removing procedure for the ink tank and the installation procedure for cartridges. There are two types of cartridges; cleaning cartridges and ink cartridges for service. When using the ink tanks, cleaning cartridges, and ink cartridges...
- Page 80 SC-F7000 Serie/SC-B7000 Series Revision A Figure 3-37. Screw position Confirm the hooks (plates) shown below are evenly lowered. Hook Figure 3-38. Plates Install the cartridges. Lower the lock levers. DISASSEMBLY & ASSEMBLY Disassembly and Assembly Procedure Confidential...
-
Page 81: Paper Feed Mechanism
SC-F7000 Serie/SC-B7000 Series Revision A 3.4.6 Paper Feed Mechanism 3.4.6.1 Media Loading Lever Refer to the service manual for SC-S30600 series. 3.4.6.2 Media Loading Lever Sensor Refer to the service manual for SC-S30600 series. 3.4.6.3 PF Motor Refer to the service manual for SC-S30600 series. -
Page 82: Roll Unit
SC-F7000 Serie/SC-B7000 Series Revision A 3.4.7 Roll Unit 3.4.7.1 Roll Unit Refer to the service manual for SC-S30600 series. 3.4.7.2 Roll Receiver Assy Refer to the service manual for SC-S30600 series. 3.4.7.3 Roll Paper Holder Refer to the service manual for SC-S30600 series. -
Page 83: Reel Unit
SC-F7000 Serie/SC-B7000 Series Revision A 3.4.8 Reel Unit 3.4.8.1 Reel Unit Refer to the service manual for SC-S30600 series. 3.4.8.2 Roll Paper Holder Refer to the service manual for SC-S30600 series. 3.4.8.3 Sub-F Board (Reel) Refer to the service manual for SC-S30600 series. -
Page 84: Chapter 4 Adjustment
C H A P T E R ADJUSTMENT Confidential... -
Page 85: Overview
SC-F7000 Serie/SC-B7000 Series Revision A 4.1 Overview This chapter describes the Service Program software utility and the adjustment procedures required after repairing or replacing certain parts. 4.1.1 Precautions Always observe the following cautions whenever making an adjustment on the printer. -
Page 86: Adjustment Items And The Order By Repaired Part
SC-F7000 Serie/SC-B7000 Series Revision A 4.1.2 Adjustment Items and the Order by Repaired Part The following table shows the required adjustments by repaired or replaced part and the order in which the adjustments must be performed. NOTE 1: The adjustments required for the Main Board differs depending on whether the NVRAM on the old board can be backed up or not. - Page 87 SC-F7000 Serie/SC-B7000 Series Revision A Table 4-1. Adjustment items and the order by repaired part Replaced or Repaired Service Class Required Operations Media Replaced Reattached Page (Reattached) Part/Unit Program √ √ p. 78 Replacement Replacement √ √ Turn the power on in normal mode.
- Page 88 SC-F7000 Serie/SC-B7000 Series Revision A Table 4-1. Adjustment items and the order by repaired part Replaced or Repaired Service Class Required Operations Media Replaced Reattached Page (Reattached) Part/Unit Program √ √ √ p. 105 11 Manual Bi-d adjustment PGPP After...
- Page 89 SC-F7000 Serie/SC-B7000 Series Revision A Table 4-1. Adjustment items and the order by repaired part Replaced or Repaired Service Class Required Operations Media Replaced Reattached Page (Reattached) Part/Unit Program √ √ √ p. 114 28 Activate the ink tanks. √...
- Page 90 SC-F7000 Serie/SC-B7000 Series Revision A Table 4-1. Adjustment items and the order by repaired part Replaced or Repaired Service Class Required Operations Media Replaced Reattached Page (Reattached) Part/Unit Program √ √ √ p. 109 20 Nozzle Check PGPP √ √...
- Page 91 SC-F7000 Serie/SC-B7000 Series Revision A Table 4-1. Adjustment items and the order by repaired part Replaced or Repaired Service Class Required Operations Media Replaced Reattached Page (Reattached) Part/Unit Program √ √ √ p. 114 22 Activate the ink tanks. √...
- Page 92 SC-F7000 Serie/SC-B7000 Series Revision A Table 4-1. Adjustment items and the order by repaired part Replaced or Repaired Service Class Required Operations Media Replaced Reattached Page (Reattached) Part/Unit Program √ √ p. 81 Replacement Replacement √ √ Turn the power on in Serviceman mode.
- Page 93 SC-F7000 Serie/SC-B7000 Series Revision A Table 4-1. Adjustment items and the order by repaired part Replaced or Repaired Service Class Required Operations Media Replaced Reattached Page (Reattached) Part/Unit Program √ Turn the power on in Serviceman mode. Before replacement √...
- Page 94 SC-F7000 Serie/SC-B7000 Series Revision A Table 4-1. Adjustment items and the order by repaired part Replaced or Repaired Service Class Required Operations Media Replaced Reattached Page (Reattached) Part/Unit Program √ 10 Serviceman mode ON √ p. 122 11 Rear AD Adjustment √...
- Page 95 SC-F7000 Serie/SC-B7000 Series Revision A Table 4-1. Adjustment items and the order by repaired part Replaced or Repaired Service Class Required Operations Media Replaced Reattached Page (Reattached) Part/Unit Program √ √ p. 59 Replacement Replacement √ Turn the power on in normal mode.
-
Page 96: Adjustment Items
SC-F7000 Serie/SC-B7000 Series Revision A 4.1.3 Adjustment Items This section describes the adjustment items different from those for SC-S30650 only. For the adjustments other than listed below, see the service manual for SC-S30650. Table 4-2. Adjustment Items Service Class Adjustment Items... -
Page 97: Tools/Consumables For Adjustments
SC-F7000 Serie/SC-B7000 Series Revision A 4.1.4 Tools/Consumables for Adjustments Consumables Table 4-5. Consumables The tables below show the tools required for adjusting this printer. Consumable Name Code Target Adjustment Hardware Tools Premium Glossy Photo Most of the adjustments Table 4-3. Hardware tools... -
Page 98: Service Program Basic Operations
SC-F7000 Serie/SC-B7000 Series Revision A 4.1.5 Service Program Basic Operations Refer to the service manual of SC-S30600 series. ADJUSTMENT Overview Confidential... -
Page 99: Nv-Ram Backup / Nvram Viewer
SC-F7000 Serie/SC-B7000 Series Revision A 4.2 NV-RAM BACKUP / NVRAM Viewer 4.2.1 NVRAM Read Procedure Refer to the service manual of SC-S30600 series. 4.2.2 NVRAM Write Procedure Refer to the service manual of SC-S30600 series. 4.2.3 NVRAM Viewer Basic Operation Refer to the service manual of SC-S30600 series. -
Page 100: Adjustments (Individual)
SC-F7000 Serie/SC-B7000 Series Revision A 4.3 ADJUSTMENTS (Individual) Refer to the service manual of SC-S30600 series. ADJUSTMENT ADJUSTMENTS (Individual) Confidential... -
Page 101: Adjustments (Sequence)
SC-F7000 Serie/SC-B7000 Series Revision A 4.4 ADJUSTMENTS (Sequence) This mode displays the required adjustments per replaced part and executes the adjustments in order. The Service Program for this printer includes the following items in addition to the parts replacement. Remedy for ink clogging due to a long unused period... -
Page 102: Installing Firmware
SC-F7000 Serie/SC-B7000 Series Revision A 4.5 Installing Firmware Refer to the service manual of SC-S30600 series. 4.6 Image & Test Print Refer to the service manual of SC-S30600 series. 4.7 Counter Reset Refer to the service manual of SC-S30600 series. -
Page 103: Cr Related Adjustments
SC-F7000 Serie/SC-B7000 Series Revision A 4.10 CR Related Adjustments 4.10.1 CR Belt Tension Check Refer to the service manual of SC-S30600 series. 4.10.2 APG Function Check Refer to the service manual of SC-S30600 series. 4.10.3 CR Scale Check Refer to the service manual of SC-S30600 series. -
Page 104: Manual Uni-D Adjustment
SC-F7000 Serie/SC-B7000 Series Revision A 4.10.5 Manual Uni-D Adjustment CHECKING THE ADJUSTMENT RESULT Select the following menu items from the control panel. PAPER USED Media Setup Customize Settings 0 RIP Settings Size: 24 inch length or longer Set [1.5] in Platen Gap. -
Page 105: Manual Bi-D Adjustment
SC-F7000 Serie/SC-B7000 Series Revision A 4.10.6 Manual Bi-D Adjustment 15. Select the pattern with the fewest printed lines and check the number. 16. Input the numbers selected in Step 15 and press the [OK] button. PAPER USED When the entries are complete, the printer goes back to "Ready". - Page 106 SC-F7000 Serie/SC-B7000 Series Revision A 13. Load the user's media to the printer. 14. Select the following menu items from the control panel. Media Setup Customize Settings 0 RIP Settings 15. Set [1.5] in Platen Gap. 16. Set [0.2mm] in Head Alignment and press the [OK] button.
-
Page 107: Pg Adjustment
SC-F7000 Serie/SC-B7000 Series Revision A 4.10.7 PG Adjustment REQUIRED TOOL Thickness gauge STANDARD VALUE 2.55 pass 2.65 stop Thickness gauge PROCEDURE When any paper is loaded, remove it. Unlock the CR Unit, and move the unit to the center of the platen. - Page 108 SC-F7000 Serie/SC-B7000 Series Revision A Move the CR Unit to the left end, and remove the CR Cover. (P. 60) Loosen the screws that secure the PG adjustment levers on the left and the right. Move the PG adjustment levers up and down to change the gap (PG).
-
Page 109: Head Related Checks And Adjustments
SC-F7000 Serie/SC-B7000 Series Revision A 4.11 Head Related Checks and Adjustments 4.11.1 Tube Inner Pressure Reduction Refer to the service manual of SC-S30600 series. 4.11.2 Head ID Input Refer to the service manual of SC-S30600 series. 4.11.3 Nozzle Check Refer to the service manual of SC-S30600 series. -
Page 110: Head Inclination Manual Adjustment (Cr Direction)
SC-F7000 Serie/SC-B7000 Series Revision A 4.11.5 Head Inclination Manual Adjustment (CR Examine the printed pattern using a loupe. direction) If adjustment is needed, go to Step PAPER USED Size: 24 inch length or longer Paper feed Type: Premium Glossy Photo Paper (250) - Page 111 SC-F7000 Serie/SC-B7000 Series Revision A For which direction to turn the knob, see below. C H E C K P O I N T Paper feed direction When BK lines lie When BK lines lie above C lines, below C lines,...
-
Page 112: Head Slant Manual Adjustment (Pf Direction)
SC-F7000 Serie/SC-B7000 Series Revision A 4.11.6 Head Slant Manual Adjustment (PF direction) Examine the printed pattern using a loupe. See if the gaps between the blocks are parallel. If adjustment is needed, go to Step PAPER USED Size: 24 inch length or longer... - Page 113 SC-F7000 Serie/SC-B7000 Series Revision A Move the CR unit to the left end of the printer. 13. When finished, click [Finish] and turn the printer OFF. Remove the CR Cover. (P. 60) Loosen the screw (Bit No. 1) that secures the Adjustment Knob.
-
Page 114: Ink Supply Related Checks And Adjustments
SC-F7000 Serie/SC-B7000 Series Revision A 4.12 Ink Supply Related Checks and Adjustments 4.12.1 Switch between Ink Cartridges and Ink Tanks EXECUTION MODE Normal Mode PROCEDURE Turn the printer ON. Start the Service Program and select Switch between Ink cartridges and Ink tanks. -
Page 115: Activation Of Cleaning Cartridge
SC-F7000 Serie/SC-B7000 Series Revision A 4.12.2 Activation of Cleaning Cartridge EXECUTION MODE Normal Mode PROCEDURE Turn the printer ON. Start the Service Program and select Activation of Cleaning cartridges. Select the color to validate (All channels Single channel). Click [Run]. -
Page 116: Ink Eject
SC-F7000 Serie/SC-B7000 Series Revision A 4.12.3 Ink eject Due to the structure of this printer, you cannot replace only one C H E C K P O I N T tank. Therefore, replacement of the tanks should be made according to the combinations below. -
Page 117: Tube Inner Cleaning
SC-F7000 Serie/SC-B7000 Series Revision A 4.12.4 Tube Inner Cleaning 12. Turn on the printer. 13. Confirm that there are no errors. Due to the structure of this printer, you cannot replace only one C H E C K P O I N T tank. -
Page 118: Initial Ink Charge
SC-F7000 Serie/SC-B7000 Series Revision A 4.12.5 Initial Ink Charge 12. Turn on the printer. 13. Confirm that there are no errors. Due to the structure of this printer, you cannot replace only one C H E C K When replacing old ink tanks with new ones (such as due to wrong ink mixture P O I N T tank. -
Page 119: Media Feed Related Checks And Adjustments
SC-F7000 Serie/SC-B7000 Series Revision A 4.13 Media Feed Related Checks and Adjustments 4.13.1 PF Belt Tension Check Refer to the service manual of SC-S30600 series. 4.13.2 PF Scale Check Refer to the service manual of SC-S30600 series. ADJUSTMENT Media Feed Related Checks and Adjustments... -
Page 120: Manual Adjustment For Media Feeding
SC-F7000 Serie/SC-B7000 Series Revision A 4.13.3 Manual Adjustment for Media Feeding PAPER USED Size: 24 inch length or longer Type: Premium Glossy Photo Paper (250) EXECUTION MODE Normal Mode PROCEDURE Turn the printer ON. Start the Service Program and select Manual Adjustment for Media Feeding. -
Page 121: Boards Related Checks And Adjustments
SC-F7000 Serie/SC-B7000 Series Revision A 4.14 Boards Related Checks and Adjustments 4.14.1 Main Board initial setting Refer to the service manual of SC-S30600 series. 4.14.2 RTC&USB ID Input Refer to the service manual of SC-S30600 series. 4.14.3 MAC Address Input Refer to the service manual of SC-S30600 series. -
Page 122: Panel Setting Reset & Job History Reset
SC-F7000 Serie/SC-B7000 Series Revision A 4.15 Other Printer Checks and Adjustments 4.15.1 USB Port and Network Communication Check Refer to the service manual of SC-S30600 series. 4.15.2 Suction Fan Adjustment Refer to the service manual of SC-S30600 series. 4.15.3 Panel Setting Reset & Job History Reset Refer to the service manual of SC-S30600 series. -
Page 123: Chapter 5 Maintenance
C H A P T E R MAINTENANCE Confidential... -
Page 124: Overview
SC-F7000 Series/SC-B7000 Series Revision A 5.1 Overview Ensure sufficient work space for servicing. C A U T I O N Locate the printer on a stable and flat surface. This chapter provides information on how to maintain the printer in its optimum When using compressed air products;... -
Page 125: Setting Up/Storing The Printer
SC-F7000 Series/SC-B7000 Series Revision A 5.2 Setting Up/Storing the Printer Refer to the service manual for SC-S30600 series. MAINTENANCE Setting Up/Storing the Printer Confidential... -
Page 126: When Left Unused/Transportation
SC-F7000 Series/SC-B7000 Series Revision A 5.3 When left unused/transportation Start the printer in the Serviceman Mode. Turn on the printer while pressing [Menu] + [Back] + [OK]. 10. Select eject. 5.3.1 When left unused Select channels, and press the [Run] button to run the ink eject. - Page 127 SC-F7000 Series/SC-B7000 Series Revision A 5.3.1.2 Preparation for installation (after transport) Start the printer in the Serviceman Mode. Turn on the printer while pressing [Menu] + [Back] + [OK]. Remove all the ink tanks. (Page 79) Lower all the lock levers.
-
Page 128: Transportation
SC-F7000 Series/SC-B7000 Series Revision A 5.3.2 Transportation Select eject. Select All channels and press the [Run] button to discharge ink. When moving or transporting the printer, the following should be carried out by 10. Select Activation of Cleaning cartridge. serviceman. - Page 129 SC-F7000 Series/SC-B7000 Series Revision A 5.3.2.2 Preparation after transportation 12. Select Initial ink charge. Select channels, and press the [Run] button to run the initial ink charge. (Page 118) REQUIRED TOOLS 13. Select Nozzle Check. Stubby screwdriver Select Nozzle Check Pattern...
-
Page 130: Exchange Parts
SC-F7000 Series/SC-B7000 Series Revision A 5.4 Exchange Parts Exchange parts of this printer are as follows. Note *1: M/C = Maintenance call S/C = Service call *2: See Chapter 2 “Troubleshooting” for details of maintenance call and service call. Table 5-1. Exchange Parts... - Page 131 SC-F7000 Series/SC-B7000 Series Revision A When exchanging any of the parts below, follow the flow chart below. Print Head START CR Encoder Ink Holder Damper Kit Pump Cap Unit Check Print Head life Check Print Head life Exchanging Print (usage amount) by NVRAM...
-
Page 132: Cleaning
SC-F7000 Series/SC-B7000 Series Revision A 5.5 Cleaning PRESSURE ROLLER Use a soft-bristled brush to clean off the dust and paper dust on the pressure rollers. Figure 5-1. Cleaning the pressure rollers MEDIA HOLDING PLATE/PLATEN Use a soft cloth damped with water to wipe off the lint, dust, and ink on the Platen. - Page 133 SC-F7000 Series/SC-B7000 Series Revision A When the bottom surface of the print head is stained with ink spatters, apply very PRINT HEAD AND SURROUNDINGS/WIPER/CAP/WIPER RAIL small amount of Ink cleaner on a waste cloth to wipe them off. Be careful not to touch the nozzle surface when cleaning the Print C A U T I O N Head and its surroundings.
- Page 134 SC-F7000 Series/SC-B7000 Series Revision A When ink stain is on the attachment part, take out the Wiper to clean. Wipe the outer surfaces of the four caps with a cleaning swab. Do not touch the inner part of the caps.
- Page 135 SC-F7000 Series/SC-B7000 Series Revision A Press the OK button. The wiper moves toward the rear. Remove the wiper cleaner. 10. Using a cleaning swab moistened with Ink cleaner, clean the wiper rail. Figure 5-8. Cleaning the wiper rail 11. Attach the wiper cleaner.
-
Page 136: Lubrication
SC-F7000 Series/SC-B7000 Series Revision A 5.6 Lubrication Refer to the service manual for SC-S30600 series. MAINTENANCE Lubrication Confidential... -
Page 137: Chapter 6 Appendix
C H A P T E R APPENDIX Confidential... -
Page 138: Block Wiring Diagram
SC-F7000 Serie/SC-B7000 Series Revision A 6.1 Block Wiring Diagram PANEL UNIT SENSOR SENSOR ENCODER PRINT HEAD PNL-B BOARD SUB-D BOARD CN400 CN401 CN101 CN103 CN102 PANEL BOARD SUB BOARD PG SENSOR CN100 CN104 CN404 CN405 PE SENSOR MEDIA LOADING LEVER SENSOR... -
Page 139: Connection Diagram
SC-F7000 Serie/SC-B7000 Series Revision A 6.2 Connection Diagram 6.2.1 Sensors Refer to the service manual of SC-S30600 series. 6.2.2 Ink Holder Refer to the service manual of SC-S30600 series. 6.2.3 CR Unit Refer to the service manual of SC-S30600 series. -
Page 140: Panel Menu Map
SC-F7000 Serie/SC-B7000 Series Revision A 6.3 Panel Menu Map This section provides the map of executable menus on the Control Panel. APPENDIX Panel Menu Map Confidential... - Page 141 Date And Time MM/DD/YY HH:MM Language Language Unit: Length Alert Sound Setting Alert Lamp Setting English French Italian German Portuguese Spanish Dutch Russian Korean Chinese Unit: Length ft/in Alert Sound Setting Alert Lamp Setting Reset All Settings SC-F7000 Series/SC-B7000 Series...
- Page 142 Feed Amount 2 -1000.0 to 1000.0 (0.1 Feed Speed 2 Wait to 999.9 sec to 200 % Life Count 0 to 99999999 PGtyp Wait Life Count PG++ Wait 0.0 to 999.9 sec Life Count 0 to 99999999 SC-F7000 Series/SC-B7000 Series...
-
Page 143: Part Names Used In This Manual
SC-F7000 Serie/SC-B7000 Series Revision A 6.4 Part names used in this manual Refer to the service manual of SC-S30600 series. APPENDIX Part names used in this manual Confidential... -
Page 144: Exploded Diagram/Parts List
SC-F7000 Serie/SC-B7000 Series Revision A 6.5 Exploded Diagram/Parts List For the exploded diagrams and parts list, refer to Service Parts Information. APPENDIX Exploded Diagram/Parts List Confidential...
Need help?
Do you have a question about the SC-B7000 Series and is the answer not in the manual?
Questions and answers