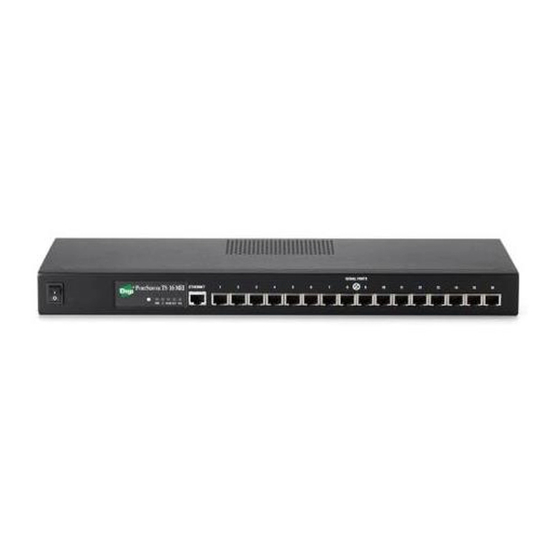
Digi PortServer/8 User Manual

Digi PortServer/8 User Manual

Intelligent network terminal servers
Table of Contents

Advertisement

Digi International
6400 Flying Cloud Drive
Eden Prairie, MN 55344
(612) 943-9020
Digi GmbH
Domkloster 1
50667 Köln
Germany
Digi Asia Pte Ltd
13-06 Tower 'A'
391A Orchard Road
Ngee Ann City
Singapore 0923
User's Guide and Reference Manual
for the
PortServer/8 and PortServer/16
Intelligent Network Terminal Servers
90028700B

Advertisement

Table of Contents
loading

Summary of Contents for Digi PortServer/8

  • Page 1 6400 Flying Cloud Drive Eden Prairie, MN 55344 (612) 943-9020 Digi GmbH Domkloster 1 50667 Köln Germany Digi Asia Pte Ltd 13-06 Tower ‘A’ 391A Orchard Road Ngee Ann City Singapore 0923 User’s Guide and Reference Manual for the PortServer/8 and PortServer/16...
  • Page 2 Information in this document is subject to change without notice and does not represent a commitment on the part of Digi International. Digi International provides this document “as is,” without warranty of any kind, either expressed or implied, including, but not limited to, the implied warranties of fitness or merchantability for a particular purpose.
  • Page 3: Table Of Contents

    Table of Contents PREFACE..........................vi ..................vi ONVENTIONS SED IN THIS ANUAL Keyboard Entry ........................vi Typefaces ..........................vi ....................vii LECTRONIC MISSION OTICES Federal Communications Commission (FCC) Statements ............vii Industry Canada Compliance Statements................vii INTRODUCTION ........................1 PORTSERVER QUICK START....................3 Configuring the PortServer over the Ethernet................5 COMMAND REFERENCE....................28 .........................28 BBREVIATIONS...
  • Page 4 RJ C ........................91 ONNECTORS 10 Pin RJ 45 Plugs ........................92 8 Pin RJ 45 Plugs........................93 6 Pin RJ 11 Plugs........................94 4 Pin RJ 11 Plugs........................95 Digi RJ-45 to DB-25 Cable Legs ...................96 Connecting Modems ......................97 Page iv Ÿ PortServer Terminal Server...
  • Page 5 UMBERS ........................102 PECIFICATIONS ......................103 UPPORT ERVICES The Digi Bulletin Board System................... 103 Internet FTP Server......................103 World Wide Web Server....................... 103 DigiFACTs FaxBack Server ....................103 Information About Your System ................... 104 Technical Support ....................... 105 Customer Service ........................ 105 ......................
  • Page 6: Preface

    Preface Conventions Used in this Manual Certain conventions are used in this manual with respect to keyboard entry and typefaces: Keyboard Entry • Single keystrokes are enclosed in angle brackets (e.g. <Enter>, <Esc>, etc.) • Control keys (i.e. keys which are struck while holding down the <Ctrl> key) are shown as single keystrokes.
  • Page 7: Electronic Emission Notices

    Electronic Emission Notices Federal Communications Commission (FCC) Statements This equipment has been tested and found to comply with the limits for Class A digital devices pursuant to Part 15 of the FCC Rules. These limits are designed to provide reasonable protection against harmful interference when the equipment is operated in a commercial environment.
  • Page 8 Notes: Page viii Ÿ PortServer Terminal Server...
  • Page 9: Introduction

    Introduction The Digi PortServer intelligent terminal server gives you the ability to Description connect up to 16 RS-232 asynchronous serial devices (such as terminals and printers) to an Ethernet network. Both Twisted Pair (10BaseT) and Thinnet (10base2) cabling standards are supported via the appropriate connectors on the side of the PortServer box.
  • Page 10 “see” the devices connected to the ports. For supported operating systems, Digi’s RealPort port control protocol gives powerful control in accessing the remote PortServer ports. The PortServer software features extensive help functions. From the...
  • Page 11: Portserver Quick Start

    PortServer Quick Start This “Quick Start” Getting Started section will help you quickly get your PortServer terminal server up and running. Wherever possible, the factory default settings are used. Later, once you have verified that the PortServer can communicate with your network, you can fine-tune the net- work and terminal parameters for optimum performance.
  • Page 12 (RJ-45 to DB-25) is included with your PortServer. Please note that this Digi cable leg is wired straight-through, and that you will need a null modem cable or adapter to connect a terminal if you use the included cable leg.
  • Page 13: Configuring The Portserver Over The Ethernet

    Simple 3-Wire Cable RJ-11 - 4 Pin DB-25 Male Signal Signal = Cable Shield) This same configuration can be constructed using 6 pin RJ-11 plugs, or either 8 or 10 pin RJ-45 plugs. See “RJ Connectors” on page 91 for the relationship of the various sizes of RJ connectors to the 10 pin RJ-45 jack.
  • Page 14 Connect other terminals and peripherals to the PortServer At this point you may wish to connect other devices (terminals, modems or printers) to the PortServer. If you’d prefer to “play with it” a bit and add other peripherals later, skip this part and go to the next section, Log in and Configure the PortServer on page 9.
  • Page 15 A more inclusive cable (necessary if you are going to set your port device as a host) is a full 10- wire null-modem cable: Full 10-Wire Null Modem Cable Pin 10 Pin 1 RJ-45 - 10 Pin DB-25 Male Signal Signal = Cable Shield) PortServer Terminal Server Ÿ...
  • Page 16 Modems The easiest way to connect modems is to use Digi’s RJ-45 to DB-25 straight-through cables, which offer full 10-pin connections for full modem control. (You may find ten-pin RJ-45 connectors difficult to find in the retail market). Here are the choices and part numbers:...
  • Page 17 Printers Serial printers can have different wiring requirements because of their manufacturer’s inter- pretations of the RS-232 “standard.” For those printers that can work with software handshaking (also called “XON/XOFF”), the three-wire hookup for terminals shown on page 5 will work well. Printers that require hardware handshaking (sometimes referred to as “DTR/DSR”) should work with the terminal hardware handshaking wiring scheme shown on page 6.
  • Page 18 Step 4. When AC is showing on the PortServer display, press the Return or Enter key on your keyboard; you should get the login: prompt. Enter root . When asked for the root password, enter dbps : login: root passwd: #>...
  • Page 19 If you have one, enter the IP address of the IP Name Service Domain Server’s machine that will translate names to addresses. This example Name uses “192.83.159.2”: #>set config nameserv=192.83.159.2 #> Note that if you do not have an IP Name Service machine, you can use the PortServer’s Set Host commands to build a table of names and their IP addresses.
  • Page 20 Testing the network connection You should now be able to establish communications with another network machine. (You will need to know the IP Address of the other machine.) Enter the following ping command to test the connection: #>ping 192.83.159.227 #> (Again, the IP address “192.83.159.227"...
  • Page 21 Set up ports for your uses Your next step would be to configure individual PortServer ports for your own specific uses. This section sets up these example ports: • A wyse60 terminal on port 2, running at 38400 baud with software flow control •...
  • Page 22 (Wyse60 terminal on port 2, running at 38400 bps with software Terminal Setup Example flow control) Step 1. Turn off the power to the terminal and the PortServer, and connect the Wyse terminal to Port 2. Power up again. Step 2. At the Port 1 control terminal, log in as root .
  • Page 23 While the default port flow control setting is for software flow Flow Control control, let’s set it again just to make sure, by typing: #>set flow ixon=on range=2 #>set flow ixoff=off range=2 (In the above, set flow ixon=on sets port #2 to use software flow control (typically XON/XOFF) for output data .
  • Page 24 Set Port #3 to be a Printer port by typing: Define Port as Printer #>set port dev=prn range=3 Note that you did not have to set the port to be a terminal in the previous example, because they all default to terminal as shipped.
  • Page 25 Modem Setup Example (Bidirectional modem with hardware flow control on port 4) Step 1. Turn off the power to the modem and the PortServer, and connect the modem, wired as discussed on page 8, then power up again. Step 2. At the control terminal, log in as root .
  • Page 26 Change the flow control for Port #4 to RTS/CTS (“hardware”) Flow Control by typing: #>set flow rts=on range=4 #>set flow cts=on range=4 (In the above, set flow rts=on sets port #4 to use hardware flow control for input data. set flow cts=on sets port #4 to use hardware flow control for output data.) Also note that the modem must be set (through AT commands or DIP switches) for hardware flow control.
  • Page 27 Set up a new user A typical next step would be to set up a new user and password. For this example, we will: • Set up a new user for that Wyse 60 terminal on Port #2; the user’s login will be betty . •...
  • Page 28 Create New Create “regular” (as opposed to root) user “Betty” by typing: User “Betty” #>set users name=betty The user names are stored in a table of users, viewable by typing “ set users ” without any other parameters. As you will later find, this way of getting the current PortServer setup information works for all commands.
  • Page 29 Passwords are case-sensitive, and limited to eight characters or Change Betty’s less. Changing the password can be done either by Betty Password to herself, or by the root user. “MeBoss” As root, set the password itself to “ MeBoss .” Type: newpass name=betty The PortServer responds with current passwd:...
  • Page 30 Have User First, we create table entries for the host named “Corporate,” “Rex” bypass including its IP address (152.83.151.1 is a “phony” name used PortServer here for an example). Note that the “ip=” part is not necessary Command if you have IP name service. Shell, connect directly to #>set host name=corporate ip=152.83.151.1...
  • Page 31 Telnet and Multisession Here is an example of Betty logging in on her newly-configured terminal, logging into her com- pany’s Corporate and Engineering hosts via telnet, switching between the two sessions, then logging out. The PortServer supports up to nine separate login sessions per port. For example, if your company has host computers named Sales, Tech and Production, you can log into all three, and switch among the different sessions and the PortServer command shell by using the telnet escape key followed by a number or carriage return.
  • Page 32 Log in as The PortServer is already up and running. Betty turns on her “Betty” terminal, presses <enter> (if the login prompt is not already showing) and sees: MegaCorp> She types in Betty and presses ENTER. Next she sees: passwd: Betty enters “...
  • Page 33 Betty’s session with Corporate is session #1, and her session Switch between with Engineering is session #2. From her Engineering session, sessions she can switch to Corporate by typing <Ctrl-]> 1 (the telnet escape character <Ctrl-]> followed by the number 1). From her session on Corporate, she can switch to the Engineering session by typing <Ctrl-]>...
  • Page 34 PortServer. However, it is not possible to telnet to Port #4 by entering “ telnet termserver 4 ”. By Digi International convention, we add 2000 to the PortServer’s port number to create the tcp port numbers.
  • Page 35 In the modem setup example (page 17), the connection from Set Modem for Hardware the PortServer to the modem was set to use RTS/CTS hardware Handshake handshaking. Here, Betty tells the modem to use the same, by typing: on Serial Connection AT&K3 (Betty is connected directly to the modem, so there are no com-...
  • Page 36: Command Reference

    Command Reference This Command Reference is divided into these parts: Abbreviations ......................(page 28) PortServer Help Screens..................(page 29) PortServer Editing Keystrokes................(page 30) PortServer Commands ................... (page 31) telnet Commands....................(page 60) rlogin ........................(page 61) Abbreviations All PortServer commands may be abbreviated to their shortest unique letters. Therefore the com- mand: set users name=jill can be abbreviated to:...
  • Page 37: Portserver Help Screens

    PortServer Help Screens On-line help for the PortServer's command language is available to you through context-sensitive help screens. Help is available by entering a “?” either by itself or after part of a command line. The screen will tell you which parameters are available to complete the command line. At the PortServer prompt, enter a “...
  • Page 38: Portserver Editing Keystrokes

    PortServer Editing Keystrokes The following keystrokes can be used in editing commands sent to the PortServer from a ter- minal: Page 30 Ÿ Command Reference...
  • Page 39: Portserver Commands

    PortServer Commands These commands are specific to the PortServer. admin Syntax: admin The admin command allows you root privileges with the PortServer if you have previously logged in as other than root. You will be asked for the root password. boot Syntax: reset|eewrite...
  • Page 40: Cpconf

    cpconf Syntax: hostname filename cpconf tohost|fromhost cpconf term The cpconf (copy configuration) command was added to allow saving and restoring the configu- ration of the PortServer to a disk file. The format of the save file is a list of the set commands needed to set up the PortServer in the current configuration.
  • Page 41: Exit

    If an attempt is made to change the IP address when restoring over the network, the restoration will fail because the PortServer will ignore any conversation on the old IP address. The save file prints a “#” at the beginning of the set config ip= x.x.x.x command, commenting it out to avoid the problem.
  • Page 42 tablename displays the following information (values shown are arbitrary examples). info These are actual screen dumps of a root-level session—note the root prompt (#>): #> info network Network statistics collected over last 129 minute(s). UcastPktsRcvd UcastPktsTxmt BcastPktsRcvd 5432 BCastPktsTxmt bytes recvd 917683 bytes txmtd 48291...
  • Page 43: Kill

    #> info tcp Network statistics collected over last 129 minute(s). tcpInSegs tcpInFast tcpInErrs tcpInCksErrs tcpInTcbErrs tcpInNotOkErrs : tcpInDrpData tcpInDrpOwByte : tcpInUrgBytes tcpInNotInSeq tcpOutSegs tcpOutResets tcpOutRetxmts tcpActiveOpens : tcpPassiveOpen : tcpAttemptFail : tcpEstabResets : tcpCurrEstab tcpRtoAlgorith : tcpRtoMin tcpRtoMax tcpHolAllocErr : tcpTmrAllocErr : tcpBarSyn tcpBadReset...
  • Page 44: Newpass

    newpass Syntax: [ user= username] newpass Use the newpass command to create or change your current password. If you are at the root level, be very careful not to forget your root password. If you supply the optional name= username, another user’s password can be changed. Root-level privileges are required to change another user’s password.
  • Page 45: Quit

    quit Syntax: quit The quit command terminates your current login session. If you quit a session without first closing it, PortServer will automatically do a close for you. (See the telnet commands). Note that exit works the same as quit . can also be used to give up root privileges temporarily acquired with the admin command.
  • Page 46: Set

    Syntax: tablename [options . . . ] The set command is used to set or display various PortServer system and port parameters. The different tables that can be substituted for tablename are: altip config The variables in these tables are refer- host route terms...
  • Page 47: Saving To Eeprom

    Multiple command options can be included in the same line with a single range option. For example: set line range=1-4 baud=2400 parity=E csize=7 stopb=1 will set the serial characteristics of ports 1 through 4 for 2400 baud, even parity, character size of 7 and 1 stop bit.
  • Page 48: Altip

    altip Syntax: [ range= range] set altip ipaddr group= port# | group# set altip ip= ipaddress set altip rmip= range set altip rmrange range= The altip command allows you to telnet to a port or huntgroup using an IP address (or host name).
  • Page 49: Arp

    Syntax: [ range= range] set arp ipaddr ether= etaddr [ tim2liv= time] set arp ip= range rmarp=on set arp range= This sets or displays the arp (Address Resolution Protocol) table entries. The arp table maps IP addresses to Ethernet addresses. In most cases, this is done automatically by the ARP protocol and manual modification of this table will not be required.
  • Page 50: Config

    64, the maximum number of entries in the EEPROM patch table. Anyone with more than 40 corrected errors should contact Digi Technical Support for assistance. “EP” appears on the front panel display any time a write to EEPROM is in progress.
  • Page 51: Booting The Portserver Software With Remote Boot

    A feature of the PortServer operating system software is that it can be upgraded without ROM or other hardware changes. Any upgraded software from Digi can be installed on a host on the network that supports TFTP (Trivial File Transfer Protocol).
  • Page 52: Flow

    TFTP Error Messages The host with the bootfile may pass back a TFTP error message, which the PortServer will display in the alphanumeric display. This message will be in the form En, where n can be one of the following: Error not defined, see error message (if any) File not found Access Violation...
  • Page 53 | off aixon=on Use auxiliary flow control characters (defined by set keys xona= and set keys ) for output flow control. Default= off xofa= | off altpin=on Setting Altpin ON switches the function of the DSR and the DCD inputs on the interface connector, so that DCD is available when using an 8-pin RJ-45 connector instead of a 10-pin RJ-45 connector.
  • Page 54: Host

    host Syntax: [ range= range] set host hostname ip= ipaddress set host name= hostname set host rmhost= range set host rmhost=on range= This sets or displays the host name table, which maps host names to IP addresses. If name service is configured, this table is filled in automatically, and manual modification of this table will probably not be required.
  • Page 55: Keys

    keys Syntax: option=value set keys Use keys to define the local key combinations for various functions. The different keys that can be set are: erase intr kill range save tesc xoff xona xoffa Each of the preceding will have their own options, as outlined in the following descriptions. Use to specify a single port or group of ports.
  • Page 56: Line

    value xona= Use to set the auxiliary XON Character you prefer. Default= ^Q (<Ctrl-Q>) value xoffa= Use to set the auxiliary XOFF Character you prefer. Default=^S (<Ctrl-S>) line Syntax: option=value set line Use line to view or modify serial line parameters. Use set line range= to specify a single port or group of ports.
  • Page 57: Logins

    | off onlcr=on Use to map (ON) or not to map (OFF) NEWLINE characters to CR-NEWLINE on output. Default= off | off otab=on Converts output tabs to eight spaces. Default= off | E | N parity=O Use to select Odd, Even or No parity. Default= N (no parity). startport# - endport# range= Specify a range of ports to be modified.
  • Page 58 Use to define the PortServer command prompt. Default is digi> . (The root prompt of ># cannot be changed.) character_string logprompt= Use to define the login prompt (up to 11 characters). Default is login: . Root privileges required.
  • Page 59: Ports

    ports Syntax: option=value set ports Use set ports to set or display device configuration parameters. set ports range is used to specify multiple ports, or one specific port. Options are: auto dest dport edelay group sess range save termtype Each of the preceding will have their own options, as outlined in the following descriptions. (More than one option can be included in a command.) | off auto=on...
  • Page 60 remote_port# dport= Use to specify the port number an auto connect port should connect to. (See set ports auto on page 51). • If set to 23, specifies telnet protocol services. • If set to 513, specifies Rlogin services. • If set to 0 (the default value), then checks the value of uid (below);...
  • Page 61: Route

    route Syntax: [ range= range] set route network_address mask= ipmask gateway= ipaddress set route net= numhops metric= range set route rmroute=on range= displays, adds entries to, or removes entries from the routing table. Making changes set route with this command requires root privileges. Options are: mask gateway metric...
  • Page 62: Terms

    terms Syntax: [ range= range] set terms terminal_type [ npages= of screens] set terms termtype= [ clrseq= clear_escseq] [ swtseq= screen# pageswitch_escseq] ... [ save=on | off ] terminal_type set terms rmterm range set terms rmterm=on range= This command sets or displays the terminal types, and their associated escape sequences used when switching between sessions.
  • Page 63 Example: This example sets up the user's default terminal (since no range is specified) to a Wyse60, supporting three screens with a clear sequence of <Ctrl-[> + (control-left bracket, plus key) and defines keys to switch between the three screens. set terms term=wy60 npages=3 clrseq=^[+ set terms term=wy60 swtseq=1^[w0 set terms term=wy60 swtseq=2^[w1...
  • Page 64: Users

    users Syntax: [ range= range] set users username [ passwd=on | off ] [ auto=on | off ] set users name= [ dest IPaddress] [ dport= tcp_port#] username set users rmuser= range set users rmuser=on range= newusername name= oldusername set users newname= This command sets or displays the user name table.
  • Page 65 • • (Also see set port auto on page 51, which is similar except that a port is set up so that any user on that port will bypass the PortServer's command shell and automatically connect to the defined destination.) •...
  • Page 66: Snmp

    snmp Syntax: [ run=off | on ] [ auth_trap=off | on ] [ trap_dest= ipaddress] snmp [ location= PortServer’s location] The snmp command is used to configure and enable/disable snmp. The snmp community is “public.” Snmp sets are not supported. | off snmp run=on This starts or stops the SNMP daemon.
  • Page 67: Who

    Syntax: The who command displays a list of the current users of the PortServer. Information includes each user's name and tty, the number of sessions each user is using, and where each user is connected from and connected to. The output looks like: #>...
  • Page 68: Remote Access Commands

    Remote Access Commands The commands in this section are remote access related. close Syntax: close Closes the current tcp session (the session last escaped from) to reenter the PortServer operating system’s command mode. mode Syntax: [ option=offlow ] mode The mode command is used to display telnet operating parameters. #>...
  • Page 69: Rlogin

    rlogin The rlogin command logs a user into a remote system. syntax: rlogin hostipaddr|hostname [options] options: [ user= username] [ esc= escape_char] To avoid entering your password when logging into a remote system, you may put the PortServer's node name in the . rhosts file. You may also ask the remote system administrator to make passwords globally unnecessary by entering the PortServer's node name in the remote hosts file.
  • Page 70: Send

    send Syntax: telnet_special_character send This command transmits one of the following telnet special characters to the last active telnet session: abort output esc character escape are you there? go ahead break interrupt process erase character no operation erase line synchronize process synch For example, to send a break signal, type: send brk...
  • Page 71: Telnet

    Use the format telnet nodename port#+2000 to telnet to a device on a specific port of the PortServer unit. Nodename is the PortServer's node name. By Digi International’s convention, 2000 is added to the port number; to reference a device on port 8, you would use the value 2008.
  • Page 72: Appendix

    Devices and Wiring Considerations...................81 Serial Device Type Characteristics Table...................84 Printers .............................85 Modems ............................86 RTTY Program ........................89 RJ Connectors ...........................91 Multiple Sessions ........................98 Configuring Multi Screens ....................100 PortServer Port Numbers......................101 Specifications .......................... 102 Digi Support Services......................103 Page 64 Ÿ Appendix...
  • Page 73: Realport Protocol

    RealPort Protocol RealPort is a protocol developed by Digi International that, when used in conjunction with device driver software on a host operating system, allows ports on the PortServer to be used as if they were connected directly to the host system. For instance, one advantage the RealPort protocol has...
  • Page 74: Simple Network Management Protocol (Snmp)

    Simple Network Management Protocol (SNMP) Also see SNMP on page 58. General Information The PortServer provides a Simple Network Management Protocol (SNMP) agent. This agent implements the current standard Management Information Base II (MIB-II) as defined in RFC1213. In addition, this agent also supports the Character-based MIB (RFC1316) and the RS232-like MIB (RFC1317).
  • Page 75: Snmp Protocol

    SNMP Protocol The SNMP agent in the PortServer supports the Get, GetNext, Set, and Trap messages that are defined in RFC1157. The following is a description of these messages. Retrieves the value of a specific object from one of the supported MIBs. GetNext Retrieves the value of the object following a specific object in the MIB list.
  • Page 76 icmpInDestUnreachs udpLocalAddress icmpInTimeExcds udpLocalPort icmpInParmProbs icmpInSrcQuenchs icmpInRedirects SNMP MIB icmpInEchos snmpInPkts icmpInEchoReps snmpOutPkts icmpInTimestamps snmpInBadVersions icmpInTimestampReps snmpInBadCommunityNames icmpInAddrMasks snmpInBadCommunityUses icmpInAddrMaskReps snmpInASNParseErrs icmpOutMsgs snmpInTooBigs icmpOutErrors snmpInNoSuchNames icmpOutDestUnreachs snmpInBadValues icmpOutTimeExcds snmpInReadOnlys icmpOutParmProbs snmpInGenErrs icmpOutSrcQuenchs snmpInTotalReqVars icmpOutRedirects snmpInTotalSetVars icmpOutEchos snmpInGetRequests icmpOutEchoReps snmpInGetNexts icmpOutTimestamps snmpInSetRequests icmpOutTimestampReps snmpInGetResponses...
  • Page 77: Portserver Front Panel

    PortServer Front Panel CCITT 103 104 105 106 107 109 108 125 ™ SEND RD RTS CTS DSR DCD DTR RI OFC IFC ETHERNET LG POL CS RX ERR EVF TX COL SERIAL TWISTED RECEIVE TRANSMIT PAIR The front panel of the PortServer terminal server has ten LEDs, two seven-segment alphanumeric displays, and two pushbuttons ( The pushbuttons are used to: Select diagnostic tests (see User Diagnostics on page 73).
  • Page 78: Ethernet (Ethernet Activity)

    ETHERNET (Ethernet Activity) When EA is shown by the alphanumeric display, the row of ten LEDs gives Ethernet information as follows: “Serial” Data has been transmitted on any of the 8 or 16 serial lines. Data has been received on any of the 8 or 16 serial lines.
  • Page 79: Portserver Bios

    PortServer BIOS The PortServer’ BIOS can be broken down into three parts: Power On Self Test (POST), Command Mode and user diagnostics. The POST sequence performs a series of basic tests to ensure that the microprocessor, memory, network interface controller, etc. are functioning properly. Command Mode is used to activate the Ethernet operating system and to switch to the user diagnostics.
  • Page 80 Set temporary stack at 00400h. Data segment now available (00800h). Test 256K DRAM from 40000h to 7FFFFh. Test 256K DRAM from 80000h to BFFFFh. Test 256K DRAM from C0000h to FFFFFh. Set BIOS stack at 3FC00h. Transfer interrupt vectors from EPROM to DRAM. Disable all hardware interrupts.
  • Page 81: User Diagnostics

    User Diagnostics Video Display Diagnostics The two modes of the user diagnostics are video display mode and front panel mode. Either mode can be selected at any time before the POST diagnostic tests finish. • Front Panel Mode: Press either “arrow” pushbutton ( ).
  • Page 82: Basic Test Descriptions

    Enter Front Panel Mode by pressing either the left or right pushbutton on the front panel during the POST startup tests. At this time, all of the lights (LEDs) go OFF, the left 7-segment display is blank, and the right 7- segment display reads “1.”...
  • Page 83 Test 2 - Memory Test Each pass of this test performs a pattern test and an address tag test to DRAM memory. The byte pattern is incremented for each pass and is displayed on the front panel LEDs 0-7 (TD-RI). The pattern is written to 32K bytes beginning at address 08000h. The pattern is written again to 32K bytes beginning at address 30000h.
  • Page 84 Test 5 - Built-In UART External Loopback Test Same as Test 4, but uses external loopback. From the front panel, press the right pushbutton ( ) to select the port to test. The display will cycle from “01” to “16” or highest UART plus “All”. With the port selected, press the left pushbutton ( ) to start the test.
  • Page 85: Portserver Security

    PortServer Security The PortServer has four basic security access levels: Root login This allows complete access to everything. The root user can write and save any of the con- figurable parameters for any port. This login is always present, and must always have a password. It is not possible to remove the root user entry, or delete the root user password.
  • Page 86 Auto-Connect User login The PortServer supports two types of automatic logins. Auto Connect User (described here) connects a specified user to a specified host no matter what port or terminal that user logs in from. Auto Connect Port (described on page 79) connects a specified port to a specified host no matter what user logs in through it.
  • Page 87 telnet example: set users name=martha passwd=on dport=23 dest=192.1.2.3 auto=on Auto connect user w/o password This is the same as “Auto Connect User with Password,” but set up with “ passwd=off ” added to the command line. Auto-Connect Port Auto Connect Port connects a specified port to a specified host no matter what user logs in through it.
  • Page 88: Resetting The Portserver To Factory Defaults

    Resetting the PortServer to Factory Defaults Resetting the PortServer memory to the factory defaults will cause you to lose all user settings. Turn off the PortServer’s power switch. Press and hold both “arrow” pushbuttons ( ) at the same time, and turn on the power switch.
  • Page 89: Devices And Wiring Considerations

    Devices and Wiring Considerations Configuring PortServer Ports as Specific Devices The Serial Device Type Characteristics Table on page 84 summarizes the device type char- acteristics described in the following text. You may also wish to refer to set ports dev= on page 51 of the Command Reference section.
  • Page 90 (Terminals) dev=term This is designed for a terminal device. When the device is set to a terminal device, the incoming port ignores DCD. All outgoing connect attempts are refused. Wiring required: Only TD, RD, and GND connections are needed, making it easy to wire up to a terminal. (Printers) dev=prn The PortServer treats printers as outgoing devices that ignore DCD.
  • Page 91 (Modem Out) dev=mout This is designed for a modem for outgoing communications with full DTR/DCD modem support. Until an outgoing connection is made, DTR remains low, keeping a modem from answering the telephone. When an outgoing connection succeeds, DTR is raised. The state of DCD is ignored, except that a high-to-low transition of DCD closes the connection, and drops DTR.
  • Page 92: Serial Device Type Characteristics Table

    Serial Device Type Characteristics Table This table summarizes the device type characteristics. Device DTR + RTS Spawn Login Remote Connect Action when Type when idle (telnet, rsh) allowed DCD drops term high data ignore never ignore host never if DCD hangup high DCD raises...
  • Page 93: Printers

    Printers Configuring a Printer First, you need to define the port that the printer is connected to as a printer device, with the command set ports dev=prn range printer port. (See page 51.) Also see Devices and Wiring Considerations on page 81. Connecting a Printer See the discussion on connecting peripheral devices on page 6 for a suggested printer wiring diagram, and the discussion under “...
  • Page 94: Modems

    • TABS (ASCII 9) can be converted to spaces, with 8 spaces per TAB character. Use set if you want tabs converted. (See page 49). line otab=on Modems Notes on Configuring Modems Usually its desirable to configure modems to be bidirectional ( dev=mio ) although if desired they may also be configured to be input only ( dev=min ) or output only ( dev=mout ).
  • Page 95: Configuring Cu And Uucp To Dial Out Without Realport

    Configuring CU and UUCP to dial out without RealPort Use FTP or the Digi BBS and download the “rtty” program. (See The Digi Bulletin Board System on page 103.) The source code will always be available there, and binaries will be provided for the most popular operating systems.
  • Page 96 UUCP and CU work on most systems. The RTTY program is provided on an as-is basis by Digi as a service to its customers, but because it is tricky to configure, and usually needed only by sophisticated users, it is not covered by our regular unlimited technical support policy.
  • Page 97: Rtty Program

    The following is an extract from the RTTY source code mentioned on page 87, explaining the command usage. RTTY is provided on a limited-support basis for our customers, when used with the PortServer and other Digi network products. /********************************************************** * NAME * rtty - Connect a tty to a remote TCP port.
  • Page 98 "@(#)and only with, Digi terminal servers and other network products.", Page 90 Ÿ PortServer Terminal Server...
  • Page 99: Rj Connectors

    8 or 10-pin RJ-45 connector, and so on. The diagrams on the following pages illustrate the relationship of the various modular plug configurations to Digi’s standard 10-pin RJ-45 jack, and show which RS-232 signals are available in each configuration.
  • Page 100: 10 Pin Rj 45 Plugs

    10 Pin RJ 45 Plugs The 10-pin RJ-45 plug carries all eight of the RS-232 signals supported by the PortServer hardware, plus the two ground lines, Signal Ground (SG) and Chassis Ground (GND). The 10-pin configuration includes the modem control lines Ring Indicator (RI) and Data Carrier Detect (DCD).
  • Page 101: Pin Rj 45 Plugs

    8 Pin RJ 45 Plugs The 8-pin RJ-45 plug supports all of the RS-232 signals except the modem control lines RI and DCD. It is ideal for use with terminals and printers that require full hardware handshaking (as when both DSR and CTS must be satisfied for data transmission to occur). The PortServer software permits software rewiring the RJ-45 connectors so that DCD is available in 8-pin configurations.
  • Page 102: Pin Rj 11 Plugs

    6 Pin RJ 11 Plugs 6-pin RJ-11 plugs can be used in hardware handshaking situations that require only RTS and CTS to be available. RJ-11 WIRING: 6 PIN PLUG TO 10 PIN JACK Page 94 Ÿ PortServer Terminal Server...
  • Page 103: Pin Rj 11 Plugs

    4 Pin RJ 11 Plugs The 4-pin RJ-11 plug can be used in situations requiring no handshaking, or software handshaking (XON/XOFF). No hardware handshake lines are available with this configuration. This is useful for the popular three-wire connection (TxD, RxD and Signal Ground) used for terminals and printers that support XON/XOFF handshaking.
  • Page 104: Digi Rj-45 To Db-25 Cable Legs

    DB-25 plug. The most simple and direct approach is to purchase ready-made Cable Legs from a Digi International dealer or distributor. These are made with a full 10-pin RJ-45 plug (which can be difficult to obtain in the retail market), connected via a two or four foot cable to a DTE-configured DB-25 plug.
  • Page 105: Connecting Modems

    Indicator) and DCD (Data Carrier Detect) are on pins 1 and 10, respectively, of Digi’s RJ-45 jack, the adapter cable provided by Digi is ideal, since it has a 10-pin RJ-45 plug, and is terminated in a modem-ready, DTE-configured DB-25 plug.
  • Page 106: Multiple Sessions

    Multiple Sessions Any user can use the multiple session feature if that user's port is configured to allow it. Users logged into a host with one of the auto options ( auto port or auto user ) cannot run multiple sessions, as this would defeat the security purpose of the Auto connections.
  • Page 107: Switching To Another Session

    Switching to another session At the PortServer command line, type the session number as the first character of a line to switch to the associated session. This is a special case, and does not require that you hit return after typing the number.
  • Page 108: Configuring Multiscreens

    Configuring Multiscreens The PortServer supports up to 16 different terminal types. Each terminal type must have a different name, although a particular manufacturer's terminal may be known by several different names. For example you might want to have separate names for a wyse 60 in 43 line mode (no screen switching), a wyse 60 in 24 line standard mode (2 screens available), a wyse 60 in 24 line ECON-80 mode (3 screens available) and even a wyse 60 in WYSE 50+ mode (6 screens available).
  • Page 109: Portserver Port Numbers

    PortServer Port Numbers The PortServer provides two ranges of TCP/IP service numbers that you can connect to from other systems: 2001 - 2099 Telnet Connect 2101 - 2199 Raw Connect A connect made to any 20XX port uses the Telnet protocol, providing full Telnet compatibility. You would use the 20XX ports in commands like: pr myfile | telnet dbps-nodename 2001 A connect to any 21XX service is a raw connection, passing 8-bit clean data at all times.
  • Page 110: Specifications

    20% to 80% Altitude 0 to 2135 meters (0 to 7,000 feet) Certification The Digi International PortServer terminal server is certified to meet the following emissions and safety standards: Emissions: FCC Part 15, Subpart J, Class A CSA C180.8-M83, Class A...
  • Page 111: Digi Support Services

    Download protocols include Zmodem, Xmodem, Ymodem, Kermit and others. Internet FTP Server Digi has set up an Anonymous FTP server for those with access to the Internet network. The ad- dress is ftp.digibd.com. Log in as anonymous, and enter your E-mail address when asked for a password.
  • Page 112: Information About Your System

    Information About Your System Serial number of your Digi product: Make, model and clock speed of your computer: How much RAM does your computer have? Hard disk Type: Memory addressed at: controller: I/O port used: IRQ: LAN card: Type: Memory addressed at:...
  • Page 113: Technical Support

    Technical Support At Digi, we are proud of our products, and support them. Our dealers and distributors are fully trained on our product line, so that they can help you on a technical level should assistance be needed. Your first level of support is your Digi dealer, the place where you purchased your Digi product.
  • Page 114 Returns should be directed to the dealer or distributor from whom you purchased the product. If you need to return your Digi product for repair, it is first necessary to obtain an RMA (Returned Merchandise Authorization) number from Digi, by speaking to a Digi Customer Service repre- sentative.
  • Page 115: Index

    Default Settings, ii Auto-connect port dest security, 79 specify port destination, 51 Auto-connect user Device security, 78 set ports for devices, 51 Digi BBS, 103 domain, 42 —B— baud —E— setting, 48 BBS, 103 edelay setting, 52 binary connection, 51...
  • Page 116 set if required, 50 —F— Logins FaxBack, 103 parameter setting, 49 File logprompt remote boot, 43 setting, 50 Flow control, 44 appendix, 81 —M— Front Panel, 69 FTP server, 103 Mode telnet parameters, 60 Modem —G— connecting, 97 gateway, 42 device, 82, 83 Go ahead Modem / In...
  • Page 117 setting parameters, 51 ixoff, 45 Printer ixon, 45 device, 82 ri, 45 setting port as, 51 rts, 45 set keys eof, 47 —Q— erase, 47 intr, 47 Quick Start, 3 kill, 47 tesc, 23, 47 —R— xoff, 47 xoffa, 48 Range, 38 xon, 47 RARP, 5...
  • Page 118 Synchronize process char (synch), 62 —T— Technical Support, 105 telnet characters, 62 command, 26, 63 telnet escape character, 23, 47 Term terminal escape sequences, 54 Terminal device, 82 setting port as, 51 Termtype setting, 52 tesc, 23, 47 TFTP error messages, 44 tim2liv, 41 Trivial File Transfer Protocol error messages, 44...

This manual is also suitable for:

Portserver/16

Table of Contents