Table of Contents
Advertisement
Advertisement
Table of Contents

Related Manuals for Digi ConnectPort LTS Series


Summary of Contents for Digi ConnectPort LTS Series
- Page 1 ConnectPort LTS User Guide...
- Page 2 Information in this document is subject to change without notice and does not represent a commitment on the part of Digi International. Digi provides this document “as is,” without warranty of any kind, expressed or implied, including, but not limited to, the implied warranties of fitness or merchantability for a particular purpose.
- Page 3 +1 952.912.3444 or visit us at www.digi.com/support. Digi ConnectPort LTS User Guide...
-
Page 4: Table Of Contents
Remote login (rlogin) Line Printer Daemon (LPD) HyperText Transfer Protocol (HTTP)/HyperText Transfer Protocol over Secure Socket Layer (HTTPS) Internet Control Message Protocol (ICMP) Point-to-Point Protocol (PPP) Advanced Digi Discovery Protocol (ADDP) Secure Shell (SSH) RealPort software Encrypted RealPort Alarms Modem emulation... - Page 5 Configure the device using the ConnectPort LTS web interface Sign in to the web interface Use a web browser to sign in to the web interface Use Digi Device Discovery utility to sign in to the web interface Power failure message Home page...
- Page 6 Digi ConnectPort LTS User Guide...
- Page 7 Monitoring the status using the LCD interface Running diagnostics using the LCD interface Miscellaneous functions in the LCD interface Run the Factory Reset LCD settings Change the LCD settings ConnectPort LTS disaster recovery Restore ConnectPort LTS to Factory Default Settings Digi ConnectPort LTS User Guide...
- Page 8 ConnectPort LTS regulatory information and certifications FCC certifications and regulatory information (USA only) FCC Part 15 Class B Radio Frequency Interface (RFI) (FCC 15.105) Labeling Requirements FCC (15.19) Industry Canada (IC) certifications China regulatory information Safety statements Digi ConnectPort LTS User Guide...
-
Page 9: About This Guide
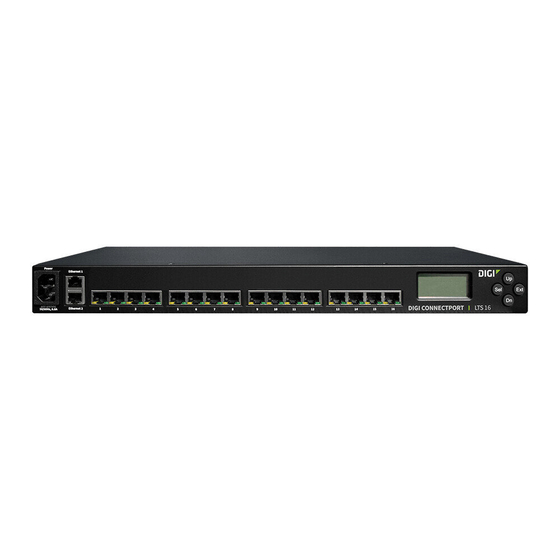
ConnectPort LTS 16 and ConnectPort LTS 16 MEI ConnectPort LTS 16 W and ConnectPort LTS 16 MEI W ConnectPort LTS 16 MEI 2AC ConnectPort LTS 32 and ConnectPort LTS 32 MEI ConnectPort LTS 32 W and ConnectPort LTS 32 MEI W Digi ConnectPort LTS User Guide... -
Page 10: Important Safety Information
In addition to this guide, you can find additional product and feature information in these documents: RealPort® Installation Guide For product support resources visit the following support pages: For additional information, see the following resources: Online help and tutorials in the web interface for the Digi device Digi Python Wiki Digi ConnectPort LTS User Guide... - Page 11 About this guide Where to find information Product information available on the Digi website, www.digi.com, and the Digi support site, including: Support forum Knowledge Base Datasheets/product briefs Application/solution guides Carrier-specific documents Digi ConnectPort LTS User Guide...
-
Page 12: Connectport Lts Features
They support IPv4 and IPv6 Ethernet protocols. ConnectPort LTS MEI is the same size as ConnectPort LTS (RS-232 only version). User interfaces You can use the following user interfaces to configure, monitor, and administer Digi devices: Web-based interface Command-line interface available via local serial port, telnet or SSH... -
Page 13: Ip Protocol Support
For more information, see Basic Network Services Settings. You can use the set service command to enable and disable network services from the command-line interface. See the Digi Connect® Family Command Reference on www.digi.com for a description of the set service command. -
Page 14: Dynamic Host Configuration Protocol (Dhcp)
The Auto-IP protocol automatically assigns an IP address from a reserved pool of standard Auto-IP addresses to the computer on which it is installed. Digi devices automatically obtain their IP addresses from a DHCP server. If the DHCP server is unavailable or nonexistent, Auto-IP assigns the device an IP address. -
Page 15: Remote Login (Rlogin)
HyperText Transfer Protocol (HTTP)/HyperText Transfer Protocol over Secure Socket Layer (HTTPS) Digi provides web pages that you can use to configure the ConnectPort LTS product. You can secure these web pages by requiring a user login. Internet Control Message Protocol (ICMP) -
Page 16: Secure Shell (Ssh)
Unix. See the RealPort Compatibility OS List in the Digi Knowledge Base for a detailed list of supported operating systems. It is ideal for financial, retail/point-of-sale, government, or any application requiring enhanced security to protect sensitive information. -
Page 17: Modem Emulation
In addition, you can enable or disable telnet processing on the incoming and outgoing modem- emulation connections. For information on the modem-emulation commands that ConnectPort LTS products support, see the Digi Connect® Family Command Reference. See Select Port Profile for more information. -
Page 18: Security Features In Digi Devices
AES (128/156/192/256-bit) SNMP security SNMP security options include: You can configure SNMP set commands to use SNMP read-only. Digi recommends changing the public and private community names to prevent unauthorized access to the Digi device (SNMPv1/v2c). You can use SNMPv3 support for enhanced security through SNMP. -
Page 19: Configuration Management
Once a ConnectPort LTS device is configured and running, you may need to periodically perform the following configuration-management tasks: Copy configurations to and from a remote host Perform the following on the Digi device: Update the firmware Reset the factory settings... - Page 20 Get started with ConnectPort LTS products This section walks you through configuring an IP address and signing in to your ConnectPort LTS device. Configuring IP addresses Test the IP address assignment Using the rc.user file Quick reference for configuring features Digi ConnectPort LTS User Guide...
-
Page 21: Get Started With Connectport Lts Products
When the IP address changes, network devices configured to talk to the ConnectPort LTS device can no longer access the device. In this case, you must locate the Digi device using the Digi Device Discovery utility and reconfigure the other network devices that need to communicate with the ConnectPort LTS device. -
Page 22: Assign An Ip Address Using Dhcp
1. Verify the Digi device is not powered on. 2. If desired, set up a permanent entry for the Digi device on a DHCP server. While this is not necessary to obtain an IP address via DHCP, setting up a permanent entry saves the IP address after the device is rebooted. -
Page 23: Assign An Ip Address From The Web Interface
To verify the IP address works as configured: 1. Access the command line of a computer or other networked device. 2. Issue the following command: ping ip-address where ip-address is the IP address assigned to the Digi device. For example: ping 192.168.2.2 Digi ConnectPort LTS User Guide... -
Page 24: Using The Rc.user File
Run advanced linux commands Initiate custom scripts Load additional configuration information The Digi Knowledge Base contains additional information on the rc.user file, common examples, and advice on how to test and implement commands using the rc.user file. Go to http://www.digi.com/support for details. - Page 25 Configuration > Network > Network Services Settings > Advanced Network Service Settings Samba settings Configuration > Network > Network Services Settings > Advanced Network Service Settings Syslog settings Configuration > Network > Network Services Settings > Advanced Network Service Settings Digi ConnectPort LTS User Guide...
- Page 26 TCP client to automatically establish a connection to a defined network port. See Automatic TCP connections (Automatic Connection). UDP Sockets Serial Bridge Modem Modem Emulation Printer Local Configuration Custom 5. Complete the fields and click Apply. Digi ConnectPort LTS User Guide...
- Page 27 TCP/UDP client. 5. Complete the fields and click Apply. Secure Shell Server (SSH) Configuration > Network > Network Service Settings > Basic Network Services Settings > Enable Secure Shell Server (SSH) Digi ConnectPort LTS User Guide...
- Page 28 Settings, or Network Services and click Apply. SNMP: Configure SNMP through Configuration > System > Simple Network Management Protocol the web interface (SNMP) Settings Enable/disable SNMP Configuration > Network > Network Service Settings > Basic service Network Services Settings Digi ConnectPort LTS User Guide...
- Page 29 Use SNMP as primary Basic network and serial settings configurable through standard and configuration interface Digi-specific Management Information Blocks (MIBs). You can also configure advanced settings through SNMP. System information: assign Configuration > System > Device Identity Settings...
-
Page 30: Network Connections And Data Paths
The following topics describe the effects of enabling features and selecting settings when configuring ConnectPort LTS devices. Network services A network service connection occurs when a remote entity initiates a connection to a Digi device. There are several categories of network services: Network services associated with specific ports... -
Page 31: Network Services Associated With Serial Ports In General
Modem: The Modem Profile allows you to attach modem devices to the serial port to establish or receive connections from other systems and modems. Both the modem dial-in and bi- directional options provide a login from the Digi device. Reverse SSH: A remote entity establishes an SSH connection to a ConnectPort LTS serial port and data passes transparently between the SSH connection and a named serial port. -
Page 32: Command-Line Interface (Cli)-Based Client Connections
Python. Modem emulation (pseudo-modem) client connections When a port is in the modem-emulation or pseudo-modem mode, it can initiate network connections based on AT command strings received on the serial port. See the Digi Connect® Family Command Reference on www.digi.com for modem emulation AT commands. -
Page 33: Overview: Configuration, Monitoring, And Administration
Overview: Configuration, monitoring, and administration This section provides an overview for configuring, monitoring, and administering Digi devices. Configuration capabilities ConnectPort LTS administration capabilities ConnectPort LTS configuration interfaces Digi ConnectPort LTS User Guide... -
Page 34: Configuration Capabilities
Note Not all configuration options provided by the command-line interface (CLI) appears in the web interface. If you need to configure more advanced options, see Access the command-line interface for instructions on accessing the CLI. Digi ConnectPort LTS User Guide... - Page 35 Allows you to manage and monitor network devices. See Simple Network Simple Management Protocol (SNMP). Network Management Protocol (SNMP) Allows you to configure, monitor status, and diagnose ConnectPort LTS issues. See ConnectPort ConnectPort LTS LCD interface. LTS LCD panel Digi ConnectPort LTS User Guide...
-
Page 36: Digi Device Discovery Utility
IP packets to a network. It sends out a User Datagram Protocol (UDP) multicast packet to all Digi devices on the network. Digi devices that support ADDP reply to the UDP multicast with their configuration information. Even Digi devices that do not yet have an assigned IP address or are misconfigured for the subnet can reply to the UDP multicast packet and appear in the device discovery results. -
Page 37: Configure The Device Using The Connectport Lts Web Interface
This section describes how to configure and manage a ConnectPort LTS device using the web interface. Sign in to the web interface Home page Apply and save changes Cancel changes Online help Configuration through the web interface Peripheral Applications pages Management Administration Digi ConnectPort LTS User Guide... -
Page 38: Sign In To The Web Interface
Use a web browser to sign in to the web interface To access the web interface for a Digi device using a browser: 1. Open a web browser and type the current IP address of the ConnectPort LTS device in the address bar. -
Page 39: Power Failure Message
To start the utility, select Start > All Programs > Digi > Digi Device Discovery > Digi Device Discovery. 6. From the Digi Device Discovery utility, locate the Digi device in the list of devices, and choose one of the following options: Double-click the Digi device to open the web interface. -
Page 40: Logout And Login
Description: A description of this Digi device. Contact: Contact information for the Digi device. Location: The location of this Digi device. Device ID: The serial number associated with this Digi device. The serial number appears on a label on the Digi device. Logout and Login To sign out of a configuration and management session: 1. - Page 41 IP addresses are in the form of 192.168.2.2, where each number is between 0 and 255. Subnet Mask: The subnet mask for the ConnectPort LTS device. A common subnet mask is 255.255.255.0. Digi ConnectPort LTS User Guide...
- Page 42 An IP address of 0.0.0.0 indicates no server is specified. Use Manual DNS: Choose this option if you want to set DNS configuration manually. Primary DNS: Set the IP address of primary DNS. Secondary DNS: Set the IP address of secondary DNS. Digi ConnectPort LTS User Guide...
- Page 43 Command-Line interface inaccessible. Supported basic network services and their default port numbers For Digi devices with multiple serial ports, the network port number defaults for various services are set based on the following formula: base network port number + serial port number...
- Page 44 The pmodem service is for connecting to whatever serial port will answer. Modem Emulation Allows the Digi device to emulate a modem. This 50001 Passthrough service is for dialing in to a particular serial port that has been set up for modem emulation.
- Page 45 Default network Service Services provided port number Remote login (rlogin) Allows users to sign in to the Digi device and access the command-line interface through rlogin. Remote shell (Rsh) Allows users to sign in to the Digi device and access the command-line interface through Rsh.
- Page 46 Login timeout (0-1440 minutes, 0 for unlimited): Idle timeout settings in minutes for the Web server. The Digi device prompts the user to log in again if the user tries to use the web interface after login timeout has expired. If you set this value 0, the web login will not expire.
- Page 47 Configure the device using the ConnectPort LTS web interface Configuration through the web interface SMTP Settings: Enable SMTP service: When enabled, the Digi device can send an email notification when an alarm occurs. SMTP server name: IP address or DNS name of the SMTP server.
- Page 48 Configuration through the web interface NFS Settings: Enable NFS service: When enabled, the Digi device can log port data to an NFS server. NFS server name: IP address or domain name of the NFS server. Mounting path on NFS server: The path to where the files are located on the NFS server.
- Page 49 Configuration through the web interface Samba Settings: Enable Samba service: When enabled, the Digi device can log port data to a Samba server. Samba server name: IP address or domain name of the Samba server. Mounting on path Samba server: The path to where the files are located on the Samba server.
- Page 50 Initiating Host: The hostname or IP address of the network device which will initiate the tunnel. This field is optional. Initiating Port: Specify the port number that the Digi device product will use to listen for the initial tunnel connection.
- Page 51 Both will override the previously assigned Auto-IP address. Reuse old IP at bootup time on DHCP failure: If the Digi device fails to receive an IP address from the DHCP server on booting up, the users can set the IP configurations of the Digi device with the previous IP configurations and connect it to the network.
-
Page 52: Serial Ports Configuration
(/) and subnet mask. Protocol: The type of protocol this port will accept or drop. Port: A TCP/IP port on the Digi device that other hosts will access. Chain: Determines whether or not hosts can access the port. - Page 53 Console Management: Manage a serial device's console port over a network connection. The Console Management profile allows you to access a Digi device's console port over a network connection. Most network devices such as routers, switches, and servers offer one or more serial ports for management.
- Page 54 Local Configuration: The Local Configuration profile allows you to sign in and access the command line interface when connecting directly to a serial port on a Digi device. This profile provides a login from the Digi device. See Assign a profile to a serial port for more information.
- Page 55 RealPort: Use RealPort to map a COM or TTY port to this serial port of your Digi device. The COM/TTY port appears and behaves as a local port to the PC or server. RealPort is also known as COM Port Redirection.
- Page 56 This is also referred to as serial tunneling. Each serial device is connected to the serial port of a Digi device server. You must configure one Digi device as the client and the other Digi device as the server.
- Page 57 1. Select Configuration > Serial Ports. 2. Click a port number from the Port column. 3. Click Change Profile. 4. On the Select Port Profile page, select a port profile option and then click Apply. Digi ConnectPort LTS User Guide...
- Page 58 Instead of connecting a terminal to the console port, cable the console port to the serial port of your Digi device server. Then using TCP/IP utilities like reverse telnet, network administrators can access these consoled serial ports from the LAN.
- Page 59 COM or TTY port, RealPort sends the data across the network to the Digi device server. The Digi device server routes the data to the serial device connected to its serial port. The network is transparent to both the application and the serial device.
- Page 60 TCP server and the other Digi device as the TCP client. Once you establish a connection between the two Digi devices the communication is bi-directional. To assign a Serial Bridge (Serial Tunneling) to a serial port on a Digi device acting as the TCP client (which initiates the connection to the TCP server): a.
- Page 61 Configure the device using the ConnectPort LTS web interface Configuration through the web interface TCP Sockets for TCP client (Automatic Connection): In a TCP client configuration, the Digi device server automatically establishes a TCP connection to an application or network device. See Automatic TCP connections (Automatic Connection) for more information.
- Page 62 The format for this port number is as follows: 20<serial port number> Replace <serial port number> with the Digi serial port number. For example, 2001 applies to serial port 1, 2010 applies to serial port 10, and 2016 applies to serial port 16.
- Page 63 TCP Sockets for TCP server: A TCP Server configuration allows other network devices to initiate a TCP connection to the serial device attached to a serial port of the Digi device server. This is also referred to as reverse telnet, console management or device management.
- Page 64 You can enable autoconnection through the TCP Sockets profile’s setting labeled Automatically establish TCP connections. TCP and UDP network port numbering conventions Digi devices use the following conventions for TCP and UDP network port numbering: For this connection type... Use this Port...
- Page 65 The Local Configuration profile allows you to sign in to and the command line interface when connecting directly to a serial port. This profile provides a login from the Digi device. Access the command line interface when connecting from serial terminals: Enable access to the command-line interface when connecting from serial terminals to configure and manage the Digi device.
- Page 66 PPP (Point-to-Point Protocol) for more information. Note The Modem profile is most often used when you configure a Digi device server for out-of- band management and PPP. Enable callback: When enabled, the Digi device disconnects the connection from a remote site and then calls the phone number specified in the Callback phone number field.
- Page 67 Always connect and maintain connections: A connection is always available. If a connection is lost it will be reconnected automatically. This type of connection is most often used in client/server configurations where this Digi device server is the client. Note Select this option to enable autoconnect for 3-wire devices.
- Page 68 TCP Port: Type the TCP port number of the destination device. The standard port numbers are 23 for telnet and 513 for rlogin. If you are bridging to another Digi device server use the raw TCP port number for its serial port. This is usually 2101 for port 1. The format for this port number is as follows: 21<serial port number>...
- Page 69 Configure the device using the ConnectPort LTS web interface Configuration through the web interface UDP Port: The port number to send data to. If you are sending data to another Digi device server use the raw UDP port number for its serial port. This is usually 2101 for port 1.
- Page 70 The default is 2101 for port 1. The format for this port number is as follows: 21<serial port number> Replace <serial port number> is the Digi serial port number. For example, 2101 applies to serial port 1, 2110 applies to serial port 10, and 2116 applies to serial port 16.
- Page 71 Always connect and maintain connections: A connection is always available. If a connection is lost it will be reconnected automatically. This type of connection is most often used in client/server configurations where this Digi device server is the client. Note Select this option to enable autoconnect for 3-wire devices.
- Page 72 TCP Port: Type the TCP port number of the destination device. The standard port numbers are 23 for telnet and 513 for rlogin. If you are bridging to another Digi device server use the raw TCP port number for its serial port. This is usually 2101 for port 1. The format for this port number is as follows: 21<serial port number>...
- Page 73 Send To: The IP address or DNS name to send data to. UDP Port: The port number to send data to. If you are sending data to another Digi device server use the raw UDP port number for its serial port. This is usually 2101 for port 1. The format for this port number is as follows: 21<serial port number>...
- Page 74 8 data bits, no parity, and 1 stop bit. When using RealPort (COM port redirection) these settings are supplied by applications running on the PC or server, and the default values on your Digi device server do not need to be changed. The possible settings are as follows: Description: Specifies an optional character string for the port which can be used to identify the device connected to the port.
- Page 75 Send data only under any of the following conditions: Enable if you need to specify the conditions when the Digi device server will send the data read from the serial port to the TCP destination. Digi ConnectPort LTS User Guide...
- Page 76 UDP Sockets, or the Custom Profile. Send Socket ID: Include an optional identifier string with the data sent over the network. The Socket ID can be 1 to 256 ASCII characters. Enter non-printable characters as follows: Digi ConnectPort LTS User Guide...
- Page 77 The selected profile type determines if the following settings are enabled. Authentication method: The authentication method. The default is None. The Digi device supports various authentication options, such as None, Local, RADIUS, LDAP. Primary/Secondary authentication server: The IP address or DNS name of the remote authentication server.
-
Page 78: Alarms Configuration
Enable alarm notifications: Enables or disables all alarm processing for the Digi device. Alarm list and status The Alarm Conditions page lists all of the alarms. You can configure up to 32 alarms for a Digi device, and you can individually enable and disable these alarms. -
Page 79: System Configuration
SNMP trap, or both, and where the alarm is sent. 5. Click Apply to save your changes. System Configuration Use the System Configuration page to configure device identity and description information, date and time settings, and settings for Simple Network Management Protocol (SNMP). Digi ConnectPort LTS User Guide... - Page 80 Use the Device Identity Settings page to create a description of the ConnectPort LTS product’s name, contact, and location. You can use this information to identify a specific Digi device product when working with a large number of devices in multiple locations.
- Page 81 Use the Date and Time Settings page to set the Coordinated Universal Time (UTC) and/or system time and date on a device, or set the offset from UTC for the Digi device's system time. Enable NTP: Select or clear the check box to enable or disable Network Time Protocol (NTP).
- Page 82 Authentication method: The authentication method. The default is None. The Digi device supports various authentication options, such as None, Local, RADIUS, LDAP. Primary/Secondary authentication server: The IP address or DNS name of the remote authentication server.
-
Page 83: Users
SSH: The escape character for users using ssh. The default is ~. Users You can configure the Digi device server to accommodate the requirements of specific users. You can configure the following user attributes: Digi ConnectPort LTS User Guide... - Page 84 The root user is the first user to access and configure the Digi device. The first user to access the Digi device can choose to disable some of the default root permissions. You are prompted to change your password the first time you sign in and after a factory reset.
- Page 85 The Users page displays a list of configured users and groups. Use the page to configure users and groups. Configure Users: User Name: Lists the configured users. To edit a user, such as change the password, click a user's name. Digi ConnectPort LTS User Guide...
- Page 86 User Configuration: Use the User Configuration page to configure a user's login credentials. User Name: The user's login name. New Password/Confirm Password: The user's login password. The password must be 4 to 16 characters long. Digi ConnectPort LTS User Guide...
- Page 87 Port access menu: Allow this user to access the port access menu. Allow web interface access: Allow this user to access the web interface for system configuration and management. Manage Serial Ports: Select the ports that the user can access. Digi ConnectPort LTS User Guide...
- Page 88 To further secure the ConnectPort LTS product, you can disable network services that are not required for the Digi device. You can disable non-secure or un-encrypted network services such as Telnet. See Basic Network Services Settings.
-
Page 89: Peripheral
Set user permissions from the command-line interface: Use the set permissions command to set permissions from the command-line interface. See the Digi Connect® Family Command Reference for the command description. Peripheral Use the options under Peripheral to configure settings for various peripheral devices on ConnectPort LTS, such as SD memory, USB, Modem, LCD, and XBee. -
Page 90: Sd Memory
Outgoing Connection: The modem sends dial-out connections to establish connections with external hosts or to connect to an external PPP network. Network Bridge Connection (bi-directional): You can use the modem to establish connections to other hosts and receive connections from other hosts. Digi ConnectPort LTS User Guide... - Page 91 PPP (Point-to-Point Protocol) for more information. Note The Modem profile is most often used when you configure a Digi device server for out-of- band management and PPP. Enable callback: When enabled, the Digi device disconnects the connection from a remote site and then calls the phone number specified in the Callback phone number field.
- Page 92 Always connect and maintain connections: A connection is always available. If a connection is lost it will be reconnected automatically. This type of connection is most often used in client/server configurations where this Digi device server is the client. Note Select this option to enable autoconnect for 3-wire devices.
- Page 93 TCP Port: Type the TCP port number of the destination device. The standard port numbers are 23 for telnet and 513 for rlogin. If you are bridging to another Digi device server use the raw TCP port number for its serial port. This is usually 2101 for port 1.
- Page 94 Send To: The IP address or DNS name to send data to. UDP Port: The port number to send data to. If you are sending data to another Digi device server use the raw UDP port number for its serial port. This is usually 2101 for port 1.
- Page 95 8 data bits, no parity, and 1 stop bit. When using RealPort (COM port redirection) these settings are supplied by applications running on the PC or server, and the default values on your Digi device server do not need to be changed. The possible settings are as follows: Description: Specifies an optional character string for the port which can be used to identify the device connected to the port.
- Page 96 Send Socket ID: Include an optional identifier string with the data sent over the network. The Socket ID can be 1 to 256 ASCII characters. Enter non-printable characters as follows: Character Sequence backspace formfeed line feed return backslash hexadecimal \xhh values Digi ConnectPort LTS User Guide...
- Page 97 Peripheral Send data only under any of the following conditions: Enable if you need to specify the conditions when the Digi device server will send the data read from the serial port to the TCP destination. Send when data is present on the serial line: Send the data to the network destinations when a string of characters is detected in the serial data.
-
Page 98: Lcd
LCD screen. After uploading the image, toggle the Enable display or Use default background image option once to force the LCD daemon to reload the image. Load custom (Python) program: Upload a custom Python program onto the ConnectPort LTS. Digi ConnectPort LTS User Guide... -
Page 99: Xbee
Guide. XBee Port Settings Allow direct Access from networks: When enabled, you can access the XBee port in the same manner that the custom profile accesses a serial port. This setting is Disabled by default. Digi ConnectPort LTS User Guide... - Page 100 Always connect and maintain connections: A connection is always available. If a connection is lost it will be reconnected automatically. This type of connection is most often used in client/server configurations where this Digi device server is the client. Note Select this option to enable autoconnect for 3-wire devices.
- Page 101 TCP Port: Type the TCP port number of the destination device. The standard port numbers are 23 for telnet and 513 for rlogin. If you are bridging to another Digi device server use the raw TCP port number for its serial port. This is usually 2101 for port 1.
- Page 102 Send To: The IP address or DNS name to send data to. UDP Port: The port number to send data to. If you are sending data to another Digi device server use the raw UDP port number for its serial port. This is usually 2101 for port 1.
- Page 103 8 data bits, no parity, and 1 stop bit. When using RealPort (COM port redirection) these settings are supplied by applications running on the PC or server, and the default values on your Digi device server do not need to be changed. The possible settings are as follows: Description: Specifies an optional character string for the port which can be used to identify the device connected to the port.
- Page 104 Send Socket ID: Include an optional identifier string with the data sent over the network. The Socket ID can be 1 to 256 ASCII characters. Enter non-printable characters as follows: Character Sequence backspace formfeed line feed return backslash hexadecimal \xhh values Digi ConnectPort LTS User Guide...
- Page 105 Peripheral Send data only under any of the following conditions: Enable if you need to specify the conditions when the Digi device server will send the data read from the serial port to the TCP destination. Send when data is present on the serial line: Send the data to the network destinations when a string of characters is detected in the serial data.
-
Page 106: Applications Pages
Applications pages Most Digi devices support additional configurable applications. Use the options under Application to configure applications. The application options vary depending on the Digi device. PPP: Connects incoming clients or serial devices to external networks using modems and telephony to maintain the connection. - Page 107 3. Select Enable Dynamic IP Address Pool for Incoming Connections. 4. Type the IP address for the incoming PPP client in the First IP Address field. 5. Type the number of addresses in the Number of Addresses field. Digi ConnectPort LTS User Guide...
- Page 108 PPP client will specify the IP address used for the PPP connection. Assign static remote IP address: If you select this option, the IP address for incoming PPP client will be assigned as specified by the Remote IP address. Digi ConnectPort LTS User Guide...
- Page 109 ConnectPort LTS device using a modem to dial the phone number of the modem connected to the serial port. For example, you can use a modem to access the network associated with the Digi device server or use modems to create a network bridge by connecting two separate networks.
- Page 110 PAP provides a simple method for the peer to establish its identity using a 2-way handshake. This is done only upon link establishment. (See RFC 1334 for further details.) BOTH: CHAP authentication will work between two ConnectPort LTS products. CHAP will be negotiated to PAP for all other connections. Digi ConnectPort LTS User Guide...
- Page 111 IP address or any address in the Dynamic IP Address Pool. Digi recommends that this address should reside on a different subnet than the Ethernet IP address.
- Page 112 ConnectPort LTS server. Prerequisite Assign a modem profile with an incoming connection to the Digi device server port. See Assign a profile to a serial port for more information.
- Page 113 Use Outgoing PPP Connections to configure outgoing PPP connections. The ConnectPort LTS device uses the outgoing PPP connections to connect to an external modem or ISP. Outgoing PPP connections typically automatically connect the Digi device server to an external Digi ConnectPort LTS User Guide...
- Page 114 ConnectPort LTS server. Prerequisite Assign a modem profile with an outgoing connection to the Digi device server port. See Assign a profile to a serial port for more information.
- Page 115 ARP requests received by this device. Process ARP requests are also known as Proxy ARP. ARP requests inform devices how and where to connect to a specific device. PPP connections use this setting. The setting is disabled by default. Digi ConnectPort LTS User Guide...
-
Page 116: Python Configuration
Application > Python menu options. Python options include: Uploading Python program files to the ConnectPort LTS device Deleting a Python program file from the device Configuring which Python programs to execute when the ConnectPort LTS device boots (also known as auto-start programs) Digi ConnectPort LTS User Guide... - Page 117 Recommended distribution of Python interpreter The current version of the Python interpreter embedded in Digi devices is 2.6.2. Use modules known to be compatible with this version of the Python language only.
-
Page 118: Realport Configuration
Configure the device using the ConnectPort LTS web interface Management specific behavior, and describes how to load and run Python programs onto Digi devices, and run sample Python programs. Python support forum on www.digi.com Find answers to common questions and exchange ideas and examples with other members of the Digi Python development community at: www.digi.com/support/forum/categories/python... -
Page 119: Serial Port Management
Off: Logging is disabled. Buffer Utilization: Displays the percentage of buffer utilization. Pause Logging/Start Logging: Allows you to stop and start logging. Refresh: When clicked, displays the latest log information. Clear Log: When clicked, deletes the log information. Digi ConnectPort LTS User Guide... -
Page 120: Administration
Certificate Management Use the Certificate Management page to upload your certificates and private key to the Digi device server. CAUTION! You must restart the web server for changes to take effect. To restart the web server, click Restart Web Server. -
Page 121: File Management
If you upload an index.htm or index.html file, that file automatically loads when you sign in to a Digi device from the web browser. - Page 122 IP address, subnet mask, and gateway. Note If the restored configuration modifies the network settings, your Digi device server will dynamically switch to the new settings. You will need to manually redirect your browser to the new IP address.
-
Page 123: Update Firmware
Update the firmware from the command-line interface via TFTP or BOOTP. Digi recommends downloading the firmware to a local hard drive before upgrading the firmware. Update the firmware from the web interface Before you update the firmware from the web interface: 1. -
Page 124: Factory Default Settings
Restore: Returns the configured settings on the Digi device to the factory defaults. Keep network settings: Select this check box to retain the IP address settings. Restore Only Serial Port Settings: Select this check box to restore only the serial settings to their factory defaults. -
Page 125: System Information
POST Version: The current Power-On Self Test (POST) code version running in the Digi device. CPU Utilization: The amount of CPU resources the Digi device uses. Up Time: The amount of time the Digi device has been running since it was last powered on or rebooted. - Page 126 ConnectPort® LTS 8/16/32 Quick Start Guide. Serial Port Diagnostics The Serial Port Diagnostics page displays information on the current state of a serial port on your Digi device. Configuration: The Configuration page displays the electrical interface (Port Type) and basic serial settings.
- Page 127 Passive Opens: Number of passive opens. In a passive open, the ConnectPort LTS listens for a connection request from a client. Bad Segments Received: Number of segments received with errors. Attempt Fails: Number of failed connection attempts. Digi ConnectPort LTS User Guide...
- Page 128 Use the Discover XBee Devices button to refresh the list of devices that joined the XBee network. (Note that the discovery operation may take a few seconds.) Click an entry in the device's table to Digi ConnectPort LTS User Guide...
- Page 129 Use the XBee Device State page to see detailed information on the state of the wireless node. The parameters that appear on this page will vary based on the capabilities supported by the node's RF Digi ConnectPort LTS User Guide...
-
Page 130: Reboot
ConnectPort LTS product for performance and security reasons. From interface, you can enable and disable network services on the Network Services Settings page for a ConnectPort LTS product. See Basic Network Services Settings. Digi ConnectPort LTS User Guide... - Page 131 This section gives some basics for using the command line interface, as well as listing some commonly used commands by function. Access the command-line interface Basics for using the command-line interface Management through the command line interface Administration Digi ConnectPort LTS User Guide...
-
Page 132: Access The Command-Line Interface
1. Choose one of the following options: Launch the command-line interface from the Digi Device Discovery Utility. Use the telnet/ssh command to launch the command-line interface. 2. To launch the CLI via telnet, issue the following telnet command from a command prompt on another networked device, such as a server: #>... -
Page 133: Management Through The Command Line Interface
Management through the command line interface This section provides information on some key commands available from the command line interface. For more information, see the Digi Connect Family Command Reference on www.digi.com. Use the following commands to display information and statistics:... -
Page 134: Backup Print
Print the configuration file in command-line format. You can use this to cut and paste into scripts. close Use the close command to close active sessions that were opened by connect, rlogin, and telnet commands. connect Use the connect command to establish a connection with a serial port. Digi ConnectPort LTS User Guide... -
Page 135: Display
The number of times the transmitter was reset The number of incoming bytes when the protocol was unknown ICMP statistics. The info icmp command displays the number of messages, bad messages, and destination unreachable messages received. Digi ConnectPort LTS User Guide... -
Page 136: Newpass
Use the rlogin command to sign in to a remote system. send Use the send command to send a telnet control command, such as break, abort output, are you there, escape, or interrupt process, to the last active telnet session. Digi ConnectPort LTS User Guide... -
Page 137: Set Alarm
Use the set group command to configure create, establish, update, or remove group attributes. set host Use the set host command to configure the host name for the Digi device. set ippool Use the IP pool command to configure the IP pool for the PPP connection. -
Page 138: Set Pmodem
Use the set service command to configure the network services. set smtp Use the set smtp command to configure SMTP. set snmp Use the set snmp command to configure SNMP, including SNMP traps, such as: Digi ConnectPort LTS User Guide... -
Page 139: Set Socket_Tunnel
Use the set user command to configure a user. set web Use the set web command to configure the web timeout value in minutes. set xbee Use the set xbee command to configure the XBee. Digi ConnectPort LTS User Guide... -
Page 140: Show
Use the status command to display a list of sessions or outgoing connections made by the connect, rlogin, or telnet commands for a Digi device. Use the status command to determine which of the current sessions to close. telnet Use the telnet command to establish an outgoing telnet connection, also known as a session. -
Page 141: Administration
You can issue commands from the command-line interface to administer ConnectPort LTS products. The following table displays several administration tasks and the commands used to perform them. See the Digi Connect® Family Command Reference for more complete command descriptions. Administrative task... -
Page 142: Simple Network Management Protocol (Snmp)
SNMP is a widely-used standard protocol that allows you to manage all device nodes on an IP network, solve network problems, and improve network performance. Most Digi devices support SNMP versions 1 and 2. ConnectPort LTS supports SNMP versions 1, 2, and 3. -
Page 143: Snmp Device Monitoring Capabilities
Network statistics, defined in RFC 1213, MIB-II Port statistics, defined in RFCs 1316 and 1317 Device information, defined in Digi enterprise MIB DIGI-DEVICE-INFO.mib You can use this information to manage network performance, gather device statistics, and find and solve network problems. -
Page 144: Download A Digi Mib
Supported RFCs and MIBs for more information on supported MIBS. Use Digi enterprise MIBs for device identification, alarm handling, and ConnectPort LTS-specific configurations. To use the MIBS, you must load MIBs into a network management station (NMS). Note that some SNMP configuration settings can be configured only from the web or command line interfaces. - Page 145 IP network information, memory use, and CPU statistics. DIGI SERIAL ALARM TRAPS MIB—A Digi enterprise MIB for sending alarms as SNMP traps. DIGI ConnectPort LTS MIB—A Digi enterprise MIB for configuring ConnectPort LTS.
- Page 146 This section discusses how to configure, monitor or diagnose a ConnectPort LTS device using the LCD interface. Keys Keypad operations Configuring the ConnectPort LTS using the LCD interface Monitoring the status using the LCD interface Running diagnostics using the LCD interface Miscellaneous functions in the LCD interface Digi ConnectPort LTS User Guide...
-
Page 147: Connectport Lts Lcd Interface
CONFIGURATION menu. The MAIN tab is the upper menu. To return to the upper menu, press Ext.) Configuring the ConnectPort LTS using the LCD interface You can configure the following ConnectPort LTS settings using the LCD interface: Digi ConnectPort LTS User Guide... -
Page 148: Change The Ip Settings
IP address, subnet mask, and gateway addresses. DHCP: Set the IP mode to DHCP. To change the IP address: 1. Select IP ADDRESS from the IP menu. 2. Select the IP address that you want to change. Digi ConnectPort LTS User Guide... - Page 149 When you finish changing the characters, press the Ext key. d. Enter the IP settings menu again to change the SUBNET MASK or GATEWAY in the manner described above. e. Press the Ext key when the IP SETTINGS menu is displayed. Digi ConnectPort LTS User Guide...
-
Page 150: Change The Hostname
2. Press the Sel key again. 3. Move cursor position using the Up (Left) and Dn (Right) keys. Once you position the cursor to the item you want to change, press the Sel key to enter the editing submenu. Digi ConnectPort LTS User Guide... -
Page 151: Change The Dns Configuration
7. Choose one of following options: SAVE APPLY: Save and apply configuration changes. DISCARD CHANGES: Discard all changes. CANCEL: Discard all changes and return to the HOST NAME menu. Change the DNS configuration 1. Select CONFIGURATION and then DNS. Digi ConnectPort LTS User Guide... -
Page 152: Monitoring The Status Using The Lcd Interface
Miscellaneous functions in the LCD interface You can run the following functions from the Miscellaneous menu. Factory Reset: Restore the configuration to factory defaults. LCD setting: Reset the LCD configuration or select a background image. Digi ConnectPort LTS User Guide... -
Page 153: Run The Factory Reset
RESET: Restore the LCD configuration, including the background image, to the factory defaults. SELECT IMAGE: Choose a background image. Change the LCD settings To change the LCD settings: 1. Select MISCELLANEOUS and then LCD SETTINGS. The LCD settings menu appears. Digi ConnectPort LTS User Guide... - Page 154 To change the background image, select SELECT IMAGE and choose one of the following options. DEFAULT IMAGE: Restore the original background image. USER IMAGE: Select a new background image and follow the prompts. Digi ConnectPort LTS User Guide...
-
Page 155: Connectport Lts Disaster Recovery
The Digi ConnectPort LTS automatically restores a corrupted configuration file system to the factory default settings. If the Digi ConnectPort LTS device fails to boot after you run a factory reset to restore the factory default settings, you can restore the firmware from the Bios menu. -
Page 156: Restore Connectport Lts To Factory Default Settings
To use the Bios menu to flash new firmware and/or new BIOS code revision: 1. Connect the console port on the rear panel of the Digi ConnectPort LTS unit to a serial port on a workstation. Use the supplied RJ45/DB9F console adapter and an Ethernet cable. - Page 157 6. Enter the information for the first menu items. Protocol: The choices are BOOTP or TFTP. IP address assigned: Type the IP address of the Digi ConnectPort LTS unit. Server’s IP address: The IP address of the BOOTP or TFTP server.
-
Page 158: Connectport Lts Hardware Specifications
ConnectPort LTS hardware specifications To get ConnectPort LTS hardware specifications, visit www.digi.com/products/serial-servers/serial- device-servers/connectportlts#specifications. Digi ConnectPort LTS User Guide... -
Page 159: Connectport Lts Regulatory Information And Certifications
ConnectPort LTS regulatory information and certifications This section documents ConnectPort LTS regulatory information and certifications. FCC certifications and regulatory information (USA only) Industry Canada (IC) certifications China regulatory information Safety statements Digi ConnectPort LTS User Guide... -
Page 160: Fcc Certifications And Regulatory Information (Usa Only)
FCC ID. Modifications (FCC 15.21) Changes or modifications to this equipment not expressly approved by Digi may void the user’s authority to operate this equipment. -
Page 161: China Regulatory Information
China regulatory information Linux Terminal Server Digi 串 口 服 务 器 LTS 16 MEI 2AC 用 户 须 知 当 系 统 出 现 故 障 时 可 能 会 导 致 严 重 的 后 果 , 为 了 应 对 这 些 后 果 , 采 用 备 份 系 统 和 安 全 装 置... -
Page 162: Safety Statements
3. Mechanical Loading: Mounting of the equipment in the rack should be such that a hazardous condition is not achieved due to uneven mechanical loading. Digi ConnectPort LTS User Guide... - Page 163 CAUTION! To reduce the risk of fire, use only No. 26AWG or larger telecommunication line cord. Cabling To determine the proper cable requirements for your application, please refer to the Cable Guide for all PortServer® TS, Digi Connect®, and Digi One® Products (Digi part number 90000253). Digi ConnectPort LTS User Guide...
Need help?
Do you have a question about the ConnectPort LTS Series and is the answer not in the manual?
Questions and answers